Navigating network issues on a Windows 10 computer can be a daunting task, especially if you’ve inadvertently altered the network adapter settings. Such misconfigurations can lead to perplexing connection problems that hinder seamless internet access. Thankfully, Windows 10 comes with built-in functionalities that allow users to reset their entire network configurations to factory settings. This not only addresses potential discrepancies but also provides an opportunity to rebuild and set up your network from the foundation.
In this gearupwindows article, we present a concise guide detailing the procedures to reset or reinstall the network adapter on your Windows 10 device. We highlight two primary, user-friendly methods to address these concerns: the use of the Settings app and the Command Prompt.
However, a word of caution is in order: the methods elaborated below will wipe out all pre-existing network configurations, including saved Wi-Fi passwords. But, rest assured, once completed, all that remains is for you to freshly configure your network connections, ensuring a robust and reliable connectivity experience.
How to Reset or Reinstall Network Adapter in Windows 10 using Settings app?
To reset or reinstall Network Adapter in Windows 10 using Settings app, follow these steps:-
Step 1. Open the Settings app.
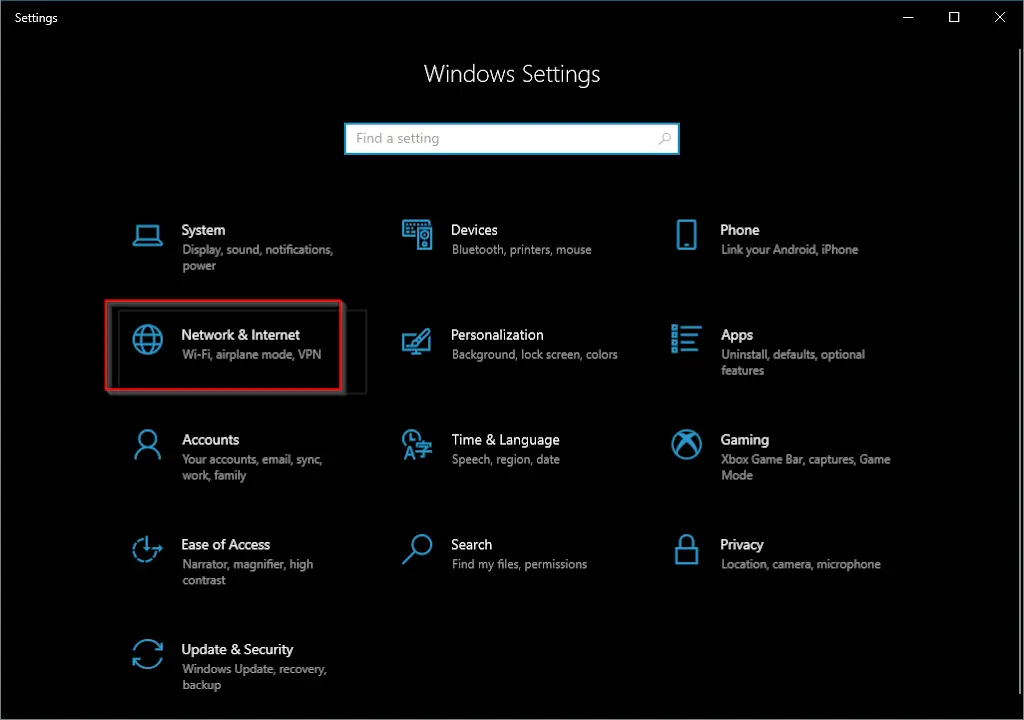
Step 2. Click on the “Network & Internet” category.
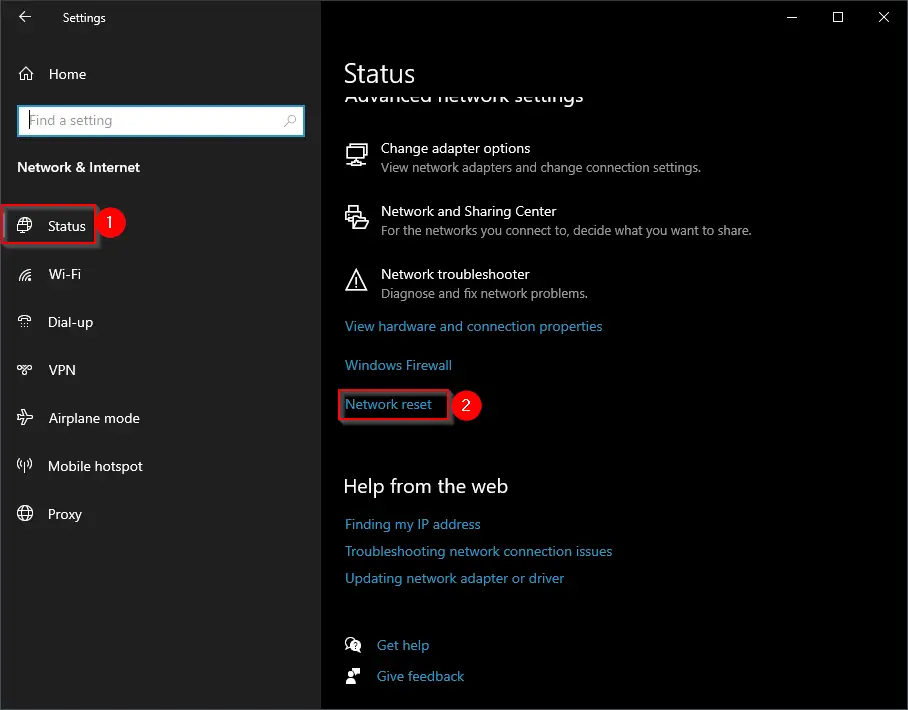
Step 3. In the left side pane of Network & Internet, select the Status tab. Then, on the right side of it, scroll down and click the link Network reset.
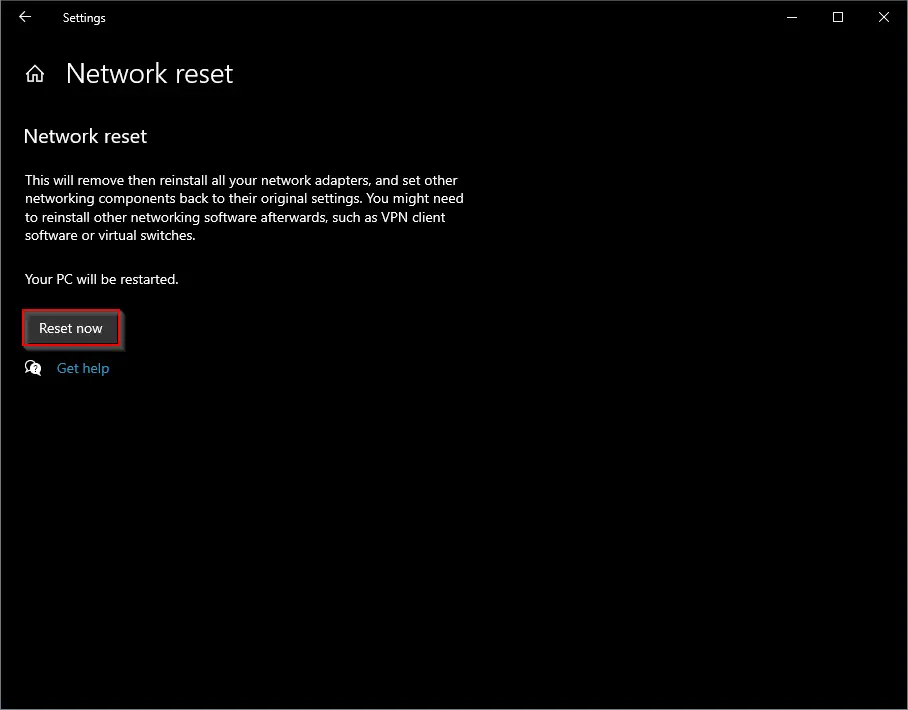
Step 4. In the next window, click on the button “Reset now.”
Step 5. A new pop-up window will appear, asking you, “Are you sure you want to reset your network settings?”
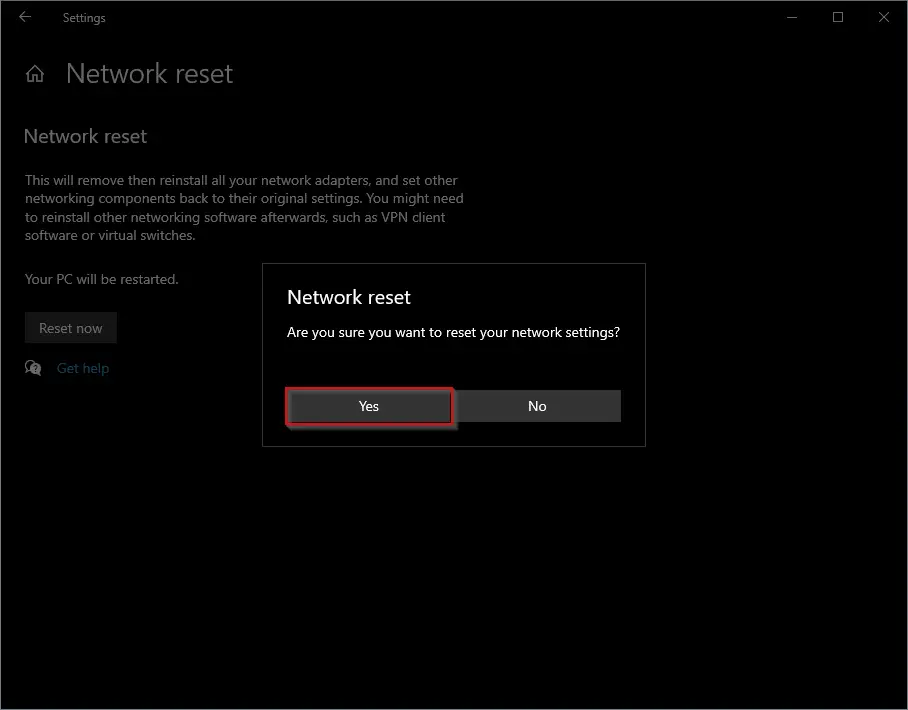
Step 6. Click the Yes button to invoke the resetting and reinstalling network adapters on your Windows 10 PC.
Step 7. A new pop-up window will appear, saying you’re about to be signed out. Save your incomplete work if any is pending, and your Windows will shut down in 5 minutes and start automatically. All the required drivers for network cards will be installed automatically once the PC is started.

How to Reset or Reinstall Network Adapter in Windows 10 through Command Prompt?
Step 1. Open the Command Prompt with administrator privileges.
Step 2. On the prompt, type the following and hit Enter from the keyboard:-
netcfg -d
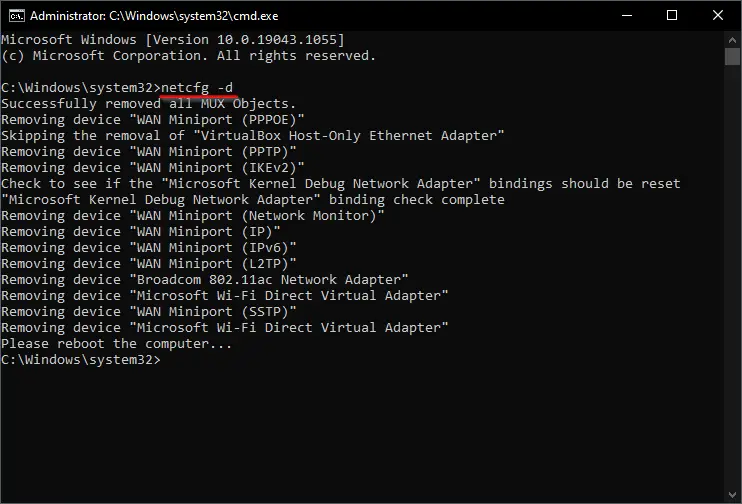
Step 3. Reboot your computer.
Now, Windows will reset and reinstall all network card drivers automatically.
Conclusion
Managing network settings on a Windows 10 system, especially when complications arise, requires a clear understanding and a systematic approach. By default, Windows 10 provides valuable tools to address these concerns, whether you’ve mistakenly tampered with adapter settings or faced unexpected glitches. With the methods described above, using both the Settings app and the Command Prompt, users can reset or reinstall their network adapters with ease. While the process may erase previous configurations and Wi-Fi passwords, the end result is a pristine network setup, ensuring consistent and stable internet connectivity. Equip yourself with this knowledge, and never let network challenges disrupt your online experience again.