Read-only, also known as write-protected, is a file system permission that only allows a user to read or copy stored data but not write new information or edit the existing data. You can set the read-only to the entire disk to prevent accidental formatting.
In this gearupwindows post, we will show the different ways to fix the read-only to a disk. This happens to HDDs a lot, and it’s also commonly seen on removable disks like SD memory cards and USB flash drives. These troubleshooting methods effectively change a hard drive, USB flash drive, pen drive, or SD card from ready only to read-write.
If you have an external HDD or USB drive which is write-protected or read-only, you can use one of the following methods to change it to read-write:-
- Change read-only permission in Properties
- Remove read-only with the Diskpart tool
- Fix disk read-only using Registry Editor
- Remove read-only with a software
Change the Read-only Permission in Windows 11/10/8/7 using the Properties dialog.
The chances are that your device permission has changed to read-only after doing a Windows upgrade or update. To resolve this kind of obstacle, you need to access the disk properties to get both the read & write permission.
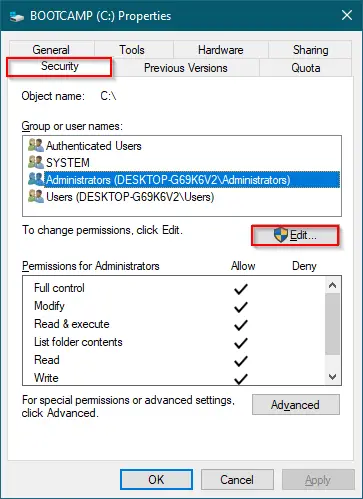
Step 1. Open Windows / File Explorer and right-click on the disk or drive that is currently read-only. Then, select the Properties option.
Step 2. Navigate to the Security tab, and click the Edit button.
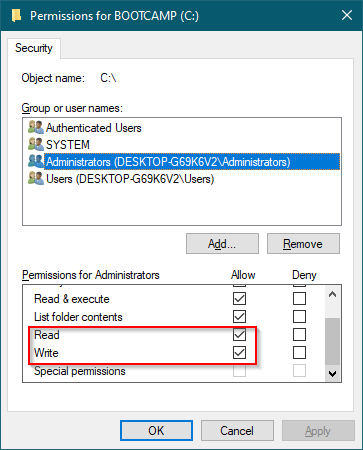
Step 3. Select a User Account, and make sure the Read and Write options are checked. If not, check both of them and click Apply, and then OK.
Once you complete the above steps, you should edit data or format the selected drive or disk.
Remove read-only with the Diskpart tool.
To remove read-only or write protection from the disk or volume, refer to the following:-
- How to Set or Remove Volume Read-Only or Write-Protect in Windows 11 / 10 / 8 / 7?
- How to Set or Remove Disk Read-Only or Write-Protect in Windows 11 / 10 / 8 / 7?
Fix disk read-only using Registry Editor.
This method is beneficial for fixing disk read-only or writes protection in a USB flash drive or SD Card. In this procedure, we will take the help of the Registry Editor; hence, we recommend taking a full backup of the Registry and creating a system restore point.
Step 1. Connect the USB flash drive or SD Card to the PC.
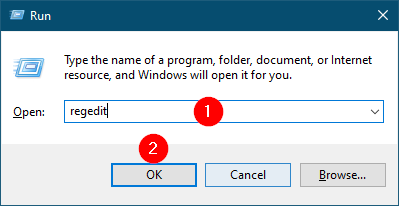
Step 2. Press the Windows logo + R keys to bring up the Run box.
Step 3. In the Run box, type regedit and hit Enter or click the OK button.
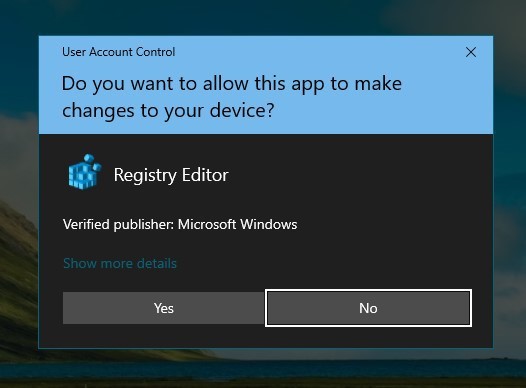
If User Account Control (UAC) dialog prompts, click Yes to continue.
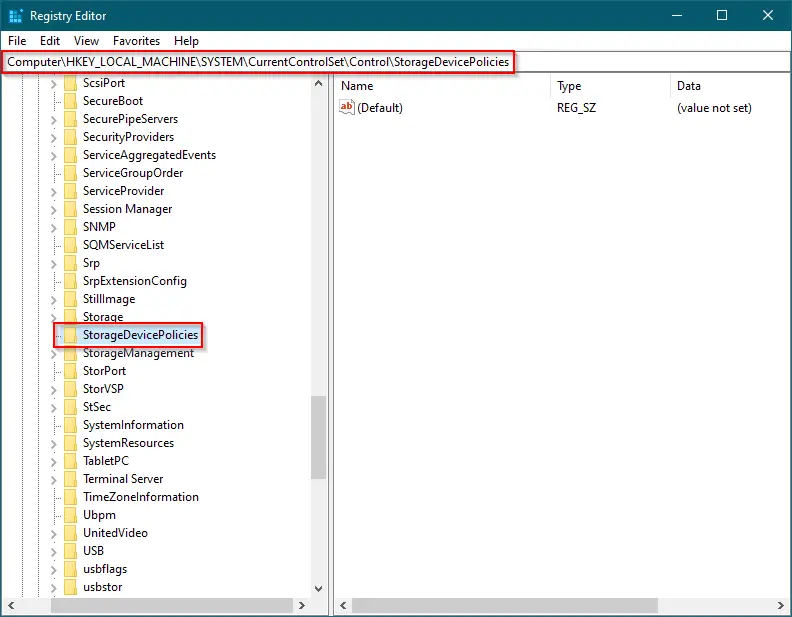
Step 4. In the Registry Editor window that opens, navigate to the following key:-
Computer\HKEY_LOCAL_MACHINE\SYSTEM\CurrentControlSet\Control\StorageDevicePolicies
Step 5. On the right side of the StorageDevicePolicies key, look for DWORD (32-bit) Value WriteProtect. If it is not available, right-click on the right-side pane, select New, and then DWORD (32-bit) Value. Rename it to WriteProtect.
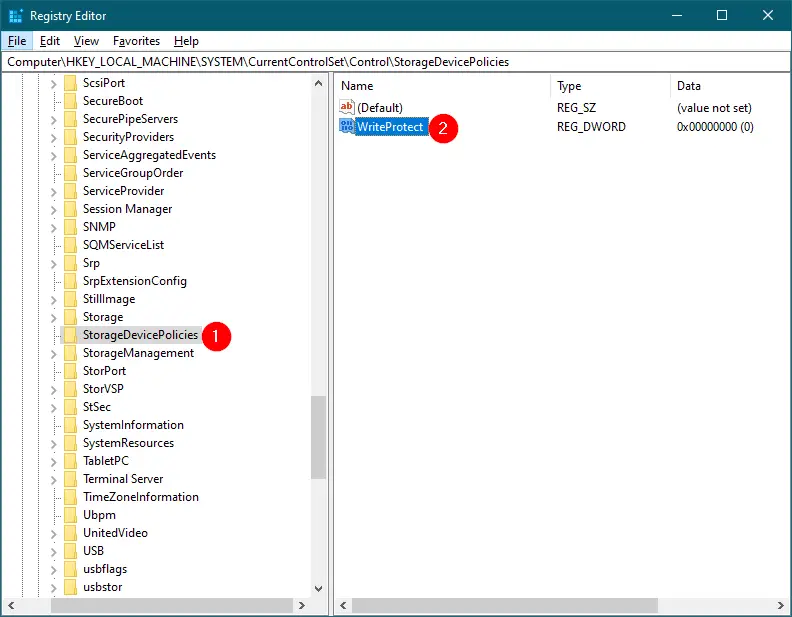
Step 6. Double-click on WriteProtect and set its Value data to 0.
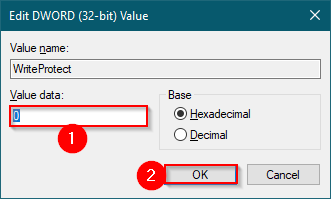
Step 7. Click OK to save the changes.
Step 8. Reboot your computer or laptop.
Once you complete the above steps, read-only or write protection should be removed from the external drive. If you want to enable read-only or write protection, in the registry editor window, navigate to the following:-
Computer\HKEY_LOCAL_MACHINE\SYSTEM\CurrentControlSet\Control\StorageDevicePolicies
And on the right side of this, double-click on WriteProtect and change its Value data to 1.
Remove read-only or write-protect with software.
EaseUS Tools M is a freeware and tiny (less than 9MB in size) application that removes the read-only or write protection from external devices.
Step 1. Download EaseUS Tools M.
Step 2. Install it on your computer or notebook, and then launch it.
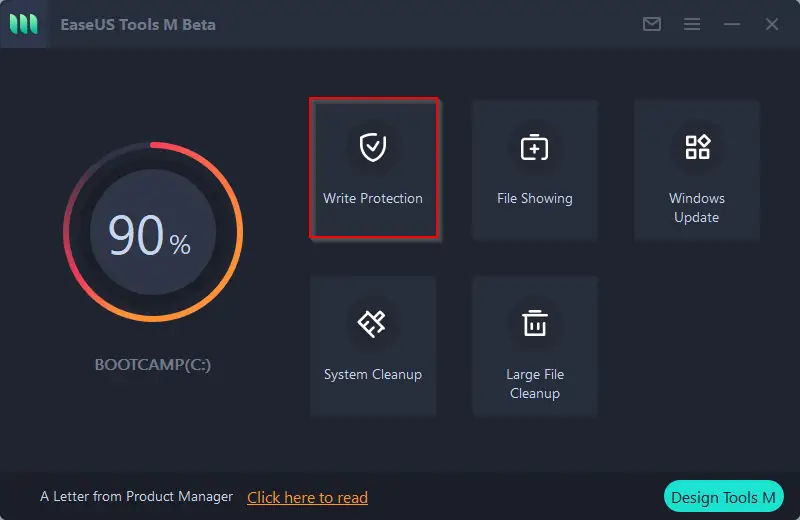
Step 3. Click on the Write Protection button.
Step 4. Select the USB drive or SD card which is connected to your PC.
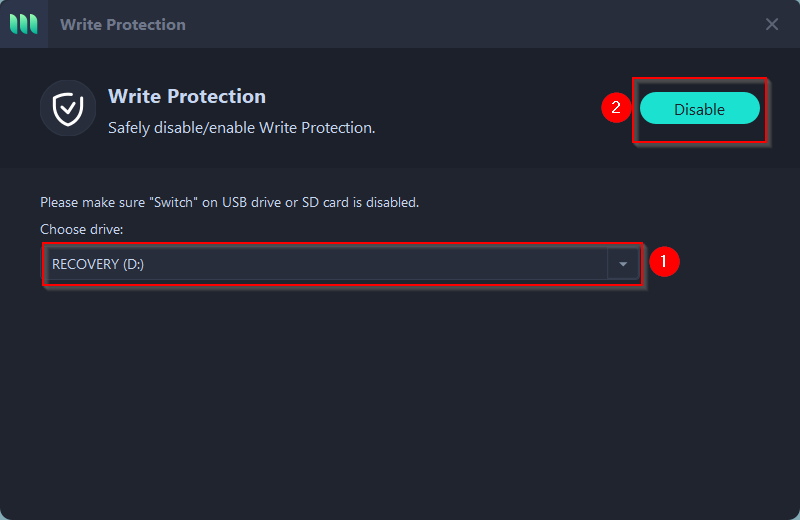
Step 5. Finally, click on the Disable button.
Once you complete the above steps, write-protection or read-only will be immediately disabled on the selected USB drive or SD card.
Download EaseUS Tools M
You can grab EaseUS Tools M here.
Conclusion
In conclusion, read-only or write-protected disks or drives can be a frustrating problem for users who need to edit or add new data to their storage devices. However, there are several ways to fix the issue and change the disk from read-only to read-write. In this gearupwindows post, we discussed four different methods to remove the read-only attribute from a disk or drive: changing permissions in Properties, using the Diskpart tool, editing the registry, and using software like EaseUS Tools M. By following these methods, users can effectively remove the read-only attribute and regain full access to their storage devices.