Today I tried to install Windows 11 on a VMware Workstation 16 Player, and I could not do so because my virtual machine was not meeting the hardware requirements to install Windows: RAM, CPU, Secure Boot, and TPM 2.0. We had configured our virtual machine with 2GB RAM, 2 Core CPUs, and a 60GB HDD. Then, I decided to bypass the minimum system requirements through Registry and proceed with Windows 11 installation. Finally, I got successful in installing Windows 11 on our virtual machine.
In this gearupwindows article, we will guide you on installing Windows 11 on a virtual machine without modifying the Windows 11 official ISO.
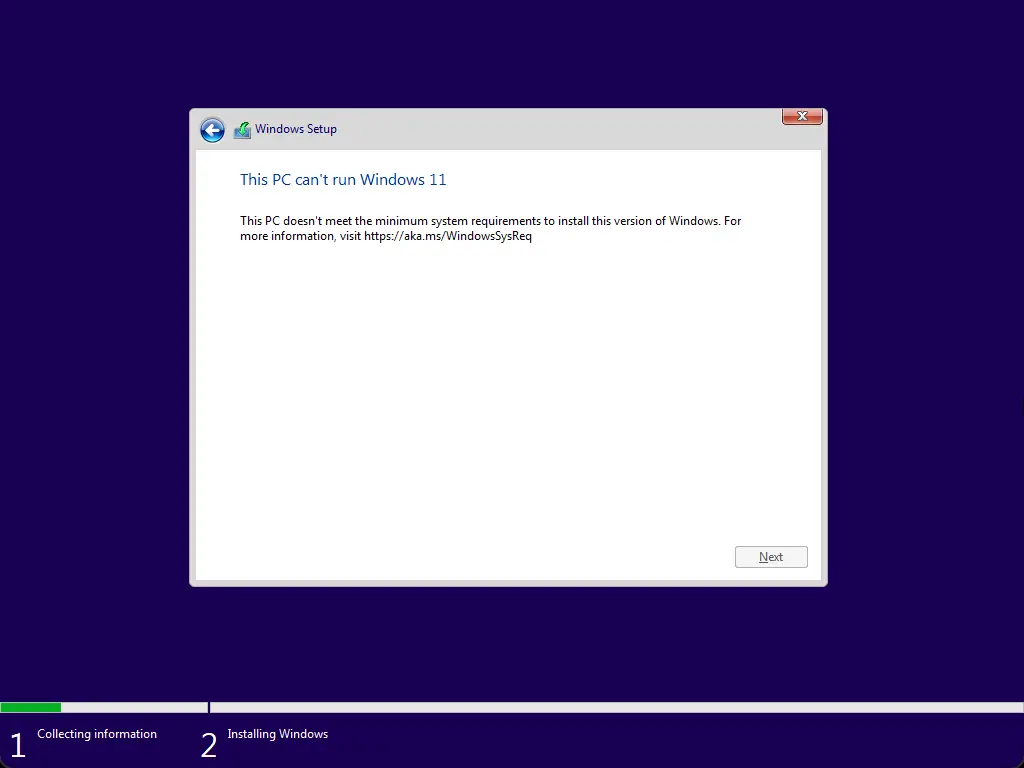
How to Fix the “This pc can’t run Windows 11” Error and install Windows 11 on Unsupported PCs?
The below-mentioned steps are applicable for all unsupported PCs, including virtual machines, that do not meet the minimum hardware requirements to install Windows 11. Basically, we will bypass RAM, CPU, SecureBoot, and TPM 2.0 in the process and install a fresh Windows 11 from scratch. Here are the steps:-
Step 1. First, download Windows 11 latest ISO from the Microsoft website.
Step 2. Then, configure your virtual machine or start installing it on your actual PC.
Step 3. When you see the error, “This PC can’t run Windows 11,” press Shift + F10 (or Shift + Fn + F10) to open the Command Prompt window on your screen.
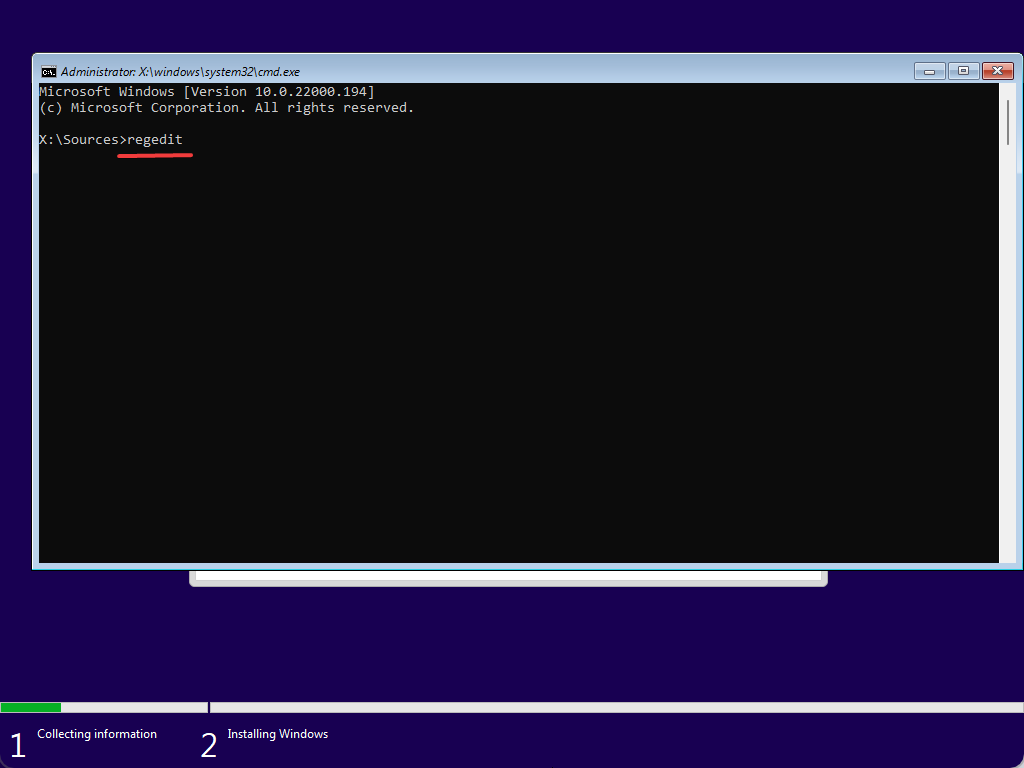
Step 4. When Command Prompt appears on your computer, type regedit and hit Enter key on the keyboard to open the Registry Editor window.
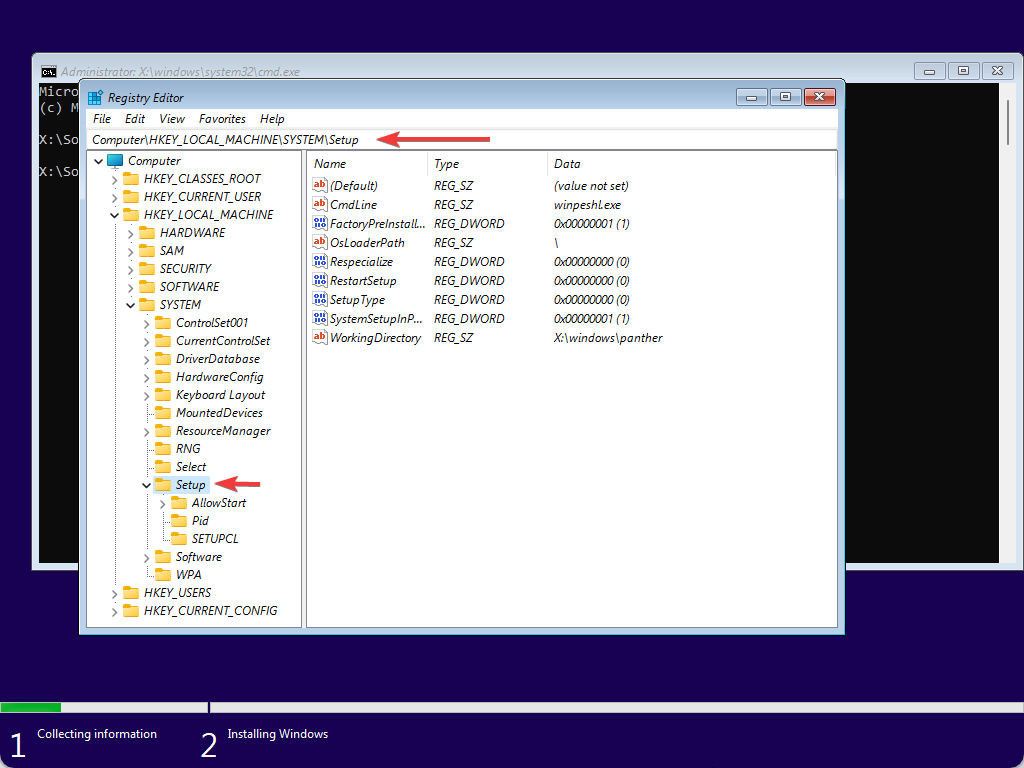
Step 5. In the Registry Editor window, navigate to the following key in the left sidebar:-
HKEY_LOCAL_MACHINE\SYSTEM\Setup
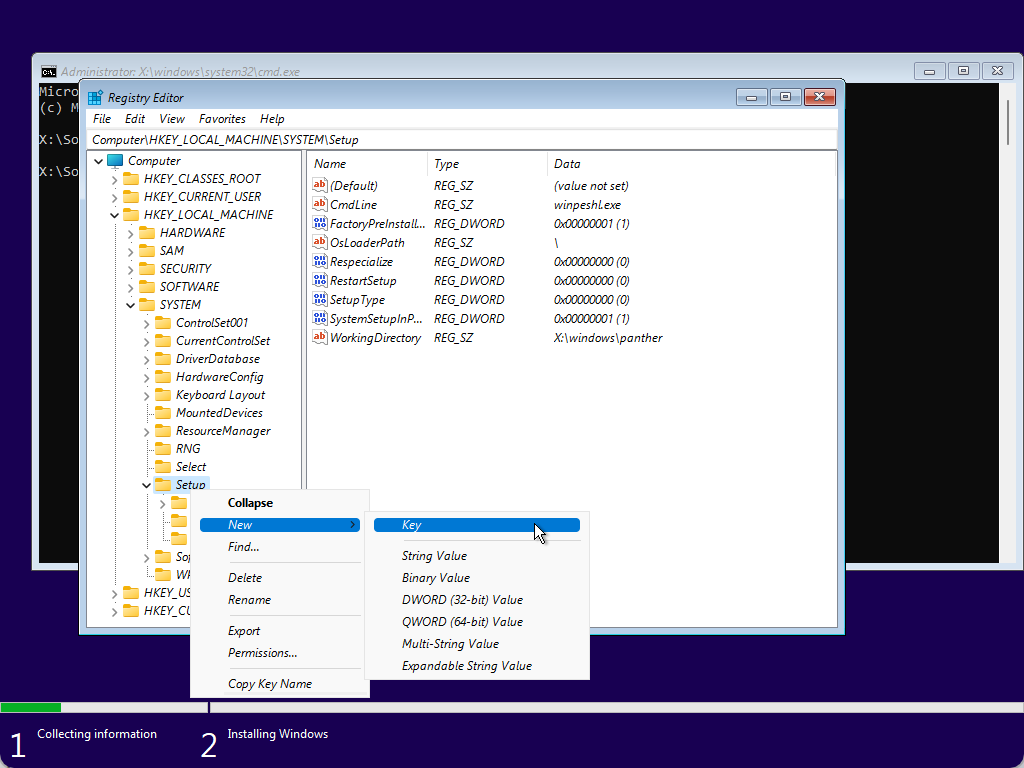
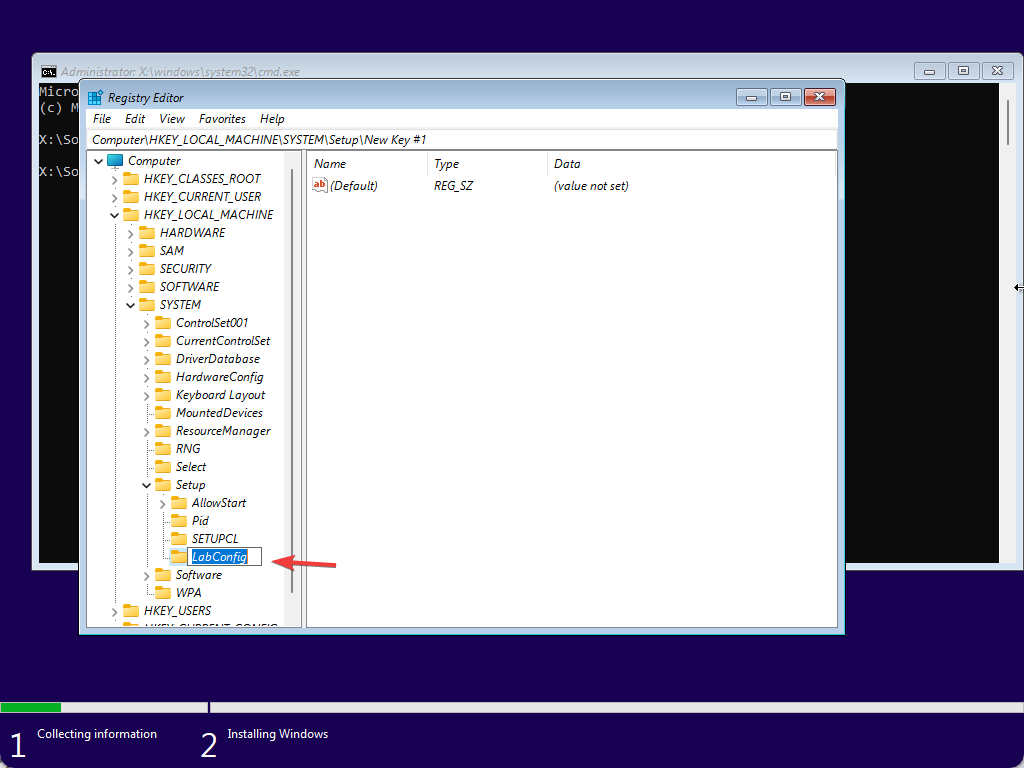
Step 6. After that, right-click on the Setup folder and select New > Key.
Step 7. Name the newly created key as LabConfig.
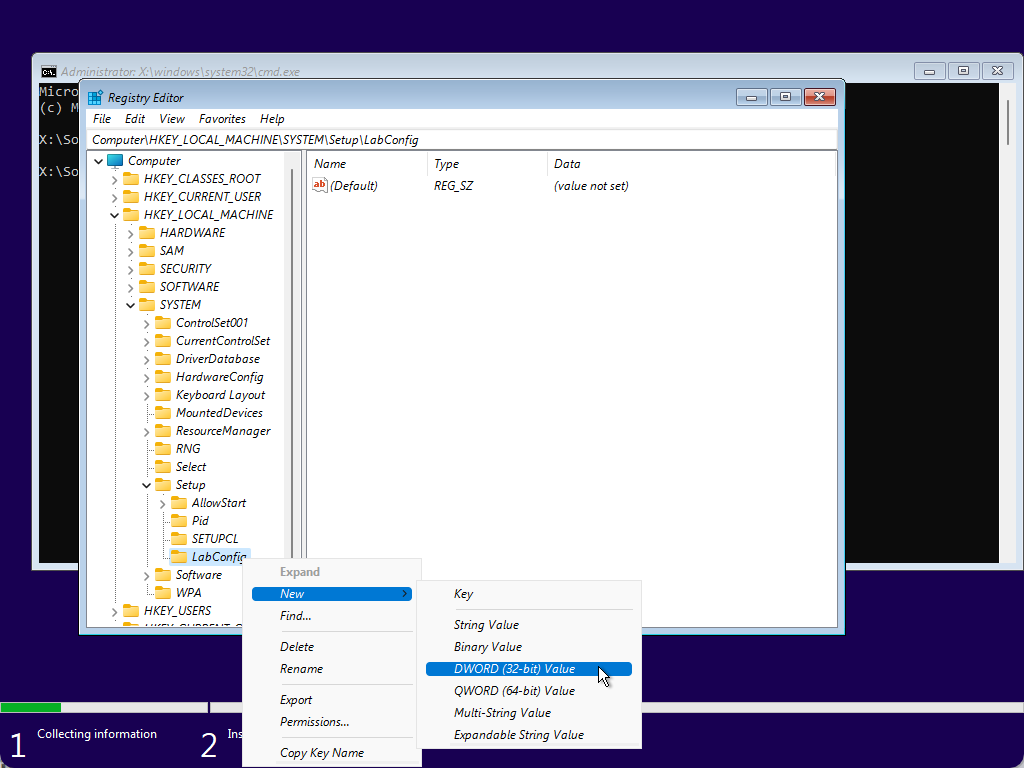
Step 8. Then, right-click on the new LabConfig key and select New > DWORD (32-bit) Value.
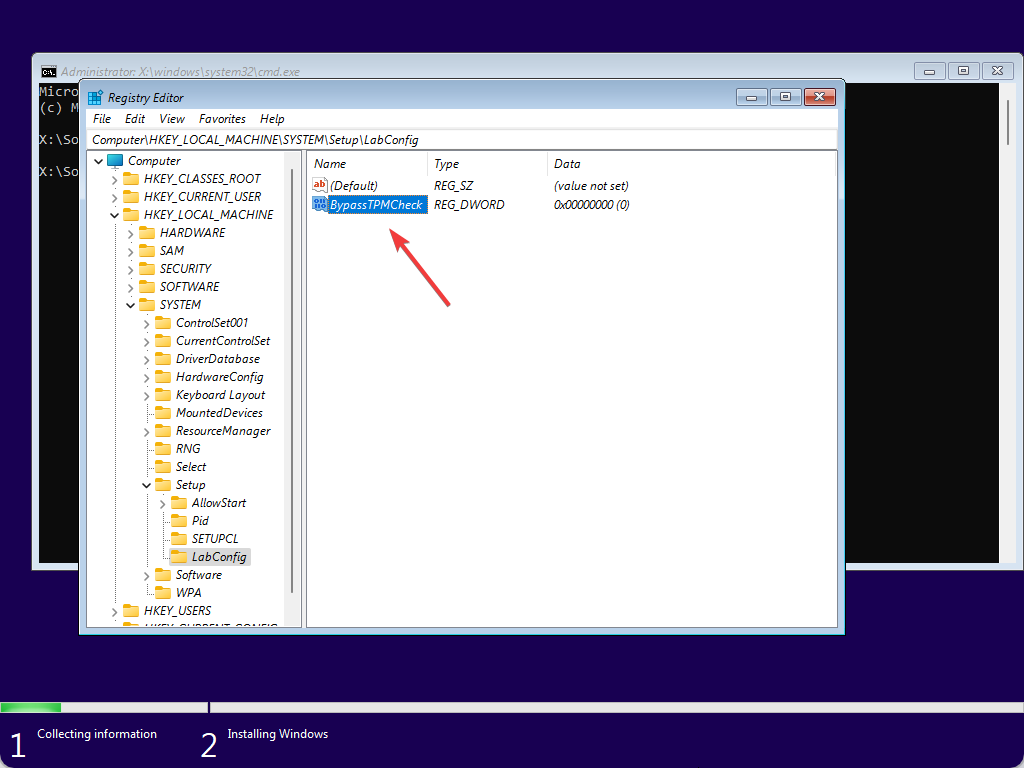
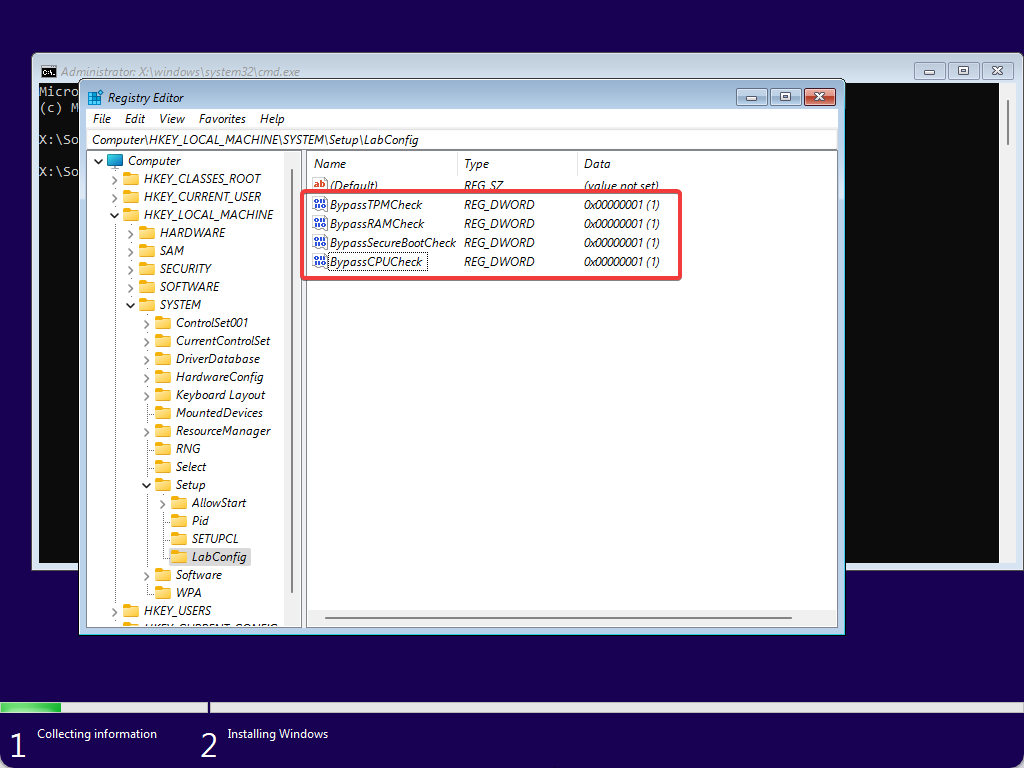
Step 9. Name it BypassTPMCheck.
Step 10. Double-click on the BypassTPMCheck and set its Value data to 1.
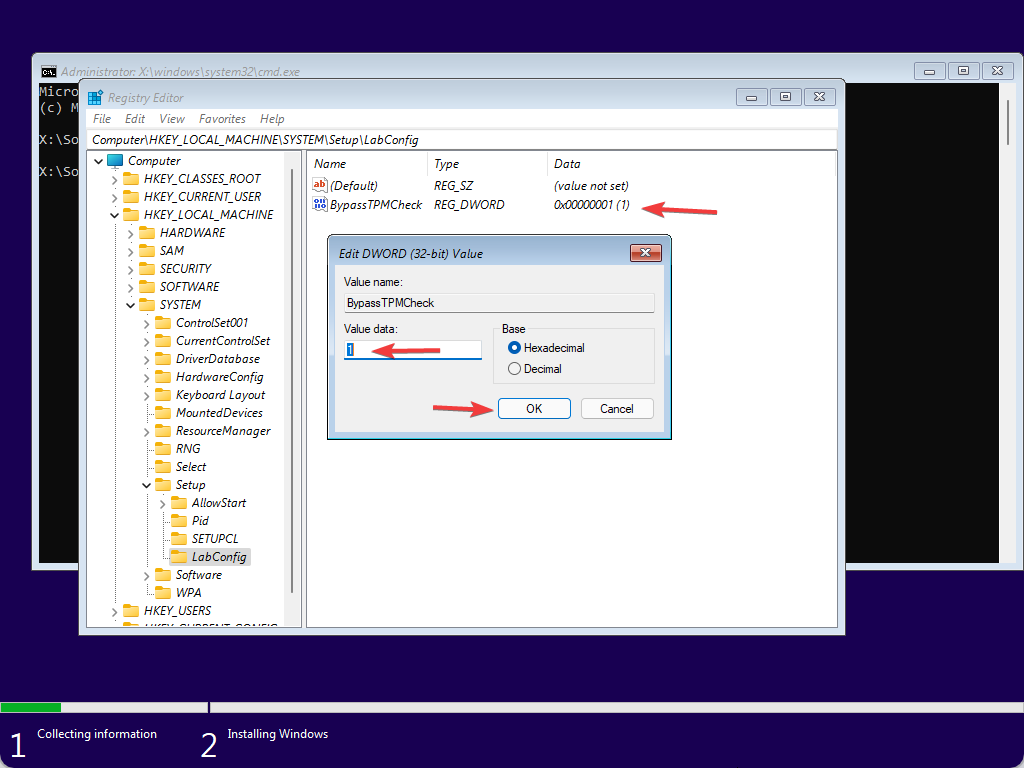
Step 11. Click the OK button.
Step 12. To disable the Secure Boot Check, again right-click on LabConfig and select New > DWORD (32-bit) Value. Name it BypassSecureBootCheck and set its Value data to 1.
Step 13. To bypass the RAM check, right-click on LabConfig and select New > DWORD (32-bit) Value. Name it BypassRAMCheck. Set its Value data to 1.
Step 14. To bypass the CPU check, right-click on LabConfig and select New > DWORD (32-bit) Value. Name it BypassCPUCheck. Set its Value data to 1.
Step 15. Until now, you have bypassed Secure Boot, TPM, RAM, and CPU checks. Your registry should look like the below image:-
Step 16. Now, close the Registry Editor and Command Prompt window.
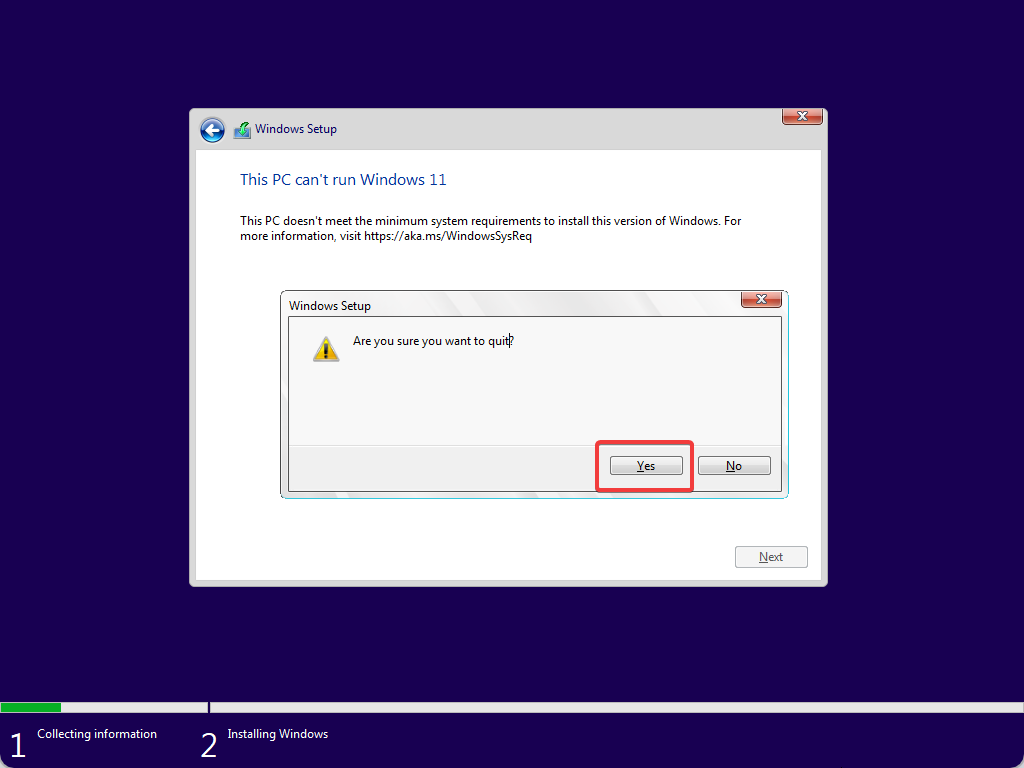
Step 17. Then, close the Windows Setup window. Click the Yes button when prompted.
Note: Please don’t restart your computer. If you reboot your computer at this stage, you’ll need to repeat the above steps.
Step 18. Click the Install now button.
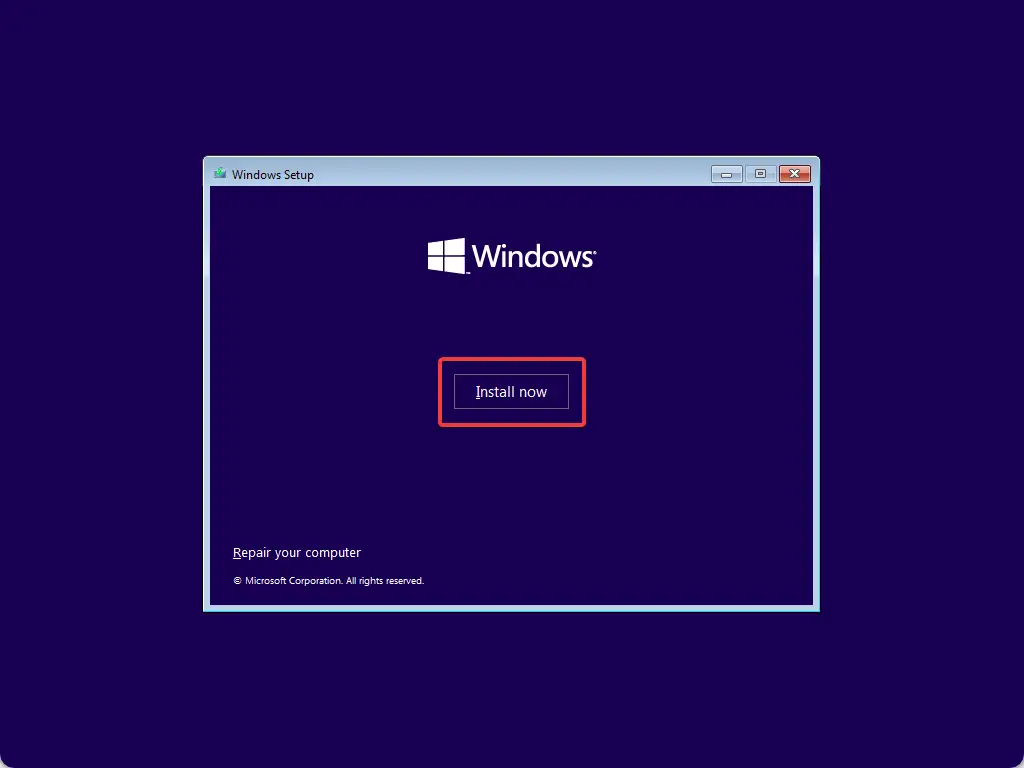
This time you’ll not get any errors. You can continue installing Windows now.
Conclusion
In conclusion, installing Windows 11 on a virtual machine that does not meet the minimum hardware requirements can be a daunting task. However, by following the steps mentioned in this gearupwindows article, you can bypass the minimum system requirements through the Registry and install Windows 11 on unsupported PCs, including virtual machines. Remember, this method is not recommended for actual PCs, and it should only be used for virtual machines. So, if you’re having trouble installing Windows 11 on your virtual machine, give this method a try and see if it works for you.
Also Read: How to Install Windows 11 Home without Microsoft Account?