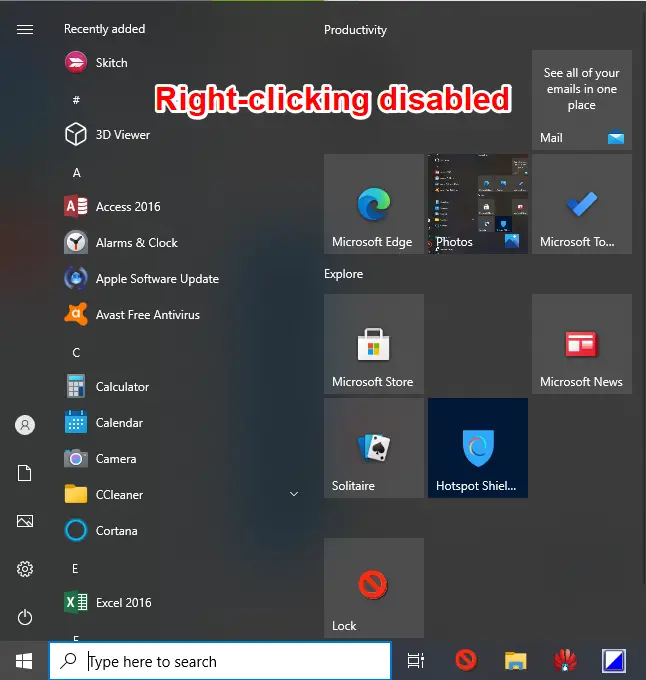
If you’re a Windows 10 user and have encountered issues with your right-click not working or responding in the start menu or start button, you’re not alone. This problem can be frustrating and can significantly slow down your workflow. The right-click feature is an essential tool in Windows 10, allowing users to access additional options and features quickly. Therefore, it’s crucial to fix this issue promptly to restore your computer’s full functionality.
There are several reasons why your right-click may not be working or responding in the start menu or start button of Windows 10. This issue can be caused by various factors, such as a corrupted system file, a bug in the operating system, or conflicts with third-party software. Fortunately, there are several solutions available that can help you fix this problem and regain full access to your computer’s features.
Fix: Right-Click not working in Start Menu or Start Button of Windows 10
- Using Group Policy
- Via Registry Editor
- By restarting File Explorer
- Through Windows PowerShell
- By replacing the WinX folder
How to fix right-click not working or not responding in the Start Menu or Start Button of Windows 10 using Group Policy?
Group Policy Edition is a built-in feature of Enterprise and Pro editions of Windows 10. However, if you are running Windows 10 Home Edition, you need first to enable the Group Policy Editor; once the Group Policy Editor is enabled on the Windows 10 Home Edition, you can proceed with further instructions.
Step 1. Launch the Group Policy Editor (To run the Group Policy Editor on Windows, open the Run box by pressing Windows Logo + R keys and typing gpedit.msc).
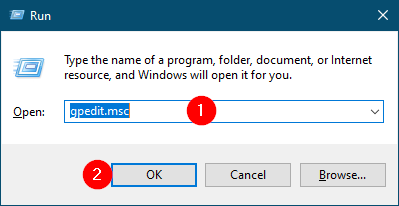
Step 2. Click the OK button to launch the Group Policy Editor.
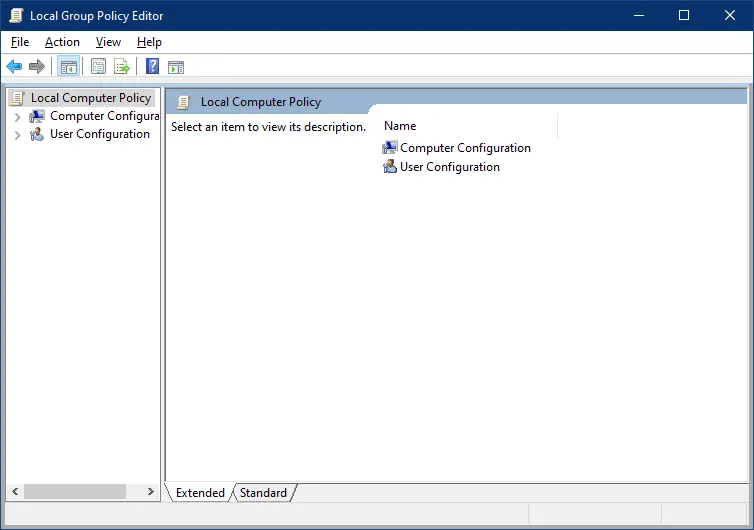
Step 3. Once Local Group Policy Editor is opened, navigate to the following path:-
User Configuration > Administrative Templates > Start Menu and Taskbar
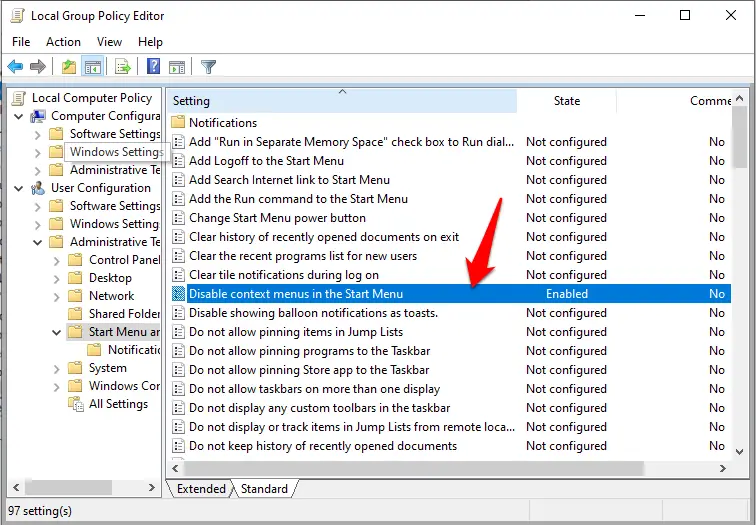
Step 4. From the right-side pane, double-click on the “Disable context menus in the Start Menu” setting.
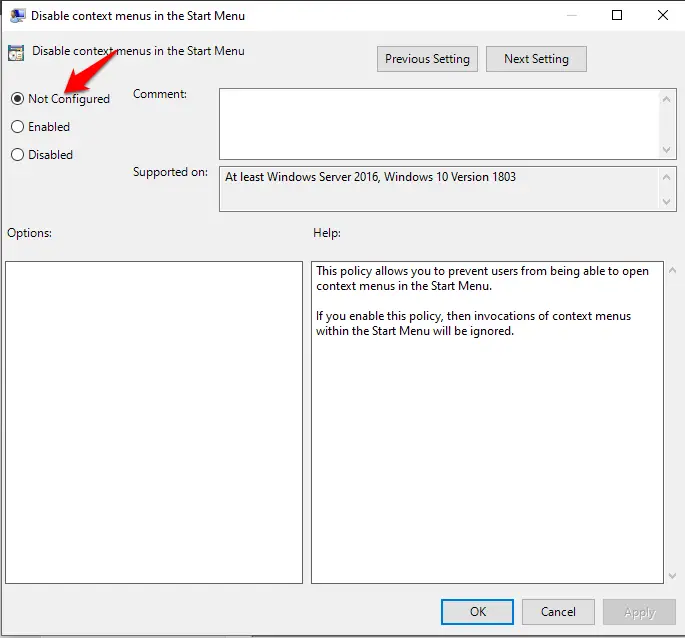
Step 5. Select Not Configured, click on Apply, and then the OK button.
How to fix right-click not working or not responding in the Start Menu or Start Button of Windows 10 via Registry Editor?
If, after changing the Group Policy, you’re still unable to right-click on the Start menu or the Start button, someone might have changed your registry file. To enable the right-click on the Start menu, do the following:-
Step 1. Press Windows Logo + R keys from the keyboard to open the Run dialog box.
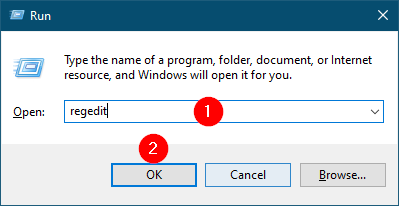
Step 2. Type regedit in the text box.
Step 3. Click the OK button to launch the Registry Editor window.
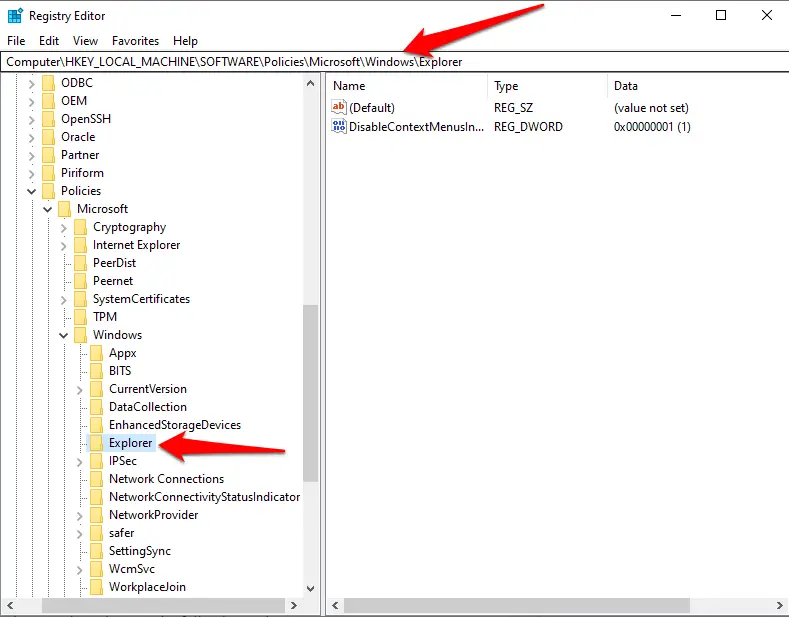
Step 4. Once the Registry Editor is opened, navigate to the following path:-
HKEY_LOCAL_MACHINE\SOFTWARE\Policies\Microsoft\Windows\Explorer
Step 5. From the right-side pane, double-click on DisableContextMenusInStart, and in the Value data field, change the value from 1 to 0.
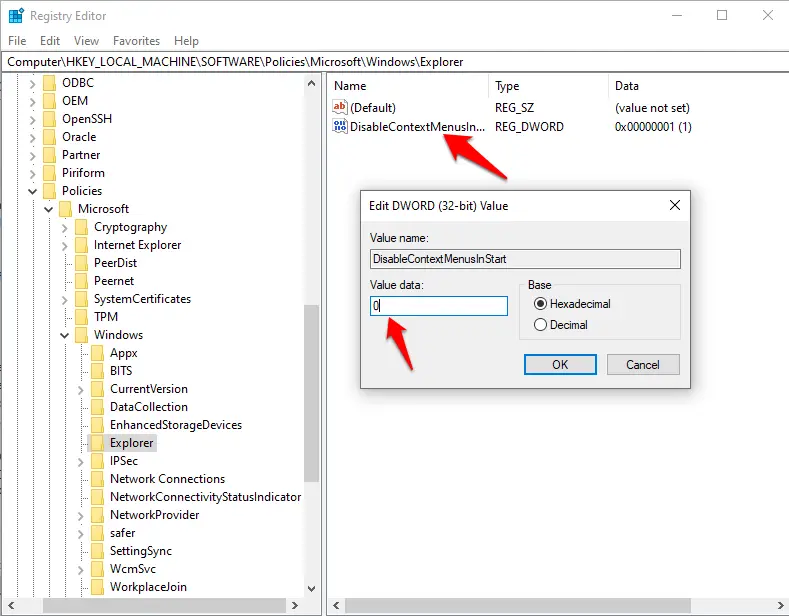
Step 6. Click the OK button and close the Registry Editor.
Click on the Start menu and right-click on any program; it should work now.
How to fix right-click not working or not responding in the Start Menu or Start Button of Windows 10 by restarting File Explorer?
Sometimes, a quick restart of File Explorer may solve the problem. To restart File Explorer on Windows 10, perform the following steps:-
Step 1. Open the Task Manager by pressing Ctrl + Shift + Esc keys from the keyboard.
Step 2. In the Task Manager window, navigate to the Processes tab.
Step 3. Look for Windows Explorer under the Processes tab. Right-click on it and then select Restart.
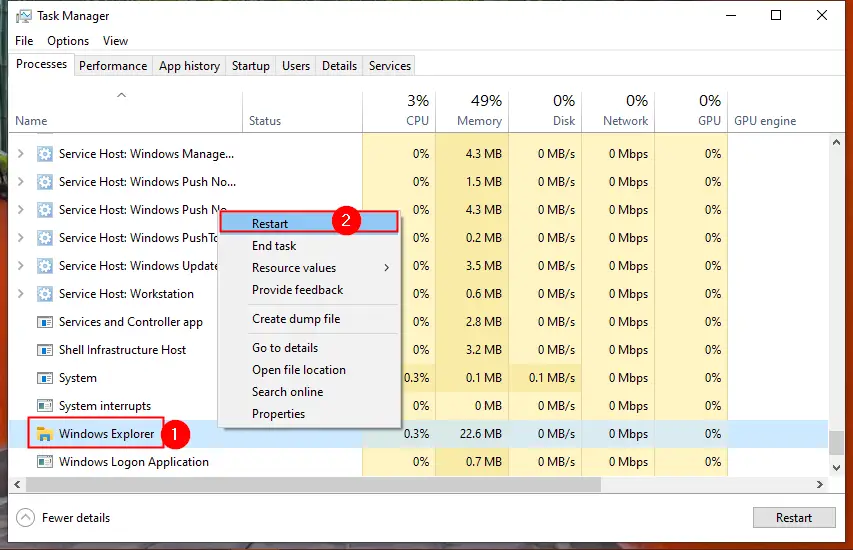
The above steps will restart File Explorer and other components of Windows 10 that rely on Windows Explorer services. Since the Context Menu also depends on the explorer.exe process, it will also restart, and right-click on the Start menu should start working as it should be.
How to fix right-click not working or not responding in the Start Menu or Start Button of Windows 10 through Windows PowerShell?
Follow these steps to fix right-click not working or not responding in Start Menu or Start Button of Windows 10 through Windows PowerShell:-
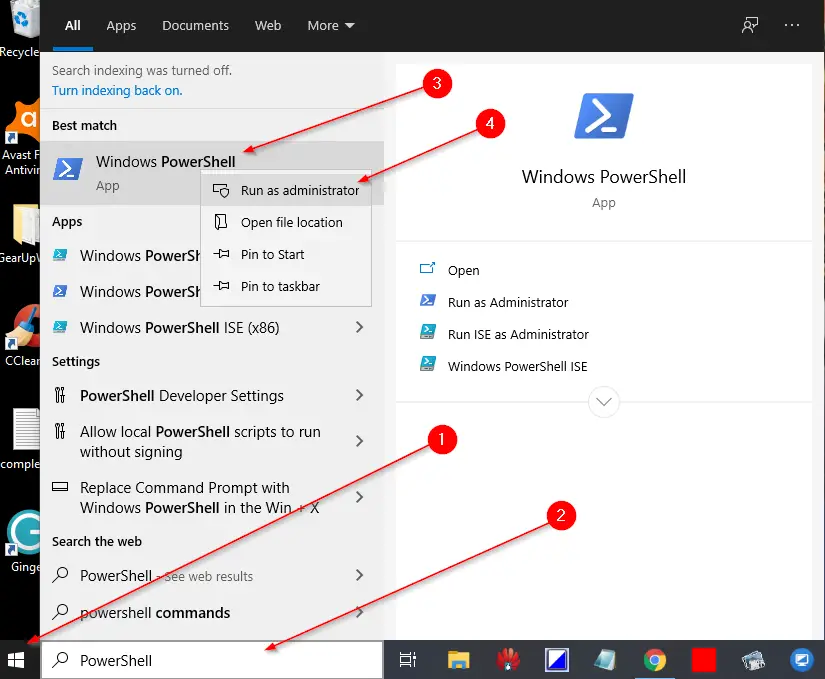
Step 1. Open Windows PowerShell with administrative rights.
To open PowerShell with elevated rights, click on the Start menu and type PowerShell.
On the available top search results, right-click on the Windows PowerShell entry and select Run as administrator.
Step 2. Copy and paste the following command in Windows PowerShell and hit Enter from the keyboard:-
Get-AppXPackage -AllUsers | Foreach {Add-AppxPackage -DisableDevelopmentMode -Register “$($_.InstallLocation)\AppXManifest.xml”}
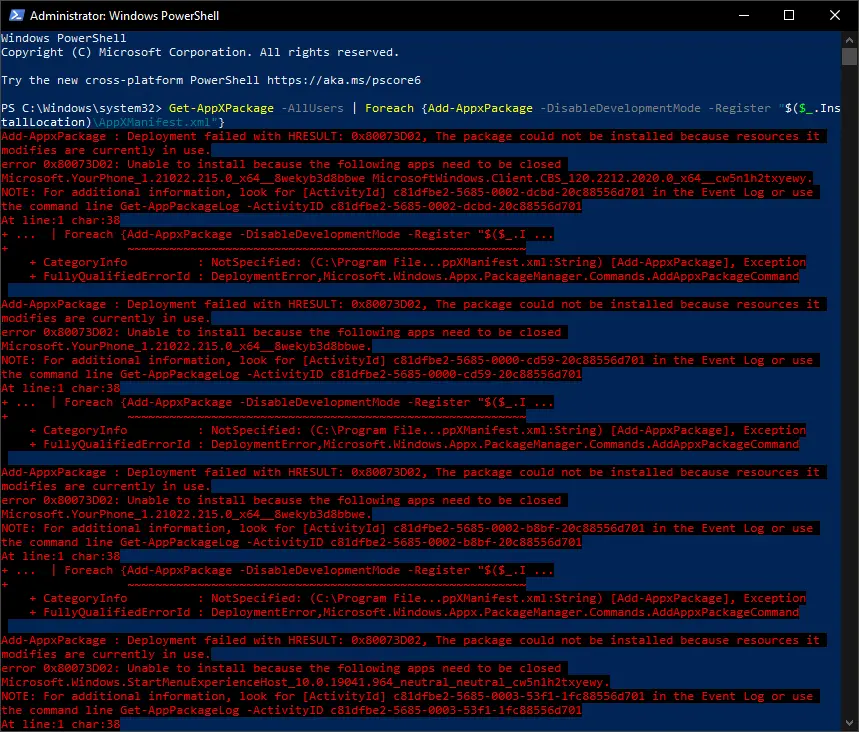
Step 3. A few packages will be installed on your computer, and you will also notice some errors that you can ignore.
After completing the above steps, check if the issue is resolved.
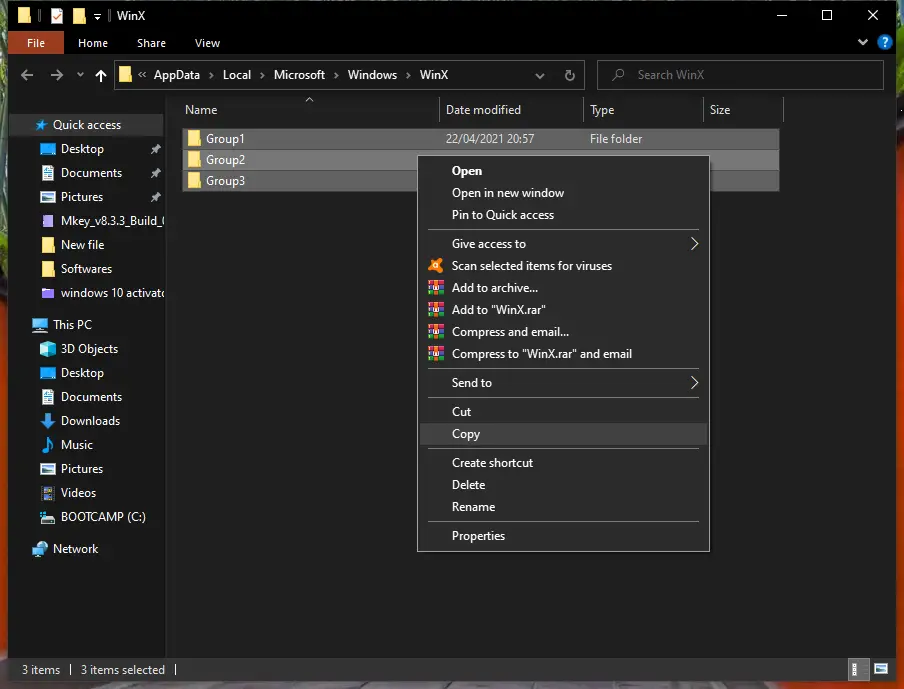
How to fix right-click not working or not responding in the Start Menu or Start Button of Windows 10 by replacing the WinX folder?
If none of the above methods work for you, it looks like the contents within the WinX folder are corrupted or damaged. You need to replace the older folder content with fresh content that will help you to fix the issue.
Step 1. Log in to your PC with an administrator account and create a new local user account.
Step 2. Access the following path:-
C:\Users\New-User-Name\AppData\Local\Microsoft\Windows\WinX
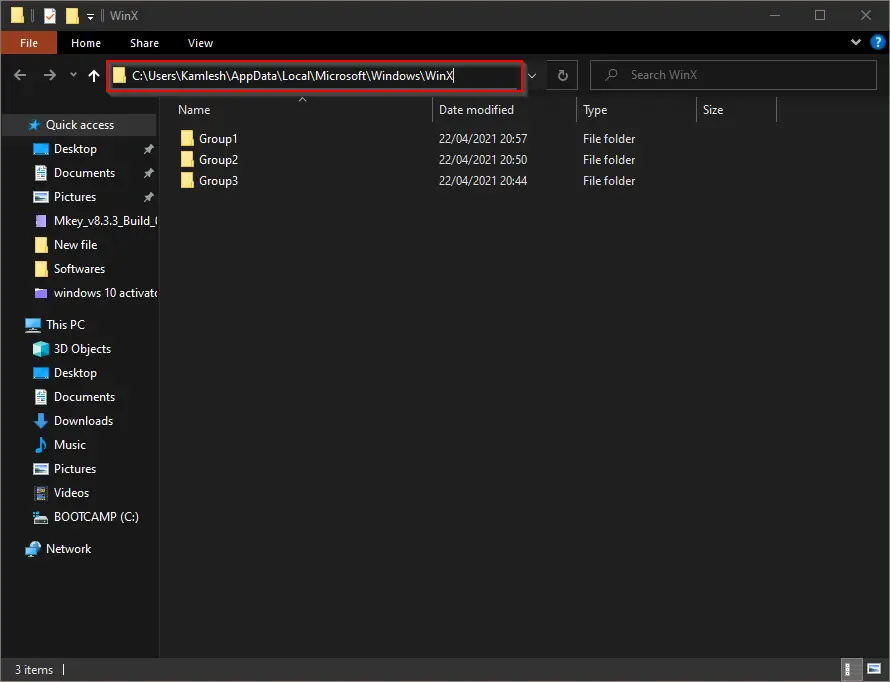
Note: In the above path, replace New-User-Name with the newly created username.
Step 3. Select all the folders, right-click on them, and choose the Copy option.
Step 4. Now, open the following folder:-
C:\Users\Old-User-Name\AppData\Local\Microsoft\Windows\WinX
Note: In the above path, replace Old-User-Name with the username in which the Start menu or button is not working.
Right-click and select the Paste option and replace all the previous folders.
Now, the right-click should start working on the Start menu.
Conclusion
In conclusion, Windows 10 users may face problems with the right-click feature not working or responding in the start menu or start button. This issue can be caused by various reasons, such as a corrupted system file, conflicts with third-party software, or a bug in the operating system. However, there are several methods available to fix this problem, such as using Group Policy, Registry Editor, restarting File Explorer, Windows PowerShell, or replacing the WinX folder. By following the steps mentioned in these methods, users can enable the right-click feature and restore their computer’s full functionality. It’s crucial to fix this issue promptly, as the right-click feature is an essential tool in Windows 10, allowing users to access additional options and features quickly.

very cool, I copied the winX from a different computer, problem fixed.
Thanks with the command on powershell was fixed my problem
You are welcome.