As a default, Windows 11 or 10 assigns users barebones avatars with gray backgrounds and white curves representing the users. In Windows 11/10, you can customize your account picture. The picture remains visible each time you sign in with your account and is also displayed as a thumbnail in the Start menu.
Using one’s own image is possible instead of the default one. In addition, if your account is linked to a Microsoft Account, you can upload images to Microsoft’s servers, which will be available on all cloud services like OneDrive, Office 365, etc. By default, they will be synced across all your devices.
You may, however, if you wish to comply with company policy, standardize the account pictures for all users on the PC to the default image, and prevent users from changing their account pictures afterward.
This gearupwindows guide will help you apply a default account picture to all users and prevent them from changing their accounts in Windows 11 or 10.
On a Windows 11 or 10 PC, you can set the default account picture for all users using either Group Policy or Registry Editor.
Note: The default account picture is stored at “%PROGRAMDATA%\Microsoft\User Account Pictures\user.jpg,” and the default guest picture is stored at “%PROGRAMDATA%\Microsoft\User Account Pictures\guest.jpg.” Due to some reason, if the default pictures do not exist, Windows will display an empty frame. If you want to display a custom image for all your user accounts, you can change the same at “%PROGRAMDATA%\Microsoft\User Account Pictures\user.jpg,”
How to Enable or Disable Apply Default Account Picture for All Users using Registry Editor?
Follow these steps to turn on or off apply the default account picture for all users through Registry Editor:-
Step 1. Open Registry Editor first.
Step 2. Next, navigate to the following Registry key:-
HKEY_LOCAL_MACHINE\SOFTWARE\Microsoft\Windows\CurrentVersion\Policies\Explorer

Step 3. Then, right-click on the Explorer key and select New > DWORD (32-bit) Value.

Step 4. Name the newly created REG_DWORD to UseDefaultTile.
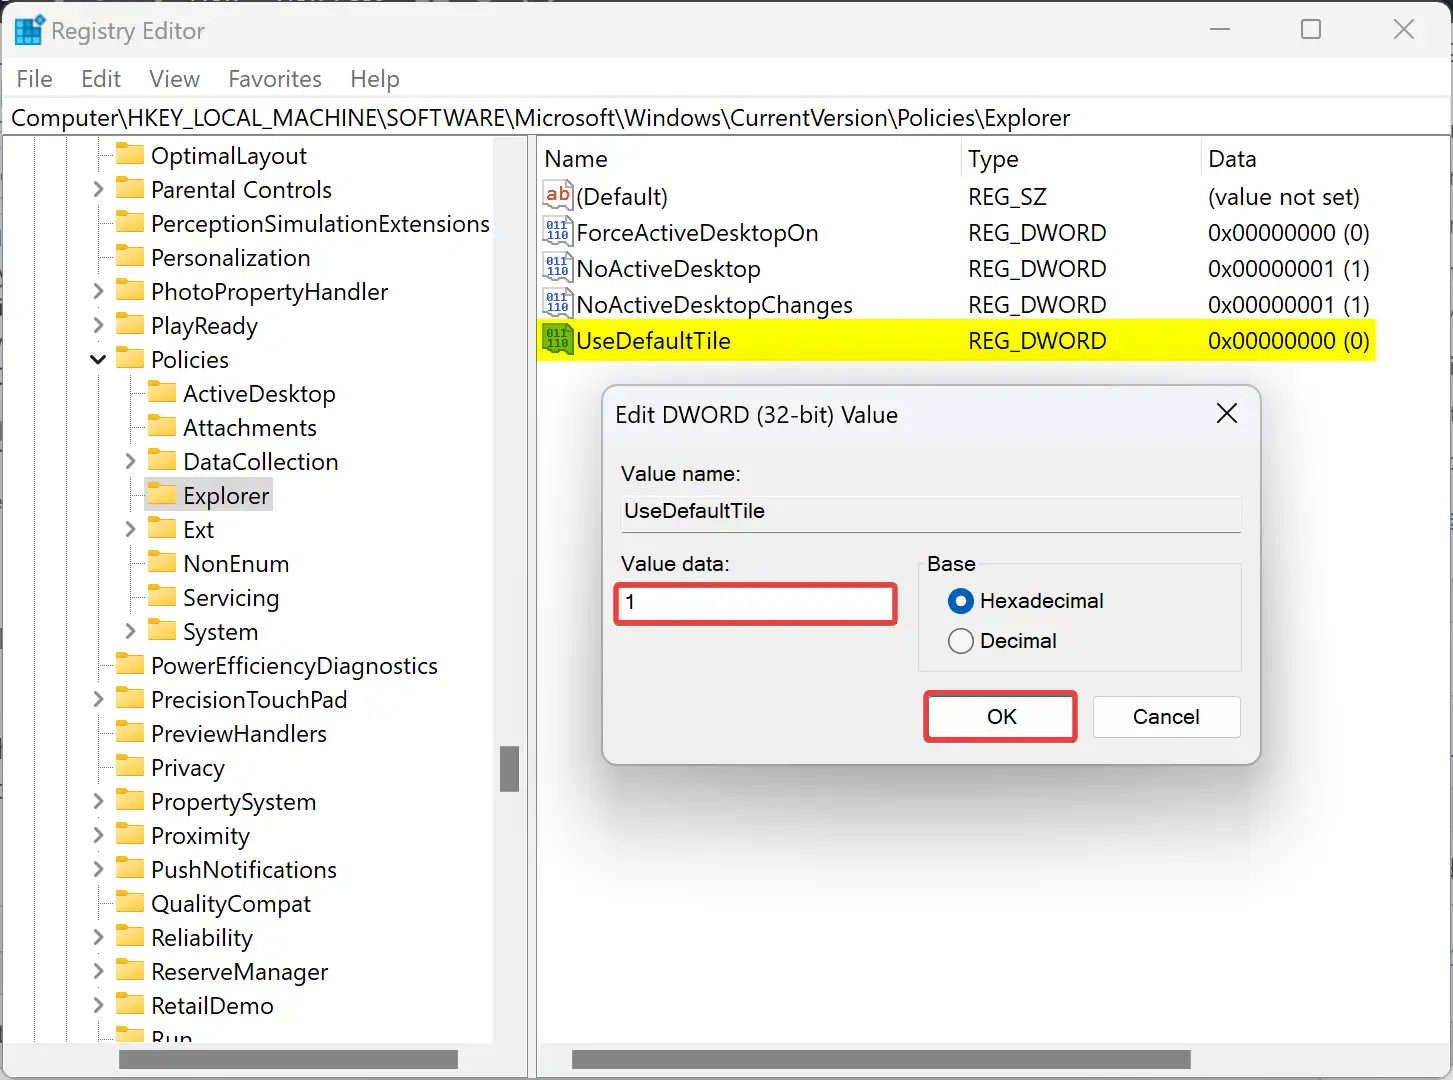
Step 5. Now, double-click on the UseDefaultTile REG_DWORD and set its “Value data” to the following:-
- 0: Enable the Customization of User Avatars.
- 1: Disable the Customization of User Avatars.
Step 6. Click OK.
Step 7. Restart your computer to apply the changes.
How to Turn On or Off Apply Default Account Picture for All Users through Group Policy?
Follow these steps to enable or disable applying the default account picture for all users using Group Policy Editor:-
Step 1. First, open Local Group Policy Editor on your computer.
Step 2. Then, go to the following path in the left sidebar:-
Computer Configuration > Administrative Templates > Control Panel > User accounts

Step 3. On the right side, double-click on the “Apply the default account picture to all users” setting.

Step 4. Select the Enabled option to set the default Account Picture for all users.
Quick Note: Select the Not Configured or Disabled option to allow users to change the account picture.
Step 5. Click Apply.
Step 6. Click OK.
Step 7. Reboot your computer to apply the changes.
Conclusion
In conclusion, customizing your account picture on Windows 11/10 is a simple and easy process that allows you to personalize your computer experience. However, in certain situations, it may be necessary to standardize the account pictures for all users on a PC to the default image and prevent users from changing their account pictures. This guide provides step-by-step instructions for achieving this through both Registry Editor and Group Policy. By following these instructions, you can easily apply the default account picture to all users on your computer and prevent them from changing their accounts.
