A user’s recently opened items are stored in the “%APPDATA%\Microsoft\Windows\Recent Items” folder by default and appear in the Start menu Recommended section, Jump Lists, and File Explorer.
When the setting is enabled, Windows programs and the system do not create shortcuts to documents opened while it is active. Also, existing document shortcuts are retained, but are not displayed. Windows programs do not display shortcuts at the bottom of the File menu, and the Recent Items menu on the Start menu is empty. Also, jump lists off of programs in the Start Menu or Taskbar do not show recently or frequently used files, folders, or websites.
How to Enable or Disable “Show recently opened items in Start, Jump Lists, and File Explorer” for Current User in Settings?
To turn on or off “Show recently opened items in Start, Jump Lists, and File Explorer” in Windows 11 Setting, use these steps:-
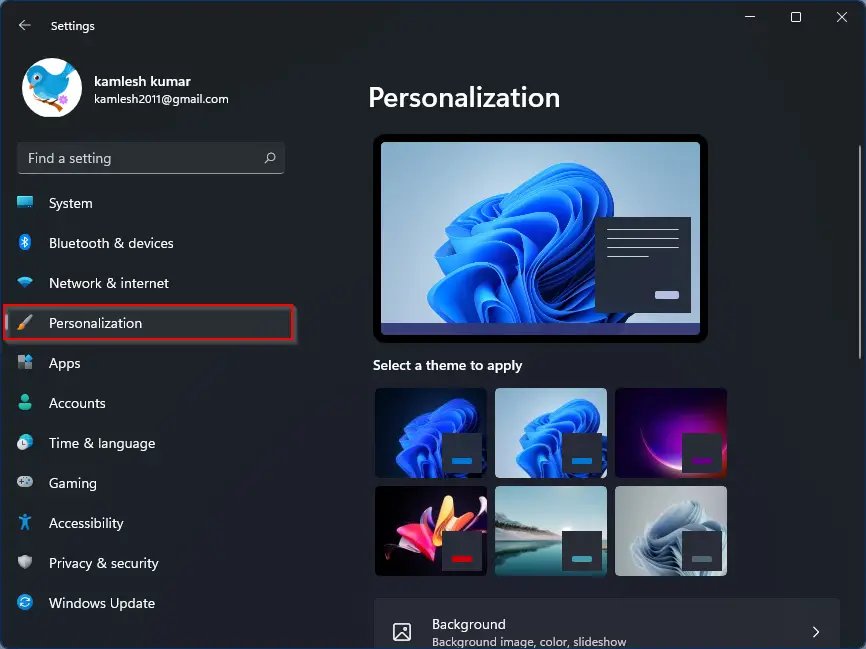
Step 1. Open Settings using Windows + I keyboard shortcut.
Step 2. Then, click Personalization on the left side.
Step 3. Next, click on Start on the right side.
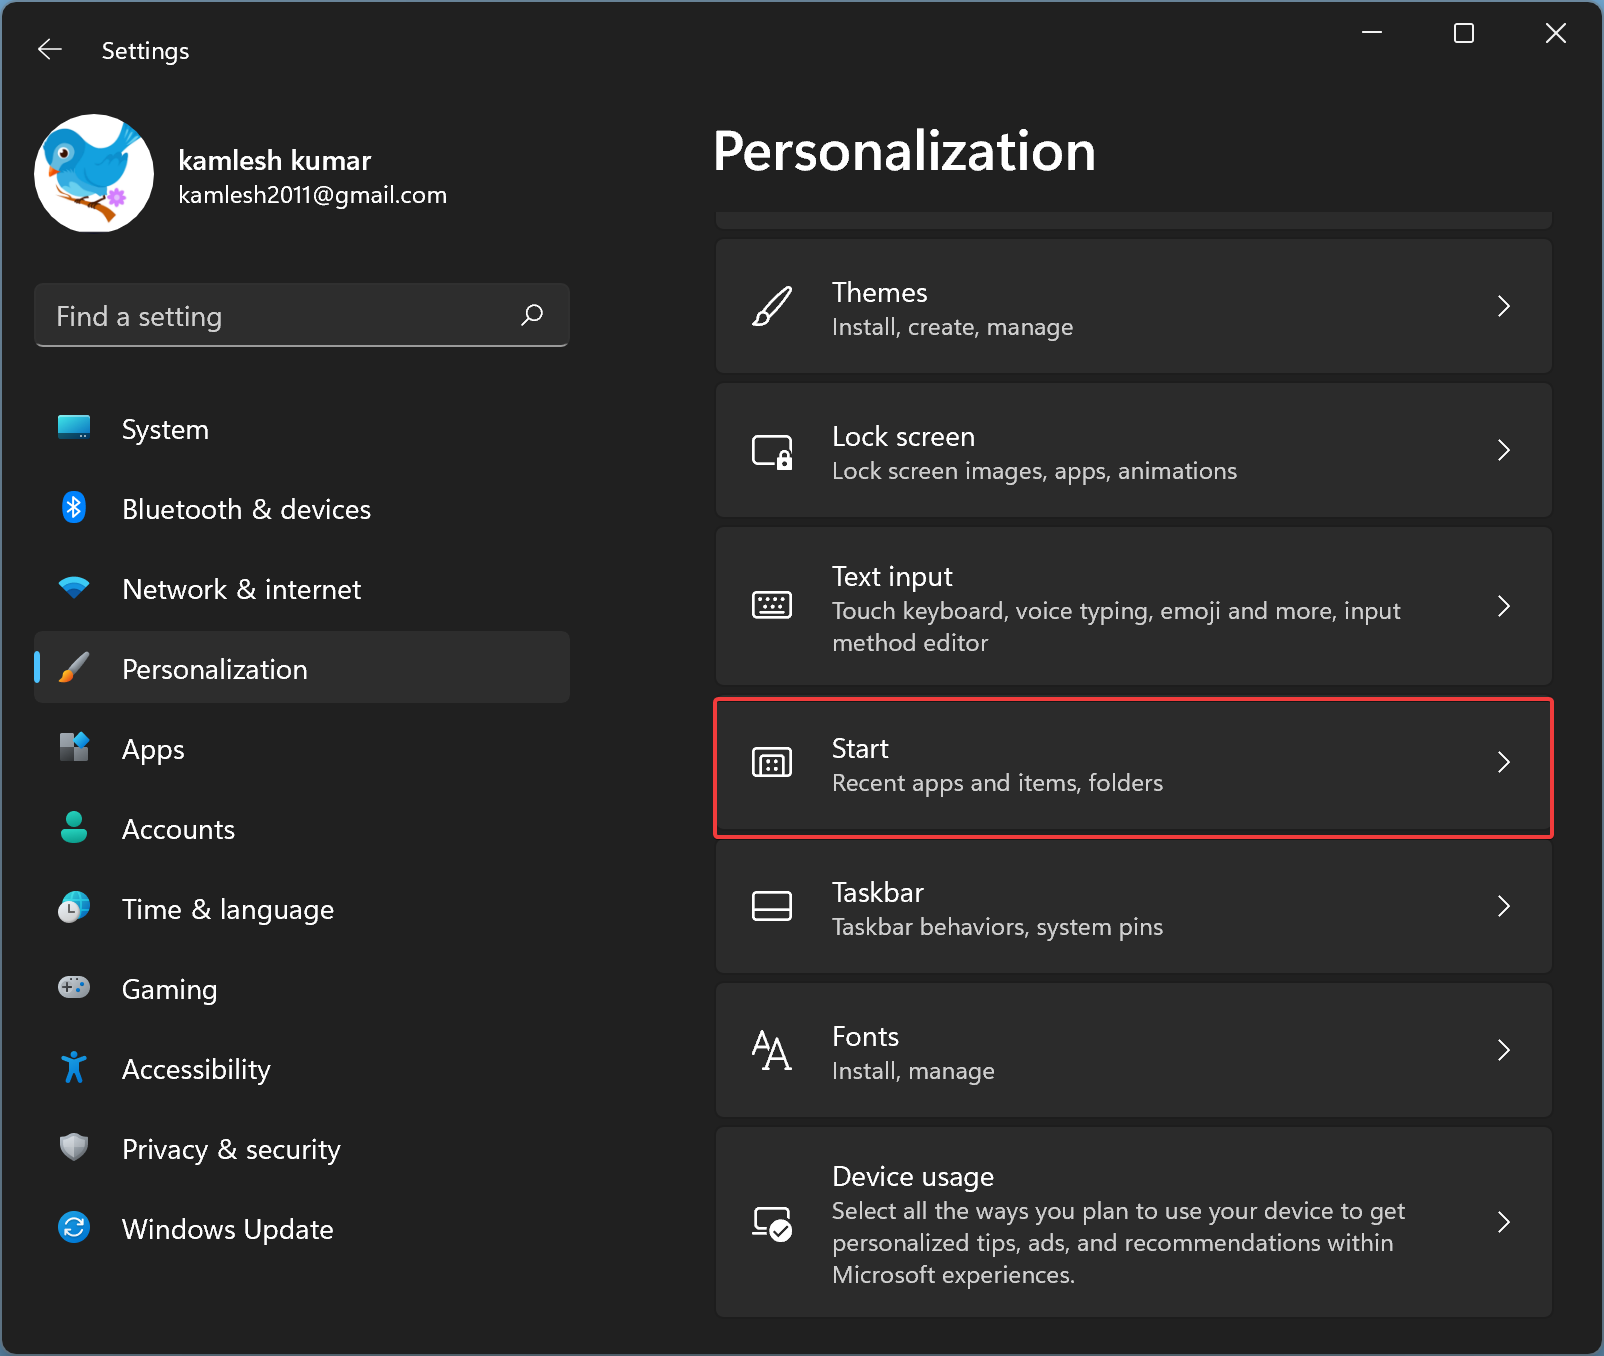
Step 4. Here, turn On or Off the toggle switch “Show recently opened items in Start, Jump Lists, and File Explorer” to enable or disable the feature.

Here, you can also turn On or Off toggle switch “Show recently added apps” and “Show most used apps.”
How to Turn On or Off “Show recently opened items in Start, Jump Lists, and File Explorer” using Group Policy?
To enable or disable “Show recently opened items in Start, Jump Lists, and File Explorer” through Group Policy, do these steps:-
Step 1. Open Local Group Policy Editor.
Step 2. Then, navigate to the following path in the left sidebar:-
Computer Configuration > Administrative Templates > Start Menu and Taskbar
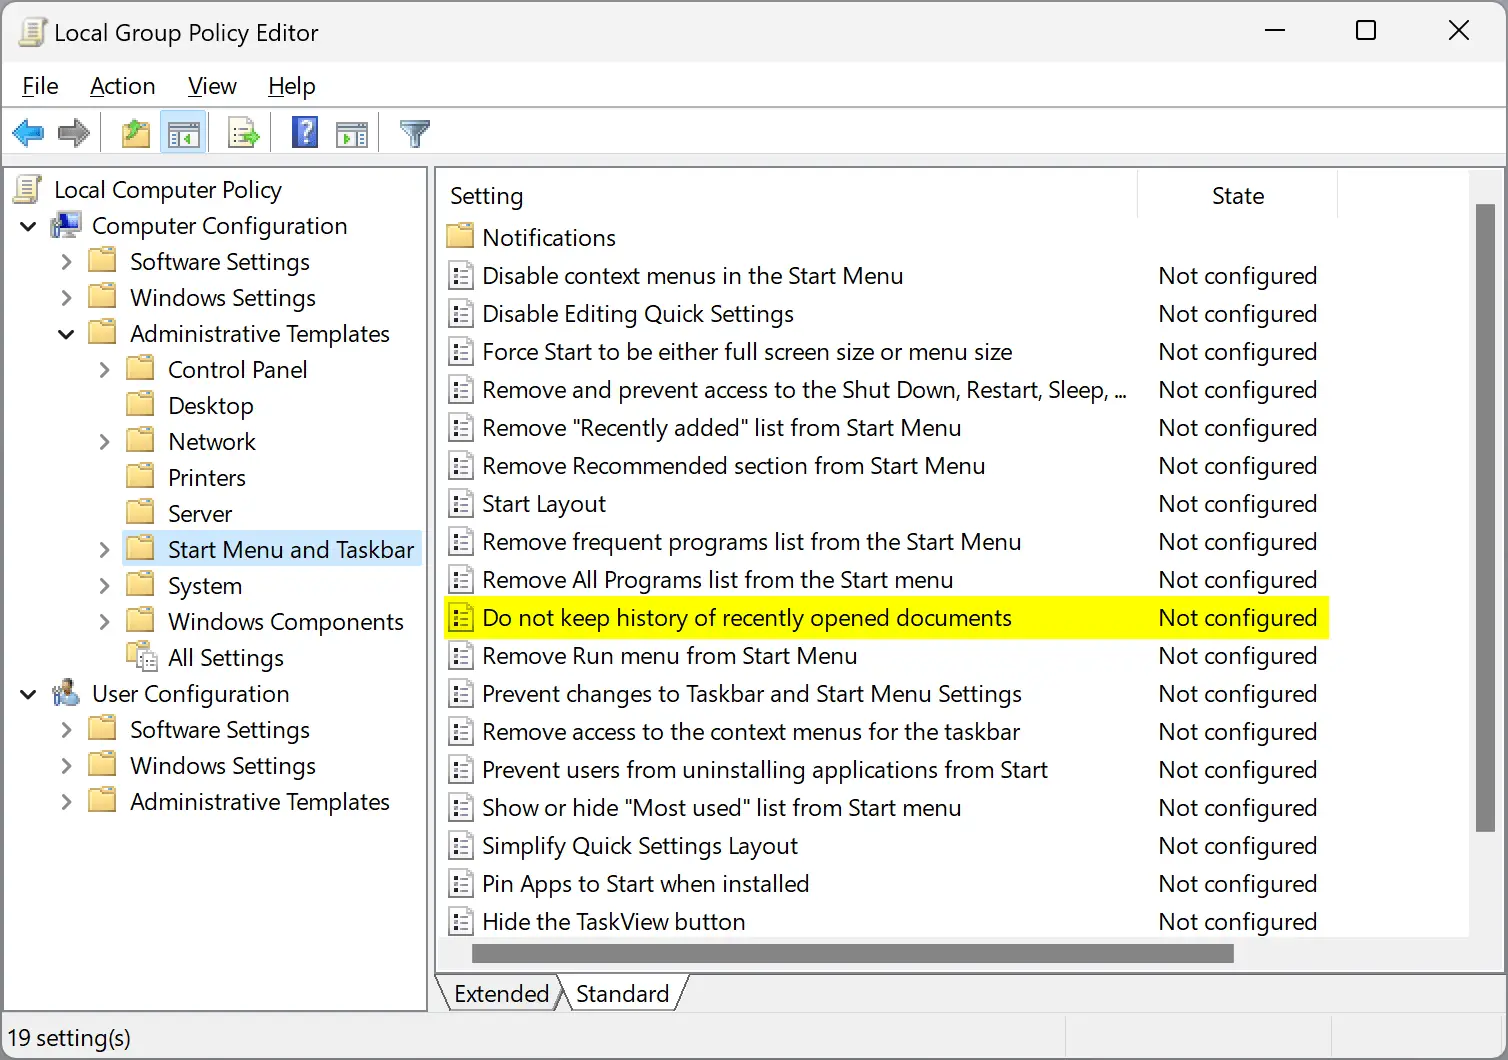
Step 3. On the right pane, double-click on the “Do not keep history of recently opened documents” setting to edit it.
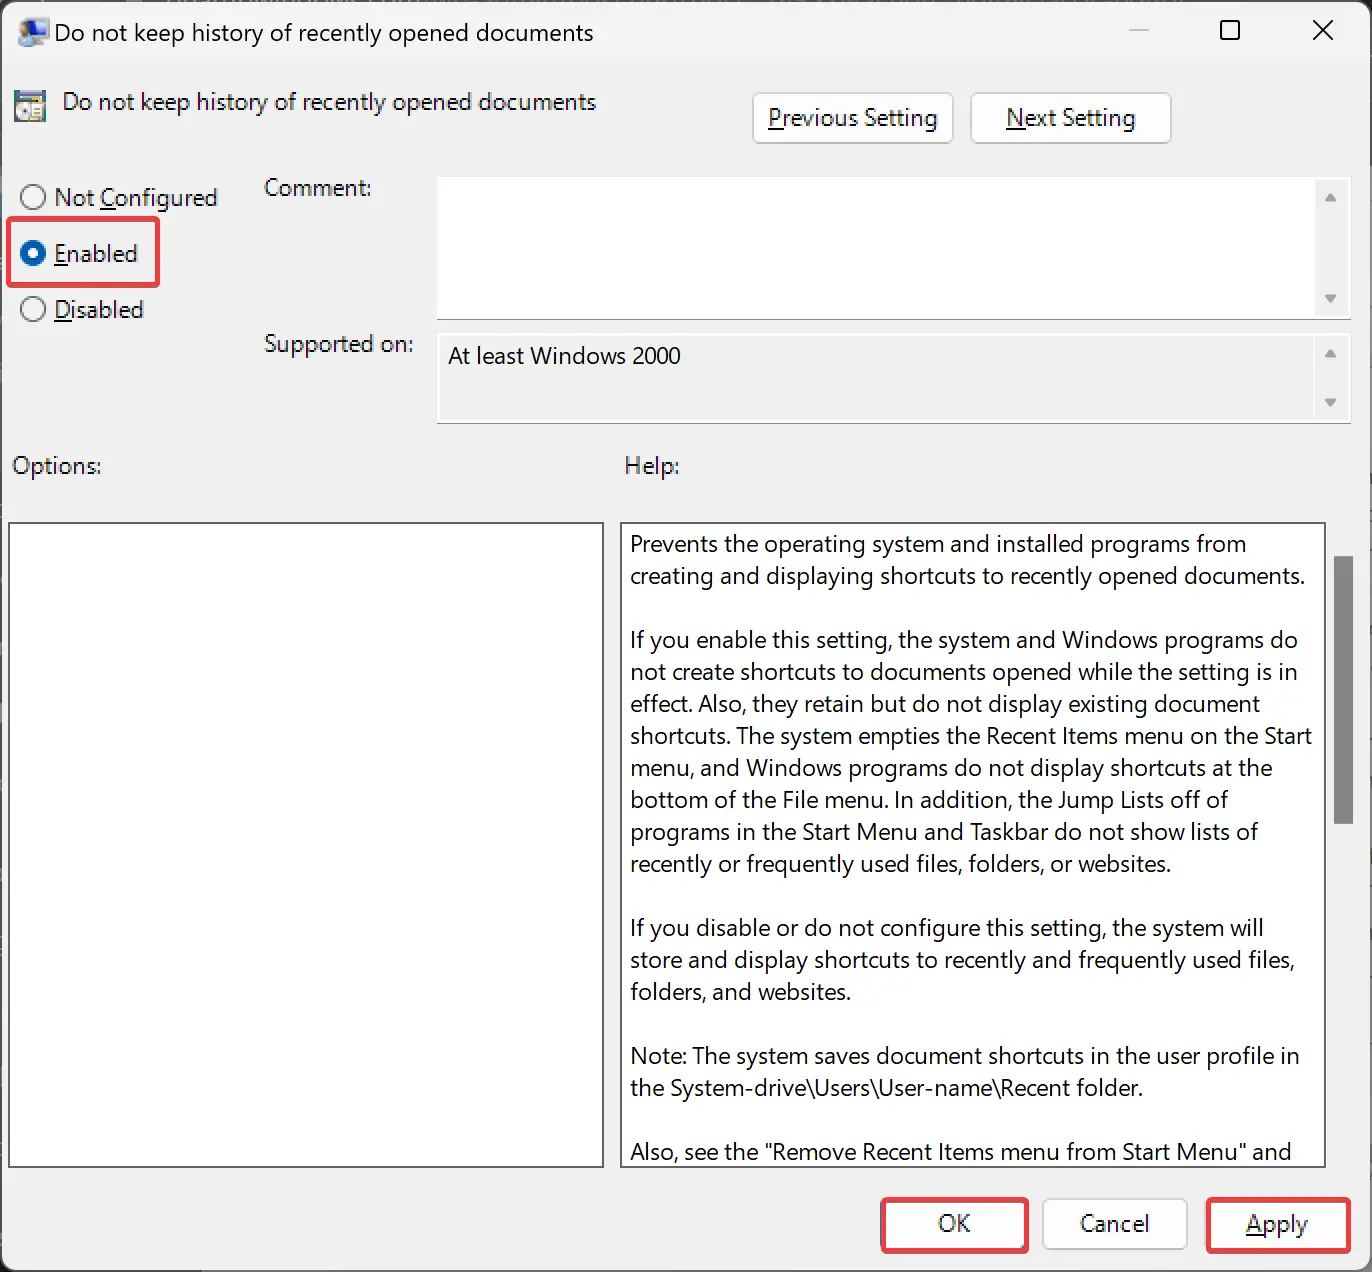
Step 4. Select Enabled to remove recently opened items in Start, Jump Lists, and File Explorer.
Quick Note: To show recently opened items in Start, Jump Lists, and File Explorer, select the Not Configured option.
Step 5. Click Apply.
Step 6. Click OK.
Step 7. Reboot your computer to apply the changes.
How to Enable or Disable “Show recently opened items in Start, Jump Lists, and File Explorer” through Registry Editor?
Follow these registry steps to turn on or off “Show recently opened items in Start, Jump Lists, and File Explorer” in Windows 11:-
Step 1. Open Registry Editor.
Step 2. Then, browse to the following path on the left side:-
HKEY_CURRENT_USER\Software\Microsoft\Windows\CurrentVersion\Policies\Explorer

Step 3. Next, right-click on the Explorer key and select New > DWORD (32-bit) Value.
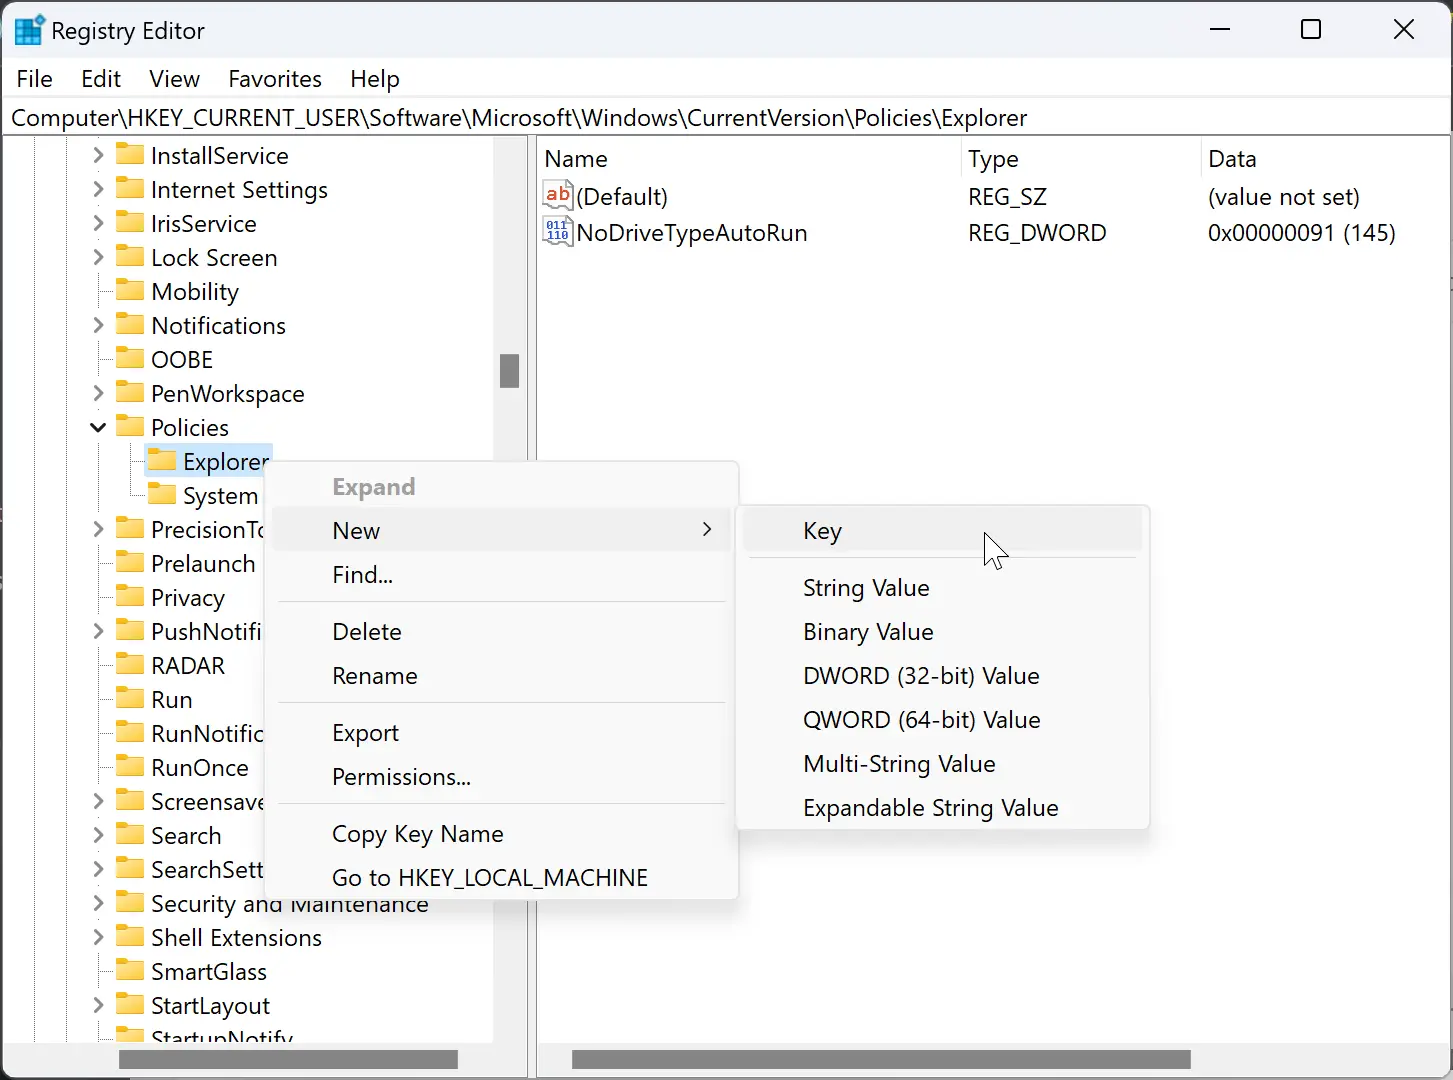
Step 4. Name the newly created REG_DWORD to NoRecentDocsHistory.
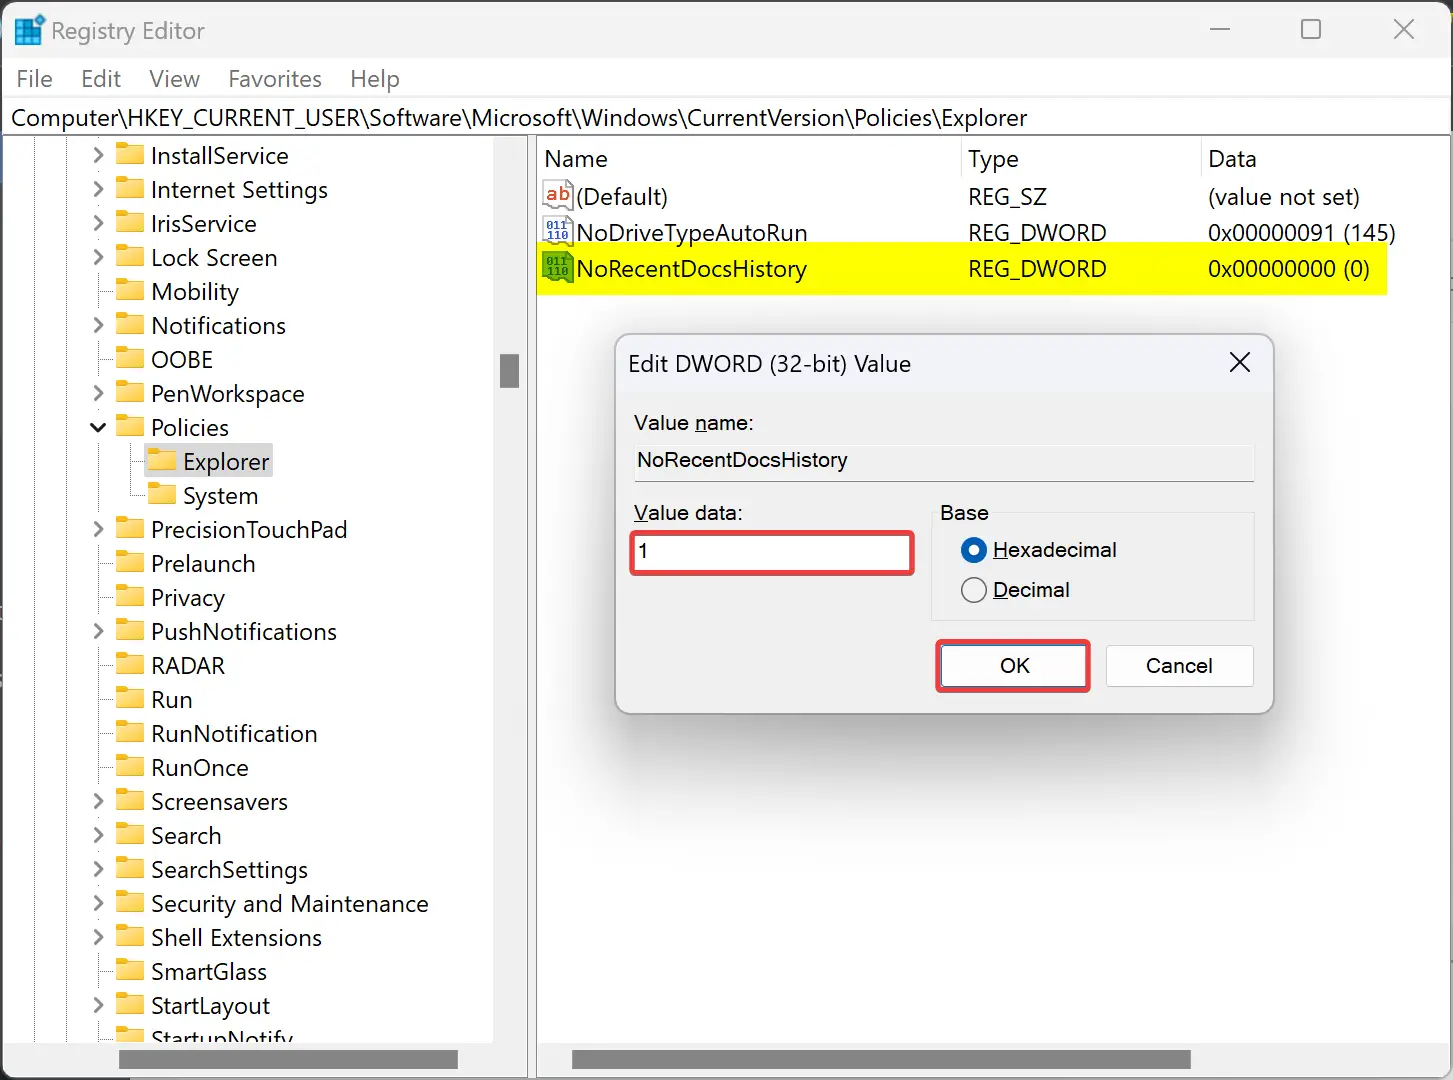
Step 5. Now, double-click on the NoRecentDocsHistory REG_DWORD and enter the following in the “Value data” field:-
- 0: Enable “Show recently opened items in Start, Jump Lists, and File Explorer” for All Users.
- 1: Disable “Show recently opened items in Start, Jump Lists, and File Explorer” for All Users.
Step 6. Click OK.
Step 7. Now, repeat the above steps for this path also:-
HKEY_LOCAL_MACHINE\SOFTWARE\Microsoft\Windows\CurrentVersion\Policies\Explorer
Step 8. Finally, reboot your PC to apply the changes.
Please note that if you disable “Show recently opened items in Start, Jump Lists, and File Explorer” using the above registry steps, it will disable the respective setting in Windows 11 Settings too.
Conclusion
In conclusion, Windows 11 allows users to control whether recently opened items are displayed in the Start menu, Jump Lists, and File Explorer through various methods such as the Settings app, Group Policy, and Registry Editor. By default, recently opened items are stored in the “%APPDATA%\Microsoft\Windows\Recent Items” folder and appear in the recommended section of the Start menu. However, when the setting is disabled, Windows programs and the system do not create shortcuts to documents opened while it is active. These options provide users with more control over their privacy and convenience while using Windows 11.
