When you press the Enter key in the Excel spreadsheet, by default, it moves the selection to the bottom cell. However, if you need, you can change the selection direction to any other order with the help of this gearupwindows article.
Let’s see it as an example. Suppose you have selected a G5 cell in an Excel spreadsheet. At this point, when you press the Enter key on the keyboard, it will move the cursor to the G6 cell. But if you want to move the cursor to another direction in Excel spreadsheets, such as G4, F5, or H5, in such situations, what will you do?
How to Change the Direction of the Enter Key in Microsoft Excel using Excel Options?
To change the cursor movement direction or selection direction after pressing Enter key in the Microsoft Excel spreadsheet, use the following steps:-
Step 1. Open a Microsoft Excel Spreadsheet on your computer.
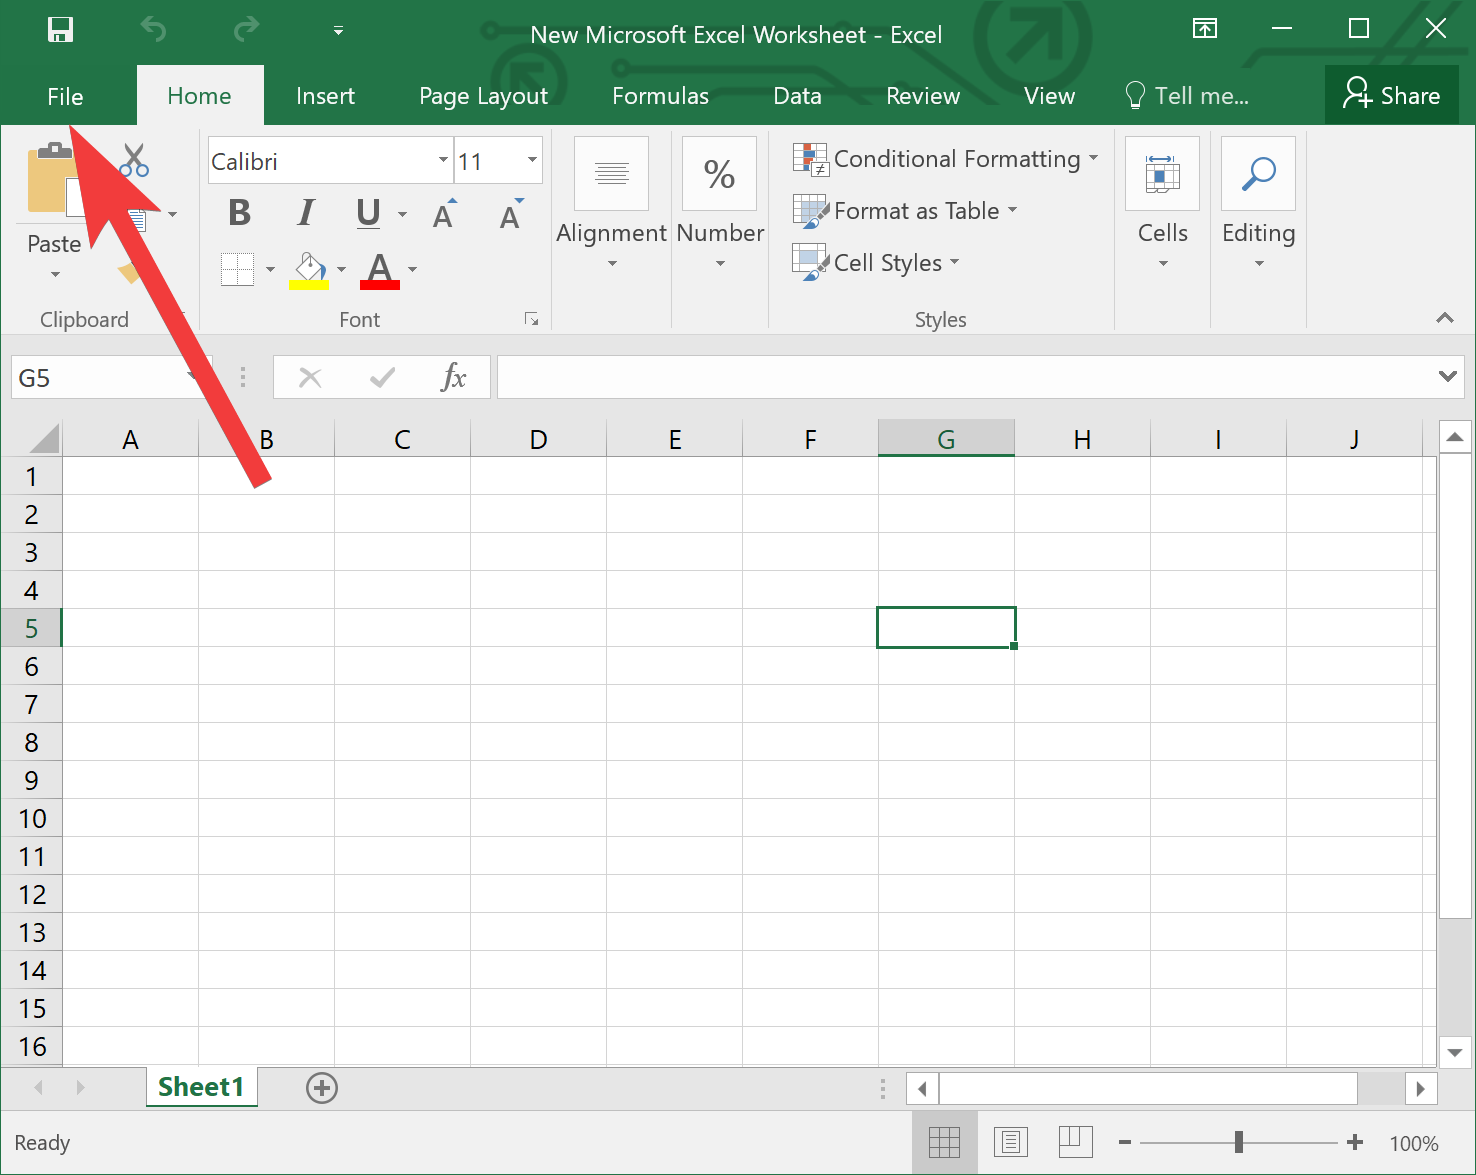
Step 2. Then, click the File menu.
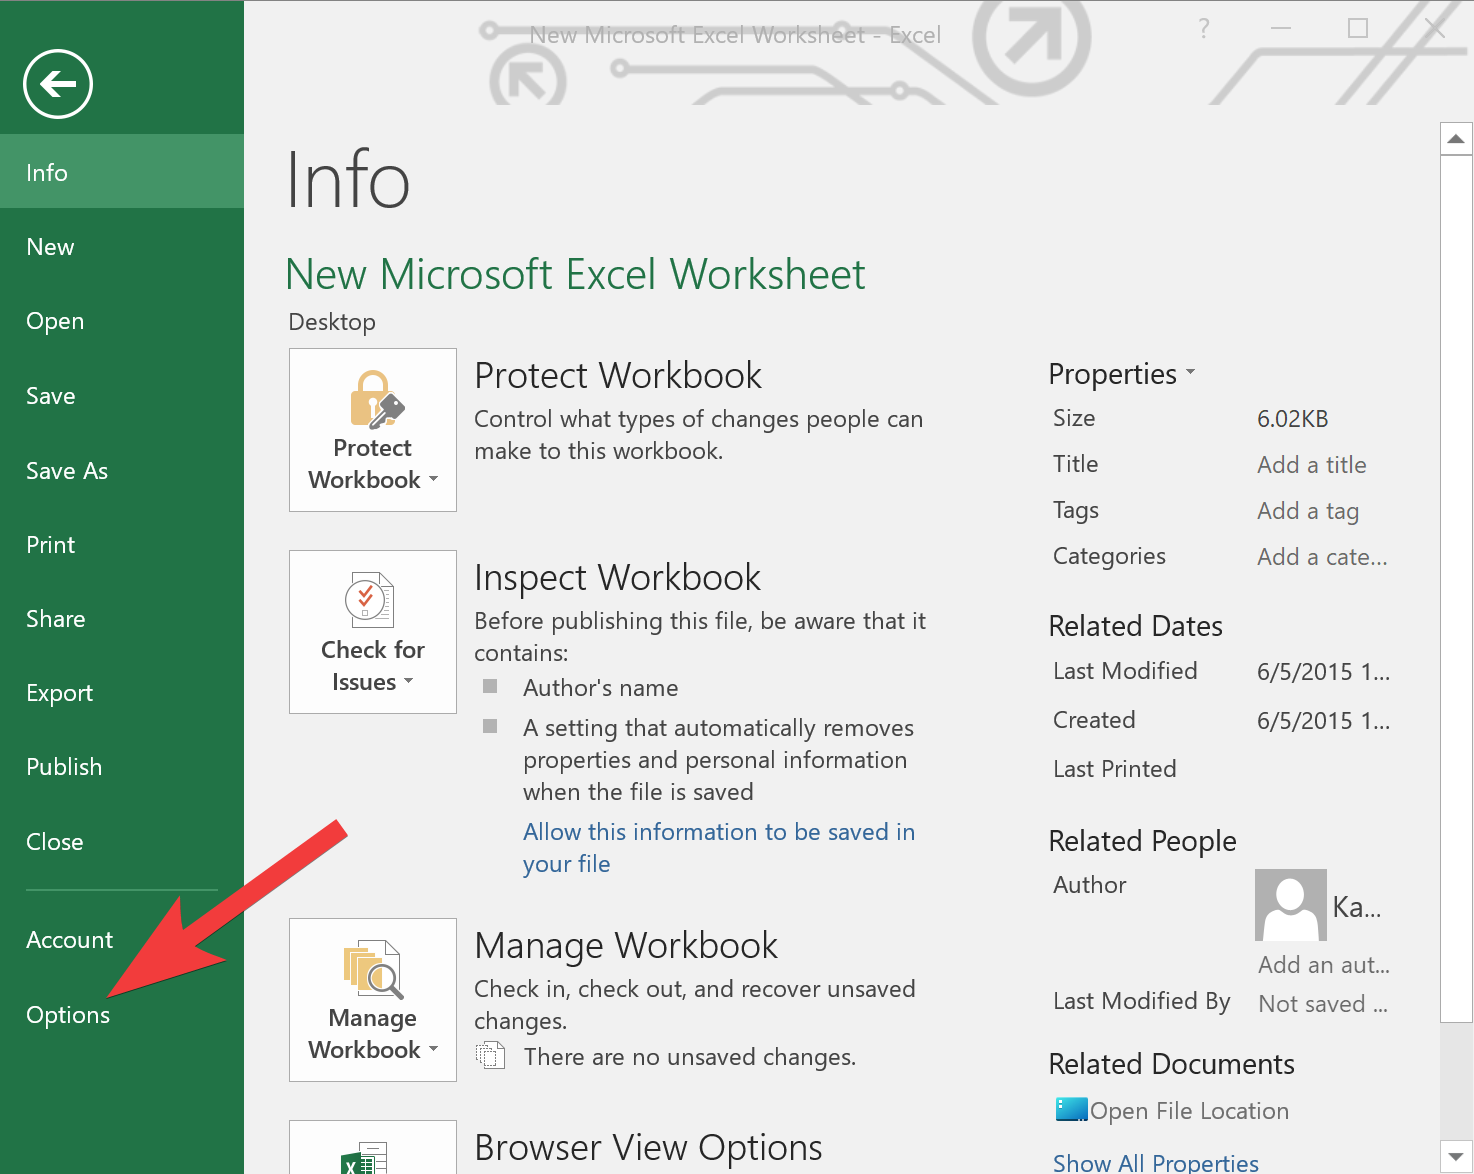
Step 3. After that, select the Options in backstage.
Step 4. Switch to the Advanced tab when the Excel Options window appears on your computer.
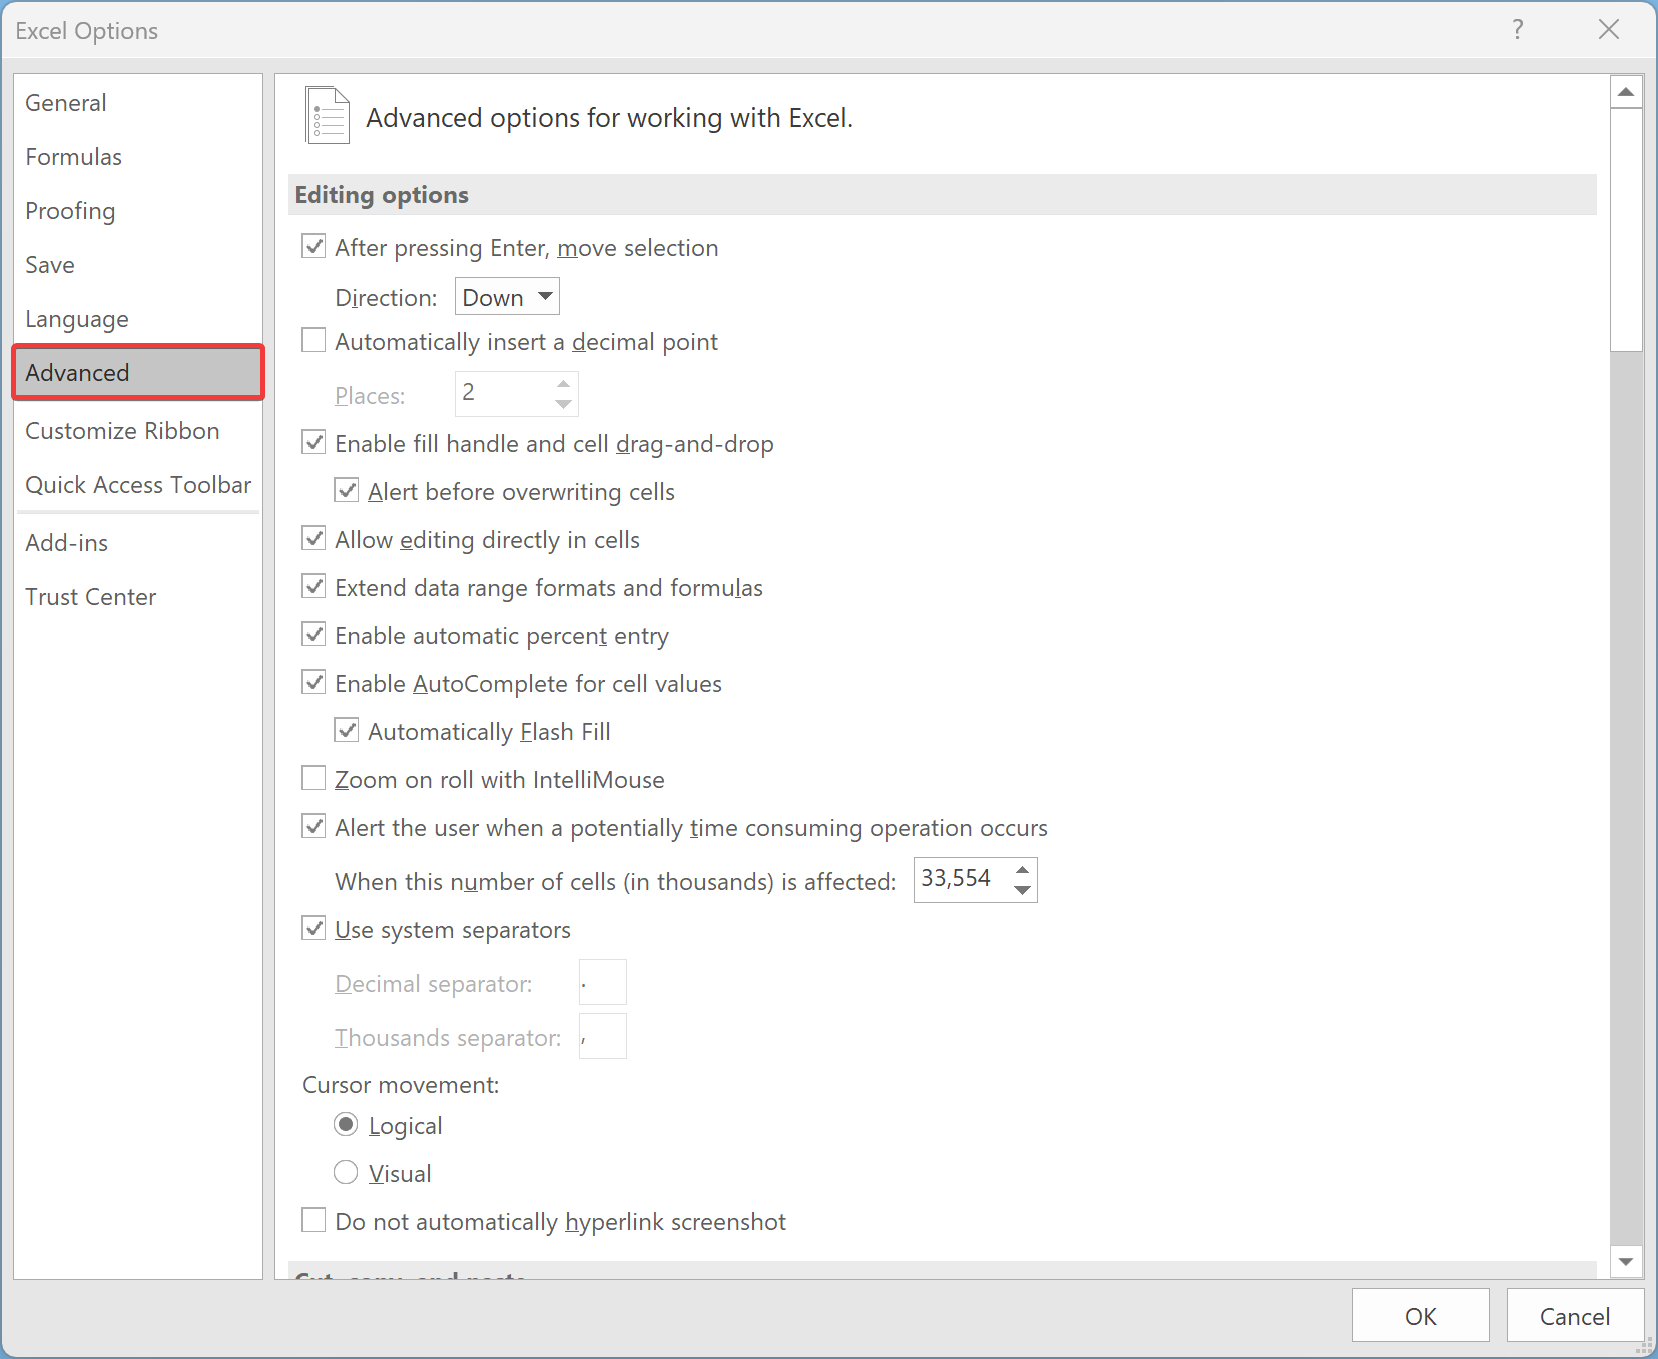
Step 5. On the opposite side of Advanced, ensure the “After pressing Enter, move selection” option is checked under the “Editing options” section. Then select the desired direction (Up, down, left, or right) from the Direction drop-down menu.
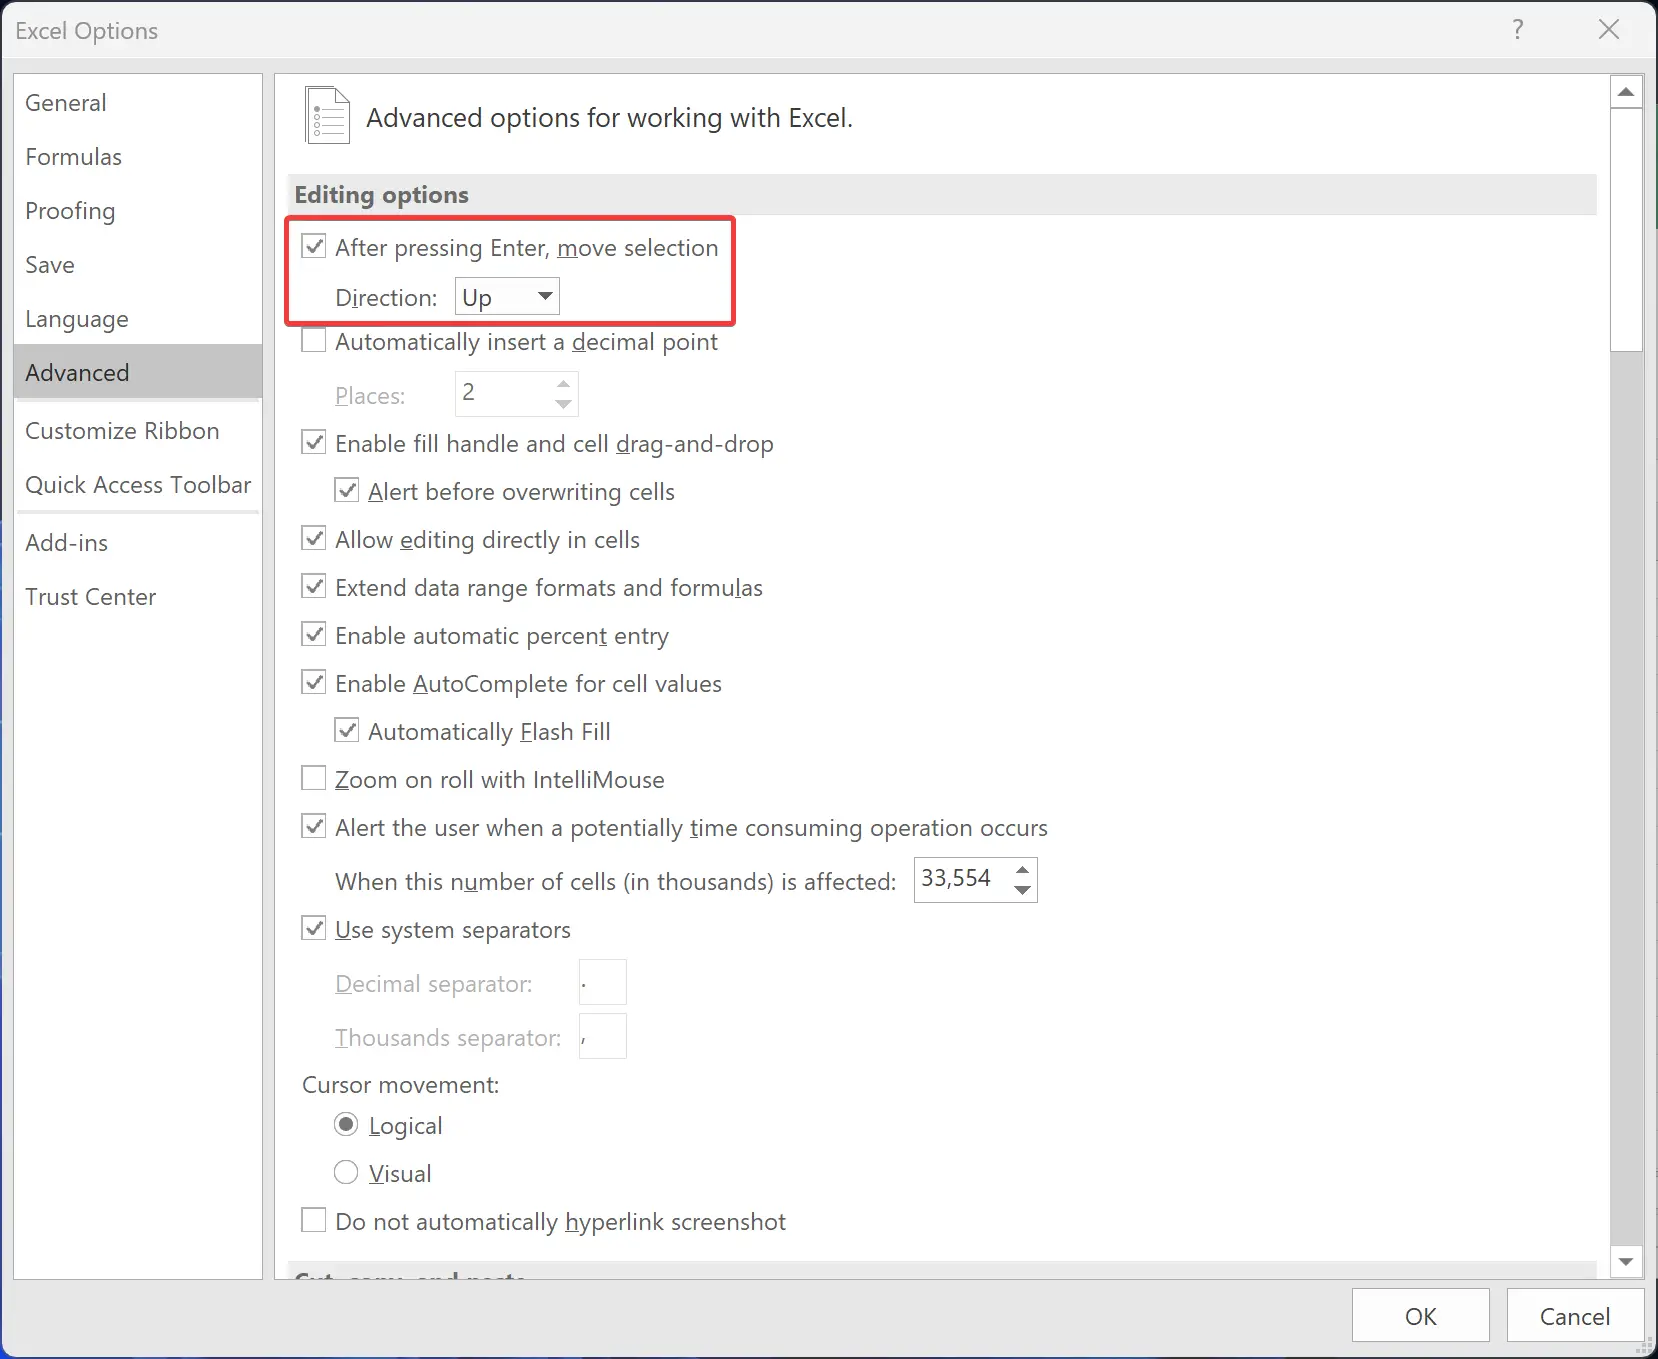
Step 6. When you’re done, click the OK button at the bottom right of the Excel Options window.
That’s it. When you press Enter key in the Excel worksheet, the cell selection direction will move accordingly.
How to Change the Selection Direction of the Enter Key in Excel using Group Policy?
To change the selection direction of the Enter key in Excel using the Local Group Policy Editor, do the following:-
Step 1. First, download and install the Office’s Group Policy template on your computer.
Step 2. Then, launch the Local Group Policy Editor.
Step 3. When the Local Group Policy Editor window opens, navigate to the following path in the left sidebar:-
User Configuration > Administrative Templates > Microsoft Excel 2016 > Excel Options > Advanced
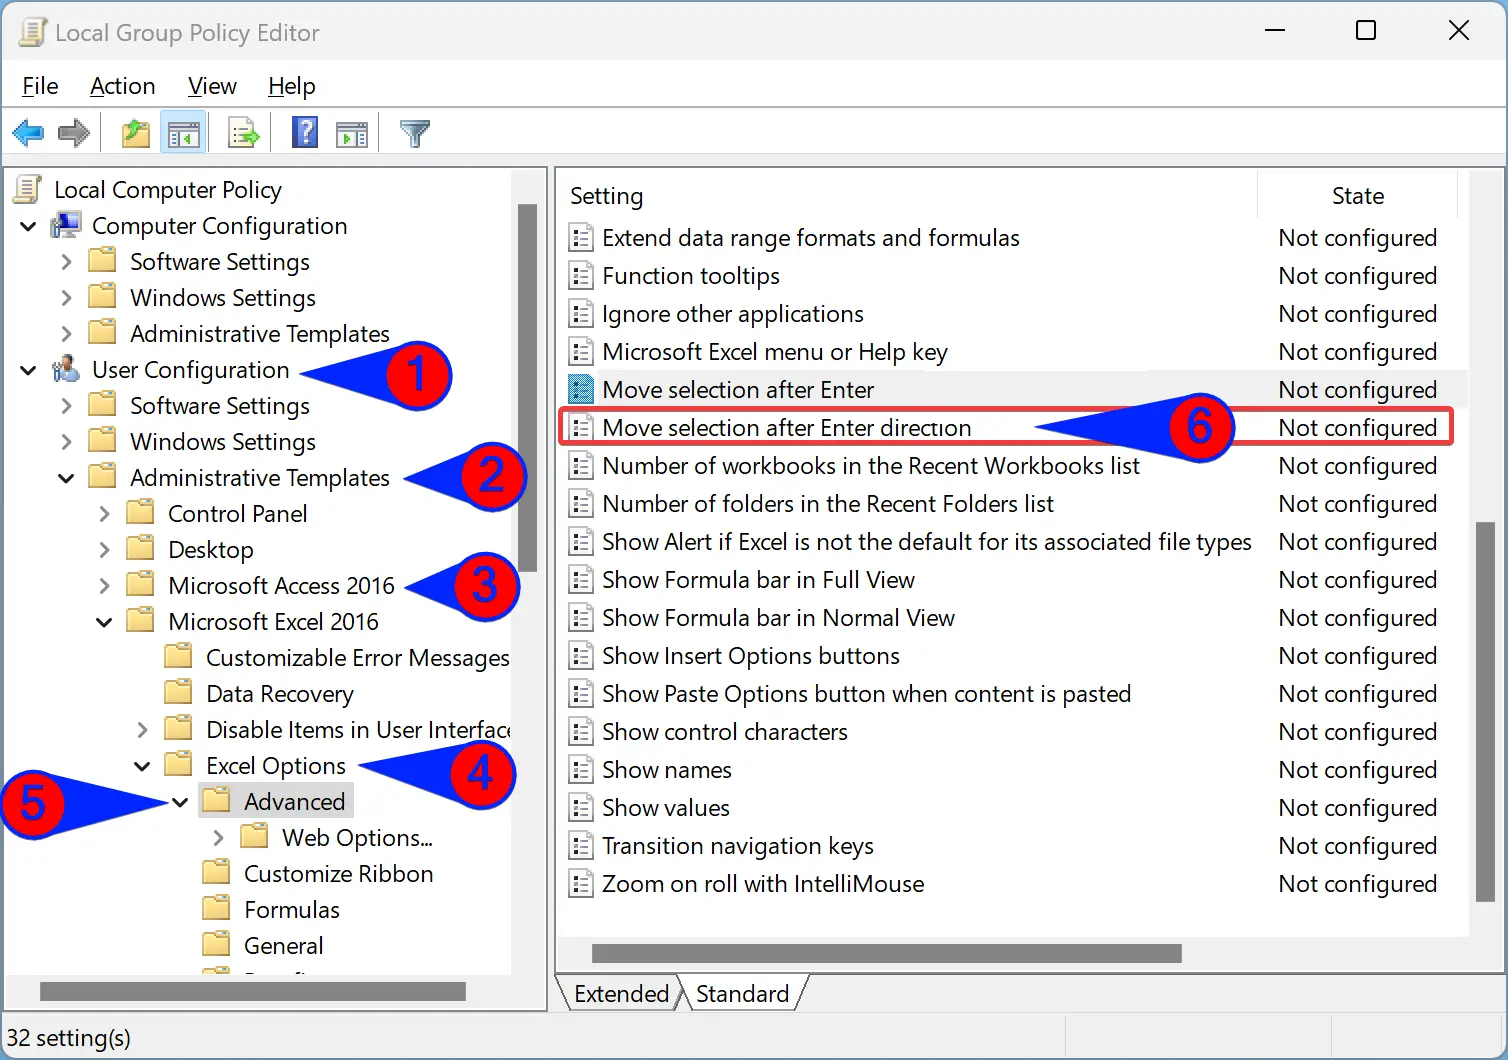
Step 4. On the opposite side of the Advanced folder, double-click the policy name, “Move selection after Enter direction.”
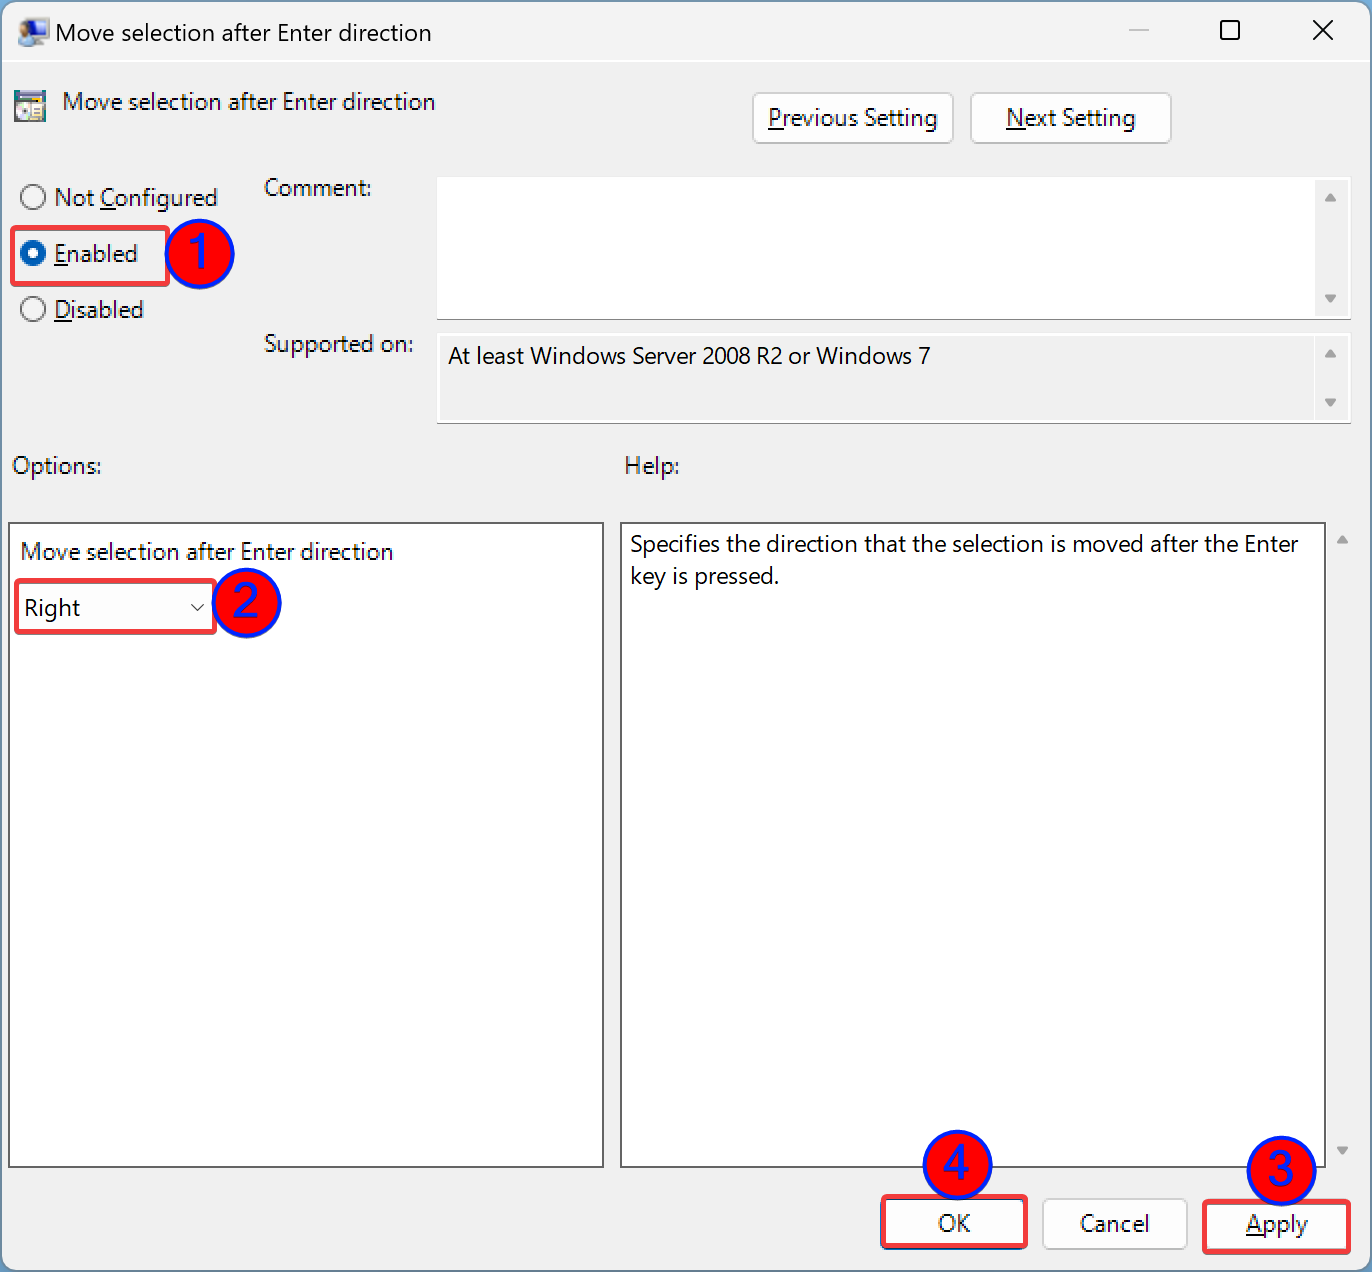
Step 5. Select the Enabled option.
Step 6. Next, choose Up, Down, Right, or Left in the “Move selection after Enter direction” drop-down menu.
Step 7. After that, click the Apply button.
Step 8. Finally, hit the OK button.
How to Modify the Cursor Movement Direction after Pressing Enter in Microsoft Excel using Registry Editor?
You can also modify or change the selection direction after pressing Enter in Excel using Windows Registry. Here are the steps:-
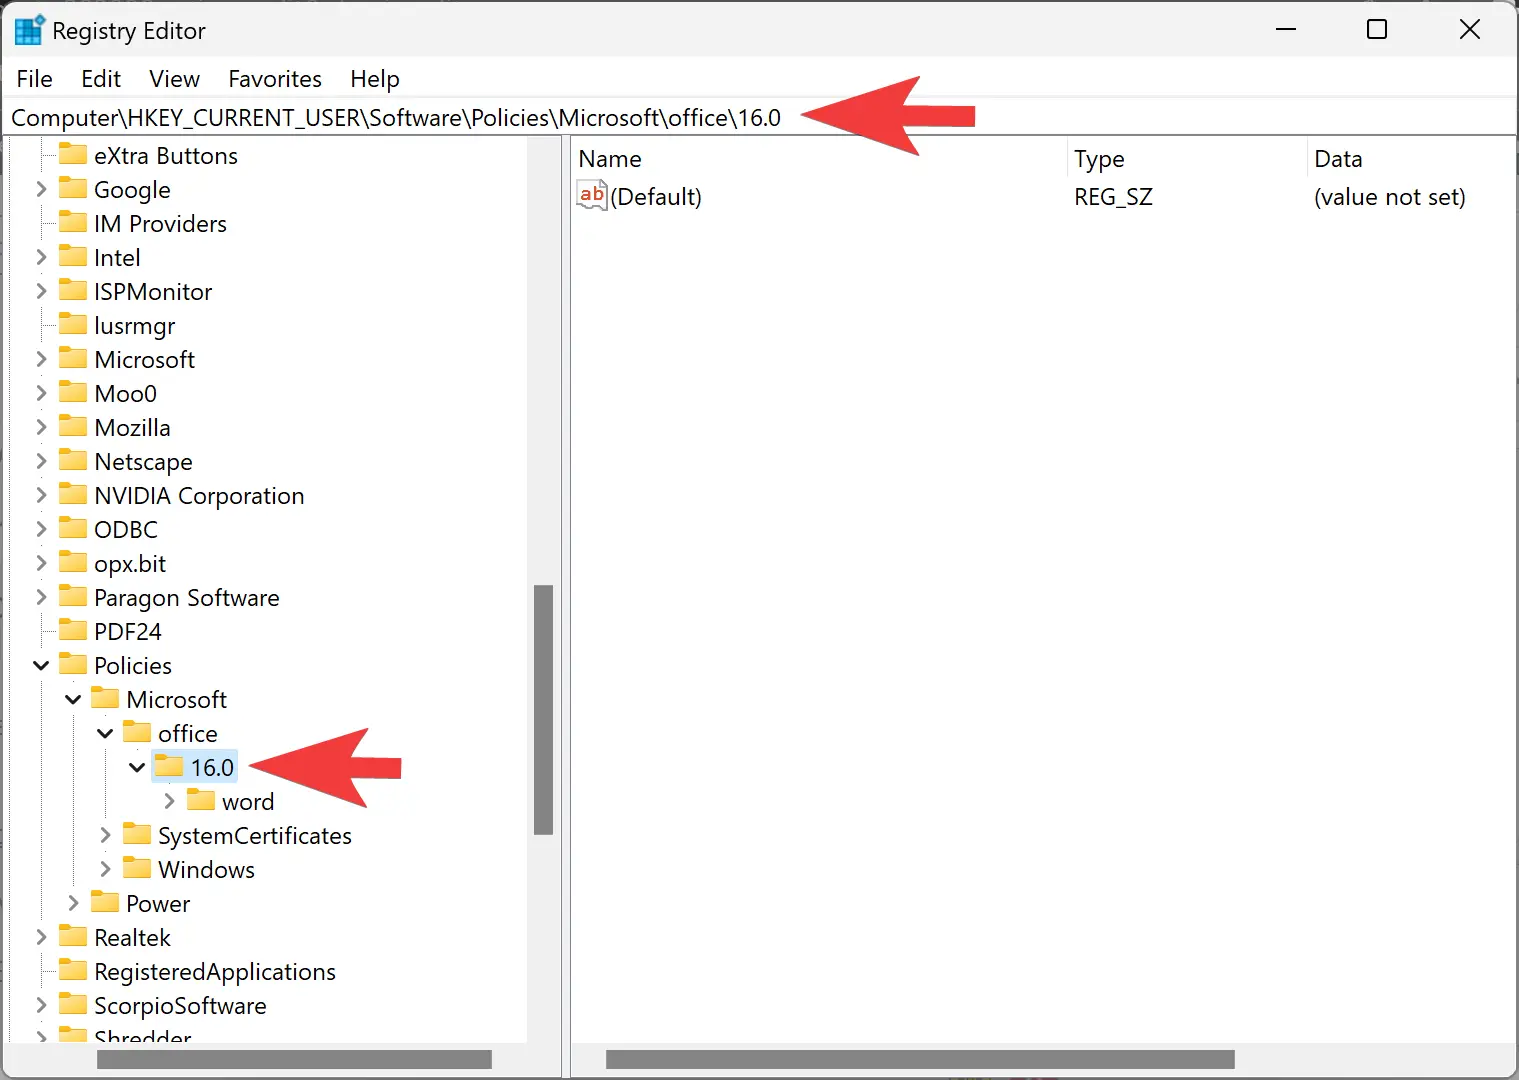
Step 1. First, open the Registry Editor window.
Step 2. Then, navigate to the following key in the left sidebar of Registry Editor:-
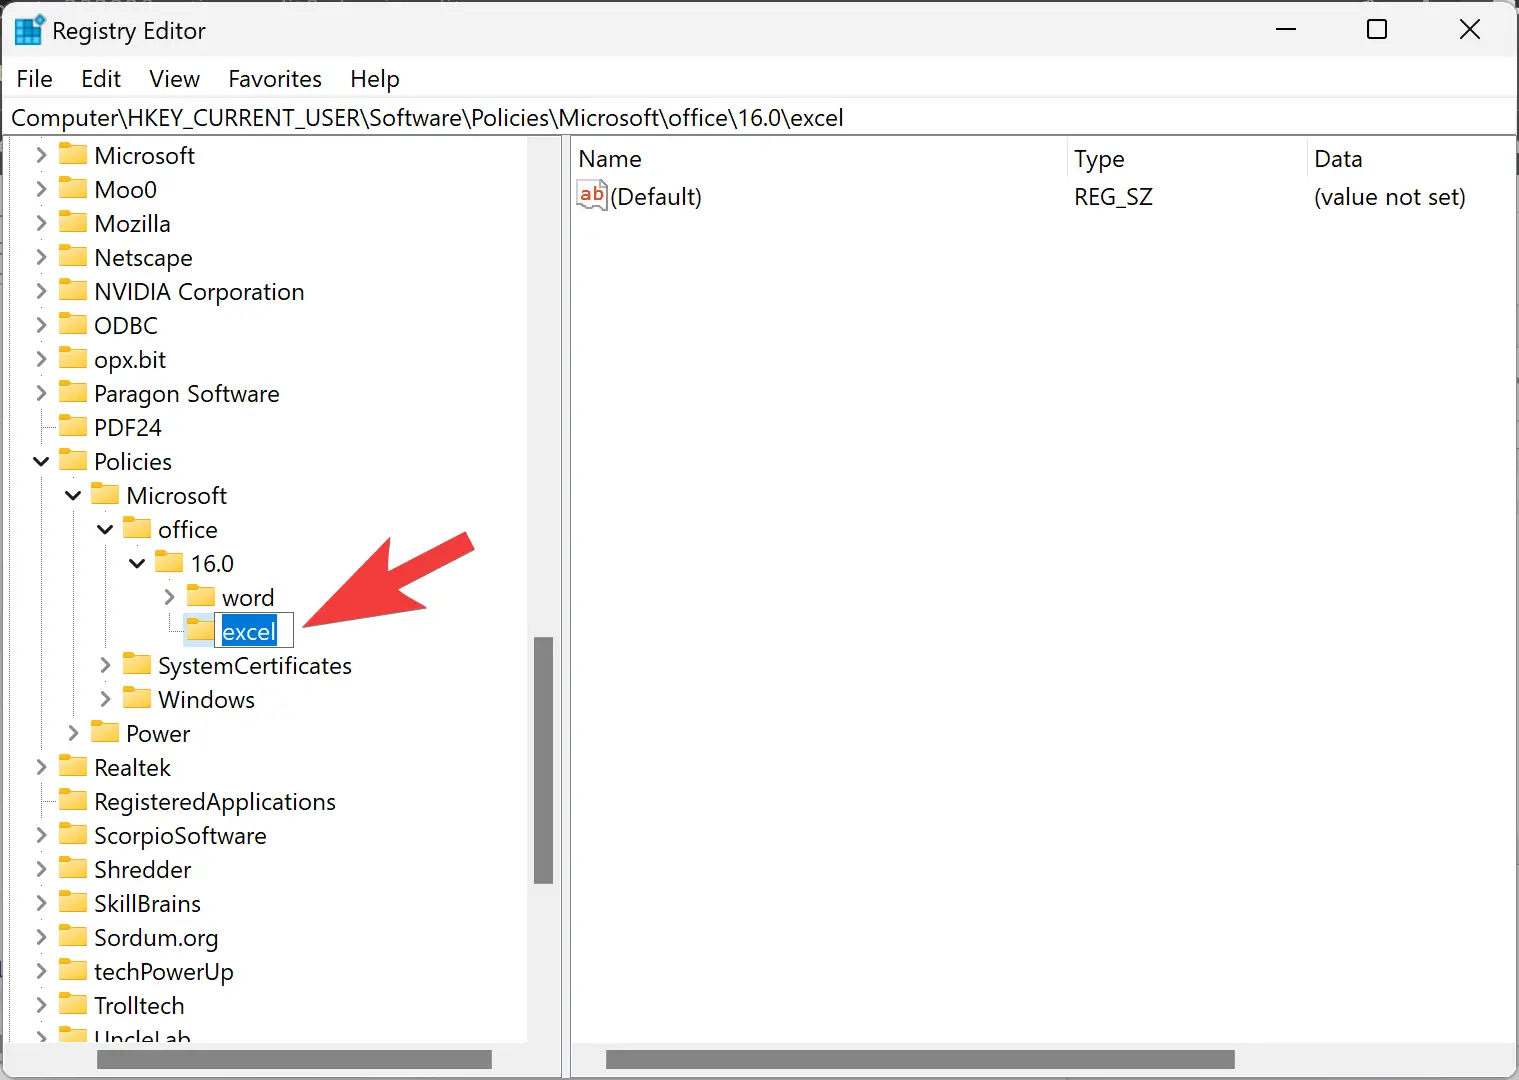
Computer\HKEY_CURRENT_USER\Software\Policies\Microsoft\office\16.0
Step 3. Right-click on the 16.0 folder and select New > Key.
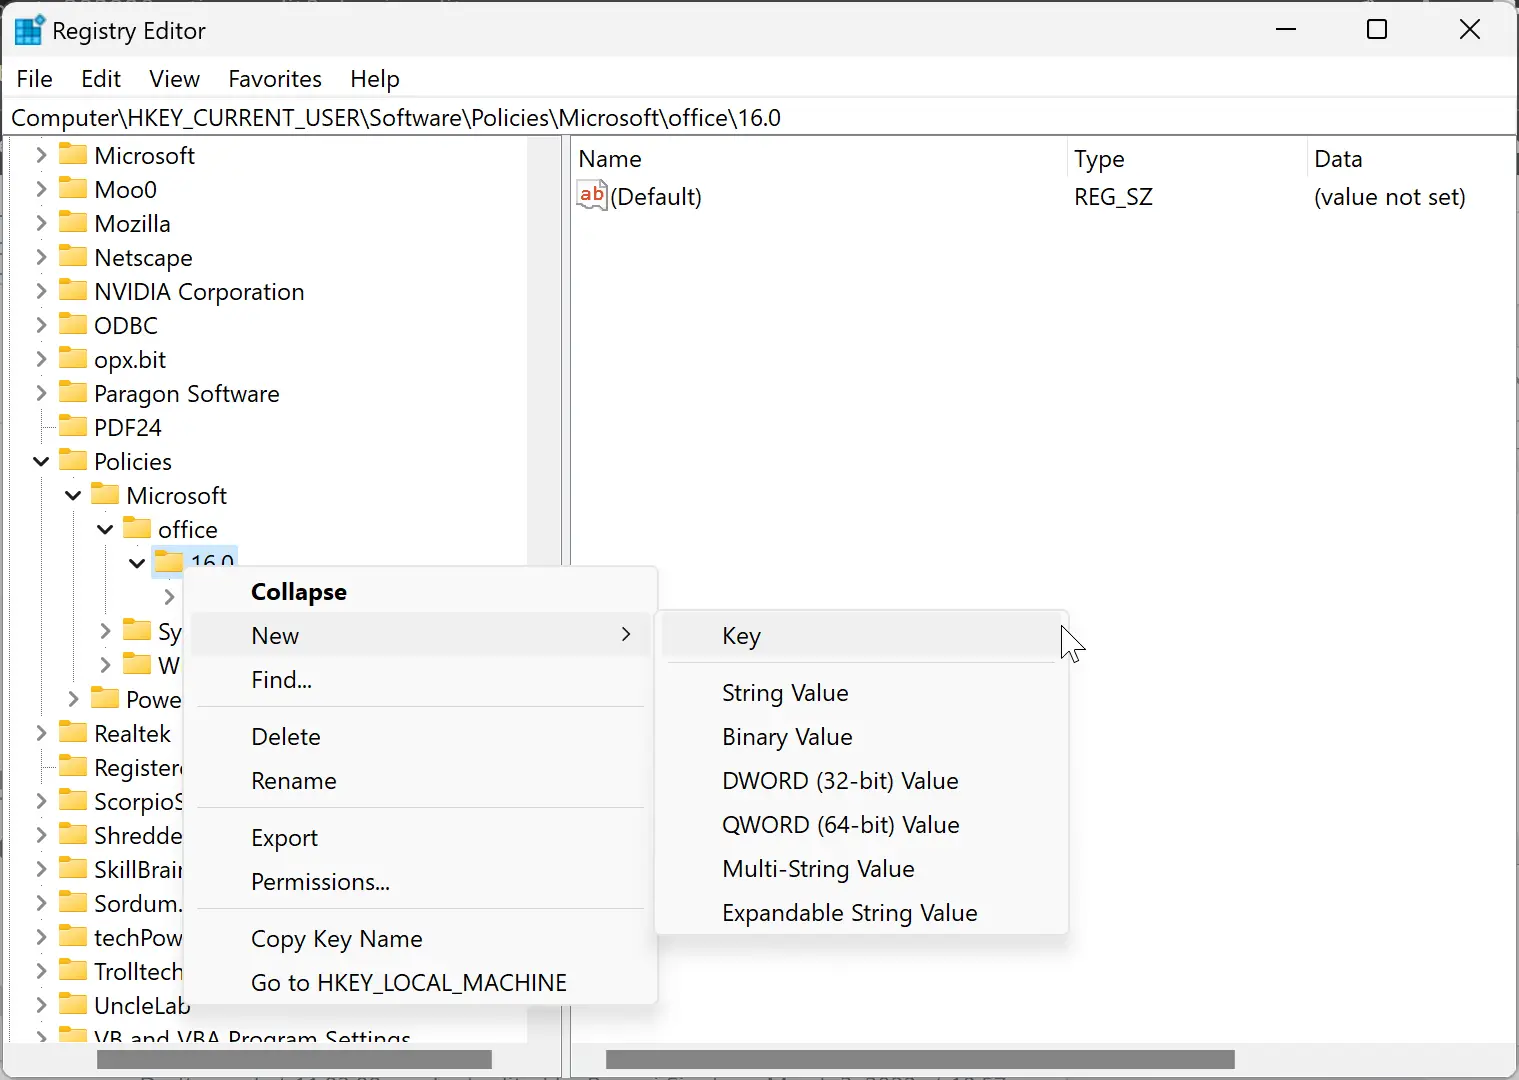
Step 4. Name the newly created key excel.
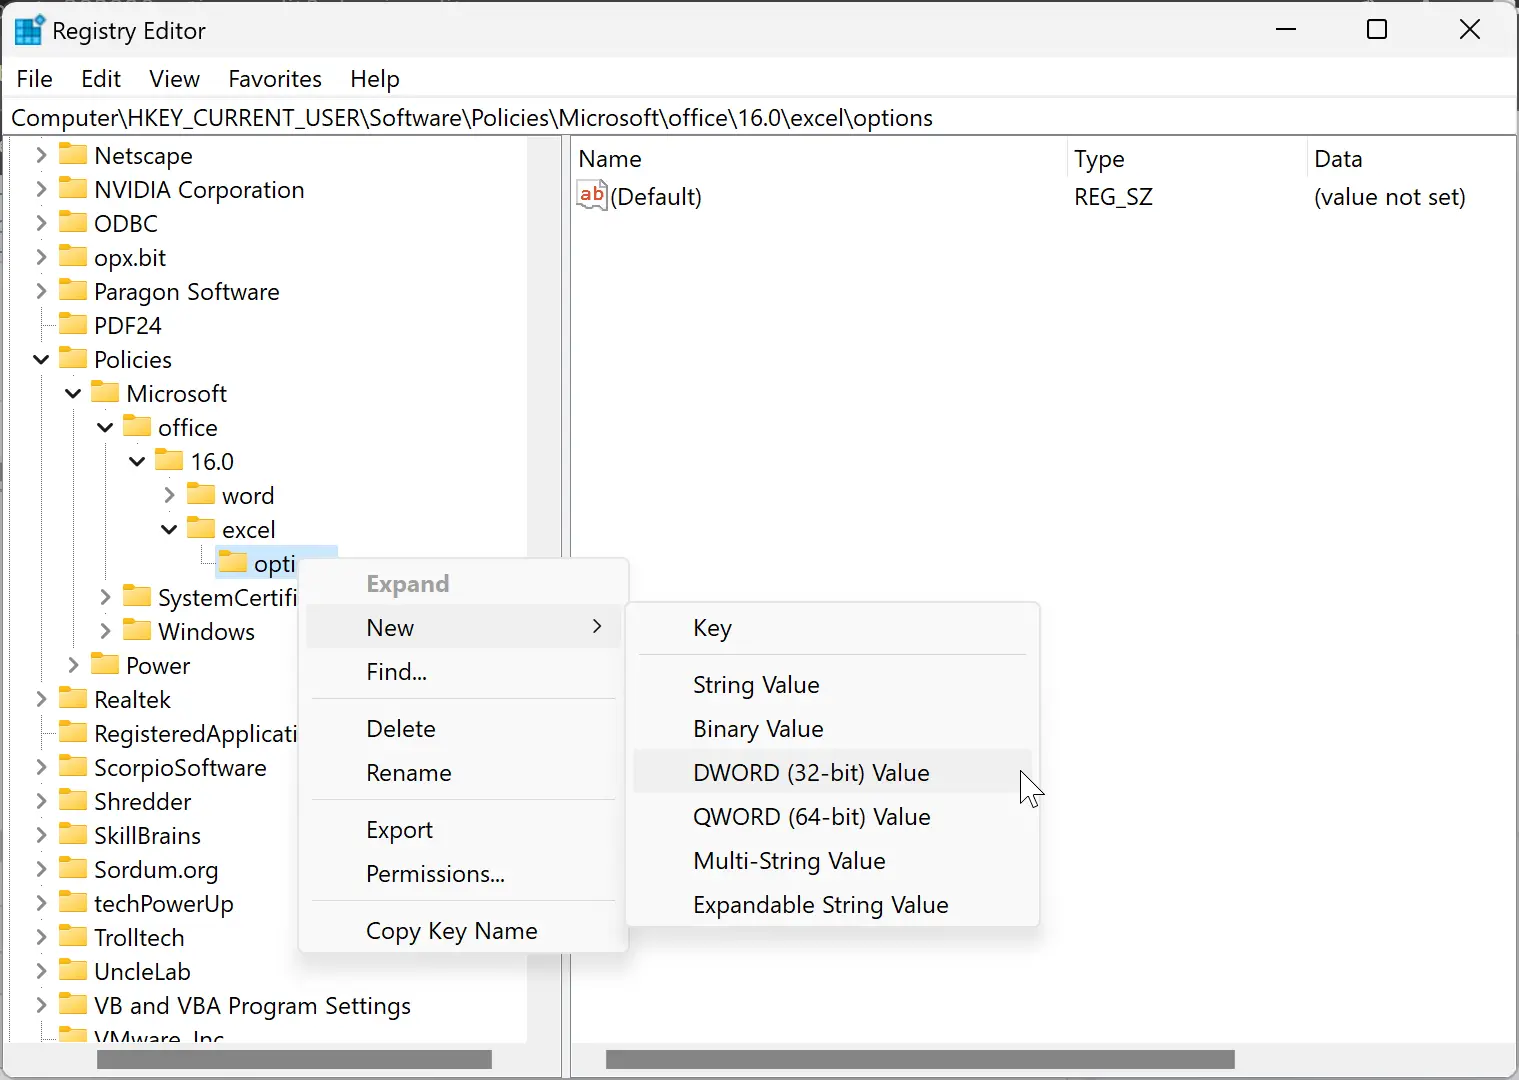
Step 5. Now, you’ll need to create a new key under excel. For that, right-click the excel folder and select New > Key. Then, name it as options.

Step 6. Next, right-click on the options folder and select New > DWORD (32-bit) Value.
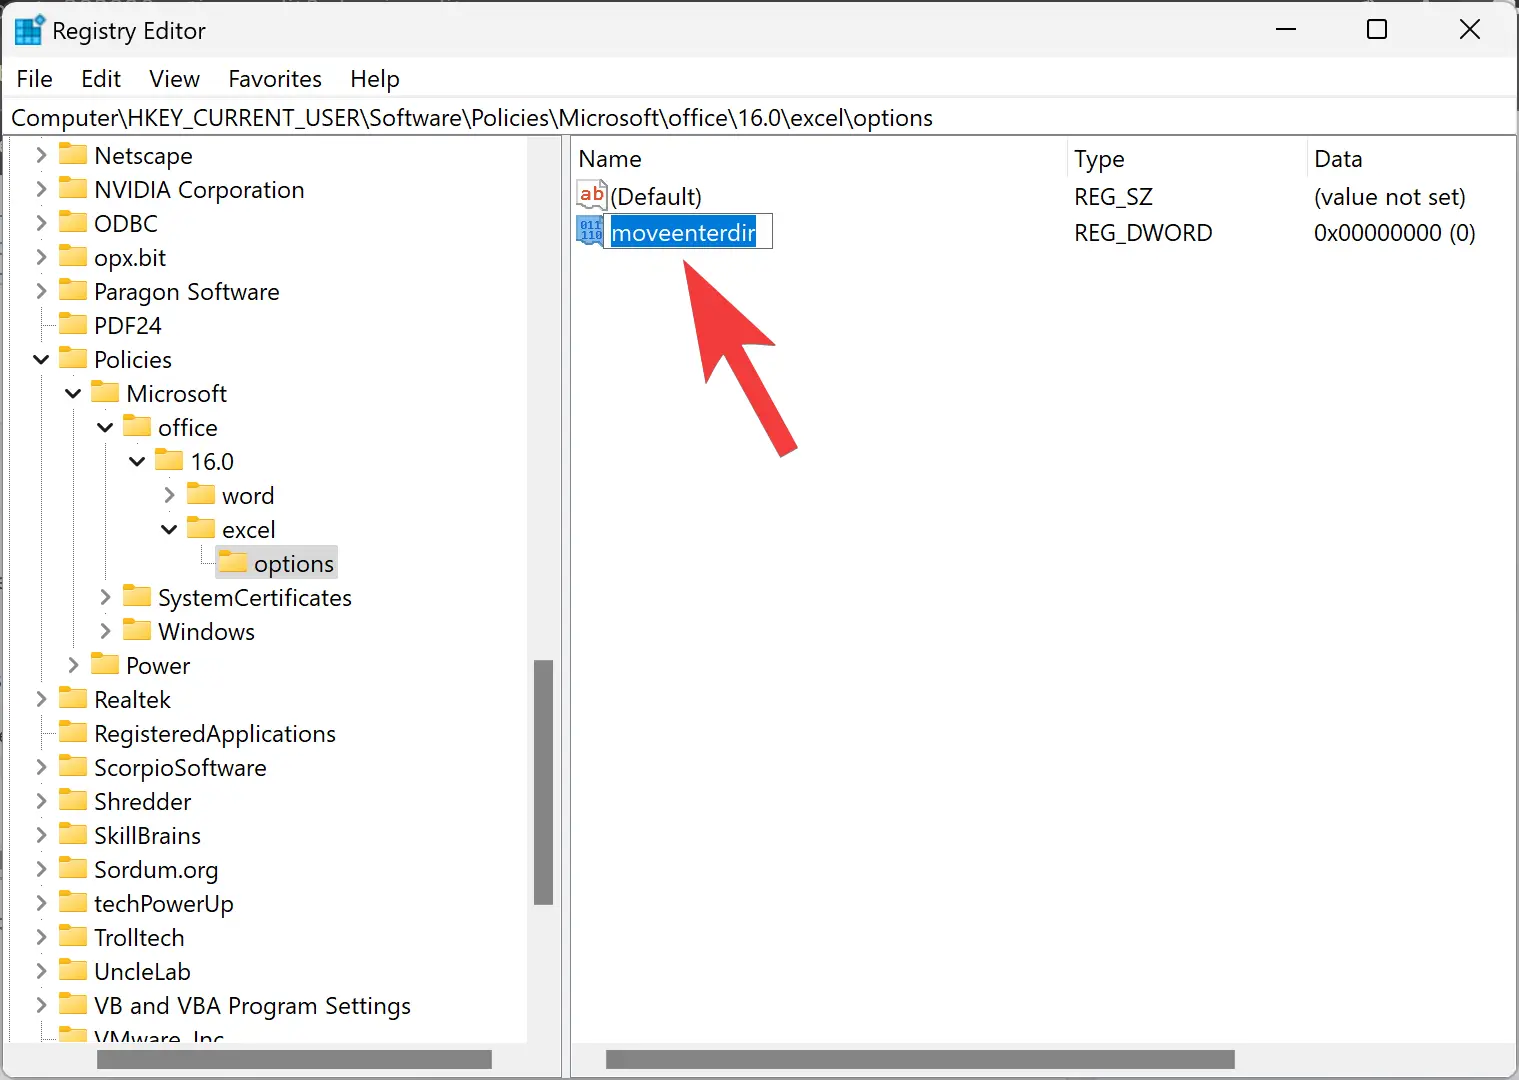
Step 7. Name this newly created REG_DWORD moveenterdir.
Step 8. Now, double-click the moveenterdir DWORD and set its Value data to the following:-
- 0 – Move the cursor to down.
- 1 – Move the cursor to the right.
- 2 – Move the cursor to up.
- 3 – Move the cursor to the left.
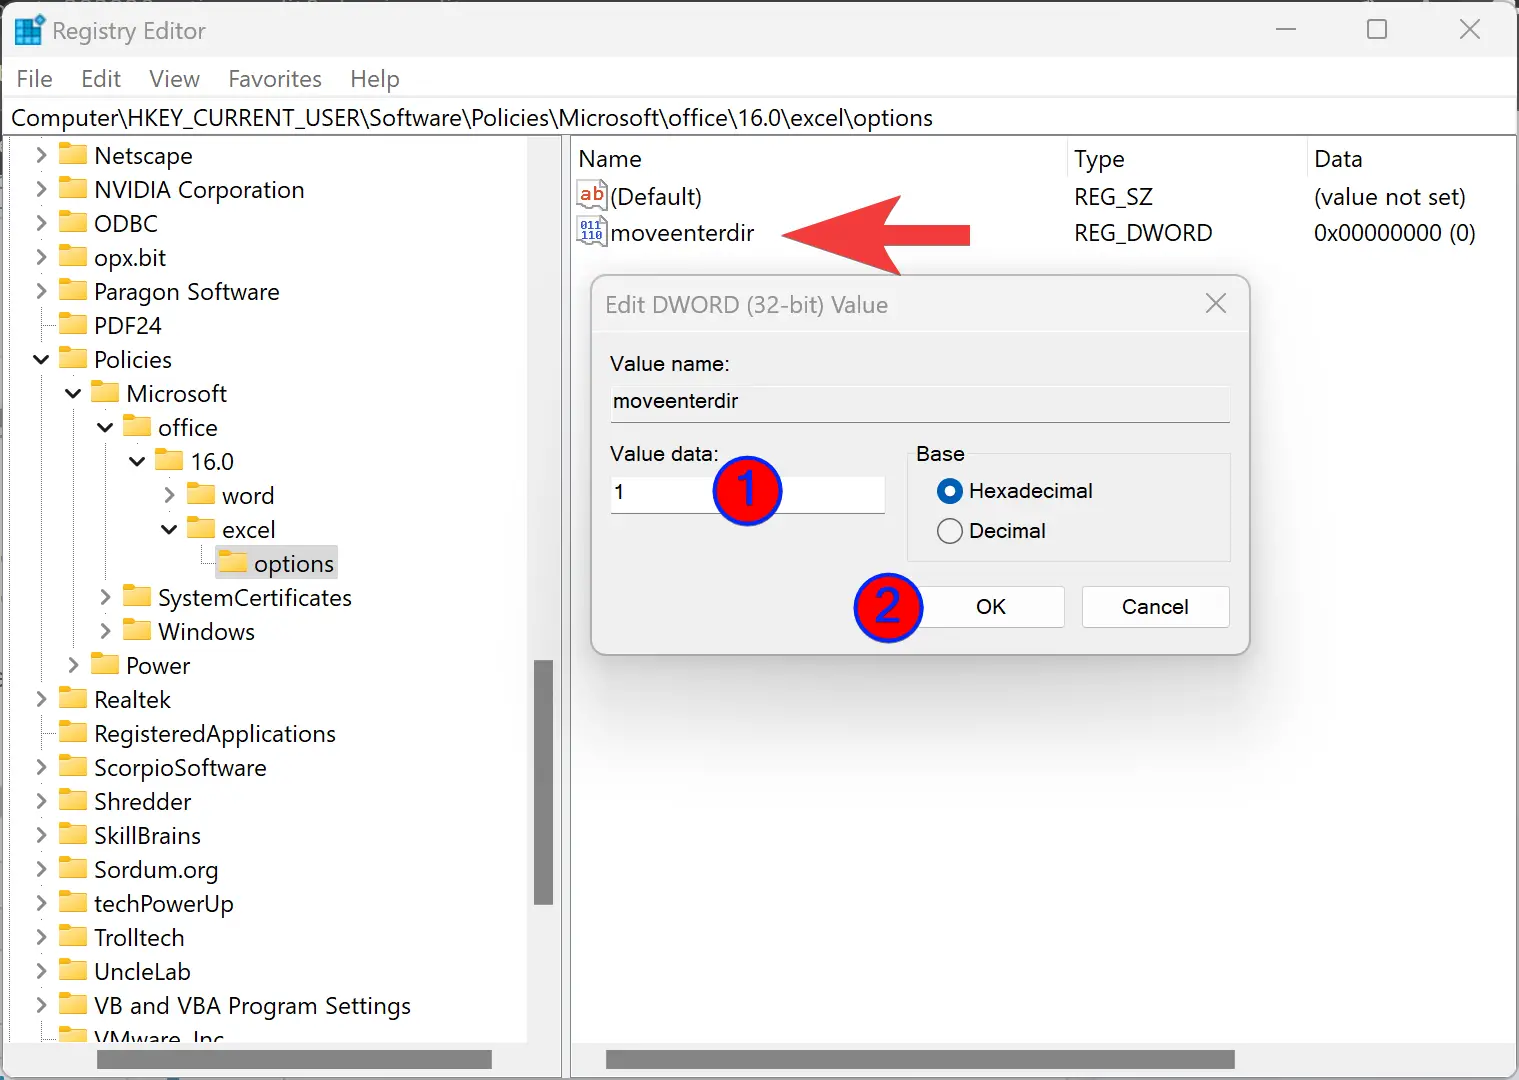
Step 9. After entering the “Value data,” click the OK button.
Step 10. Finally, reboot your computer to apply the changes.
Conclusion
In conclusion, changing the direction of the Enter key in Microsoft Excel can be a useful technique for improving productivity when working with large spreadsheets. By default, when you press the Enter key, Excel moves the selection to the bottom cell, but with the help of Excel Options, Group Policy, or Registry Editor, you can customize the direction of the selection movement to fit your needs better. Whether you prefer to move the cursor up, down, left, or right, the process is straightforward and can be done in just a few steps. So, next time you’re working on an Excel spreadsheet and need to change the selection direction, try one of these methods and see how it can improve your workflow.