Due to some reason, if you want to change the sign-in account name on Windows 10, this gearupwindows article will help you. Causes may be many, such as you need to update your personal information because you recently changed your name. You prefer to display the actual name instead of the nickname.
Whatever the reason, Windows 10 includes several options to change the name on the Sign-in screen. Instructions may differ depending on the account type (local or Microsoft account).
How to Change Account Name using Windows 10 Settings?
If you have configured your Windows 10 with a Microsoft account, your computer will pick the account name from the cloud. So, you need to change the settings online to change the account name.
To change the account name on Windows 10, use the following steps:-
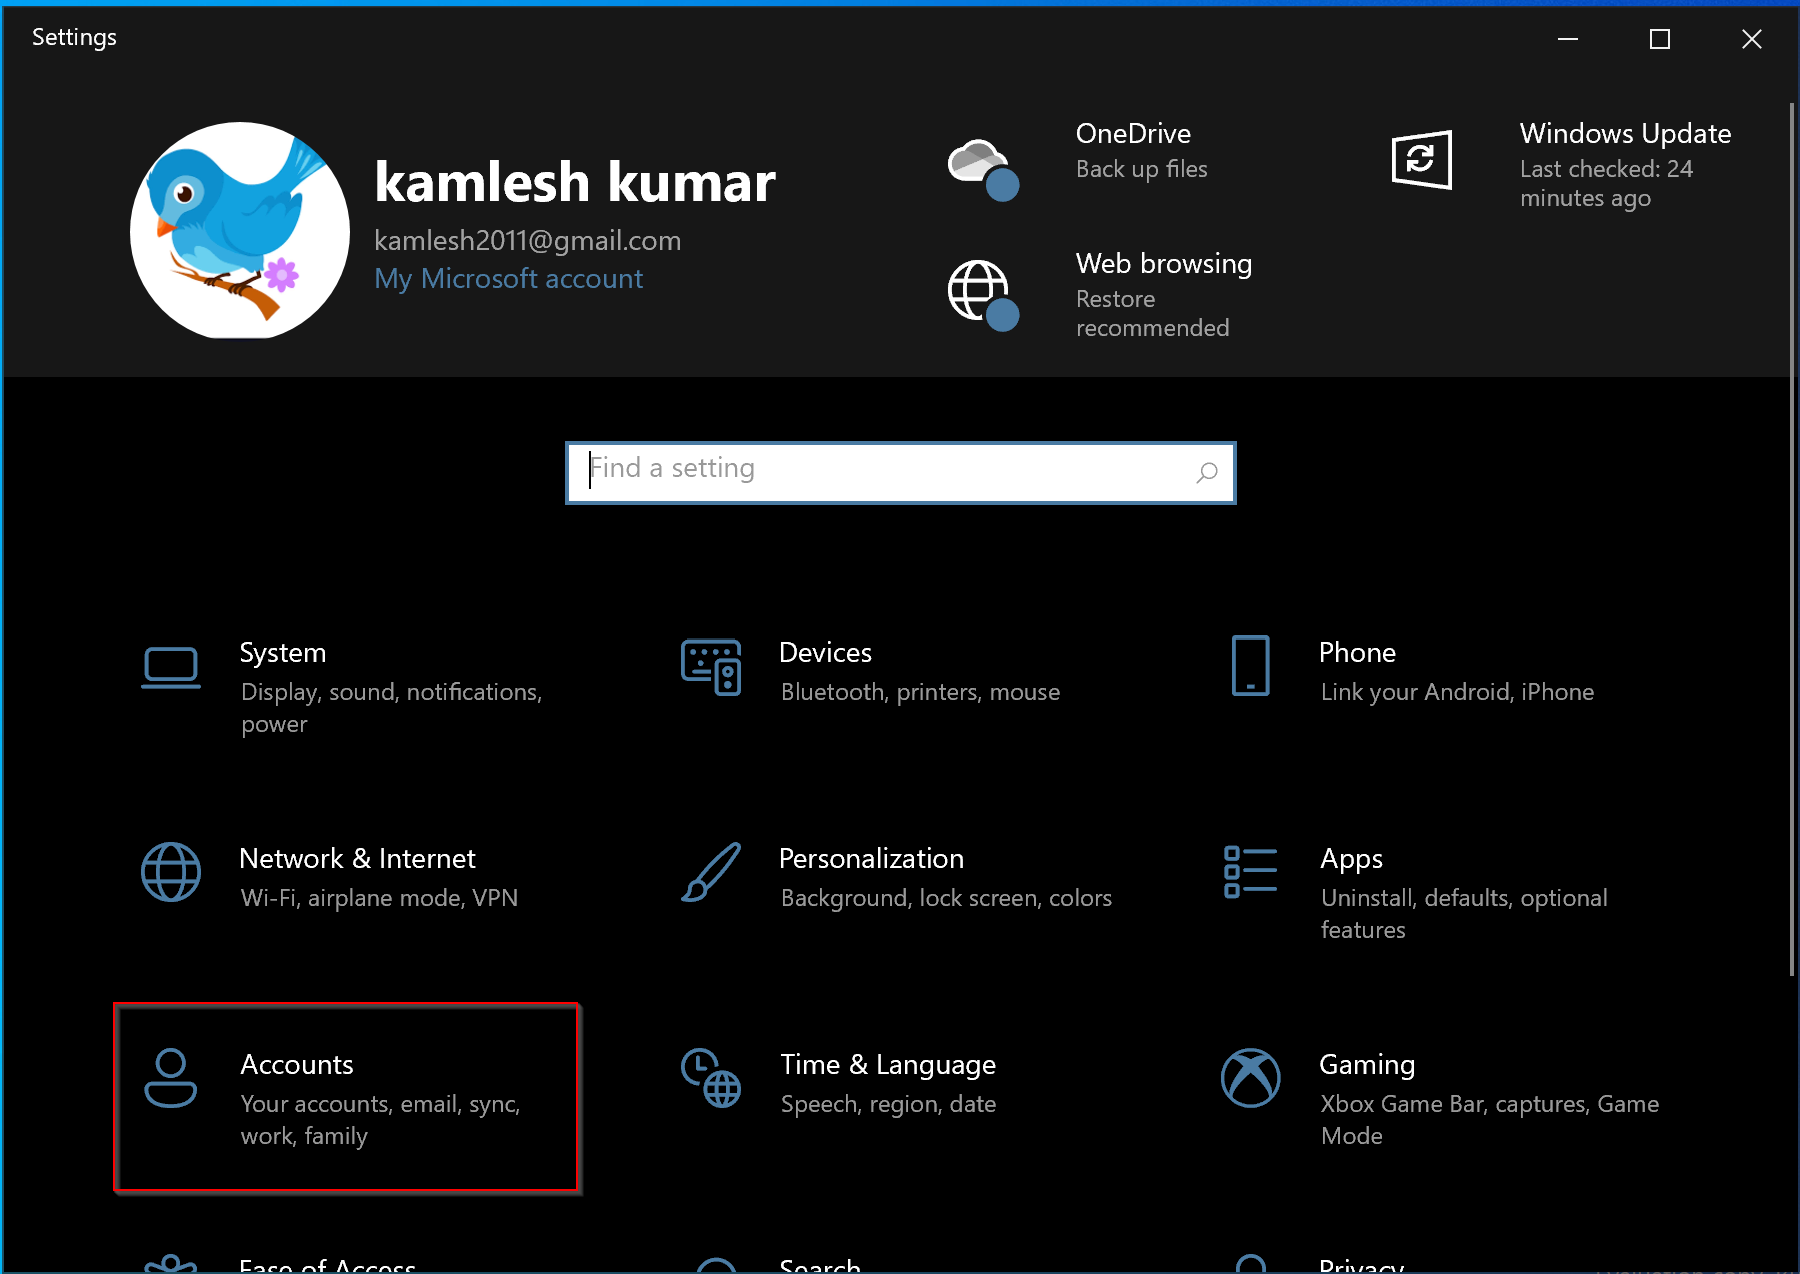
Step 1. First, open Settings.
Step 2. Then, click on Accounts.
Step 3. After that, click on Your info on the left side pane.
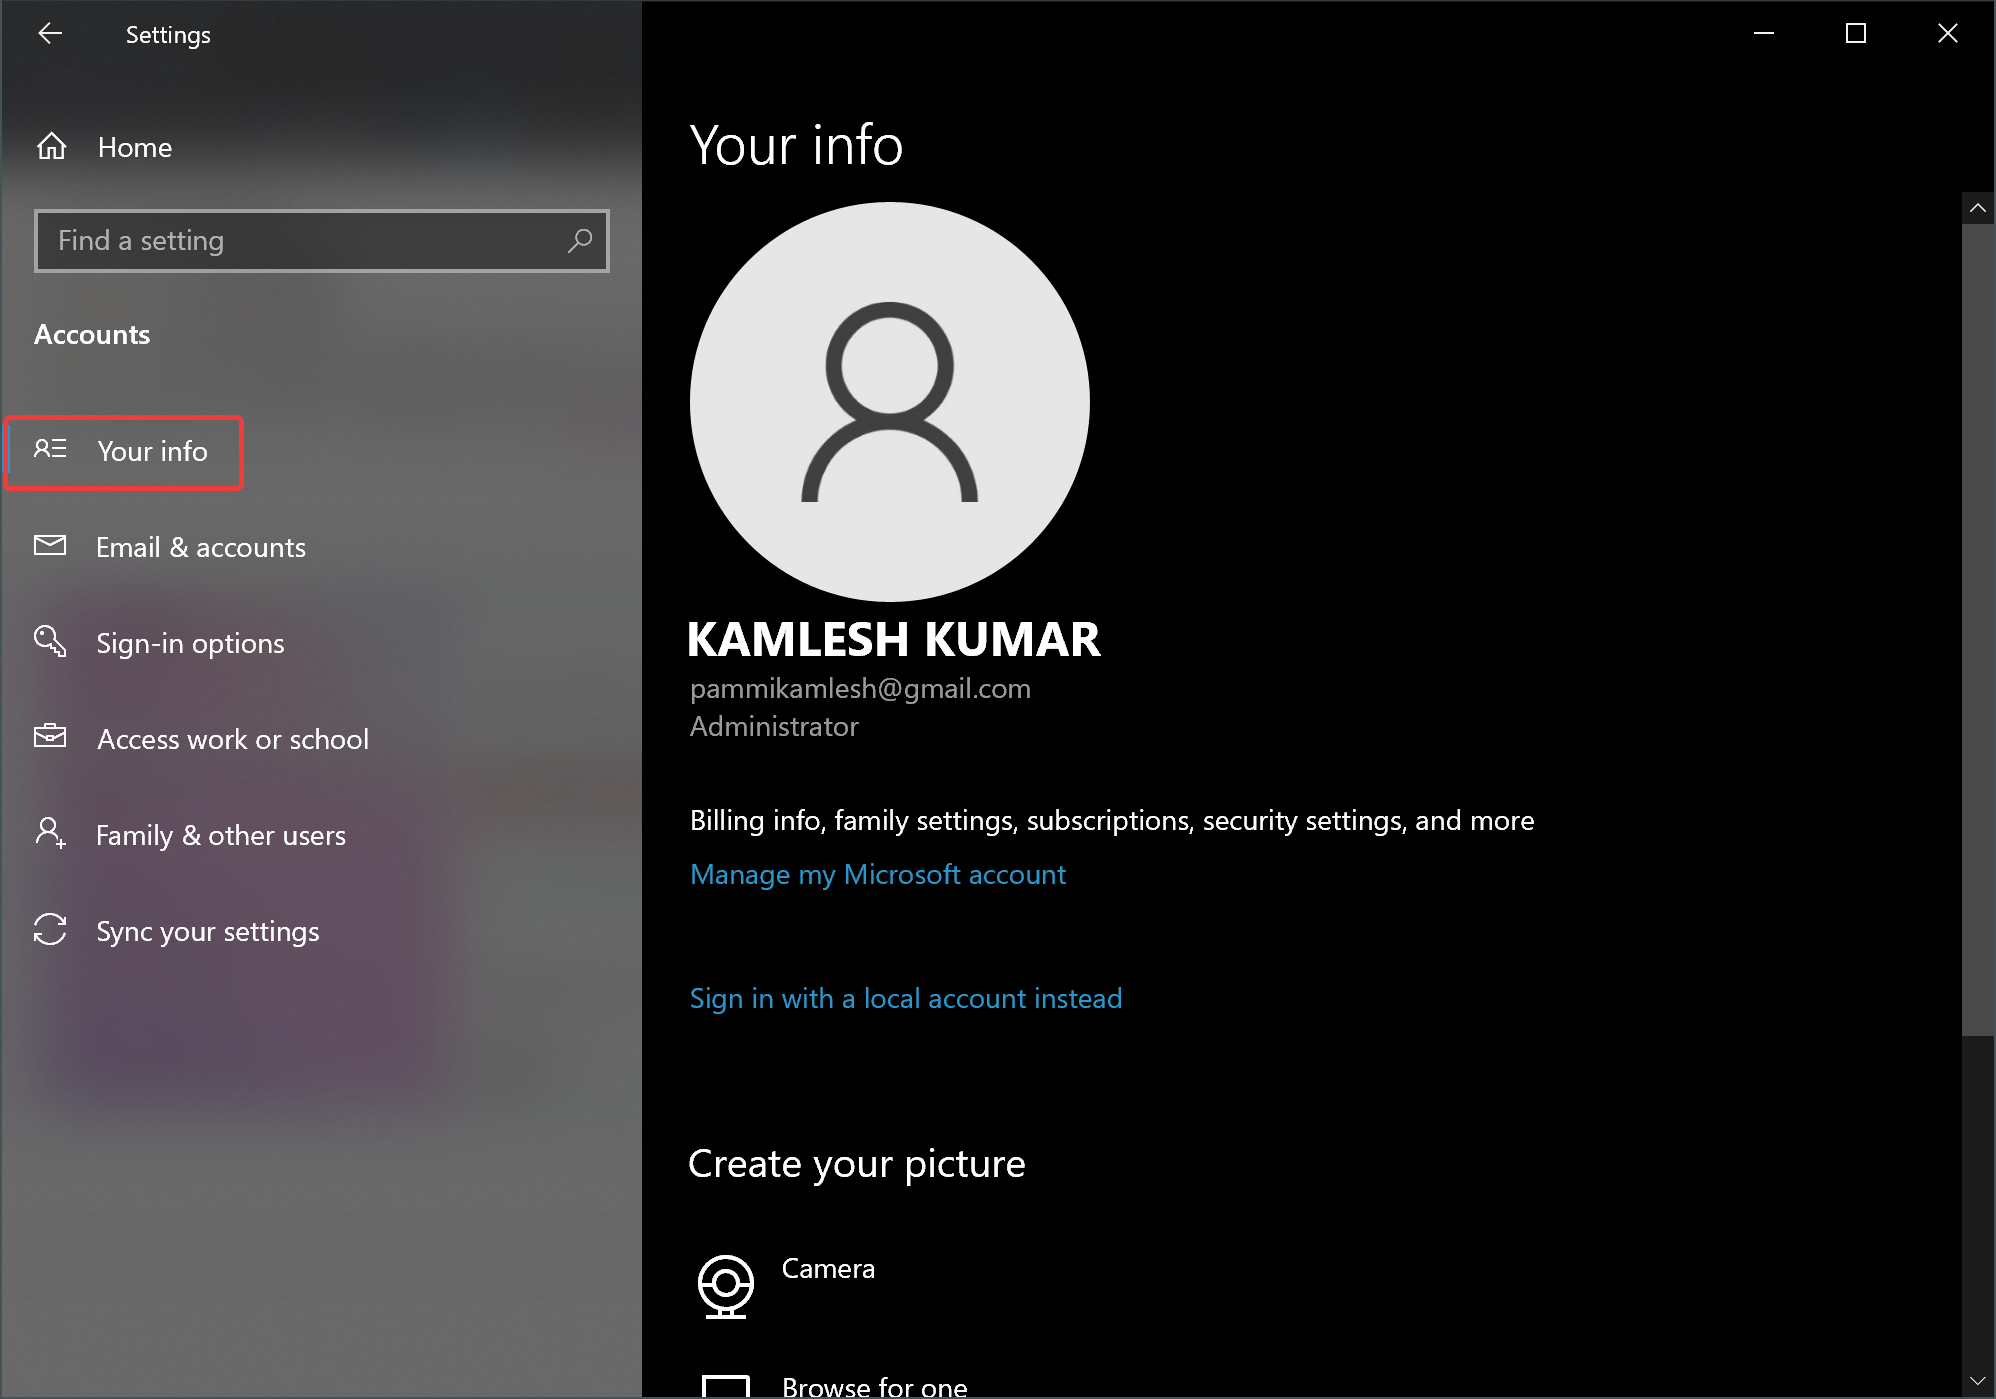
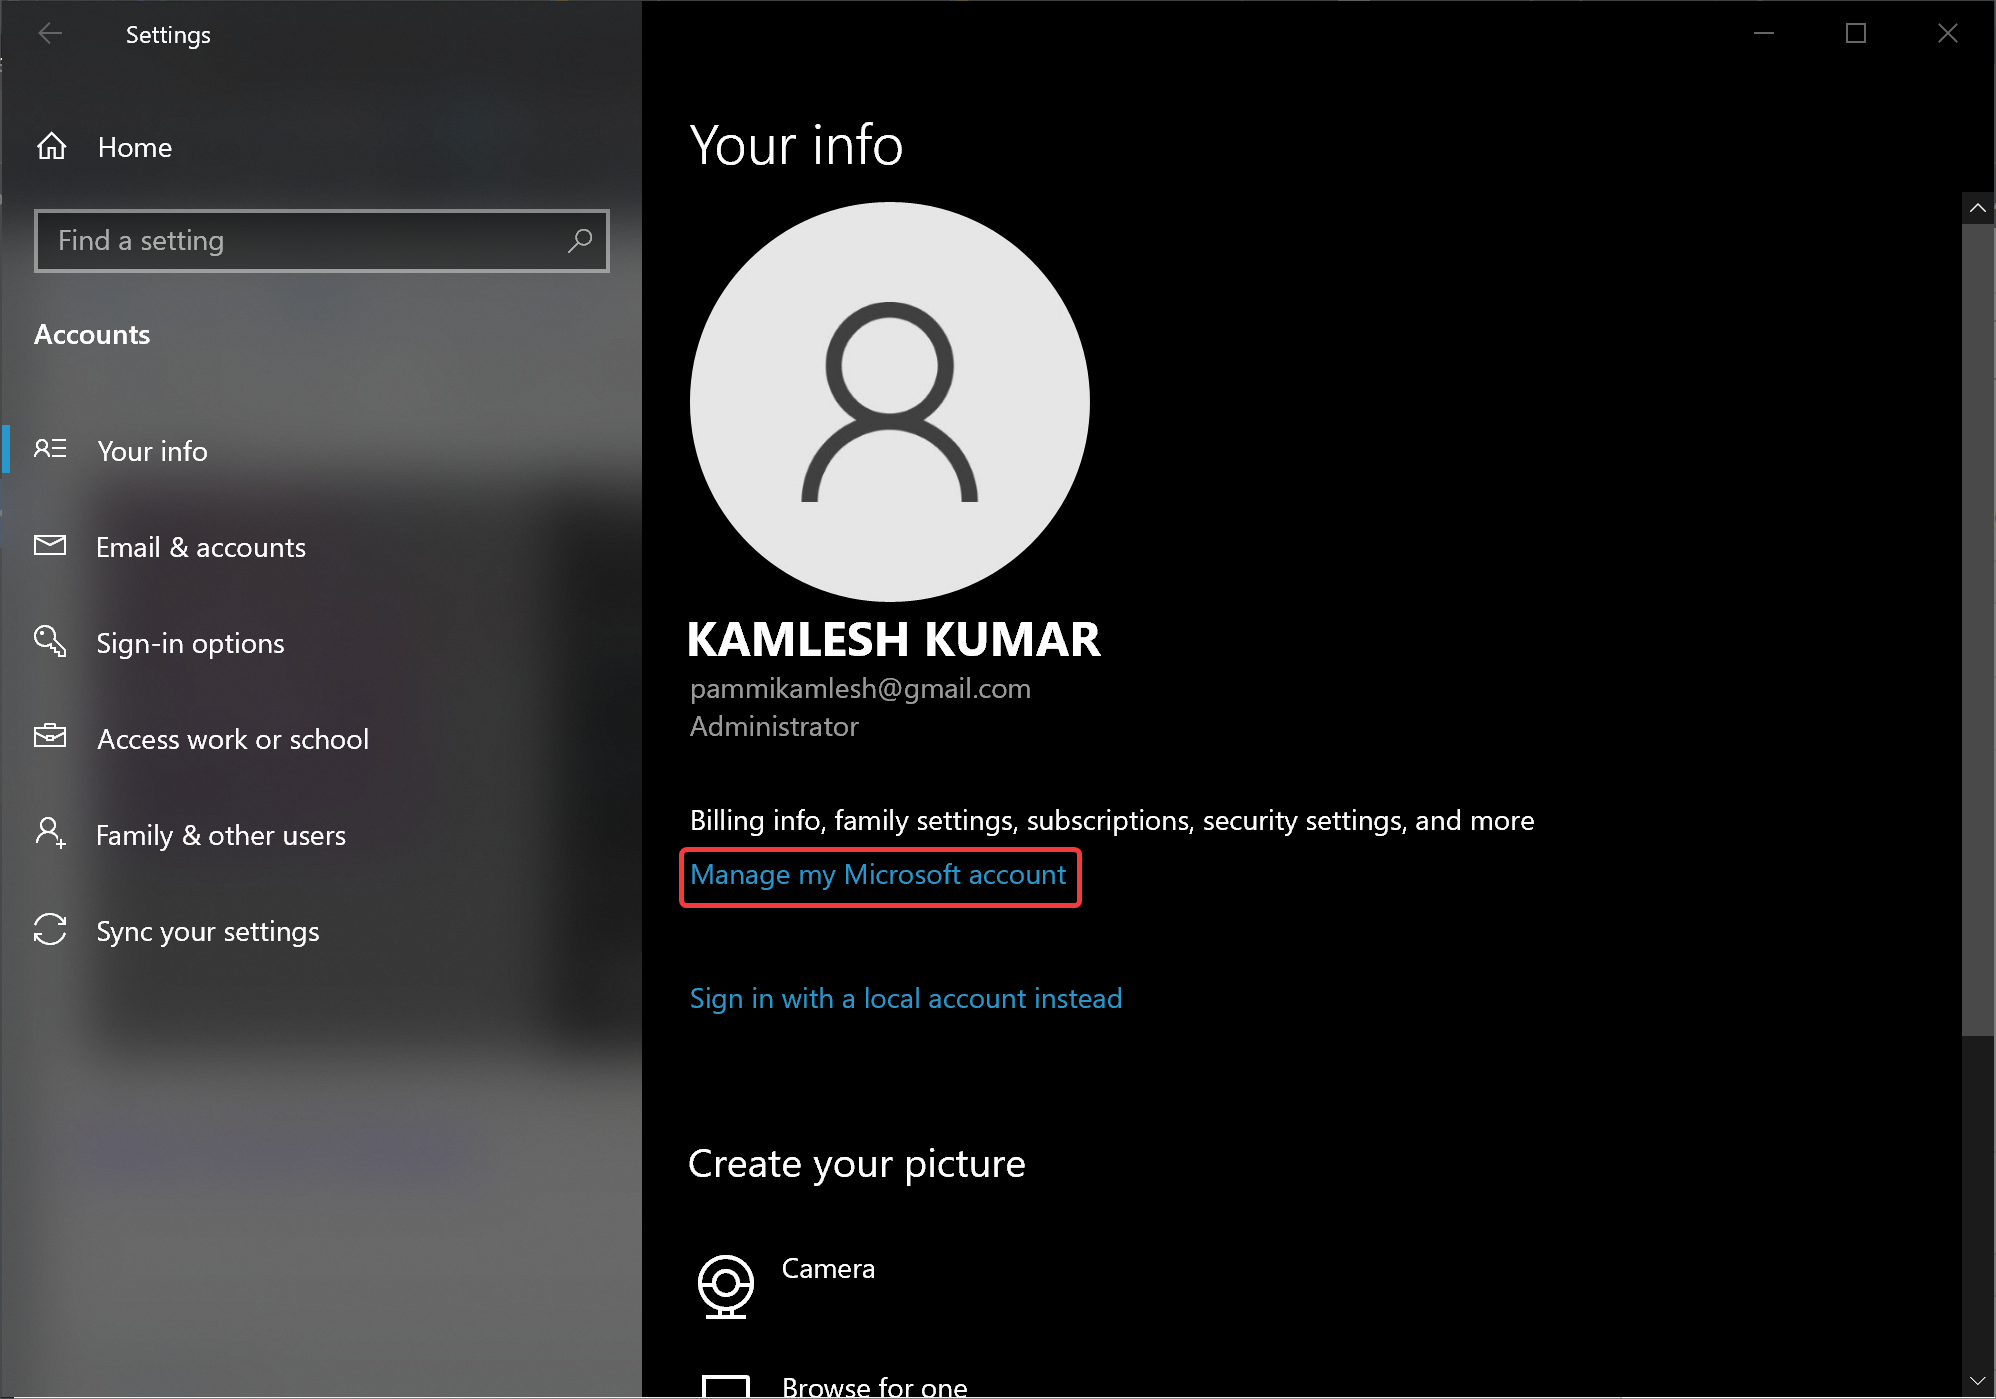
Step 4. On the right side of “Your info,” click the Manage my Microsoft account link to access the Microsoft Account Profile page.
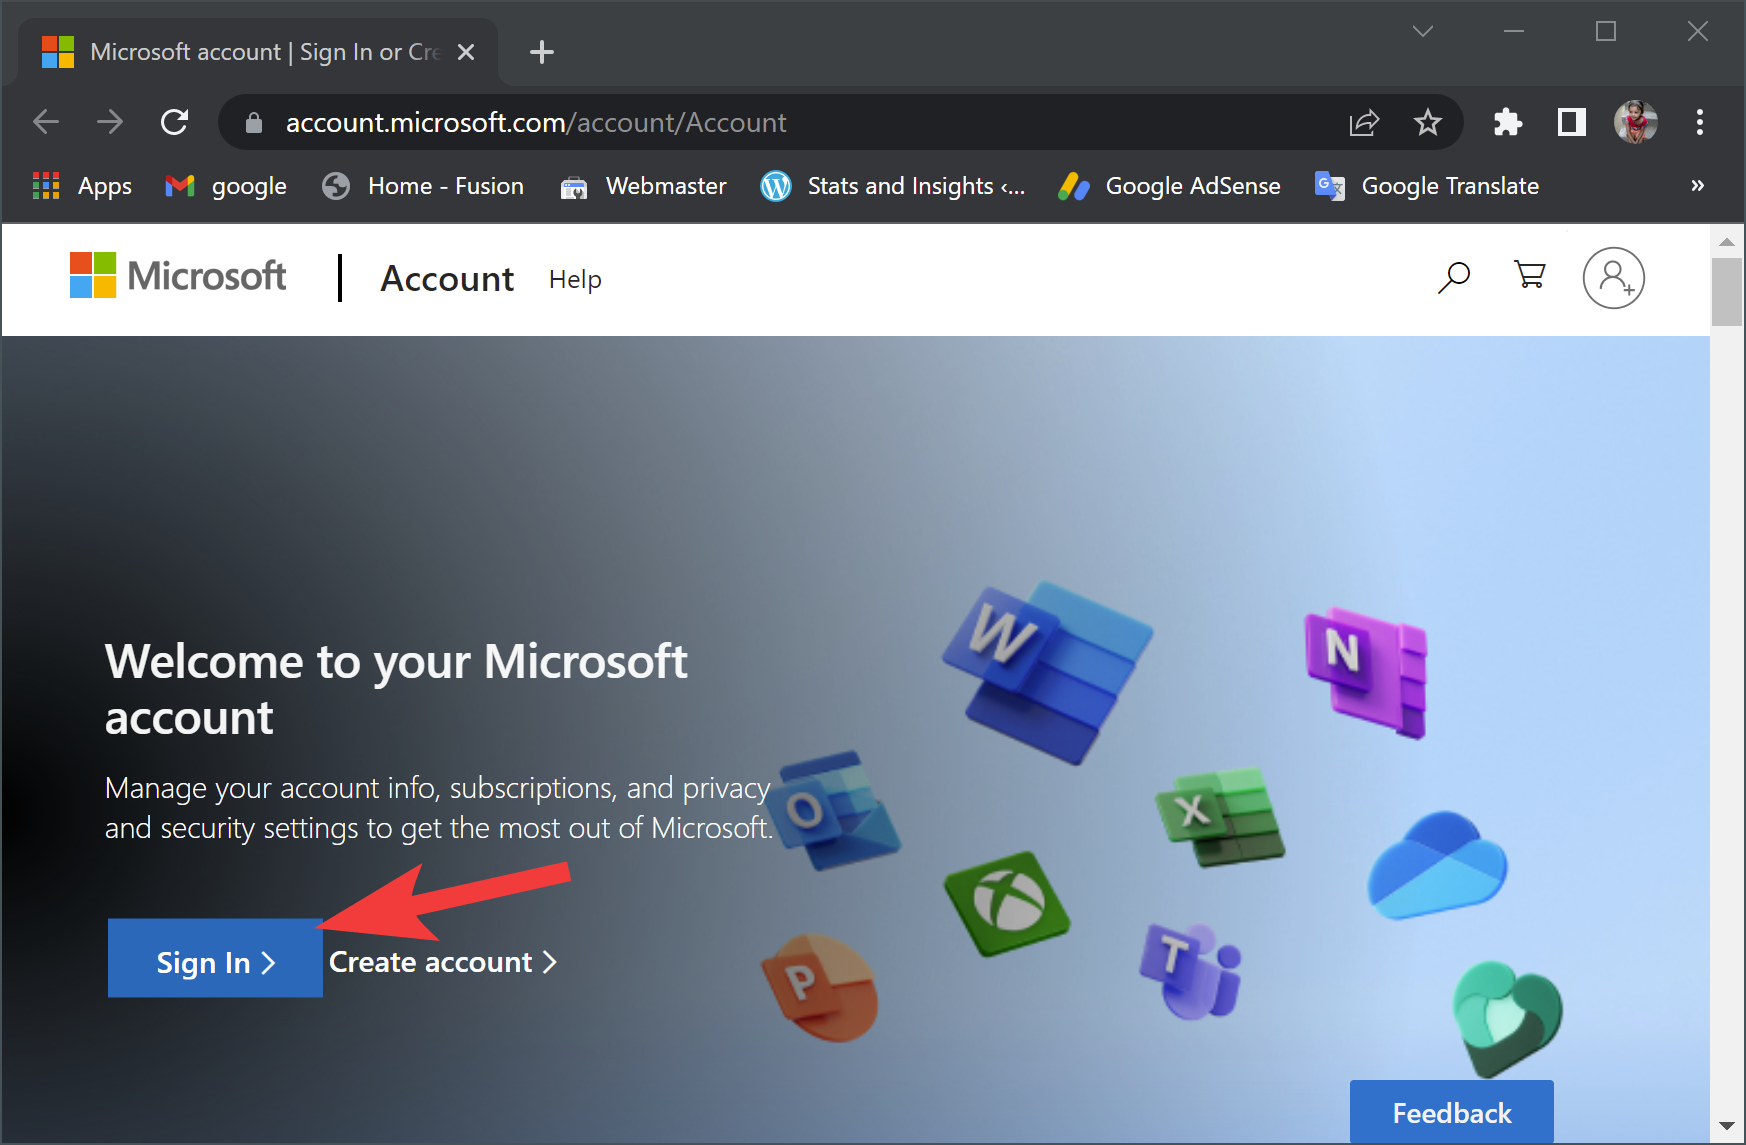
Step 5. When the Microsoft account webpage opens, click the Sign In button if required.
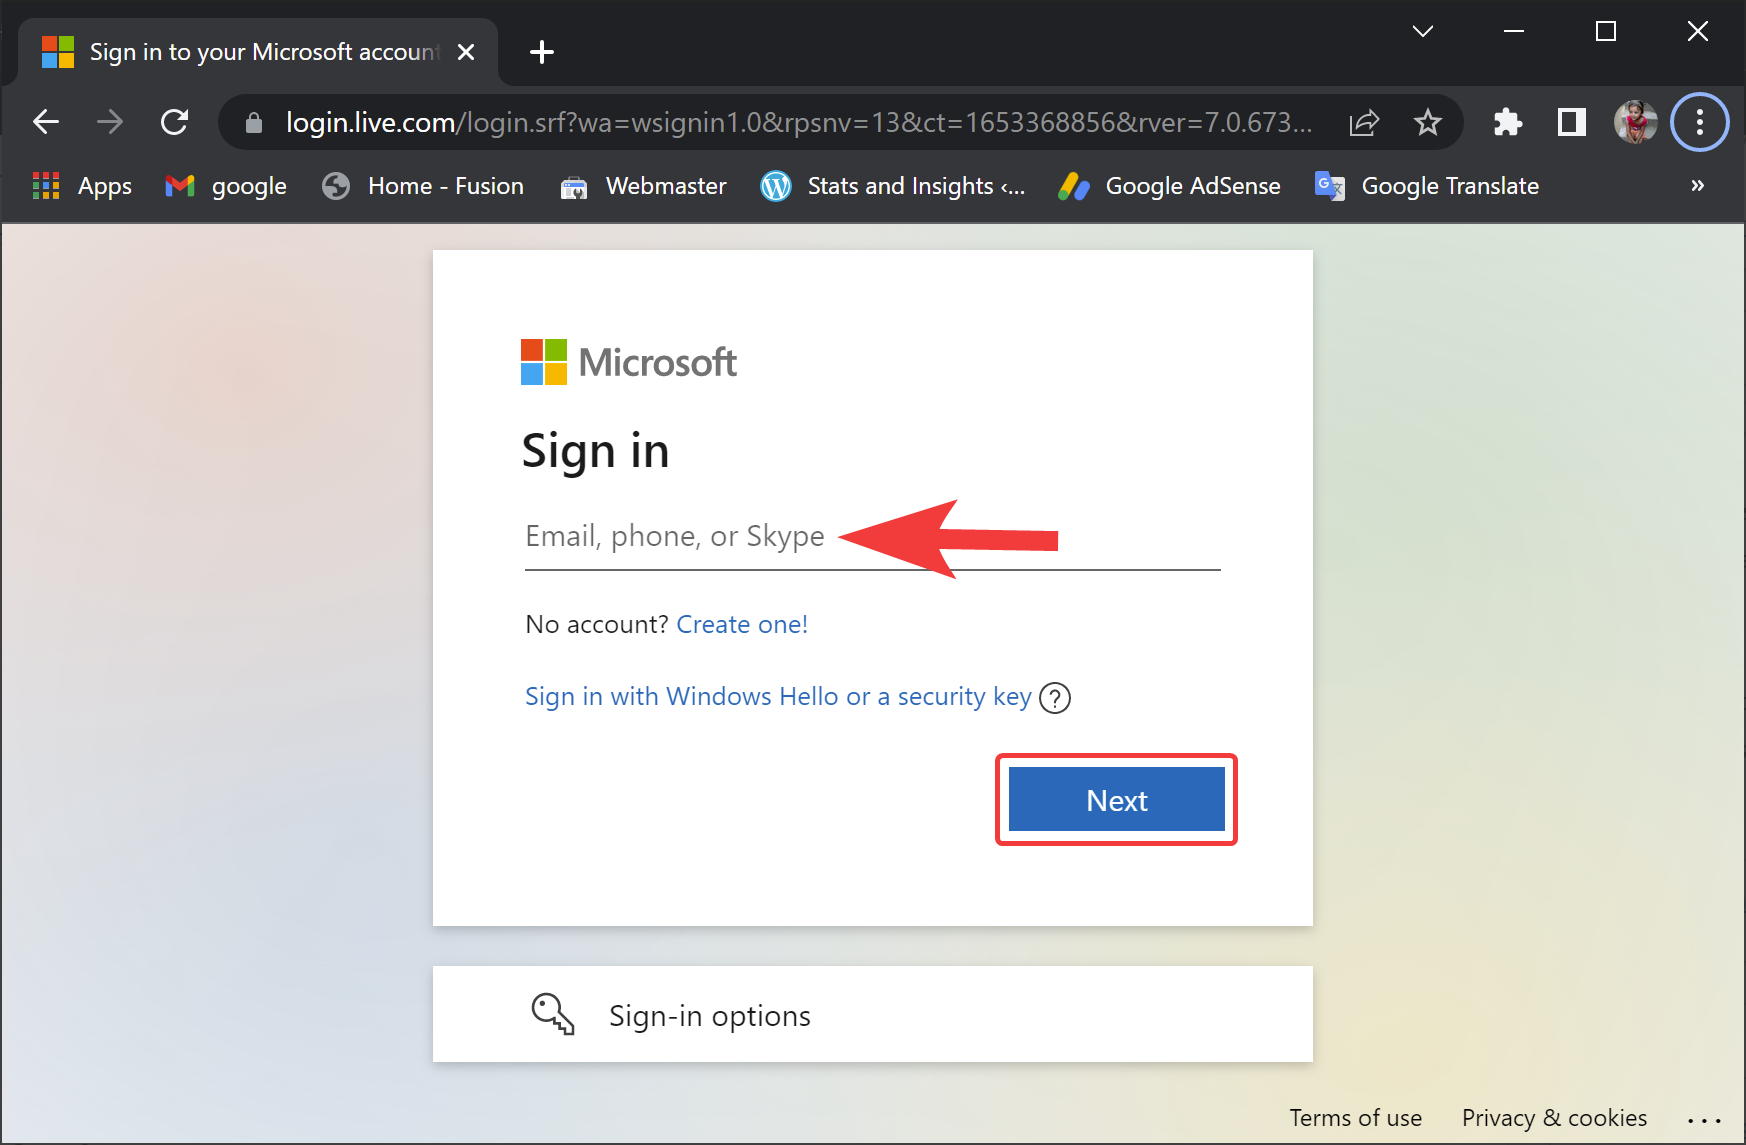
Step 6. Next, enter the “Email, phone or Skype” in the provided textbox and click the Next button.
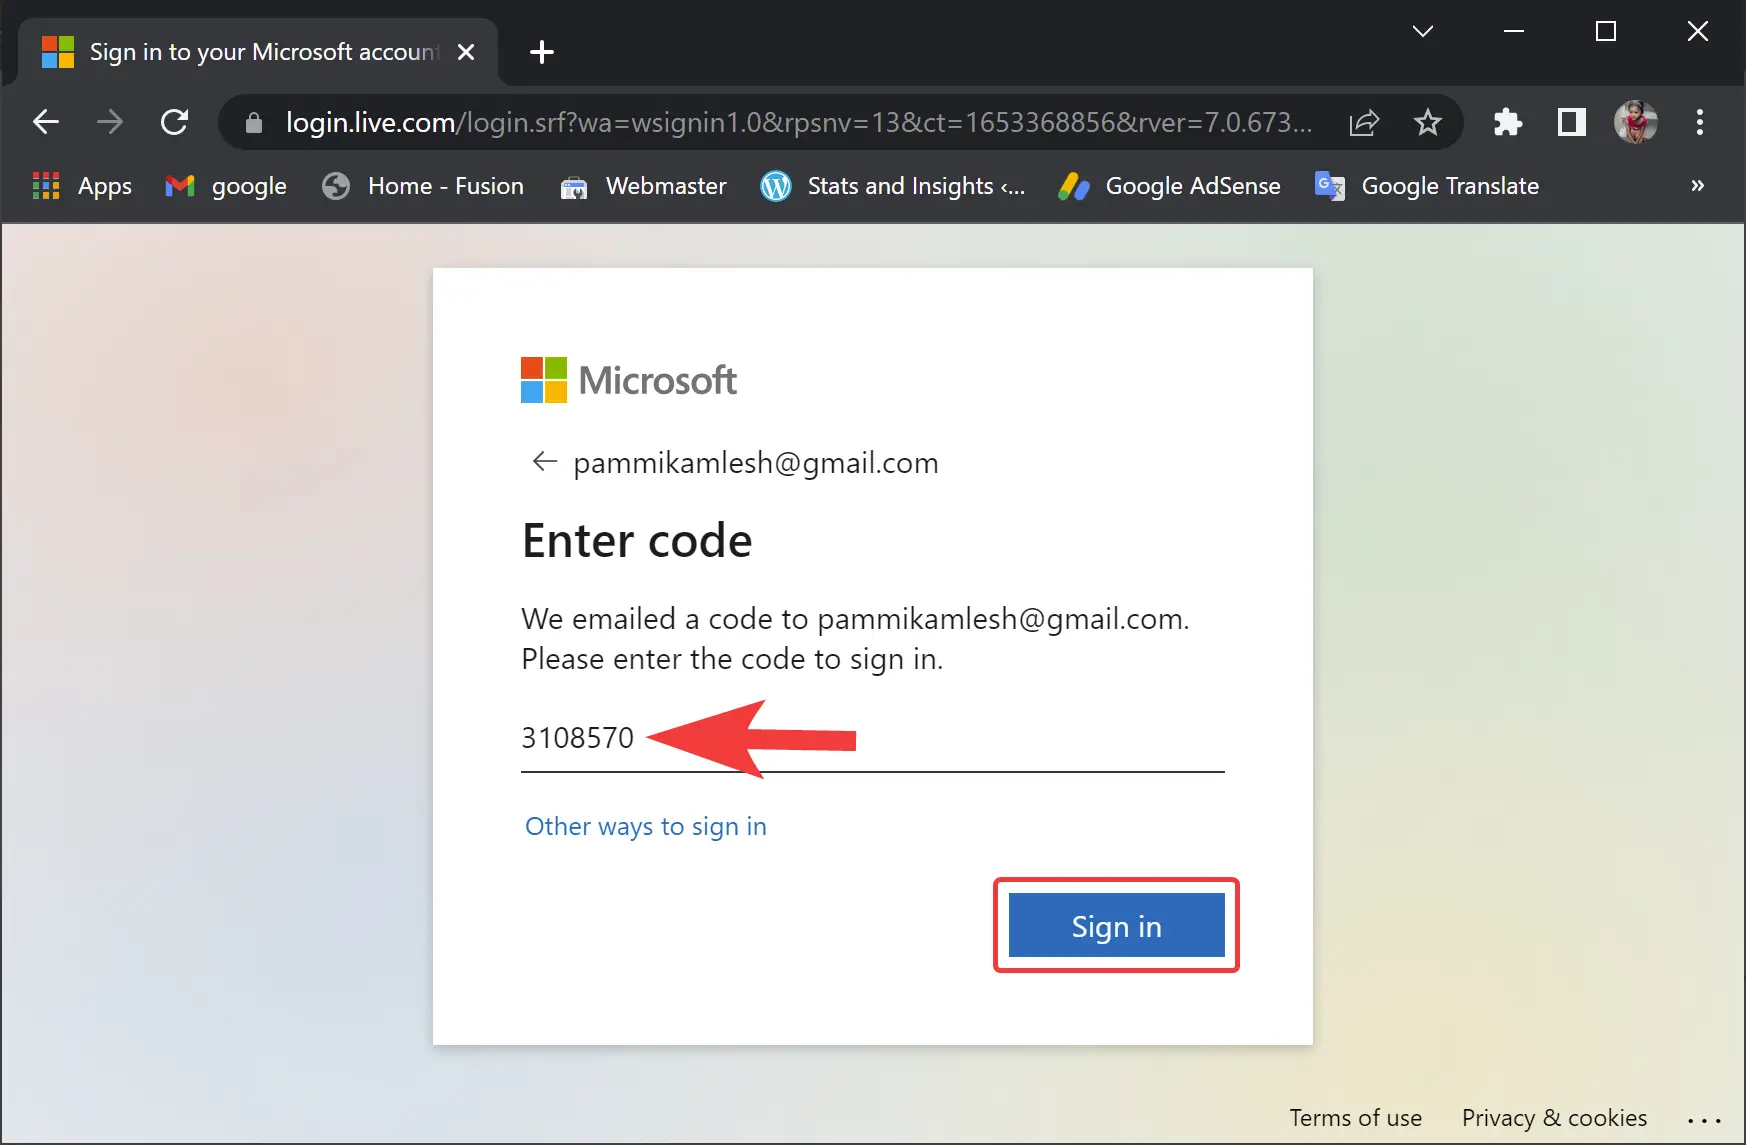
Step 7. Then, enter the code to authenticate and click the Sign in button.
Step 8. In the following screen, click the Your Info tab.
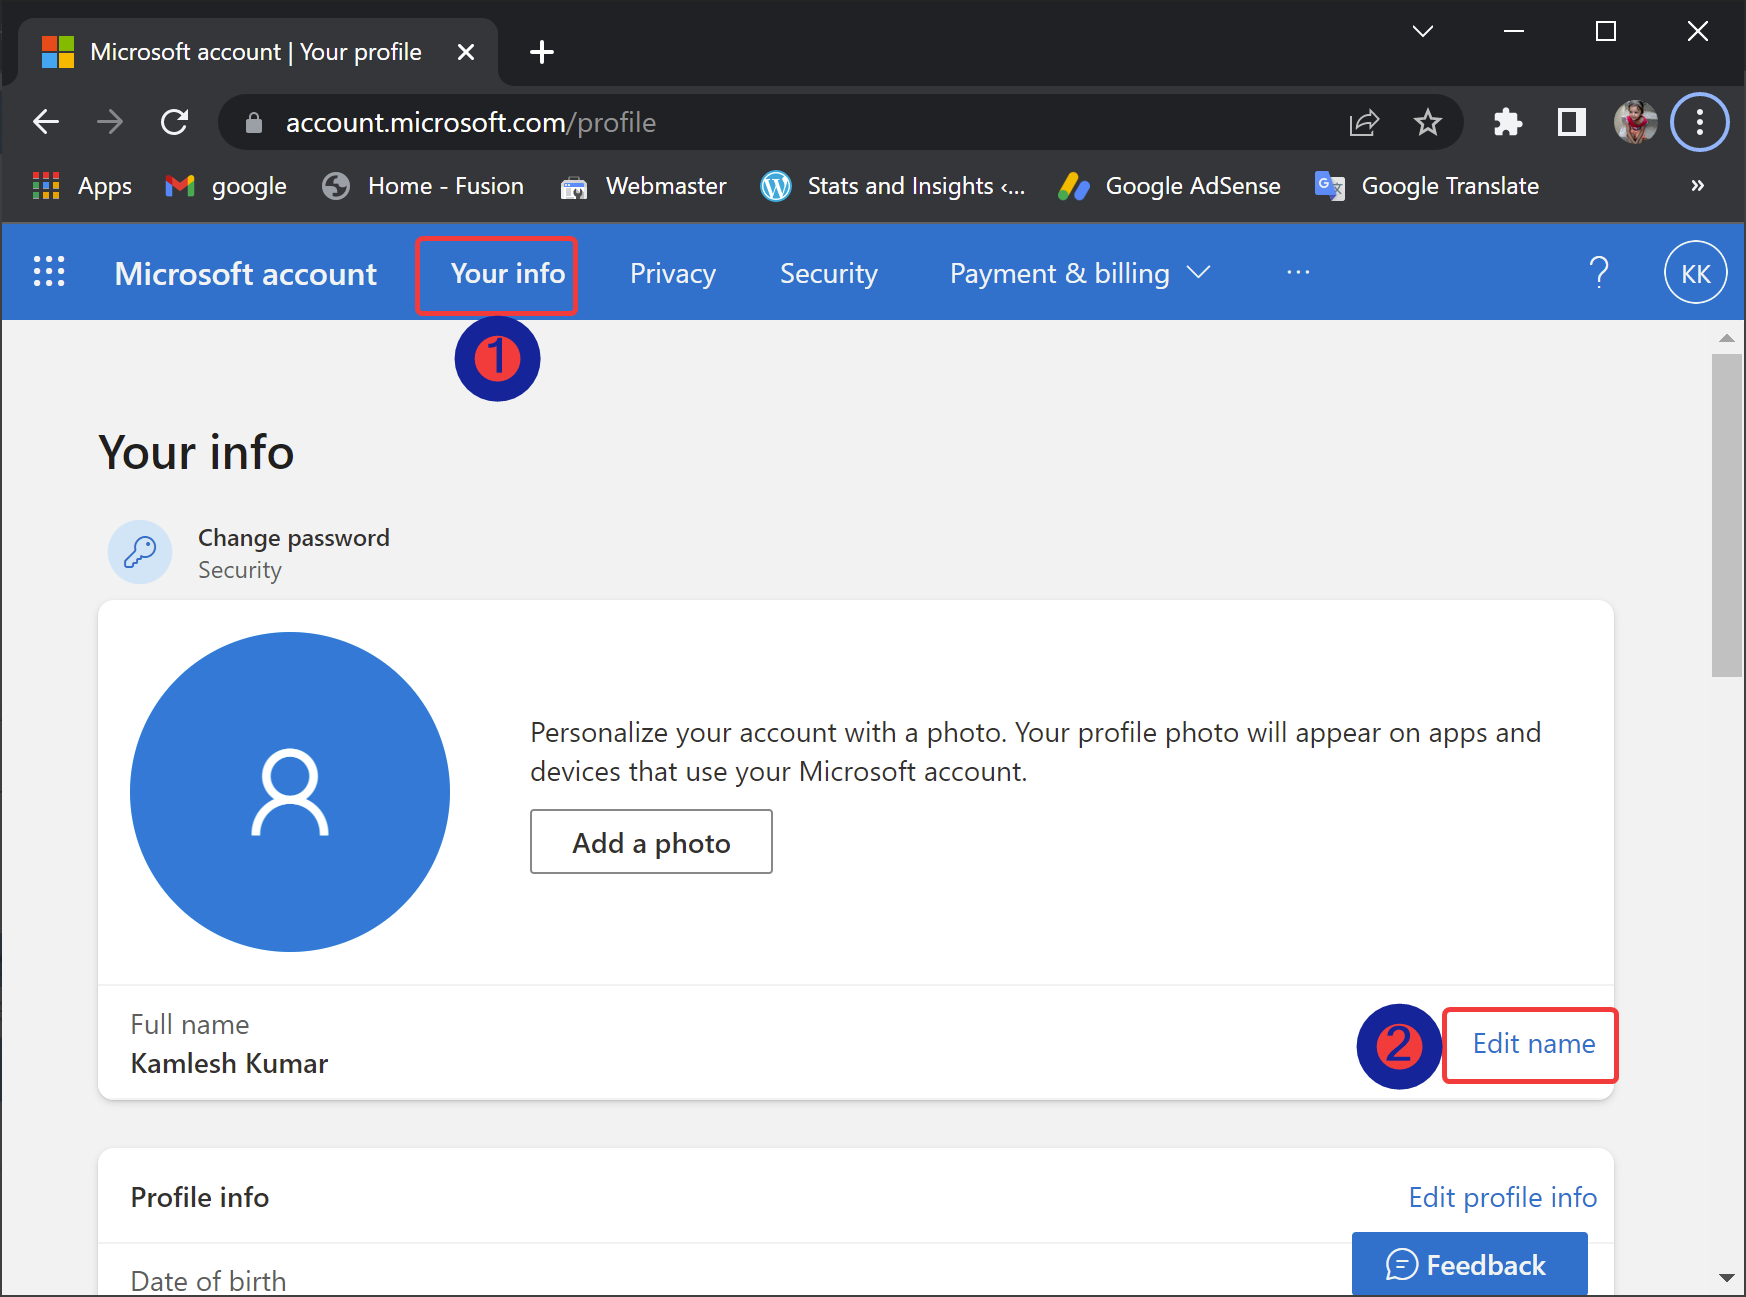
Step 9. Then, click the Edit name link.
Step 10. Next, enter the first name, last name, and captcha.
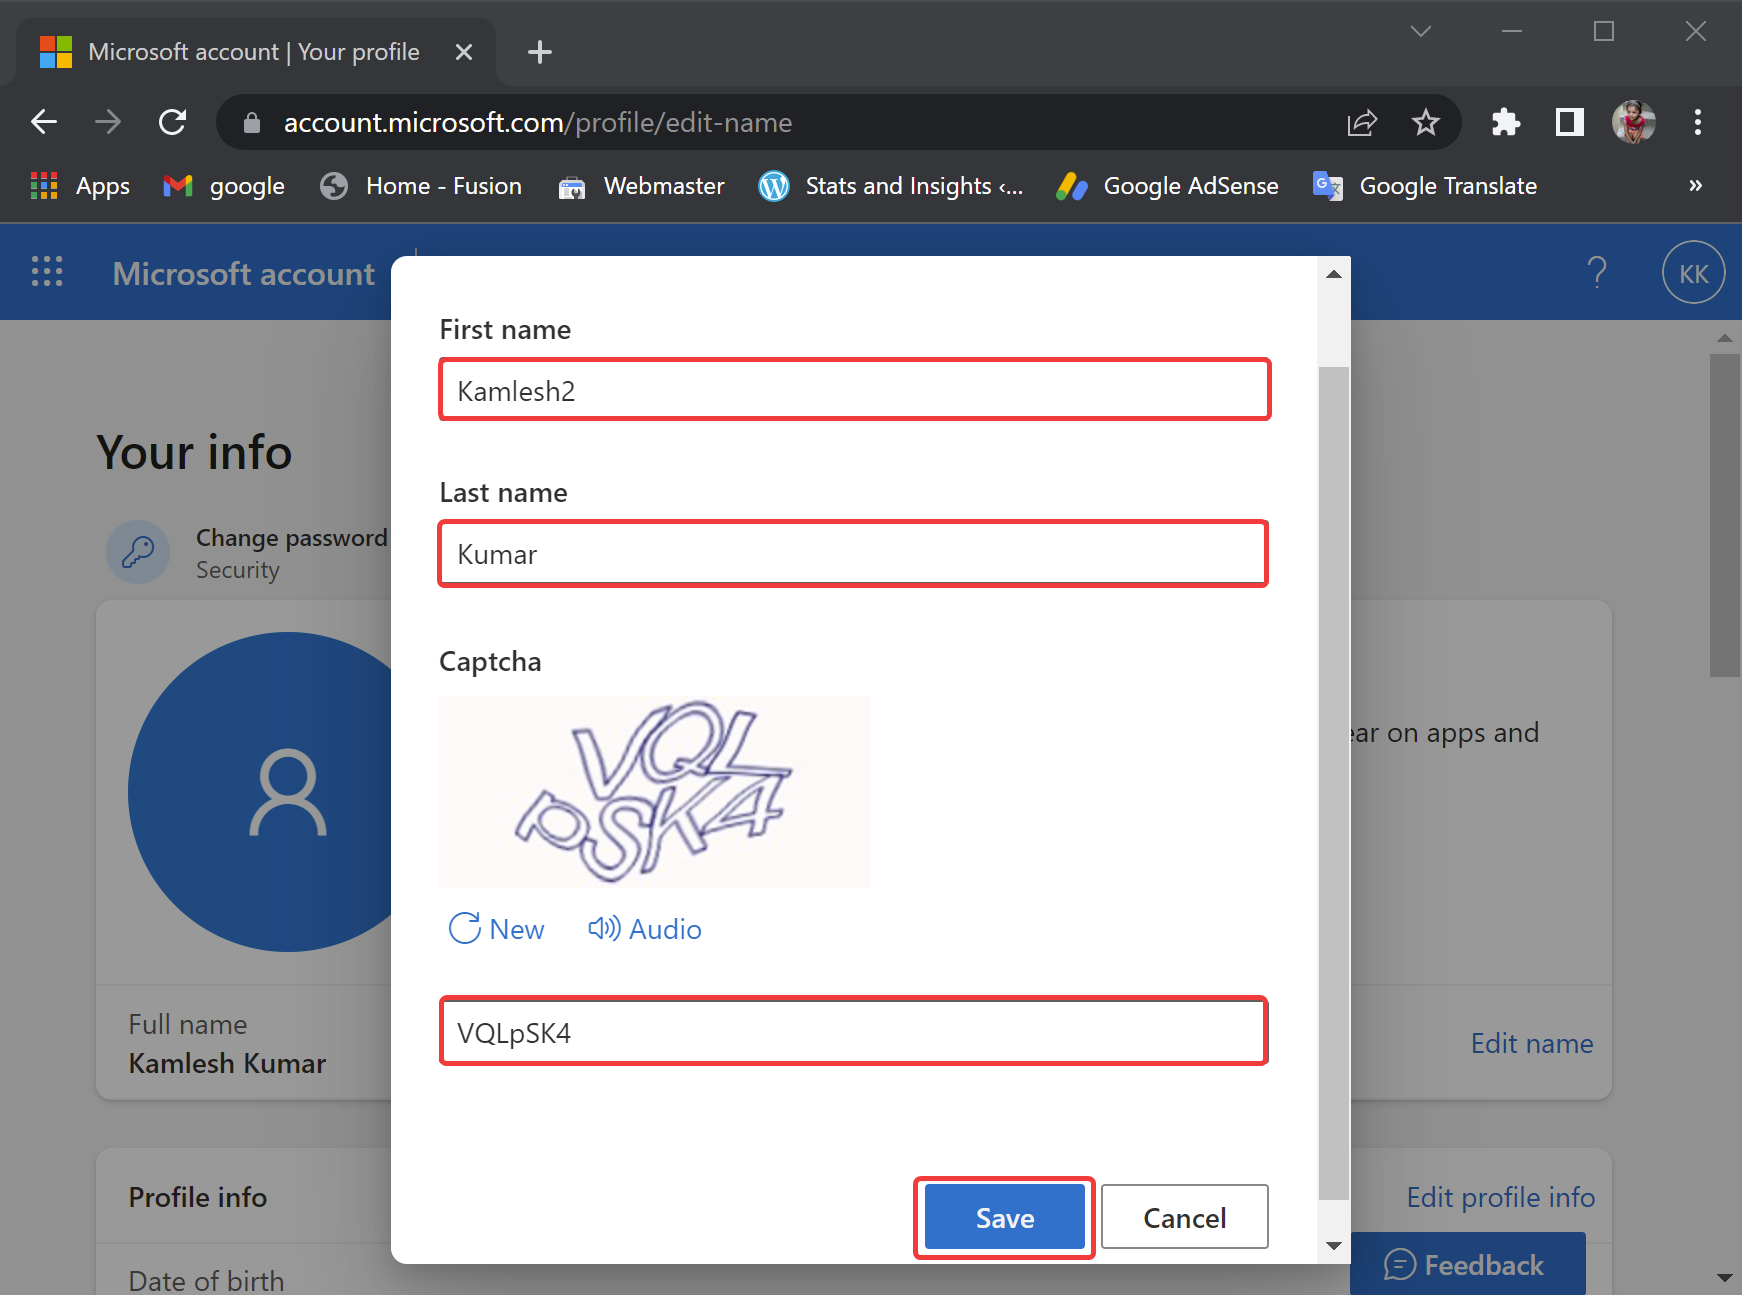
Step 11. When you’re done, click the Save button.
Step 12. At last, reboot your computer to apply the changes.
Once you execute the above steps, you will see the new name on the Sign-in screen. Your device may take some time to reflect the latest information.
The new name will also appear in services connected to your account, including Xbox Live, Outlook, OneDrive, Microsoft 365, etc.
How to Change Account Name using Control Panel on Windows 10?
If you use a local account to sign in on your Windows 10 PC, you may use multiple ways to modify the account’s name through Control Panel.
Using the User Accounts
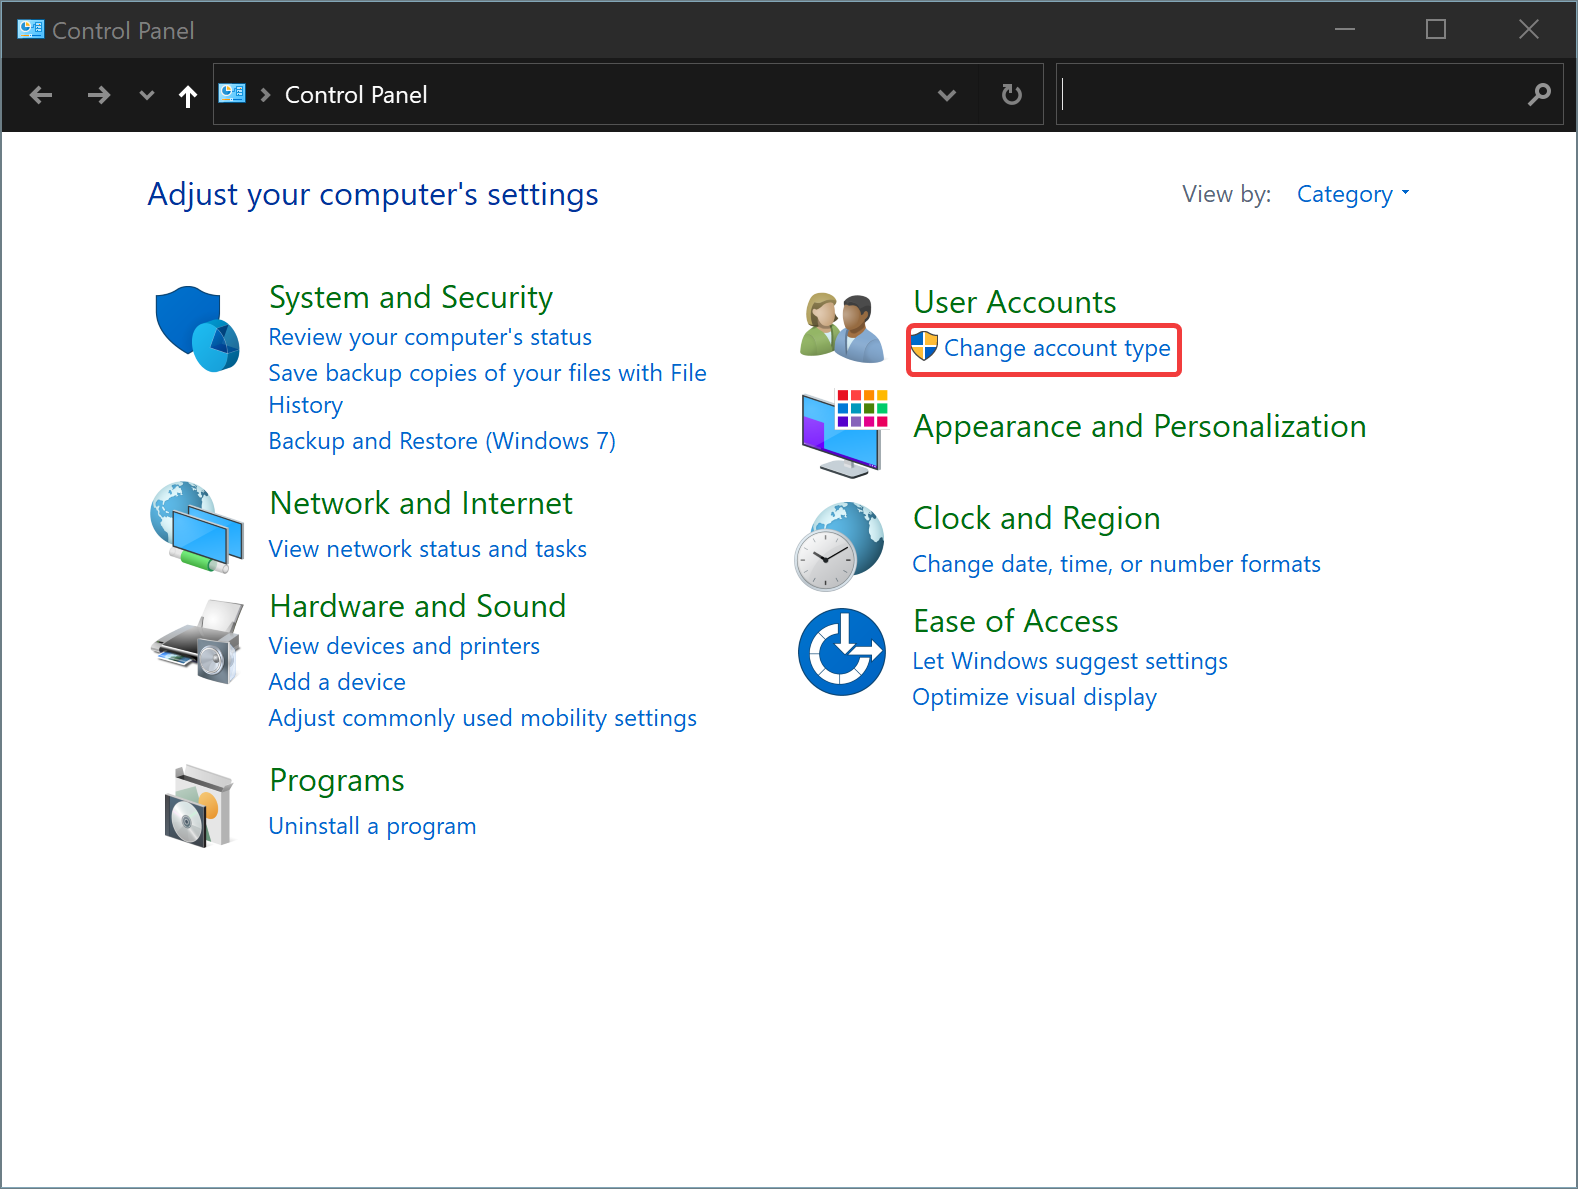
Step 1. First, open Control Panel.
Step 2. Next, click the Change account type option under the “User Accounts” section.
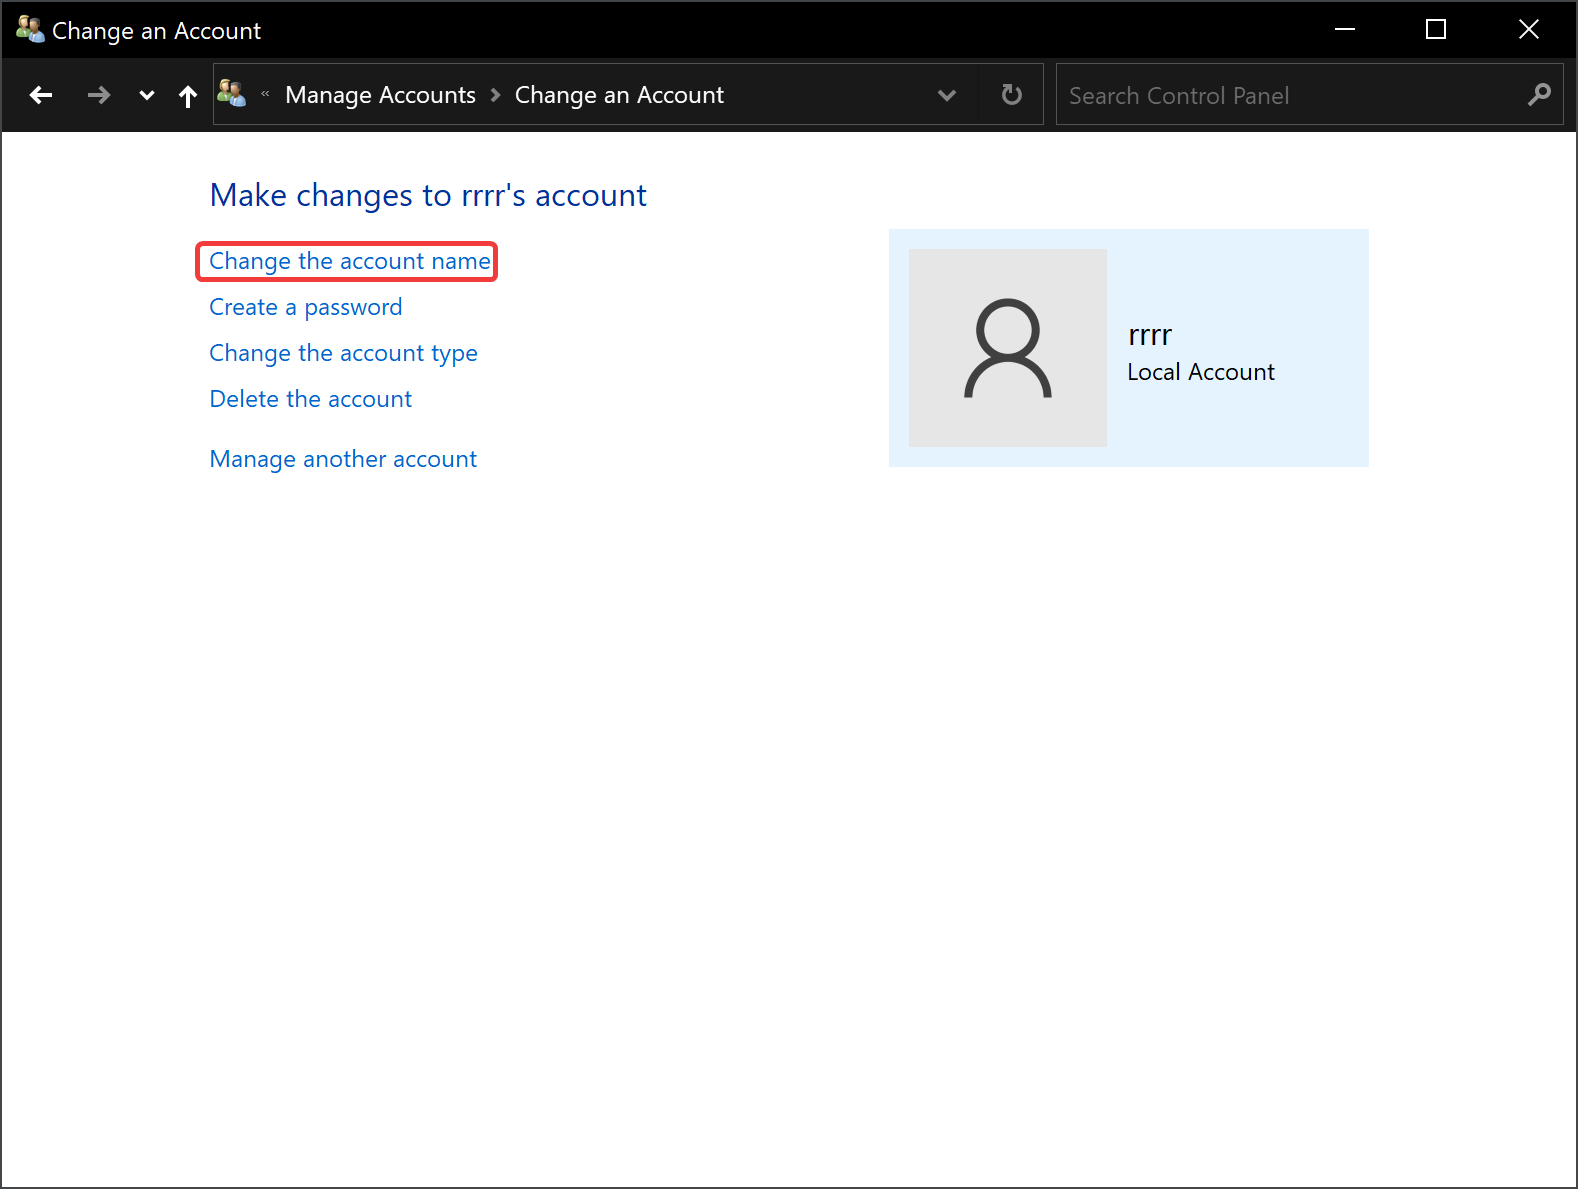
Step 3. In the following window, select a local account you want to change the name.

Step 4. Then, click the Change the account name option.
Step 5. Type the new account name for the Sign-in screen.
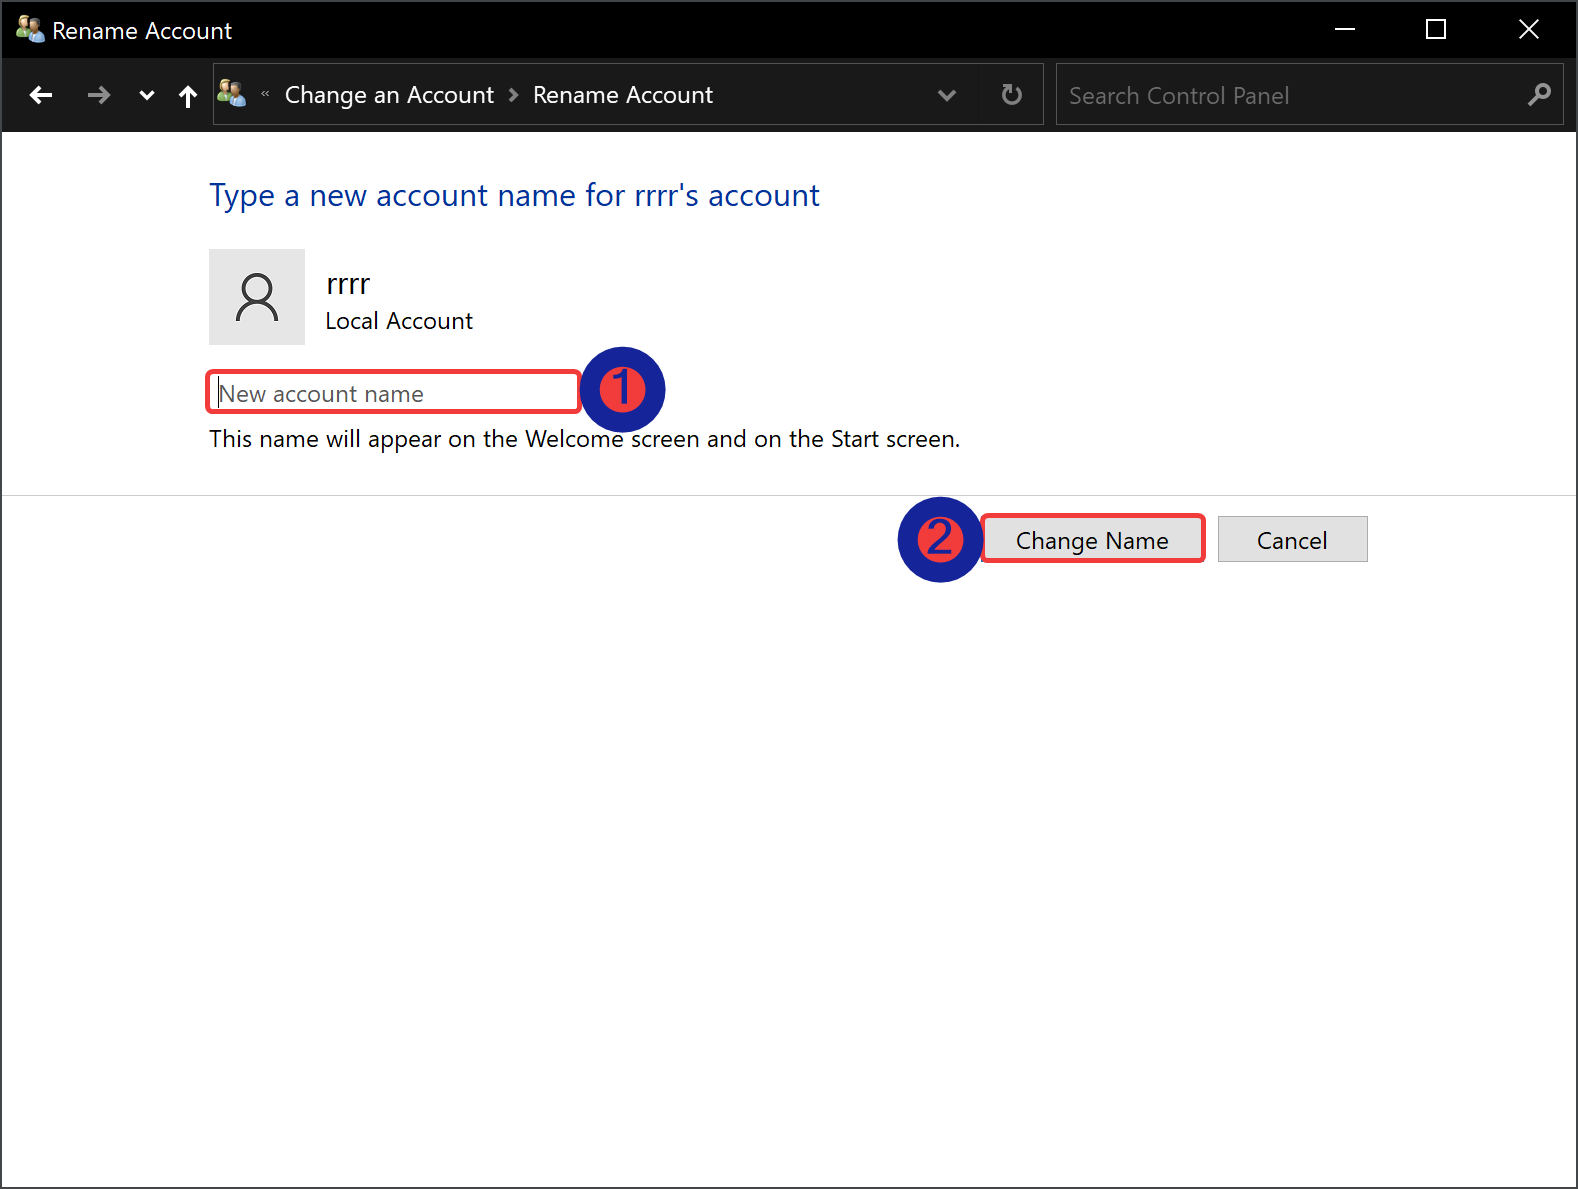
Step 6. Click the Change name button.
Step 7. Finally, reboot your computer to apply the changes.
Through netplwiz Command
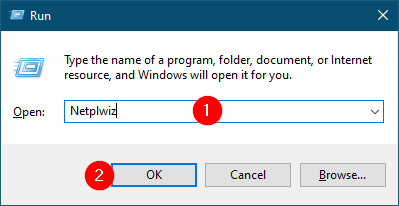
Step 1. Open the Run dialog box by pressing Windows + R keys on the keyboard.
Step 2. Then, type netplwiz and hit the OK button to open the User Accounts window.
Step 3. In the User Accounts window, switch to the Users tab.
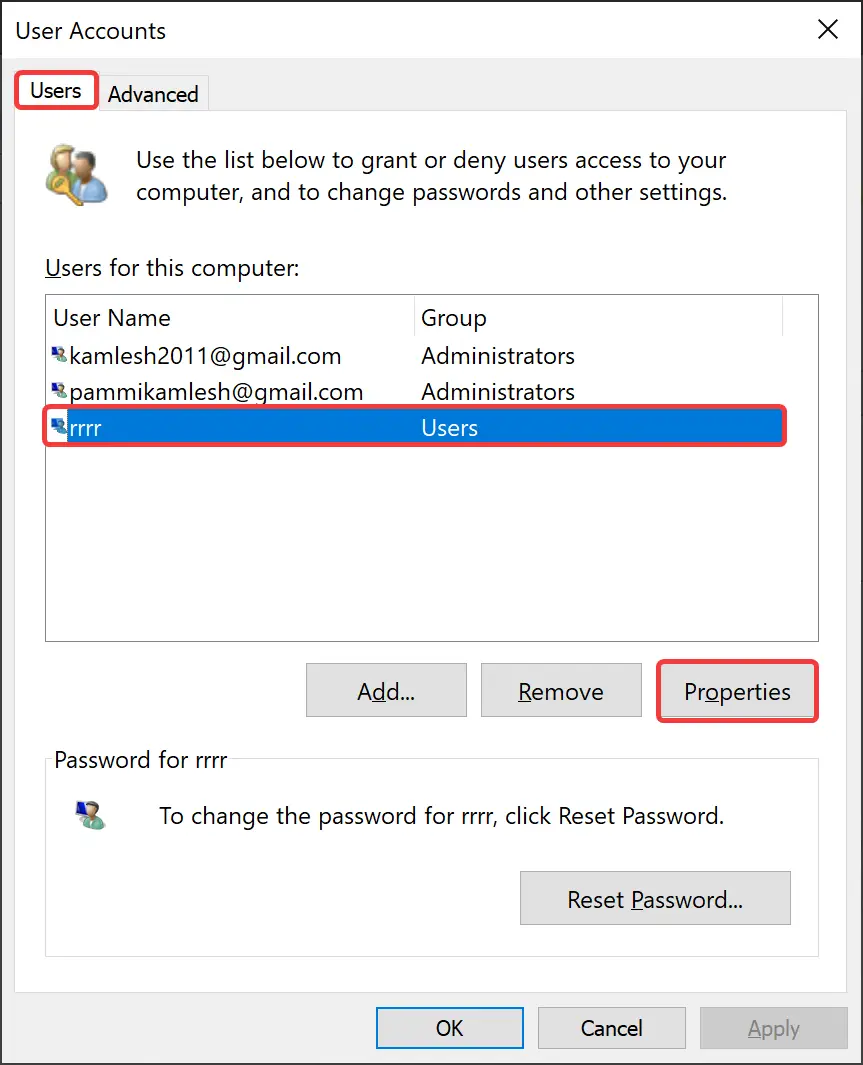
Step 4. Select a local user account you want to change the name.
Step 5. Then, click the Properties button.
Step 6. Enter a new name in the “User name” field to change the account nickname.
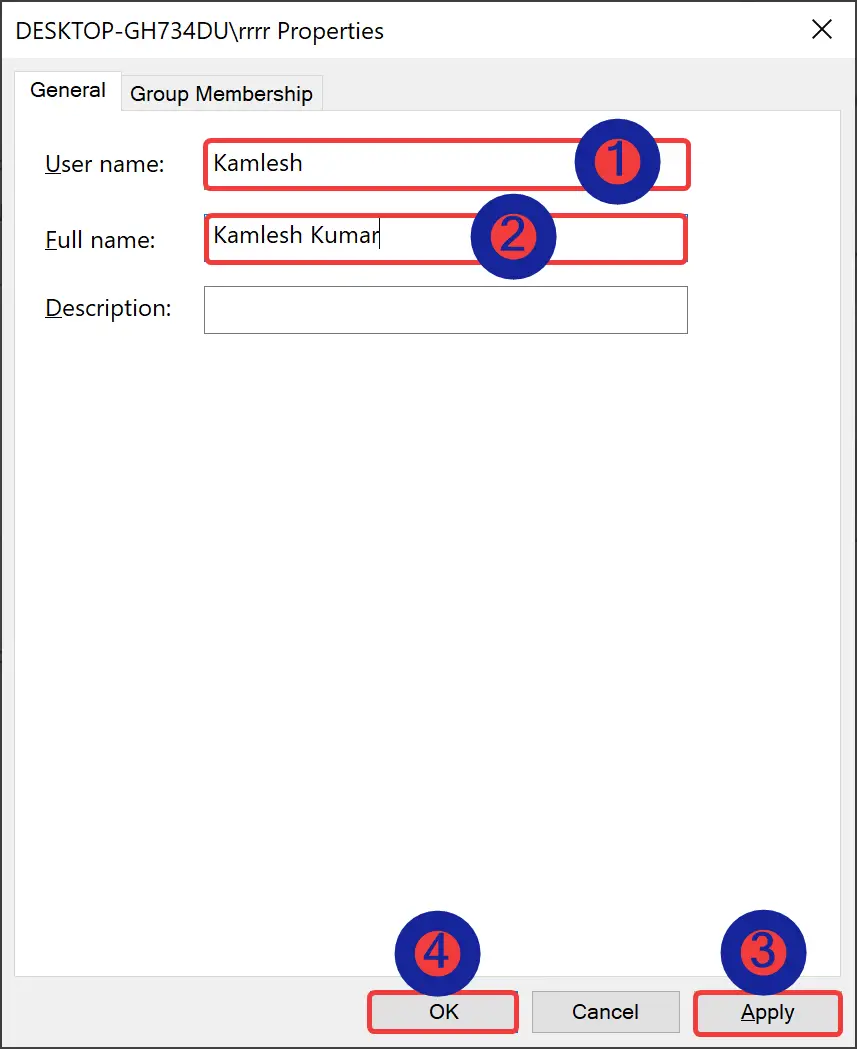
Step 7. Then, confirm the new name in the “Full Name” field.
Quick Tips: If you want to display a nickname instead of your real name, leave the “Full Name” field empty.
Step 8. Click Apply.
Step 9. Click OK.
Once you complete the above steps, sign out or restart your PC to see the new name on the Sign-in screen.
How to Change an Account Name using Computer Management?
To change the account name through Computer Management, use these steps:-
Step 1. First, open Computer Management.
Step 2. Now, expand the System Tools > Local Users and Groups branch.
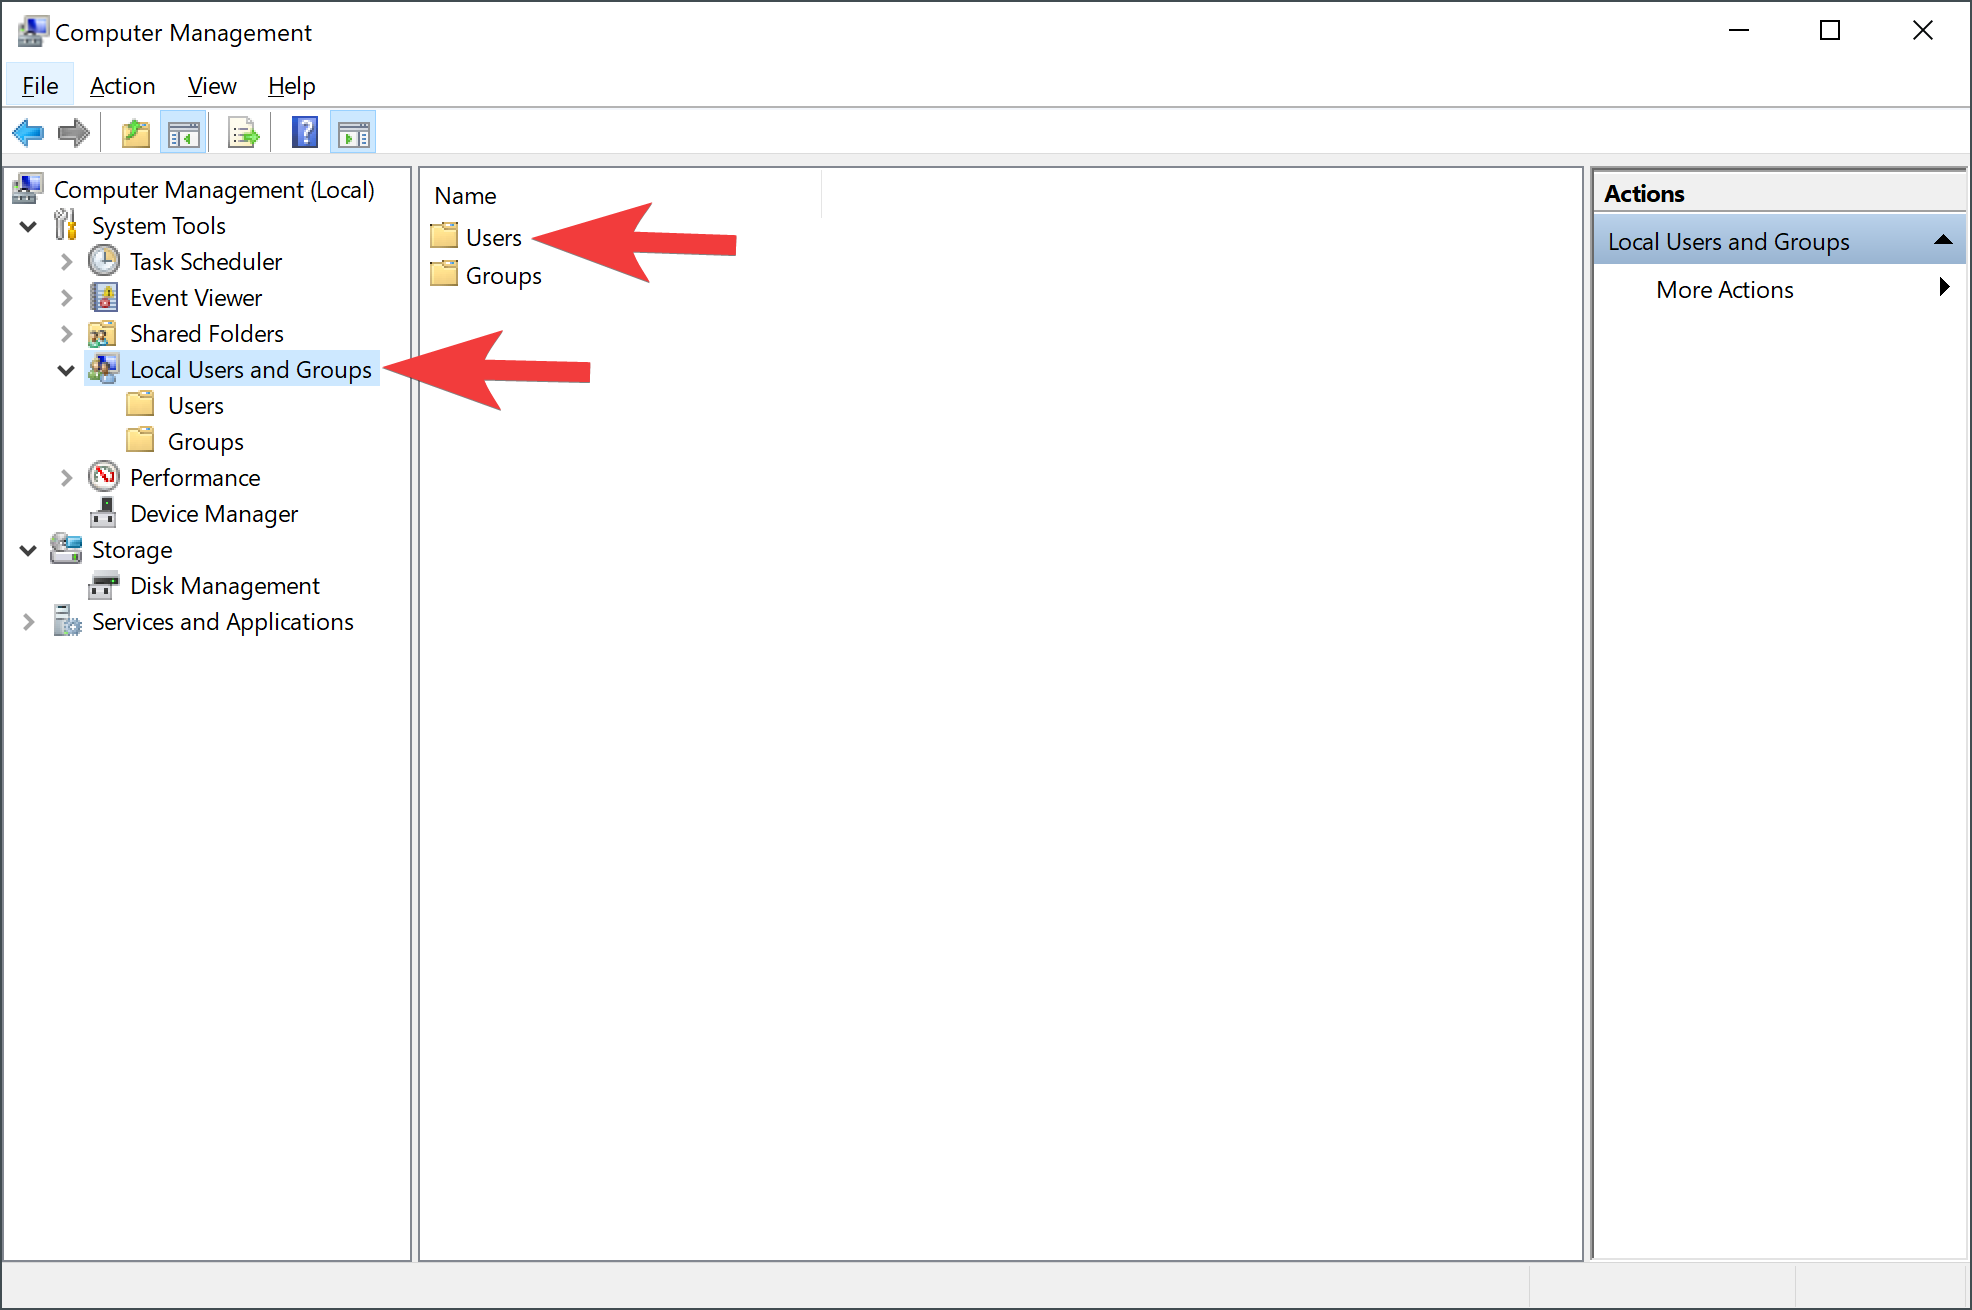
Quick Note: If you use Windows 10 Home Edition, you will not find the Local Users and Groups option under System Tools.
Step 3. On the right side of “Local Users and Groups,” double-click on Users.
Step 4. After that, right-click the account and select the Properties option in the menu.
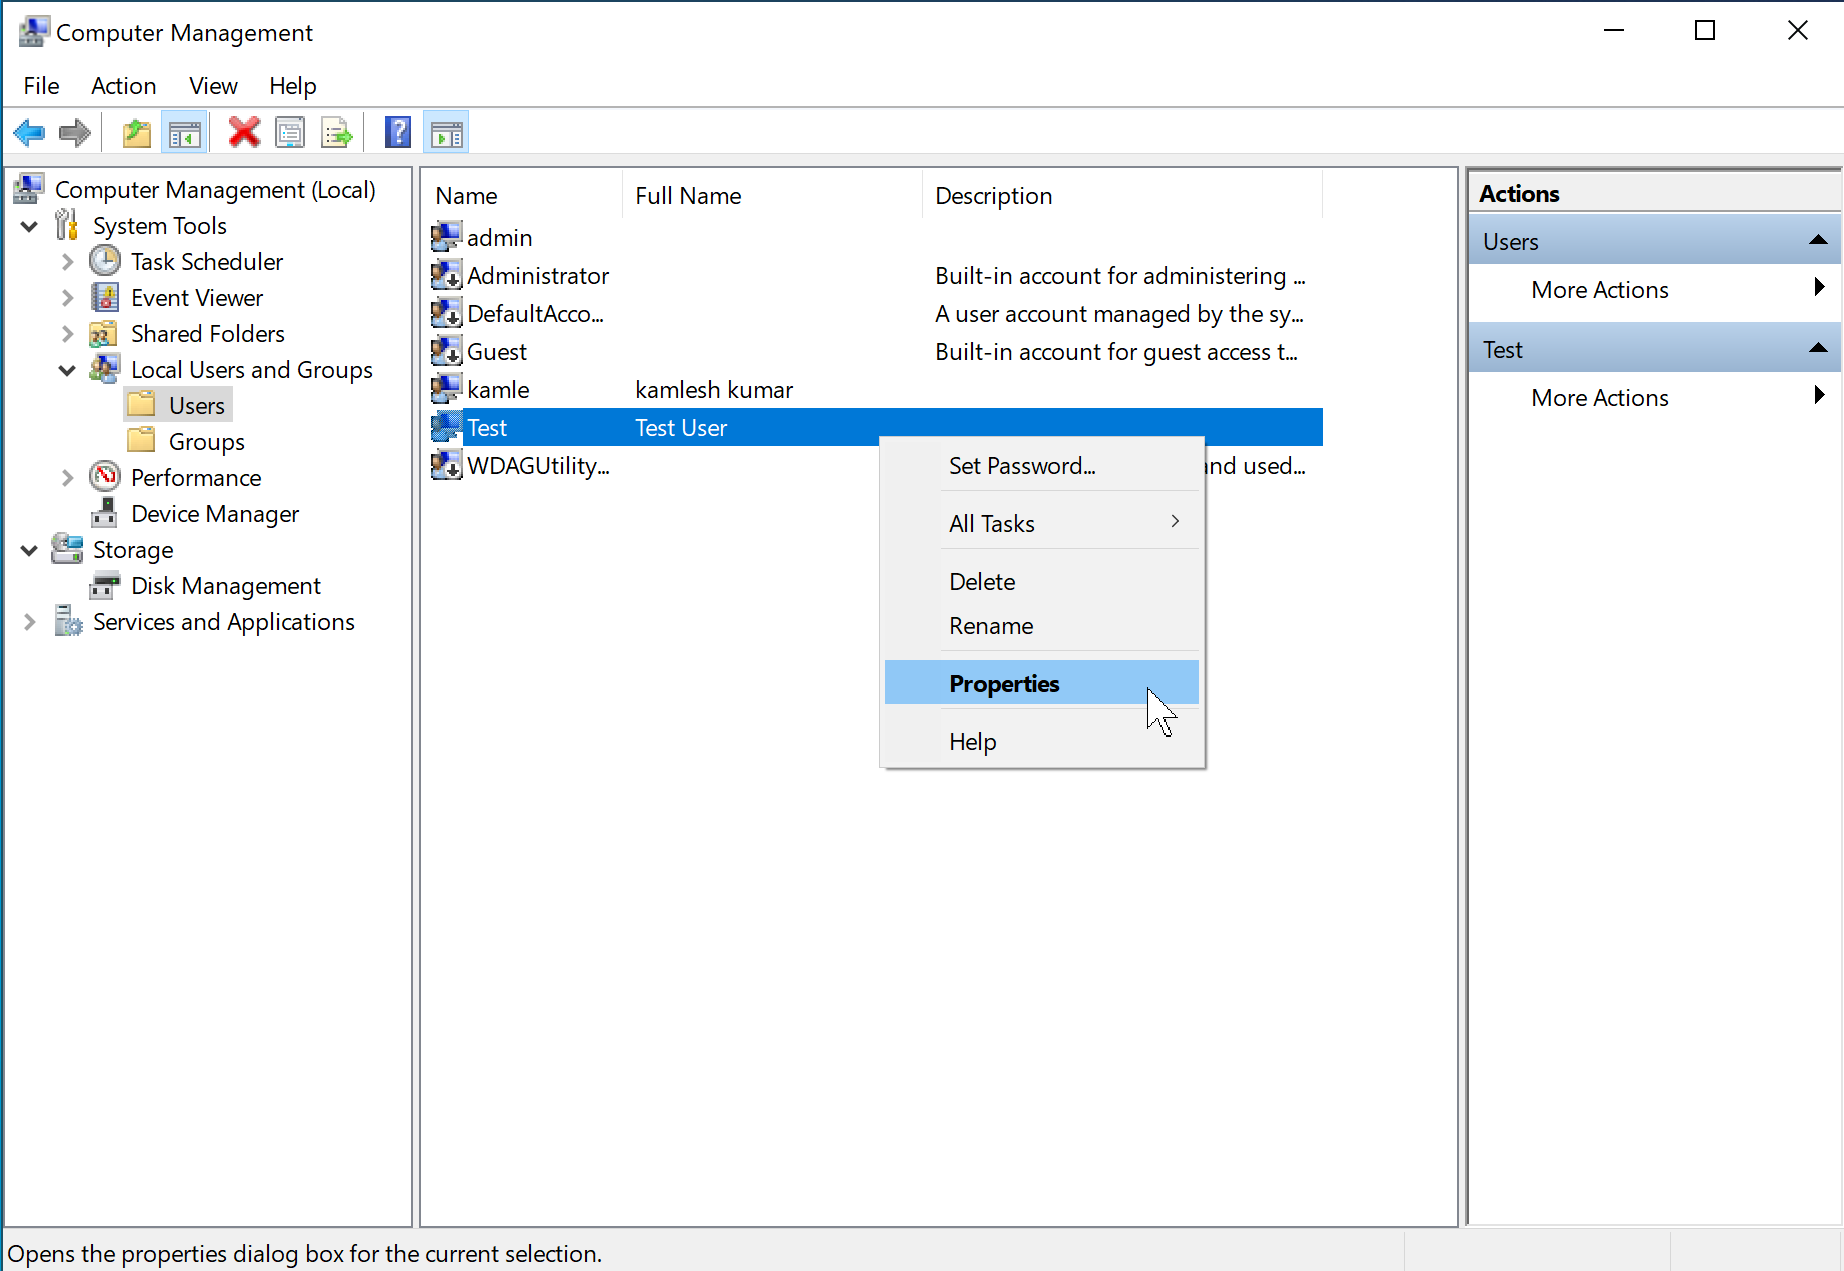
Step 5. Switch to the General tab.
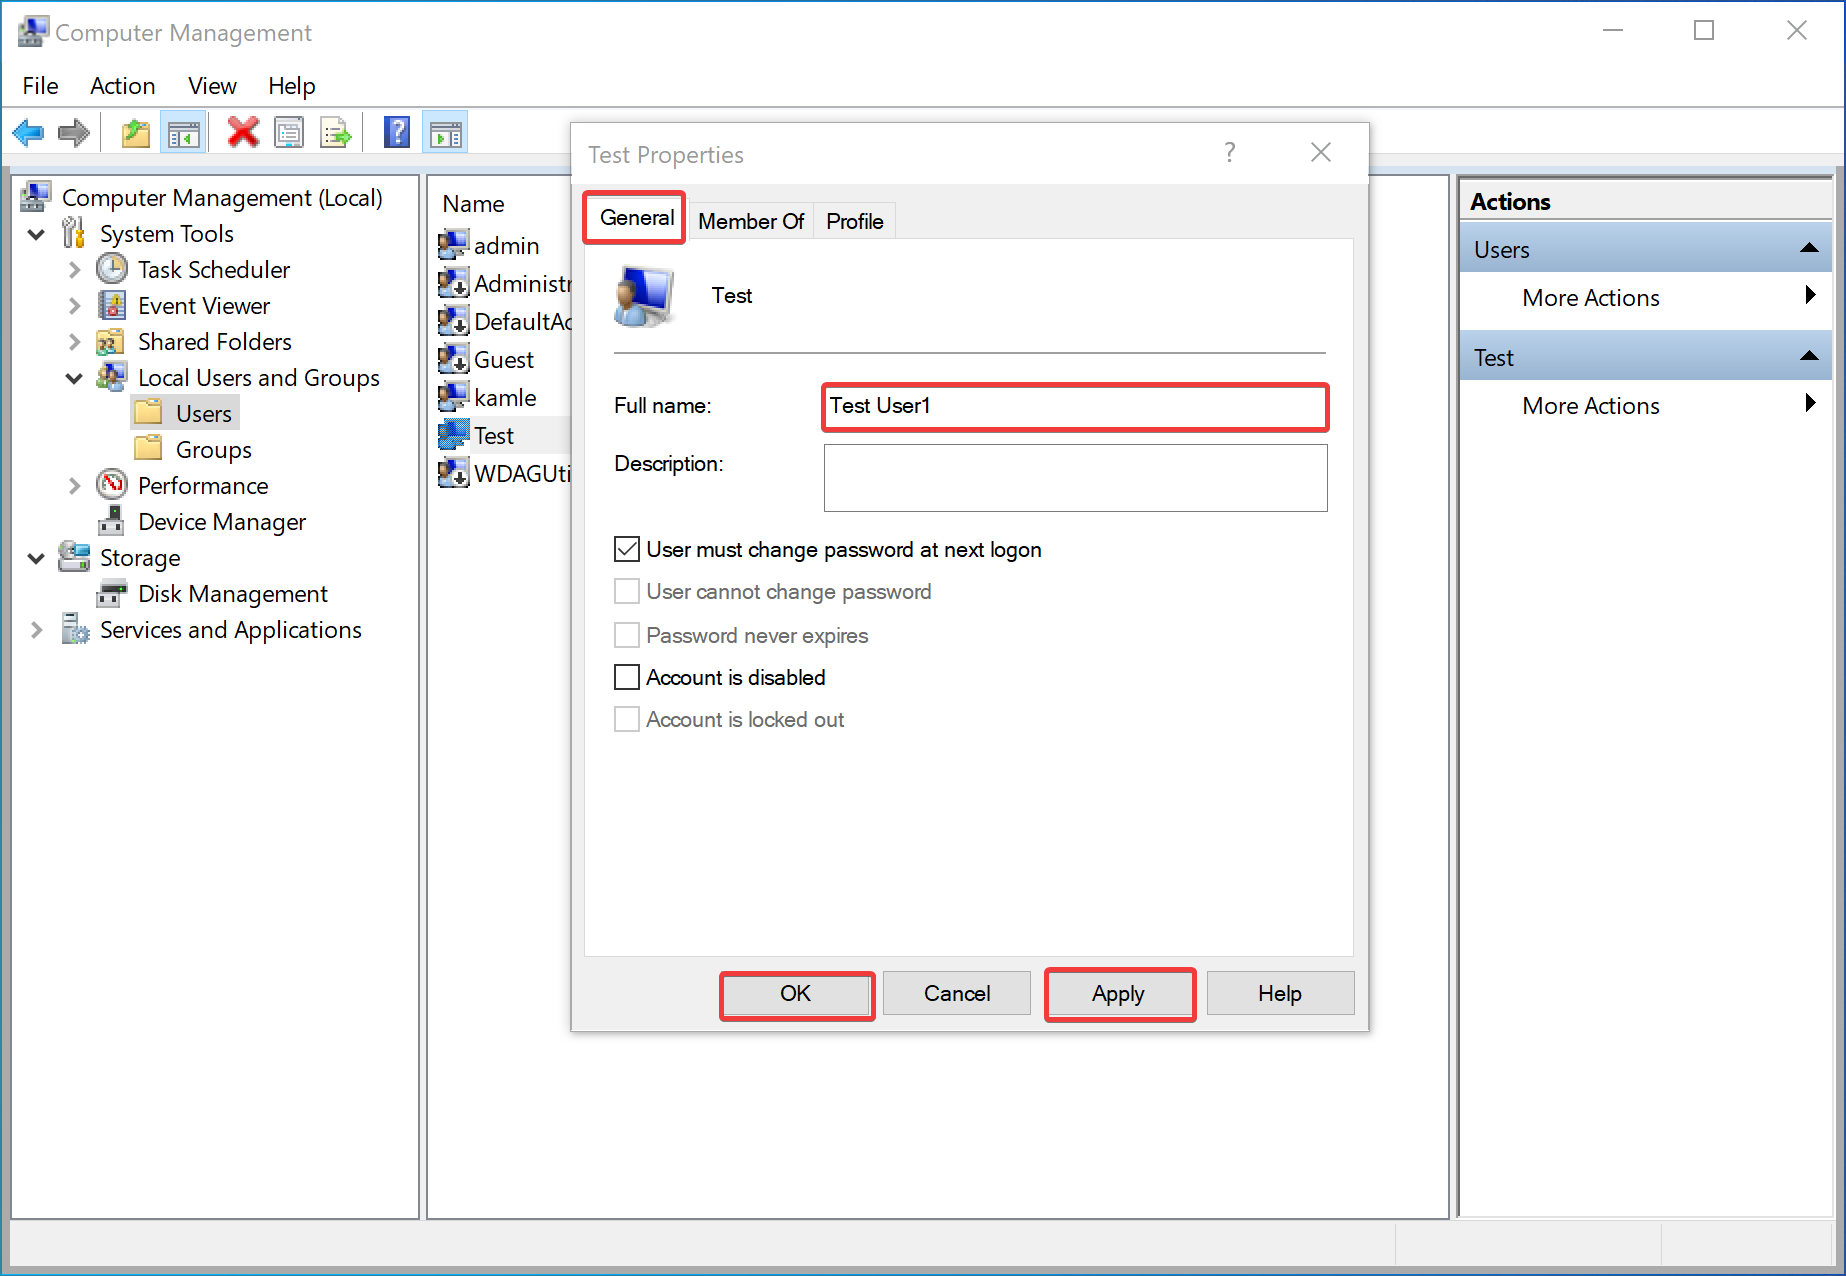
Step 6. Type a new name for the account in the “Full name” field.
Step 7. Click Apply.
Step 8. Click OK.
Step 9. Finally, sign out from your account or reboot your PC.
Once you execute the above steps, the sign-in screen will display the local account’s new name.
Conclusion
In conclusion, changing the account name on Windows 10 is a straightforward process that can be done through various methods depending on the type of account you use. This gearupwindows article provides step-by-step instructions for changing the account name using Windows 10 Settings, Control Panel, and Computer Management. Regardless of the reason for changing the account name, following these instructions will allow you to display the desired name on the Sign-in screen and other services connected to your account. It is essential to remember to reboot your computer or sign out of your account after making the changes to apply them successfully.