By default, when you create a new user account in Windows 11 or 10, it automatically generates a new user profile folder in the “C:\Users.” However, this default user profile folder name will always be based on your name. For example, if you create a new user account on your Windows 11/10 PC with “gearupwindows,” its user profile will be “C:\Users\gearupwindows.” However, Windows 11/10 uses the first five characters of your Microsoft user account name as the profile folder name.
If you don’t like the user profile folder name, you can want to change it to something else; it is possible to edit it by tweaking the registry.
In this gearupwindows article, we will guide you on changing the name of the user profile folder in Windows 11 and 10.
How to Change the User Profile Folder Name in Windows 11 or 10?
Quick Note: Windows 11/10 does not allow you to modify an existing user account profile path from the same account. So, to change your current user profile name, you need to log into a different administrator account.
Also Read: How to Change a User Account to Administrator on Windows 11/10?
To rename the User Profile Folder Name in Windows 11 or 10, use these steps:-
Step 1. Sign out from the user account that you want to change the user profile name and log in with a different administrator account.
Step 2. Next, open an administrative Command Prompt, type the following, and hit the Enter key on the keyboard to view SID (Security Identifier) for all user accounts:-
wmic useraccount get name,SID
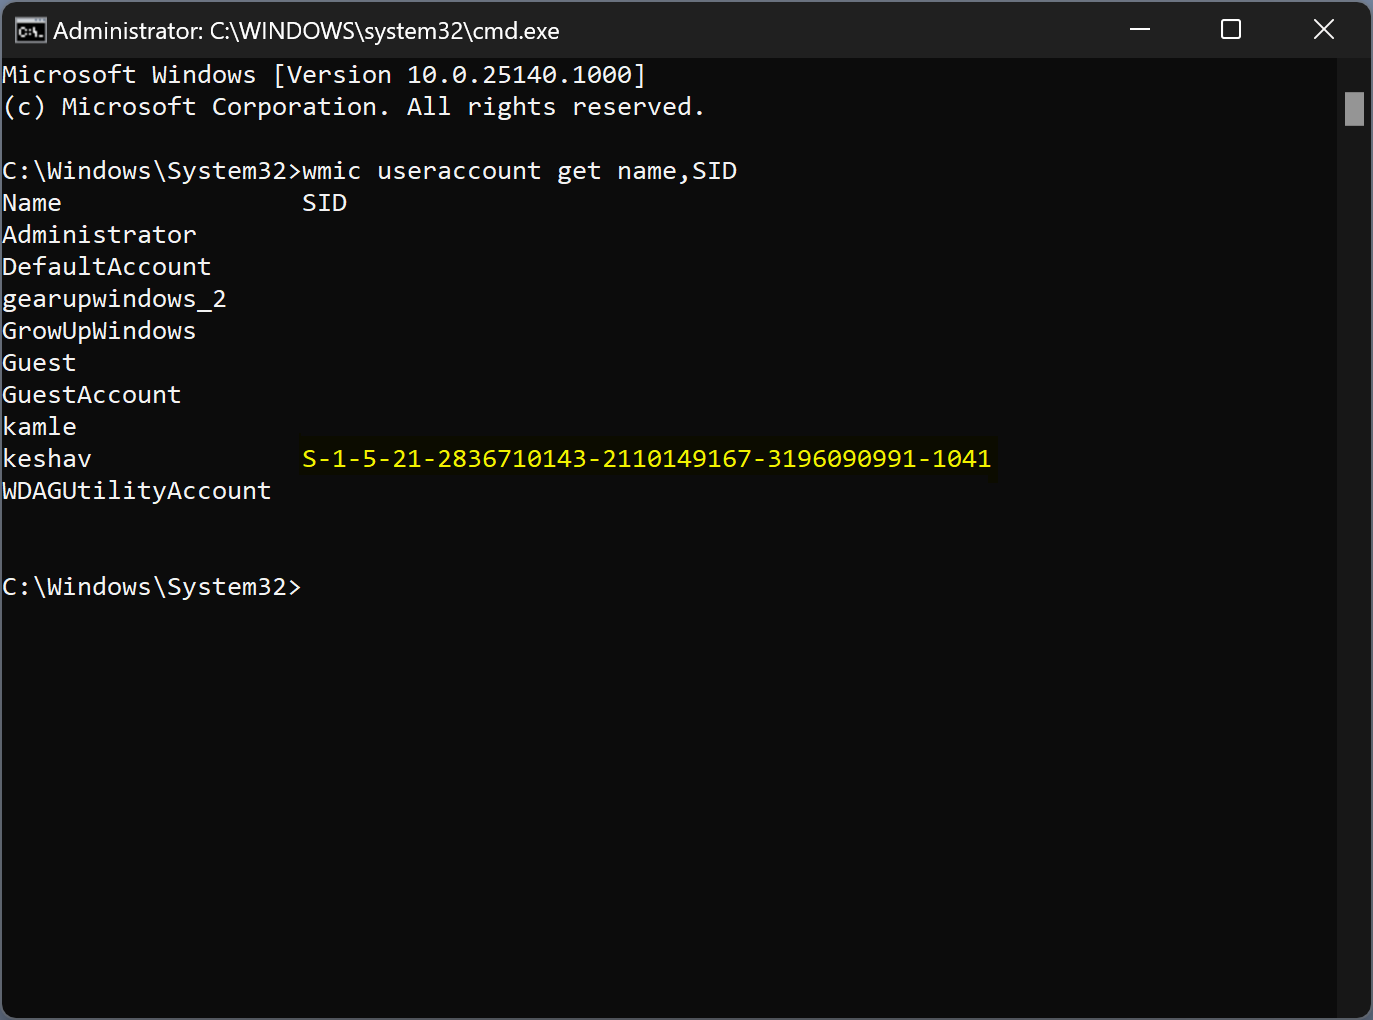
Step 3. Now, note down the SID for the user account you want to change the user profile folder name. For example, the SID for the username keshav is S-1-5-21-2836710143-2110149167-3196090991-1041.
Step 4. When you’re done, open Registry Editor.
Step 5. In the Registry Editor window, browse to the following key in the left sidebar:-
HKEY_LOCAL_MACHINE\SOFTWARE\Microsoft\Windows NT\CurrentVersion\ProfileList
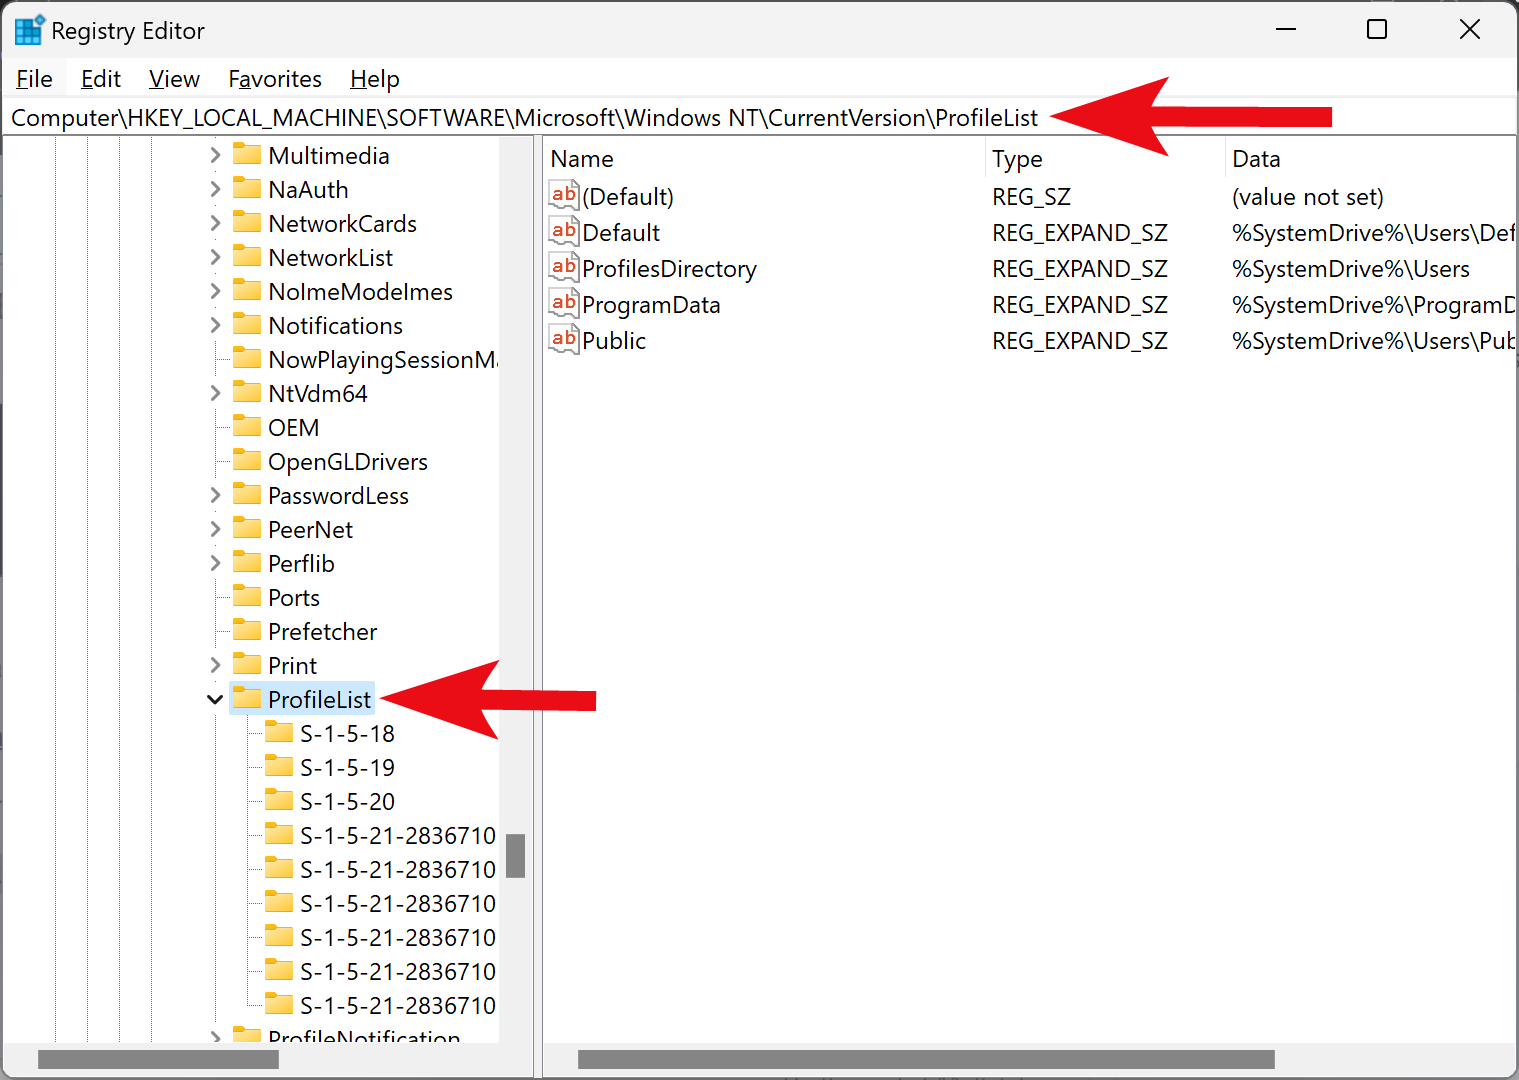
Step 6. Inside the ProfileList key, look for a folder identical to the SID you noted in Step 3 above. Select this folder by clicking on it.
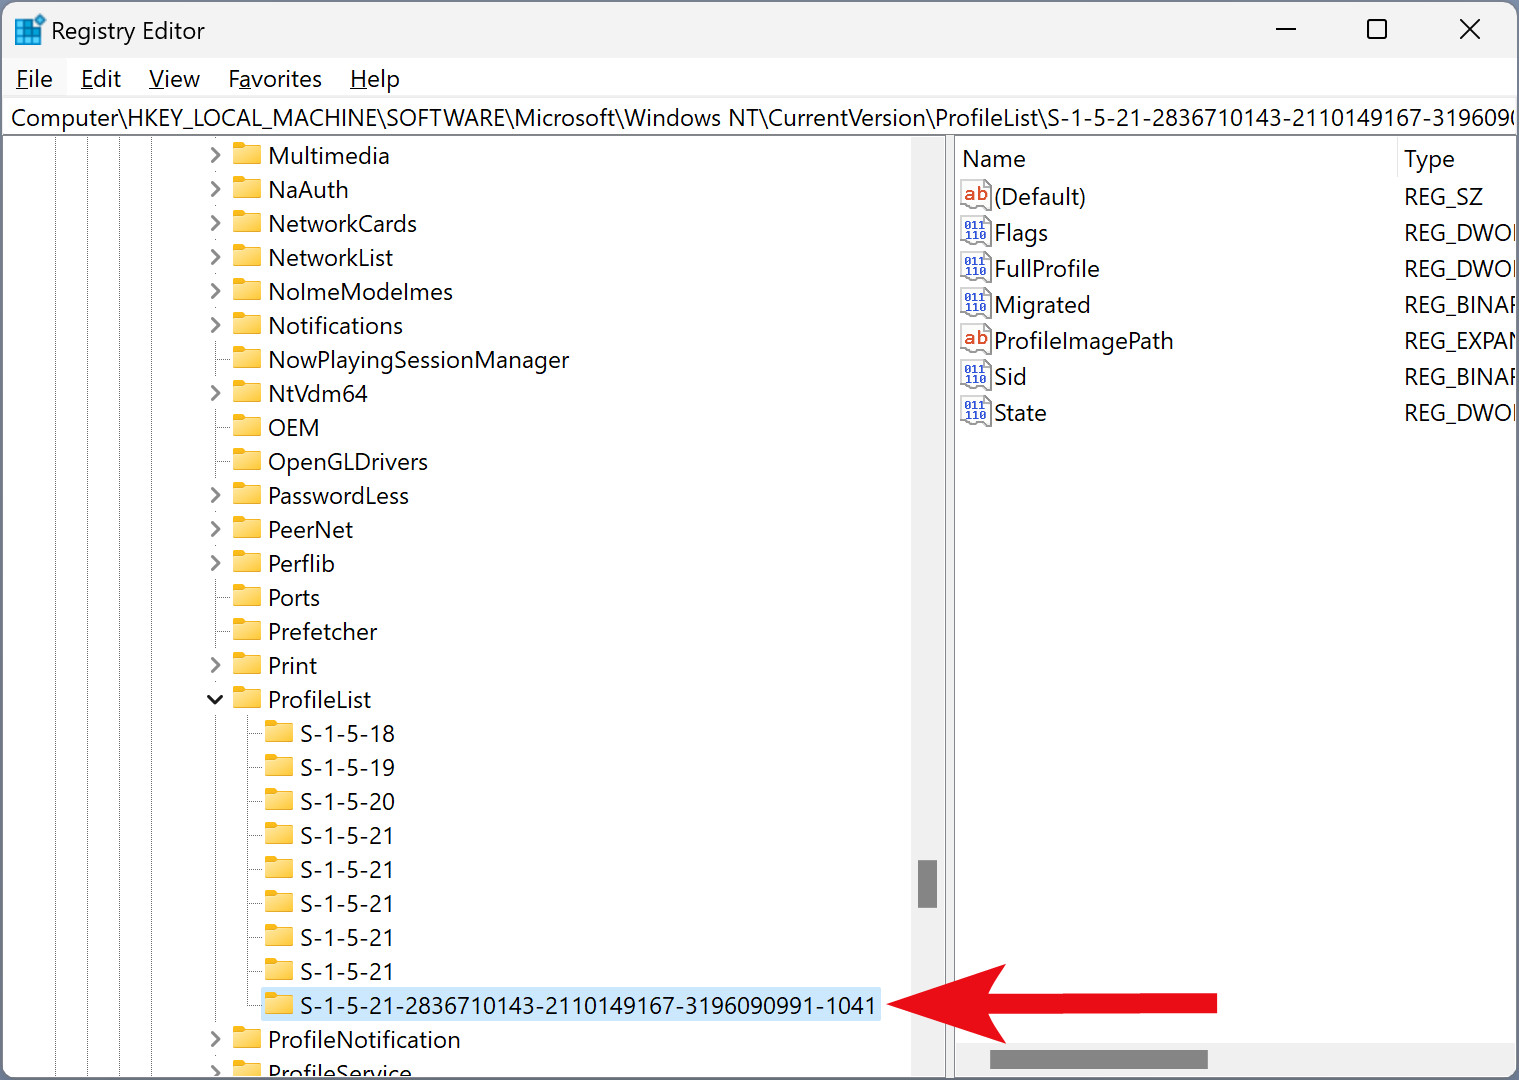
Step 7. On the right side of the SID folder, double-click on ProfileImagePath REG_EXPAND_SZ to edit it.
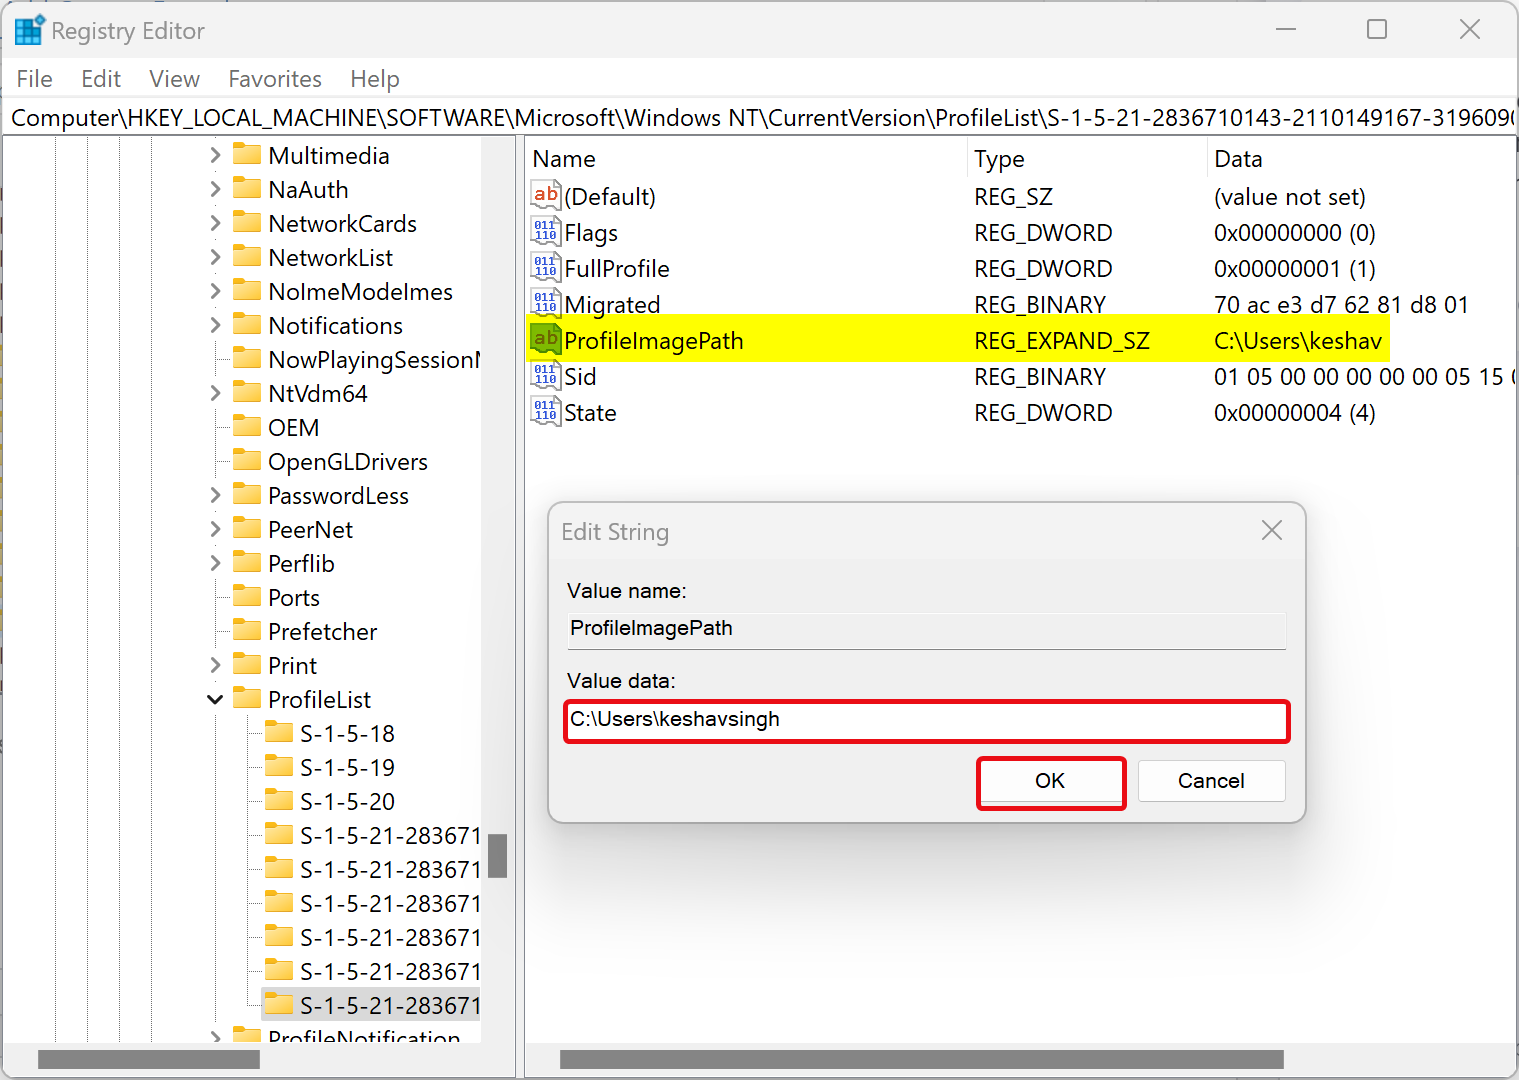
Step 8. Enter a new name in “Value data” without disturbing its path.
Step 9. Click OK.
Step 10. Now, open File Explorer (Keyboard shortcut Windows + E) and navigate to the “C:\Users” folder.
Step 11. Select the user profile name, press F2 on the keyboard, and enter the same new name you used in step 7 above.
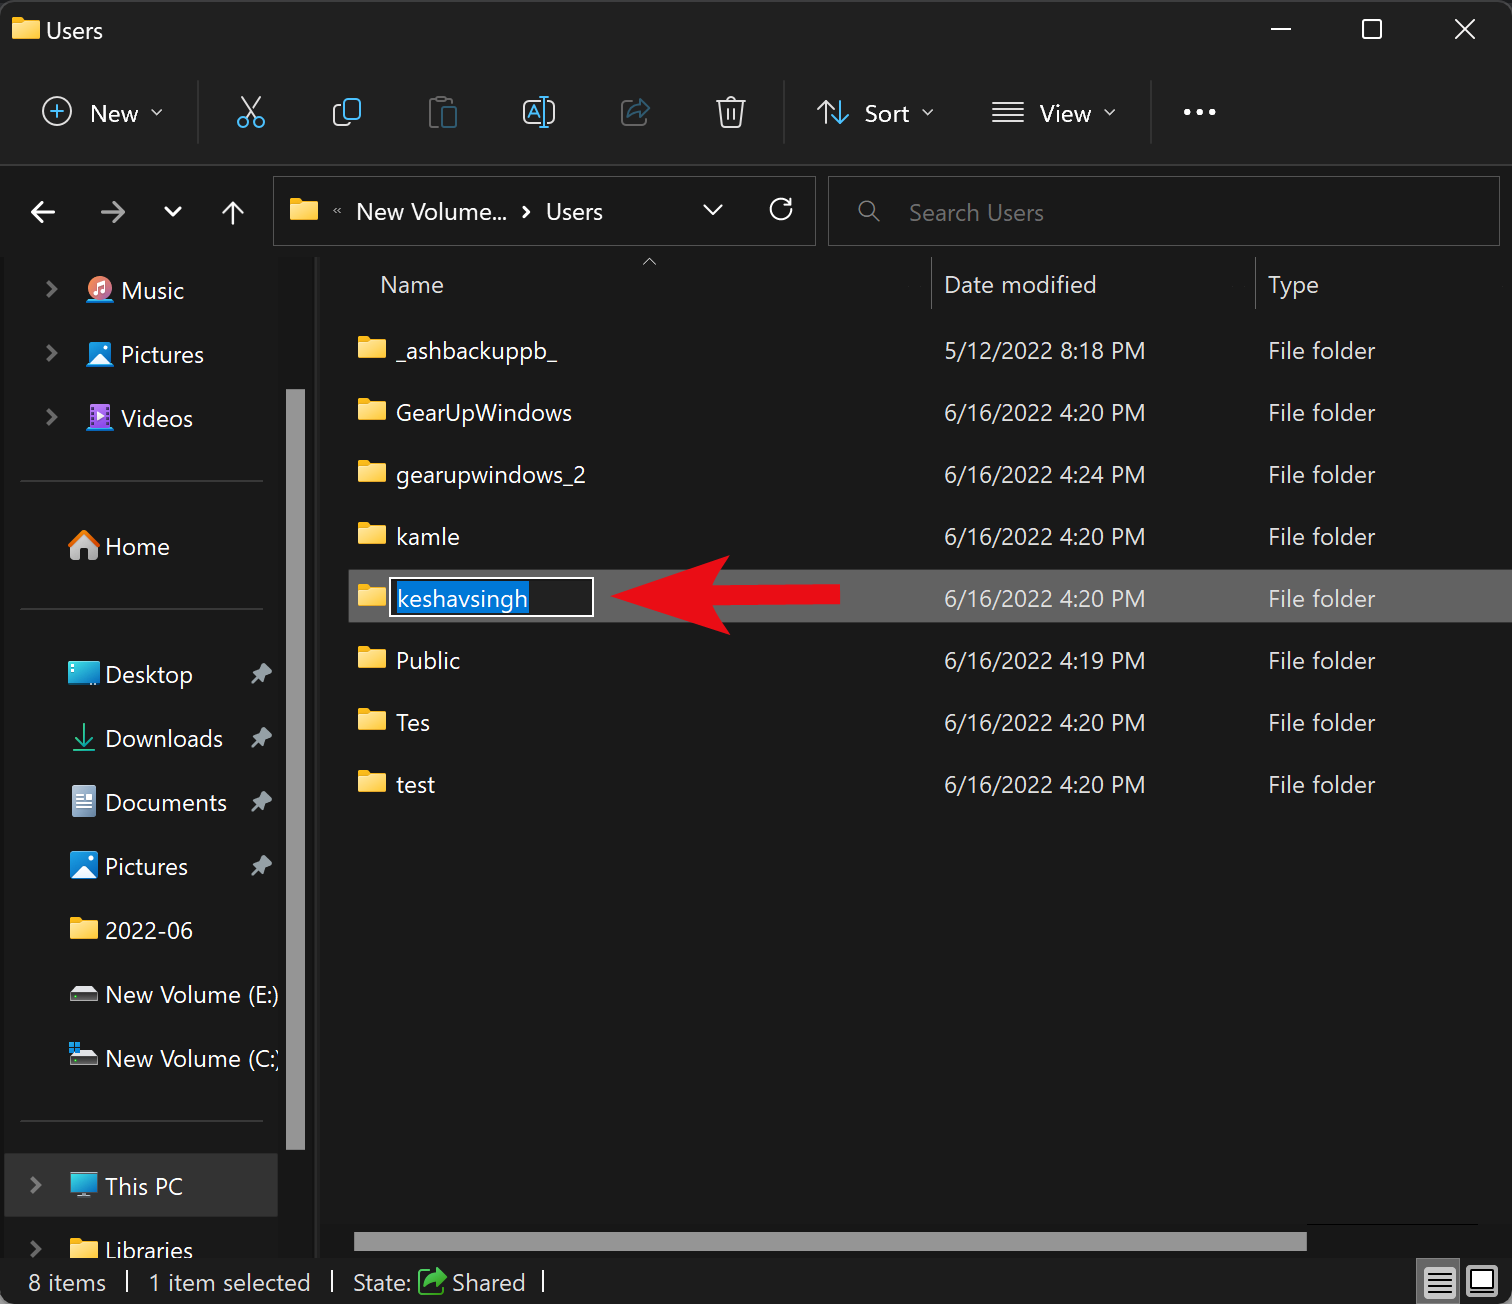
Step 12. Hit Enter on the keyboard, and click the Continue button when prompted.
Once you complete the above steps, log out from your administrator account and sign in to the user account whose profile name has been changed. Open File Explorer and navigate to the “C:\Users” folder. You will be able to use the previous profile with the new pathname.
Conclusion
In conclusion, changing the user profile folder name in Windows 11 or 10 is a simple process that involves editing the registry and renaming the folder in File Explorer. It is important to note that Windows 11/10 does not allow you to modify an existing user account profile path from the same account. Therefore, to change the user profile folder name, you need to log into a different administrator account. By following the steps outlined in this article, you can easily change the name of the user profile folder in Windows 11 or 10 to something more suitable for your needs.