Understanding the file system of a drive in your Windows 11 or 10 PC is crucial for efficient storage management and ensuring compatibility with different devices and platforms. Whether you’re troubleshooting, planning backups, or optimizing storage, knowing the file system of your drives empowers you to make informed decisions. In this gearupwindows guide, we’ll explore various user-friendly methods to check the file system of a drive, catering to both novice and experienced users alike.
What is a File System?
A file system is an underlying structure that governs how data is stored, organized, and accessed on a storage device such as a hard drive, solid-state drive, or USB flash drive. It provides the framework for the operating system to manage files and directories, enabling users to store, retrieve, and manipulate data efficiently. Common file systems used in Windows 11/10 include NTFS (New Technology File System), FAT32 (File Allocation Table 32), and exFAT (Extended File Allocation Table), each with distinct characteristics and features tailored to different needs such as file size support, encryption, compression, speed, and compatibility with various devices and platforms. Understanding the file system of a drive is essential for optimizing storage, planning backups, and ensuring data protection.
How to Check the File System of a Drive in Windows 11 or 10?
Follow one of the mentioned methods to find out the File System of a Drive in Windows 11 or 10:-
Method 1: Utilizing Disk Management
Disk Management is a built-in utility in Windows that provides a visual representation of all drives and their partitions, along with essential information like the file system.
Step 1. Right-click on the Start button or press Win+X to access the Power User menu.
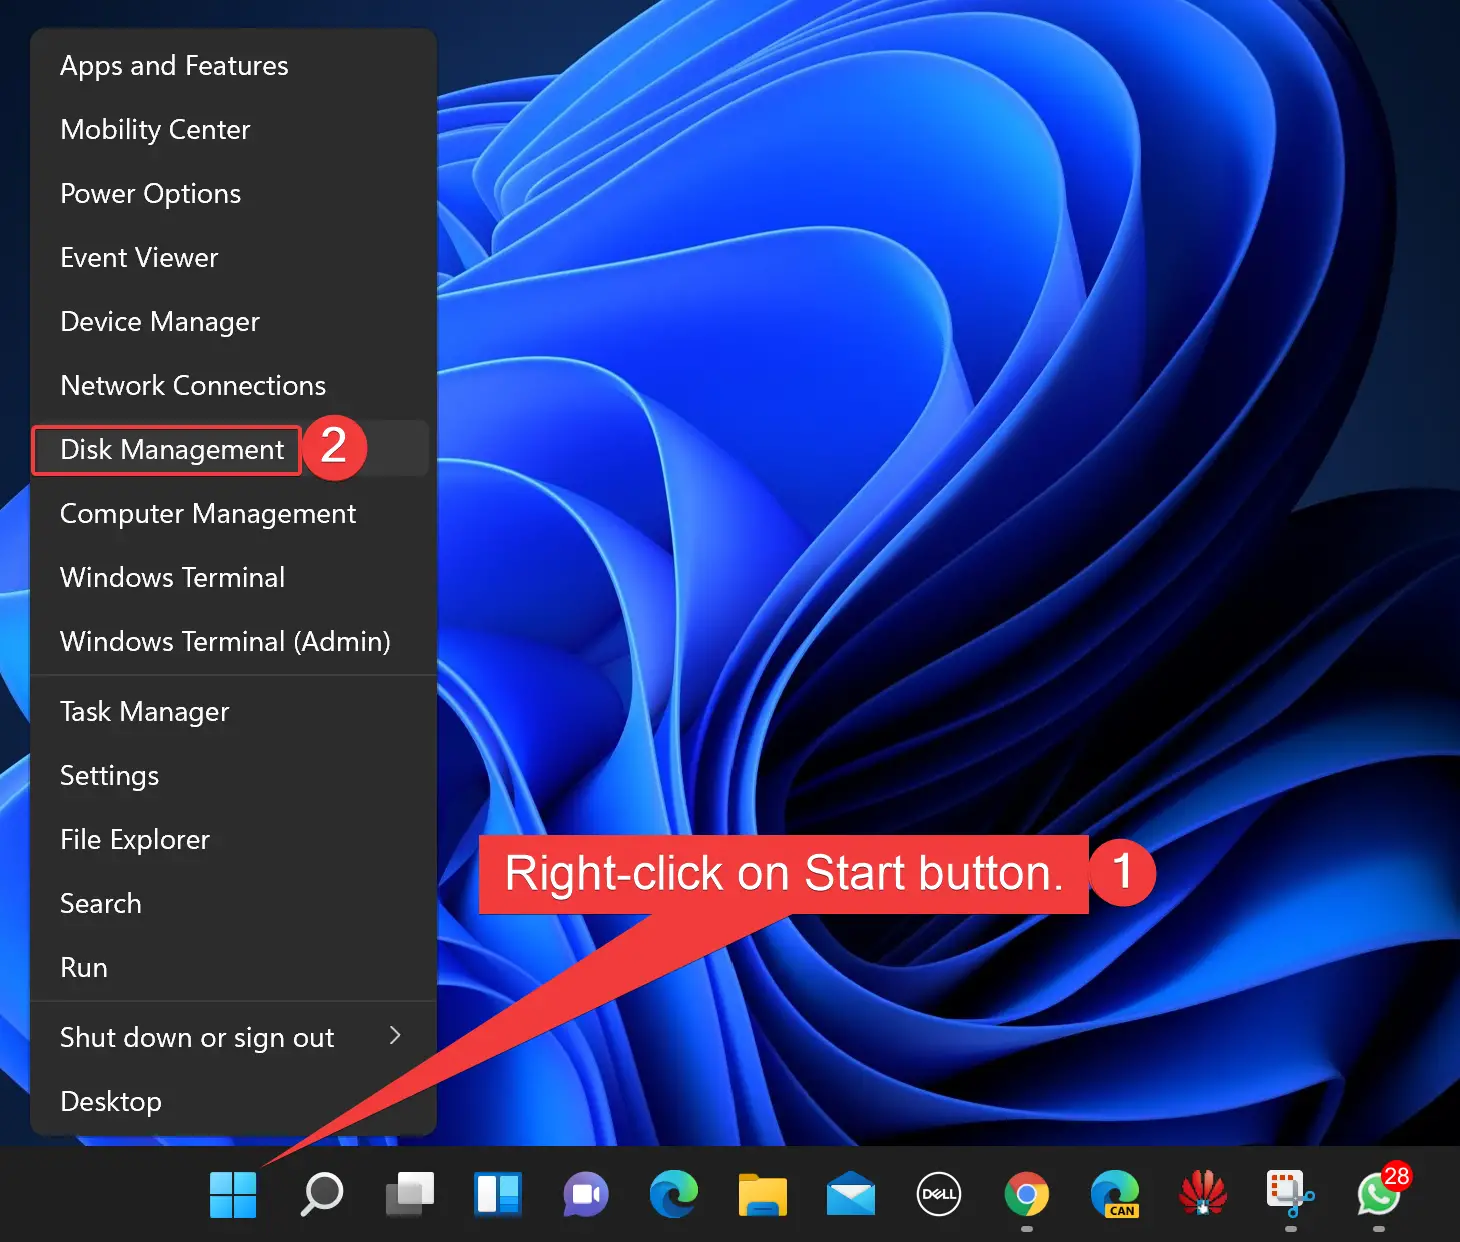
Step 2. Choose “Disk Management” from the list of options. This will open the Disk Management tool on your Windows PC.
Step 3. Once Disk Management opens, you’ll see a list of all drives and their partitions.
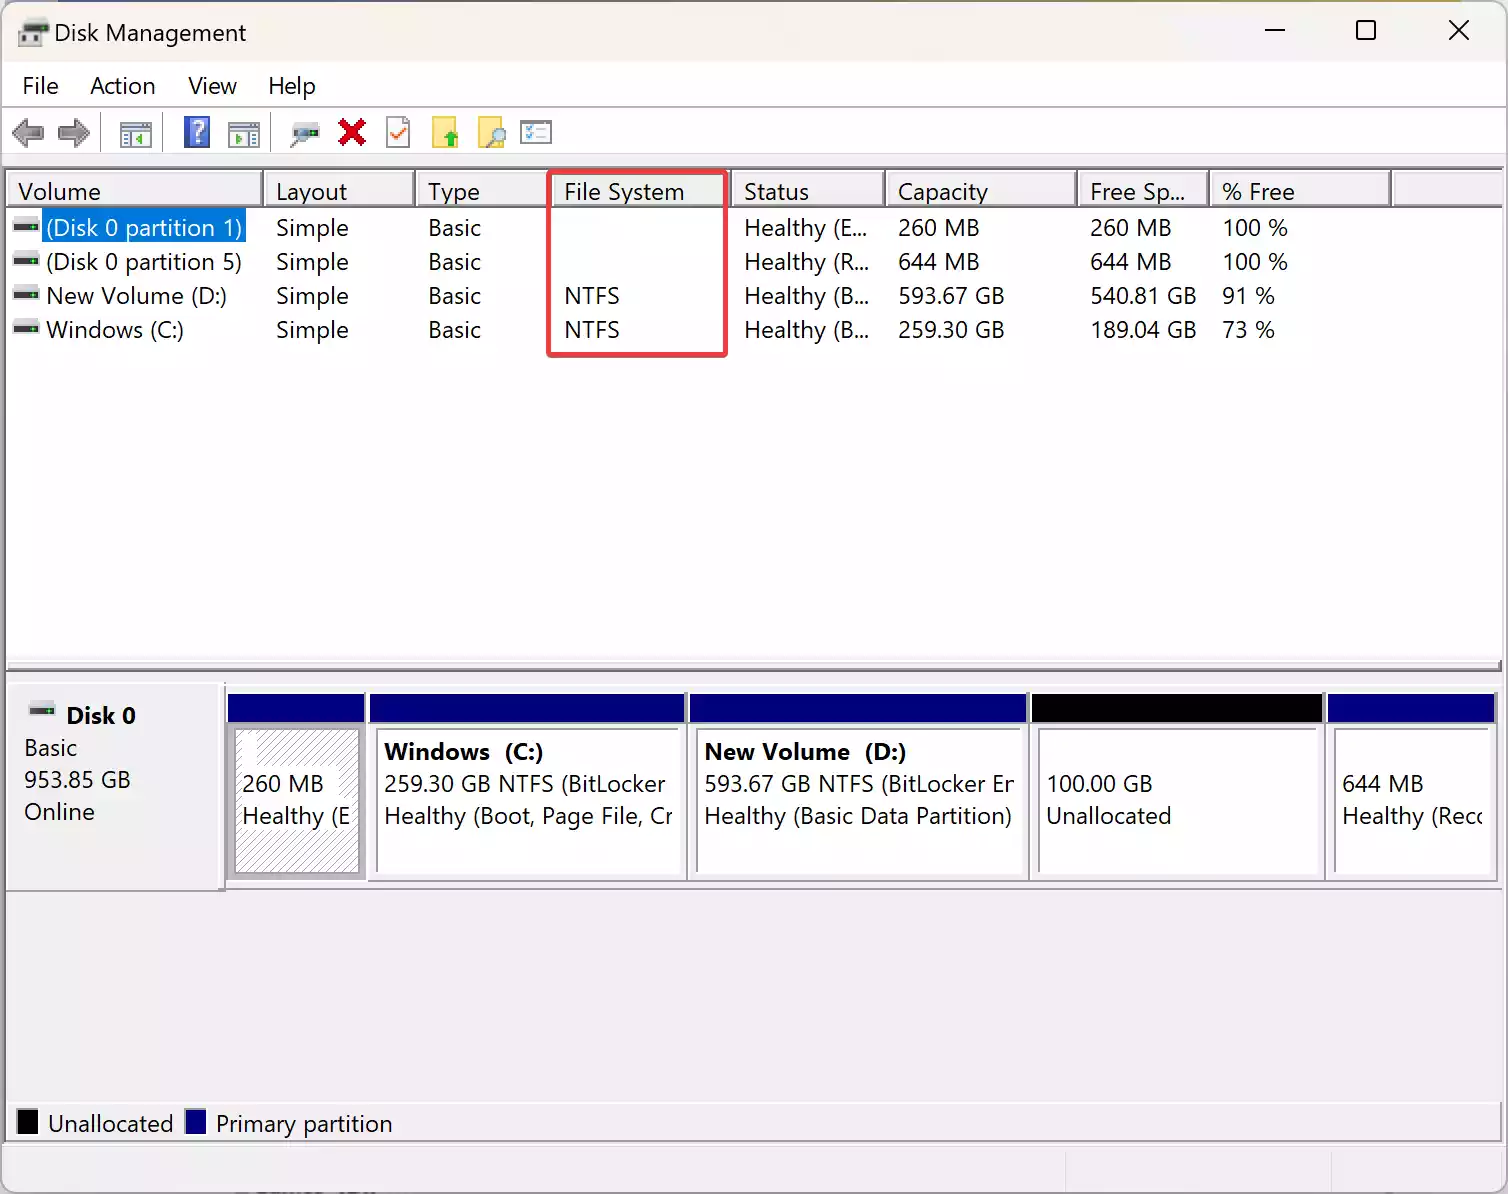
Step 4. Look for the “File System” column, which indicates the file system type for each partition.
Method 2: Using File Explorer
File Explorer offers a user-friendly interface to navigate through your drives and view their properties, including the file system type.
Step 1. Open File Explorer by clicking on the folder icon in the taskbar or pressing Windows Key+E.
Step 2. Navigate to “This PC” in the left panel to see a list of all drives and partitions.

Step 3. Right-click on the drive you want to inspect and select “Properties” from the context menu.
Step 4. In the Properties window, under the General tab, you’ll find the file system listed next to “File system.”

Method 3: Accessing Windows Settings (Windows 11 Only)
Windows Settings provides a streamlined approach to accessing information about your system’s drives, including their file systems.
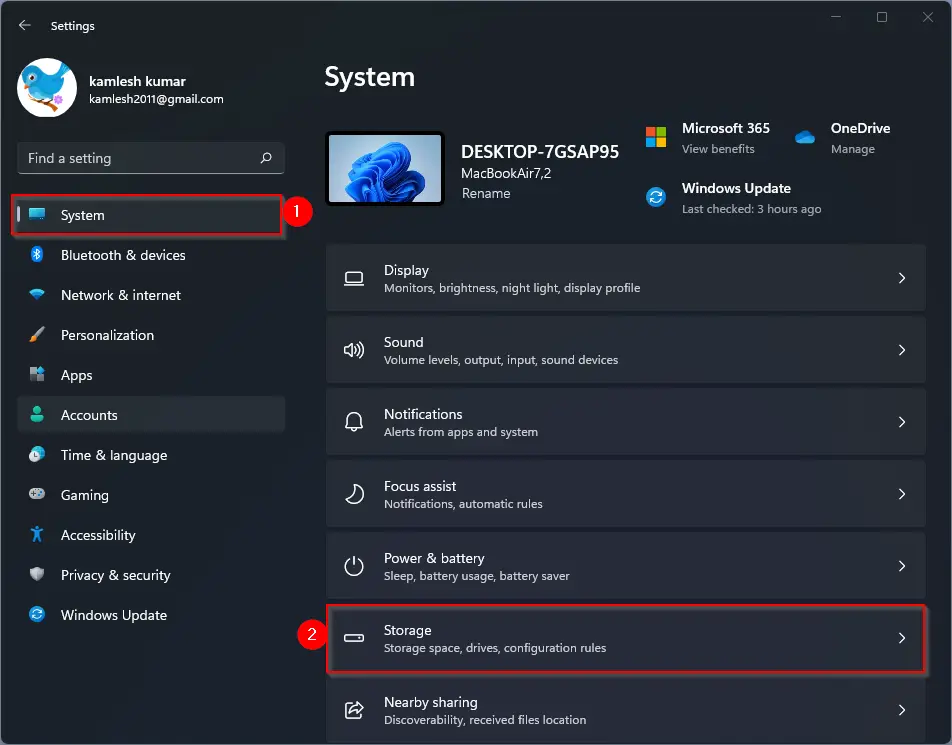
Step 1. Click on the Start button and select “Settings” (the gear icon). This will open the Settings app on your PC. Alternatively, you can use Windows key + I.
Step 2. In the Settings window, choose “System.”

Step 3. Select “Storage” from the options on the right.
Step 4. Scroll down and click on “Advanced storage settings.”
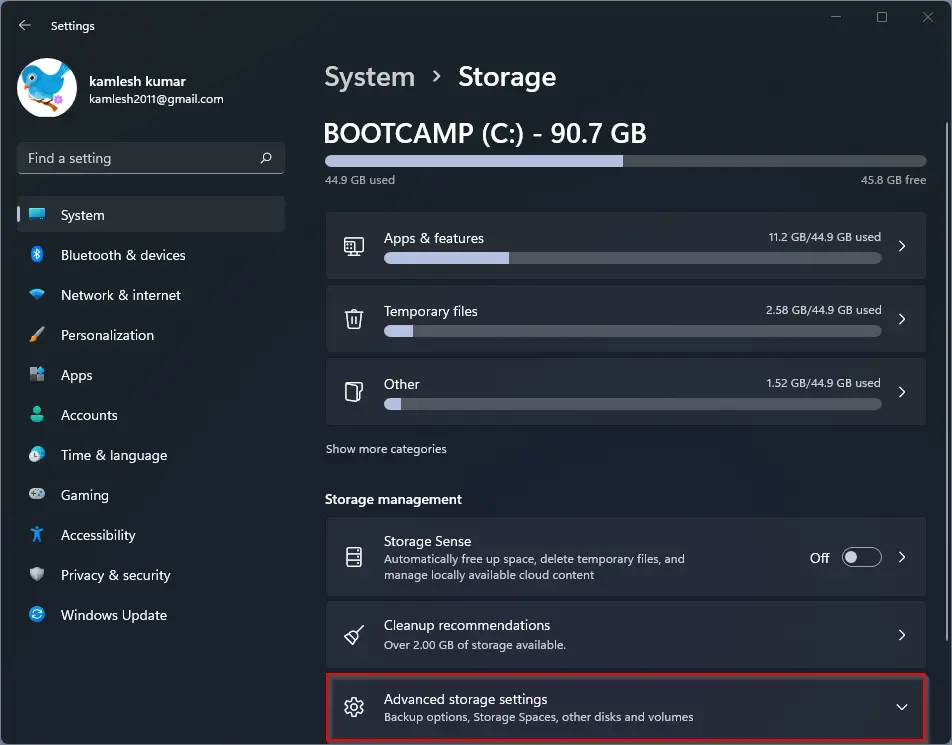
Step 5. Select “Disks & volumes.”
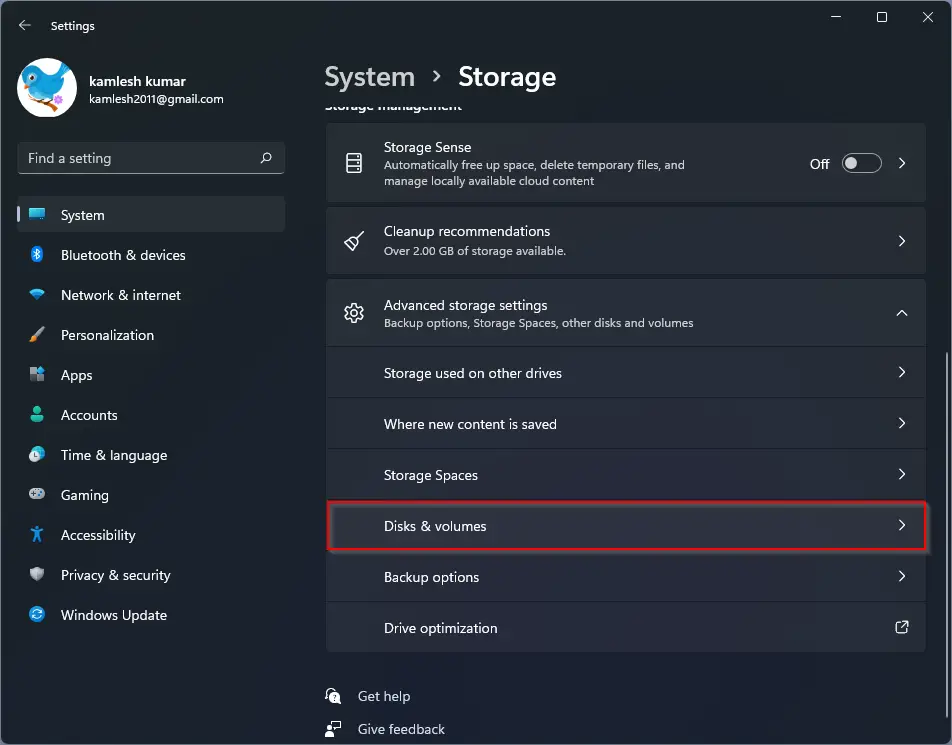
Step 6. Under “Disks & volumes,” you’ll find a list of drives and their corresponding system file types.

Method 4: Exploring System Information
System Information offers detailed insights into various hardware and software components of your system, including drive information.
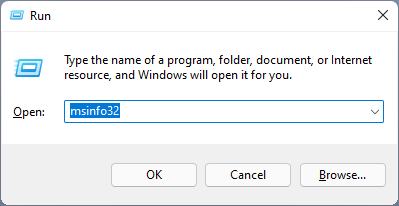
Step 1. Press Windows+R to open the Run dialog box.
Step 2. Type “msinfo32” and hit Enter. This will open the “System Information” window. You can also open the “System Information” window by searching in the Start menu.
Step 3. In the System Information window, navigate to “Components” > “Storage” > “Drives.”

Step 4. The right panel will display detailed information about your drives, including the file system type.
Method 5: Using Command Prompt
Command Prompt provides a command-line interface for advanced users to check the file system of drives using DiskPart.
Step 1. Press Win+R to open the Run dialog box.
Step 2. Type “cmd” and press Ctrl+Shift+Enter to open Command Prompt as administrator.
Step 3. Click “Yes” in the User Account Control (UAC) prompt.
Step 4. In Command Prompt, type “diskpart” and press Enter.

Step 5. Then, enter “list volume” and press Enter to see a list of volumes and their file systems.
Method 6: Leveraging PowerShell
PowerShell offers a scripting environment for system administrators and power users to retrieve drive information, including file systems.
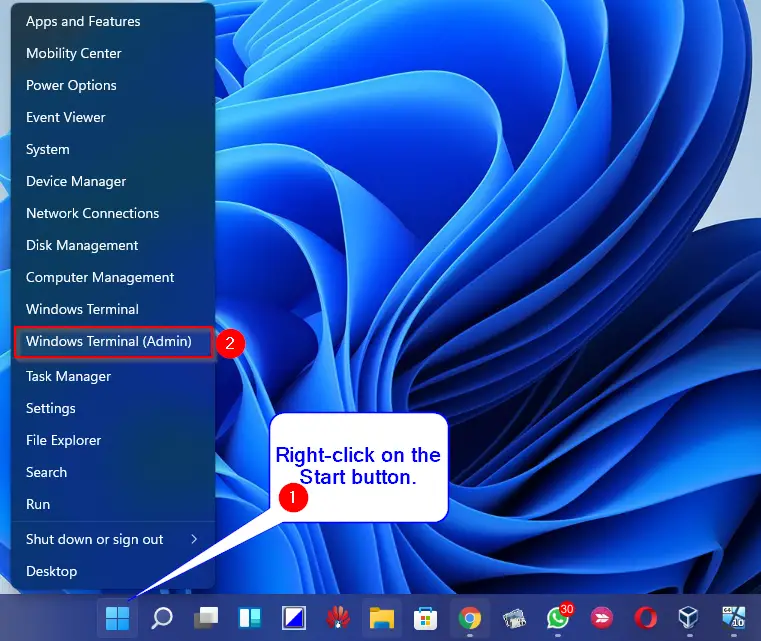
Step 1. Right-click on the Start button and select “Terminal (Admin).”
Step 2. Click “Yes” in the UAC prompt to open PowerShell with administrative privileges.

Step 3. Enter the command “Get-Volume” and press Enter to display drive information, including file systems.
Conclusion
By following these user-friendly methods, you can easily check the file system of drives in your Windows 11 or 10 PC. Whether you prefer graphical interfaces or command-line tools, there’s a method suitable for every user. Understanding the file system of your drives empowers you to manage your storage effectively and make informed decisions regarding backups, data protection, and overall system performance.
