In the intricate web of internet connectivity, the Domain Name System (DNS) serves as a crucial component, translating human-readable domain names into machine-readable IP addresses. Windows 11, the latest iteration of Microsoft’s operating system, offers users the flexibility to customize their DNS server addresses, empowering them to optimize internet performance, enhance privacy, and bolster security. In this gearupwindows guide, we will explore various methods to change DNS server addresses on Windows 11, along with best practices and considerations for selecting optimal DNS providers.
Understanding DNS and Its Importance
Before delving into the intricacies of changing DNS server addresses on Windows 11, it’s essential to grasp the fundamental role of DNS in facilitating internet communication. DNS acts as a directory that translates domain names (e.g., example.com) into corresponding IP addresses (e.g., 192.0.2.1), enabling devices to locate and connect to web resources seamlessly. By default, Windows 11 configures DNS settings automatically, often relying on the DNS servers provided by Internet Service Providers (ISPs). However, users may seek alternative DNS servers for various reasons, such as faster performance, enhanced privacy protections, or improved reliability.
Best DNS Servers for Windows 11
Before proceeding with changing DNS server addresses, it’s prudent to consider reputable DNS providers known for their performance, privacy features, and reliability. Some notable options include:-
1. Cloudflare DNS:
– Primary Server Address: 1.1.1.1
– Secondary Server Address: 1.0.0.1
2. Google Public DNS:
– Primary Server Address: 8.8.8.8
– Secondary Server Address: 8.8.4.4
3. OpenDNS by Cisco:
– Primary Server Address: 208.67.222.222
– Secondary Server Address: 208.67.220.220
Each of these DNS providers offers distinct advantages, such as faster response times, robust security features, and optional DNS encryption protocols like DNS over HTTPS (DoH) or DNS over TLS (DoT).
How to Change DNS Server Address on Windows 11?
Windows 11 provides users with multiple avenues to modify DNS server addresses, catering to diverse preferences and technical proficiencies. Here are the primary methods:-
Method 1. Using the Settings App
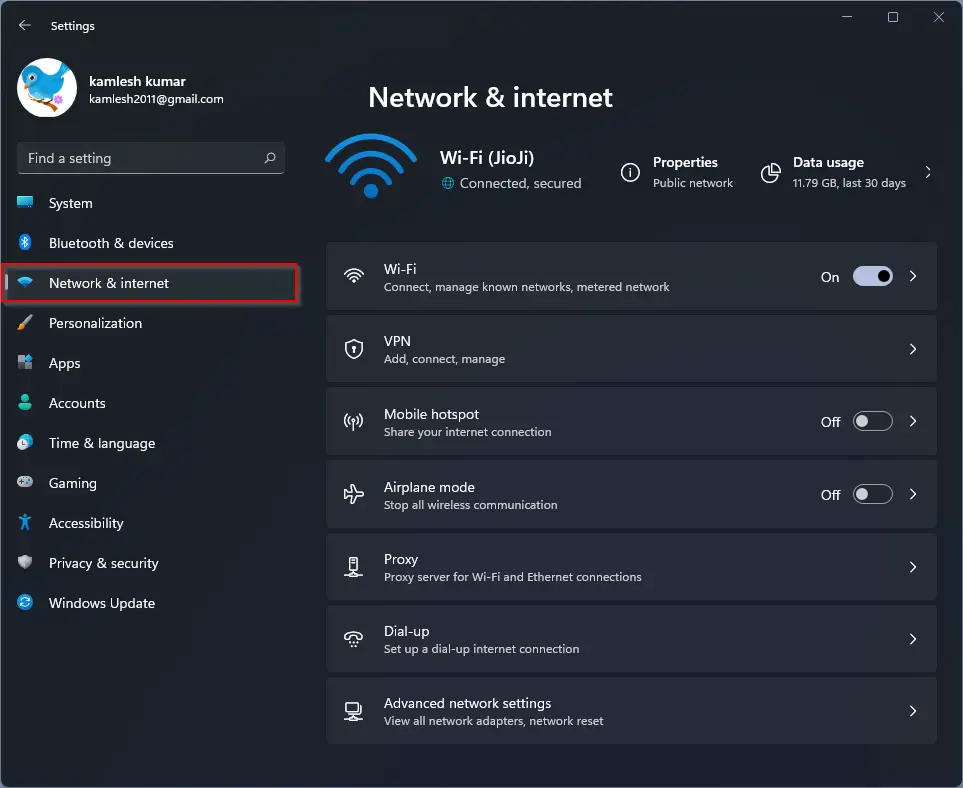
Step 1. Open Windows 11 Settings by searching in the Start menu or using Windows Key + I.
Select 2. Select Network & internet in the left sidebar.
Step 3. On the right sidebar, choose Ethernet or Wi-Fi connection.
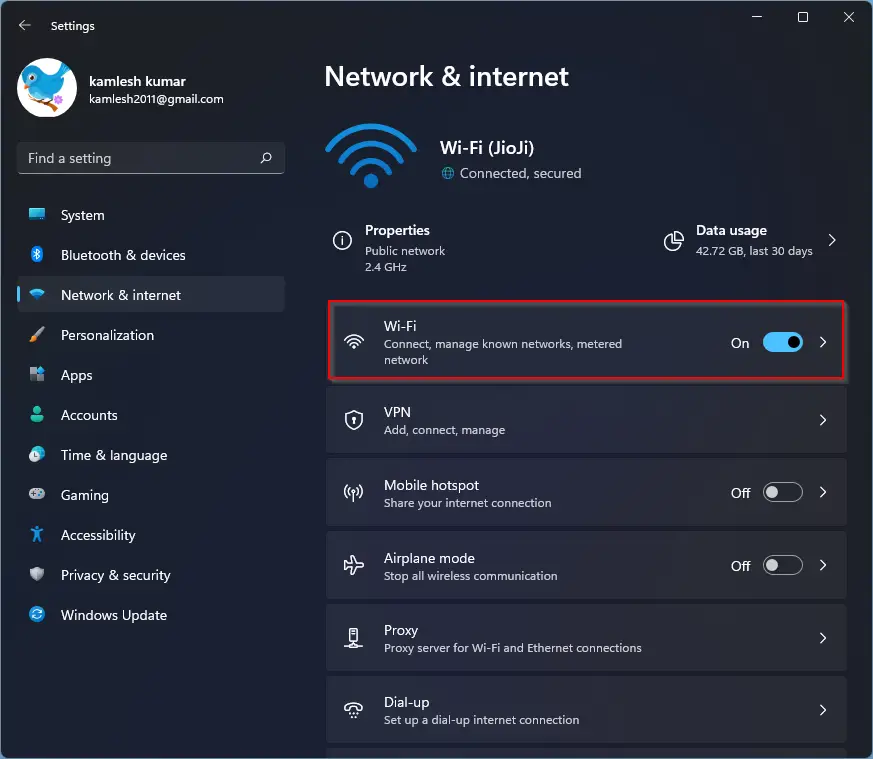
Step 4. Only for Wi-Fi: Click on the properties tile of the connected Wi-Fi.
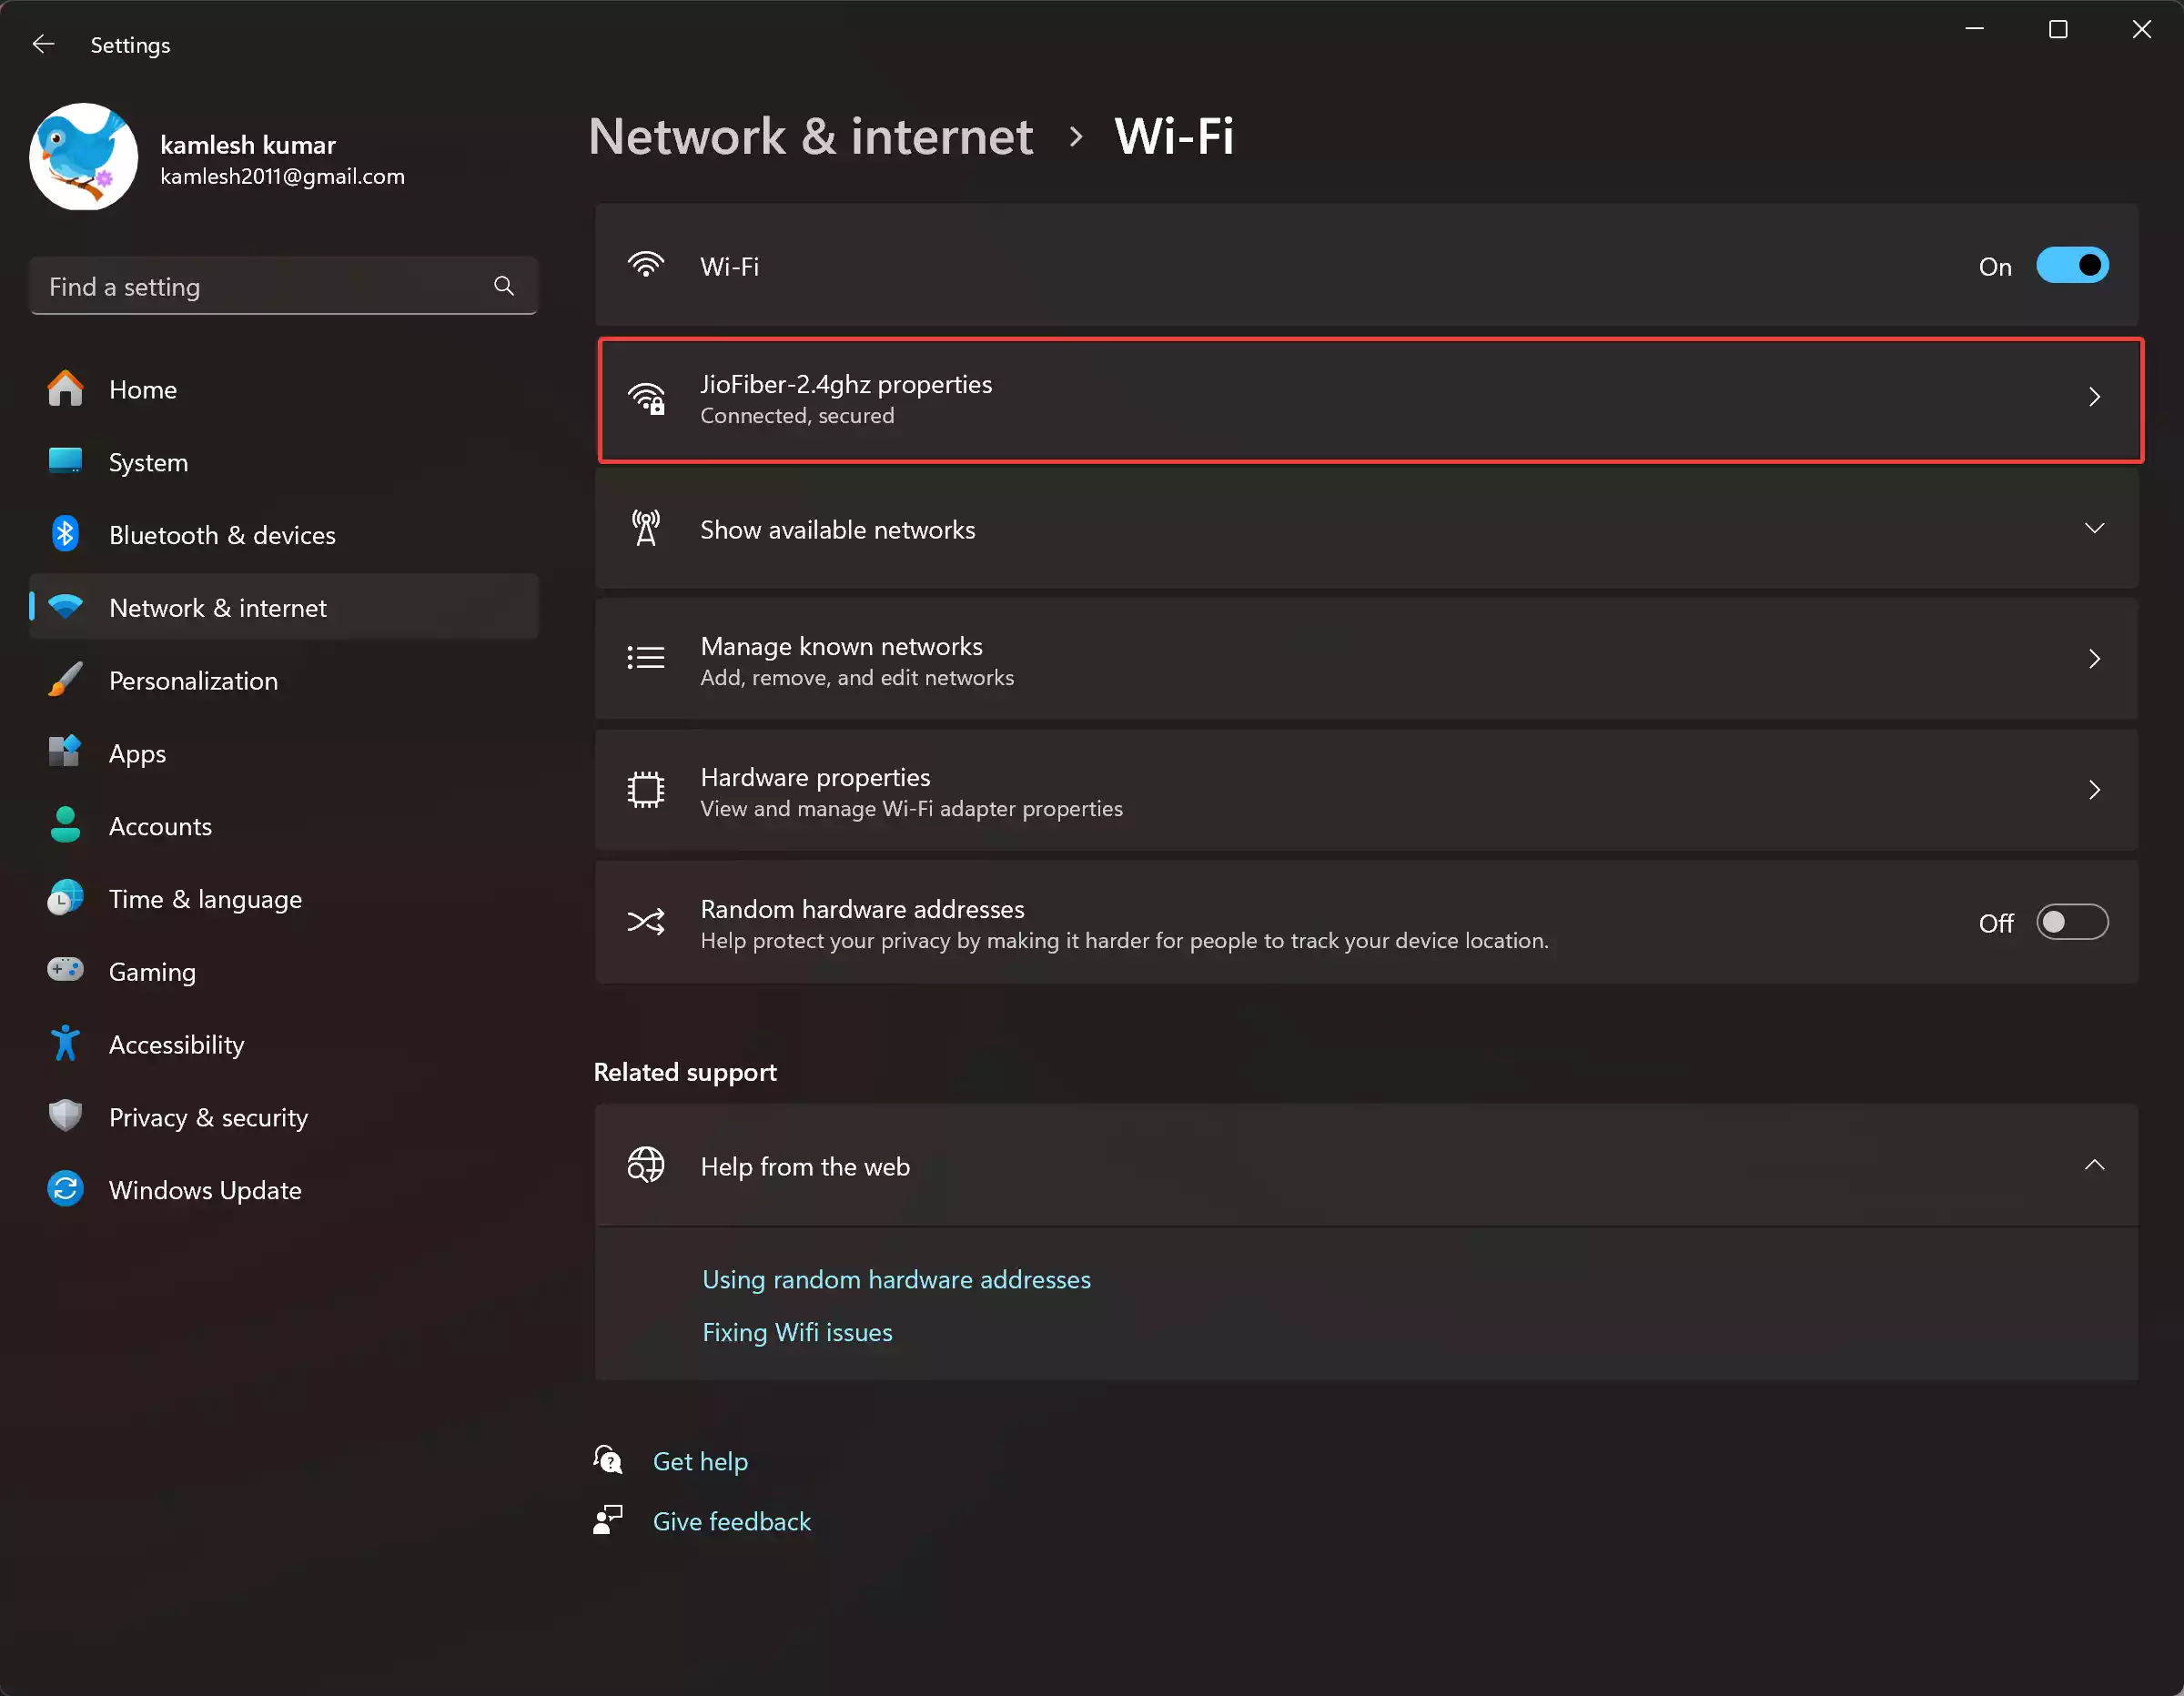
Step 5. Click on the Edit button beside “DNS server assignment.”
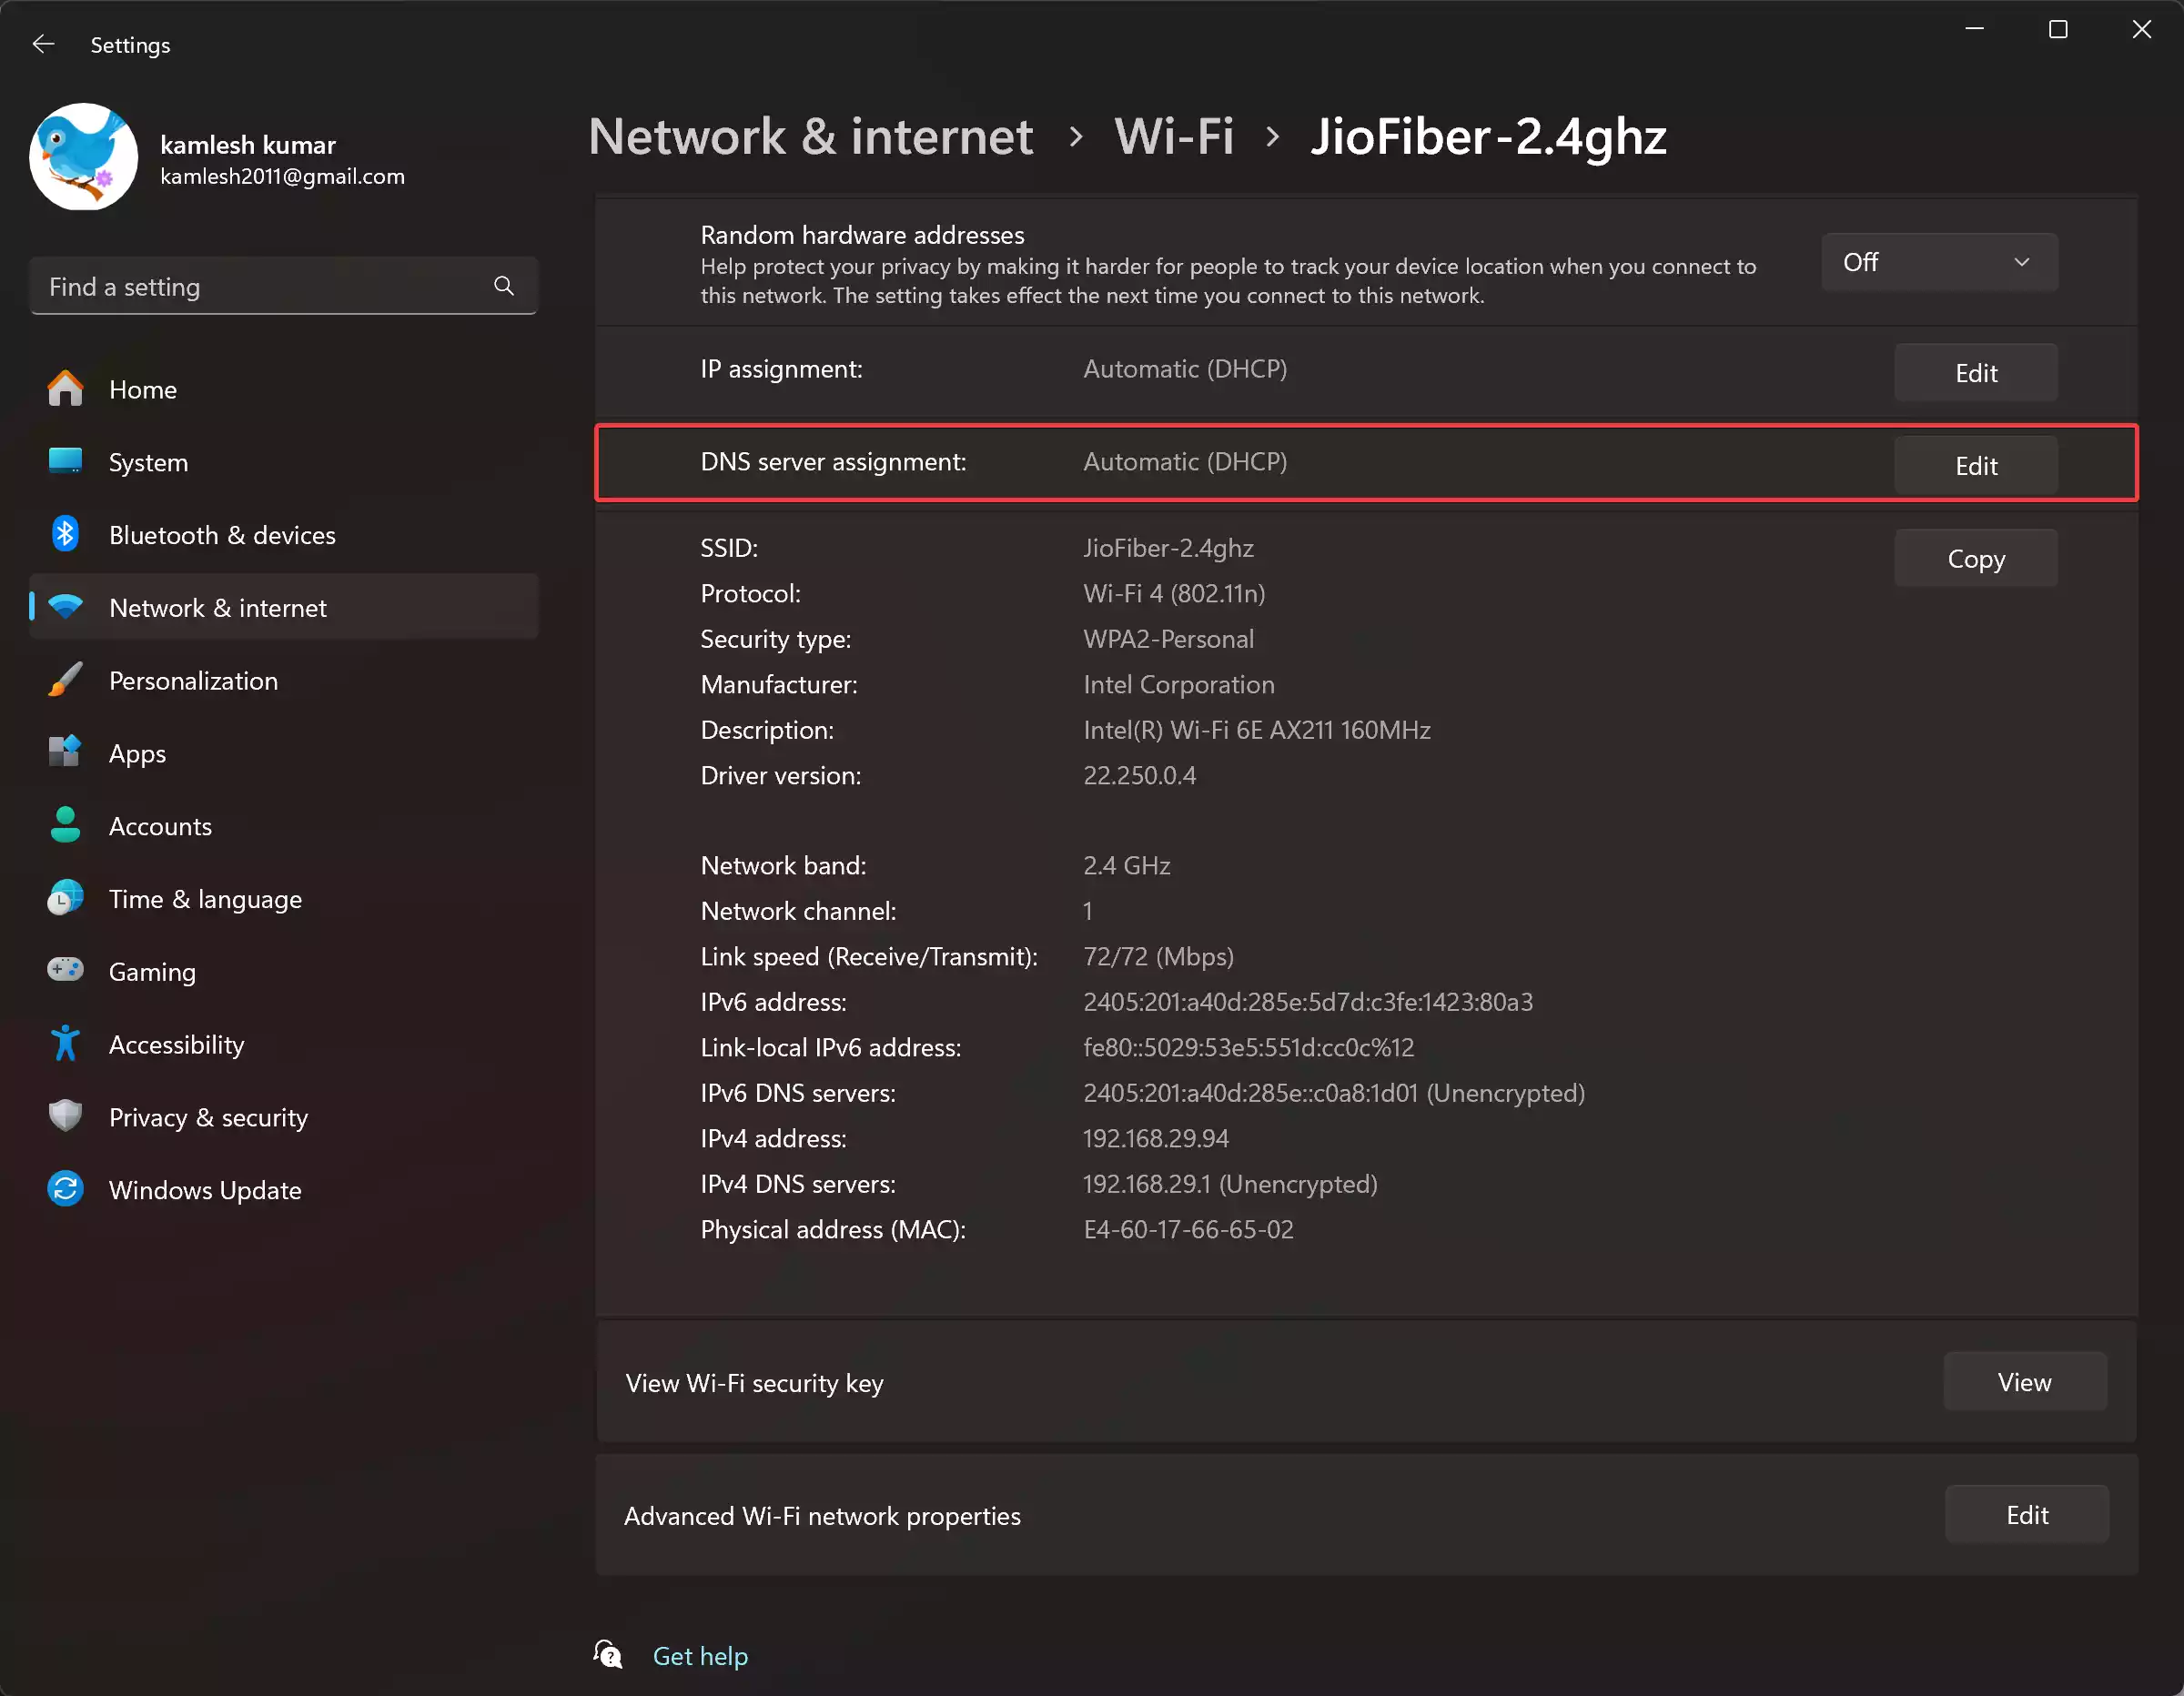
Step 6. Choose Manual from the drop-down menu of the “Edit network DNS settings” pop-up window.

Step 7. Turn on the “IPv4” toggle switch.

Step 8. Specify preferred and alternate DNS server addresses.
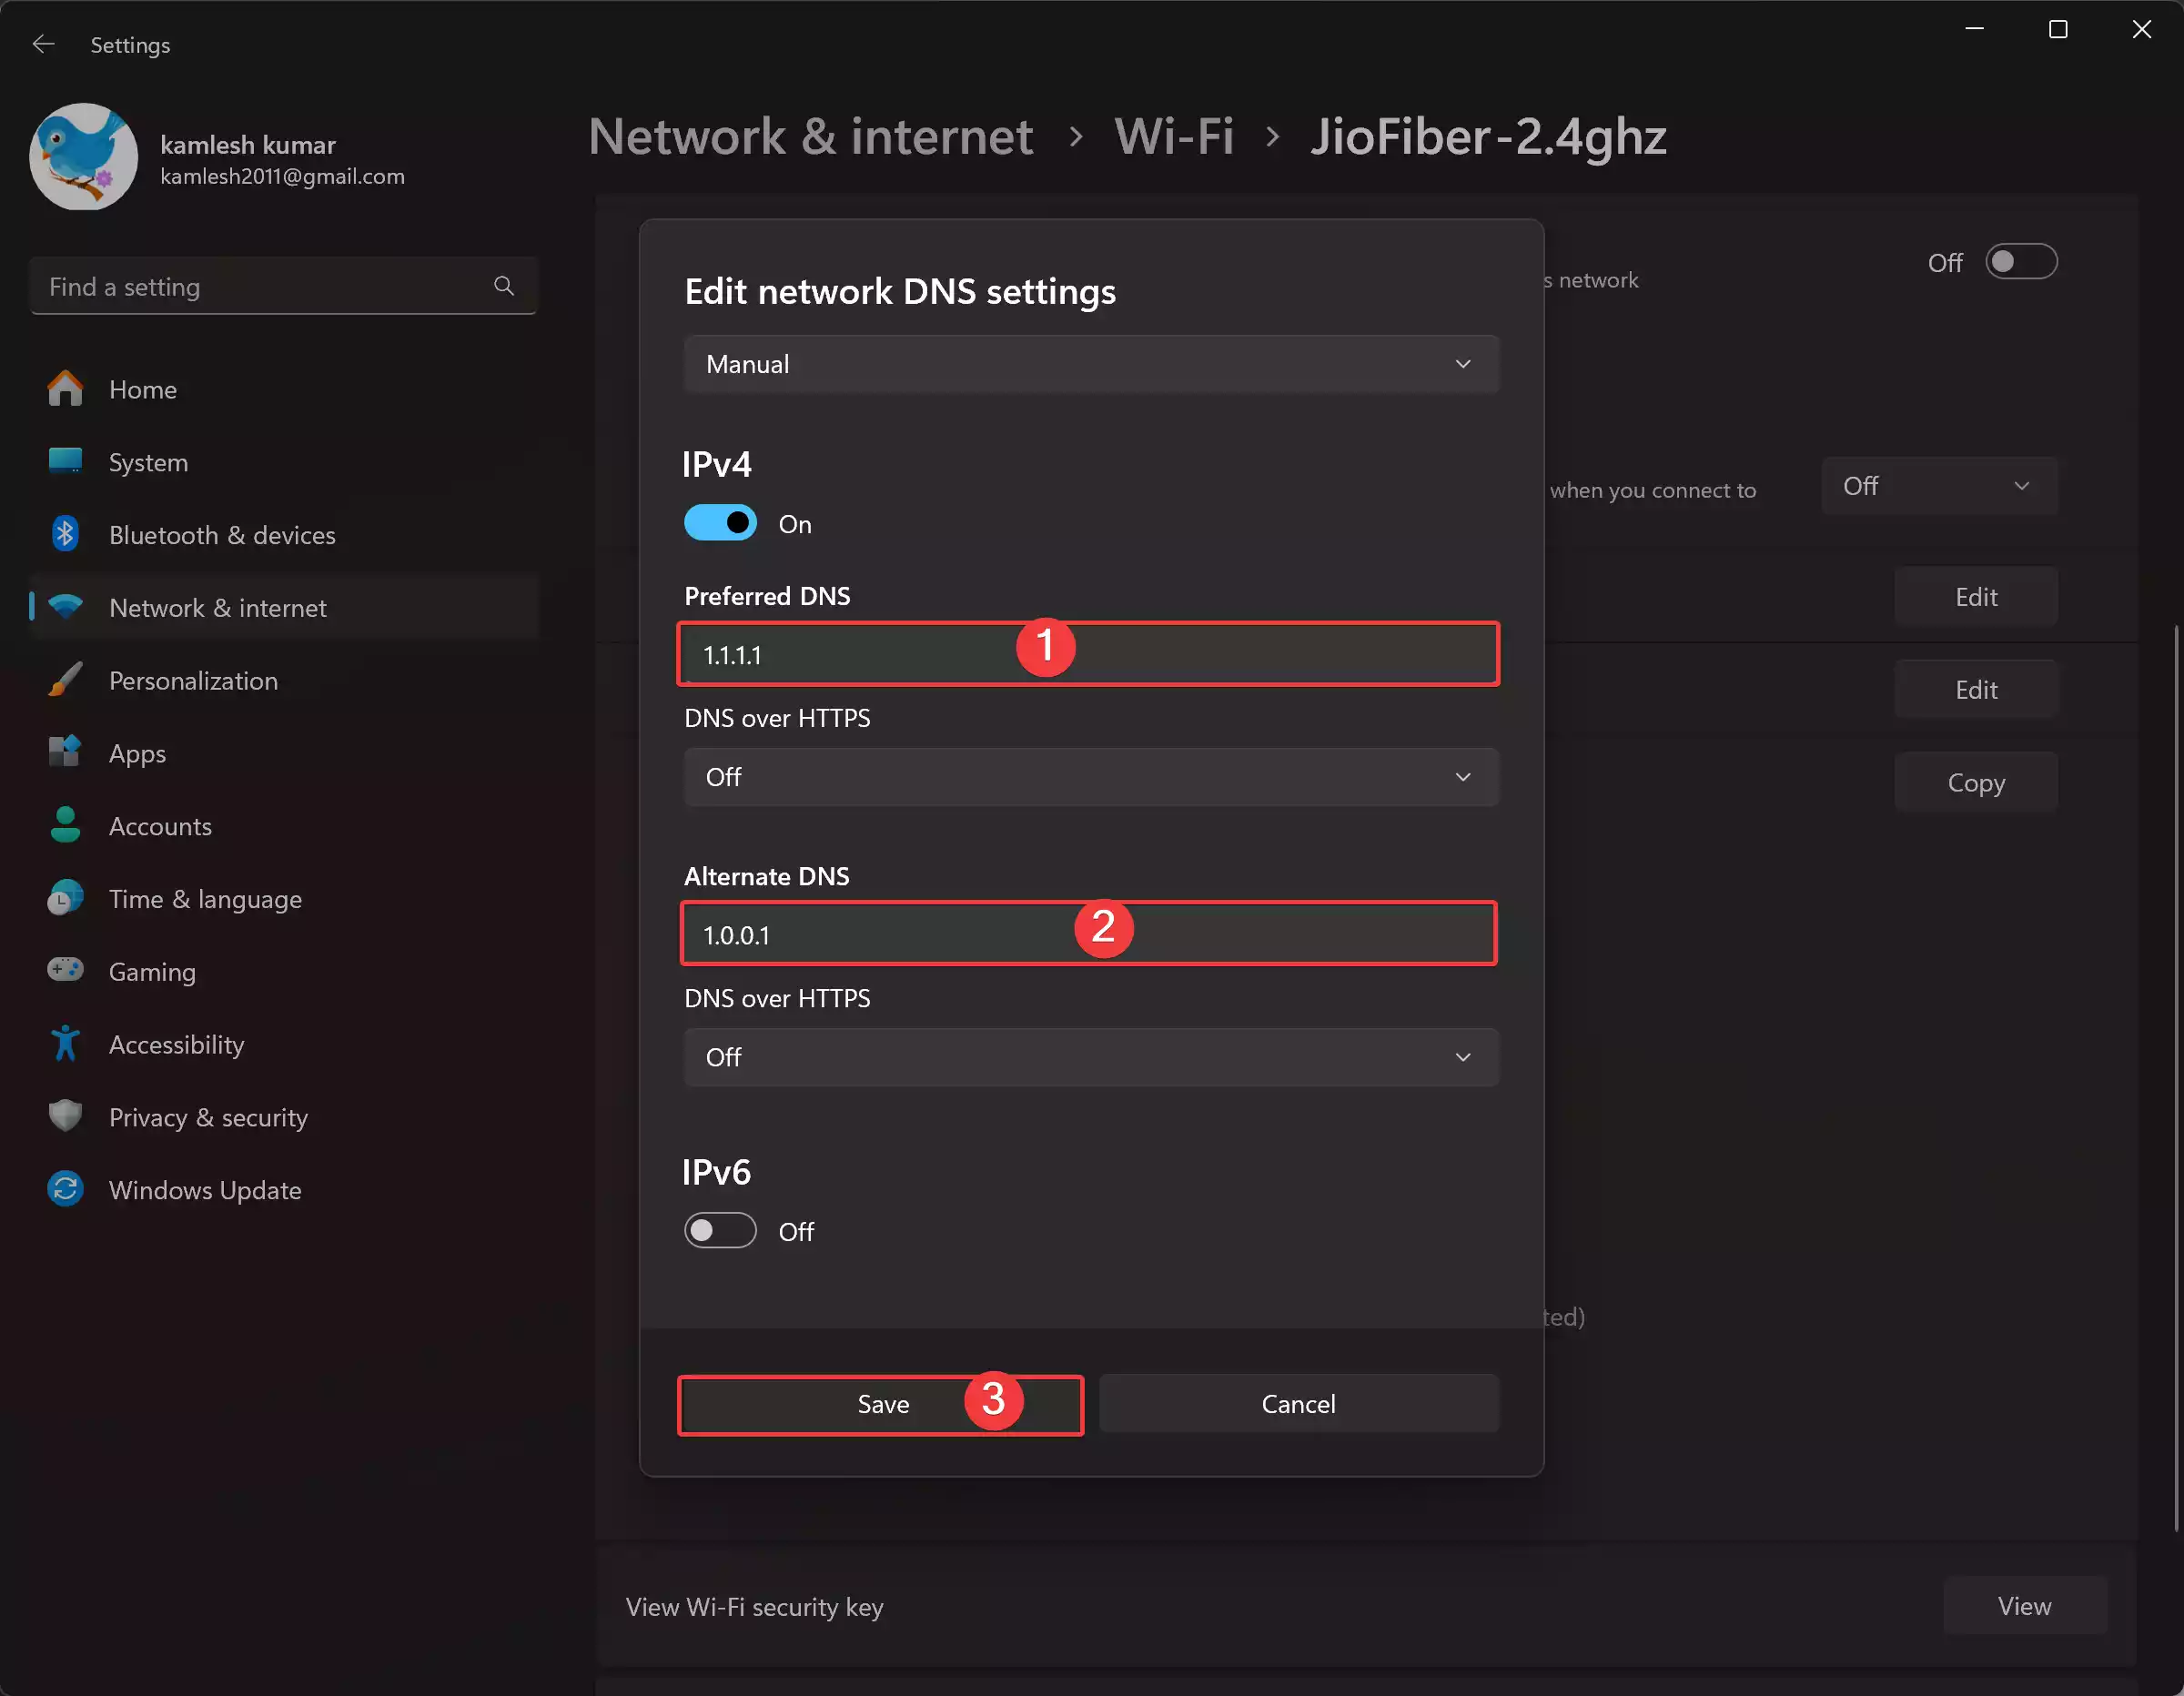
Step 9. Optionally enable DNS encryption features like DoH and configure fallback options. Save the changes to apply the new DNS settings.
Method 2. Through Command Prompt
Step 1. Open Command Prompt as an administrator.
Step 2. Enter the following command and press Enter to view the current networking configuration:-
ipconfig /all
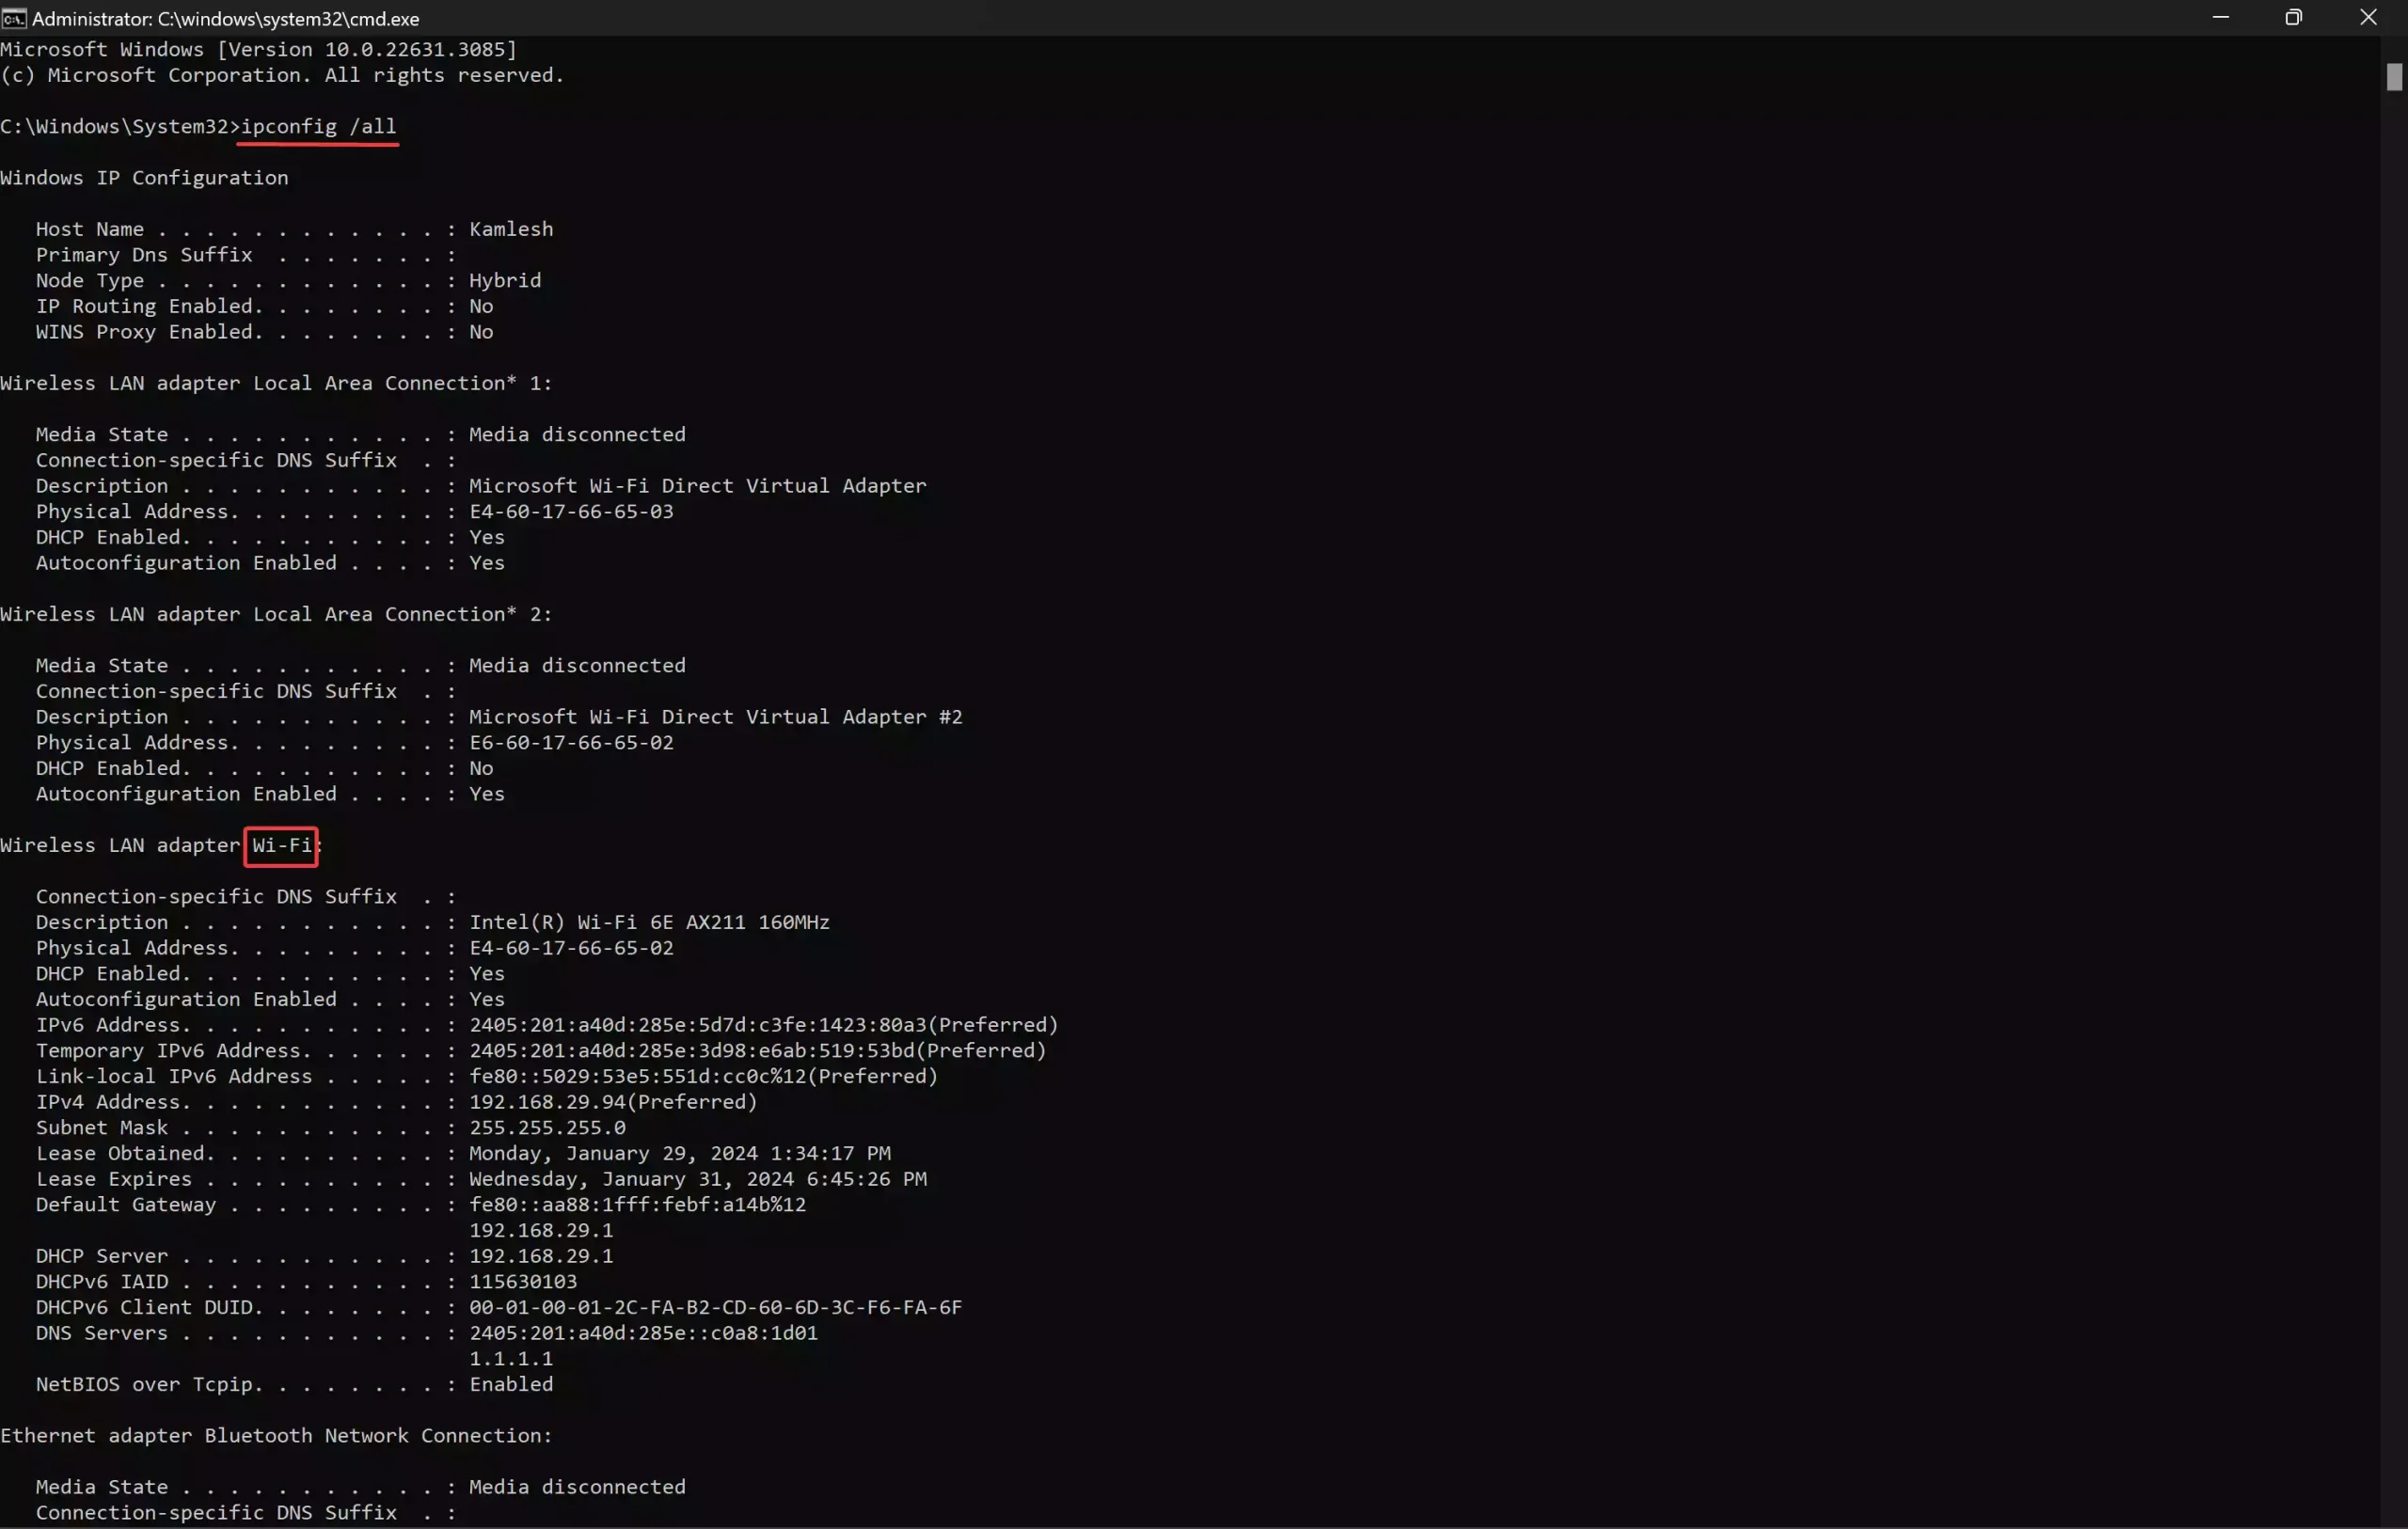
Step 3. Note down the Wi-Fi or Ethernet adapter name.
Step 4. Use the following command to set the new DNS server address and press Enter:-
netsh interface ip set dns name="Wi-Fi" static 1.1.1.1
Note: In the above command replace “Wi-Fi” with the actual adapter name and 1.1.1.1 with your preferred DNS address.
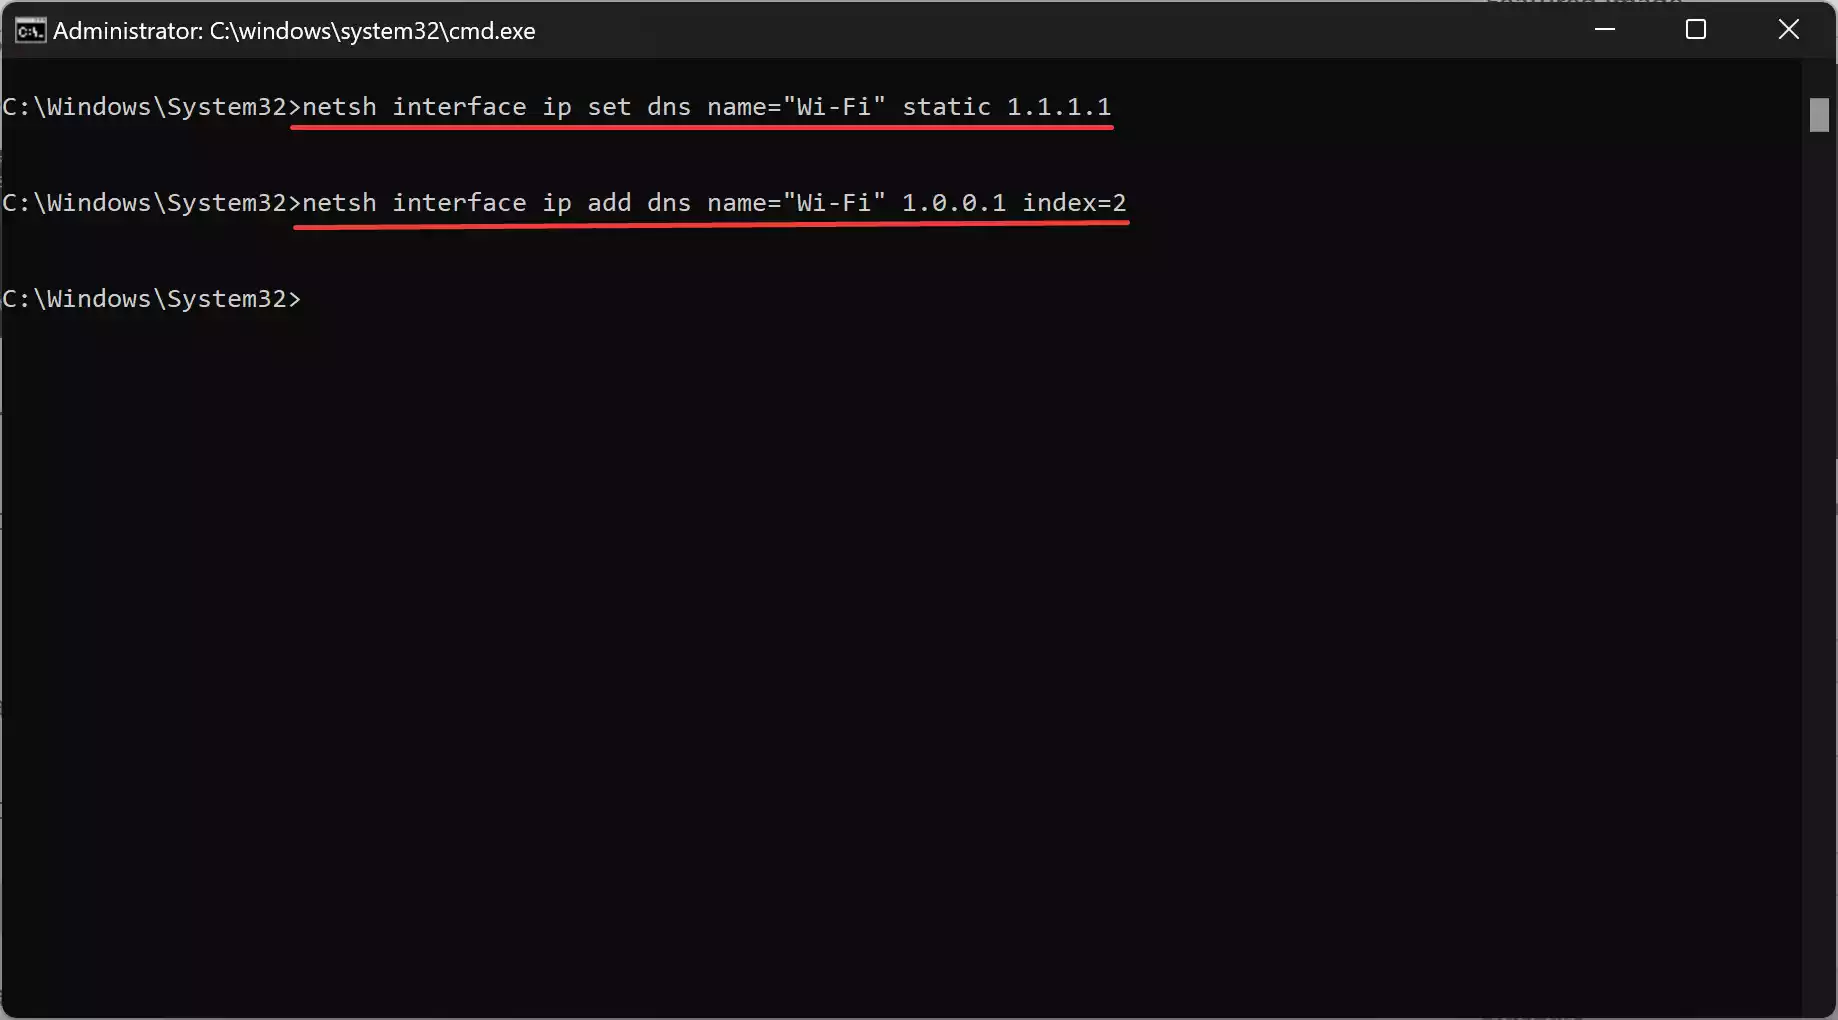
Step 5. Use the following command to set an alternate DNS server address and press Enter:-
netsh interface ip add dns name="Wi-Fi" 1.0.0.1 index=2
Note: In the above command replace “Wi-Fi” with the actual adapter name and 1.1.1.1 with your alternate DNS address.
Step 6. Verify the changes using the “ipconfig /all” command.
Method 3. Via PowerShell
Step 1. Open PowerShell as an administrator.
Step 2. Utilize the following command and press Enter to view your current network configuration:-
Get-NetIPConfiguration
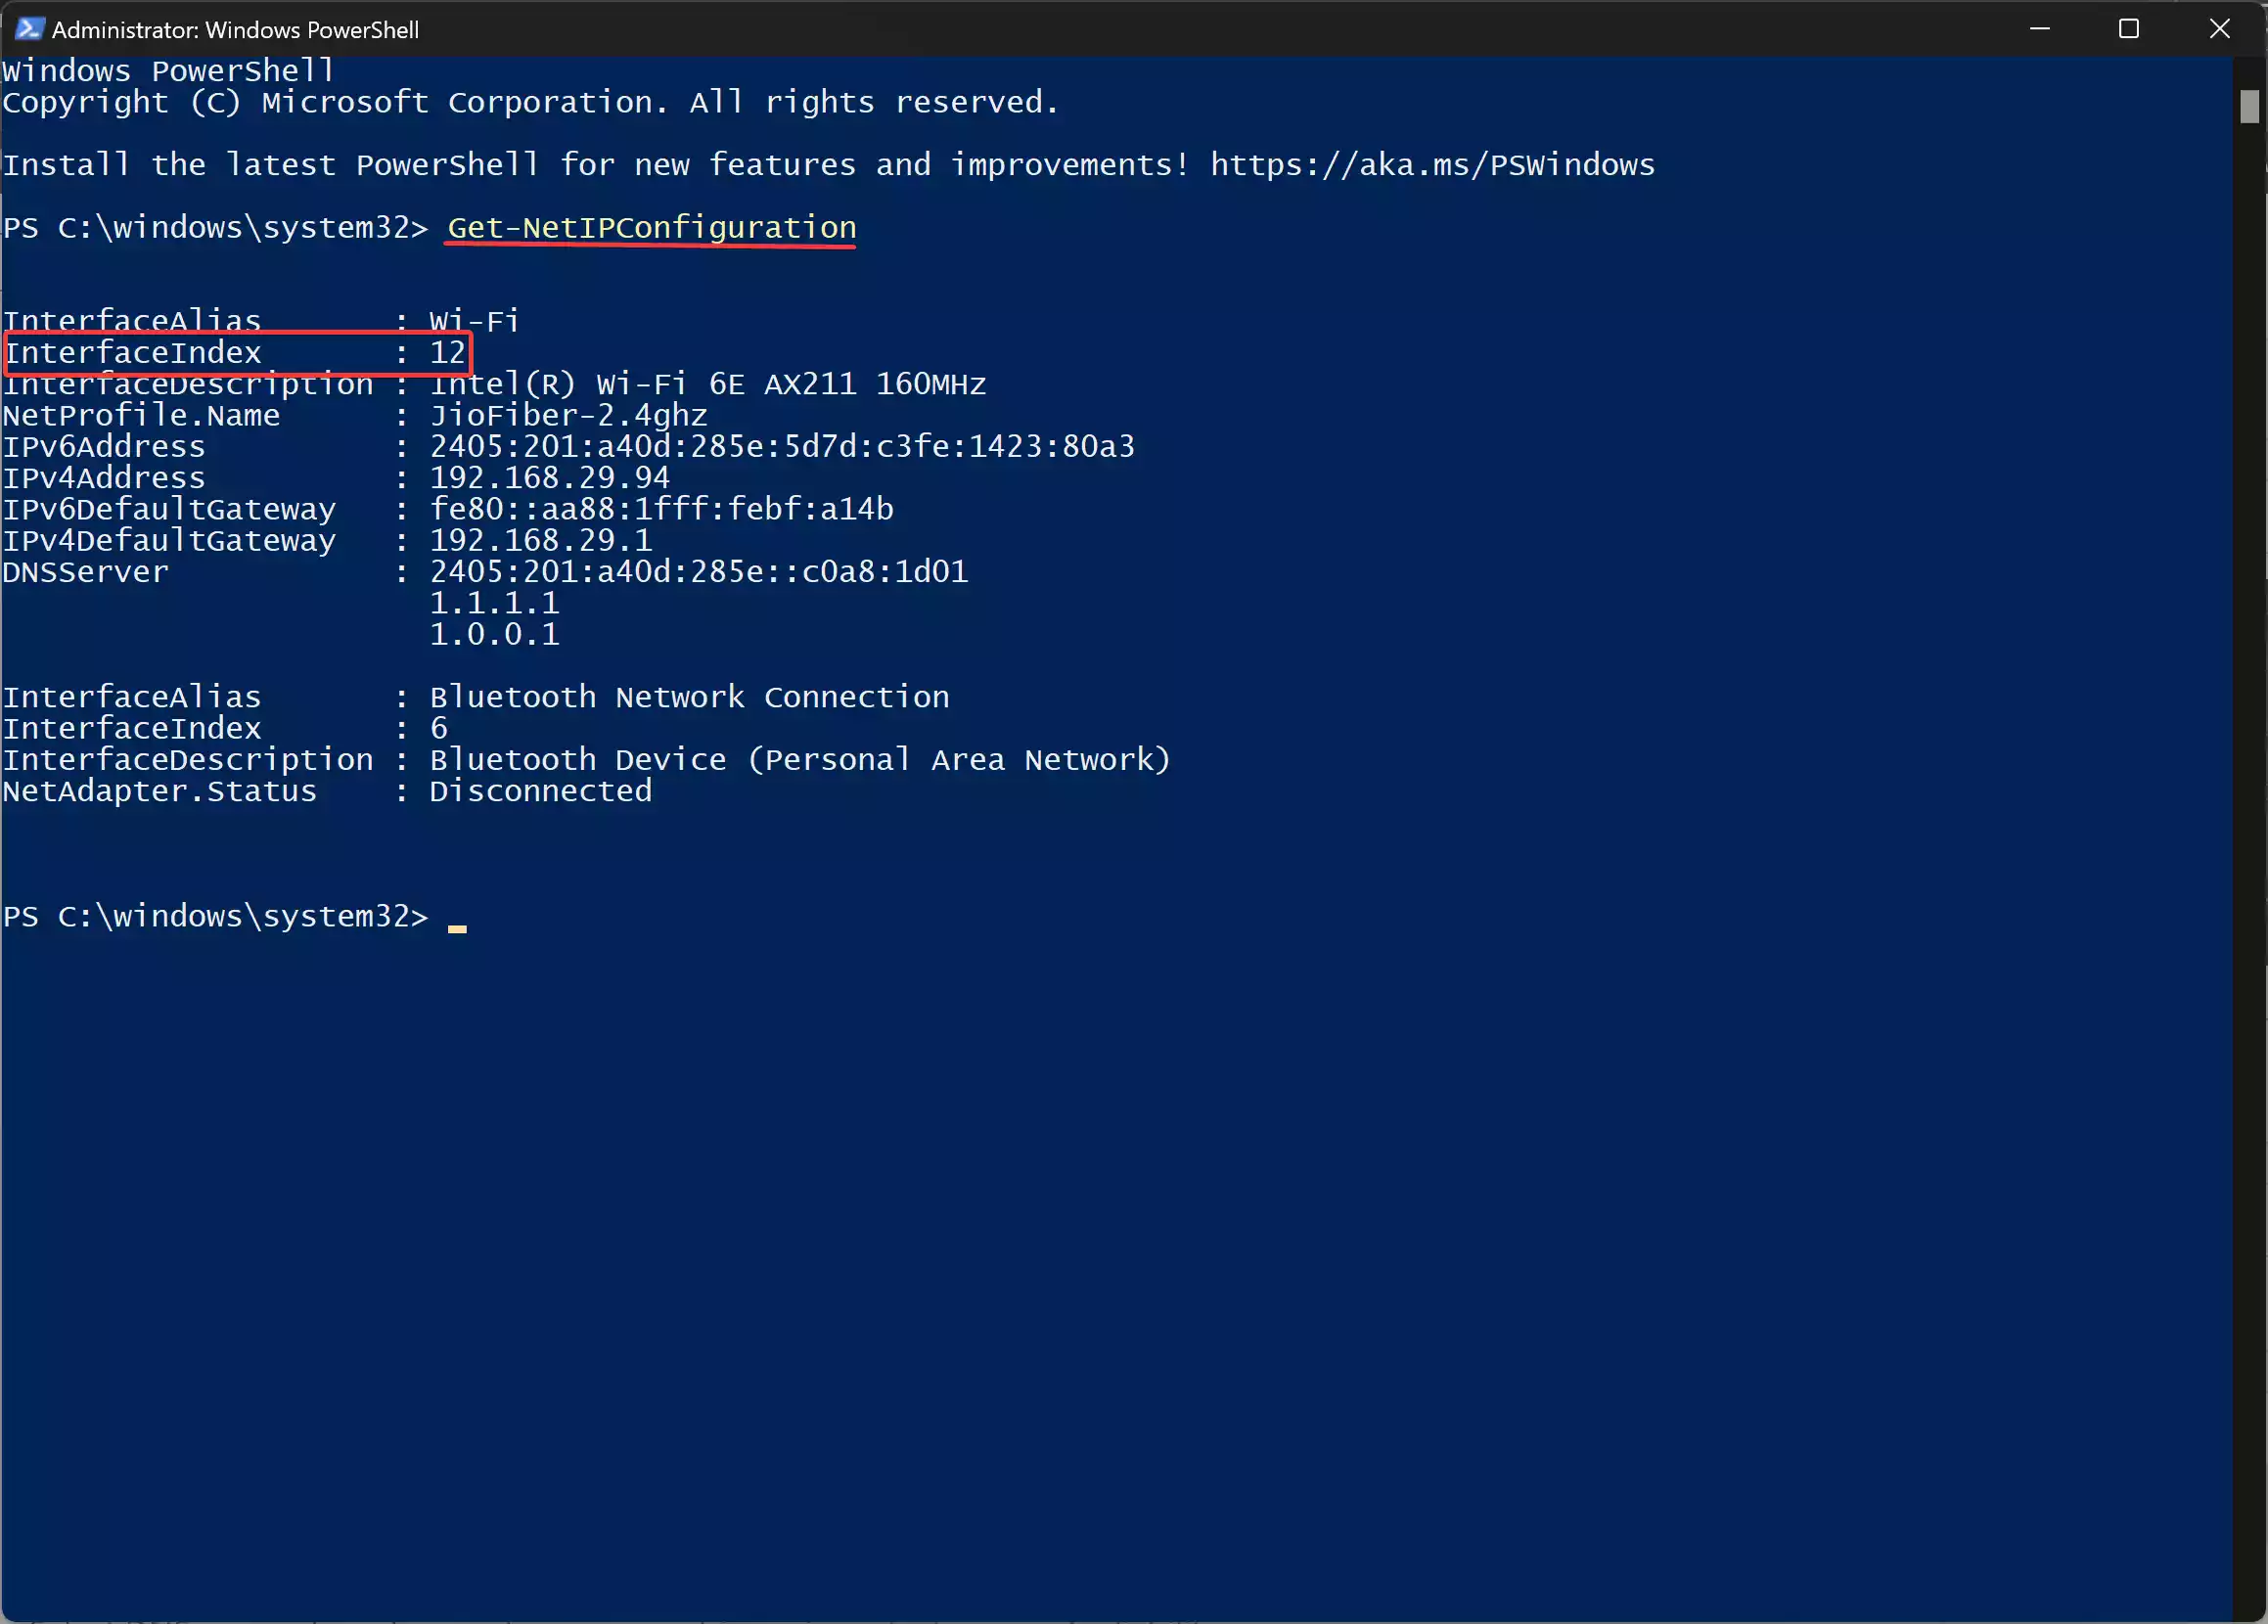
Step 3. Note down the values for the “InterfaceIndex.”
Step 4. Use the following command and press Enter to assign a primary DNS server address:-
Set-DnsClientServerAddress -InterfaceIndex 12 -ServerAddresses 8.8.8.8
Note: In the above command replace “12” with the actual interface index you noted down earlier and 8.8.8.8 with your preferred DNS address.
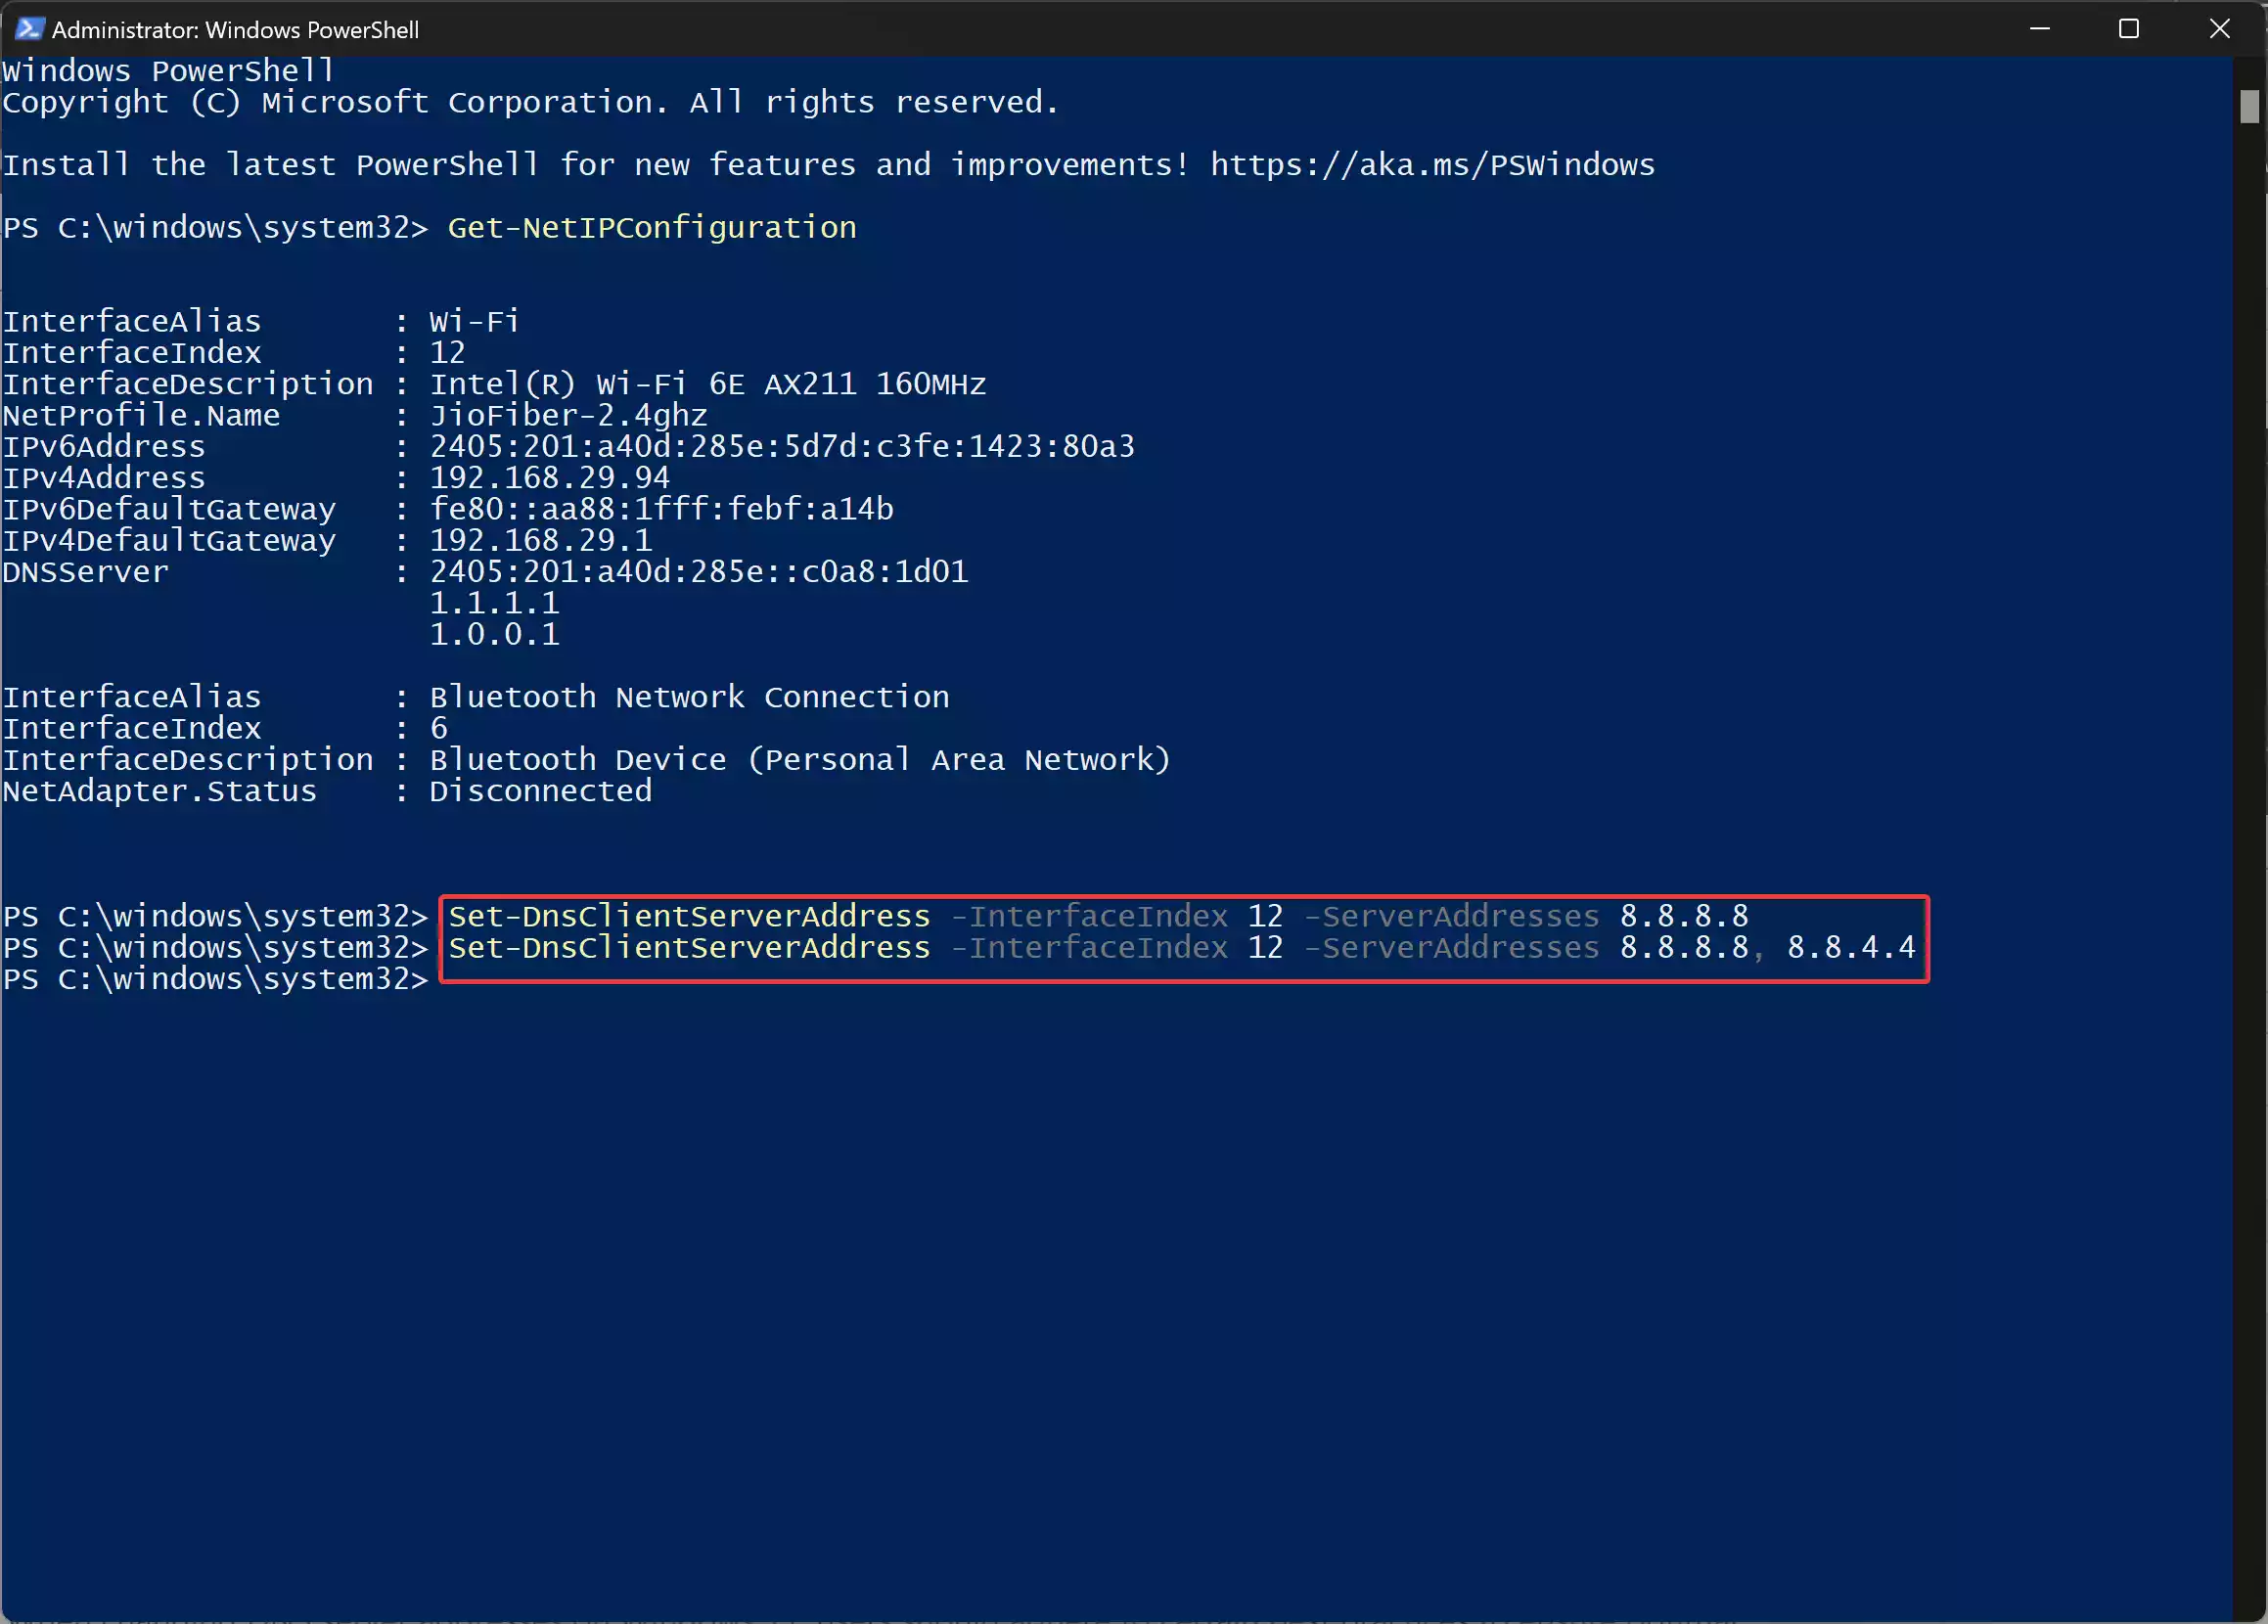
Step 5. If you want to assign both primary and secondary DNS server addresses then you can use the same command but add a comma and append the second address:-
Set-DnsClientServerAddress -InterfaceIndex 12 -ServerAddresses 8.8.8.8, 8.8.4.4
Note: In the above command replace “12” with the actual interface index you noted down earlier, 8.8.8.8 with your preferred DNS address, and 8.8.4.4 with your alternate DNS.
Method 4. Using Control Panel (Legacy Method)
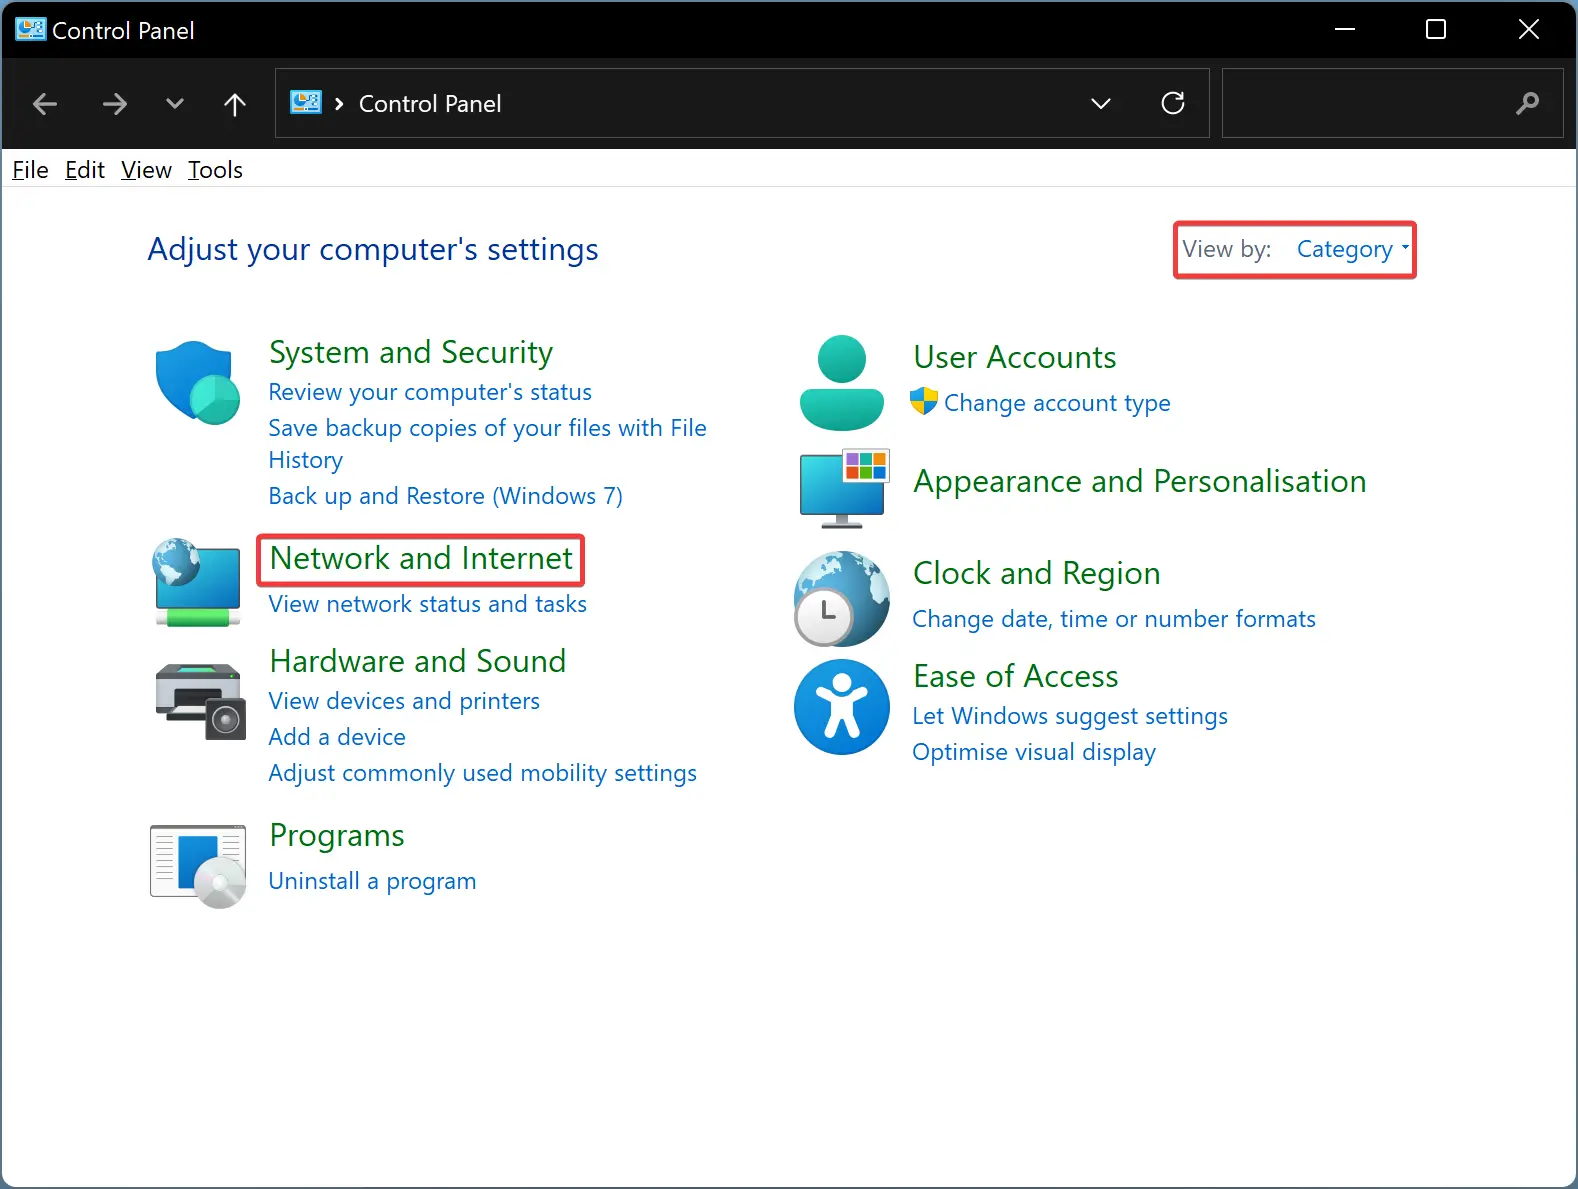
Step 1. Access the Control Panel and navigate to the Network and Internet. Ensure “View by” is set to “Category.”
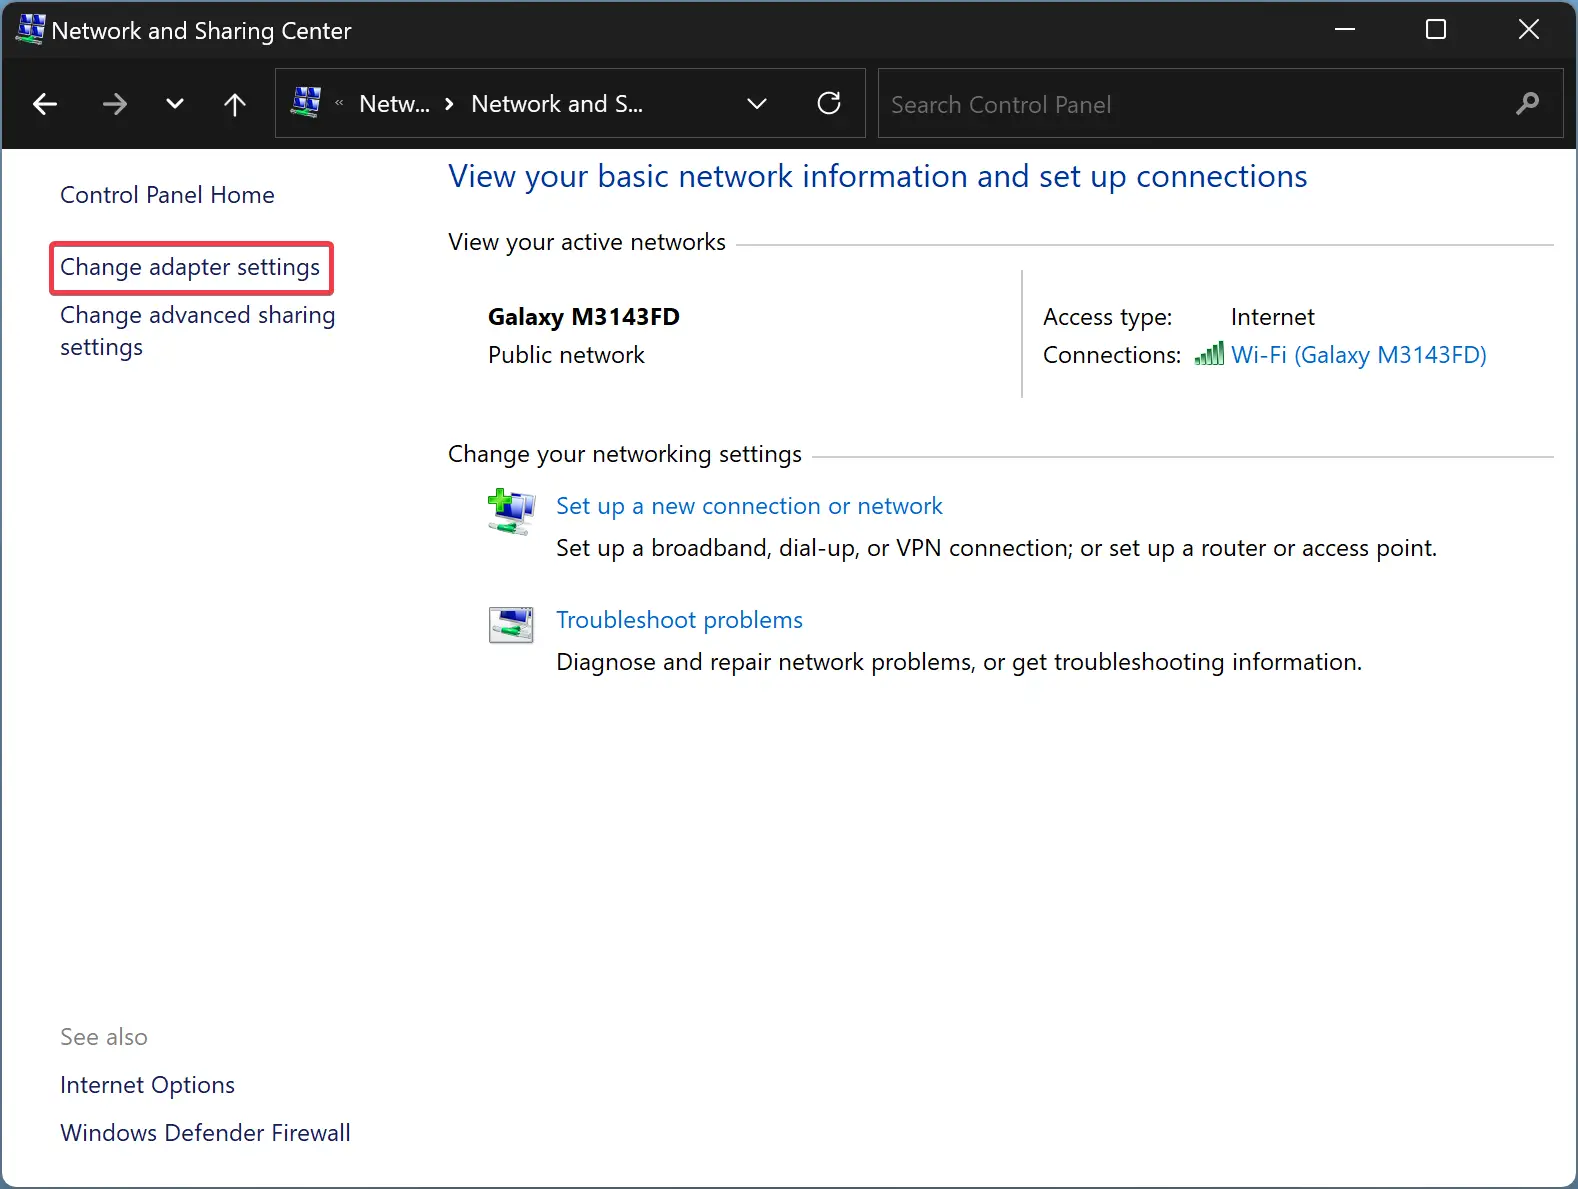
Step 2. Click on the “Network and Sharing Center.”

Step 3. Click the “Change adapter settings” option in the left sidebar.
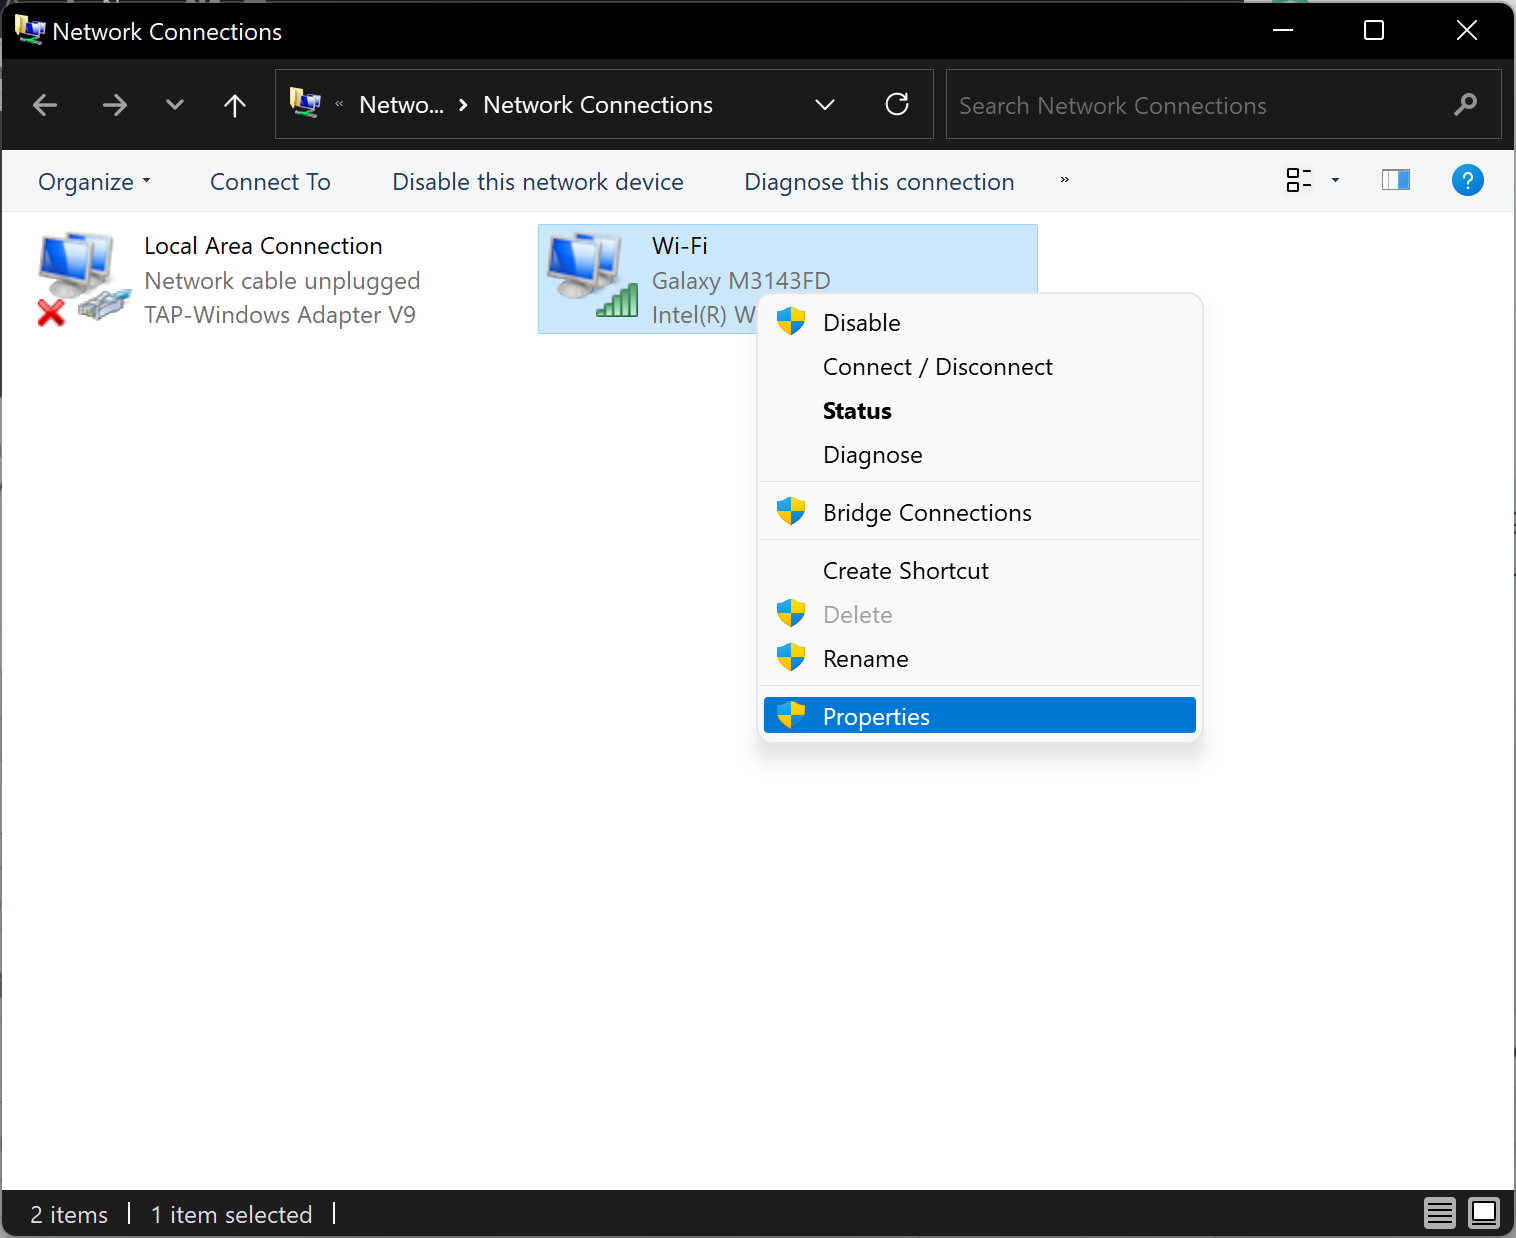
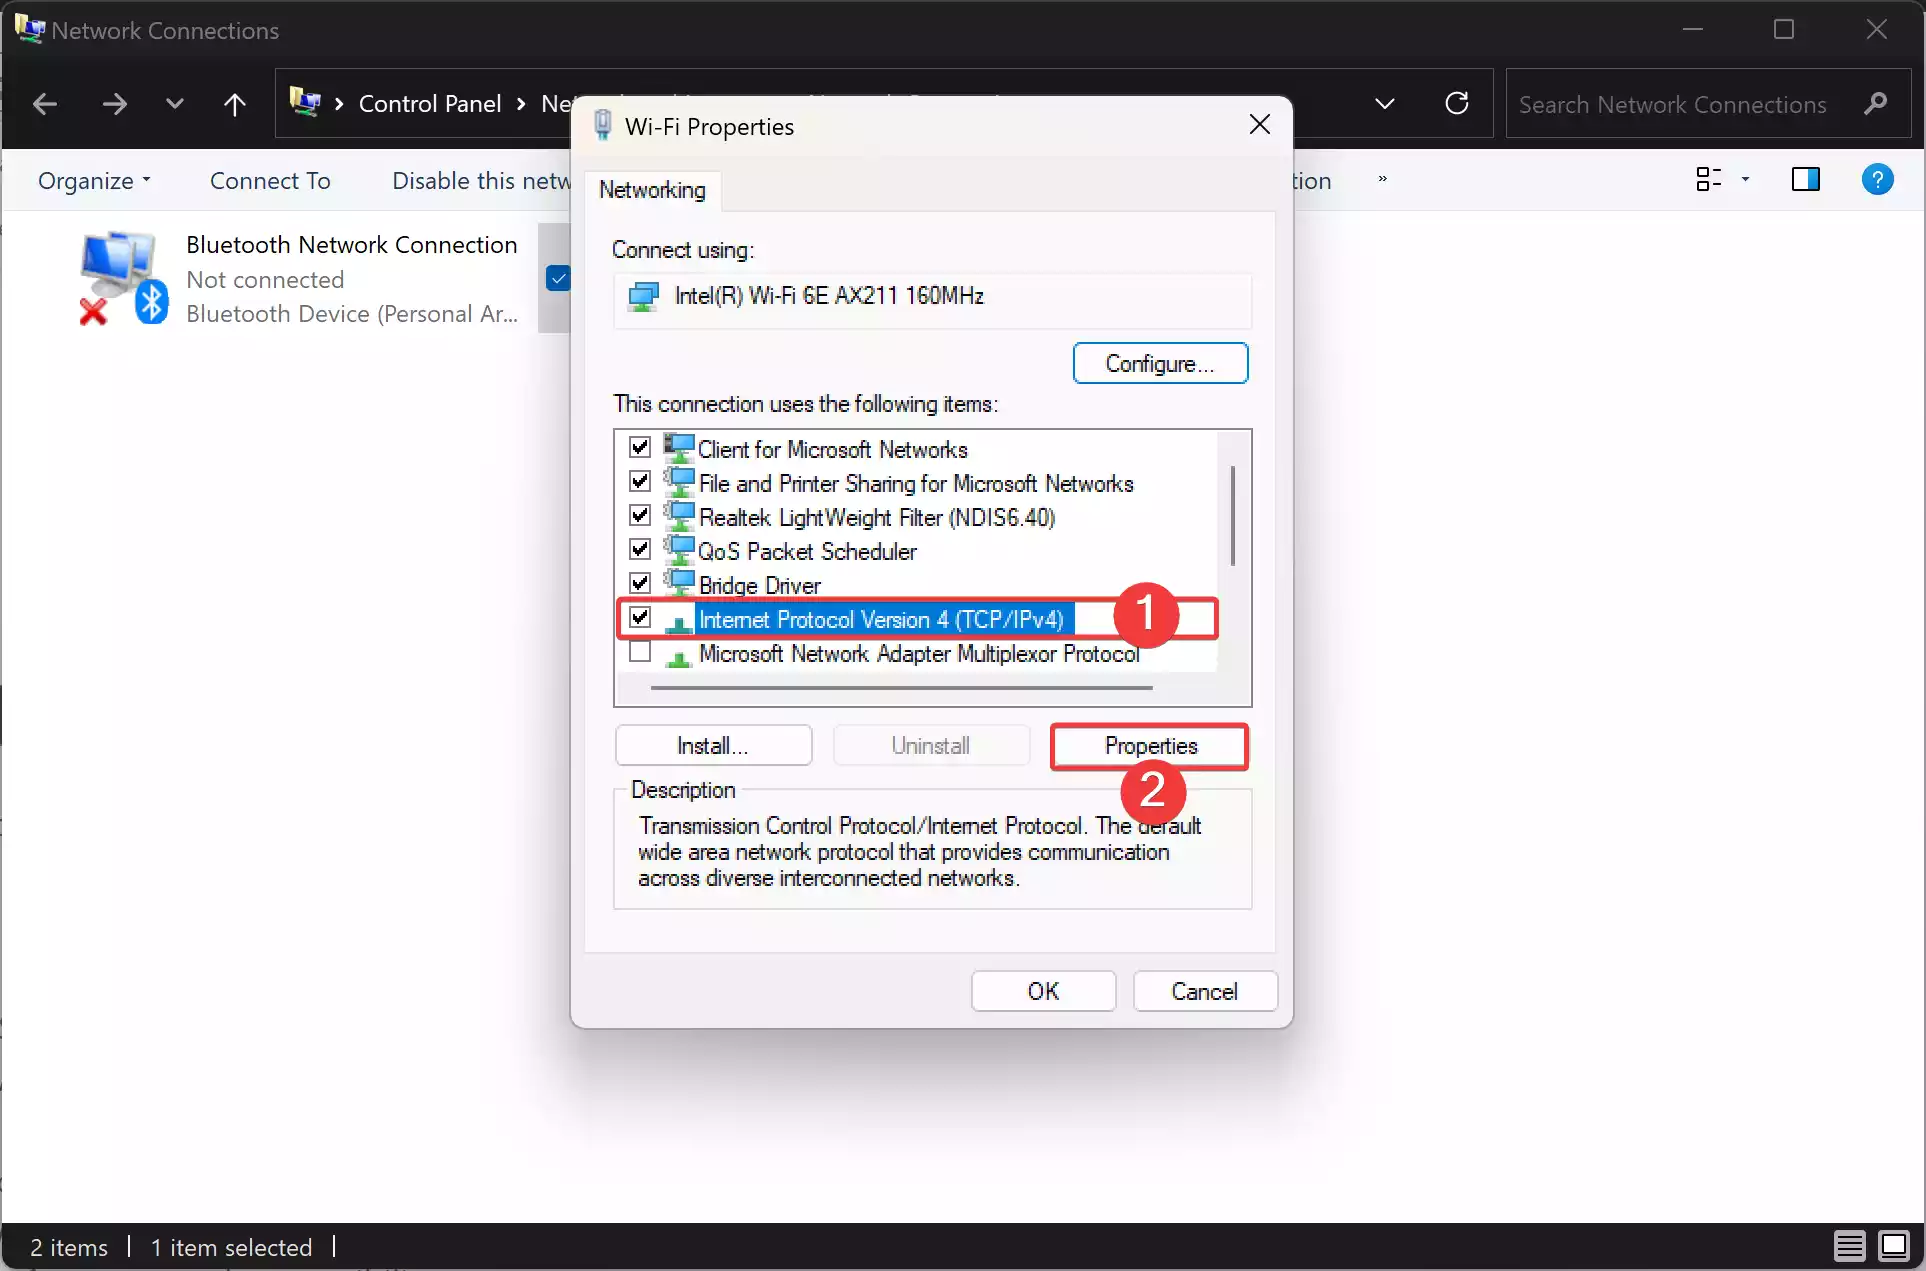
Step 4. Select the network adapter, right-click on it, and choose “Properties” in the context menu.
Step 5. Choose Internet Protocol Version 4 (TCP/IPv4) and click the “Properties” button.
Step 6. Select the “Use the following DNS server addresses” option.
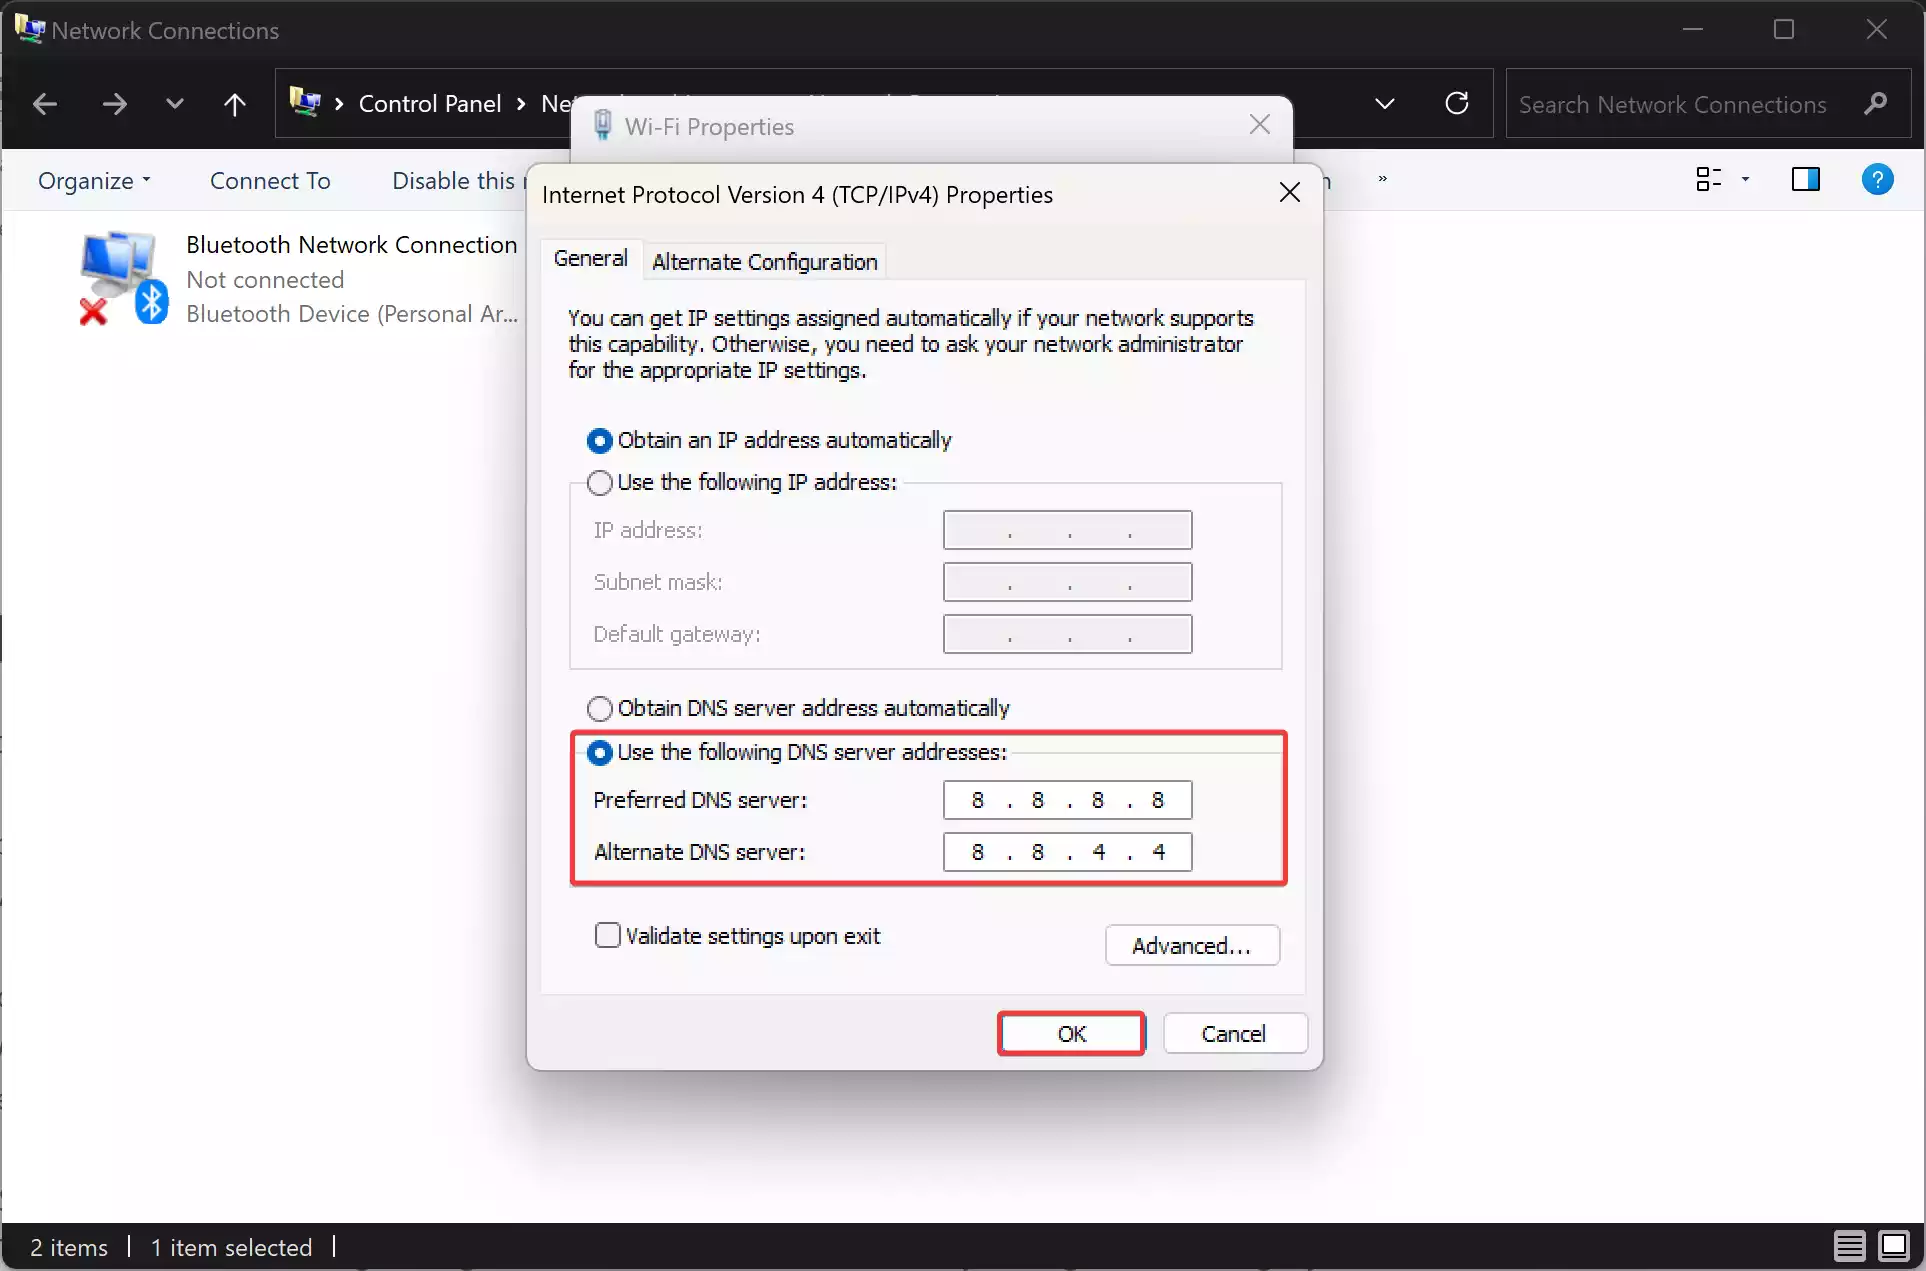
Step 7. Specify preferred and alternate DNS server addresses.
Step 8. Apply the changes by clicking the “OK” button and close the Control Panel.
Considerations and Best Practices
When changing DNS server addresses on Windows 11, users should adhere to certain best practices to ensure optimal performance and compatibility:-
– Select DNS servers based on performance metrics, privacy features, and reliability.
– Test the new DNS settings using tools like DNS leak test to verify configuration integrity.
– Avoid typographical errors when entering DNS server addresses to prevent connectivity issues.
– Consider enabling DNS encryption protocols like DoH or DoT for enhanced privacy and security.
– Periodically review and update DNS settings to adapt to changing internet conditions and evolving security threats.
Conclusion
Customizing DNS server addresses on Windows 11 empowers users to tailor their internet experience according to their preferences and requirements. By following the methods outlined in this guide and selecting reputable DNS providers, users can optimize internet performance, enhance privacy protections, and fortify security measures. Whether through the user-friendly Settings app or the command-line interfaces of Command Prompt and PowerShell, Windows 11 offers versatile options for managing DNS server addresses, ensuring a seamless and secure online experience.
