Have you ever wondered how long your computer has been running without a restart? Knowing your computer’s uptime can be useful for various reasons, such as troubleshooting issues, monitoring system stability, or just satisfying your curiosity. In this article, we will guide you through the steps to check your computer’s uptime on Windows 11 and Windows 10.
What is Uptime?
Uptime refers to the duration for which a computer has been continuously operational without a reboot or shutdown. It’s a crucial metric for system administrators and power users as it can help identify potential stability issues and ensure that essential tasks or services are running smoothly.
How to Check Your Computer Uptime on Windows 11 and 10?
Checking Uptime Using Task Manager
One of the easiest ways to check your computer’s uptime on Windows 11 and Windows 10 is by using the built-in Task Manager. Here’s how to do it:-
Step 1. Open Task Manager.
To do that, press “Ctrl + Shift + Esc” on your keyboard or, right-click on the taskbar and select “Task Manager.” Alternatively, you can press “Ctrl + Alt + Delete,” and then choose “Task Manager” from the menu that appears.
Step 2. By default, Task Manager opens in the “Processes” tab. Click on the “Performance” tab at the top/left.
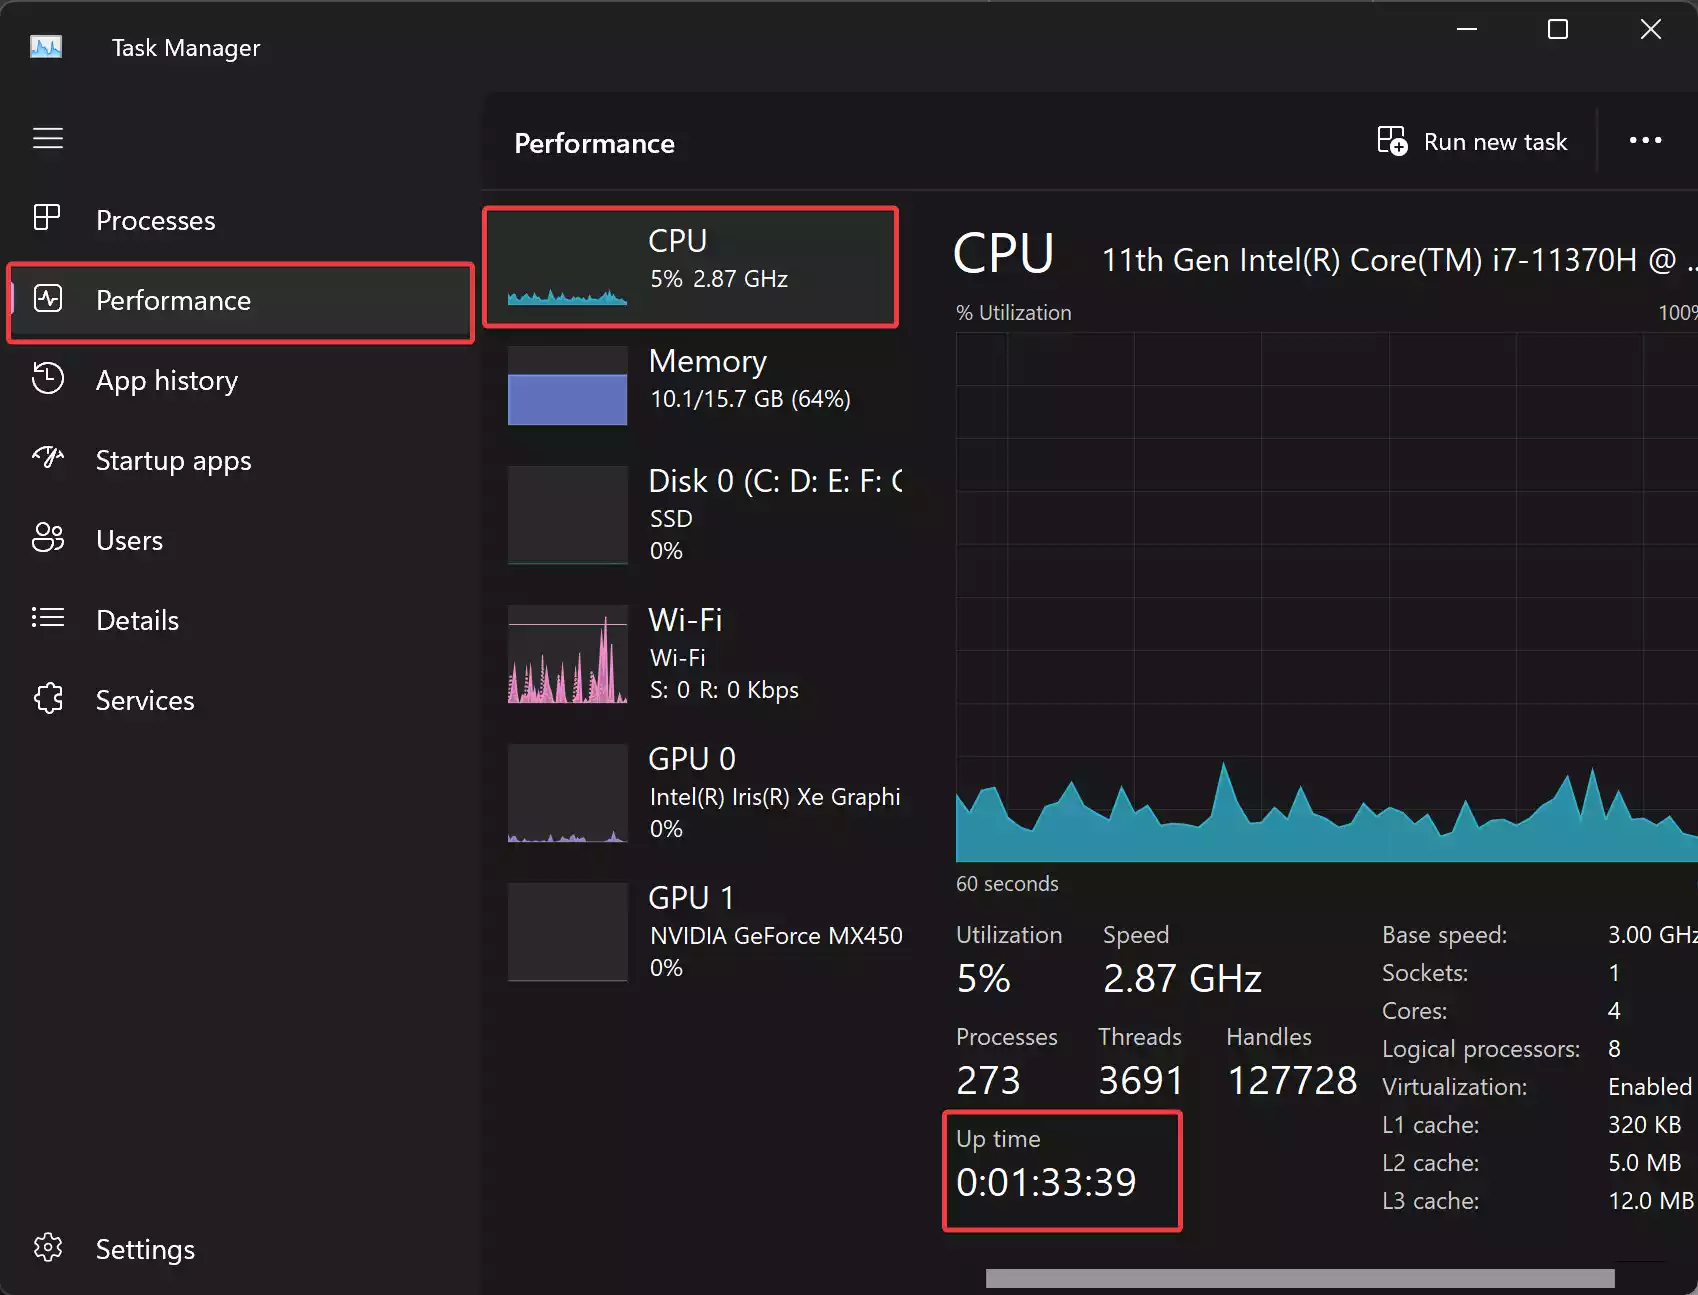
Step 3. Switch to the CPU section and look for the “Up time” option at the bottom in the “Performance” tab. You will see the time elapsed since your computer was last restarted or turned on.
This method provides a quick and straightforward way to check your computer’s uptime. However, if you prefer using the Command Prompt or PowerShell, there are alternative methods as well.
Using Command Prompt to Check Uptime
You can also check your computer’s uptime using the Command Prompt. Here’s how:-
Step 1. Open Command Prompt.
For that, press “Windows + X” and select “Windows Terminal” (Windows 11) or “Command Prompt” (Windows 10) from the context menu. Alternatively, you can search for “cmd” or “Command Prompt” in the Start menu and open it.
Step 2. In the Command Prompt window, type the following command and press Enter:-
systeminfo | find "Boot Time"
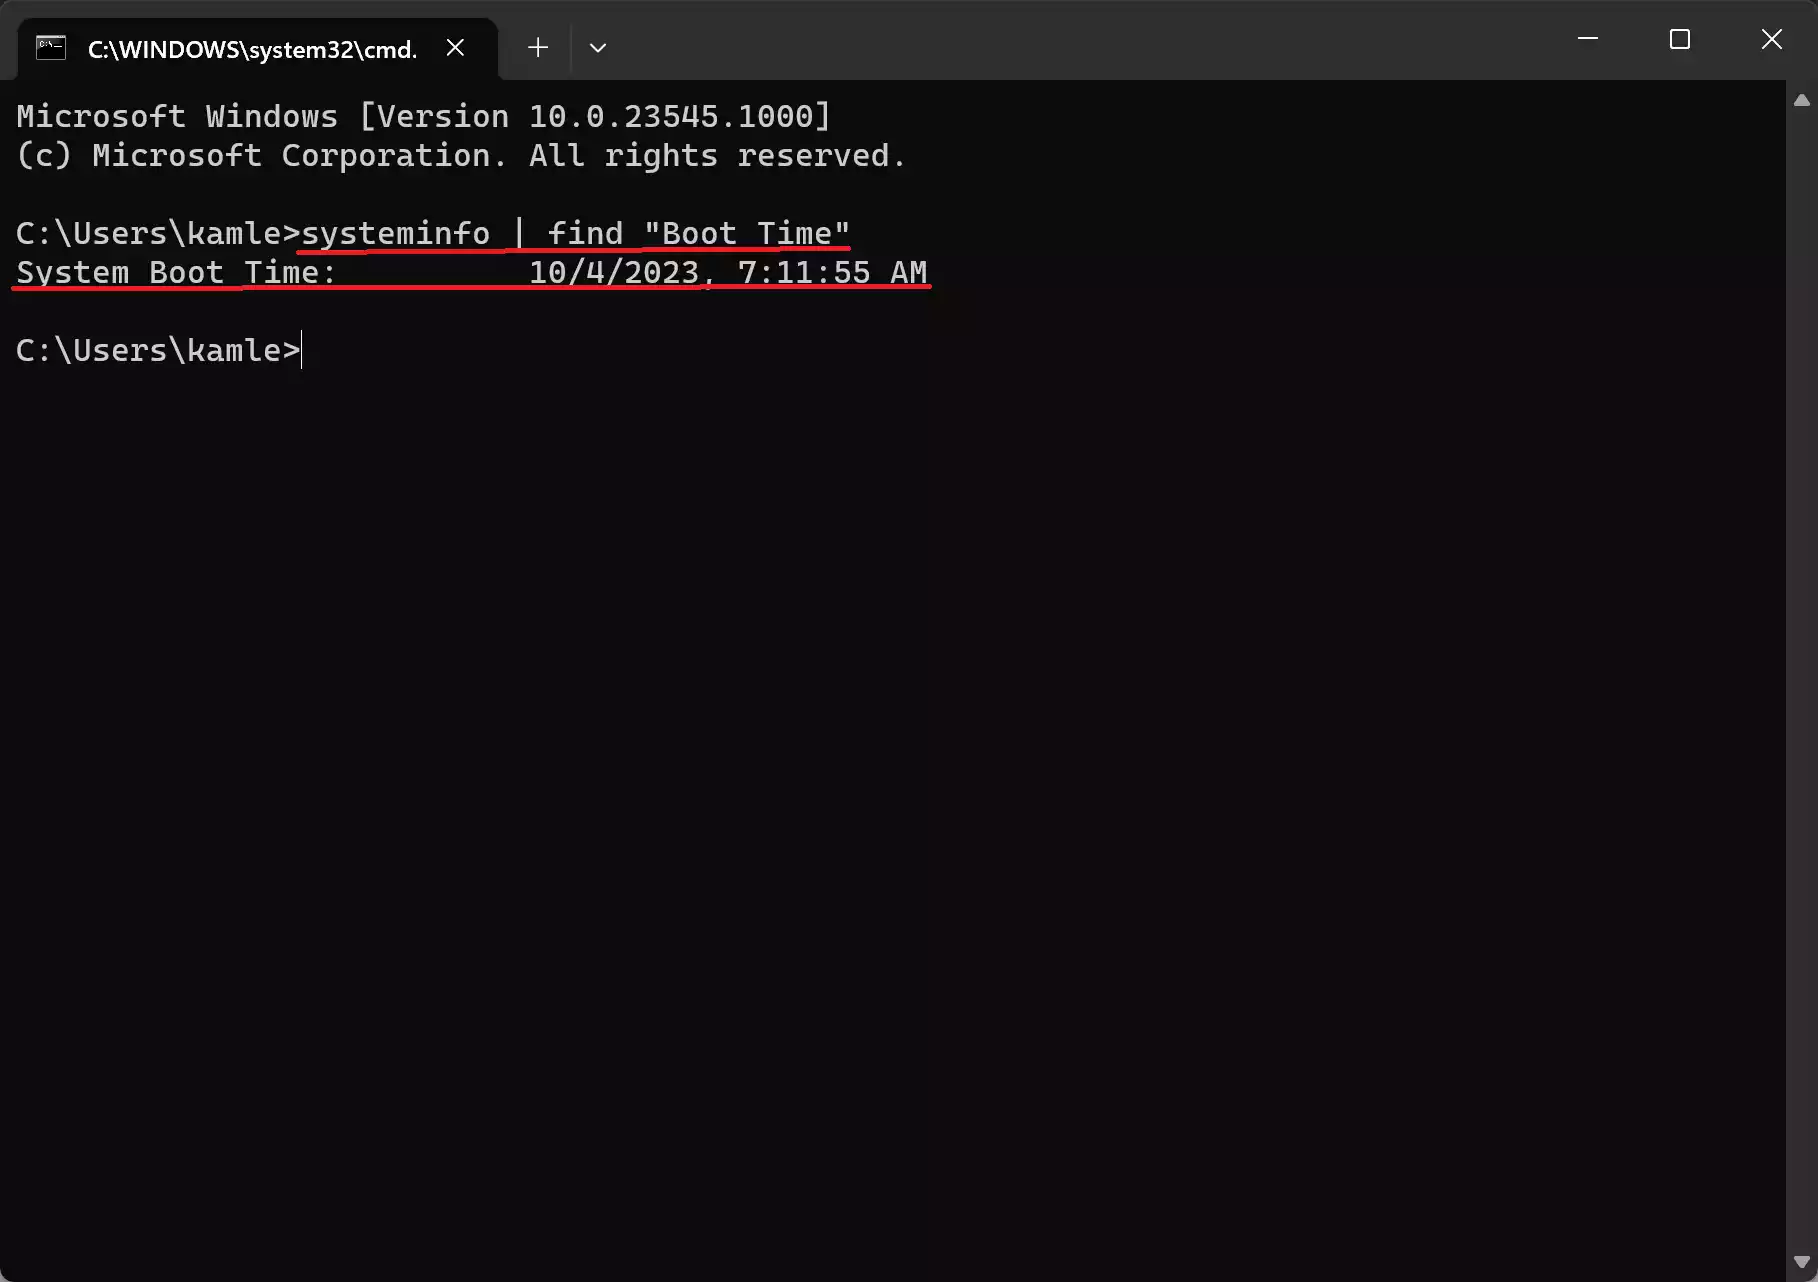
Step 3. The system will display the “Boot Time” in date, hours, minutes, and seconds.
This command only displays the date and time of the last boot-up. You can calculate uptime by subtracting this time from the current date and time.
Using PowerShell to Check Uptime
PowerShell is another powerful tool for checking uptime. Here’s how to do it:-
Step 1. Open PowerShell.
To do that, press “Windows + X” and select “Windows Terminal” (Windows 11) or “Windows PowerShell” (Windows 10) from the context menu. Alternatively, you can search for “PowerShell” in the Start menu and open it.
Step 2. In the PowerShell window, type the following command and press Enter:-
(Get-CimInstance -ClassName Win32_OperatingSystem).LastBootUpTime
This command will display the date and time of the last boot-up. You can calculate uptime by subtracting this time from the current date and time.
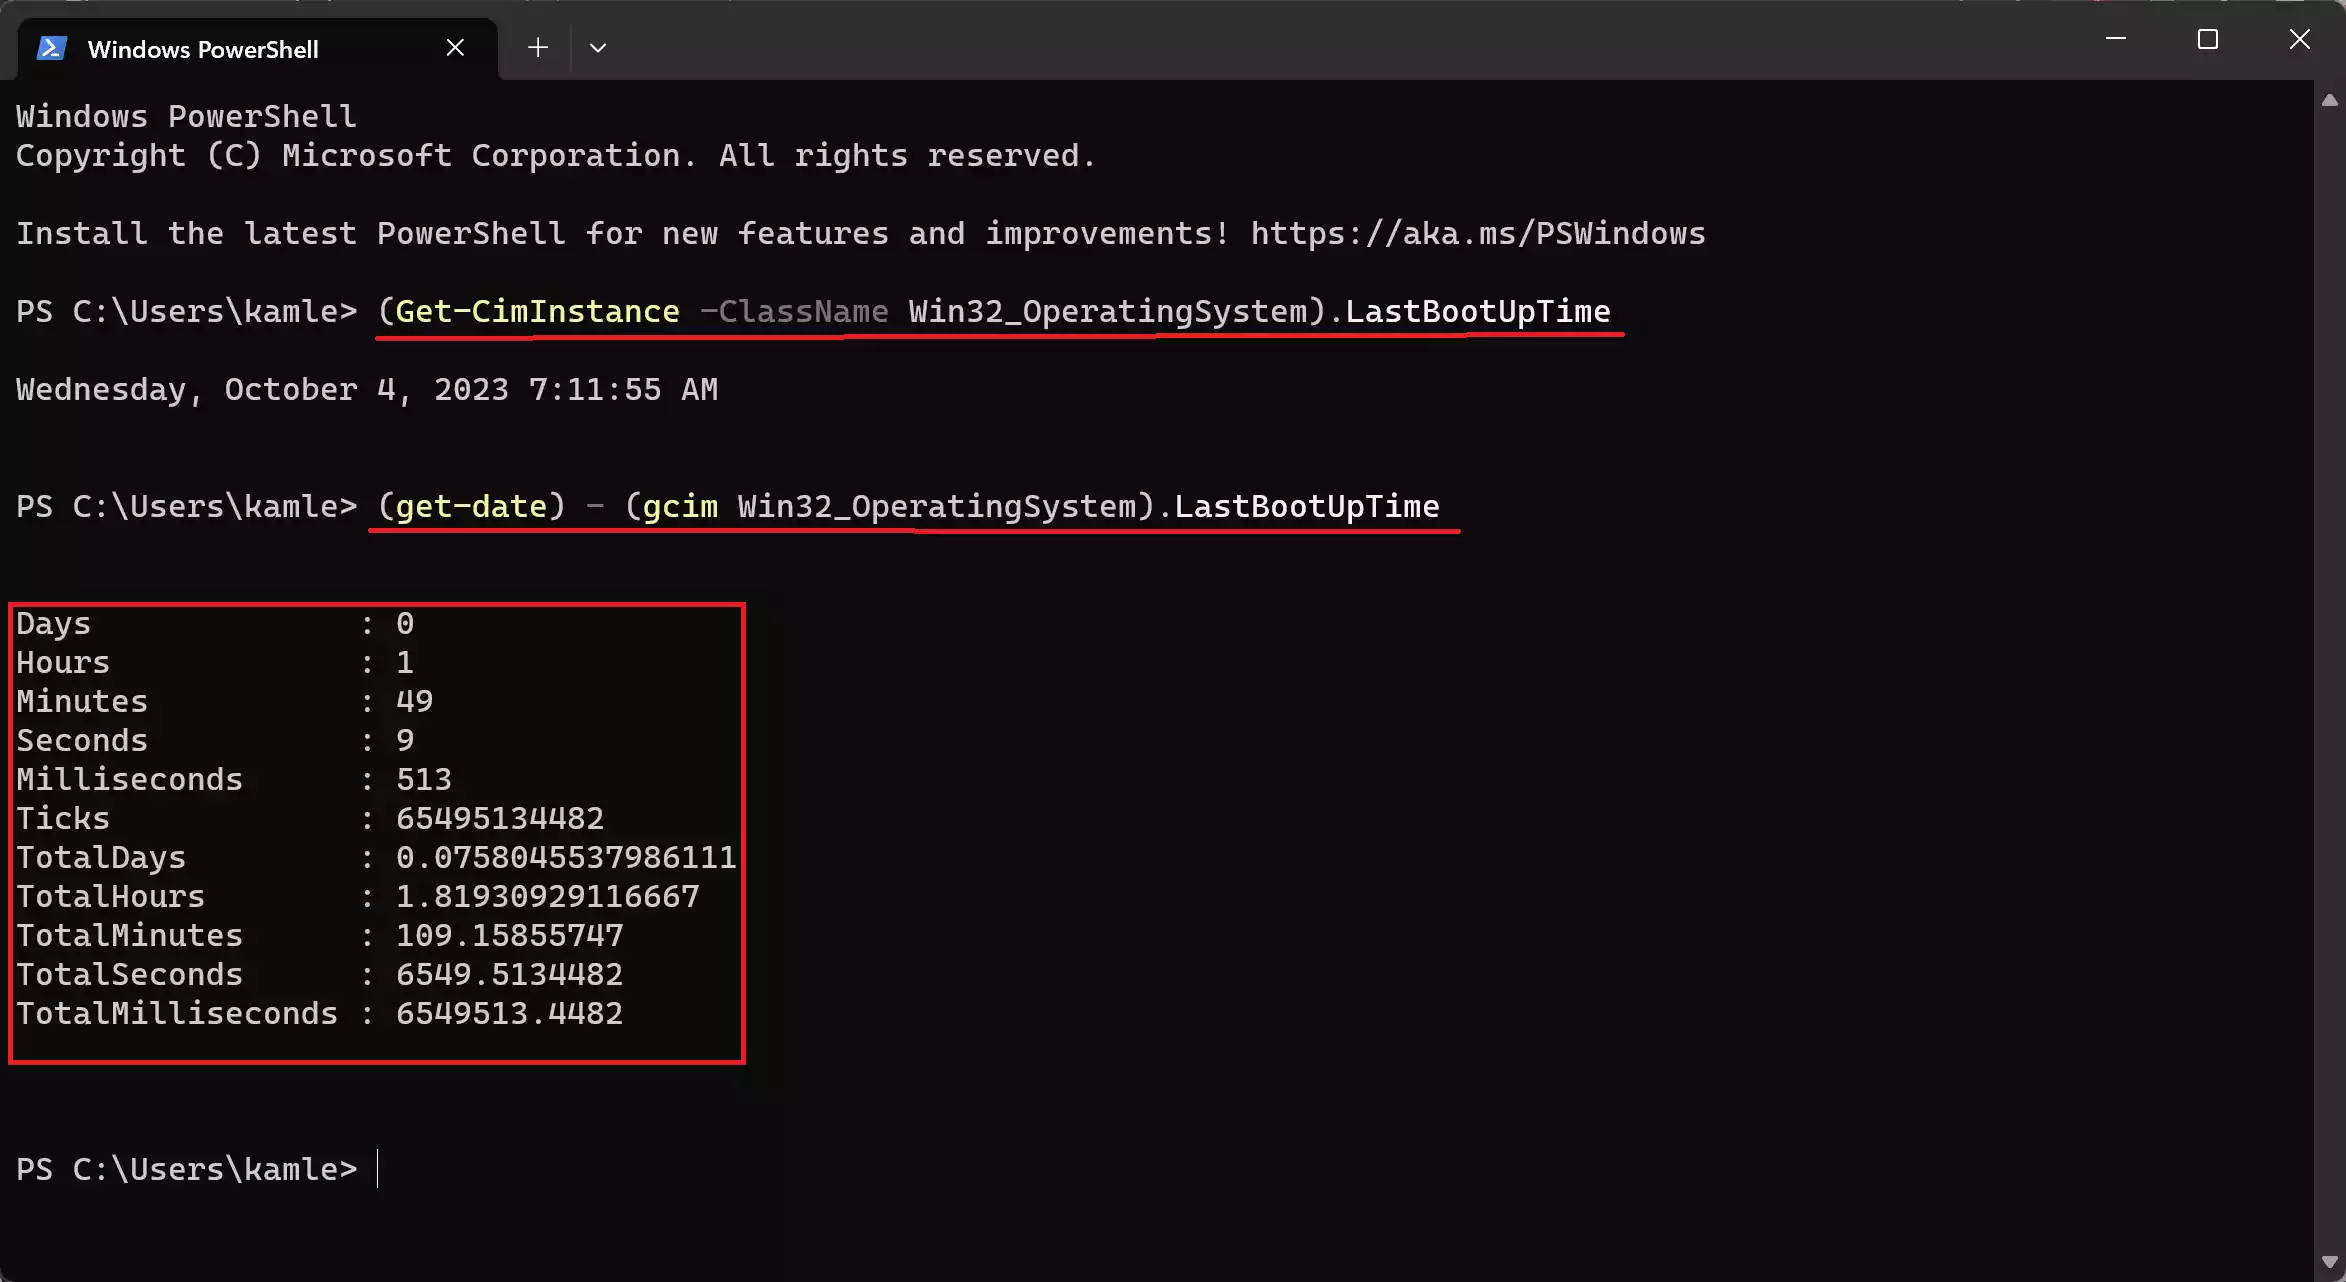
Step 3. If you want to view the calculated uptime, use this command instead:-
(get-date) - (gcim Win32_OperatingSystem).LastBootUpTime
PowerShell provides a more granular view of the last boot-up time, allowing you to perform additional calculations if needed.
Conclusion
Knowing your computer’s uptime can be valuable information, especially when troubleshooting problems or monitoring system performance. Windows 11 and Windows 10 offer multiple ways to check uptime, ranging from the simple Task Manager method to the more detailed Command Prompt and PowerShell approaches. Choose the method that suits your preferences and needs, and you’ll have a better understanding of how long your computer has been running without interruption.
