Windows 11 has several preinstalled apps, including Microsoft OneDrive, which backups your photos and files to the cloud. This built-in app keeps syncing and is also accessible on all your other devices connected to your OneDrive account. That means you can access your photos and files if you open your OneDrive account on any other computer or device.
While this is a good feature for many Windows 11 users, a few users might not prefer to save their personal files on cloud storage and may want to stop it. It may also be useless if you use other online storage services like Degoo, Mega, Amazon Photos, or similar.
On Windows 11 PC, Microsoft OneDrive is installed like a UWP app, and you can uninstall it from your device if you don’t like it. That means you can get rid of the OneDrive application easily if it is a useless application for you. It is possible to use the built-in Settings app, Control Panel, or winget command-line tool, which means there is no need to use a third-party application to remove the OneDrive app from your PC.
How to Uninstall the OneDrive app from Windows 11 Settings?
Follow these steps to uninstall the OneDrive app from Windows 11 Settings:-
Step 1. Open up the Settings app by pressing the Windows + I keyboard shortcuts, then click on the Apps category from the left side pane of the settings window.
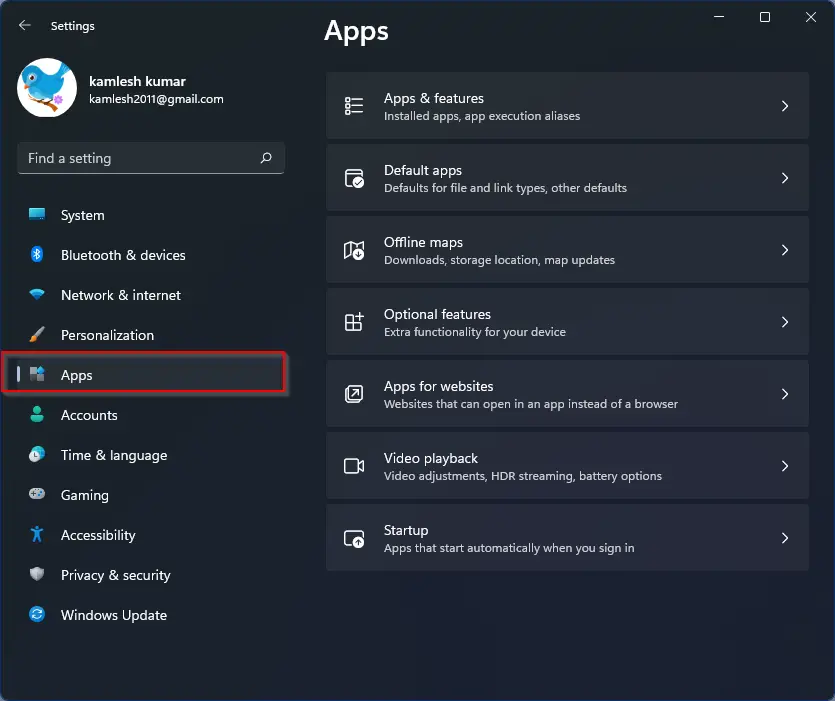
Step 2. Click on the Apps & features tab on the right-side pane of the Apps category.

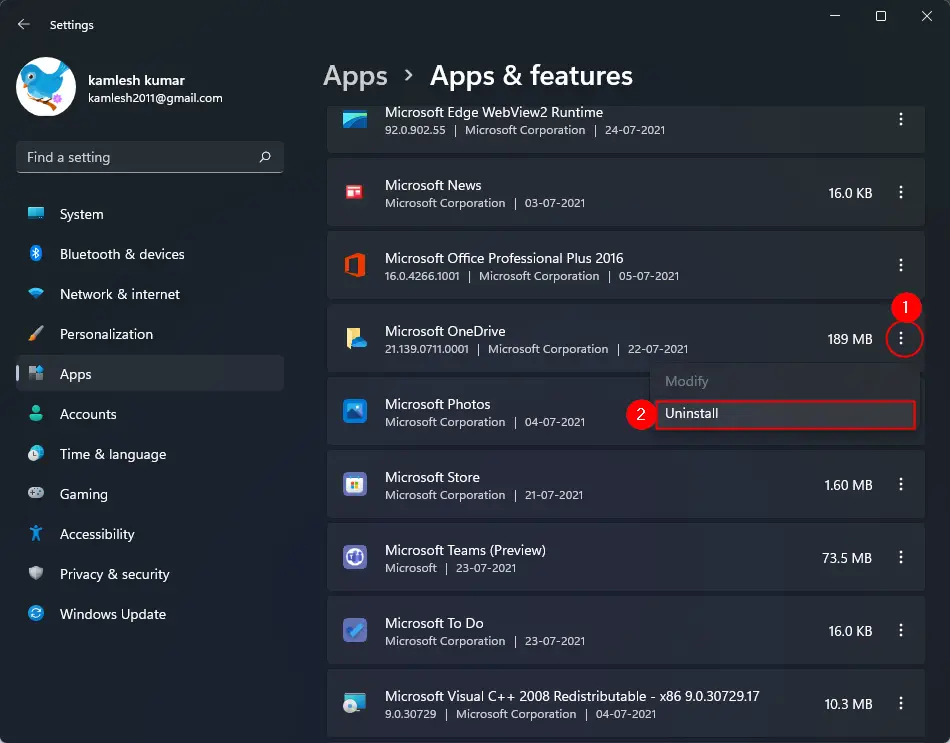
Step 3. Scroll down on the “Apps & features” settings to see the Microsoft OneDrive entry, and then click on the three vertical dots. Then, click on the Uninstall option.
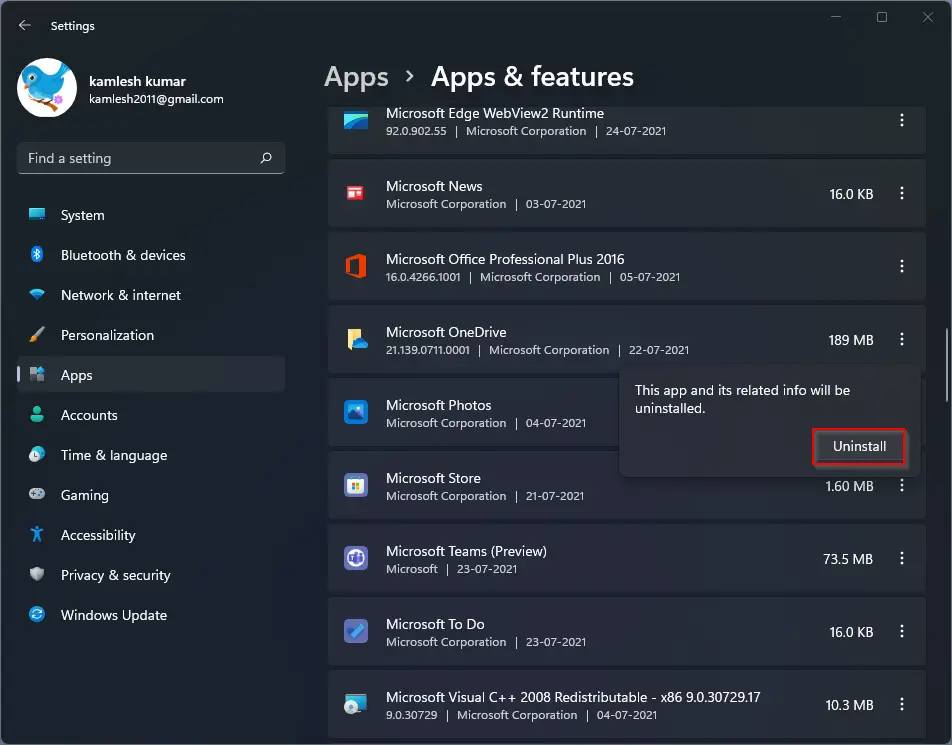
Step 4. Next, click on the Uninstall button when you see a pop-up menu.
After completing the above steps, Microsoft OneDrive will no more appear on your Windows 11 computer or laptop.
If you want to install it again on your computer, you can do it from the Microsoft Store app.
How to Remove the OneDrive App from Windows 11 Control Panel?
Follow these steps to uninstall the OneDrive app from Windows 11 Control Panel:-
Step 1. Open Control Panel.
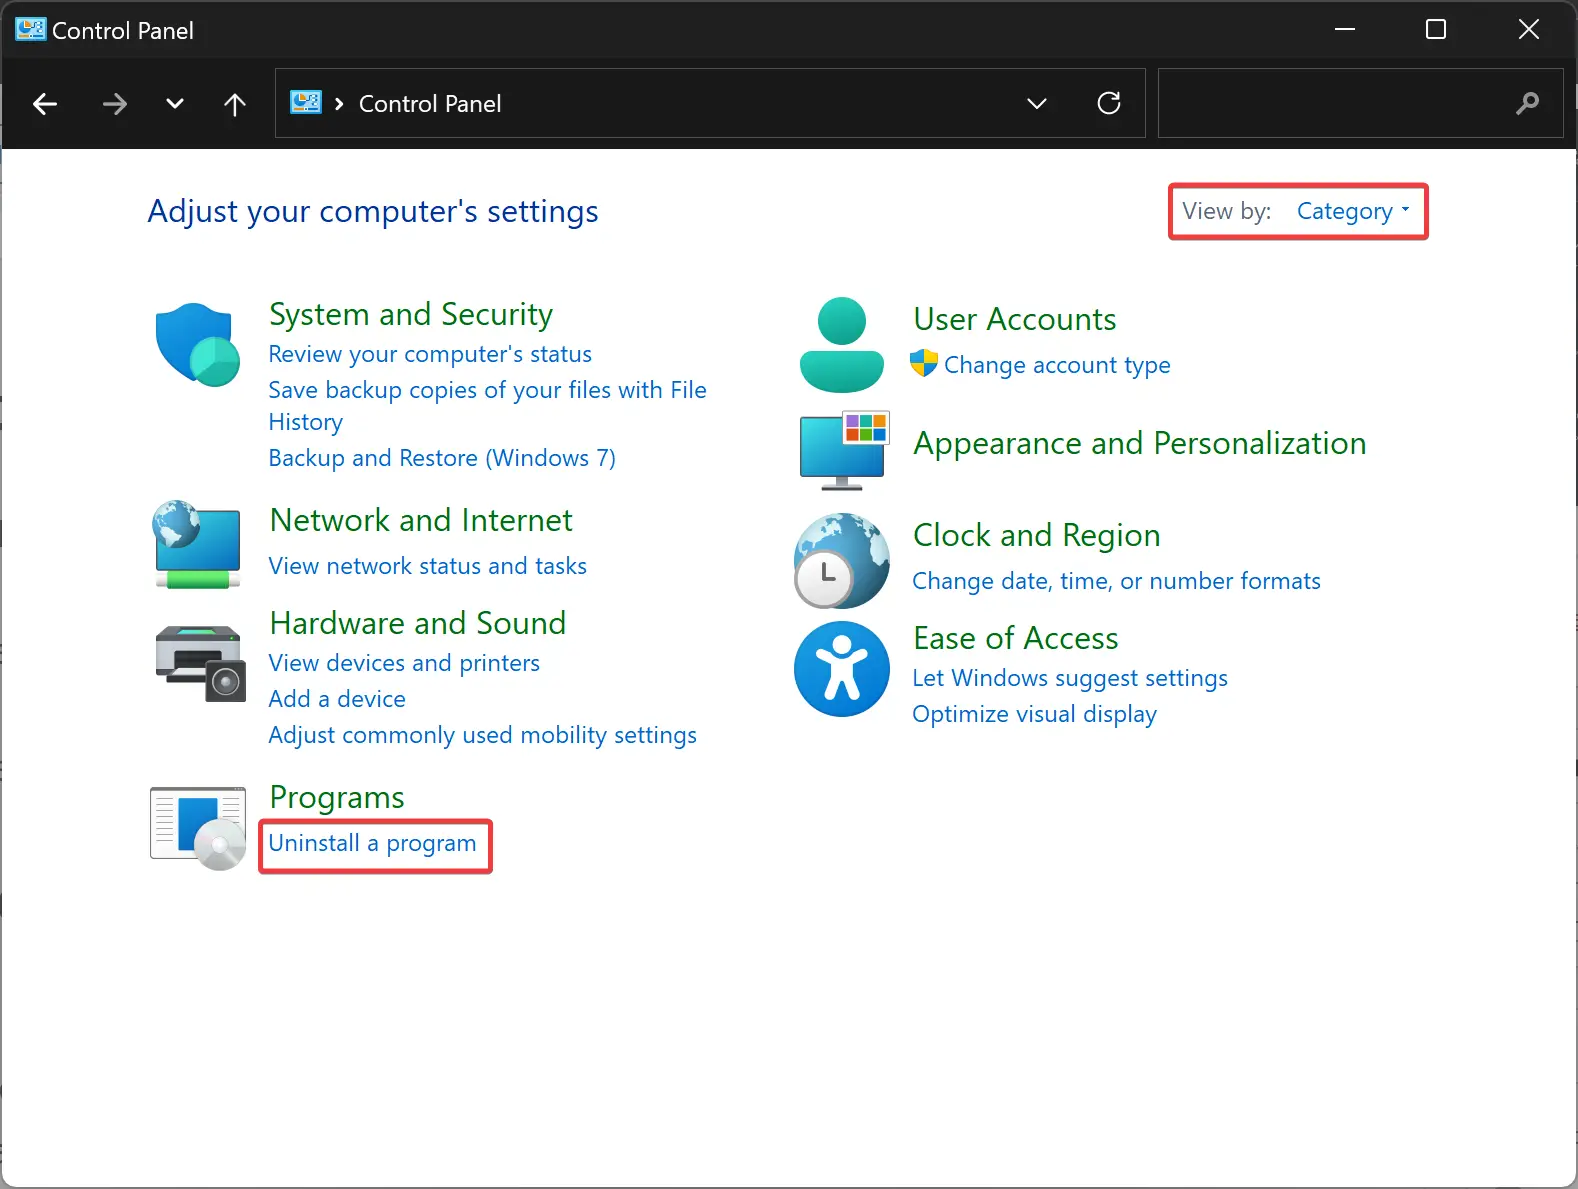
Step 2. Set “View by” to Category.
Step 3. Click on the link “Uninstall a program” under the “Programs” category.
Step 4. Scroll down and select “Microsoft OneDrive.”
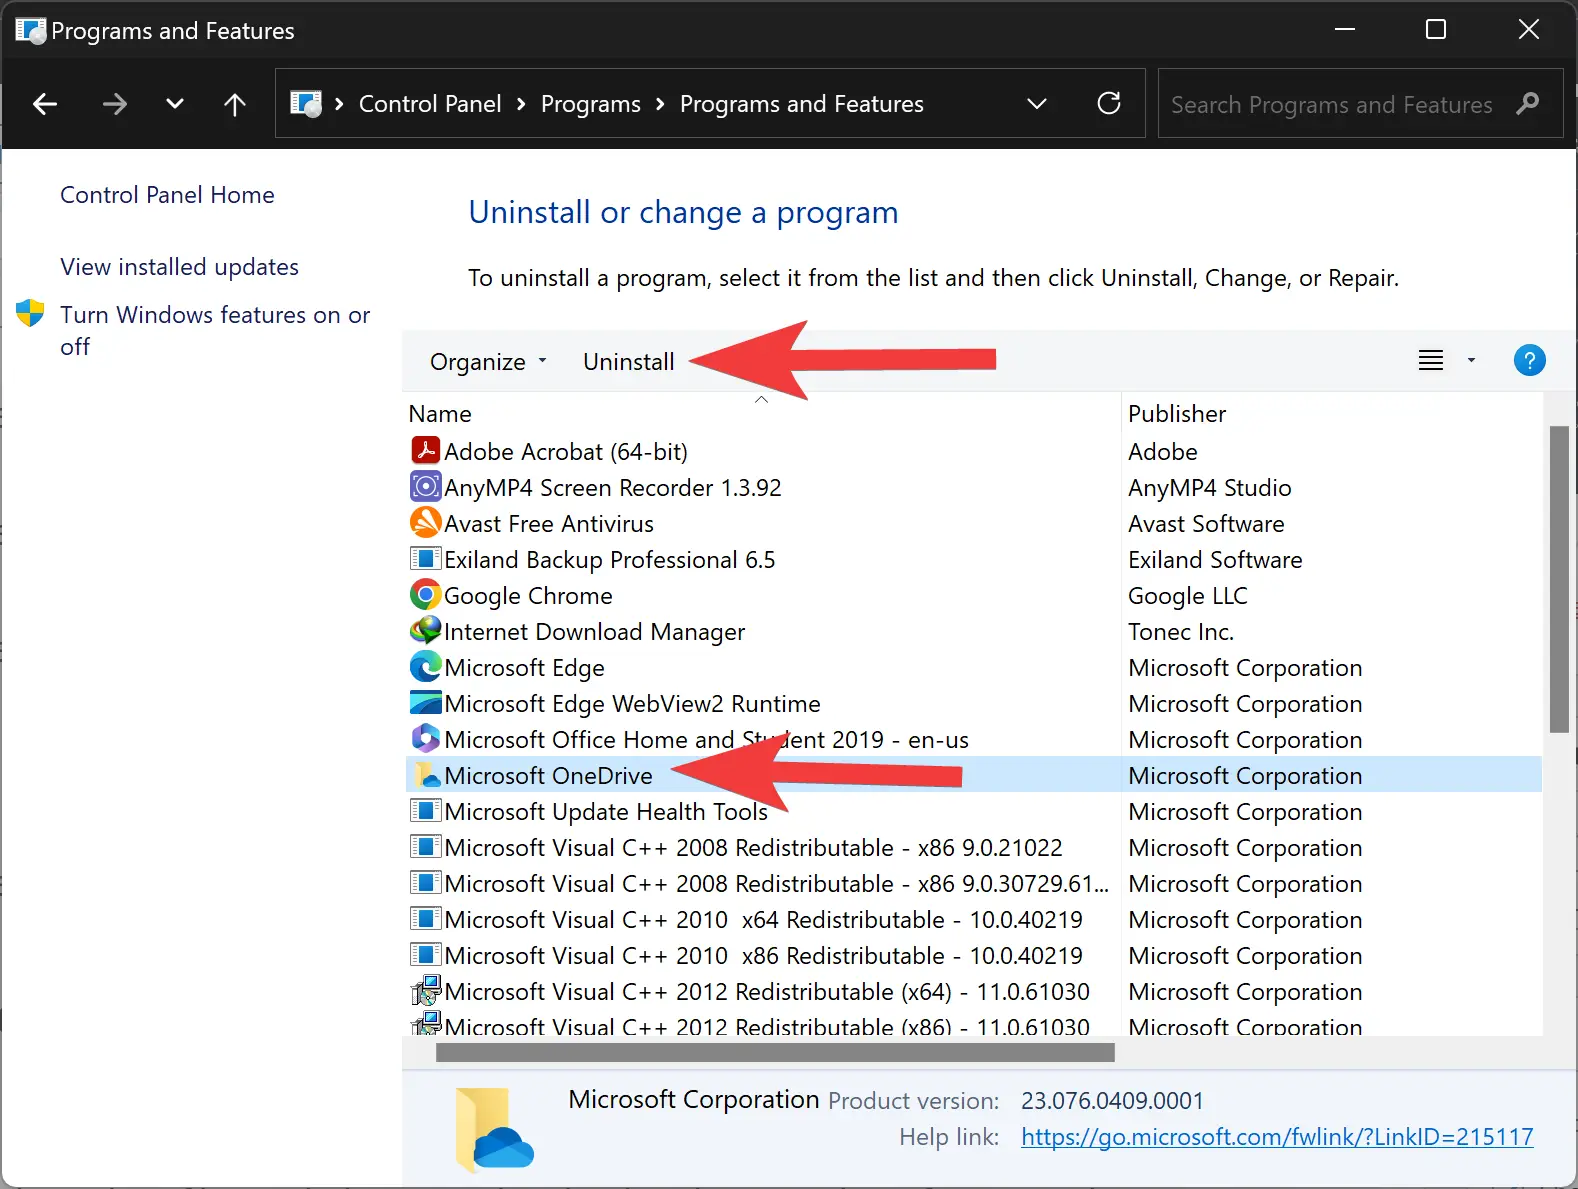
Step 5. Click on Uninstall button and follow the on-screen instructions.
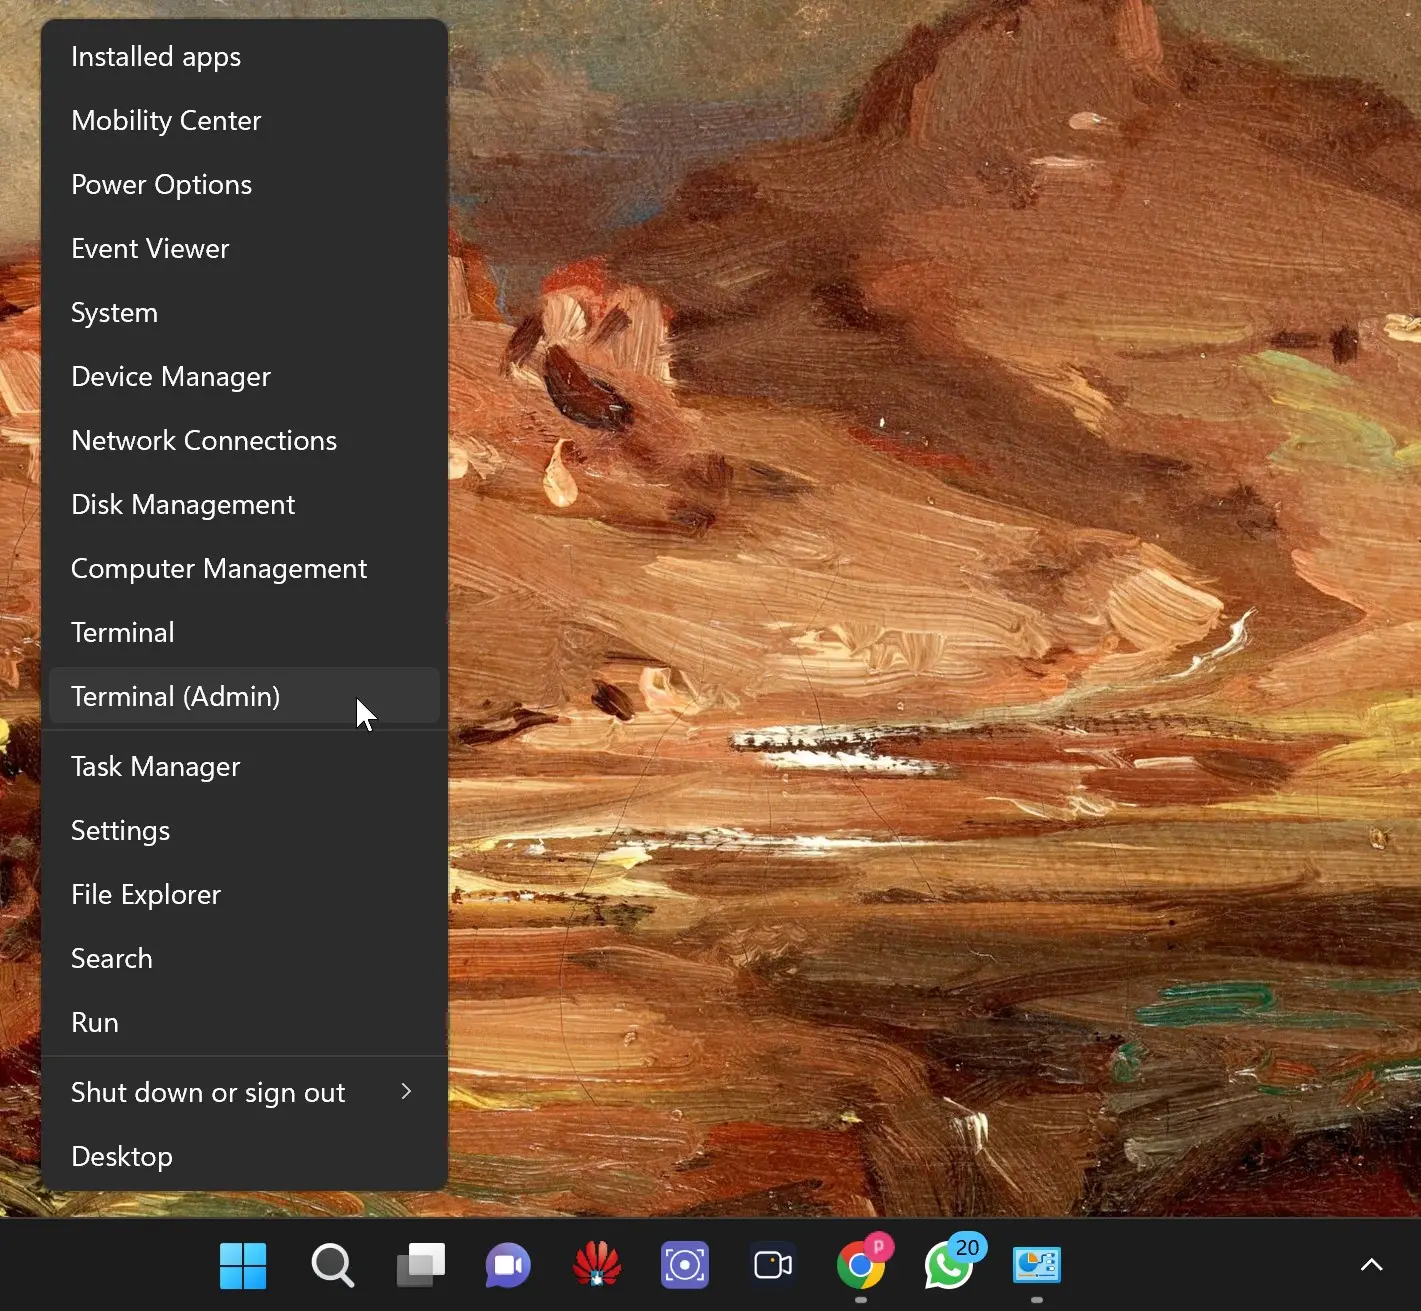
How to Uninstall OneDrive in Windows 11 from Terminal?
It is also possible to uninstall and remove OneDrive from Windows 11 using the Terminal app. Here are the steps:-
Step 1. Right-click the Start button and choose Terminal (Admin) from the pop-up menu.
Step 2. In the elevated Terminal Command Prompt or PowerShell, type the following command and press Enter.
winget uninstall Microsoft.OneDrive
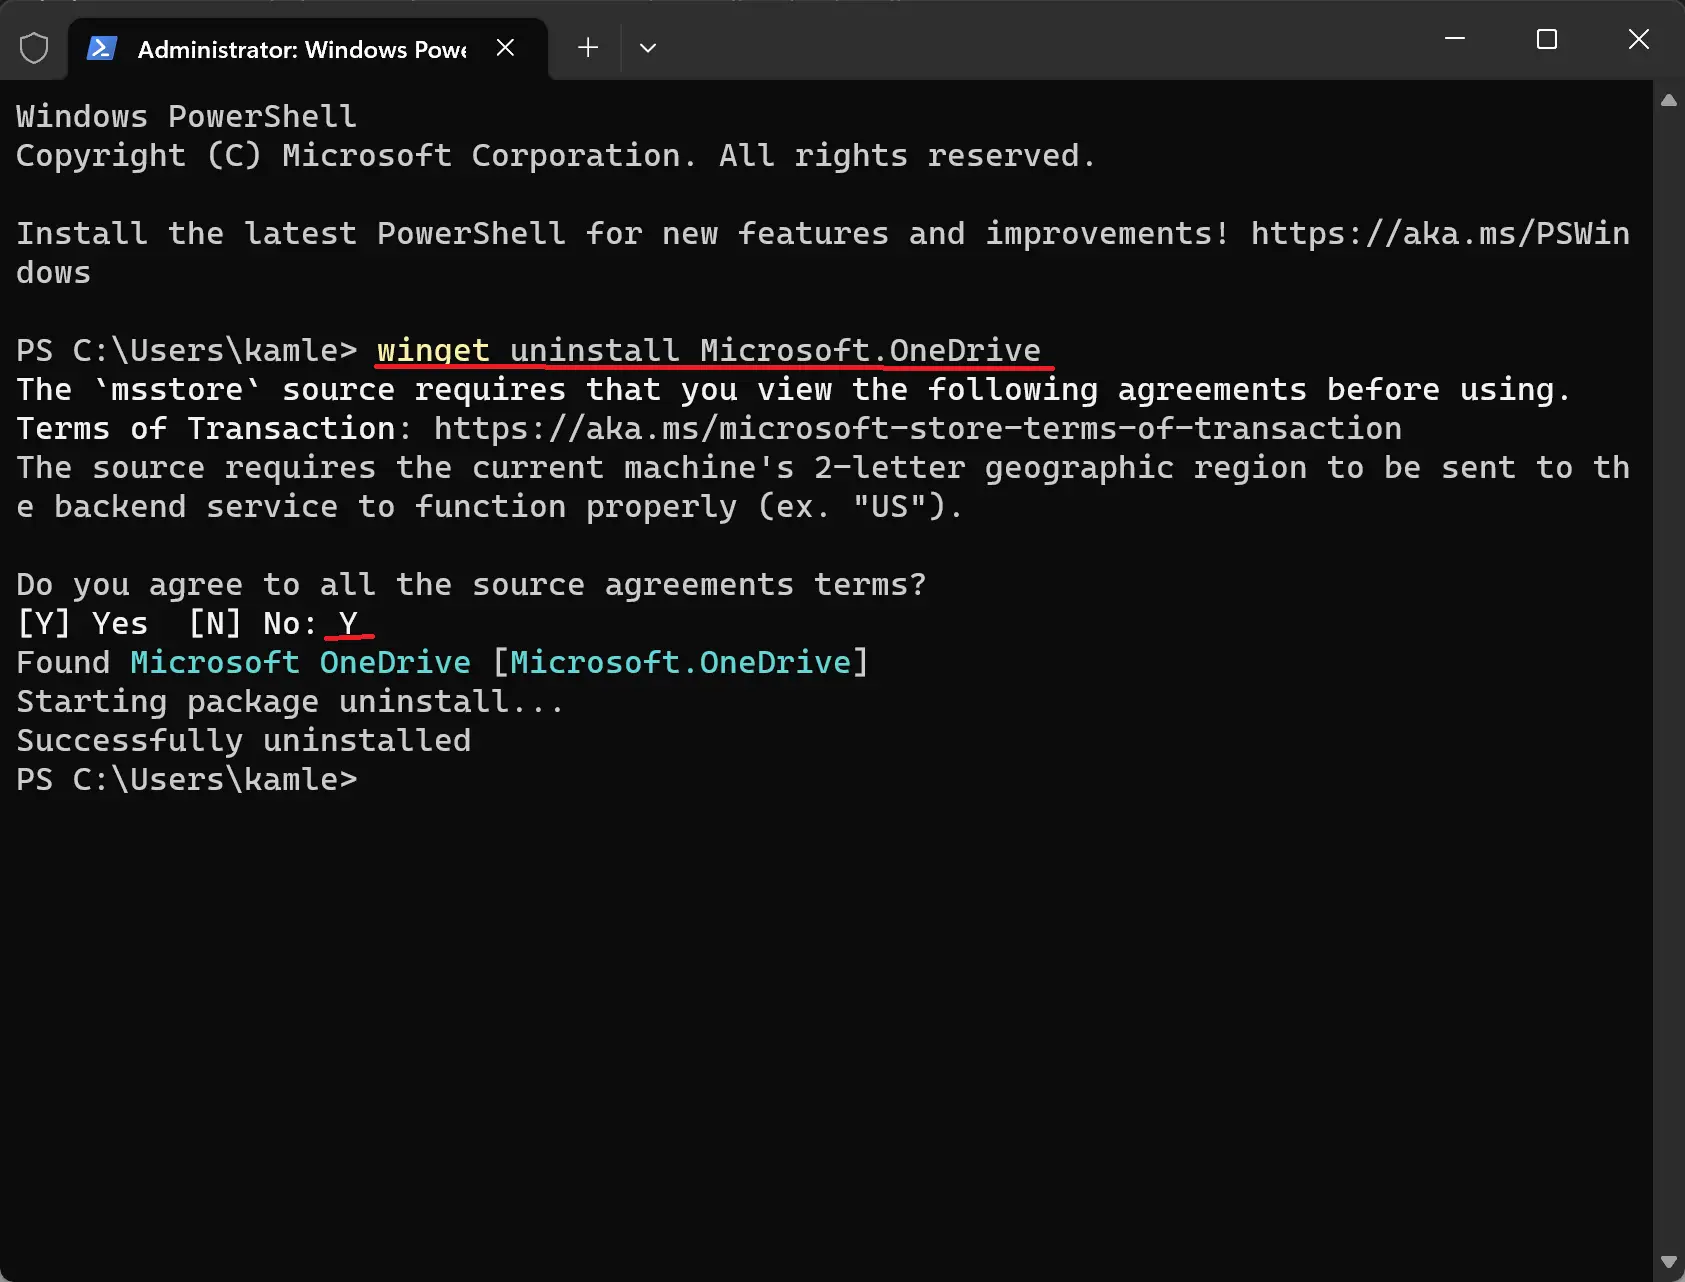
Step 3. When prompted, type Y and press Enter to continue uninstalling OneDrive.
It will immediately uninstall and remove OneDrive from your PC.
Conclusion
In conclusion, while Microsoft OneDrive is a useful app for many Windows 11 users to back up their files and photos to the cloud and access them from anywhere, some users may prefer not to use it. Fortunately, Windows 11 makes it easy to uninstall the OneDrive app without the need for third-party software. By following the simple steps outlined in this article, you can easily remove the OneDrive app from your PC. If you change your mind, you can always reinstall it from the Microsoft Store app.