Dynamic Data Exchange (DDE) is a feature in Microsoft Excel that allows data to be shared between applications in real-time. While DDE can be useful for certain tasks, it can also pose security risks if not managed properly. Therefore, it is essential to know how to disable DDE in Excel to enhance security and protect your data. In this gearupwindows article, we will explore the steps to disable DDE in Excel.
What is Dynamic Data Exchange (DDE)?
Dynamic Data Exchange (DDE) is an interprocess communication system in Microsoft Windows that allows applications to share data and send commands to one another. In Excel, DDE can be used to link data from other applications and enable real-time updates. While this functionality can be beneficial, it can also be exploited by malicious actors to launch attacks, such as phishing campaigns or the execution of malware.
Why Disable DDE?
Disabling DDE in Excel can enhance security in several ways:-
- Mitigating Security Risks: DDE can be exploited by malicious actors to execute harmful code, including malware and phishing attacks. Disabling DDE reduces the risk of such security breaches.
- Preventing Data Leakage: Disabling DDE prevents unauthorized access to sensitive data that may be inadvertently shared with other applications.
- Enhanced Control: Disabling DDE gives you better control over the data-sharing capabilities of Excel, ensuring that data is shared only when you explicitly intend to do so.
How to Turn Off Dynamic Data Exchange (DDE) in Excel?
Method 1: Using Excel Options
Step 1. Launch Excel by clicking on its icon in the Windows Start menu or by searching for it in the search bar.
Step 2. Click on “File” in the top left corner of the Excel window to open the File menu.
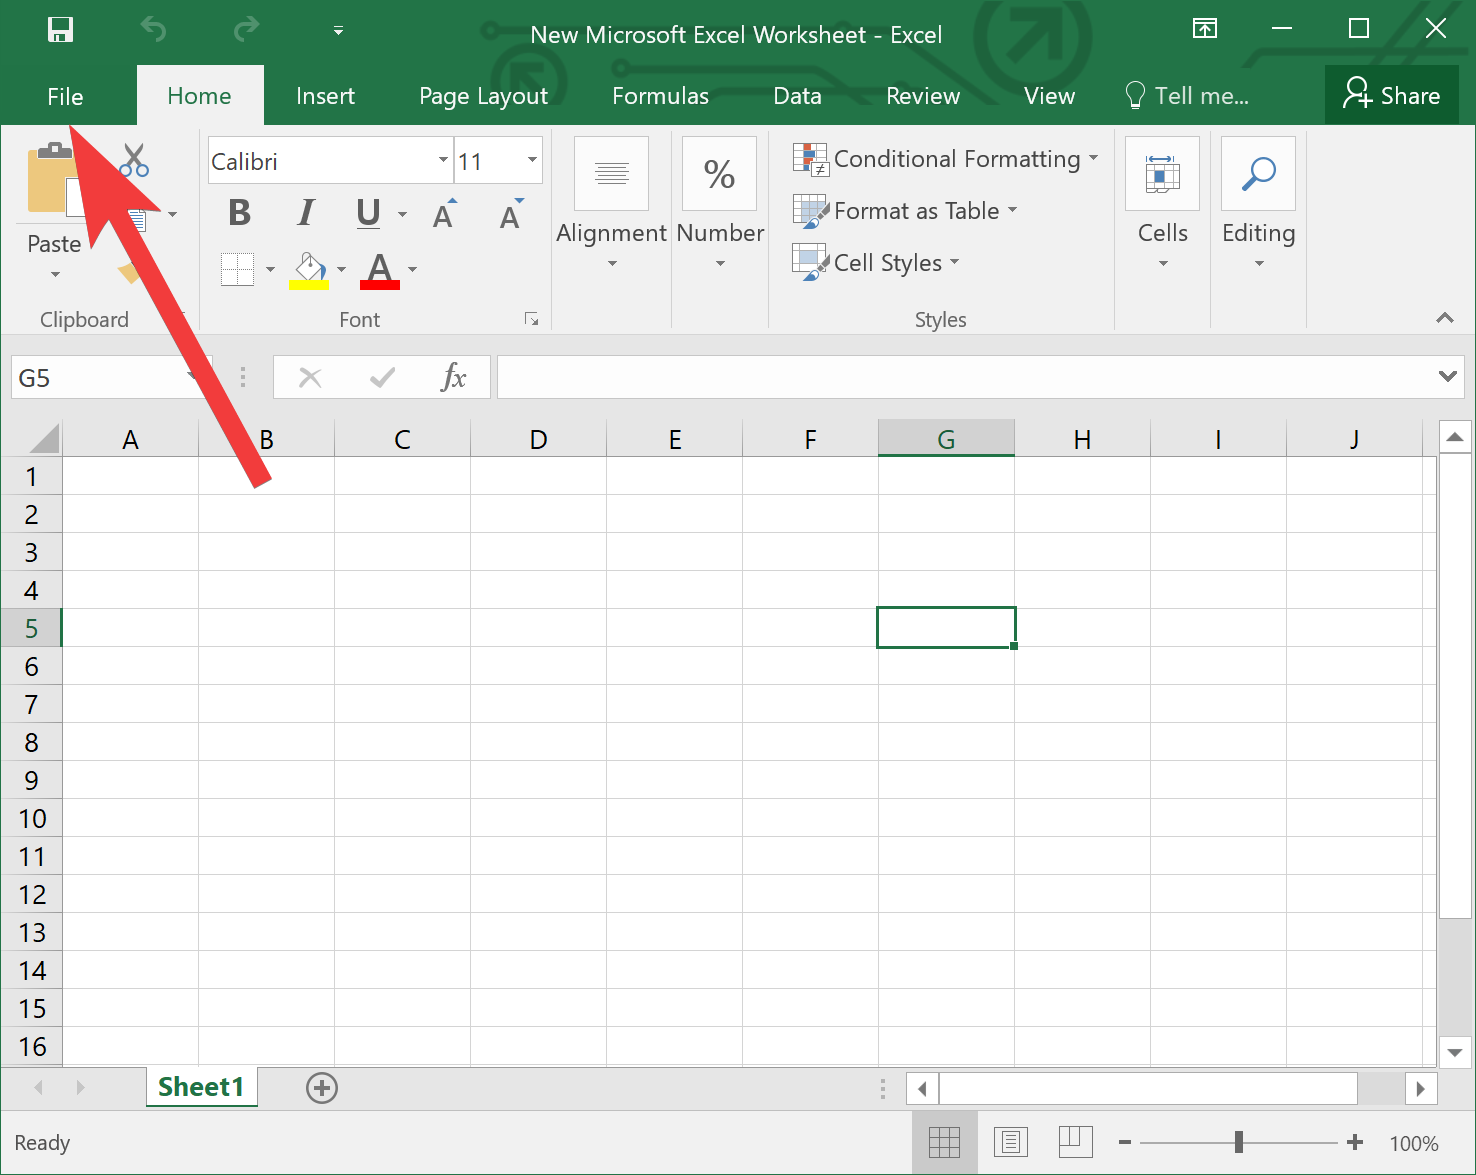
Step 3. From the File menu, select “Options.” This will open the Excel Options dialog box.
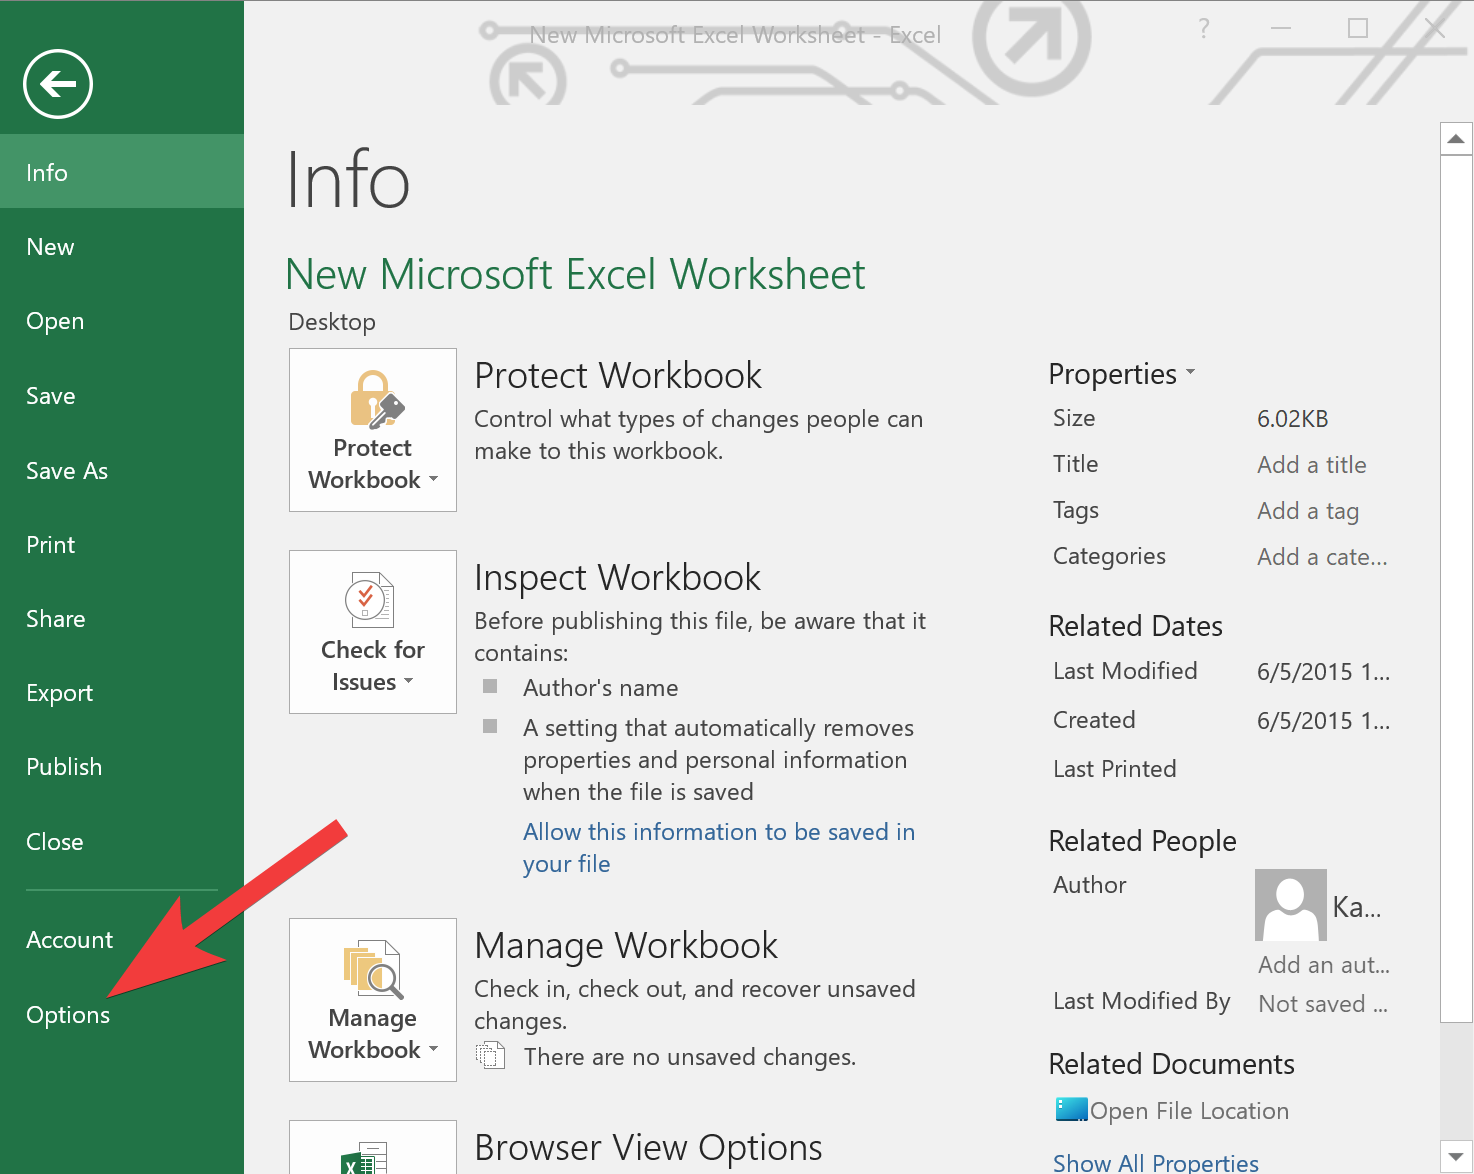
Step 4. In the Excel Options dialog box, locate and click on the “Advanced” category on the left-hand side.
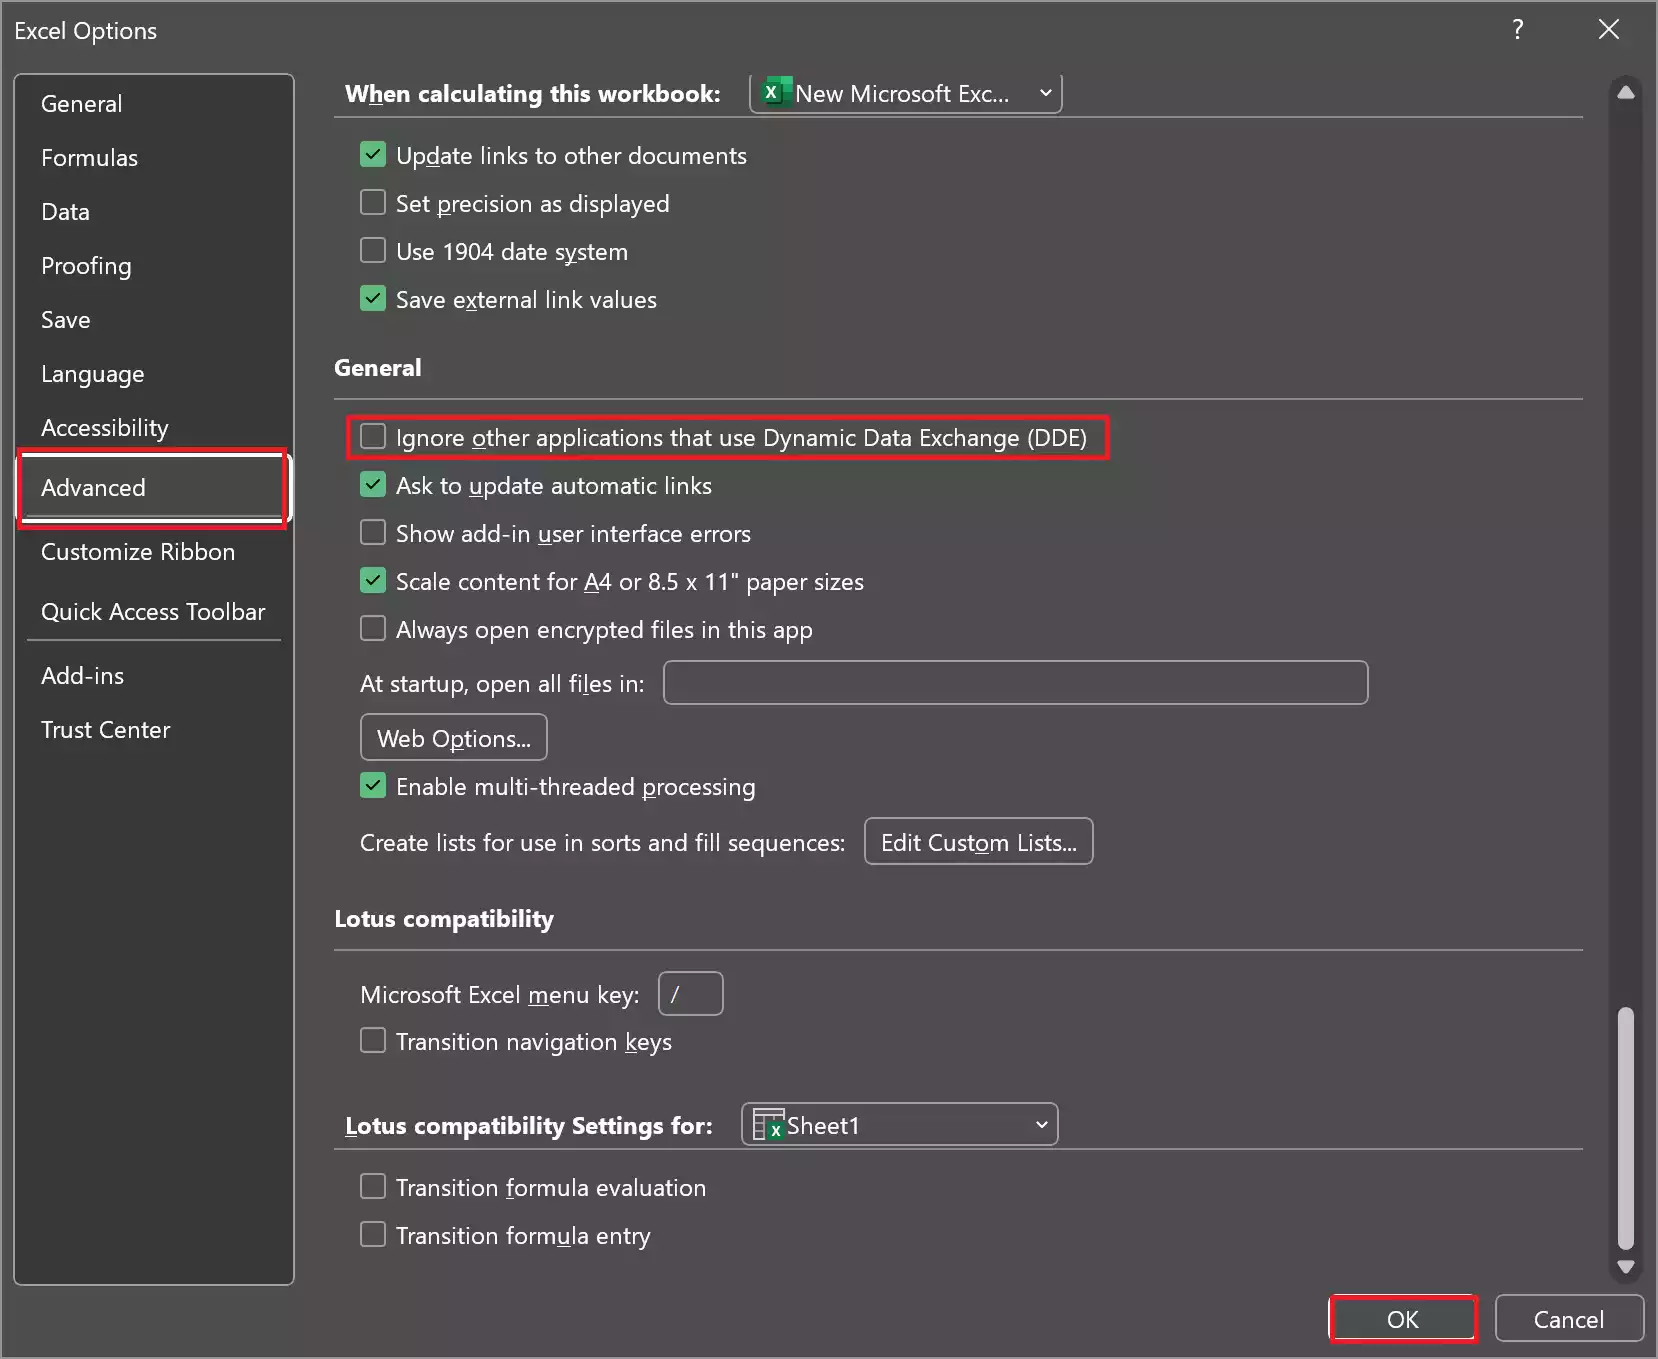
Step 5. Scroll down within the Advanced options until you find the “General” section.
Step 6. In the “General” section, look for the option labeled “Ignore other applications that use Dynamic Data Exchange (DDE).” This option is typically near the bottom of the list.
Step 7. To disable DDE, uncheck the box next to “Ignore other applications that use Dynamic Data Exchange (DDE).”
Step 8. After unchecking the box, click the “OK” button at the bottom of the Excel Options dialog box to save your changes.
Step 9. Close Excel and reopen it for the changes to take effect.
By following these steps, you have successfully disabled Dynamic Data Exchange (DDE) in Microsoft Excel.
Method 2: Using Registry Editor
In addition to the method described earlier using Excel’s user interface, you can also disable Dynamic Data Exchange (DDE) in Excel through the Windows Registry. This method provides more granular control and can be useful if you want to disable DDE for Excel across multiple computers in an organization. Please exercise caution when working with the Windows Registry, as it contains critical system settings. Follow these steps:-
Important Note: Modifying the Windows Registry can cause system instability or data loss if done incorrectly. It’s recommended to create a backup of your Registry before proceeding.
Step 1. Open the Registry Editor.
To do that, press “Win + R” to open the Run dialog box. Type “regedit” and press Enter. This will open the Windows Registry Editor.
Step 2. In the Registry Editor, navigate to the following key:-
HKEY_CURRENT_USER\Software\Policies\Microsoft\office\<Excel Version>\excel\security
Note: Replace “<Excel Version>” with the version of Excel you are using (e.g., ‘16.0‘ for Excel 2016).
Step 3. If you don’t find the above-mentioned path, you need to create it manually. In that case, navigate to this path instead:-
HKEY_CURRENT_USER\Software\Policies\Microsoft
Then, create the sub-keys accordingly.
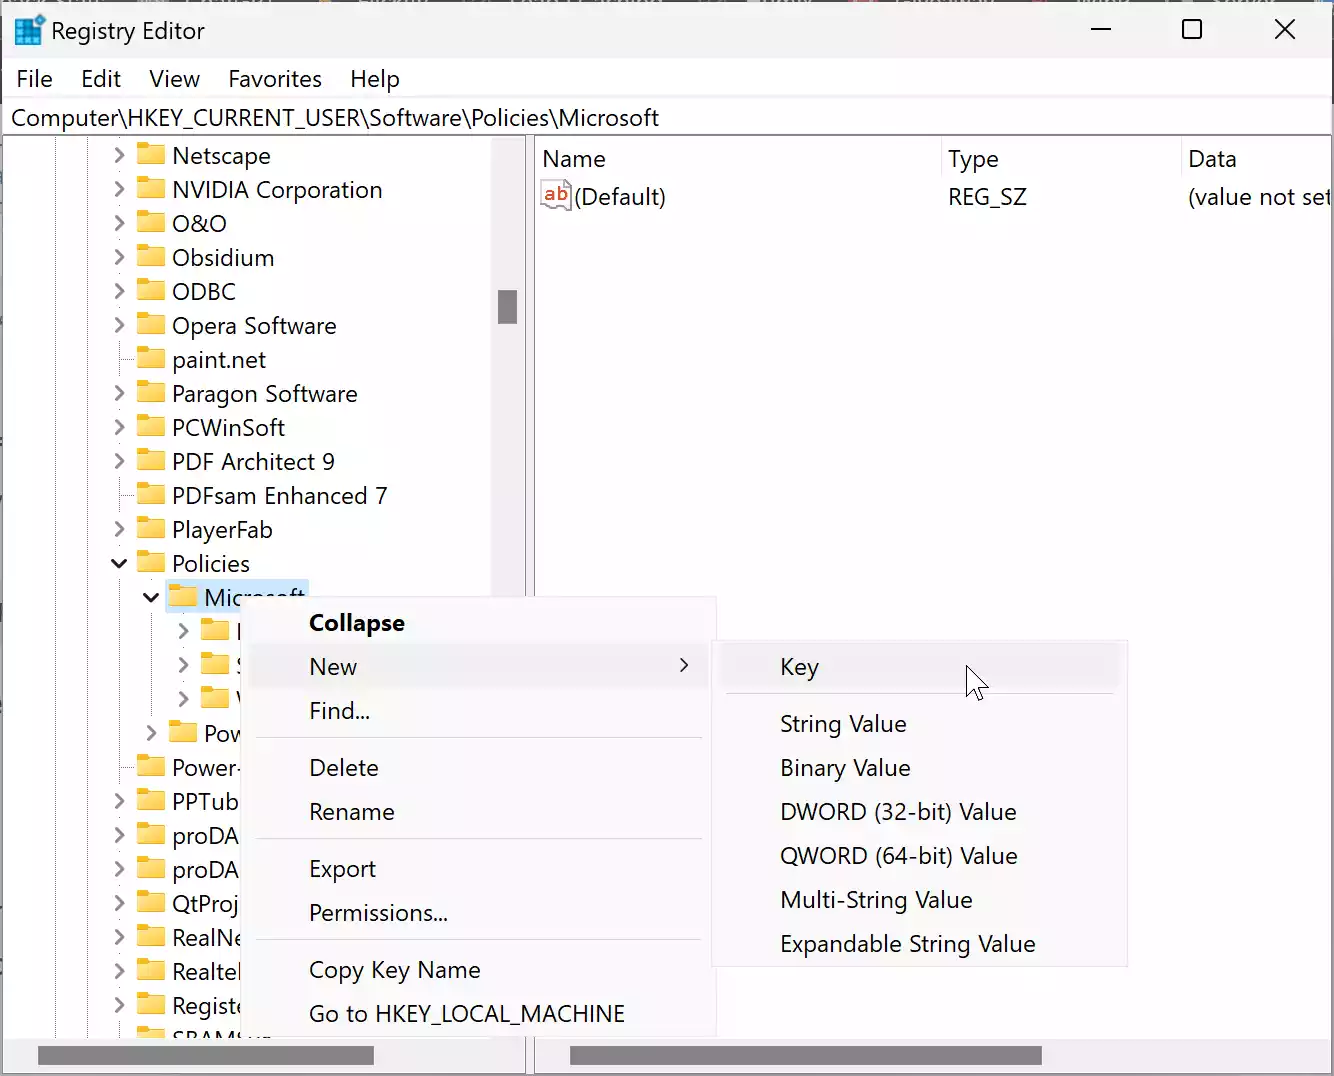
If you can find the office key, right-click on the Microsoft folder and select New > Key. Name it office. Like this, you can create other sub-keys.
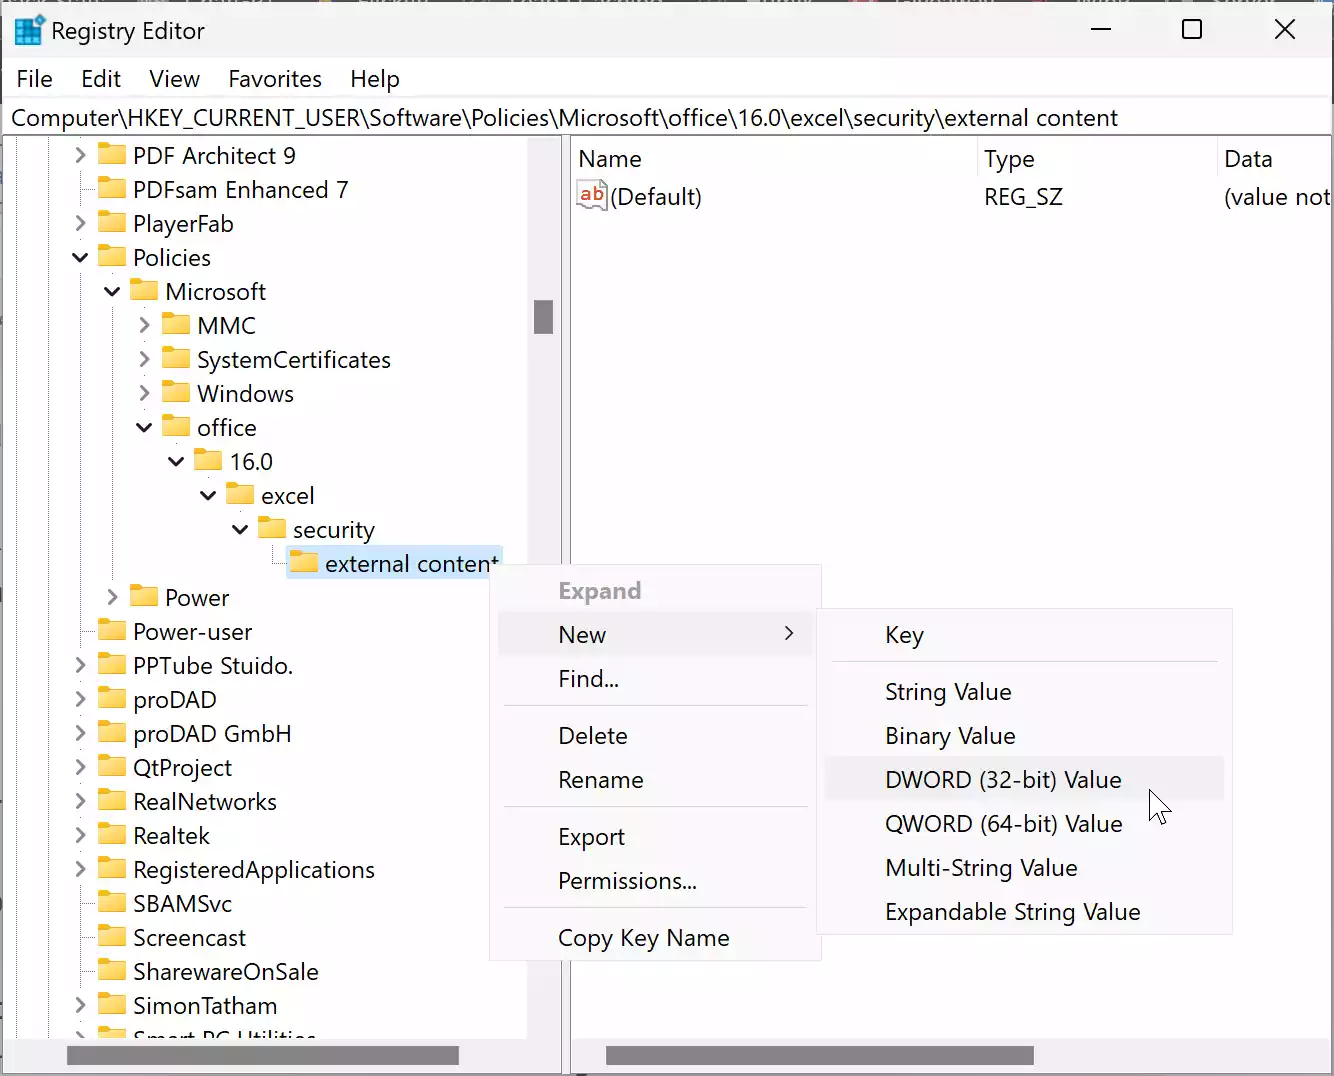
Step 4. Right-click on the “security” folder in the left pane, select “New,” and then choose “Key.”
Step 5. Name the new key as “external content.”
Step 6. Right-click on external content, select “New“ > “DWORD (32-bit) Value,” and name it as disableddeserverlookup.
Step 7. Double-click on the “disableddeserverlookup” DWORD value to edit it.
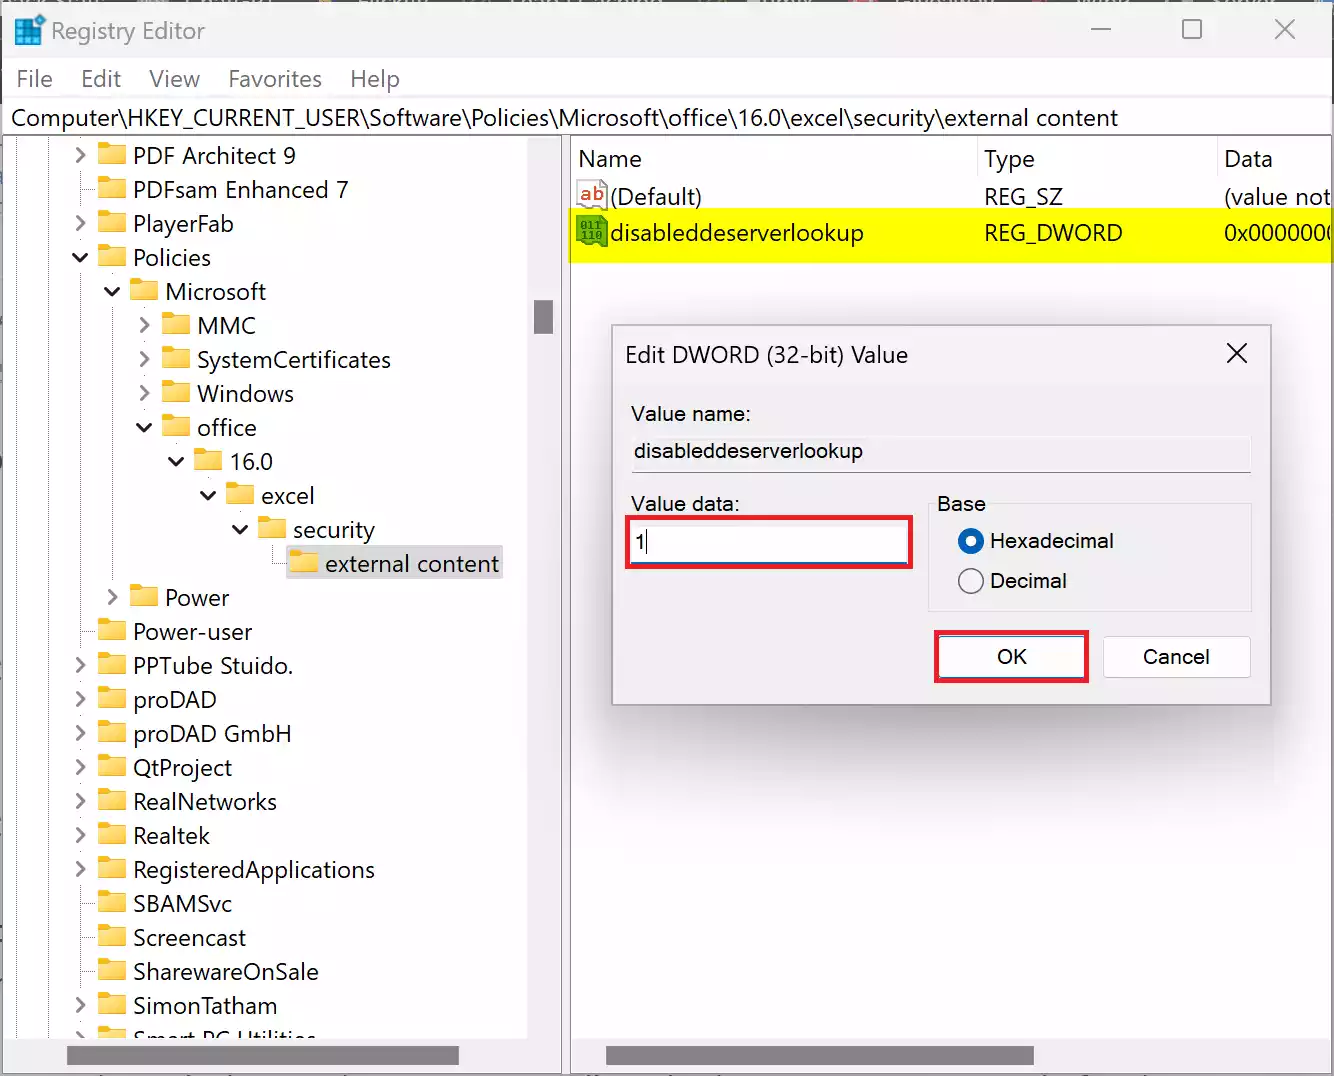
Step 8. Change the Value Data to `1` (zero) to disable DDE. Leave it as `0` to enable DDE.
Step 9. Click “OK” to save the changes.
Step 10. Restart your PC for the changes to take effect.
Disabling DDE through the Windows Registry will apply the setting system-wide for the specified Excel version. It will prevent DDE-based interactions with Excel, which can help enhance security.
Remember that working with the Windows Registry can have system-wide consequences, so be cautious and back up your Registry before making any changes. If you are not comfortable with Registry edits, consider using the Excel options method described earlier for a safer and more user-friendly approach.
Method 3: Through Local Group Policy Editor
You can also disable Dynamic Data Exchange (DDE) in Microsoft Excel using Group Policy Editor (GPE) if you are using a Windows version that supports it. Group Policy Editor allows administrators to manage various settings across multiple computers in a Windows domain. Here are the steps to disable DDE using GPE:-
Note: The Group Policy Editor is typically available in Windows Pro, Enterprise, and Education editions. If you are using Windows Home Edition, you need to enable Group Policy first or use alternative methods.
Step 1. Press “Windows + R” to open the Run dialog box.
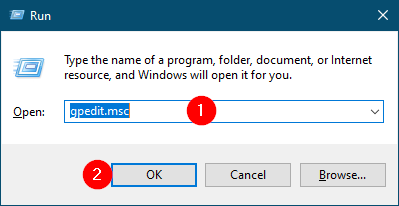
Step 2. Type “gpedit.msc” and press Enter. This will open the Group Policy Editor.
Step 3. In the Group Policy Editor, navigate to the following path:-
User Configuration > Administrative Templates > Microsoft Office <Excel Version> > Excel Options > Security > Trust Center > External Content
Note: Replace `<Excel Version>` with the version of Excel you are using (e.g., `16.0` for Excel 2016).
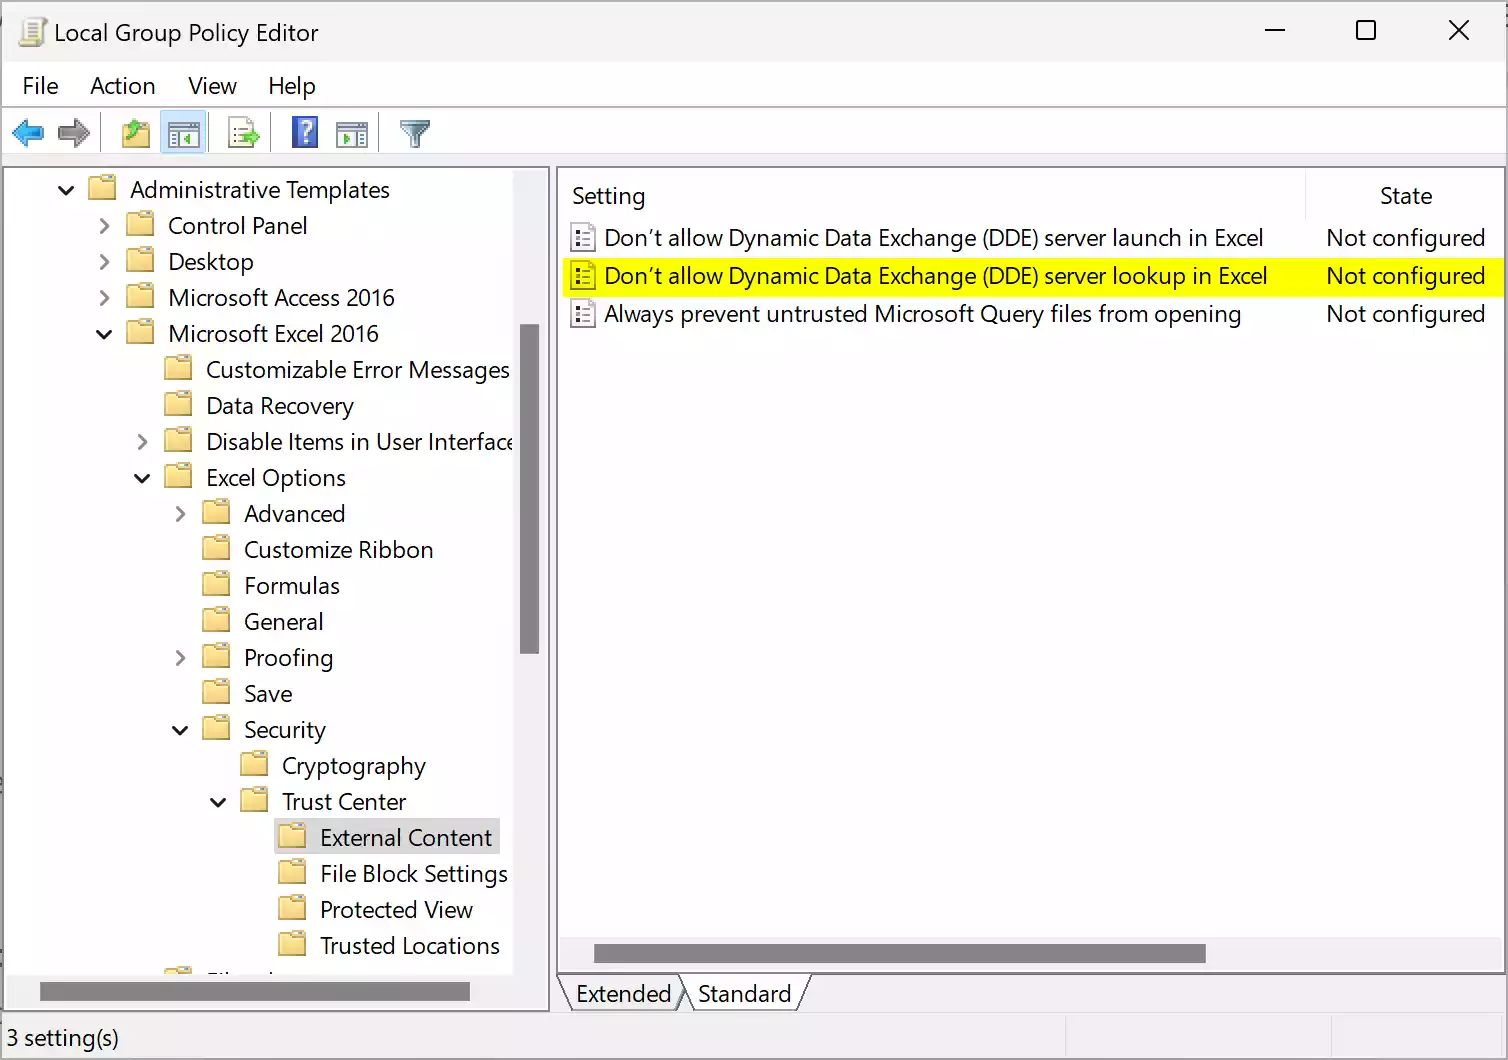
Step 4. In the right pane, you will find an option named “Don’t allow Dynamic Data Exchange (DDE) server lookup in Excel.” Double-click on it to open its properties.
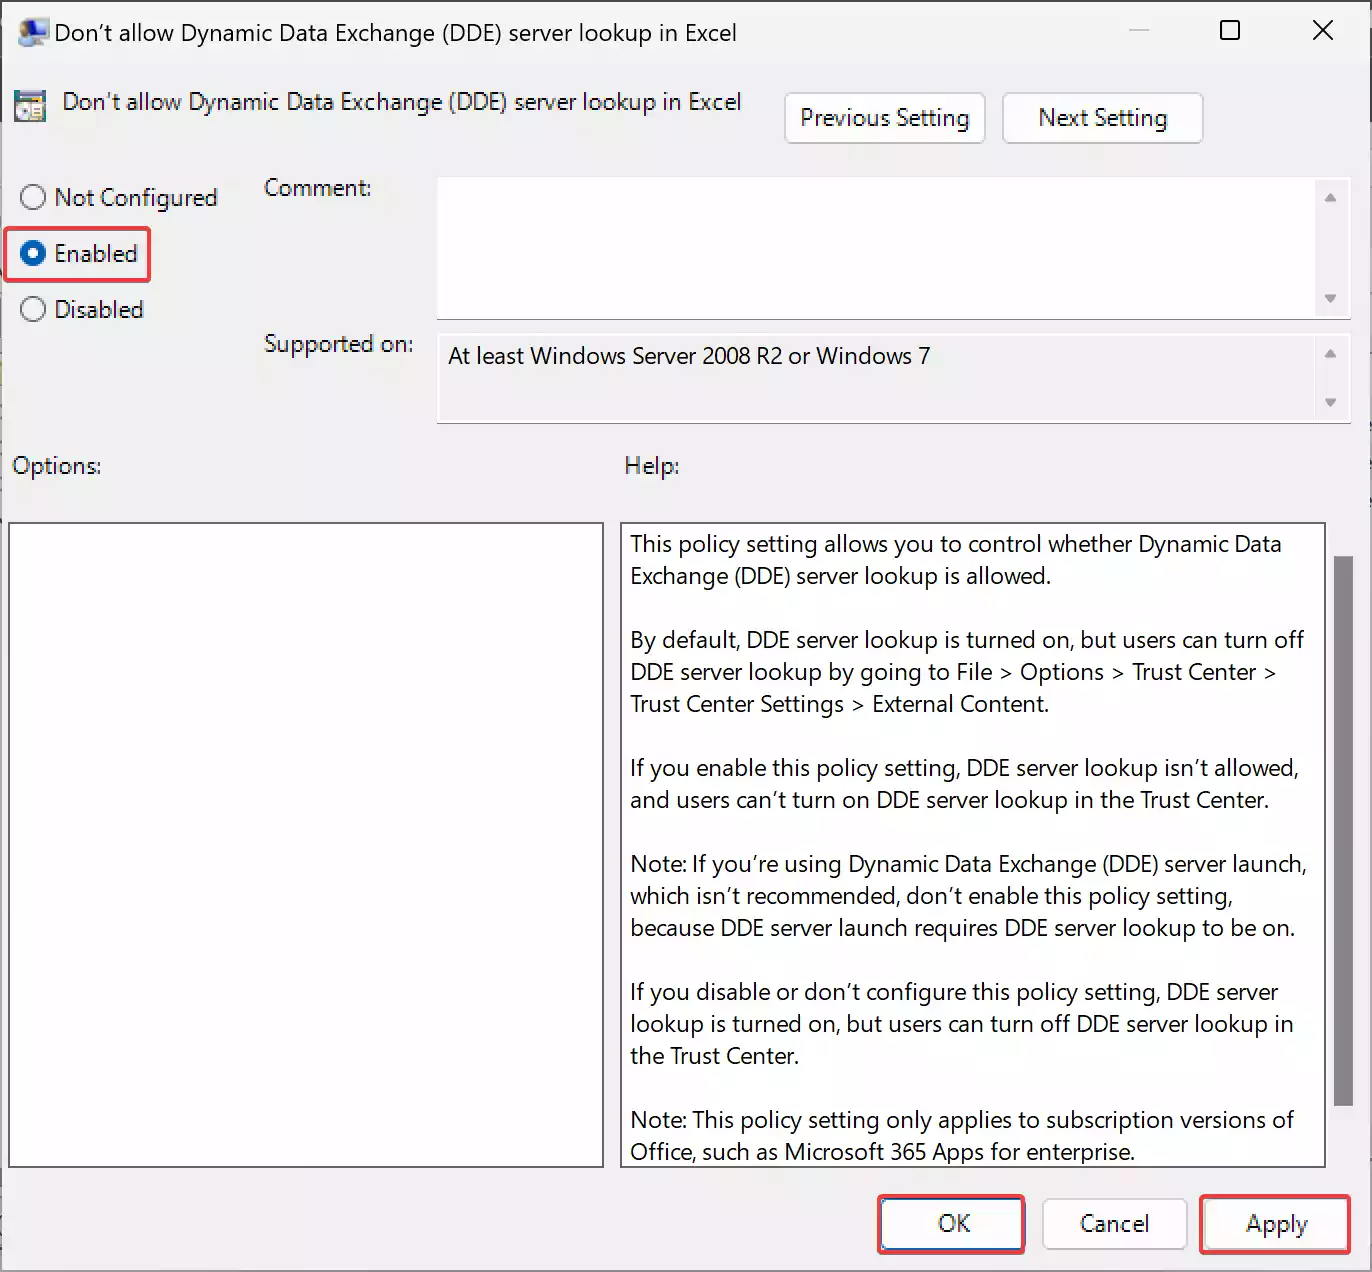
Step 5. In the properties window, select the “Enabled” option.
Step 6. Click “Apply” and then “OK” to save the changes.
Step 7. Restart your PC for the changes to take effect.
Using Group Policy Editor allows you to disable DDE for multiple users or computers in a domain, providing centralized control over Excel settings. This method is particularly useful in enterprise environments where you want to enforce security policies consistently.
Please note that access to Group Policy Editor may require administrative privileges, and the availability of certain policies may vary depending on your Windows version and network configuration. Always make sure to back up your system or registry before making changes through Group Policy if you are uncertain about the potential impact on your system.
Conclusion
Dynamic Data Exchange (DDE) is a feature that allows data to be shared in real-time between applications in Microsoft Excel. While it can be useful, it also poses security risks that may warrant its disabling. By following the steps outlined in this article, you can easily disable DDE in Excel, thereby enhancing security and protecting your data from potential threats. Remember to stay vigilant and keep your software up to date to maintain a secure computing environment.