VBS stands for Virtualization Based Security, a security feature that uses hardware virtualization. Windows utilizes this “virtual secure mode” to host several security solutions, providing them with much higher protection from vulnerabilities and preventing the use of malicious exploits. This allows users to prevent unsigned drivers, codes, software, etc., from residing in your system’s memory. Basically, it creates a secure and isolated region of memory from the regular operating system, allowing users to host various security solutions.
Microsoft introduced the VBS in Windows 10, which is now part of Windows 11. According to Microsoft, when VBS is enabled, you can enjoy the same level of security on your personal computers as commercial computers. However, when VBS is enabled, it will negatively affect PC performance. Most users do not need VBS protection, so you can turn off this bulletproof security after installing Windows 11 or purchasing a Windows 11 computer to gear up your PC performance.
PC Gamer and Tom’s Hardware revealed that your PC performance might drop by 28% when VBS is enabled on your computer. Therefore if you want to enjoy the full potential of your Windows 11 PC performance, you should turn off the VBS (Virtualization-Based Security). If you are a gamer, turning off VBS, you can easily notice improved gaming performance.
In this gearupwindows article, you will learn how to turn off VBS (Virtualization-Based Security) on Windows 11 PCs.
How to Check Virtualization-Based Security (VBS) Status in Windows 11?
To find whether Virtualization-Based Security (VBS) is enabled on your PC, use these steps:-
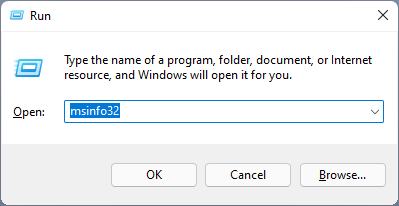
Step 1. First, hit Windows + R keys on the keyboard to invoke the Run dialog box.
Step 2. Next, type msinfo32 in the Run box and then press Enter from the keyboard to open the System Information window.
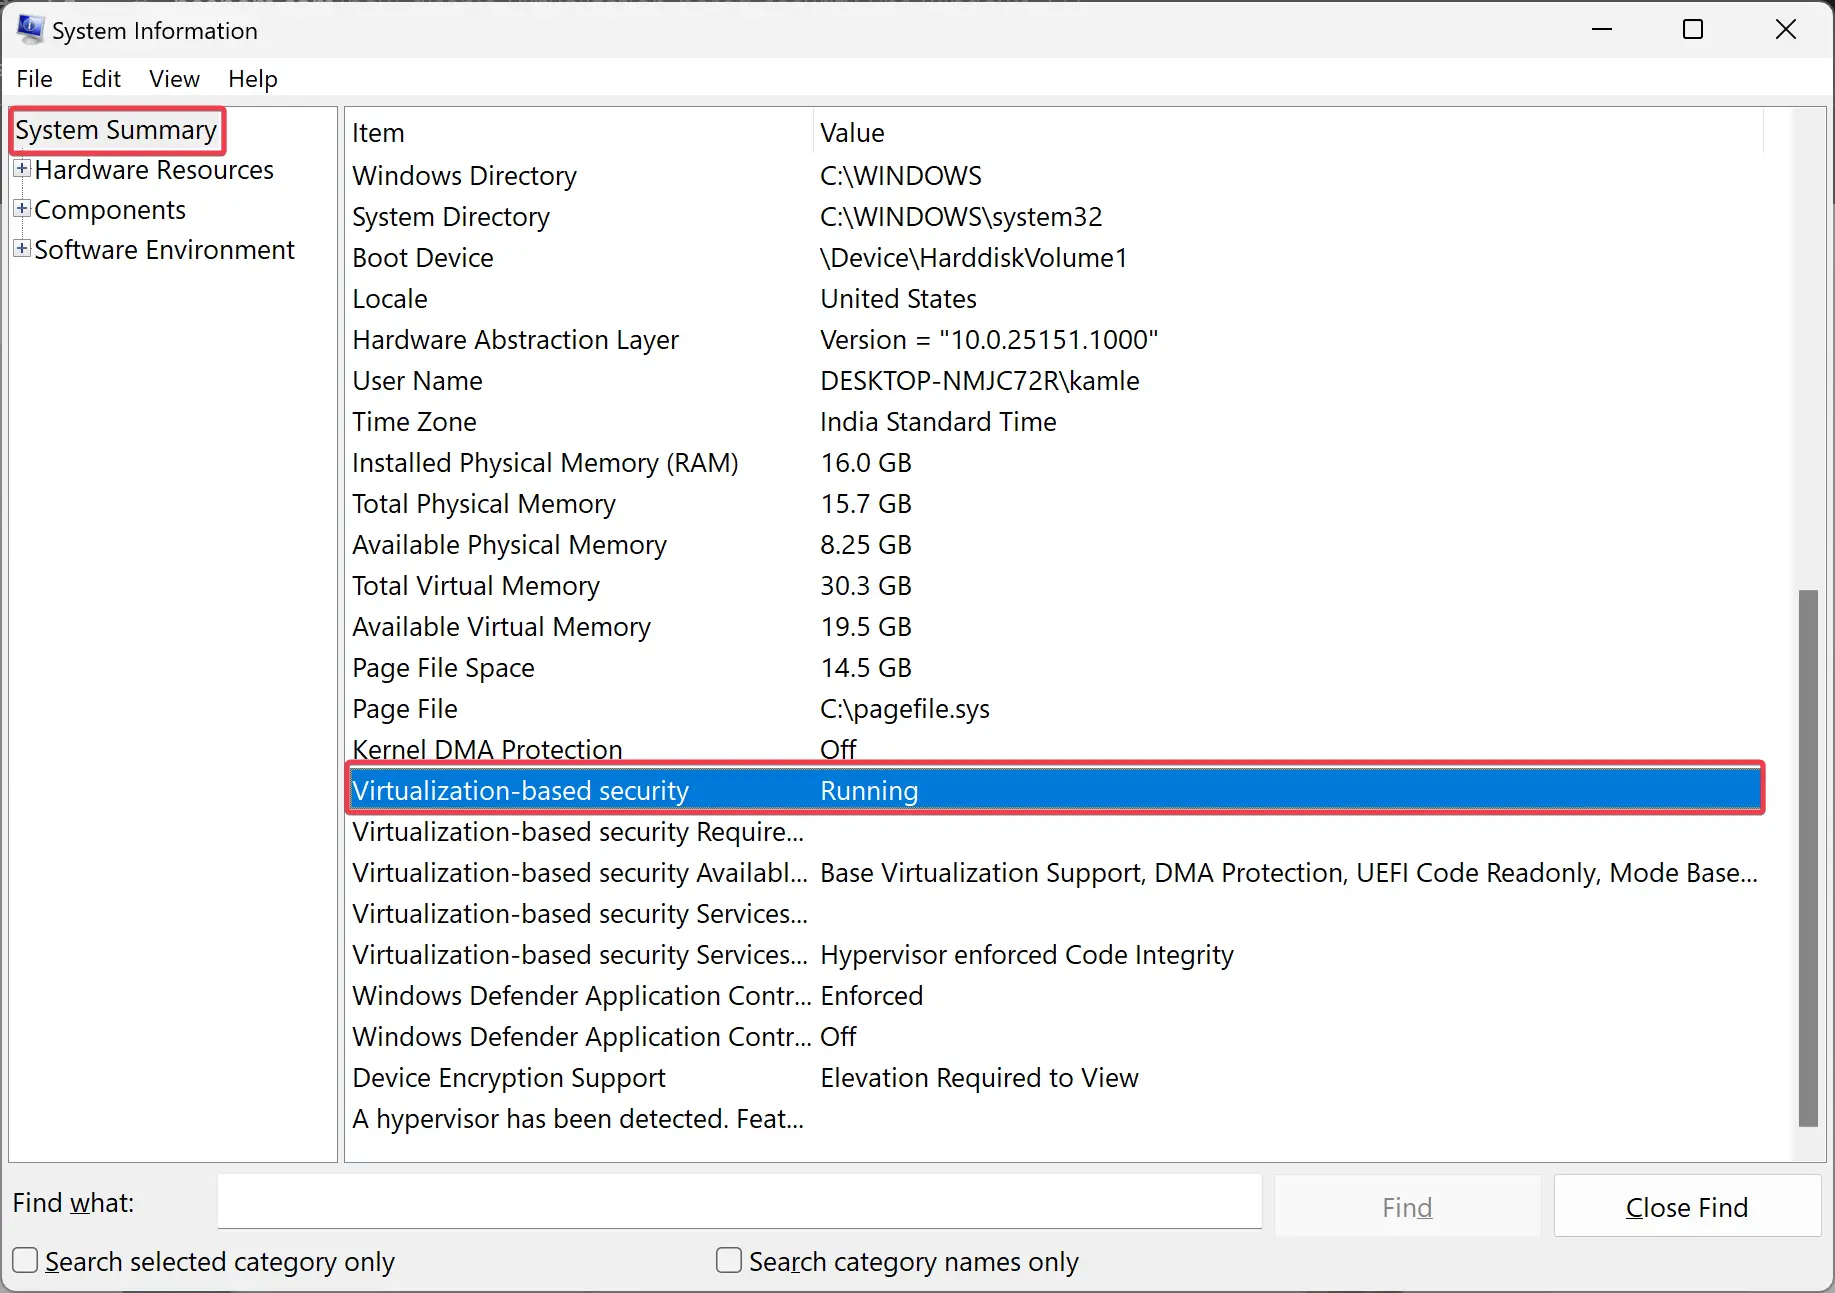
Step 3. Select System Summary on the left side when the System Information window opens. After that, besides the “Virtualization-based security” item, you can view its status. If it is “Running,” it means VBS is enabled on your Windows 11 PC. However, if you find “Not enabled,” VBS is disabled on your computer.
How to Disable VBS by Removing Windows Components in Windows 11?
If you can remove the Windows Components responsible for VBS, then VBS will be disabled automatically. Specifically, you need to disable Windows Hypervisor Platform, Virtual Machine Platform, and Microsoft Defender Application Guard on your Windows 11 PC.
To turn off VBS by removing Windows Components in Windows 11, use these steps:-
Step 1. Press Windows + R keys simultaneously to bring the Run dialog box.
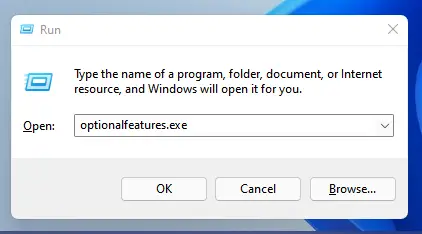
Step 2. In the Run box, type the following and hit Enter from the keyboard to call up the Windows Features dialog:-
optionalfeatures.exe
Step 3. In the Windows Features, uncheck Windows Hypervisor Platform, Virtual Machine Platform, and Microsoft Defender Application Guard (If available, you will find Microsoft Defender Application Guard under Media Features).
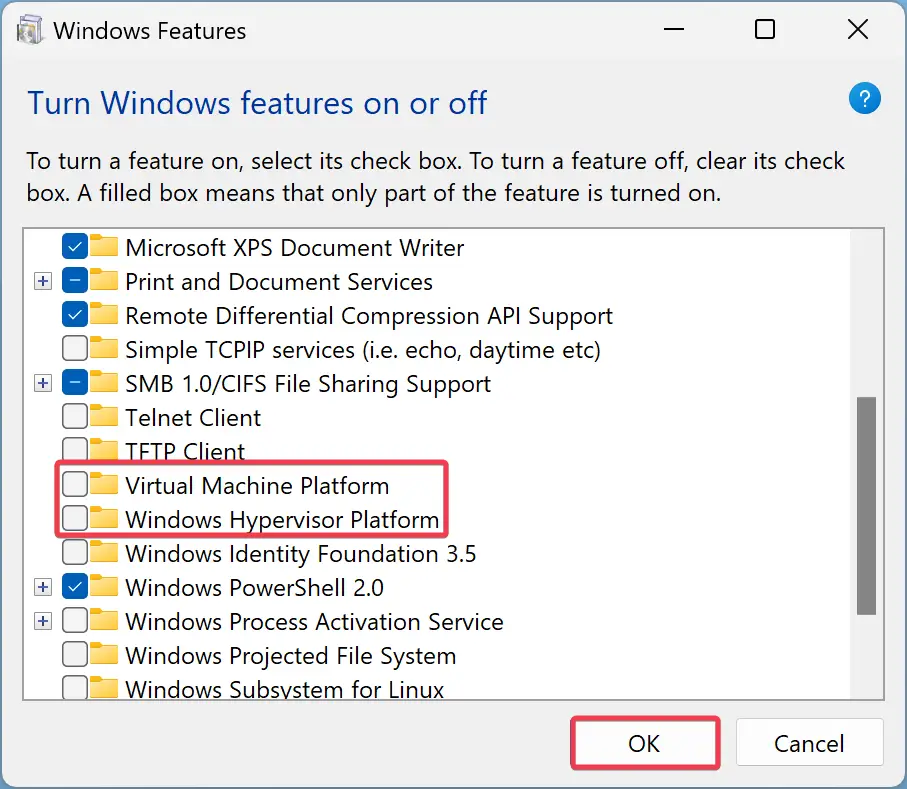
Step 4. Click OK.
Step 5. Reboot your Windows 11 machine to apply the changes.
How to Turn Off VBS (Virtualization Based Security) from Windows 11 Settings?
To disable the VBS through Windows 11 Settings, use these steps:-
Step 1. Open Settings.
Step 2. Select the Privacy & security option in the left sidebar of the Settings window.
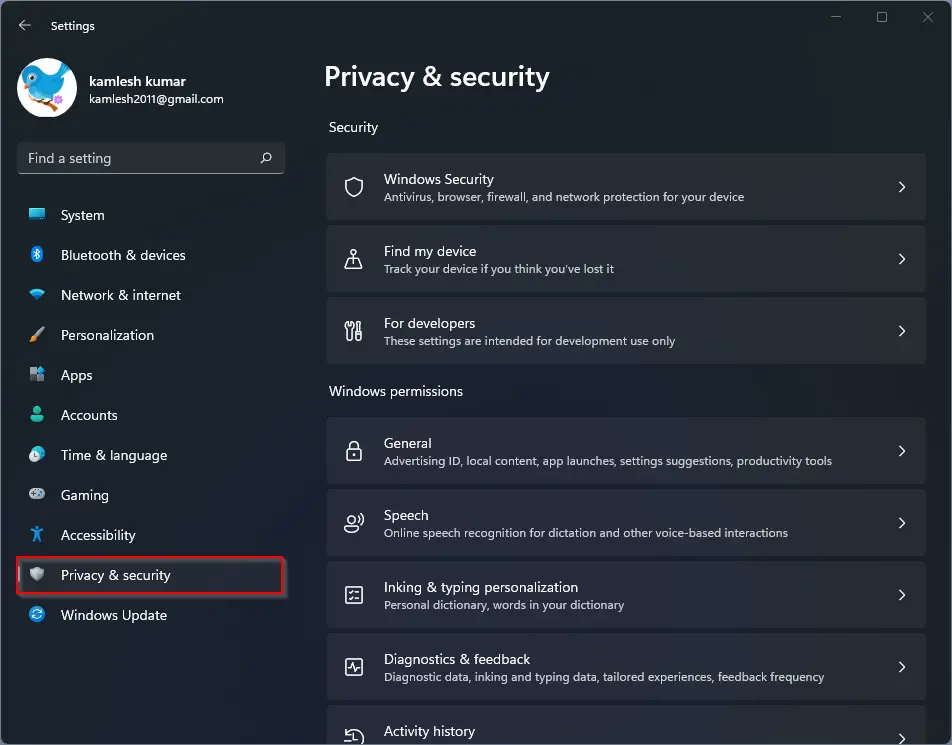
Step 3. On the right sidebar, click on the Windows Security tile.
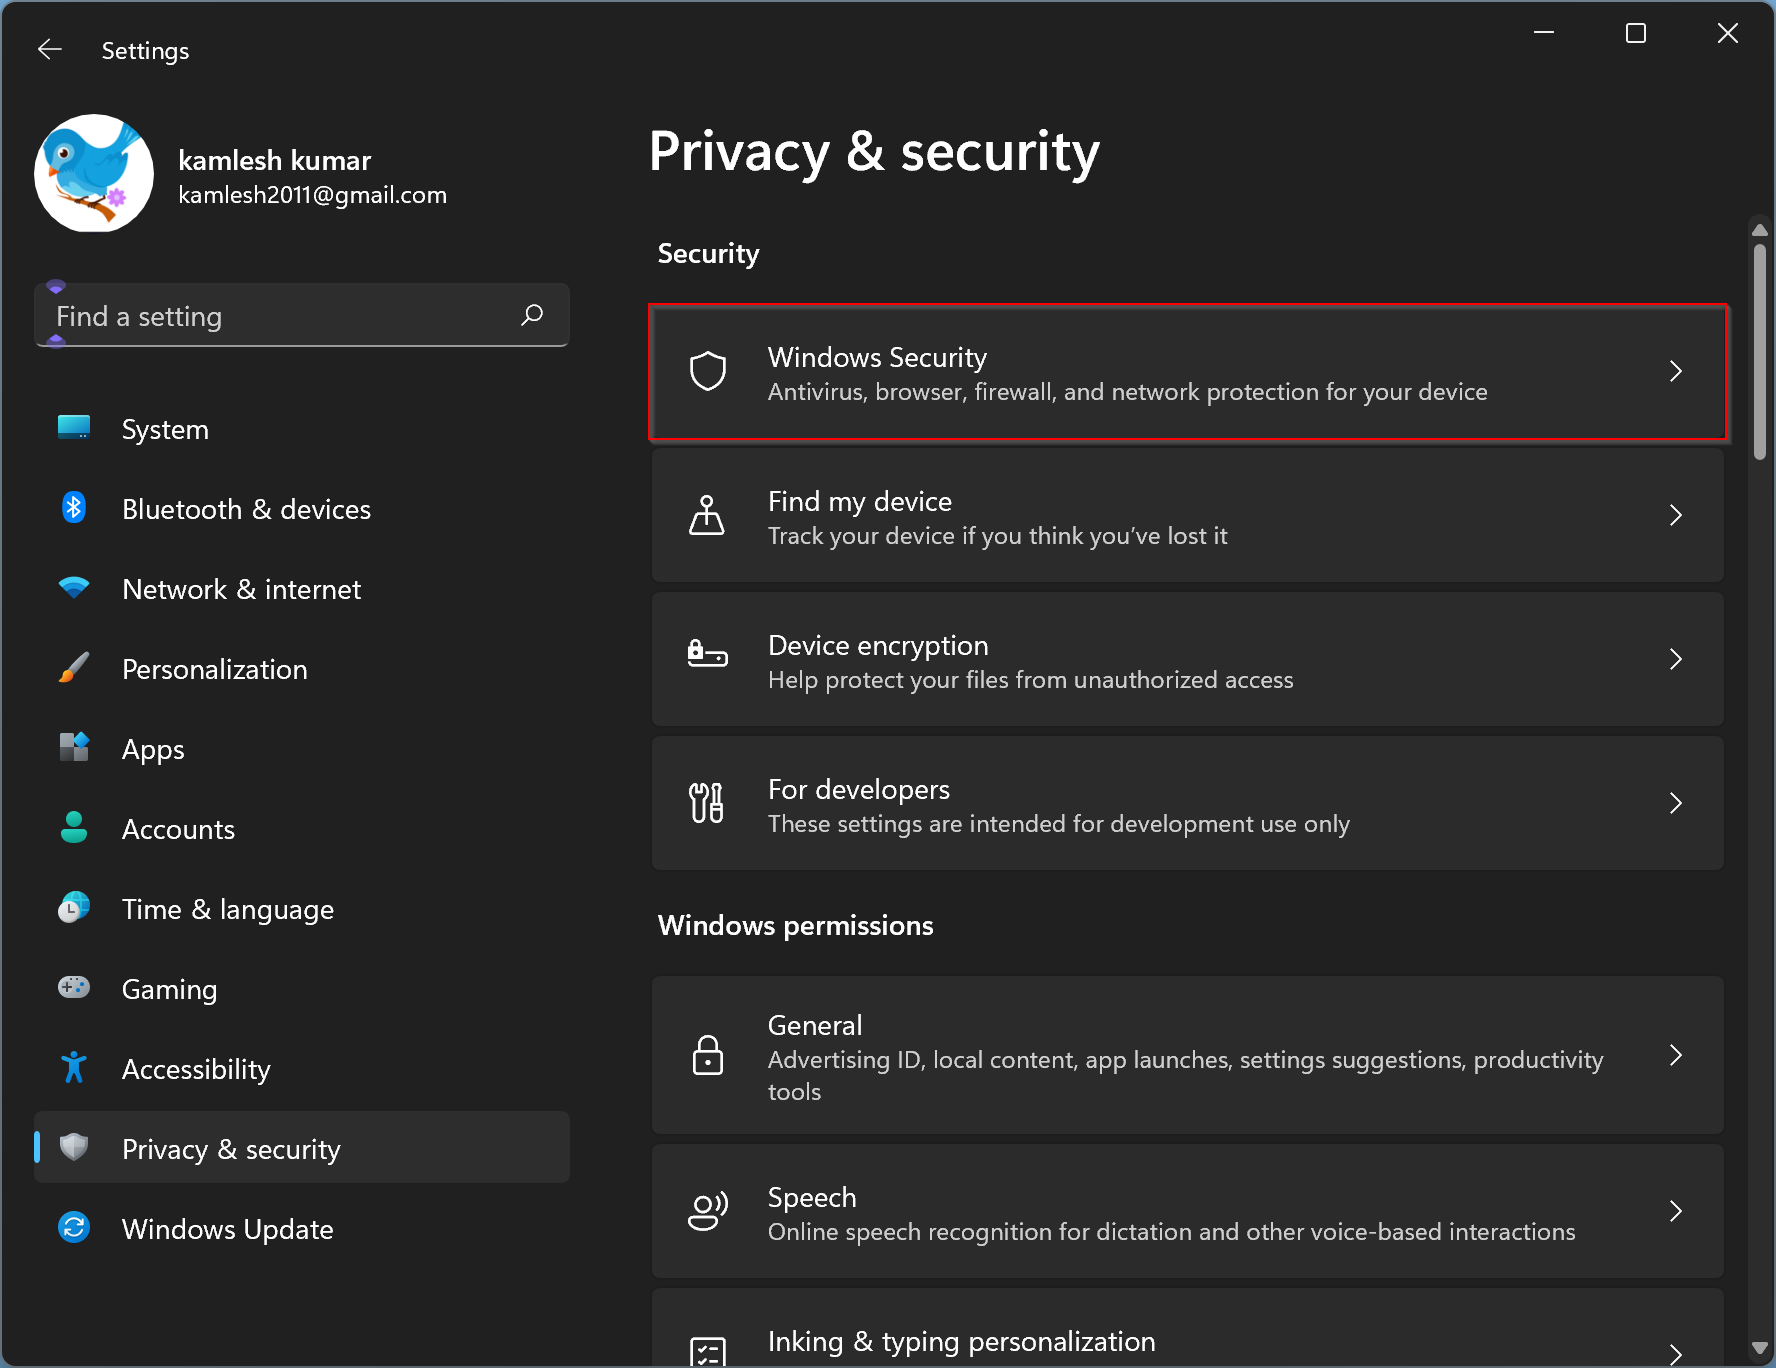
Step 4. Click the Open Windows Security button.
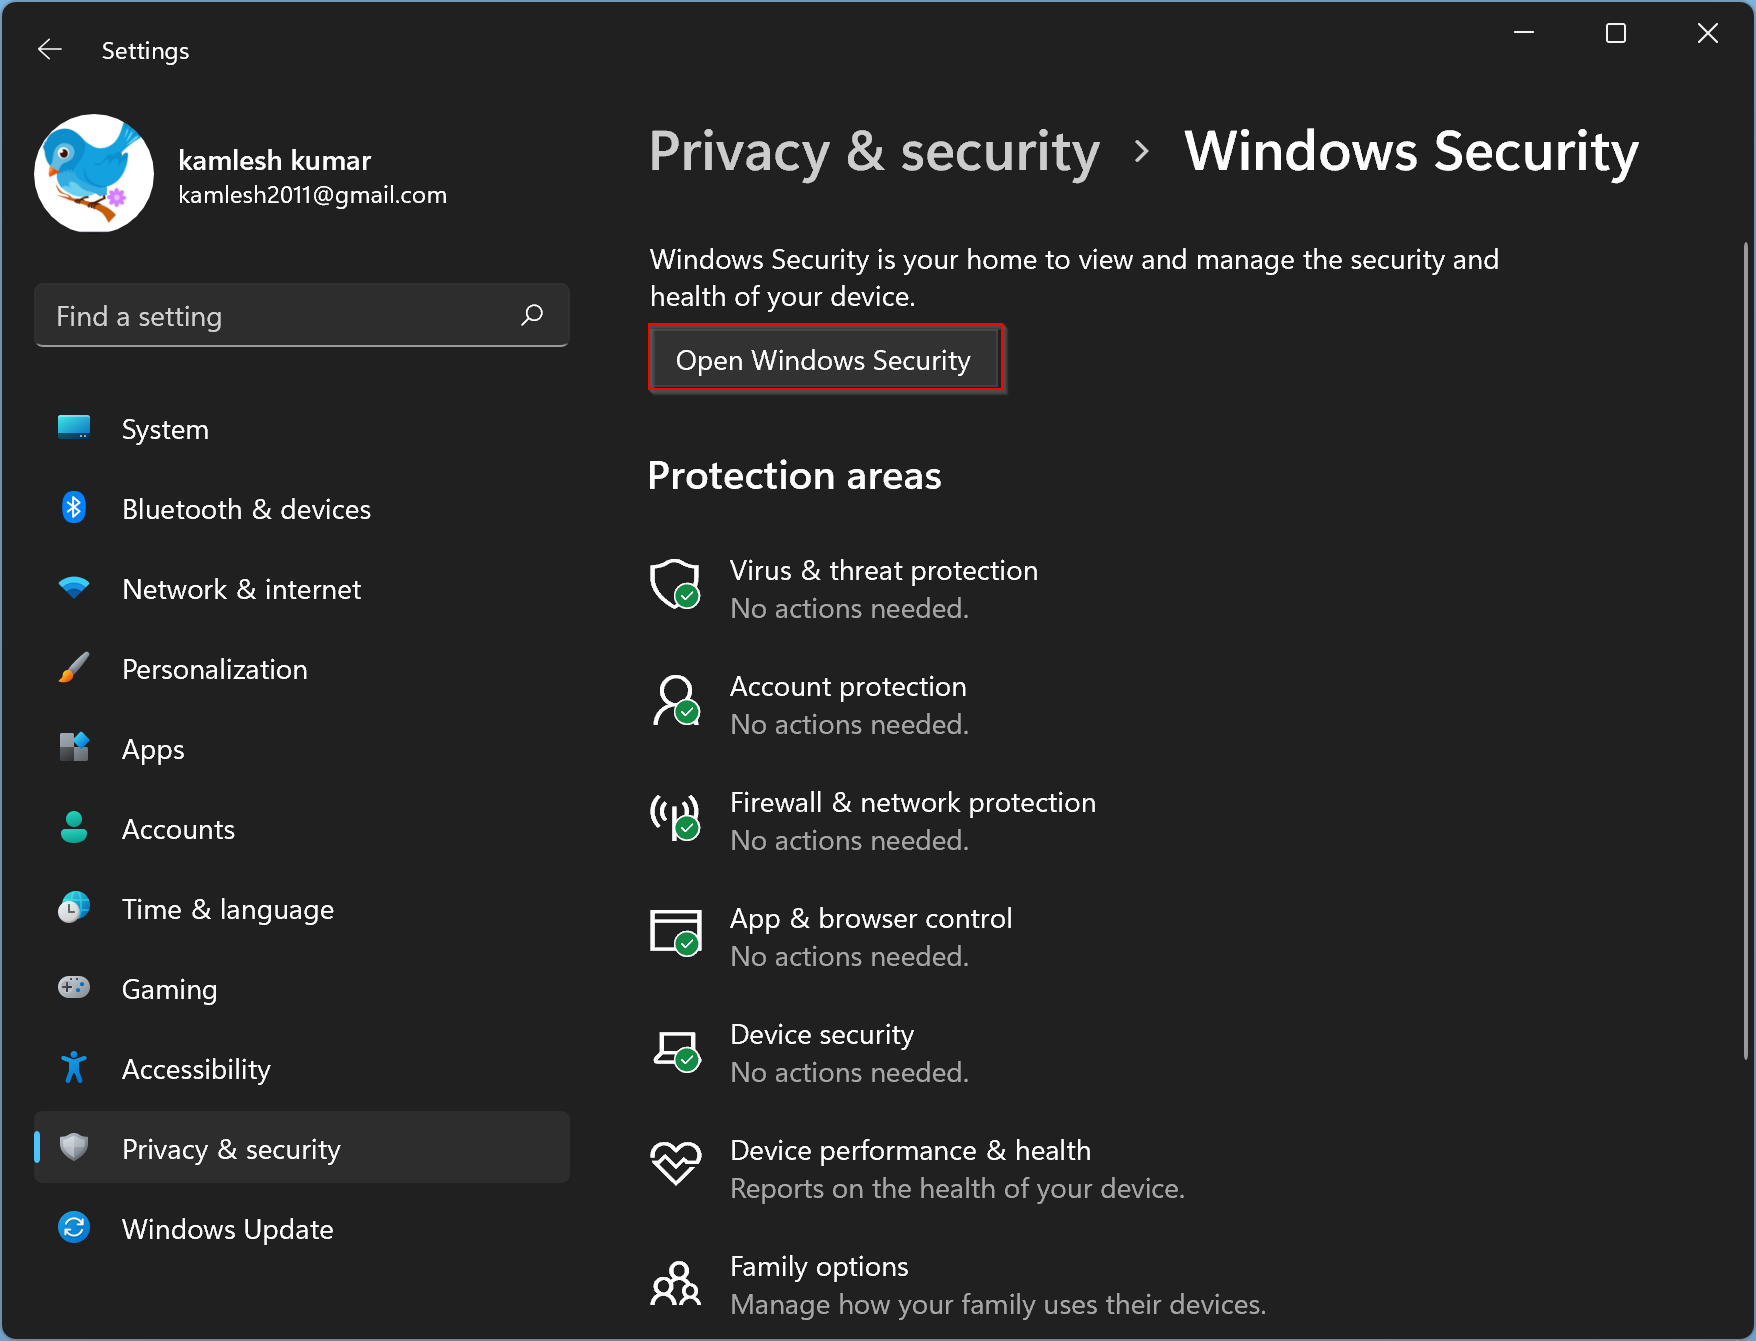
Step 5. When you’re done, the Windows Security window will appear. Switch to the Device security tab.
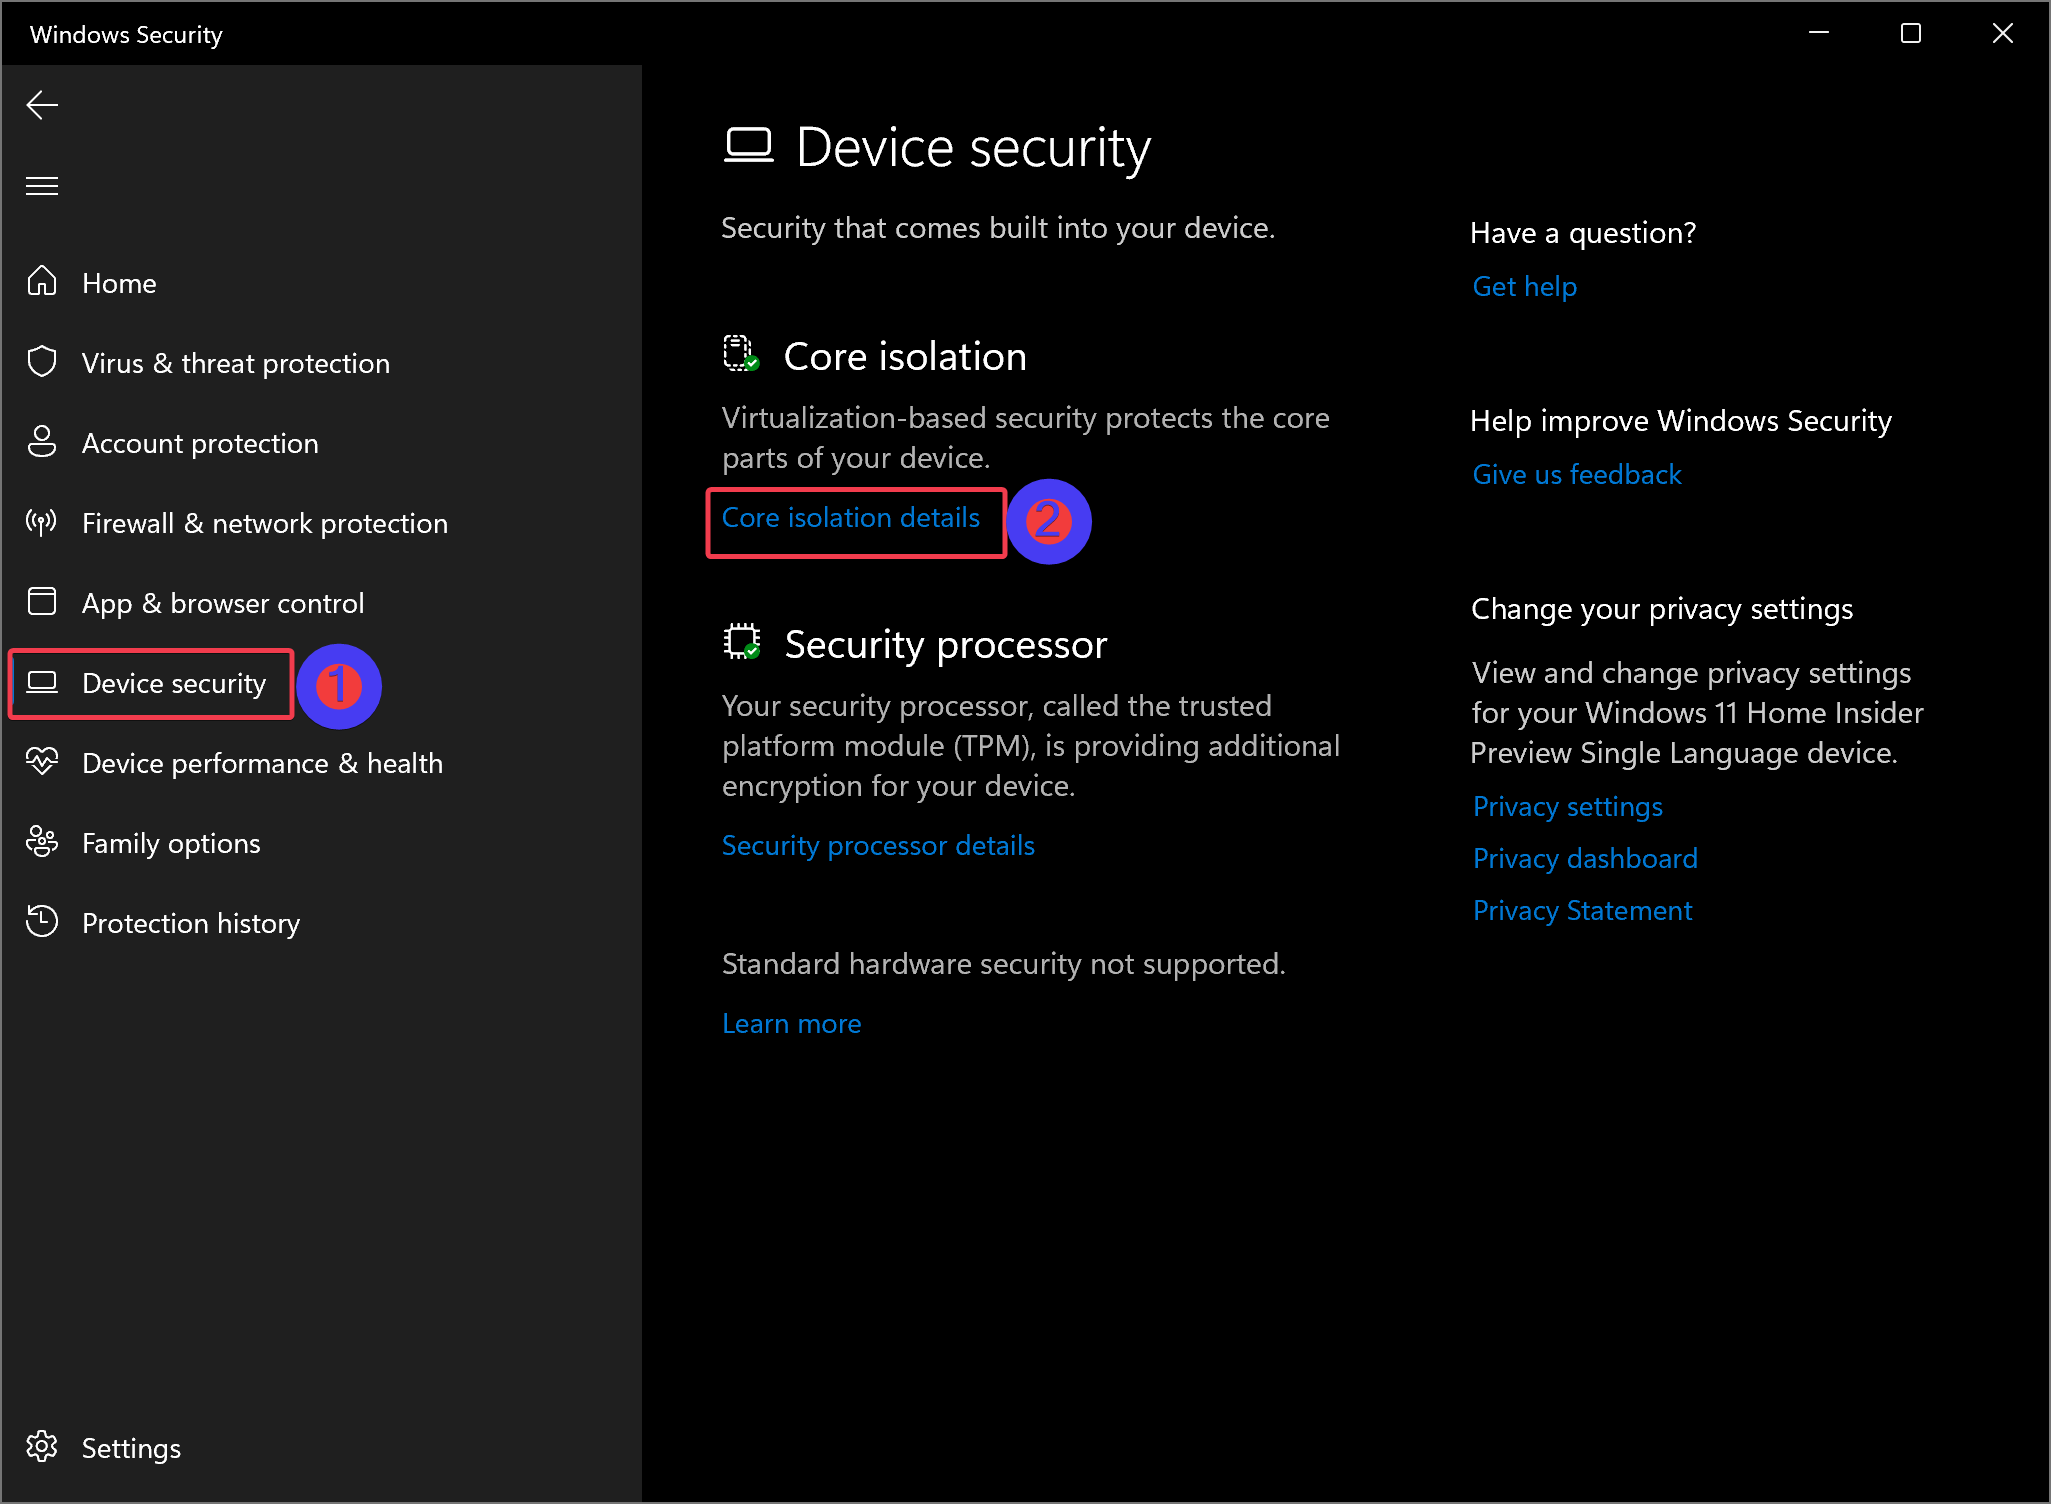
Step 6. Click on the Core isolation details link on the middle pane.
Step 7. In the following screen, turn off the toggle switch Memory Integrity to disable the feature.
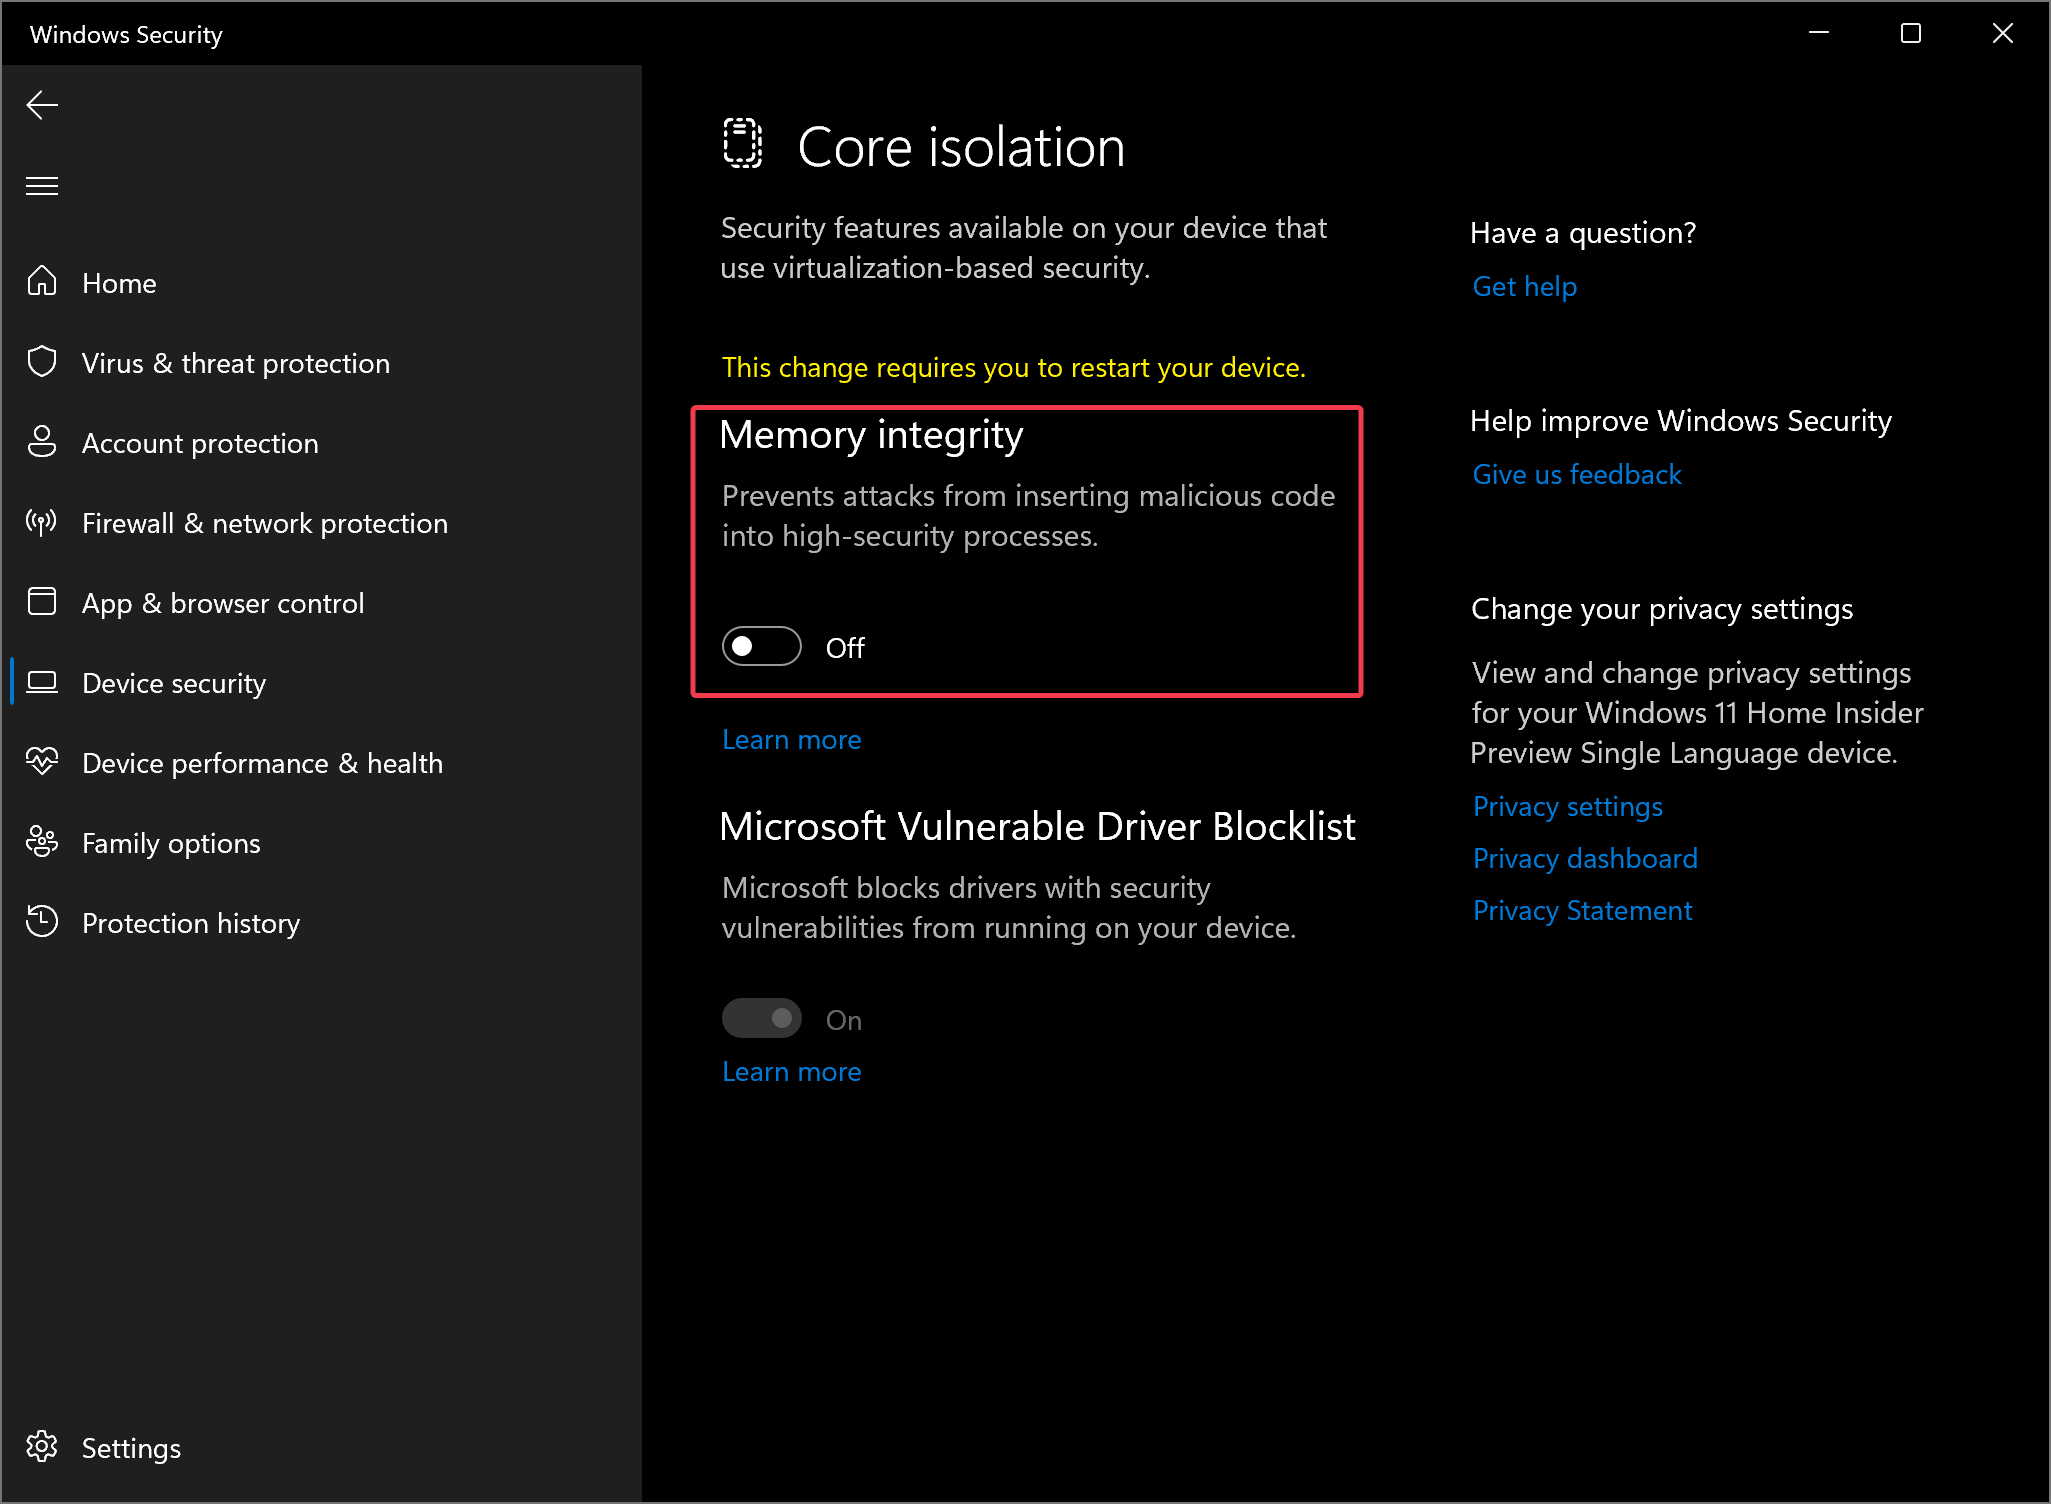
Step 8. Finally, reboot your computer to apply the changes.
After restarting your computer, open some apps and games to check their performance.
How to Disable VBS using Command Prompt?
To turn off VBS through Command Prompt, use these steps:-
Step 1. Open Command Prompt as an administrator.
Step 2. In the Command Prompt window, type the following and hit the Enter key on the keyboard:-
bcdedit /set hypervisorlaunchtype off
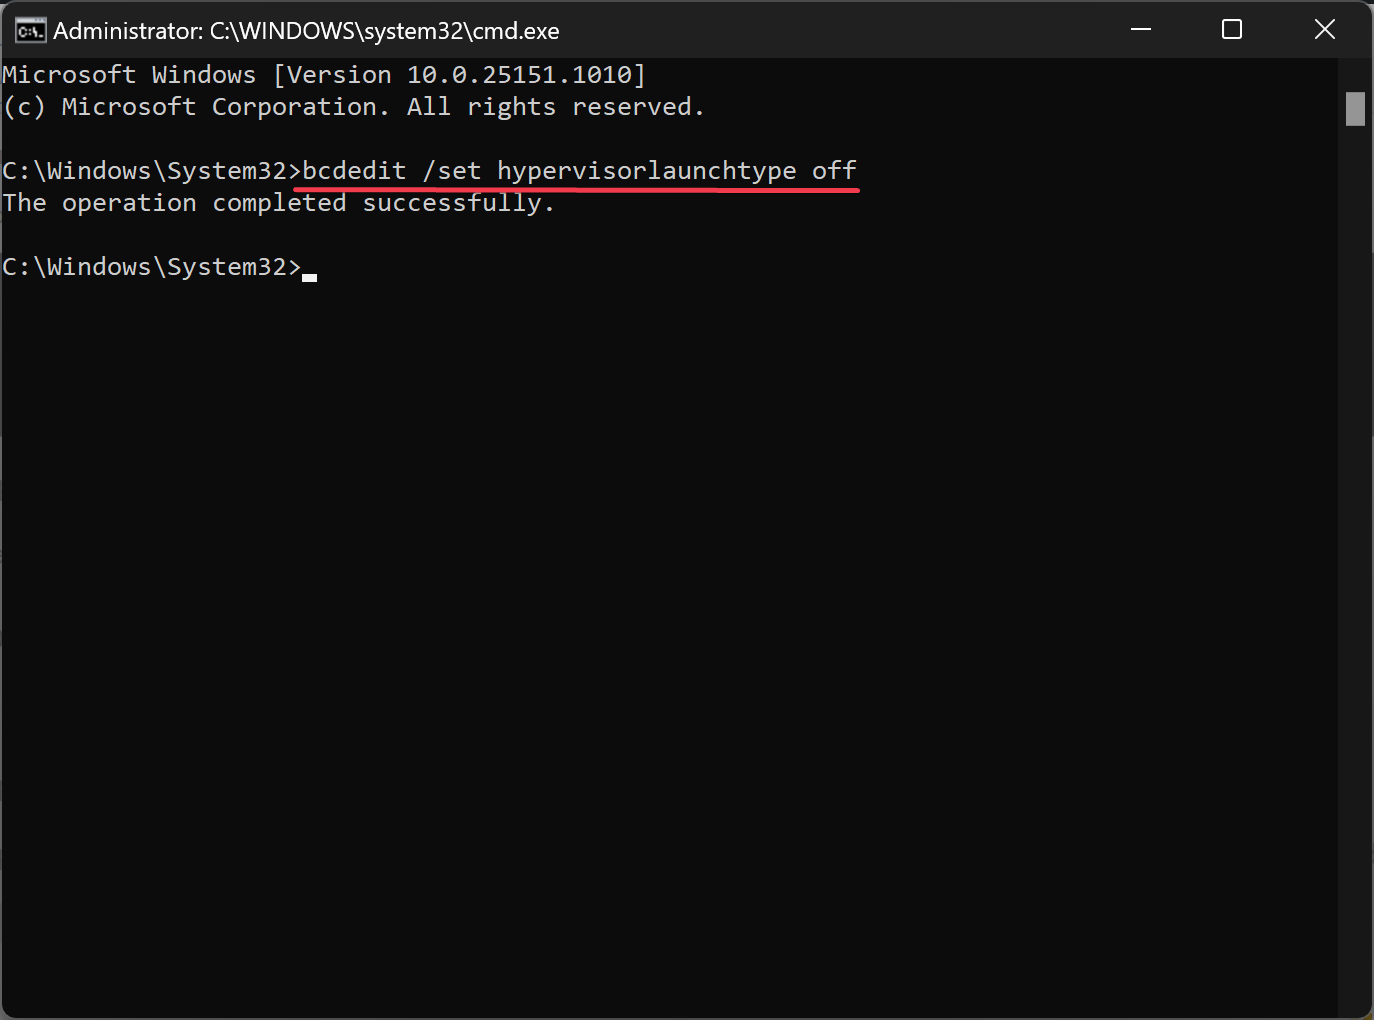
Step 3. Finally, restart your computer to apply the changes.
How to Disable VBS Using Local Group Policy Editor?
To disable or turn off VBS through Local Group Policy Editor, use these steps:-
Step 1. Open Local Group Policy Editor.
Step 2. Then, browse or navigate to the following path in the left sidebar:-
Computer Configuration > Administrative Templates > System > Device Guard
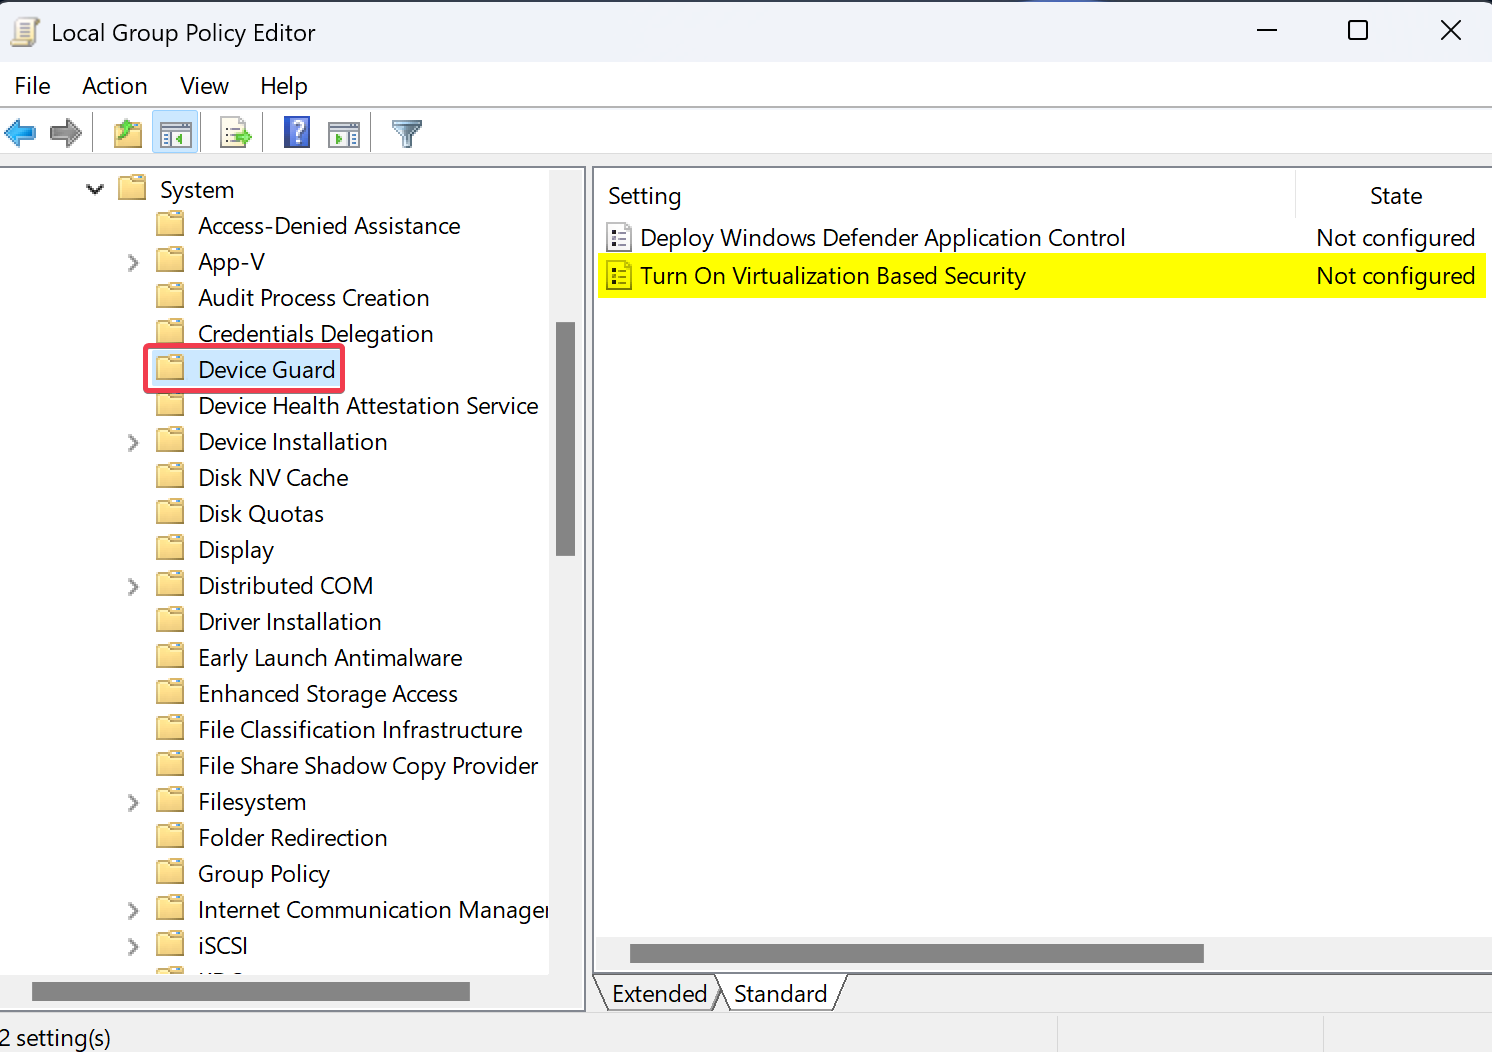
Step 3. On the opposite side, double-click on the policy name Turn On Virtualization Based Security.
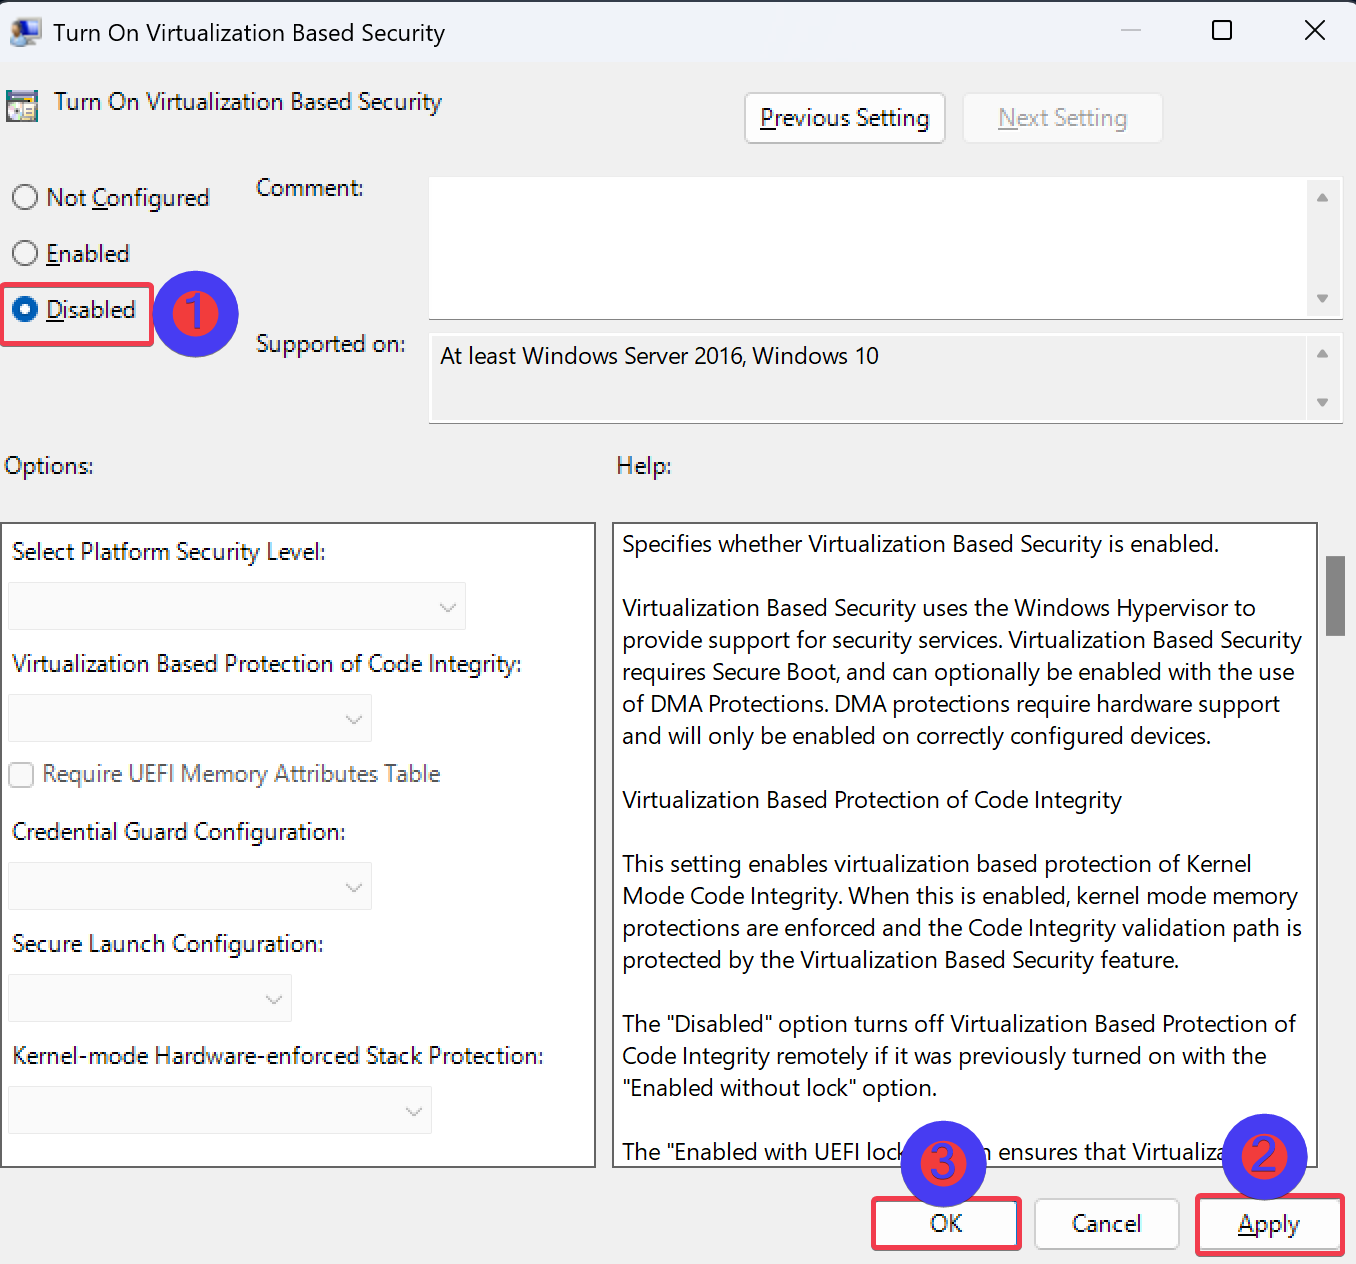
Step 4. Select Disabled.
Step 5. Click Apply.
Step 6. Click OK.
Step 7. Restart your computer.
How to Disable VBS through Registry Editor?
To turn off VBS using Registry Editor, do these steps:-
Step 1. Open Registry Editor.
Step 2. Then, browse or navigate to the following path in the left sidebar of the Registry Editor window:-
HKEY_LOCAL_MACHINE\SYSTEM\CurrentControlSet\Control\DeviceGuard
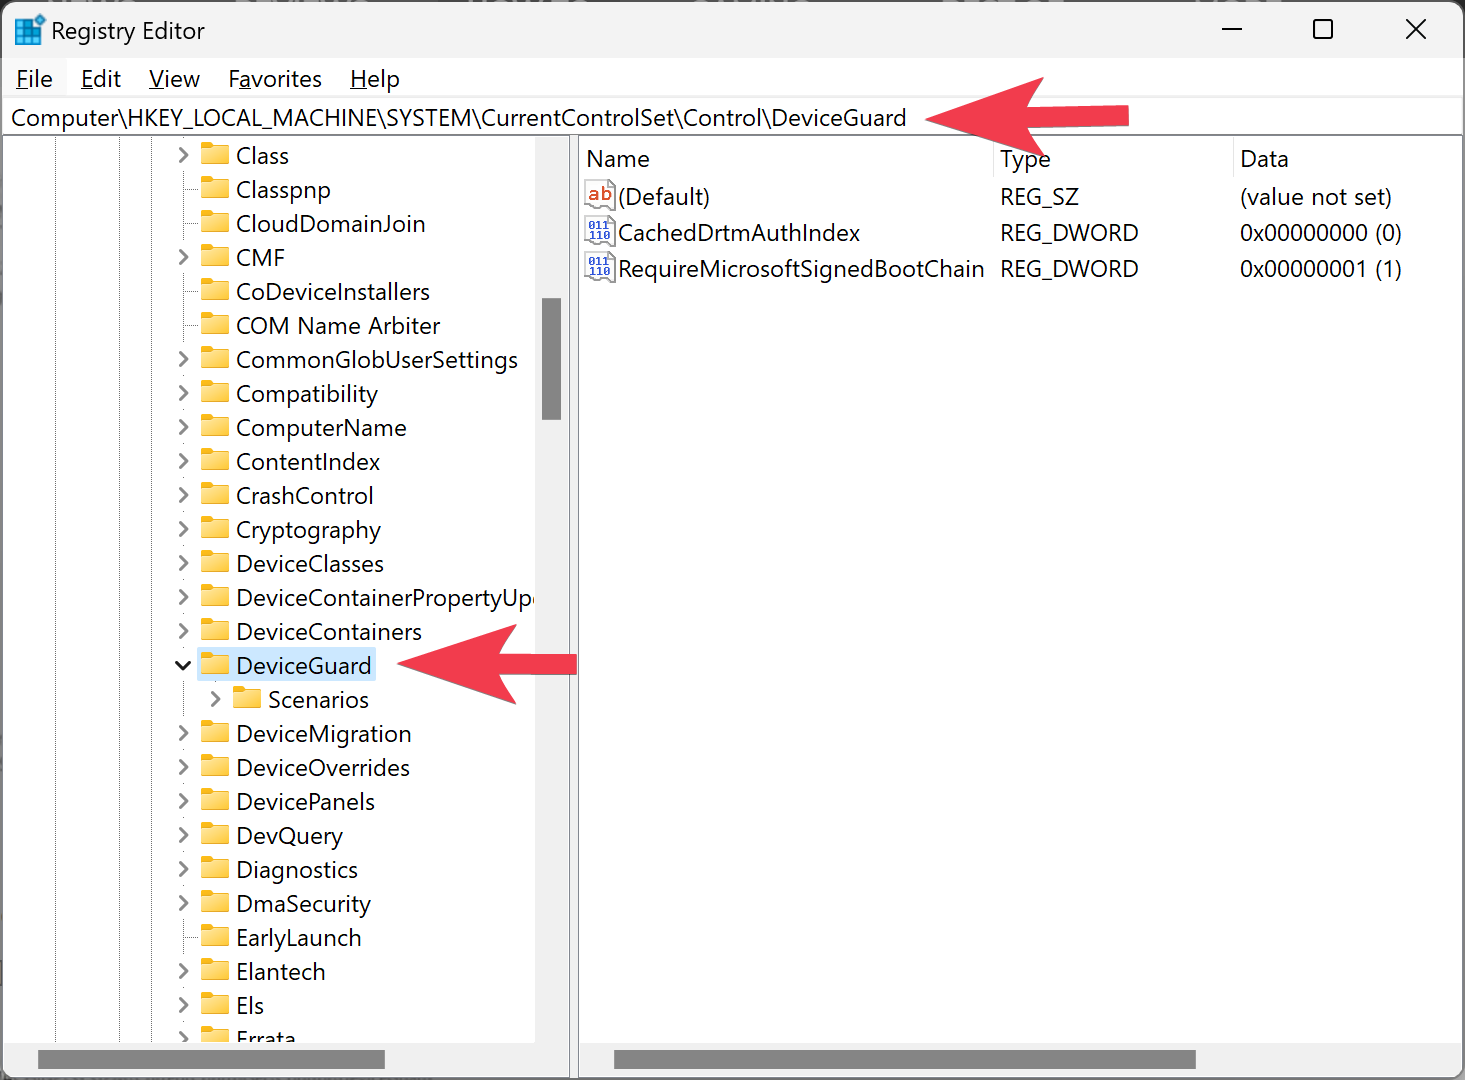
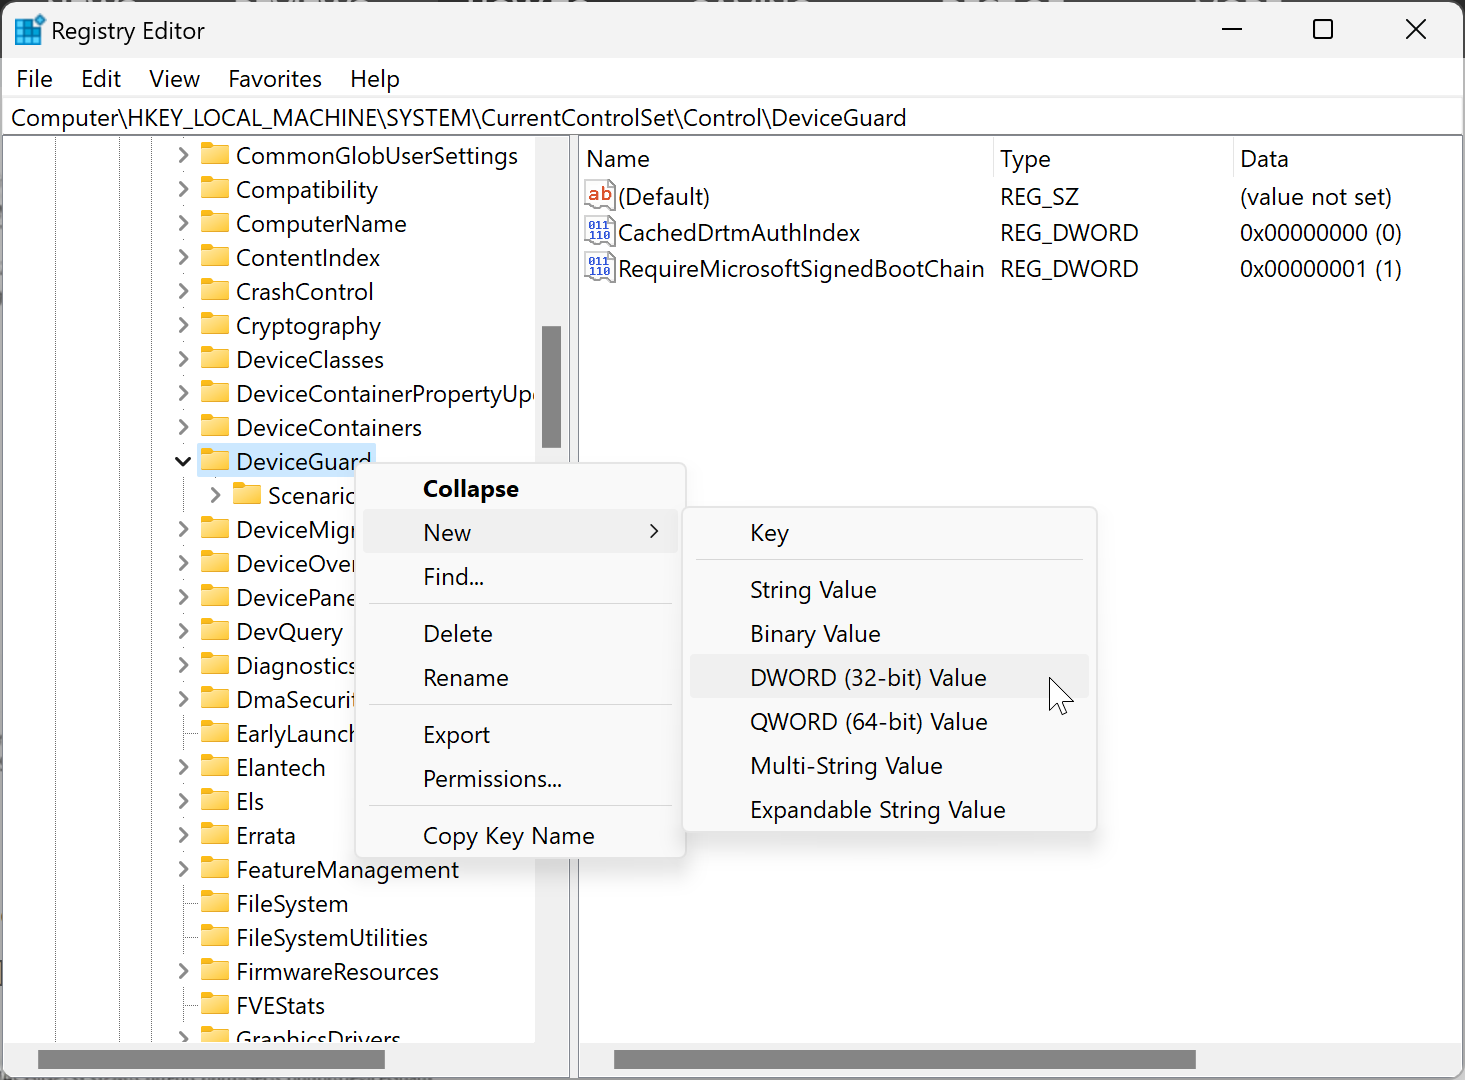
Step 3. Right-click on the DeviceGuard folder and select New > DWORD (32-bit) Value.
Step 4. Name the newly created REG_DWORD as EnableVirtualizationBasedSecurity.
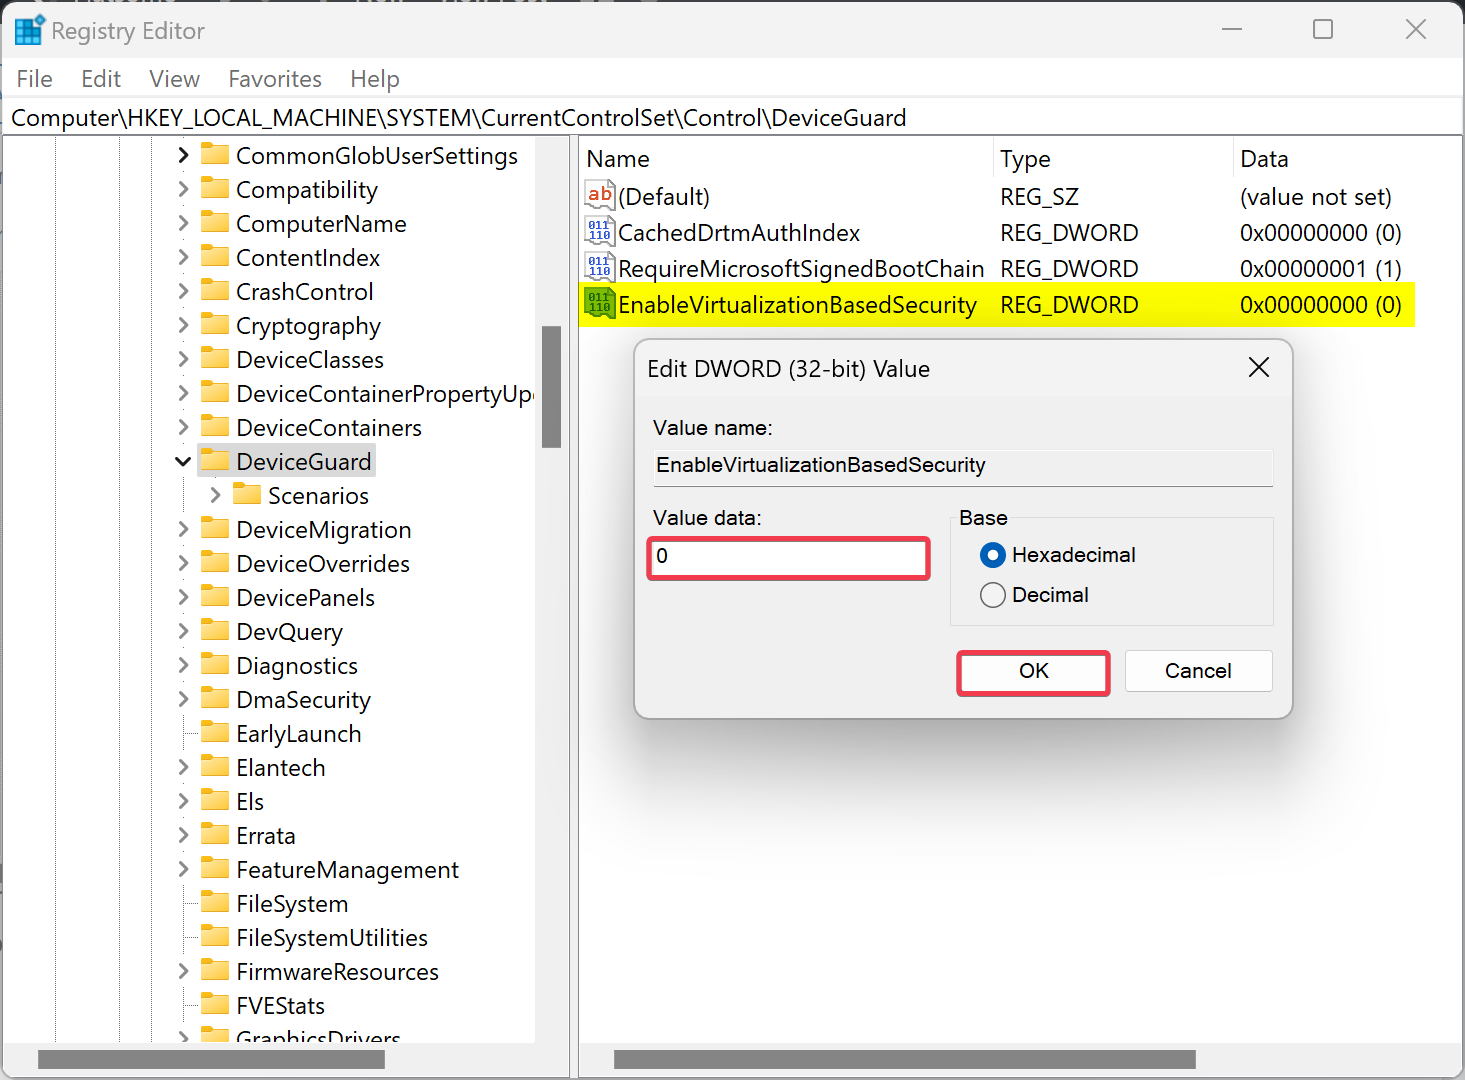
Step 5. Double-click on the EnableVirtualizationBasedSecurity REG_DWORD and set its “Value data” to the following:-
- 0: Disable VBS.
- 1: Enable VBS.
Step 6. Finally, reboot your PC to apply the changes.
Conclusion
In conclusion, Virtualization-Based Security (VBS) is a security feature used by Windows that creates a secure and isolated region of memory from the regular operating system. It provides higher protection from vulnerabilities and prevents the use of malicious exploits. However, enabling VBS can negatively affect PC performance. Therefore, turning off VBS can improve PC performance and gaming experience. This article provided five different methods to turn off VBS on a Windows 11 PC: by removing Windows components, using Windows 11 Settings, using Command Prompt, using Local Group Policy Editor, and using Registry Editor. Users can choose any of these methods according to their preferences and requirements.
I just like the helpful information you provide in your articles