Inline AutoComplete is a helpful feature in Windows 11/10 that saves you time and effort by automatically filling in commands and addresses as you type. However, if you find that this feature is disabled and you’d like to enable it, we’ve got you covered. In this article, we’ll walk you through two user-friendly methods to enable inline AutoComplete in File Explorer and Run Dialog in Windows 11/10.
How to Enable Inline AutoComplete in File Explorer and Run Dialog in Windows 11/10/8/7?
Method 1: Enabling Inline AutoComplete via Control Panel
Step 1. To get started, click on the Start button and type “Control Panel” in the search bar. Then, select “Control Panel” from the search results to open Control Panel on your Windows PC.
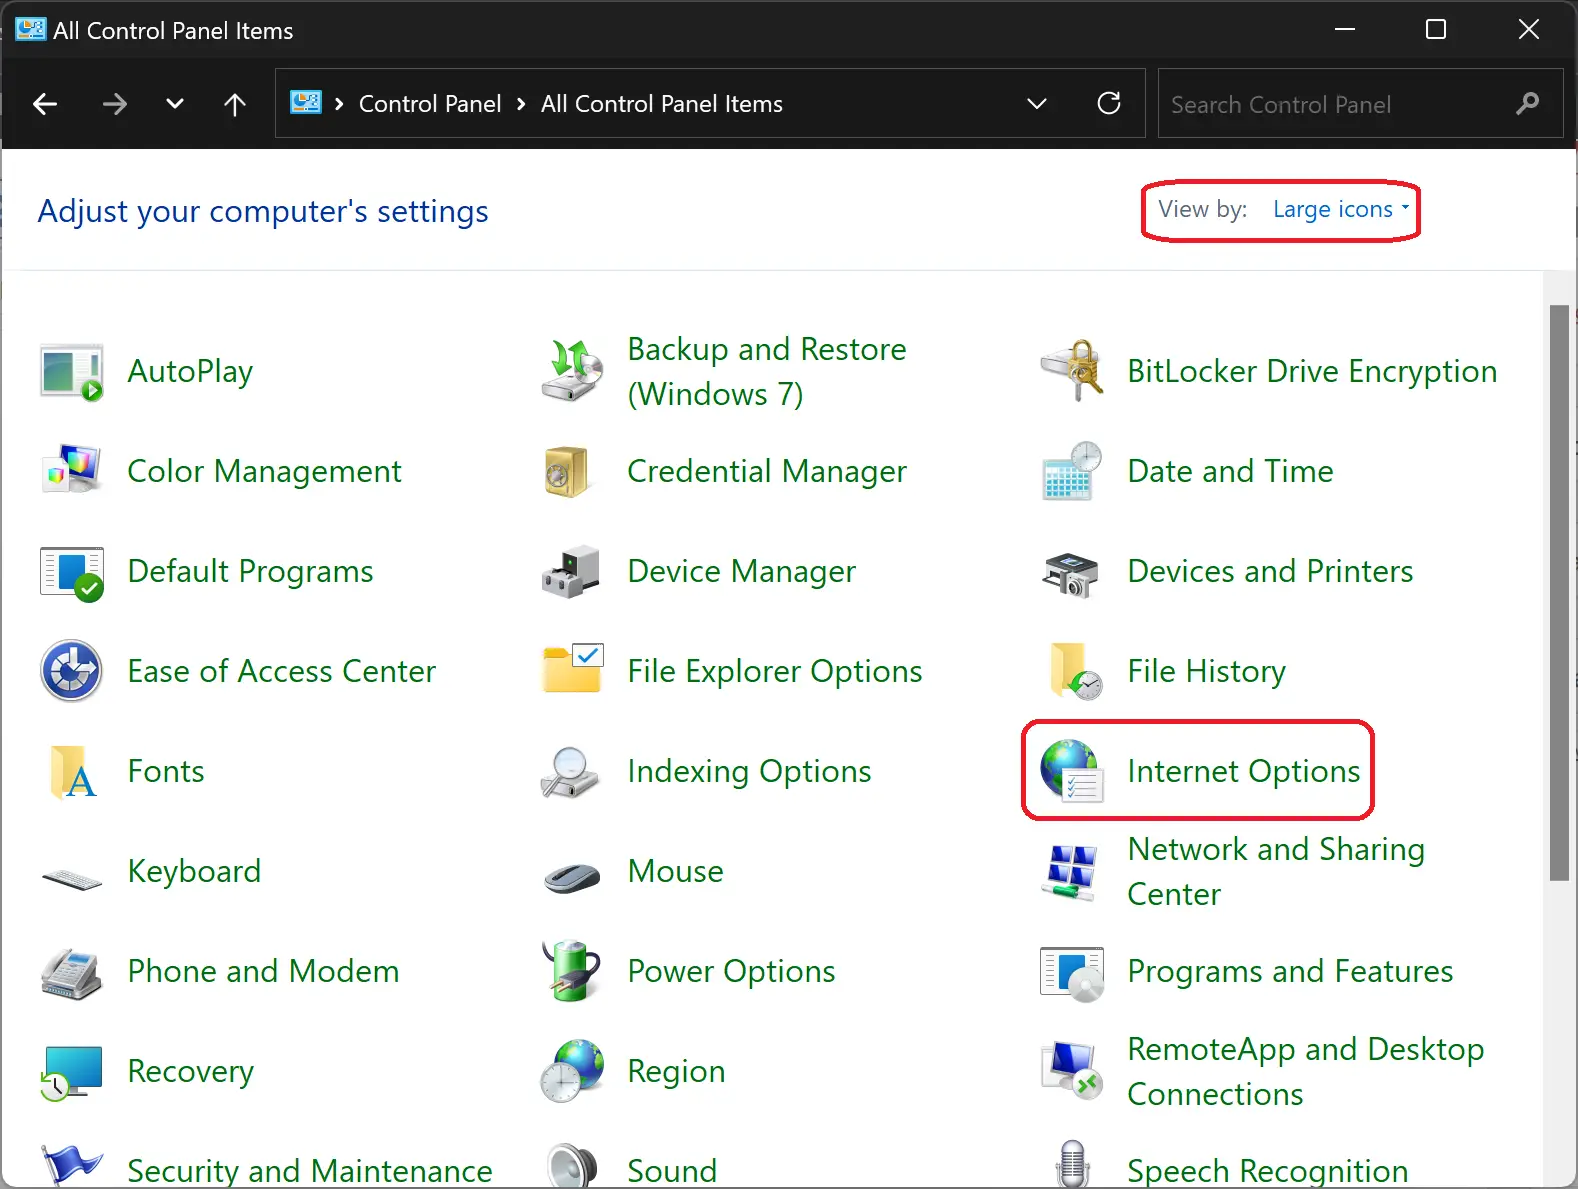
Step 2. In the Control Panel, make sure the “View by” option is set to “Large icons” so that all the options are visible. Look for and click on the “Internet Options” icon.
Step 3. In the Internet Properties window that appears, select the “Advanced” tab. Scroll down to the Browsing section and locate the “Use inline AutoComplete” option. Check the box next to it to enable the feature.
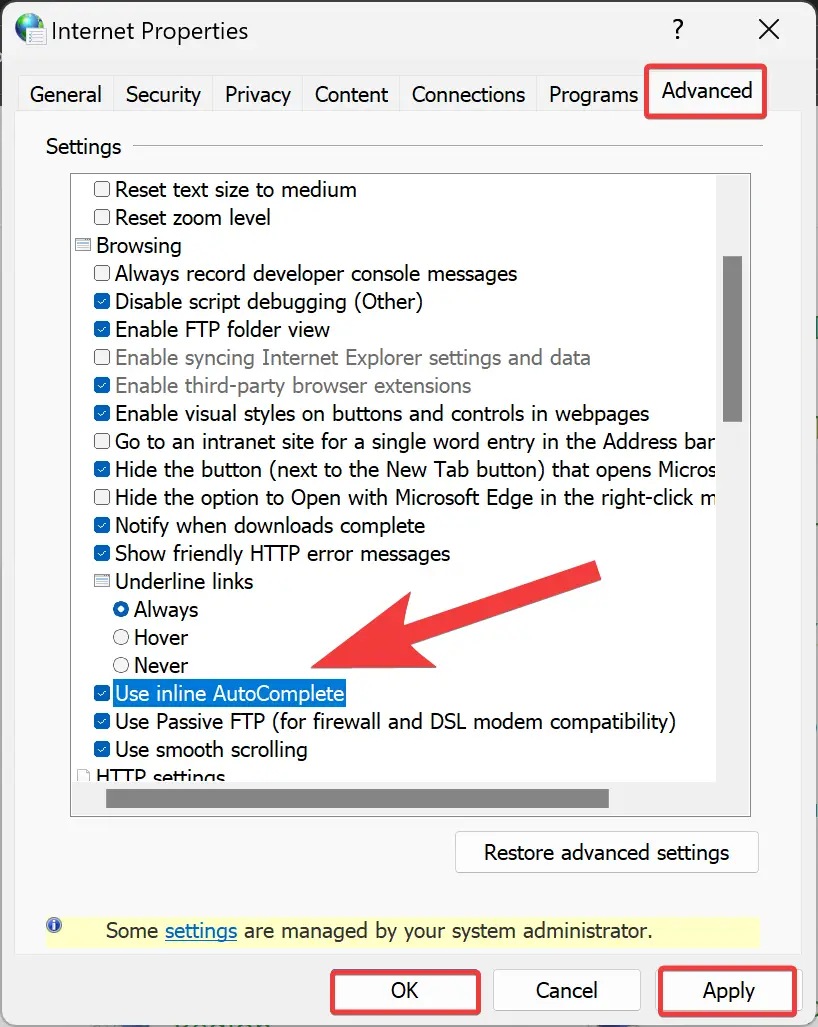
Step 4. Click the “Apply” button at the bottom of the window, followed by the “OK” button to save the changes.
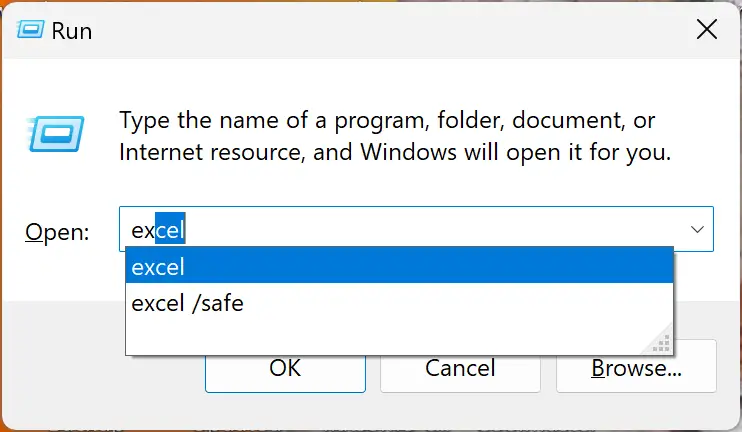
Open a new Run dialog or File Explorer window, and you should now be able to enjoy the benefits of inline AutoComplete. As you type, the rest of the command or address will be automatically filled based on your history, highlighted in light blue.
Method 2: Enabling Inline AutoComplete via Registry Editor
Step 1. Press the Windows key + R on your keyboard to open the Run dialog box. Type “regedit” in the Run dialog box and press Enter. This will launch the Registry Editor.
Step 2. In the Registry Editor, navigate to the following path:-
HKEY_CURRENT_USER\Software\Microsoft\Windows\CurrentVersion\Explorer\AutoComplete
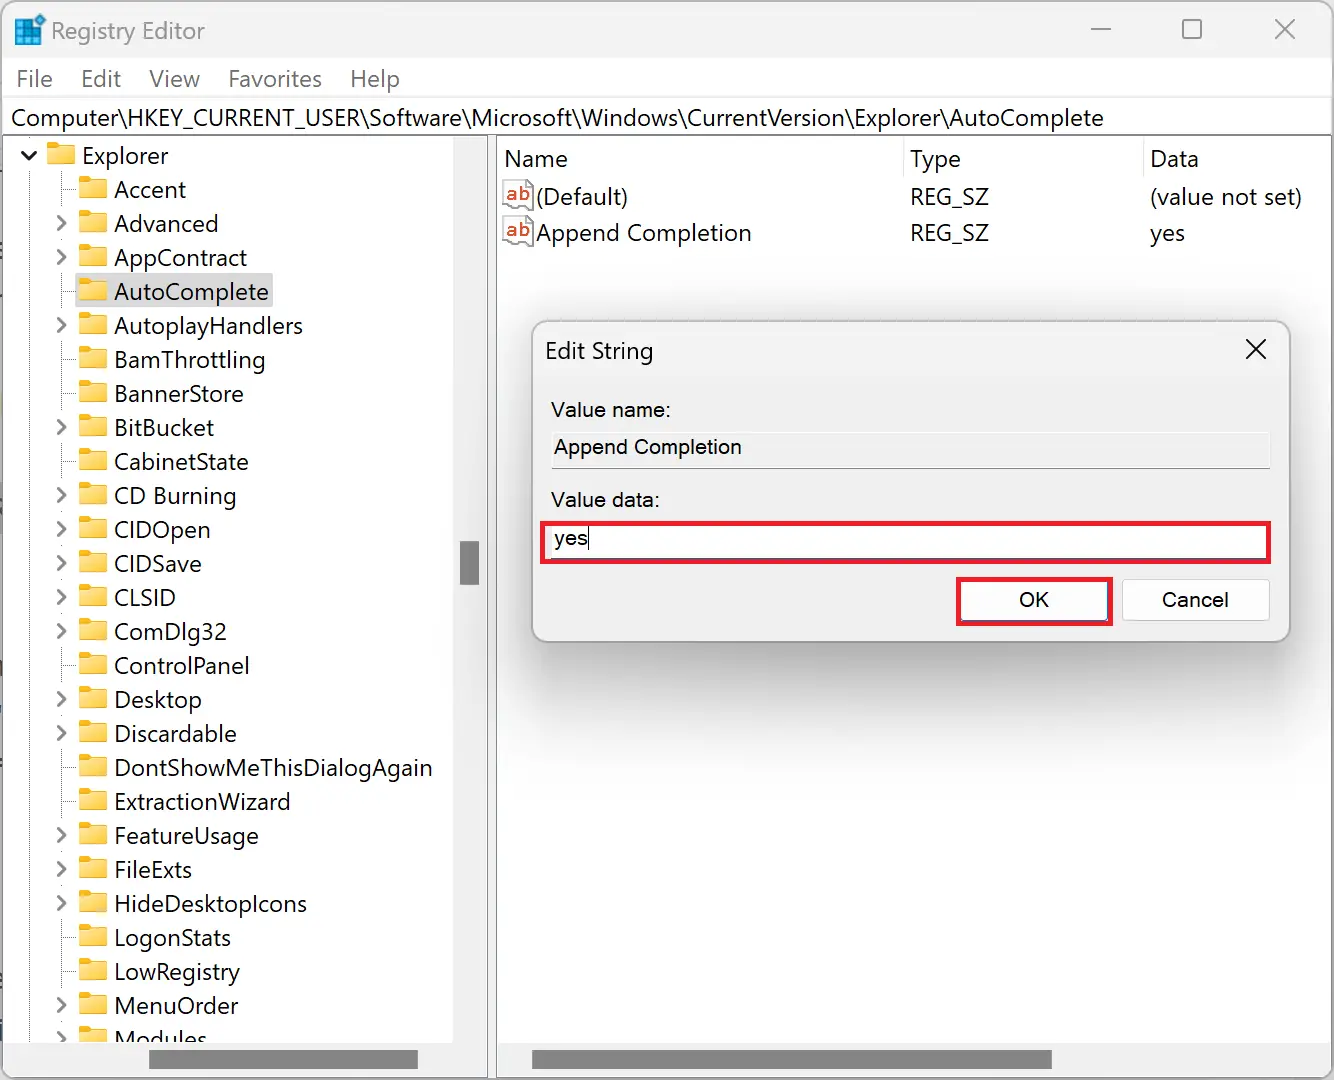
Step 3. On the right pane, locate the “Append Completion” string value and double-click on it. In the Edit String dialog box, change the value data from “no” to “yes.”
Step 4. Click the “OK” button to save the changes you made.
Step 5. Once you have made the necessary changes, close the Registry Editor.
Reopen the Run dialog box or File Explorer, and you should now have the inline AutoComplete feature enabled. As you type, the rest of the command or address will be automatically filled based on your history, highlighted in light blue.
Conclusion
By following these user-friendly methods, you can easily enable inline AutoComplete in File Explorer and Run Dialog in Windows 11/10. Whether you prefer using the Control Panel or the Registry Editor, you’ll be able to enjoy the convenience of having commands and addresses automatically filled as you type. Give it a try and streamline your Windows experience!