A variety of mouse cursors and pointers are available in Windows 11 and 10. You can even add third-party mouse schemes to your Windows.
By default, Windows allows users to change the mouse pointer scheme. You can, however, hide the Pointers tab to prevent any user account from changing the mouse pointers on your computer if you need to.
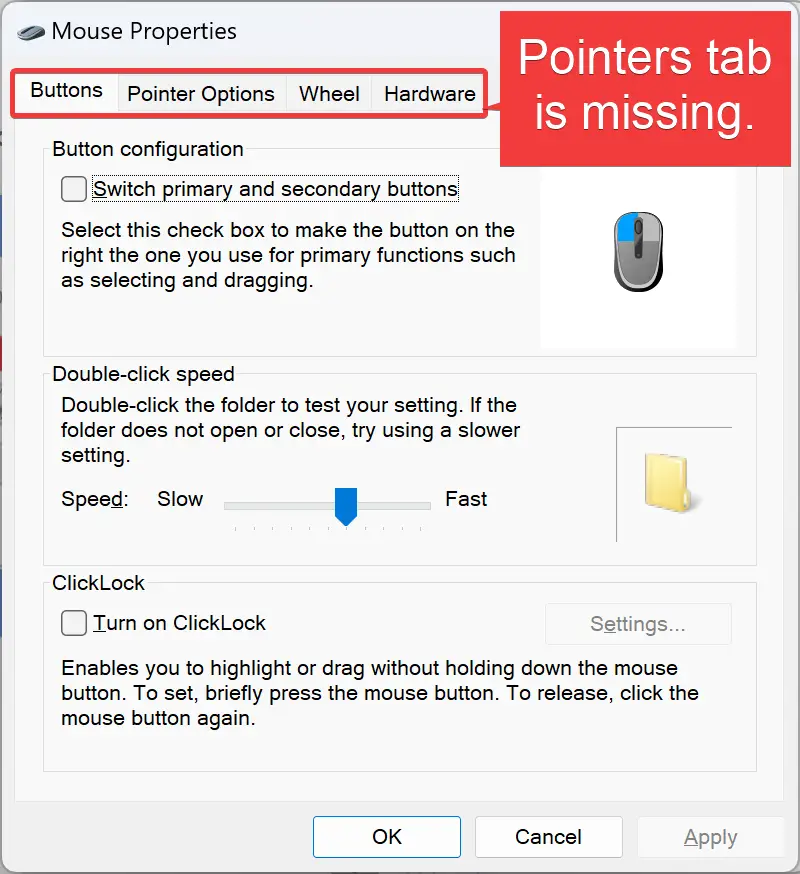
Windows 11/10 includes two built-in methods to prevent the mouse pointer or cursor from changing: the Registry Editor and Local Group Policy Editor. This gearupwindows article will teach you how to enable or disable changing the mouse cursor in Windows 11 or 10. The same instructions also apply to Windows 8 and 7.
How to Turn On or Off Changing Mouse Pointers in Local Group Policy Editor?
To enable or disable changing Mouse Pointers in Local Group Policy Editor, follow these steps:-
Step 1. Open Local Group Policy Editor.
Step 2. Then, browse or navigate to the following path in the left sidebar:-
User Configuration > Administrative Templates > Control Panel > Personalization
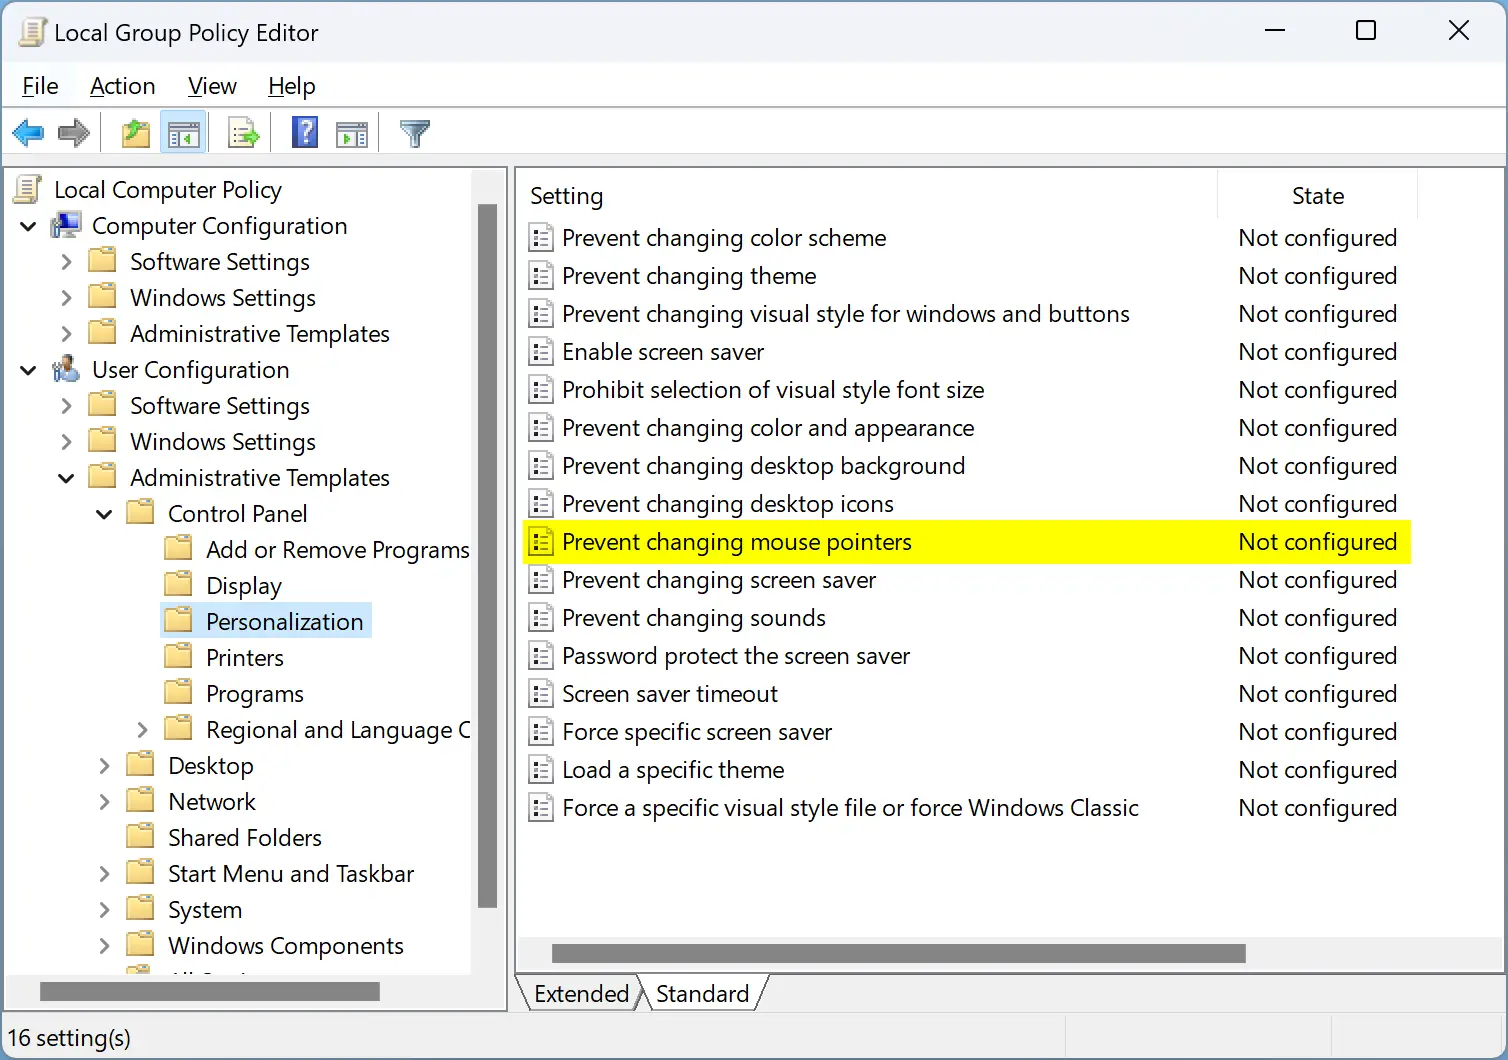
Step 3. On the right sidebar, double-click on the setting Prevent changing mouse pointers.
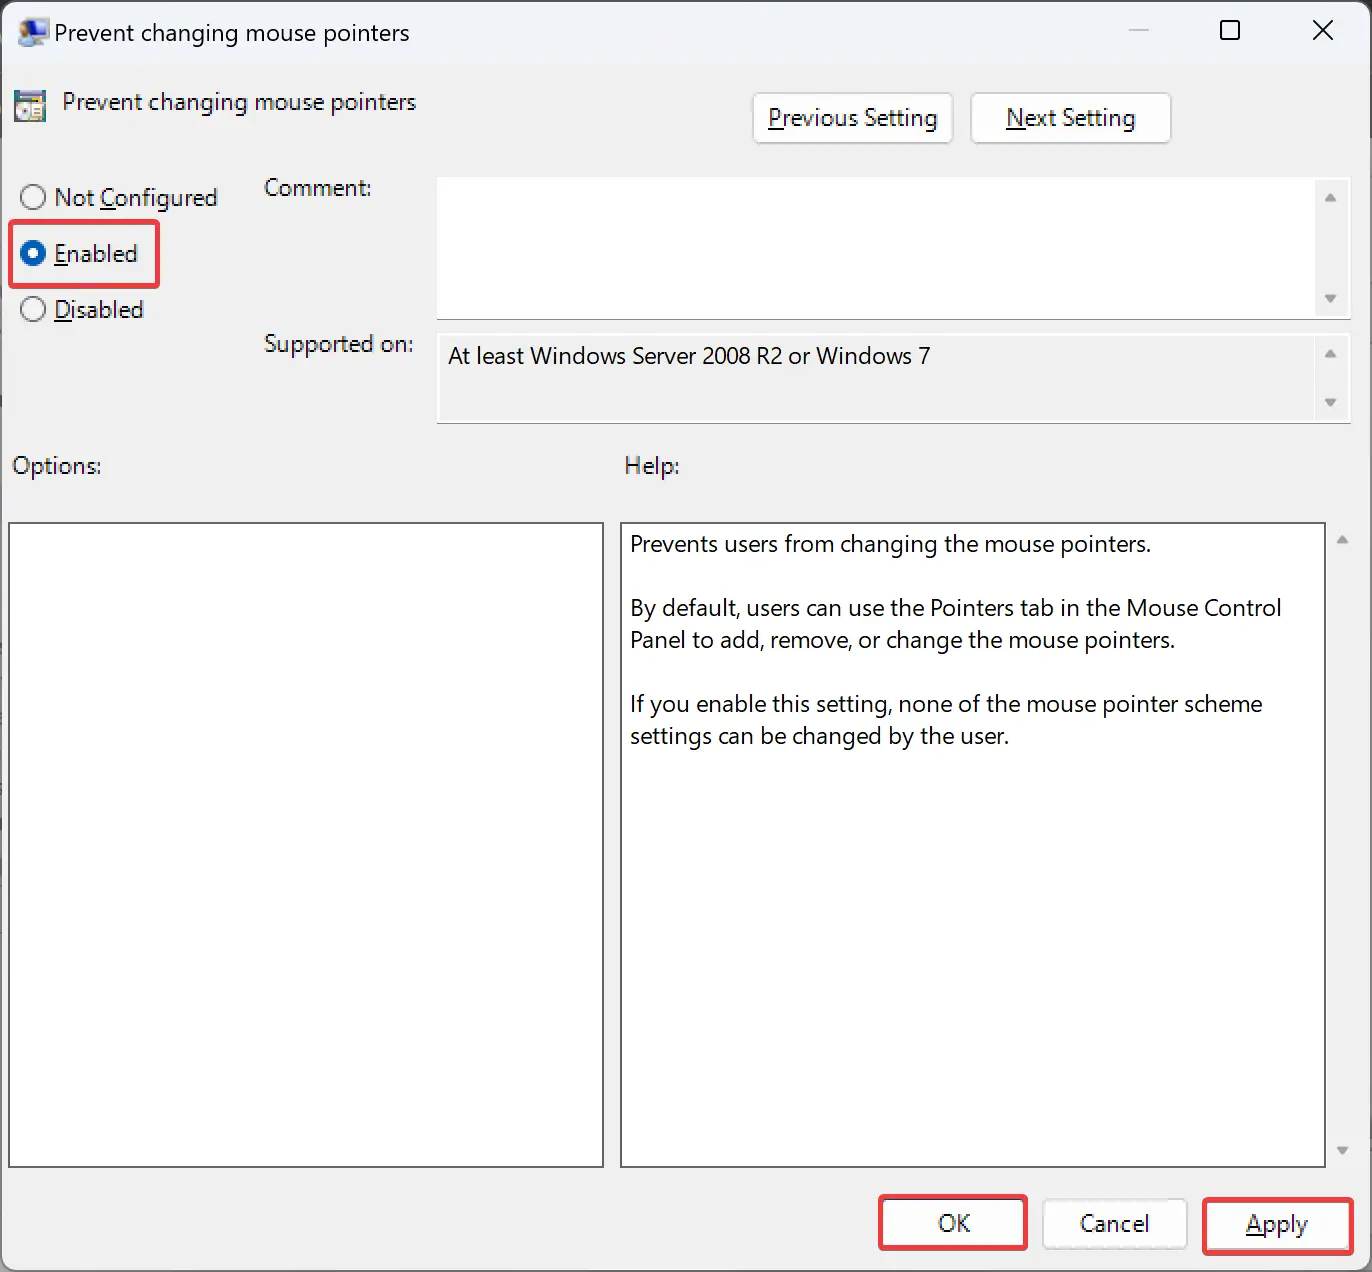
Step 4. Select Enabled to prevent changing Mouse Pointers.
Note: To revert the changes or allow changing Mouse Pointers, select the Disabled option.
Step 5. Click Apply.
Step 6. Click OK.
Step 7. Reboot your PC.
How to Enable or Disable Changing Mouse Pointers using Registry Editor?
To turn on or off changing Mouse Pointers in Registry Editor, follow these steps:-
Step 1. Open Registry Editor.
Step 2. Then, browse to the following key in the left sidebar:-
HKEY_CURRENT_USER\Software\Policies\Microsoft\Windows
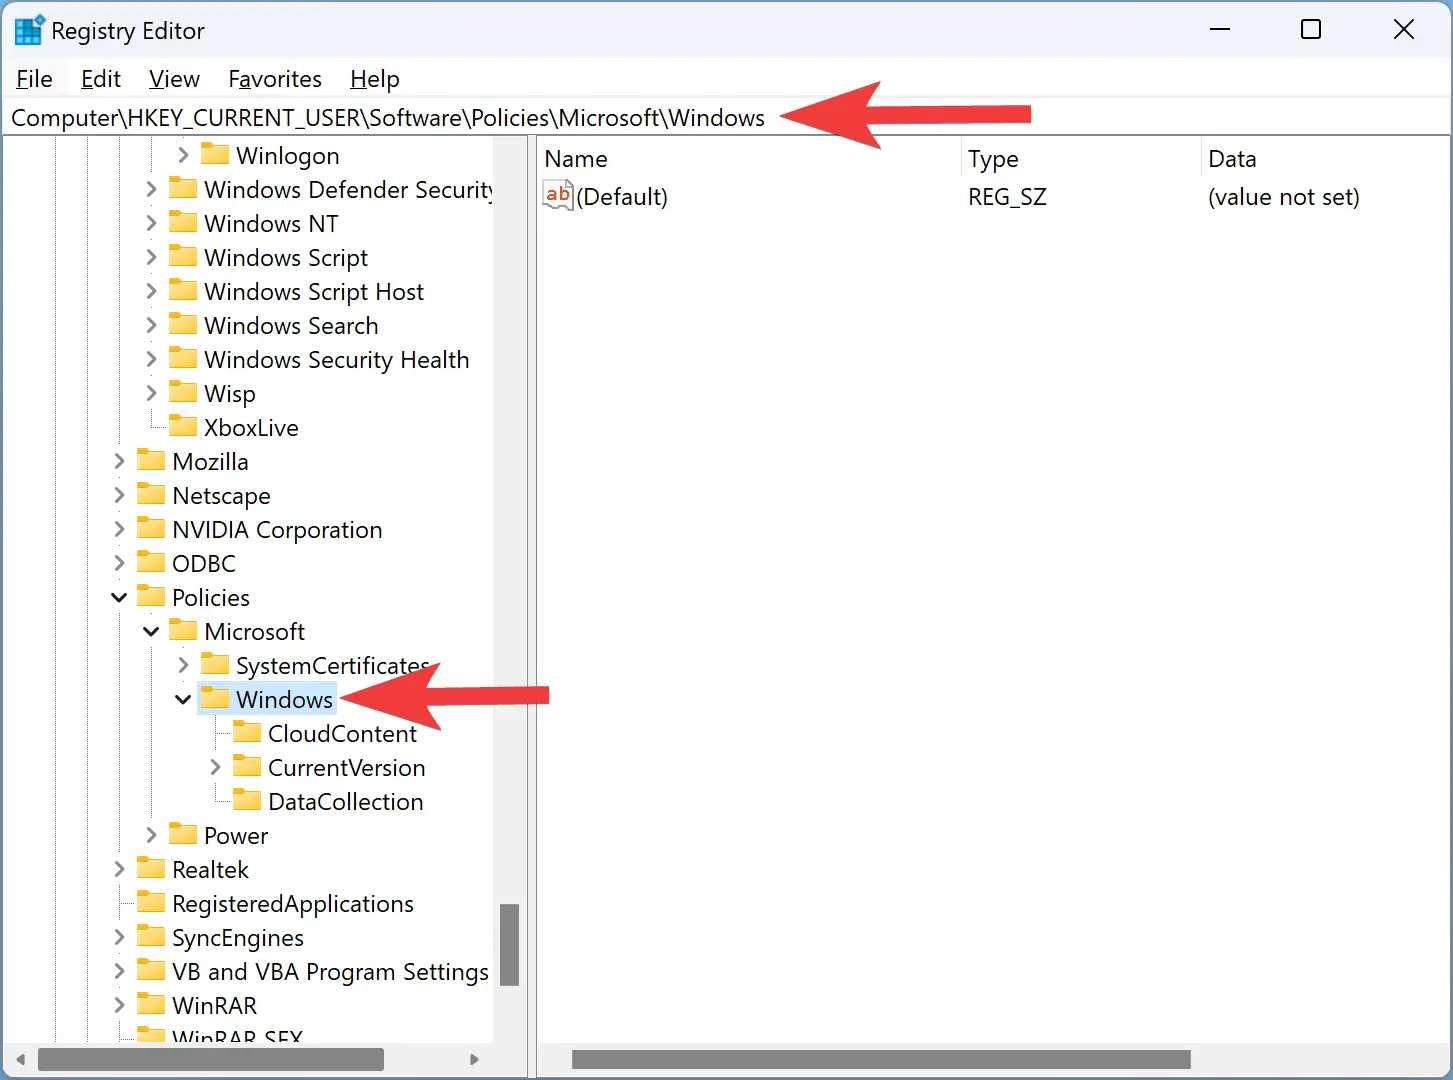
Step 3. Then, right-click the Windows key and select New > Key.
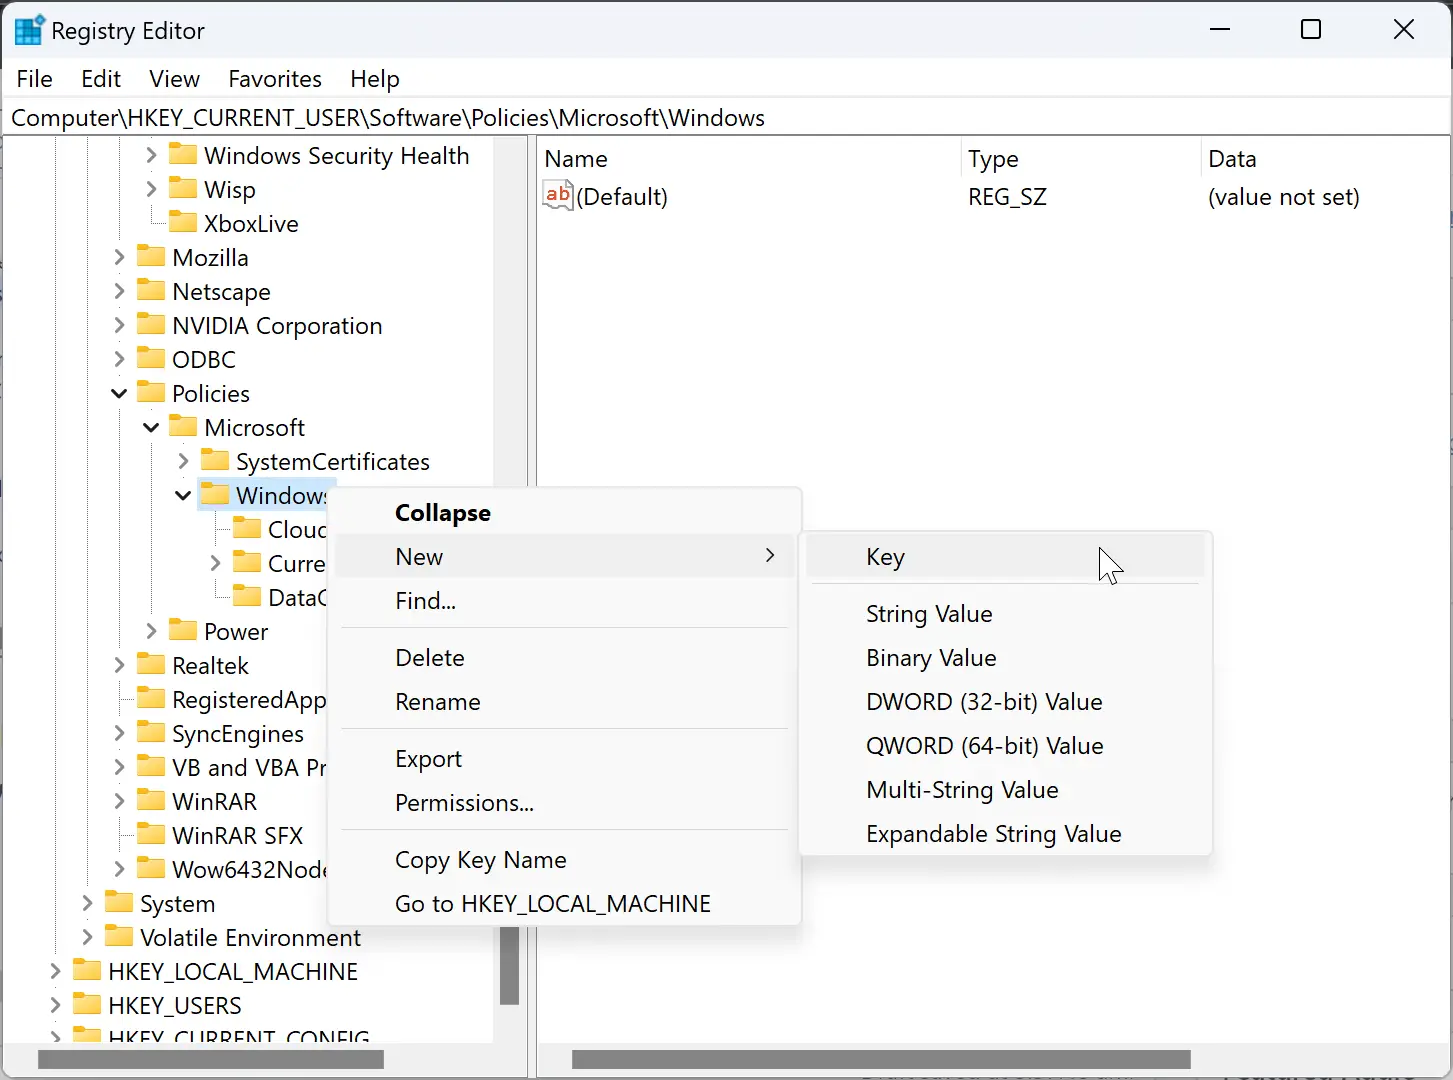
Step 4. Set the name Personalization.

Step 5. Now, right-click on the Personalization key and select New > DWORD (32-bit) Value.
Step 6. Name the newly created REG_DWORD to NoChangingMousePointers.
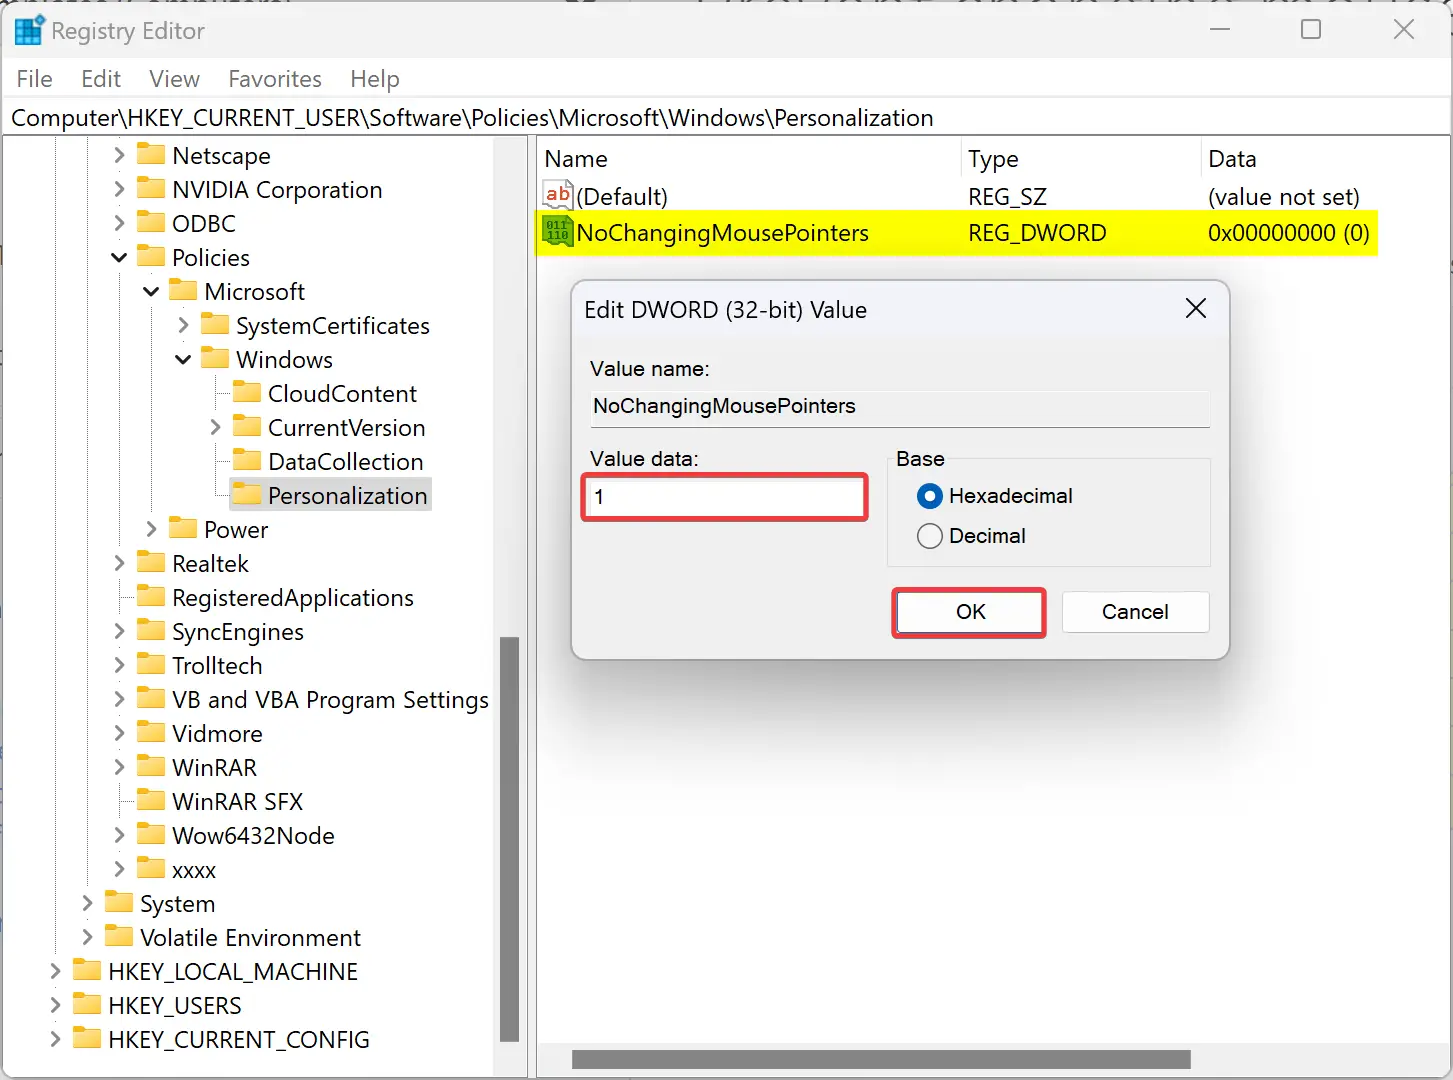
Step 7. Now, double-click on the NoChangingMousePointers REG_DWORD and set its “Value data” to the following:-
- 0: Allow Changing Mouse Pointers.
- 1: Disallow Changing Mouse Pointers.
Step 8. Click OK.
Step 9. Reboot your PC to apply the changes.
Conclusion
In conclusion, customizing the mouse pointer scheme is a fun way to personalize your Windows computer. However, if you need to restrict users from changing the mouse pointer, Windows 11/10 provides two built-in methods to do so, using either the Local Group Policy Editor or the Registry Editor. By following the step-by-step instructions outlined in this article, you can easily enable or disable the ability to change mouse pointers on your Windows computer. These instructions are also applicable to Windows 8 and 7.