How do I enable UAC prompt? How do I change user account control settings? User Account Control or UAC is a part of the Windows security system which prevents programs or application from making unwanted changes on your PC. When a program tries to change system-related parts of the Windows Registry or file system, Windows 10 shows a pop-up UAC confirmation dialog. When the user confirms by clicking the Yes button, the application can make the changes on your Windows PC.
UAC is really a helpful feature to secure your PC from threats. This way, the UAC dialog provides a special security environment for your user account by limiting the access rights. It can elevate a particular process to full access rights when necessary. However, many Windows users do not want to see these UAC prompts and prefer to use Windows 10 with the classic security model, i.e., just like Windows XP and earlier.
If you are one of those Windows 10 users who dislike the User Account Control prompt and want to eliminate the pop-up UAC dialog, this article will guide you to do so.
As of now, there are at least three ways through which you can enable or disable the UAC prompt on Windows 10. These are the following:-
- Using Control Panel
- Via Registry Editor
- Through Winaero Tweaker
How to Turn On or Turn Off User Account Control (UAC) Prompt in Windows 10 using Control Panel?
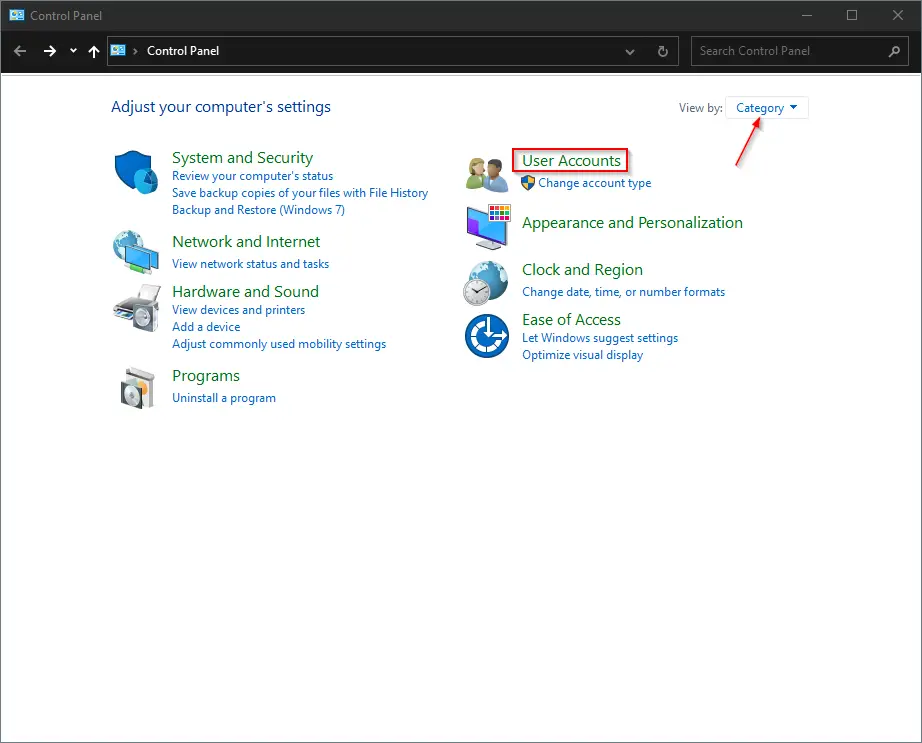
Step 1. Open Control Panel. Set the “View by” to Category and then click the User Accounts.
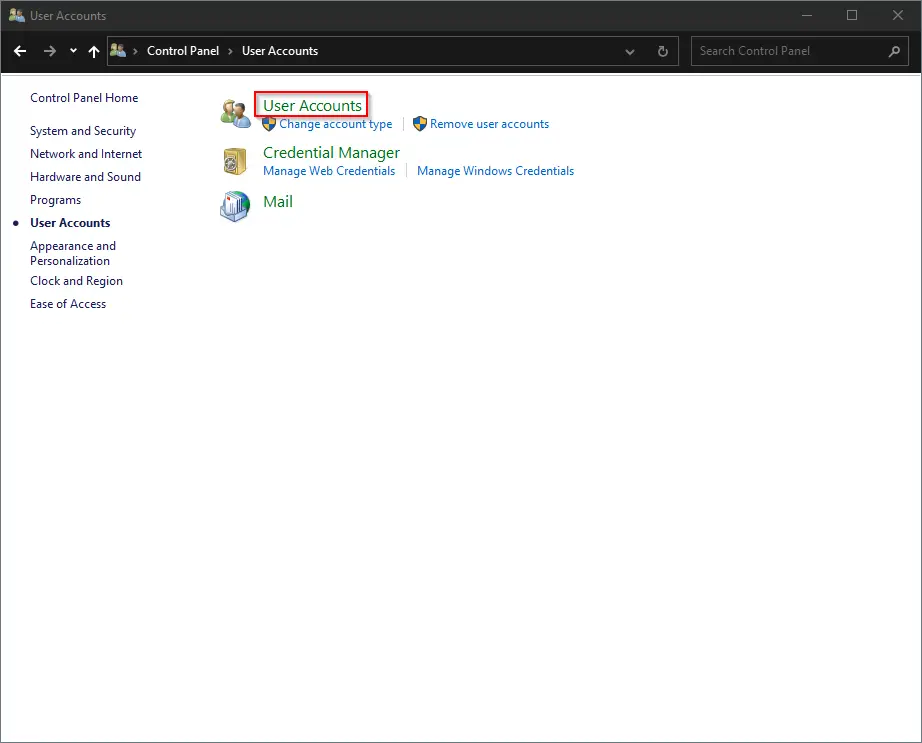
Step 2. In the next window that opens, again click the “User Accounts” option.
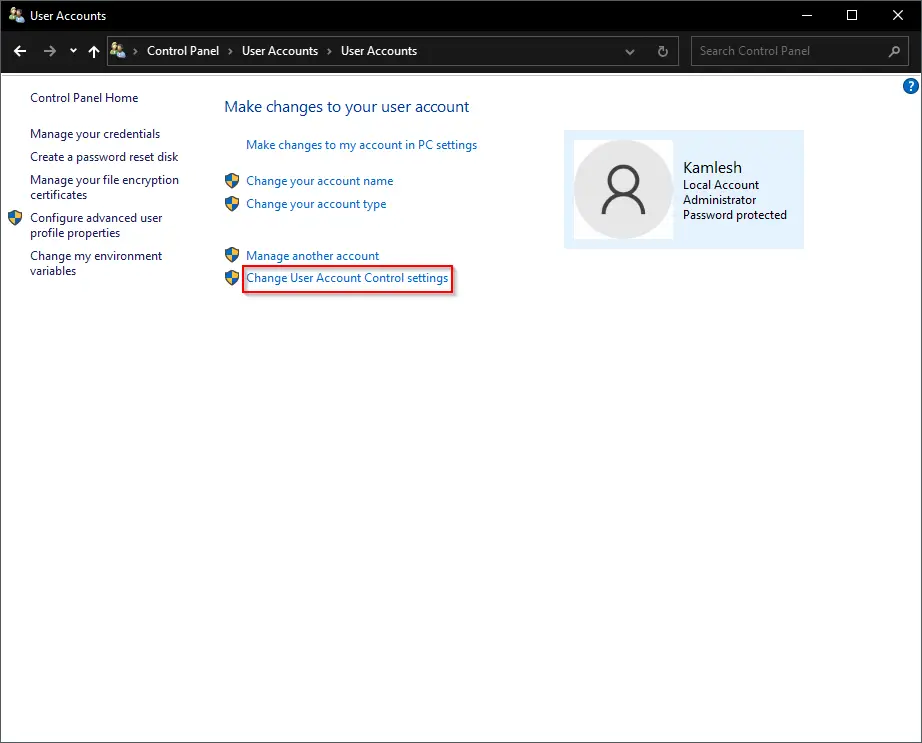
Step 3. Next, click the link “Change User Account Control settings.”
Step 4. In the User Account Control Settings dialog that opens, move the slider to the bottom (Never Notify).
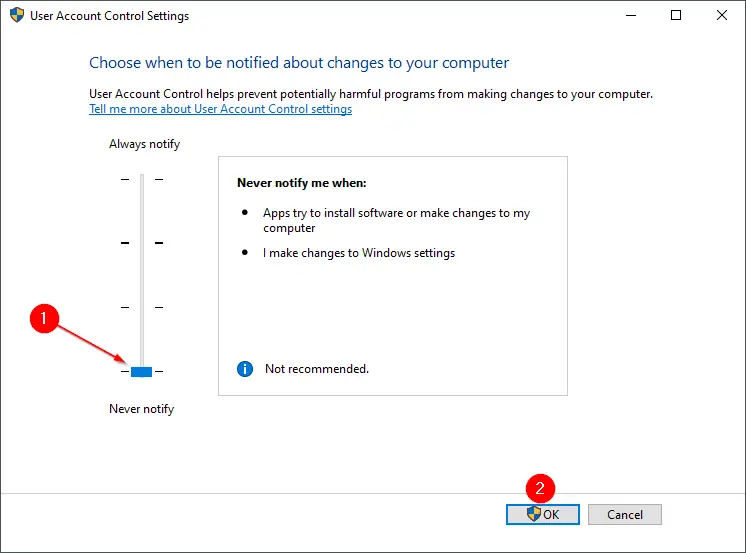
Step 5. A User Account Control (UAC) dialog will appear. Click the Yes button to continue.
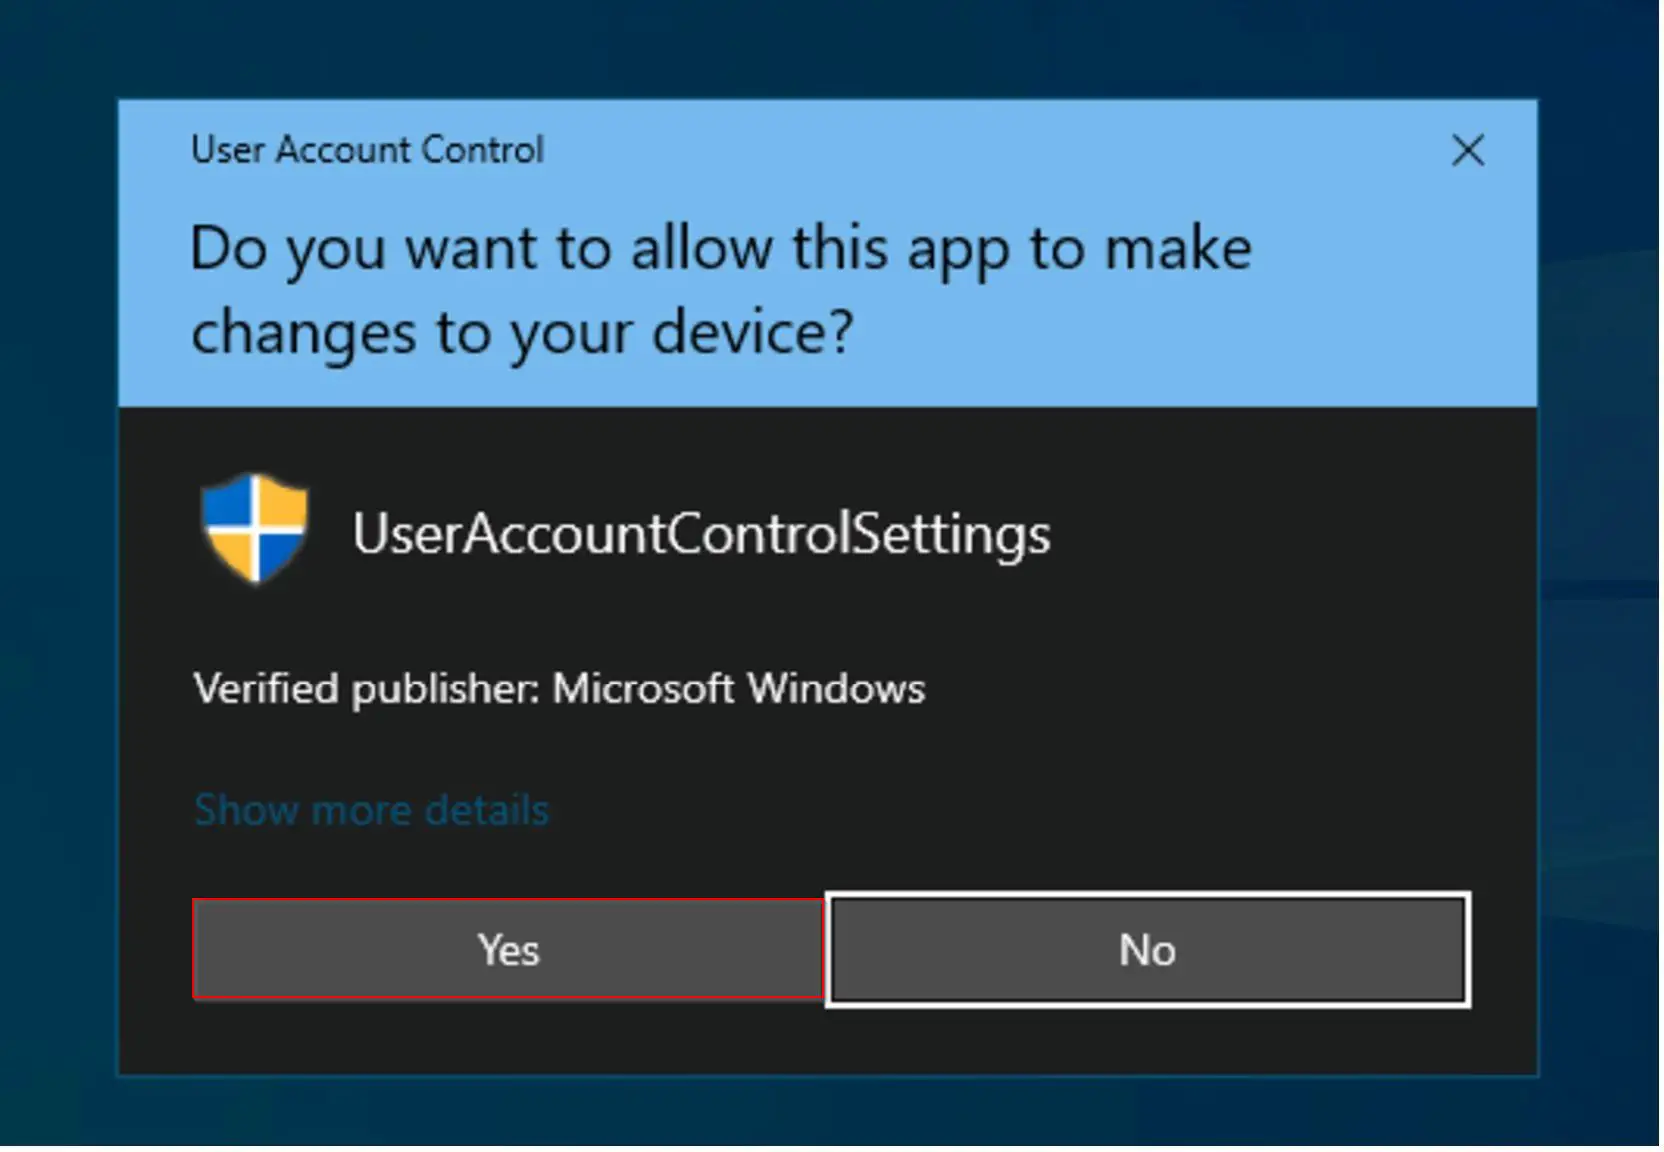
Once you complete the above steps, User Account Control (UAC) prompt is disabled on your Windows 10. Now
If you want to enable it again, repeat the above steps, and in step 4, raise the level of security by dragging the slider upward.
How to Enable or Disable User Account Control (UAC) Prompt in Windows 10 via Registry Editor?
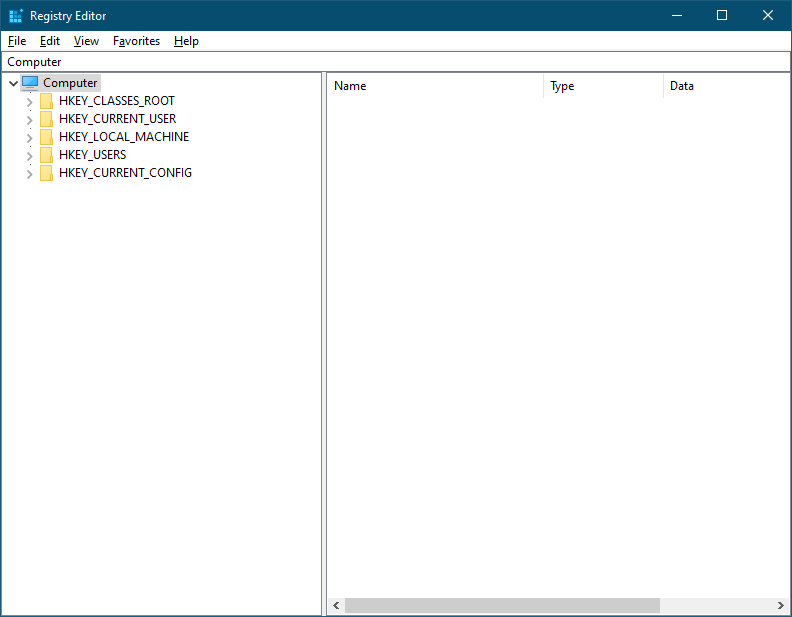
Step 1. Open the Registry Editor.
Step 2. In the left side pane of the Registry Editor, navigate to the following key:-
HKEY_LOCAL_MACHINE\SOFTWARE\Microsoft\Windows\CurrentVersion\Policies\System
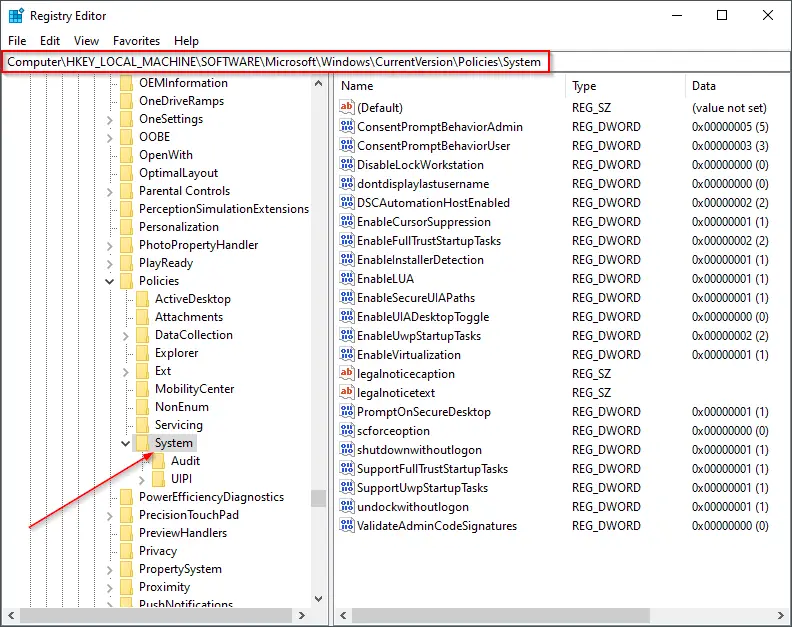
Step 3. In the right pane, look for EnableLUA and double-click on it to modify the value. Set its Value data to 0 to disable the UAC prompt.

Step 4. Click OK.
After executing the above registry steps, now User Account Control dialog will completely disappear.
If you would like to enable the UAC prompt again on your Windows 10 PC, repeat the above steps, and in step 3 above, set the Value data to 1.
How to Allow or Disallow User Account Control (UAC) Prompt in Windows 10 using Winaero Tweaker?
Winaero Tweaker is a free application that comes with several features to customize Windows 10. You can also use this tool to allow or disallow UAC prompts.
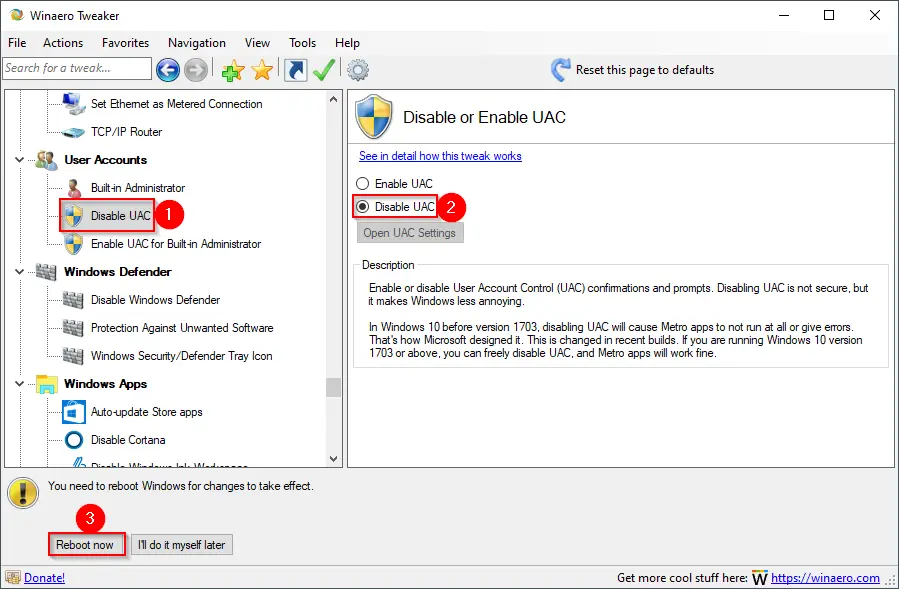
Simply download Winaero Tweaker and open in portable mode. It will extract all files in the “C” drive in WinaeroTweaker folder. Double-click on the executable file to launch this tool. In the left side pane, scroll down to the User Accounts section and then click the “Disable UAC” option. On the right side pane, select the radio button Disable UAC. Finally, click the Reboot now button to disable UAC prompt on your Windows 10 PC.
That’s all!!!