Are you tired of double-clicking on files and folders in Windows 11? If so, you’ll be happy to know that it’s possible to enable single-click opening instead. In this article from GearUpWindows, we’ll show you how to do just that with a simple guide. Whether you’re new to Windows 11 or a seasoned user, our step-by-step instructions will make it easy to customize this feature and save you time in the long run.
How to Turn On Single Click to Open an Item on Windows 11?
Follow these steps to enable single click to open an item on Windows 11:-
Step 1. First, open File Explorer by pressing the Windows + E keys.
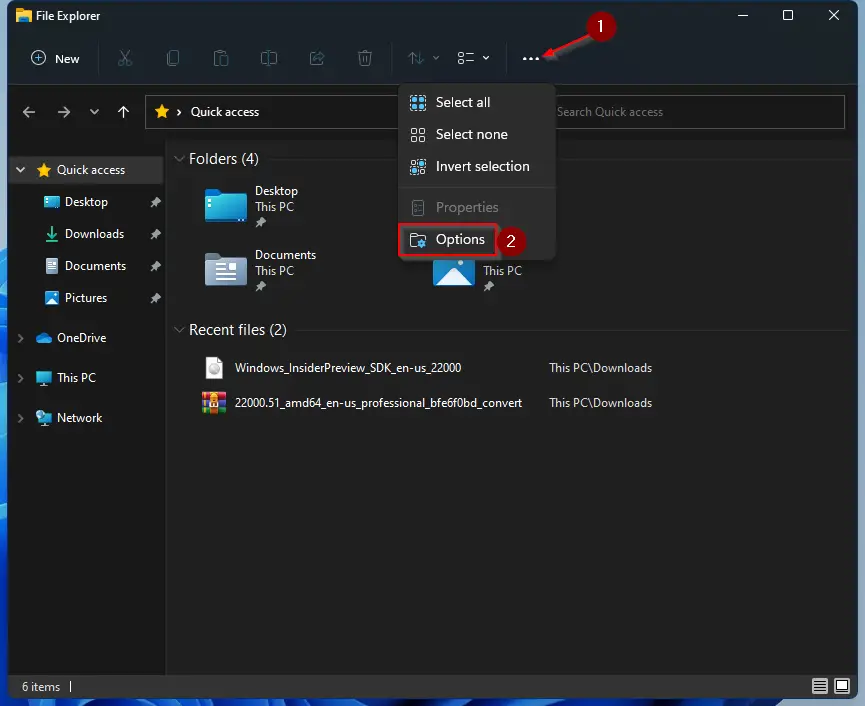
Step 2. When File Explorer opens, click on the three dots menu (ellipse) and select Options from the pop-up menu.
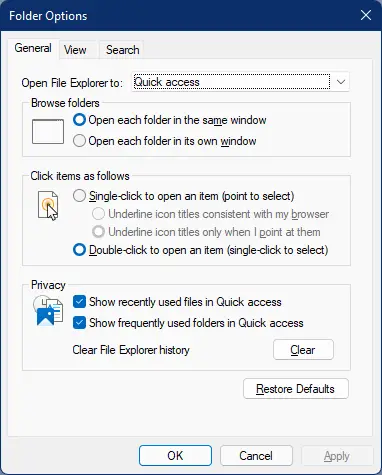
Step 3. Now, the Folder Options dialog will appear.
Step 4. Next, choose the General tab. Then select the “Single-click to open an item (point to select)” option.
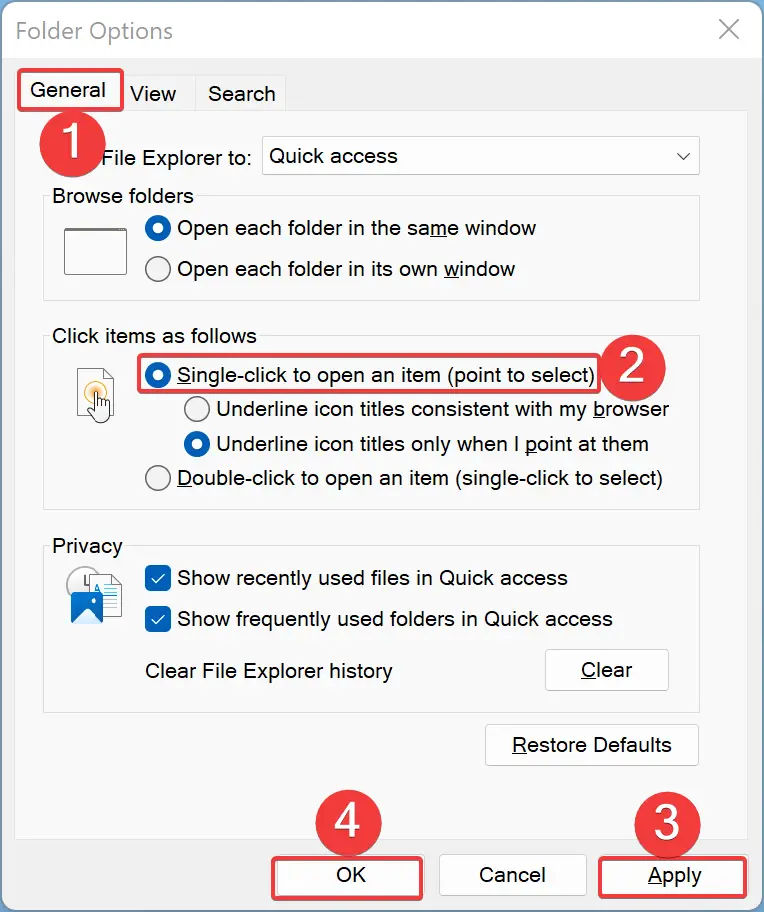
Step 5. When you’re done, click the Apply button to save the changes.
Step 6. Finally, click the OK button to exit the Folder Options window.
With the settings enabled, to select an item, just hover your mouse over it for a moment. Alternatively, enable the checkboxes in File Explorer to easily select items.
How to Turn Off Single Click to Open an Item on Windows 11?
Follow these steps to disable single click to open an item on Windows 11:-
Step 1. First, open File Explorer by pressing the Windows + E keys.
Step 2. When File Explorer opens, click on the three dots menu (ellipse) and select Options from the pop-up menu.
Step 3. Now, the Folder Options dialog will appear.
Step 4. Next, choose the General tab. Then select the “Double-click to open an item (single-click to select)” option.
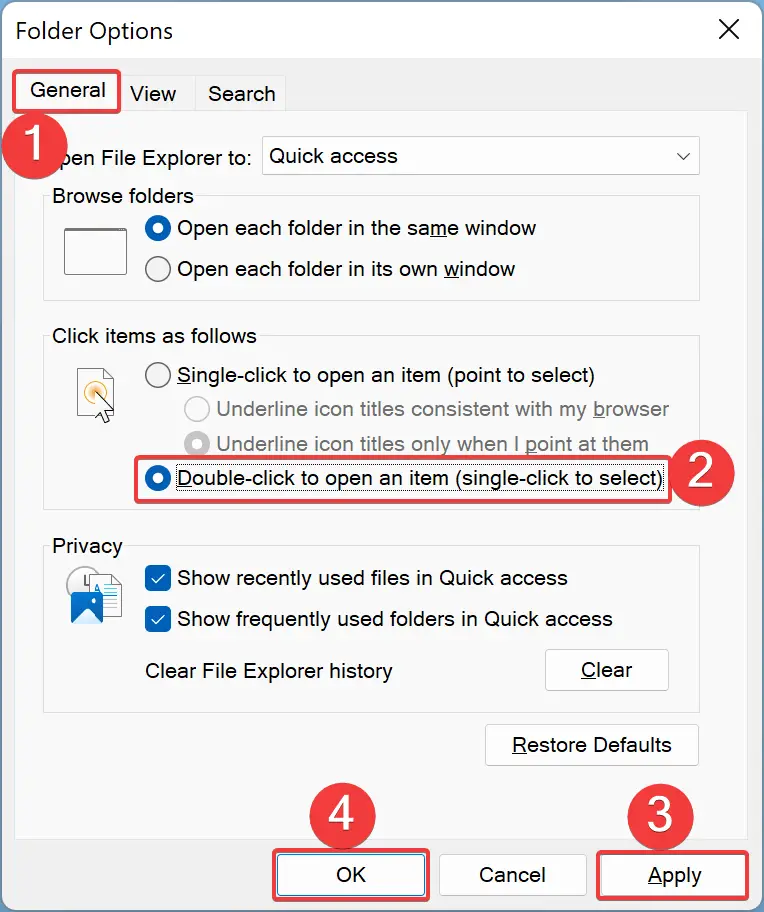
Step 5. When you’re done, click the Apply button to save the changes.
Step 6. Finally, click the OK button to exit the Folder Options window.
A single click will select an item when the settings are enabled, and a double click will open them.
How to Enable Single Click on Windows 11 using Control Panel?
To turn on the single-click feature to open a file or folder in Windows 11 through Control Panel, use these steps:-
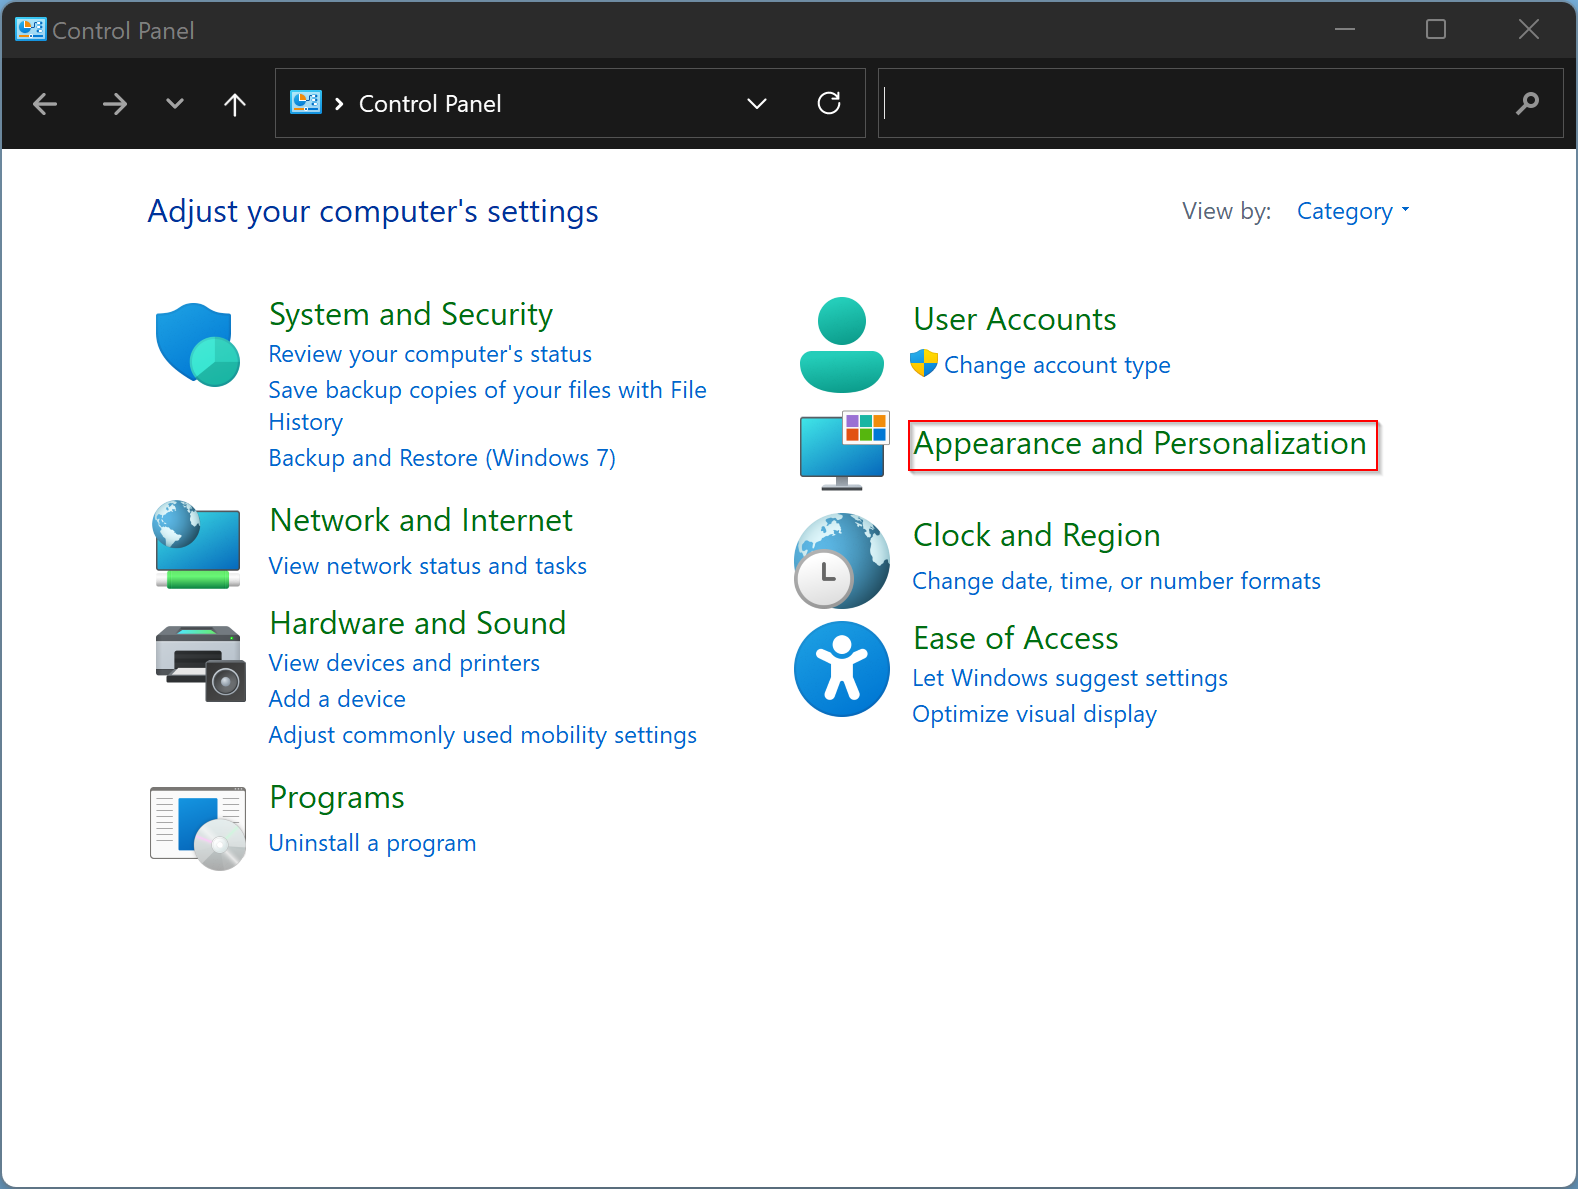
Step 1. First, open Control Panel.
Step 2. Then, click on Appearance and Personalization.
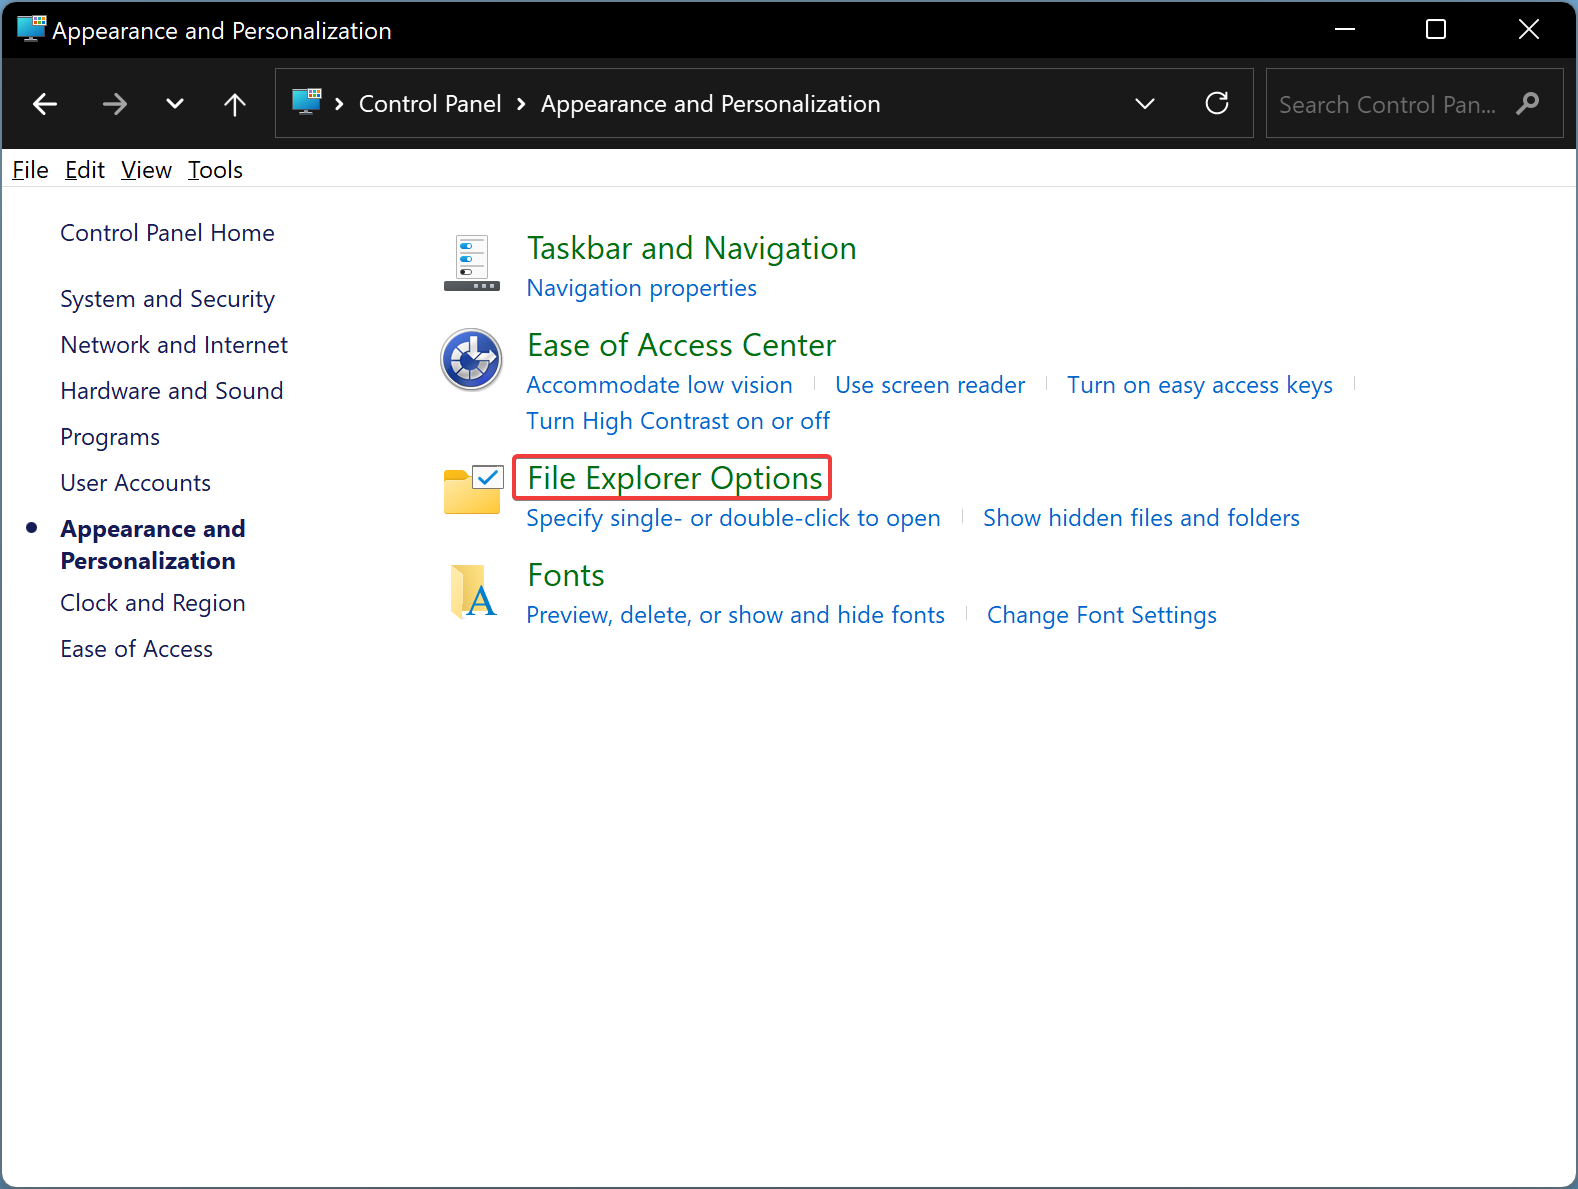
Step 3. After that, click on File Explorer Options to open the “File Explorer Options” dialog.
Step 4. Switch to the General tab in the File Explorer Options window.
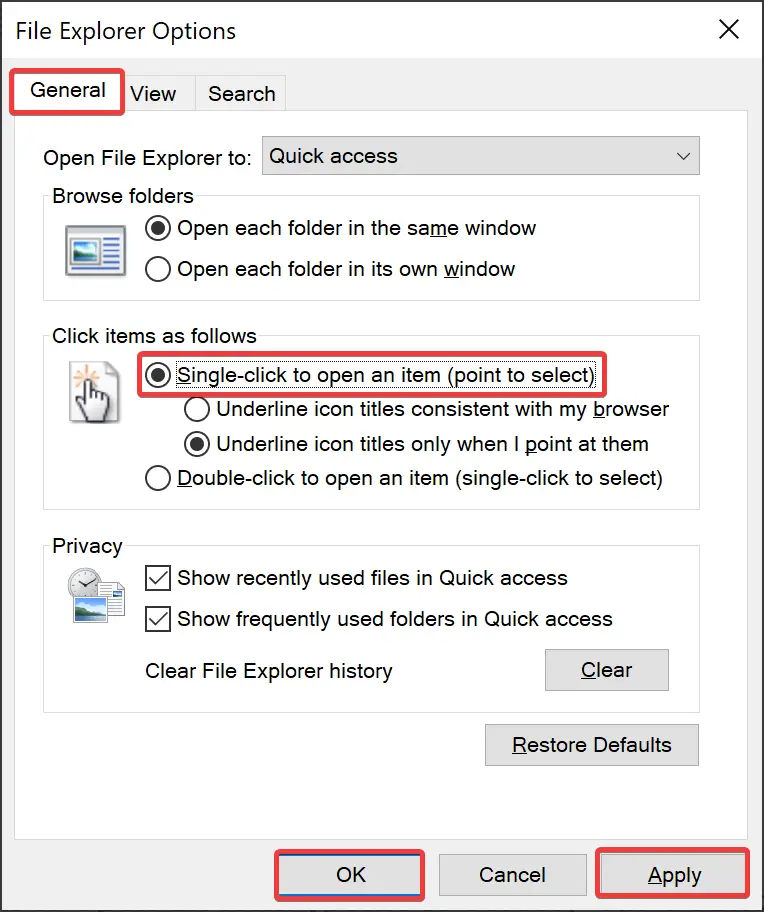
Step 5. Then, click the “Single-click to open an item (point to select)” option under the “Click items as follows” section.
Step 6. Next, click the Apply button.
Step 7. Finally, click the OK button.
How to Disable Single Click to Open an Item on Windows 11 through Control Panel?
To turn off the single click and enable the double-click feature to open a file or folder in Windows 11 using the Control Panel, use these steps:-
Step 1. Very first, launch Control Panel.
Step 2. Next, click on Appearance and Personalization.
Step 3. Then, click on File Explorer Options to open the “File Explorer Options” dialog.
Step 4. Switch to the General tab in the File Explorer Options window.
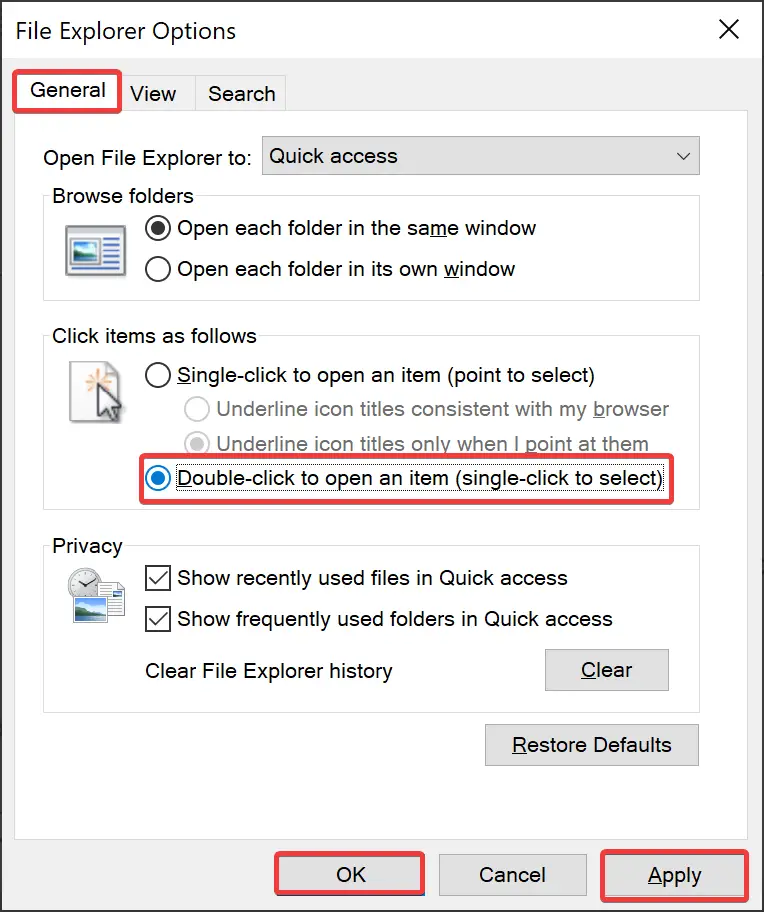
Step 5. After that, click the “Double-click to open an item (single-click to select)” option under the “Click items as follows” section.
Step 6. Then, click the Apply button.
Step 7. At last, click the OK button.
Conclusion
In conclusion, enabling single-click opening in Windows 11 can help save time and increase productivity by simplifying the file selection process. With the simple steps provided in this guide, users can easily turn on or off the single-click feature in Windows 11 using both the File Explorer and Control Panel methods. Whether you’re a new or experienced Windows 11 user, following the step-by-step instructions will allow you to customize this feature to your liking and make the most of your Windows 11 experience.
Also Read:
Fix: “Single-click to open an item” is Greyed out in Folder Options of Windows 11/10/8/7