The CPU (Central Processing Unit) is an integral part of every computer. This is also known as the brain of the computer. The more powerful your CPU, the faster your computing experience will be. Hence, before purchasing a computer or laptop, you should consider the latest CPU available on the market.
If you have already purchased a computer and want to know the CPU generation for some reason, such as troubleshooting Windows, this gearupwindows article will guide you. If your PC ships with Intel CPU, there are several ways to find its generation on Windows 11 and 10.
How to Check Intel CPU Generation on Windows 11 Settings?
To find your Intel CPU generation using the Settings app on Windows 11, use these steps:-
Step 1. Open Windows 11 Settings.
Step 2. When the Settings window appears on your computer, click on the System in the left sidebar.

Step 3. On the right sidebar, scroll down to the bottom and click on the About tab.
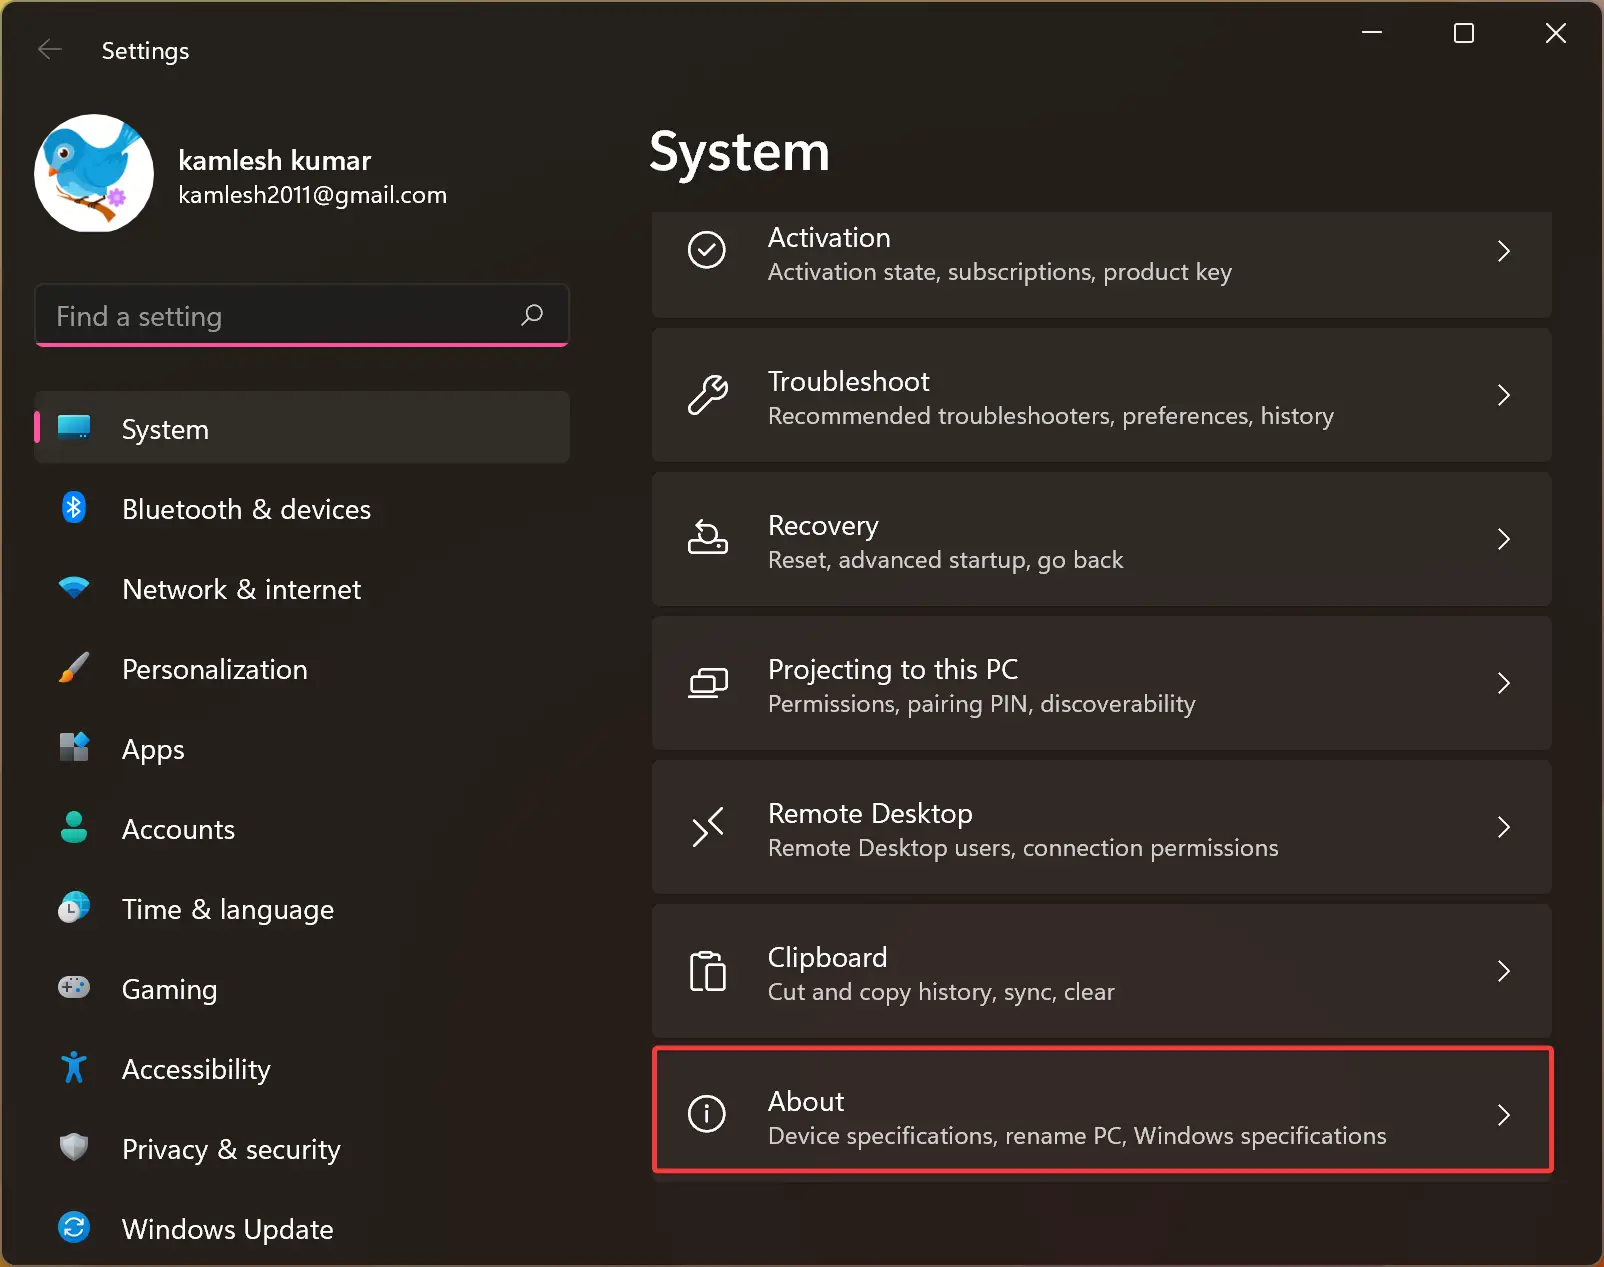
Step 4. In the following screen, under the Device specifications section, you can view your Intel CPU generation besides the Processor entry.

How to Know Intel CPU Generation on Windows 10 Settings?
To view your Intel CPU generation using the Settings app on Windows 10, use these steps:-
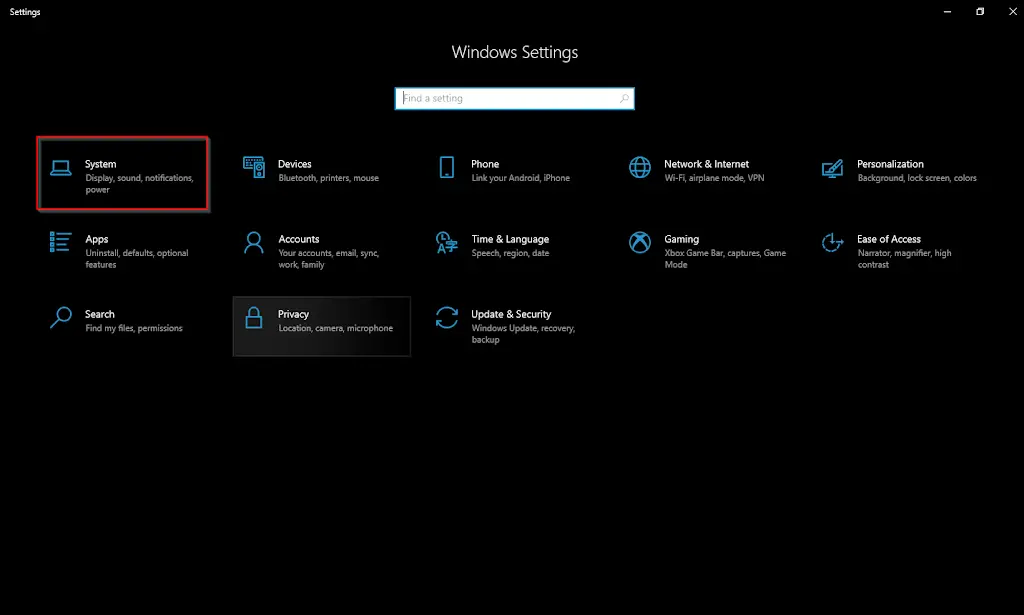
Step 1. Open Windows 10 Settings.
Step 2. Next, click on the System category.
Step 3. Now, scroll down to the bottom on the left sidebar and select the About tab.
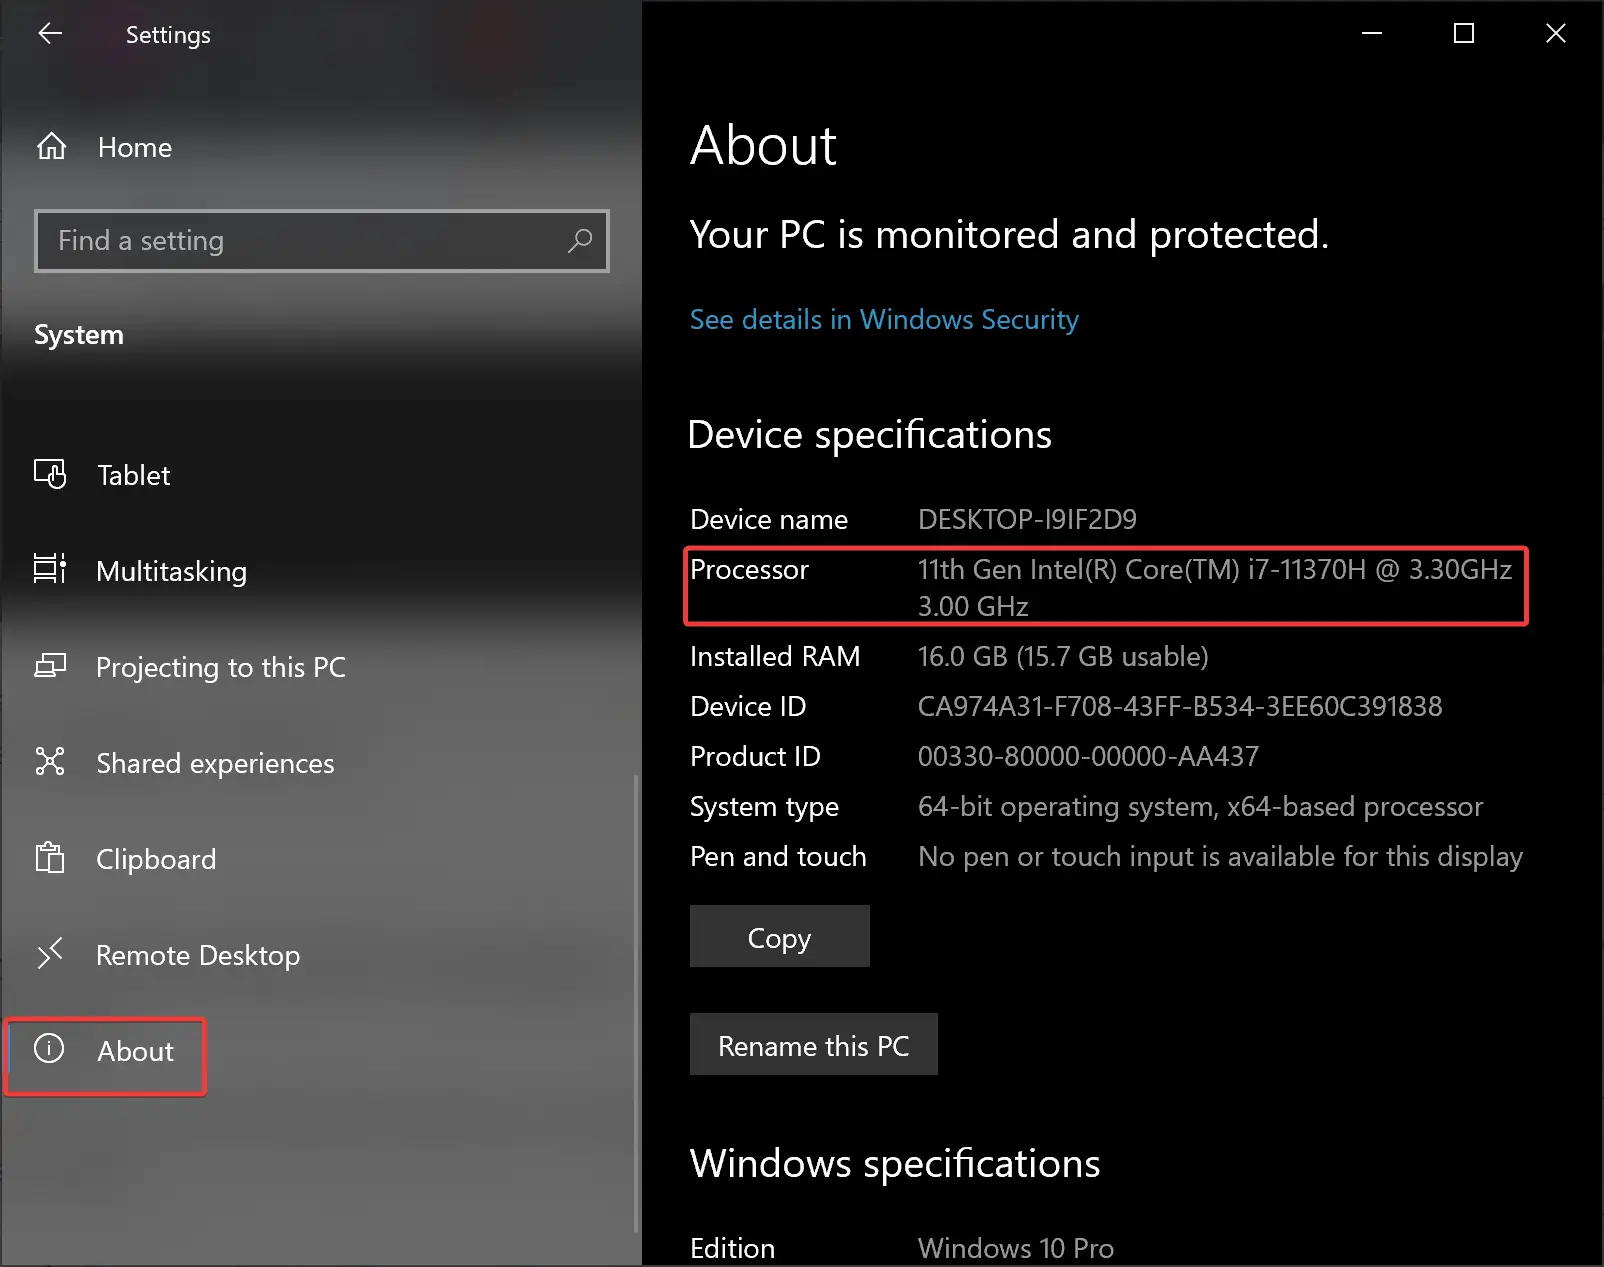
Step 4. On the right sidebar, under the “Device specifications” section, beside the Processor entry, you can view the Intel CPU information, including its generation.
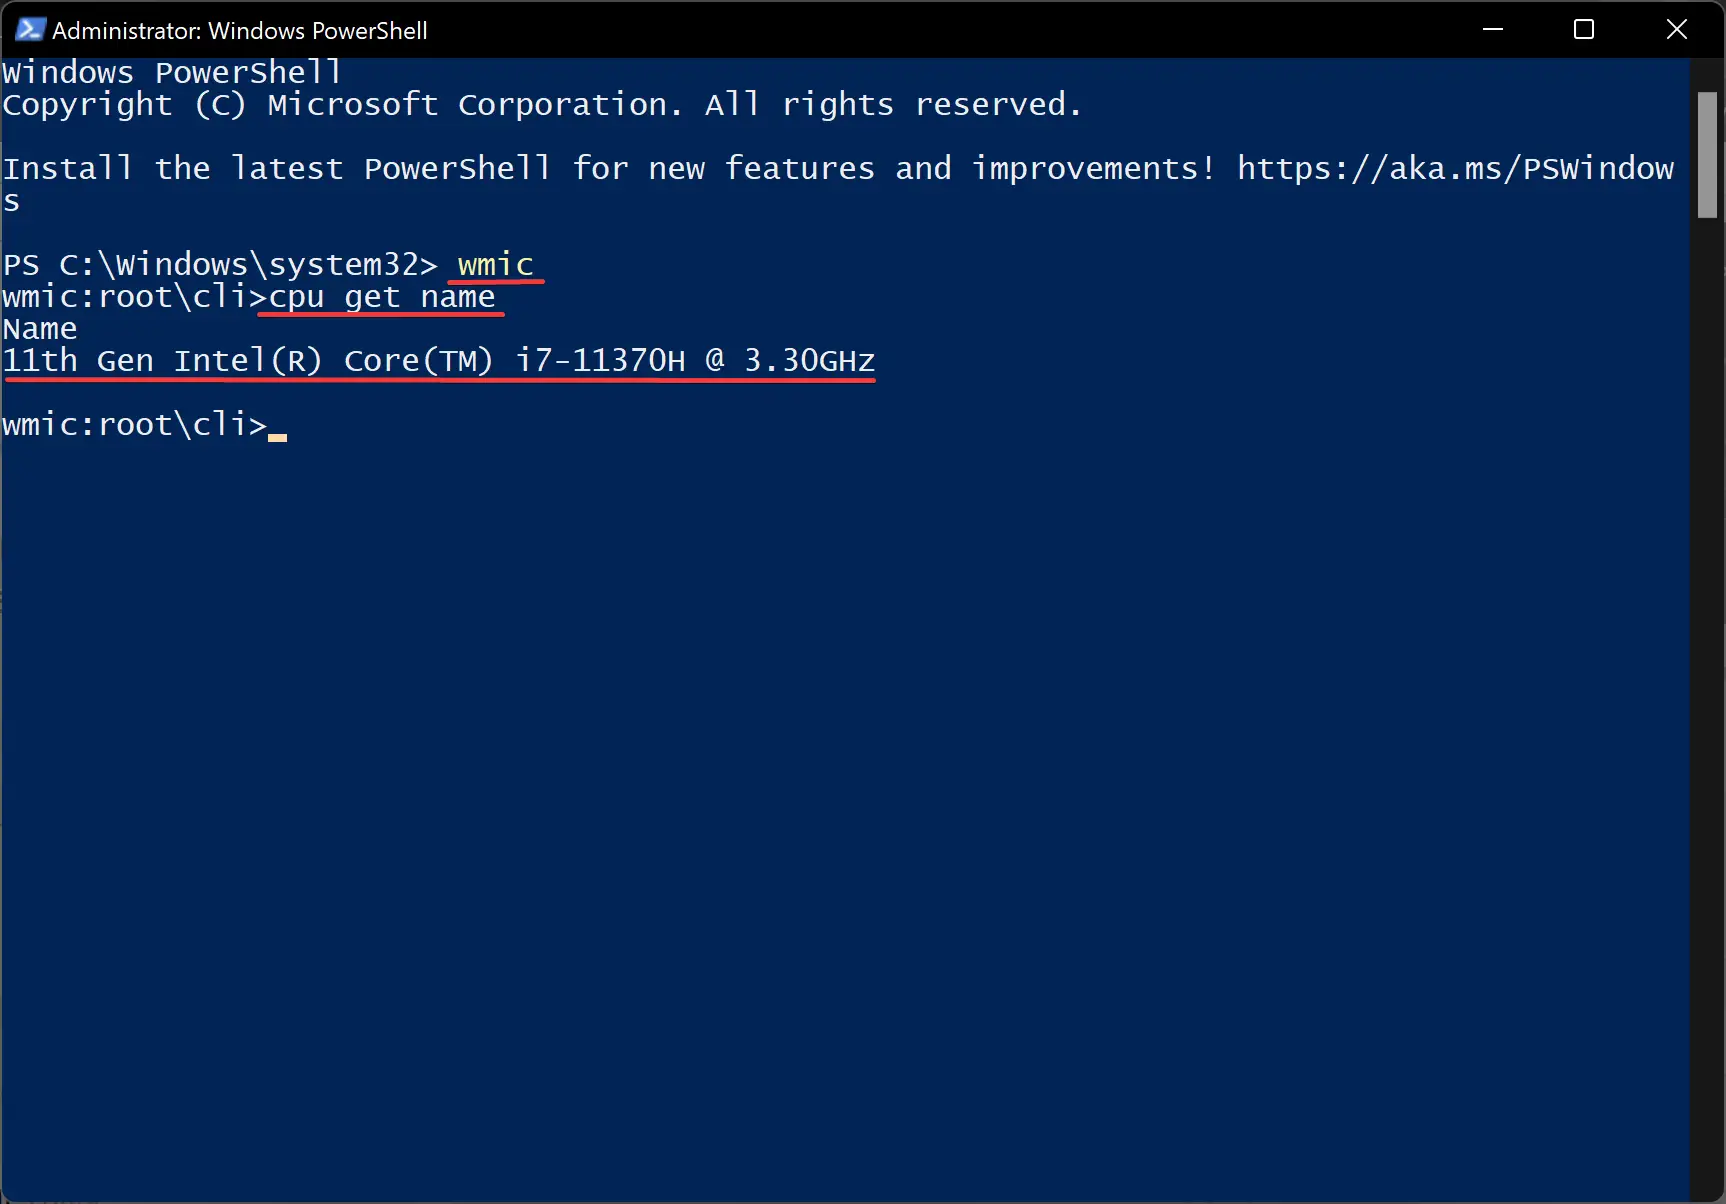
How to Find Intel CPU Generation on Windows 11 or 10 via Command Prompt?
To know your Intel CPU generation on Windows 11 or 10 through Command Prompt, use these steps:-
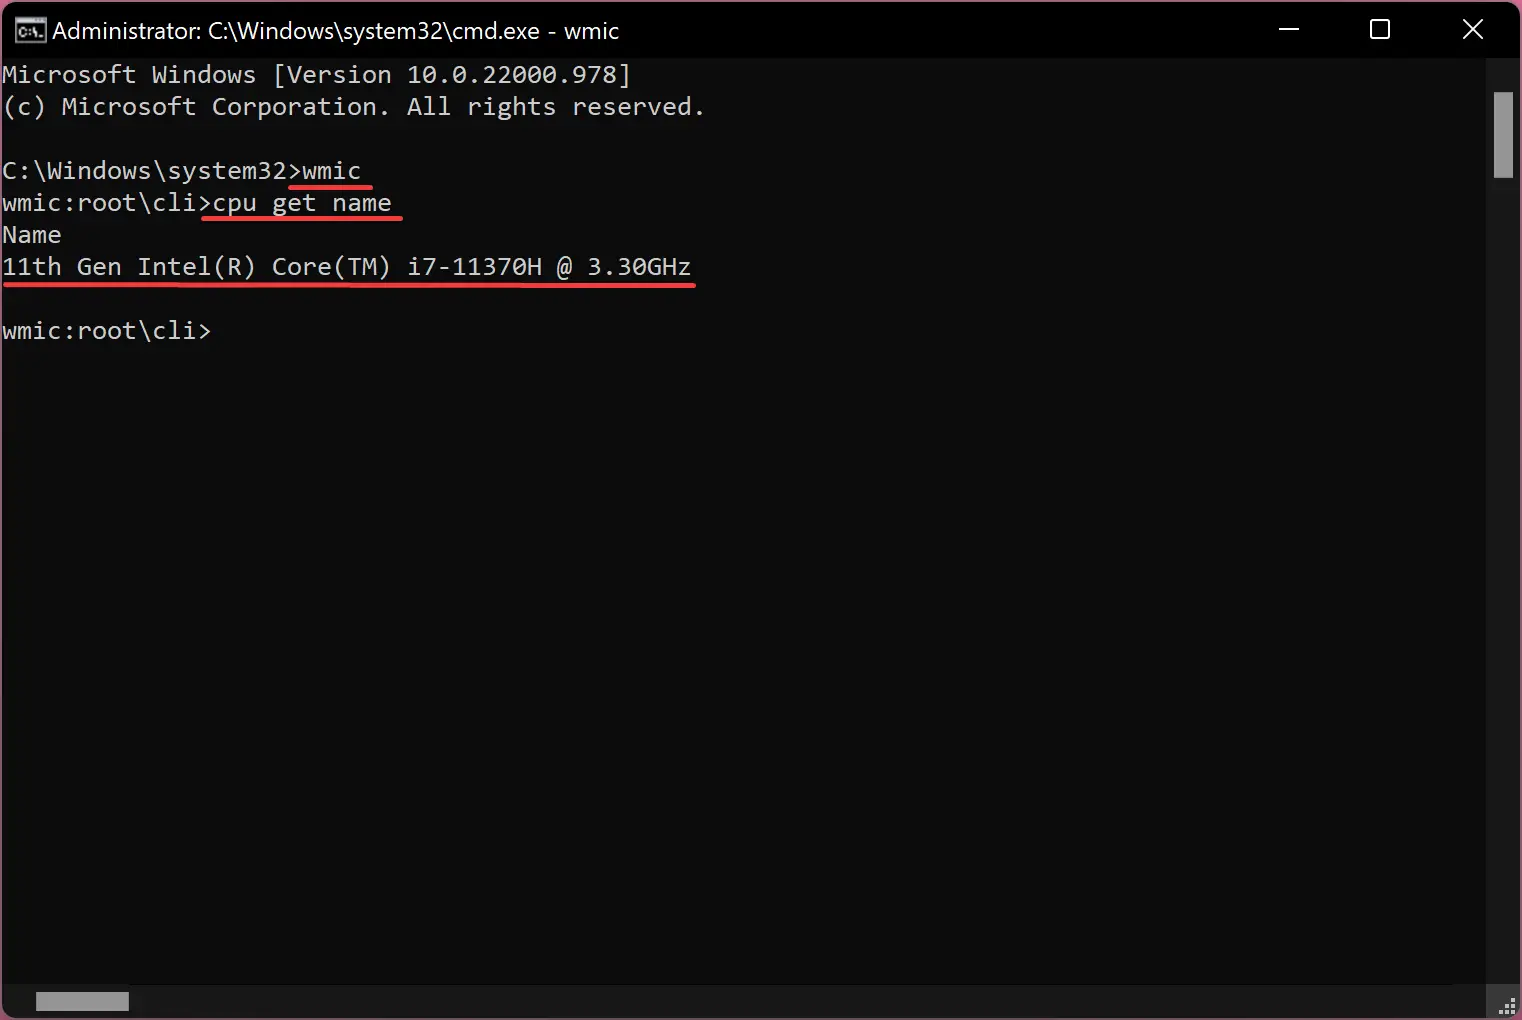
Step 1. Open an elevated Command Prompt.
Step 2. Then, type the following commands one by one and hit the Enter key on the keyboard to get the Intel CPU generation:-
wmic
cpu get name
How to View Intel CPU Generation on Windows 11 or 10 using PowerShell?
To know your Intel CPU generation on Windows 11 or 10 via PowerShell, use these steps:-
Step 1. Open Windows PowerShell as an administrator.
Step 2. Next, type the following commands one by one and press the Enter key on the keyboard to get the Intel CPU generation:-
wmic
cpu get name
How to See Intel CPU Generation on Windows 11 or 10 Task Manager?
To view your Intel CPU generation through the Windows 11 or 10 Task Manager, use these steps:-
Step 1. Open Task Manager.
To do that, use the Ctrl + Shift + Esc keyboard shortcut. Or, right-click the Start button and select Task Manager in the menu.
Step 2. When the Task Manager appears on your computer, switch to the Performance tab.
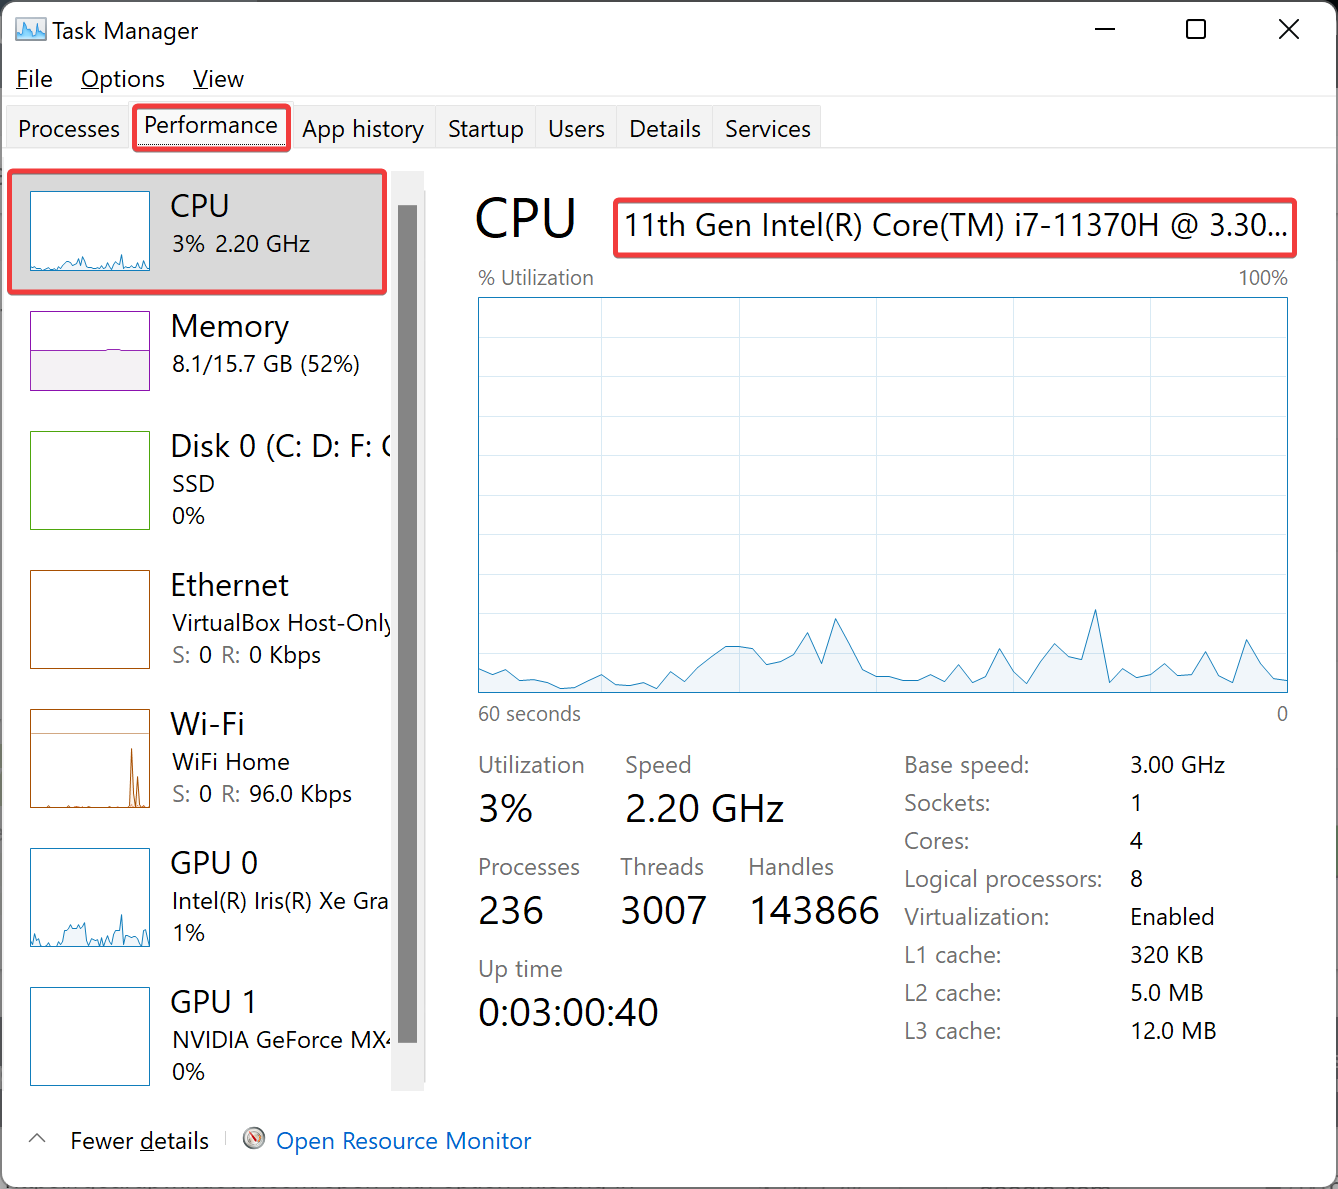
Step 3. Then, select CPU in the left sidebar.
Step 4. You can see your CPU generation information on the right sidebar at the top.
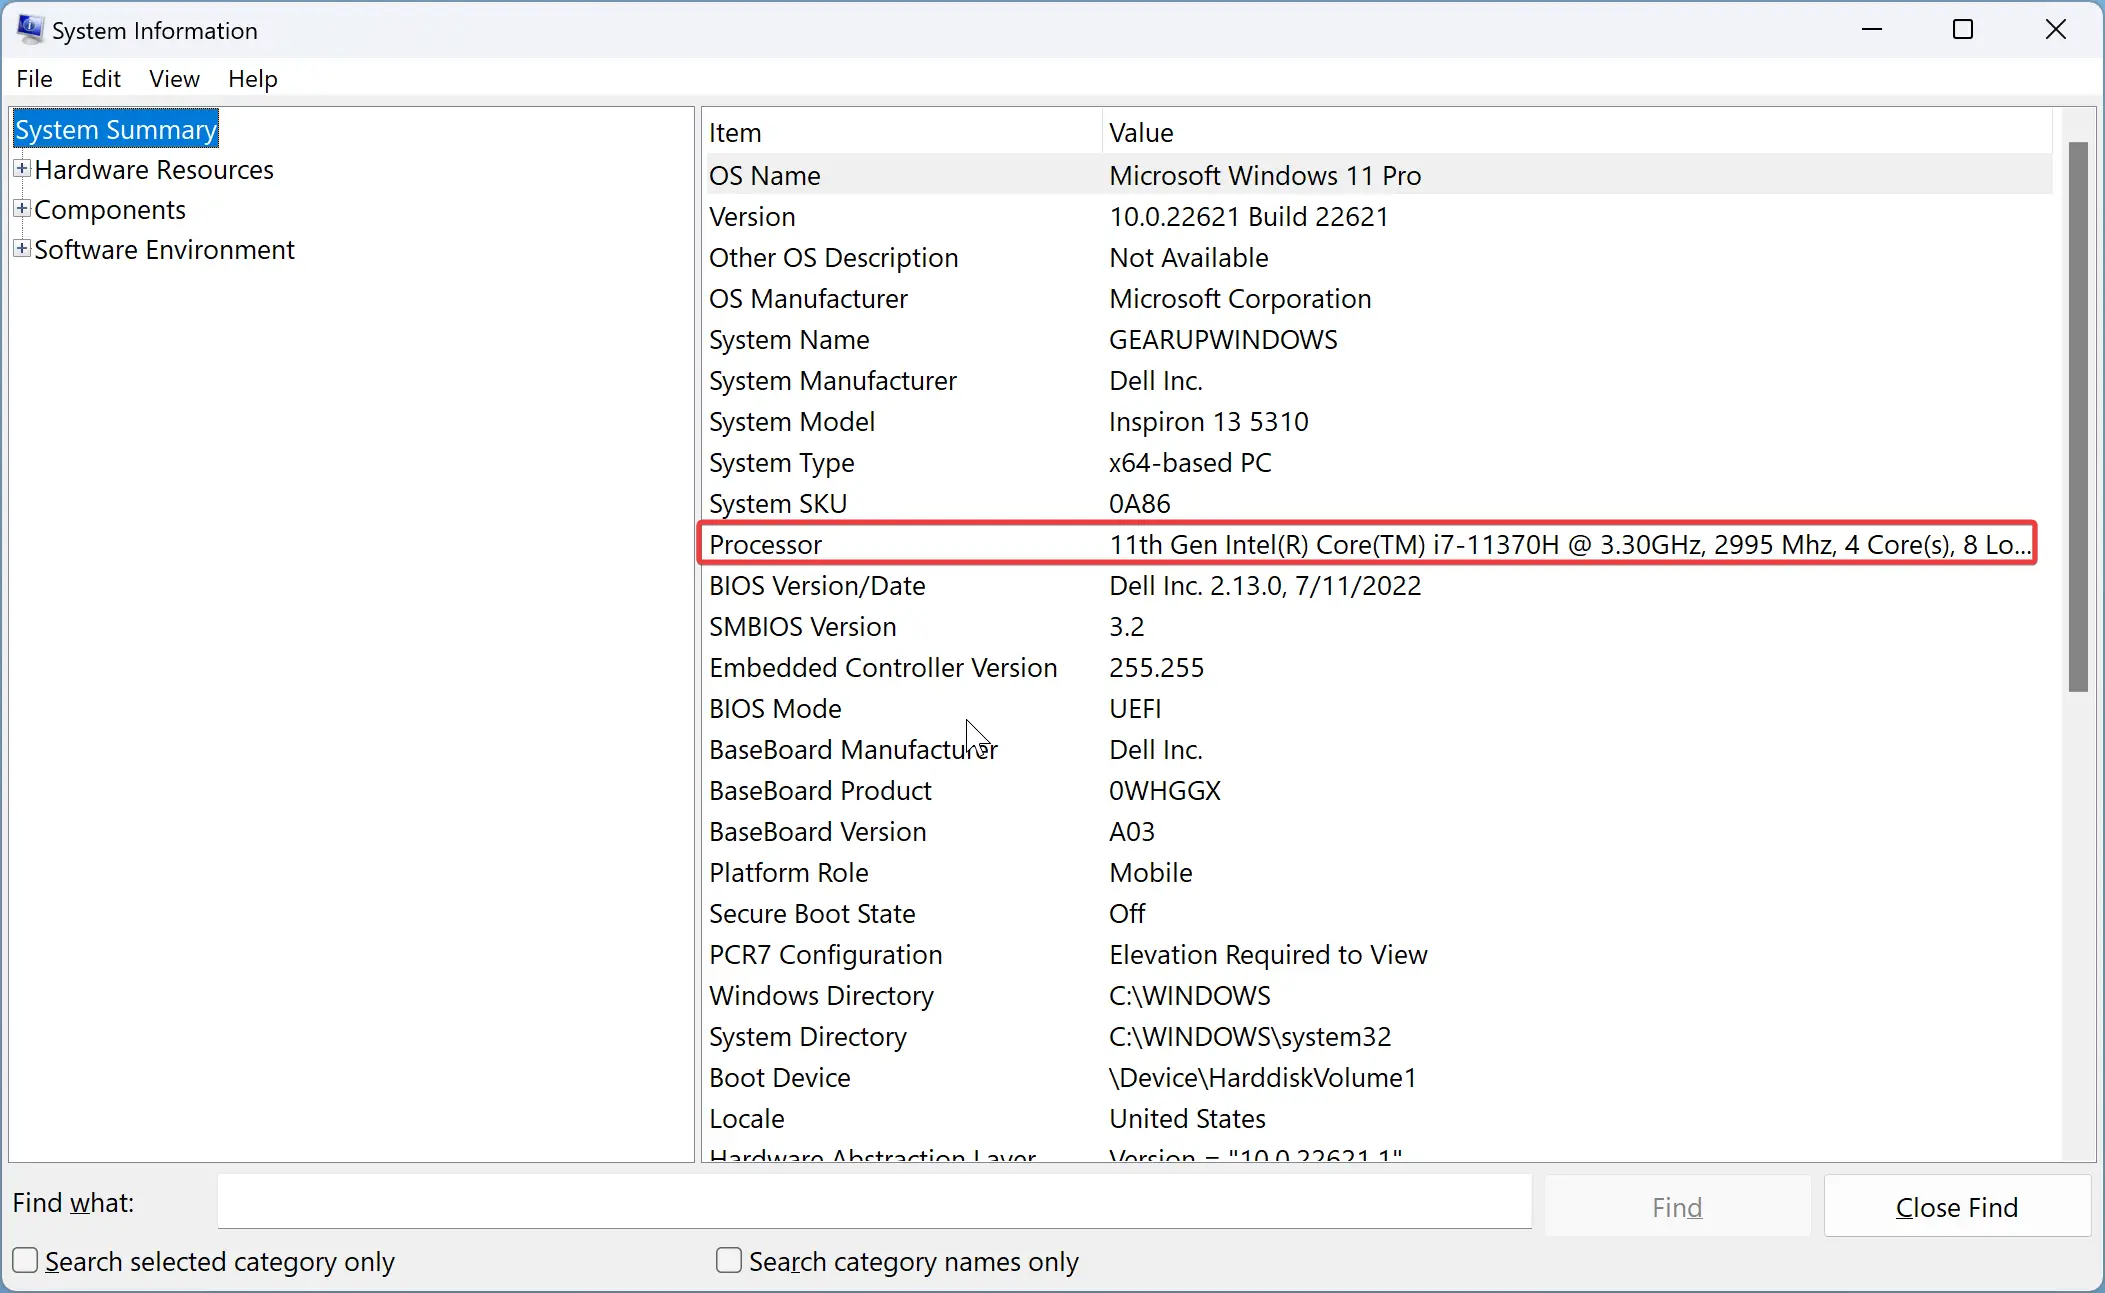
How to View CPU Details using the System Information Panel?
In the System Information Panel, you can also find information about the CPU. Here’s how you can do it.
Step 1. Open the System Information panel first.
In order to do that, press Windows + R on the keyboard to open the Run dialog box. On the keyboard, type msinfo32 and press Enter.

Step 2. In the left sidebar, select System Summary, and on the right side, you’ll find the Intel generation next to the Processor entry.
Conclusion
In conclusion, the CPU is the brain of every computer and plays a crucial role in determining the speed and performance of your device. It is essential to consider the latest CPU available in the market before purchasing a computer or laptop. However, if you have already purchased a computer and want to know the CPU generation, there are several ways to find it on Windows 11 and 10, such as through the Settings app, Command Prompt, PowerShell, Task Manager, and System Information Panel. By following these simple steps, you can easily check your Intel CPU generation and troubleshoot any issues related to your device’s performance.