Windows 11 is the latest iteration of Microsoft’s operating system, offering a sleek and user-friendly interface. While it provides various features to enhance user experience and security, it’s essential to know how to protect your sensitive files and data. One way to do this is by hiding files or folders from prying eyes. In this article, we will guide you through the process of hiding files on Windows 11.
Why Hide Files or Folders on Windows 11?
Hiding files or folders on your Windows 11 computer serves several purposes, including:-
- Privacy: You may have personal or sensitive information that you don’t want others to stumble upon accidentally.
- Organization: Hiding files can help you declutter your desktop or file explorer, making it easier to locate essential documents.
- Security: Hiding sensitive files adds an extra layer of security in case someone else accesses your computer.
How to Hide Files or Folders on Windows 11?
Here’s how you can hide files/folders on Windows 11:-
Method 1: Using File Explorer
Step 1. Open File Explorer by pressing “Windows + E” or clicking the folder icon on the taskbar. Locate the file or folder you want to hide.
Step 2. Right-click on the file or folder, and a context menu will appear.
Step 3. In the context menu, select “Properties.”
Step 4. In the Properties window, go to the “General” tab, and you will see the “Attributes” section. Check the box next to “Hidden.”
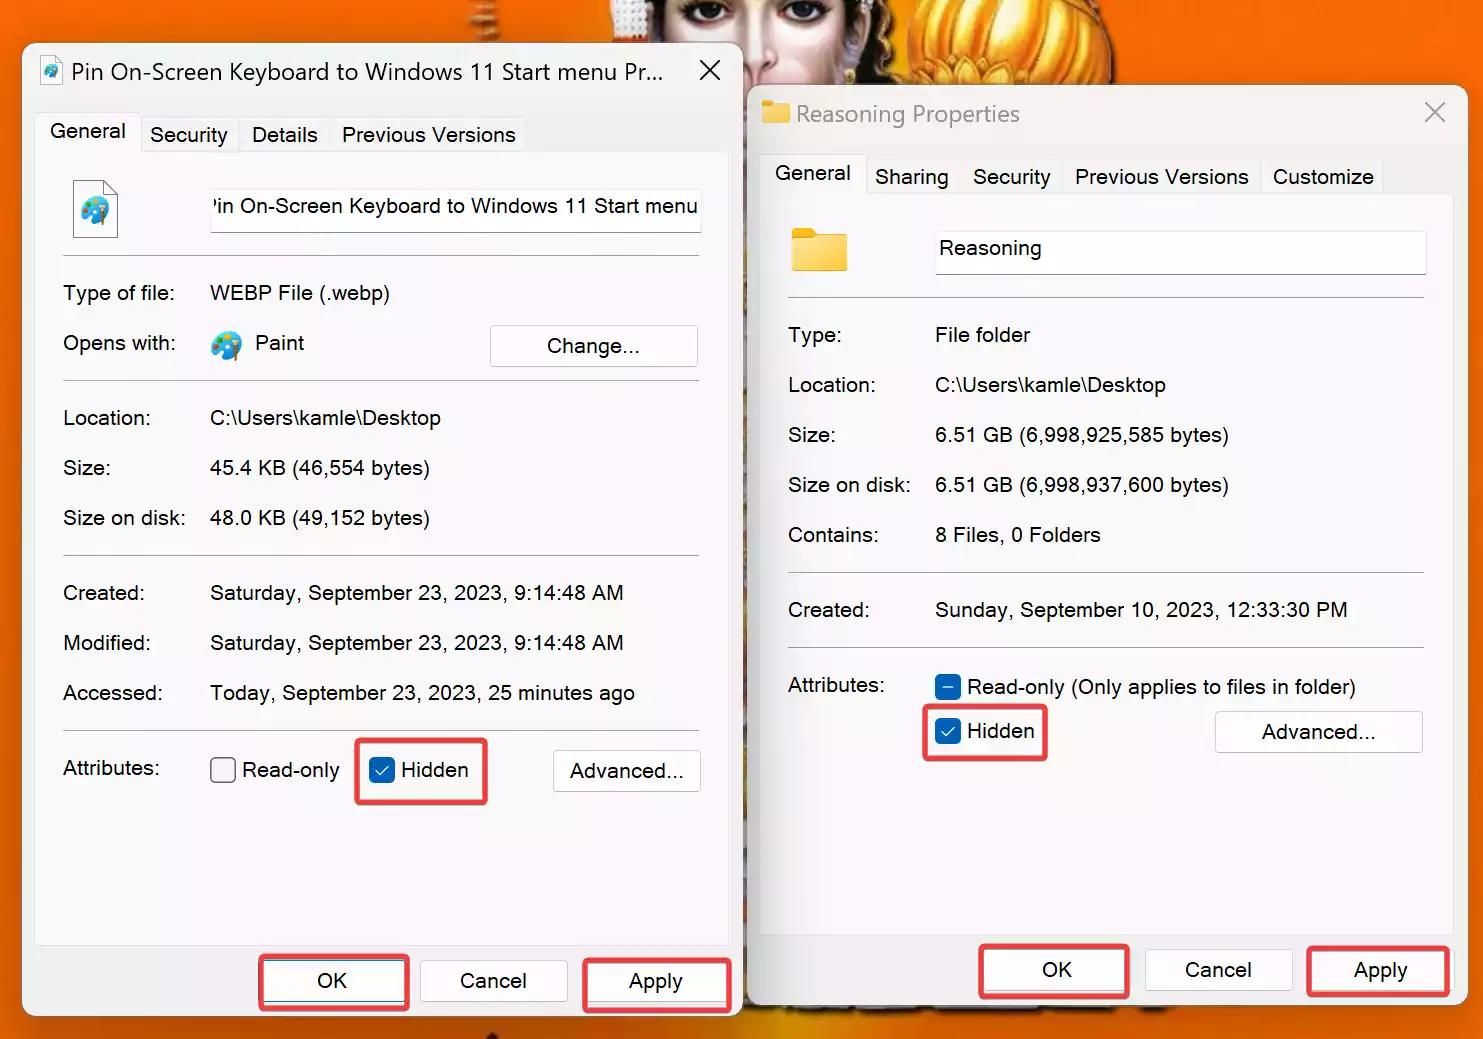
Step 5. Click “Apply” and then “OK” to confirm your choice.
The selected file or folder is now hidden. However, it’s important to note that this method only hides the file from view and does not secure it with a password.
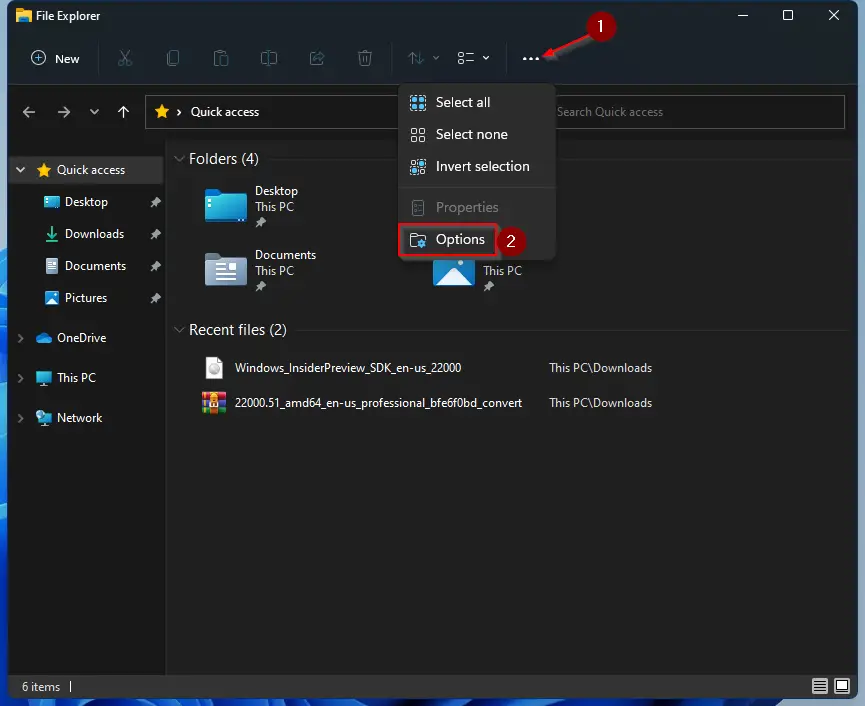
To unhide files or folders, open File Explorer and click on the “See more” button on the toolbar. Then, select the Options option to open the Folder Options dialog.
In the Folder Options dialog, switch to the View tab and select the “Show hidden files, folders, and drives” option. Then, click on the Apply and OK buttons. All hidden files and folders will appear in File Explorer.
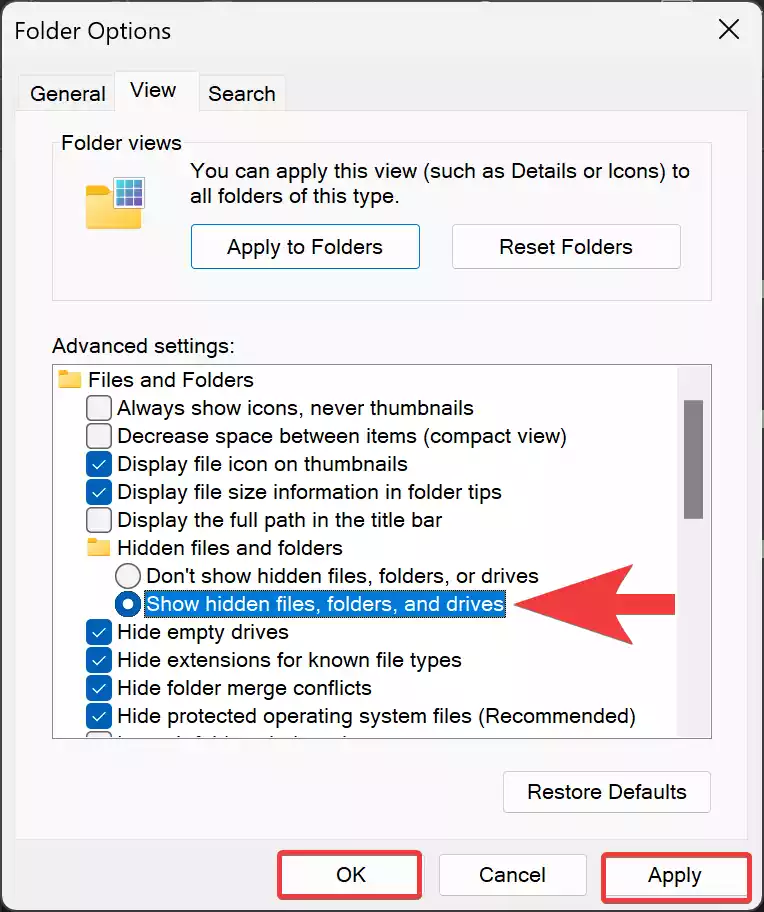
To revert the changes, repeat the above steps, select “Don’t show hidden files, folders, or drives,” and then click on the Apply/OK button.
Method 2: Using Command Prompt
If you want to take your file hiding a step further by hiding it from the command line, follow these steps:-
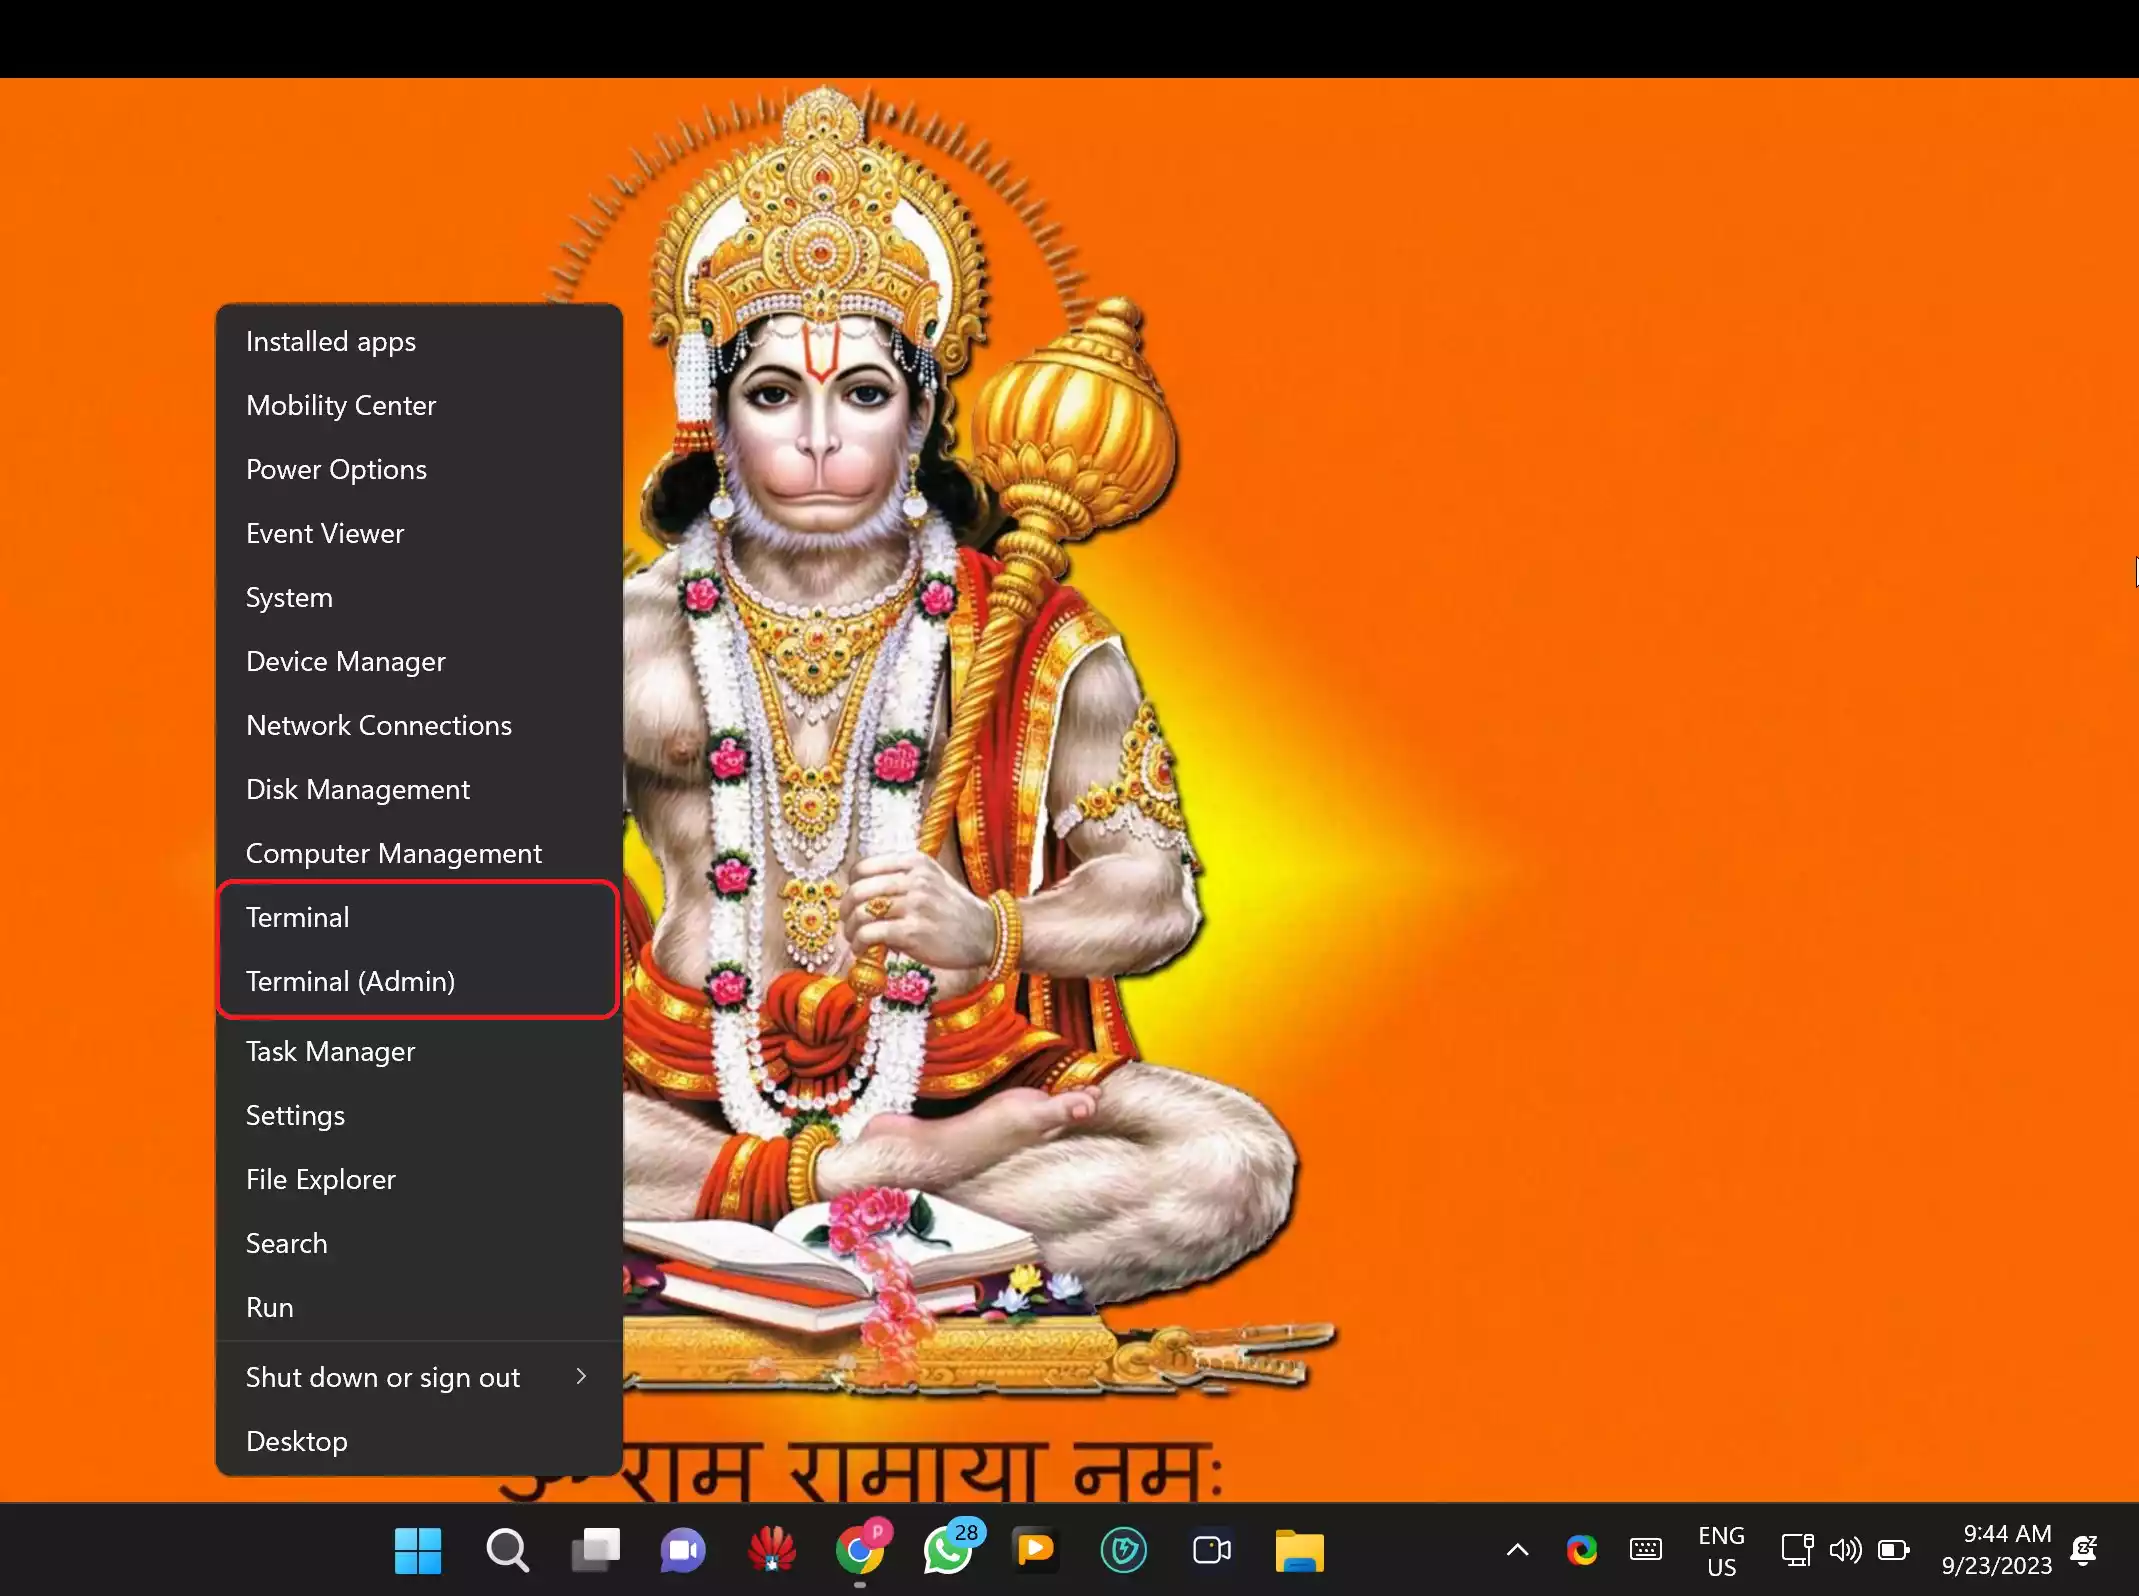
Step 1. Press “Windows + X” and select “Terminal” or “Terminal (Admin).”
Step 2. Use the “cd” command to change the directory to the location of the file you want to hide.
cd C:\Path\To\Your\Folder
Step 3. To hide a file, use the “attrib” command with the “+h” attribute. For example:-
attrib +h FileName.extension
Replace “FileName.extension” with the actual name of the file you want to hide.
Step 4. You can verify the file’s hidden status by using the “dir /a” command. Hidden files will have an “H” attribute.
Method 3: Using Third-Party Software
If you prefer a more user-friendly approach or want to add an extra layer of security, you can use third-party software to hide files/folders on Windows 11. Some popular options include SecretFolder, Wise Folder Hider, and HiddenDIR. These tools often provide features like password protection and encryption, ensuring your files remain secure even if someone gains access to your computer.
Conclusion
Hiding files on Windows 11 is a straightforward process that can help you maintain privacy, organization, and security. Whether you choose to use built-in Windows features or third-party software, taking steps to protect your sensitive data is crucial in today’s digital age.
