Windows 11 final release is scheduled for Nov 2021. However, Windows lovers install Windows 11 on Virtual Machines and use it. Several new features have been introduced on Windows 11, and some are carried forward from their predecessor Windows 10. Microsoft Defender is a part of Windows 10, and it is still available in Windows 11. It is free anti-malware software that Microsoft provides free of cost. Although Windows Defender is an application, you can not uninstall it like a regular app.

Windows Defender is part of Windows OS, but most Windows users prefer to use commercial antivirus or security programs to protect their PCs. Hence, it may be a useless application for you if you have installed a third-party antivirus on your PC. Those Windows users who want to get rid of Windows Defender applications can disable them on their PCs. Unfortunately, disabling this Defender application is a tough job using built-in options. Hence, we will use a third-party tool to disable it.
How to Enable or Disable Microsoft Defender Antivirus on Windows 11/10?
To turn on or turn off Microsoft Defender antivirus on Windows 11, do the following steps:-
Step 1. Download Defender Control portable utility.
Step 2. Extract its content using the WinRAR application.
Step 3. Now, double-click on the “dControl” executable file to launch it.
Step 4. Click on the Disable Windows Defender or Enable Windows Defender button to turn Off or turn On the Windows Defender / Microsoft Defender application.

Download Defender Control
Defender Control software is compatible with Windows 10 and Windows 11, which means you can enable or disable the Microsoft Defender application in both operating systems. You can download this portable tool from here.
How to Turn Off Microsoft Windows Defender Antivirus Temporarily on Windows 11?
If you don’t prefer to use a third-party application to disable Microsoft Windows Defender on a Windows 11 PC, do the following to disable it temporarily:-
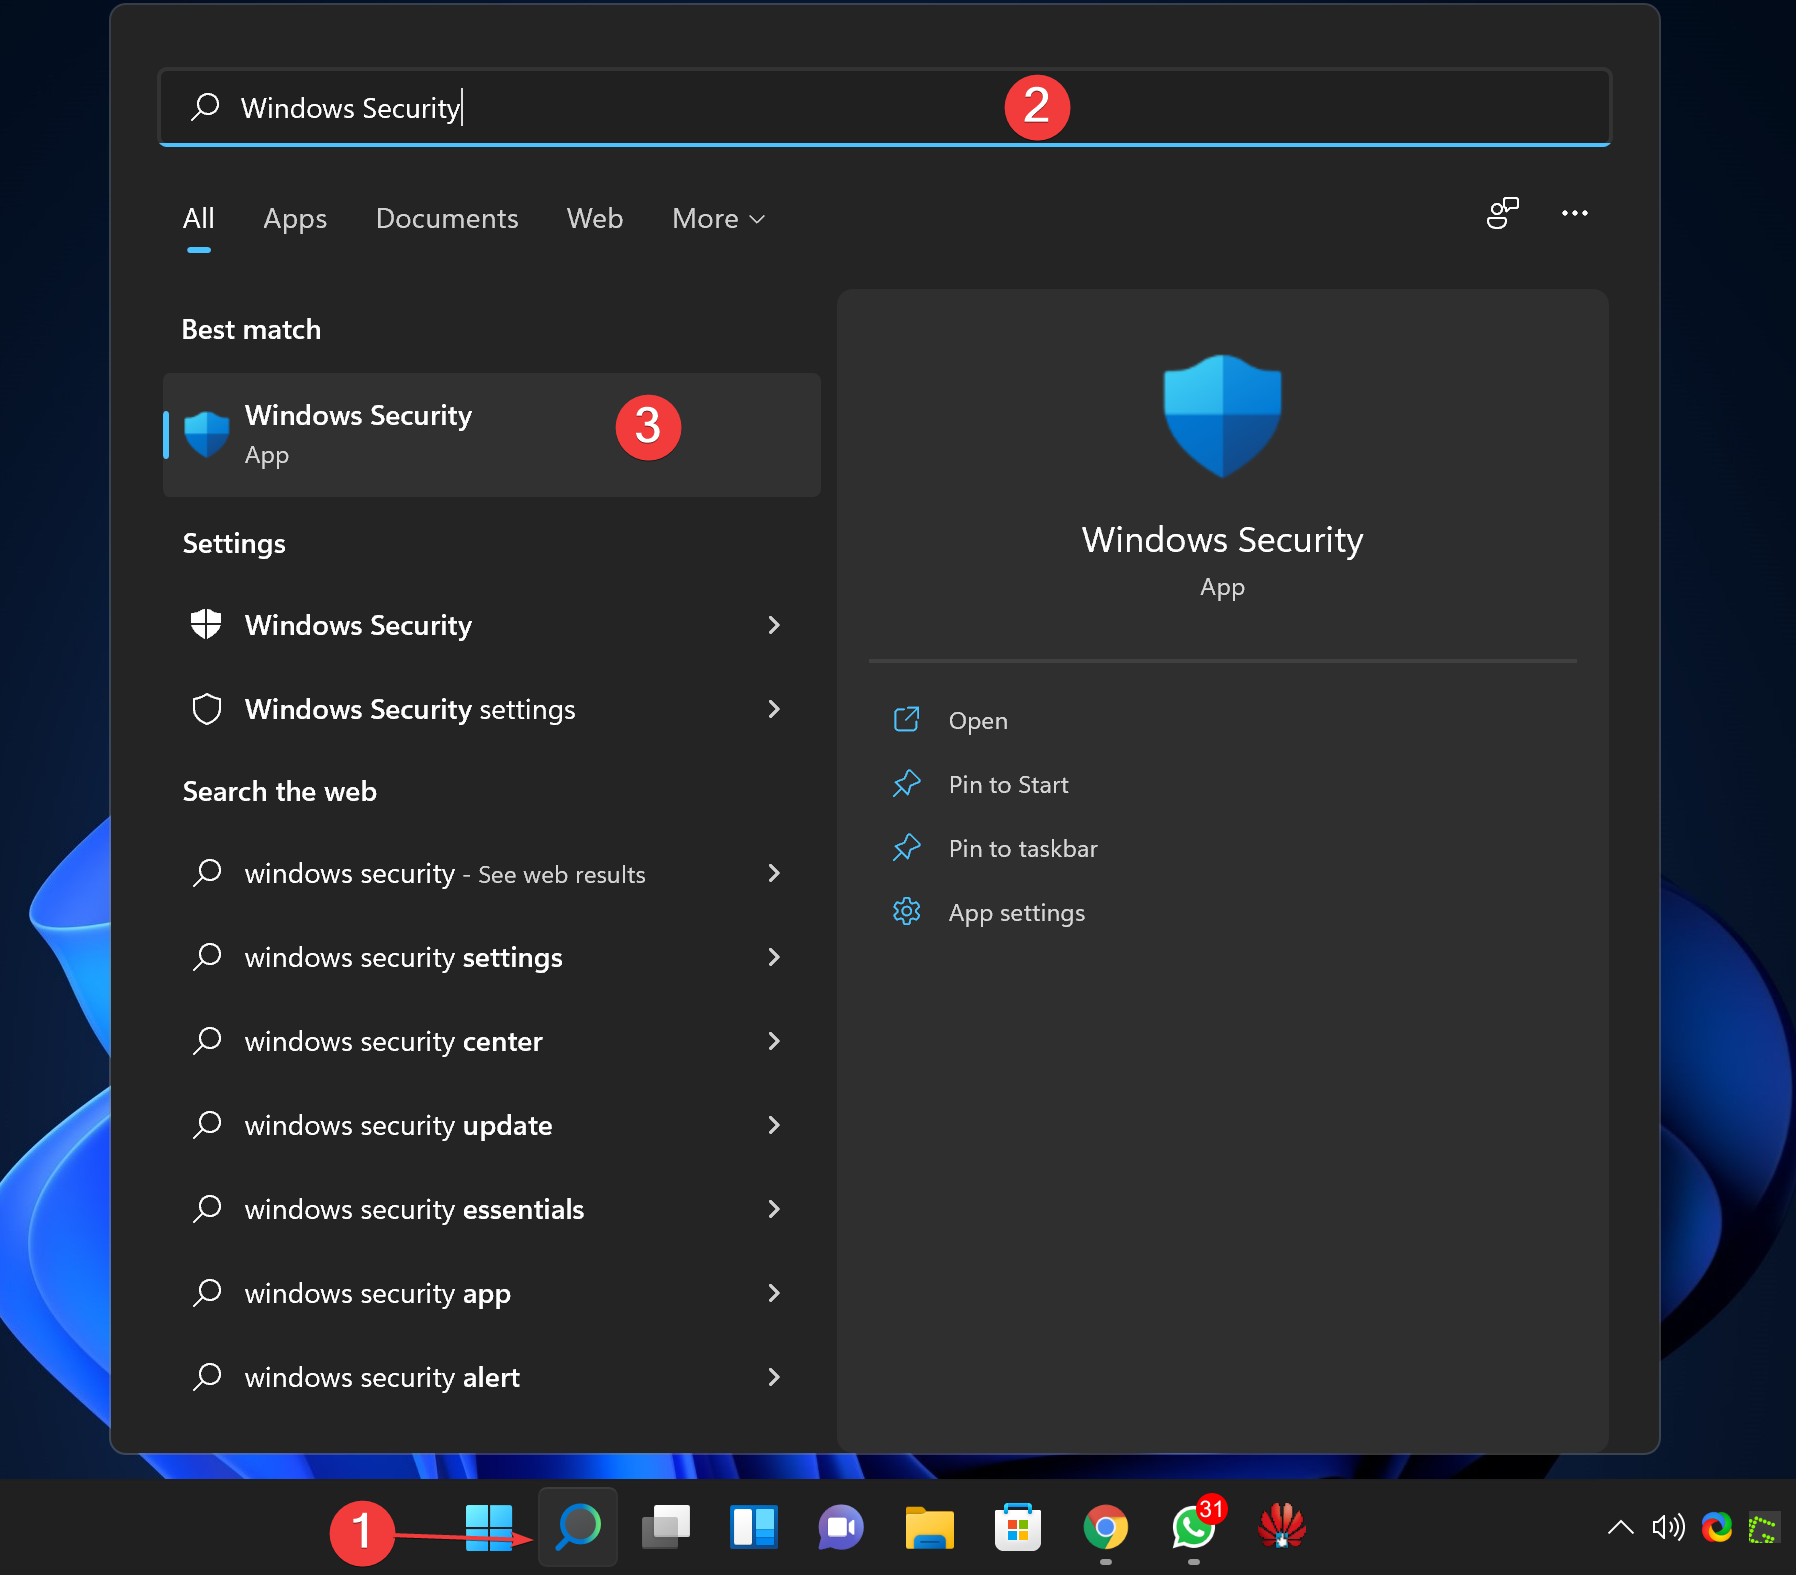
Step 1. Click on the Search or Start button at the Windows 11 taskbar and type Windows Security. In the available search results, click on its entry to open the same.
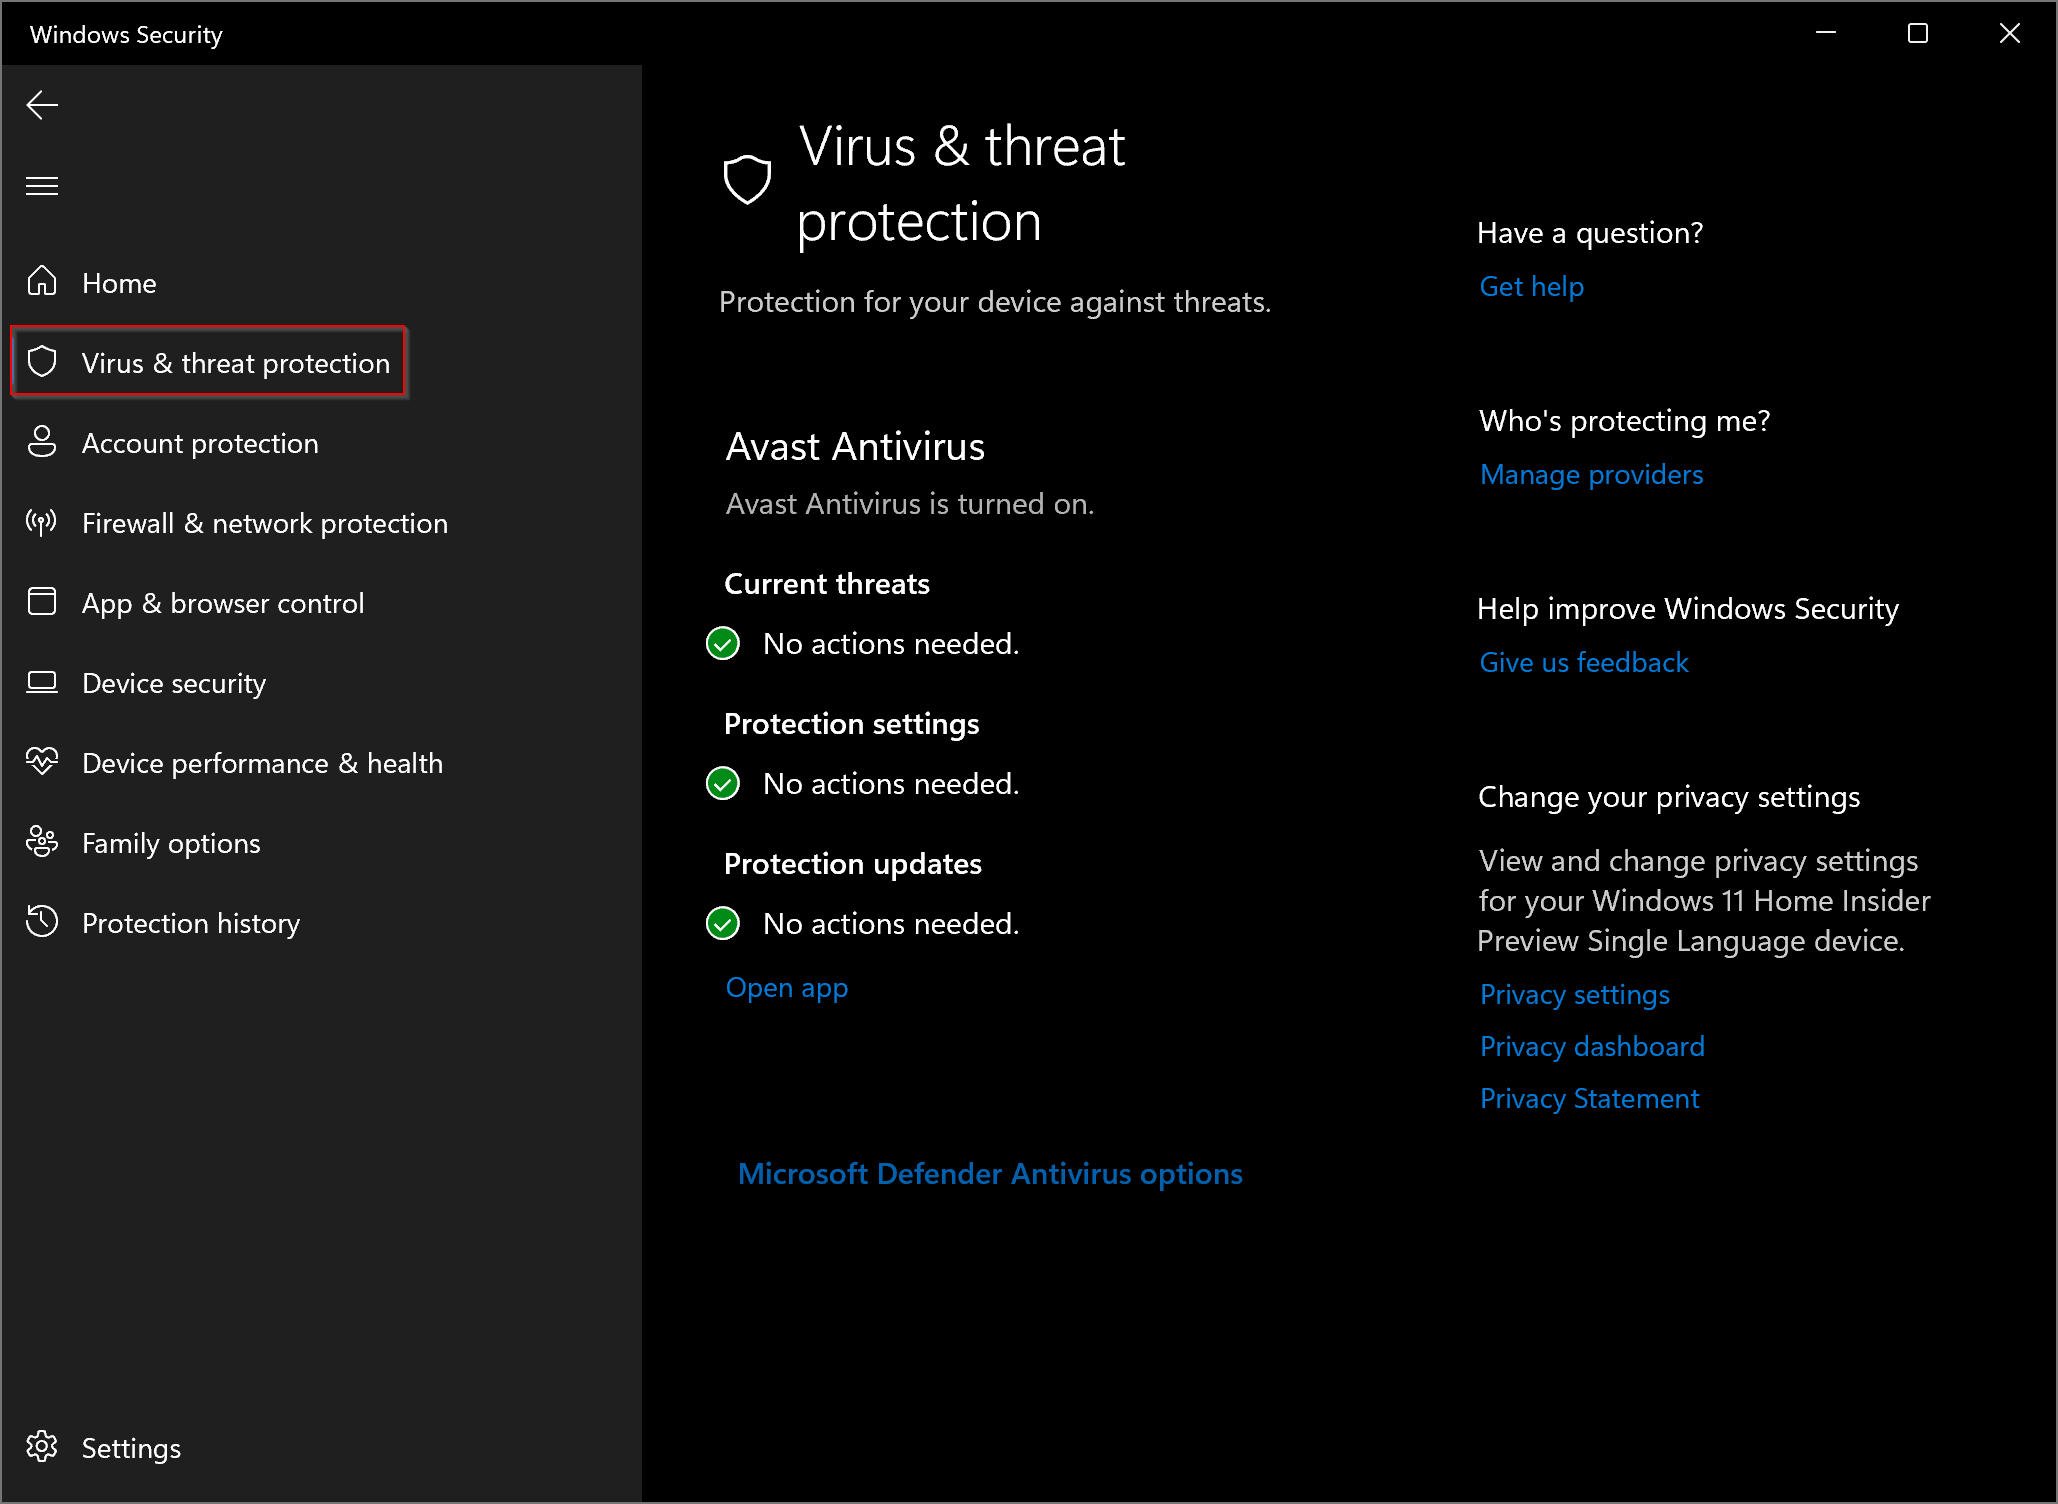
Step 2. Select Virus & threat protection in the left sidebar of “Windows Security.”
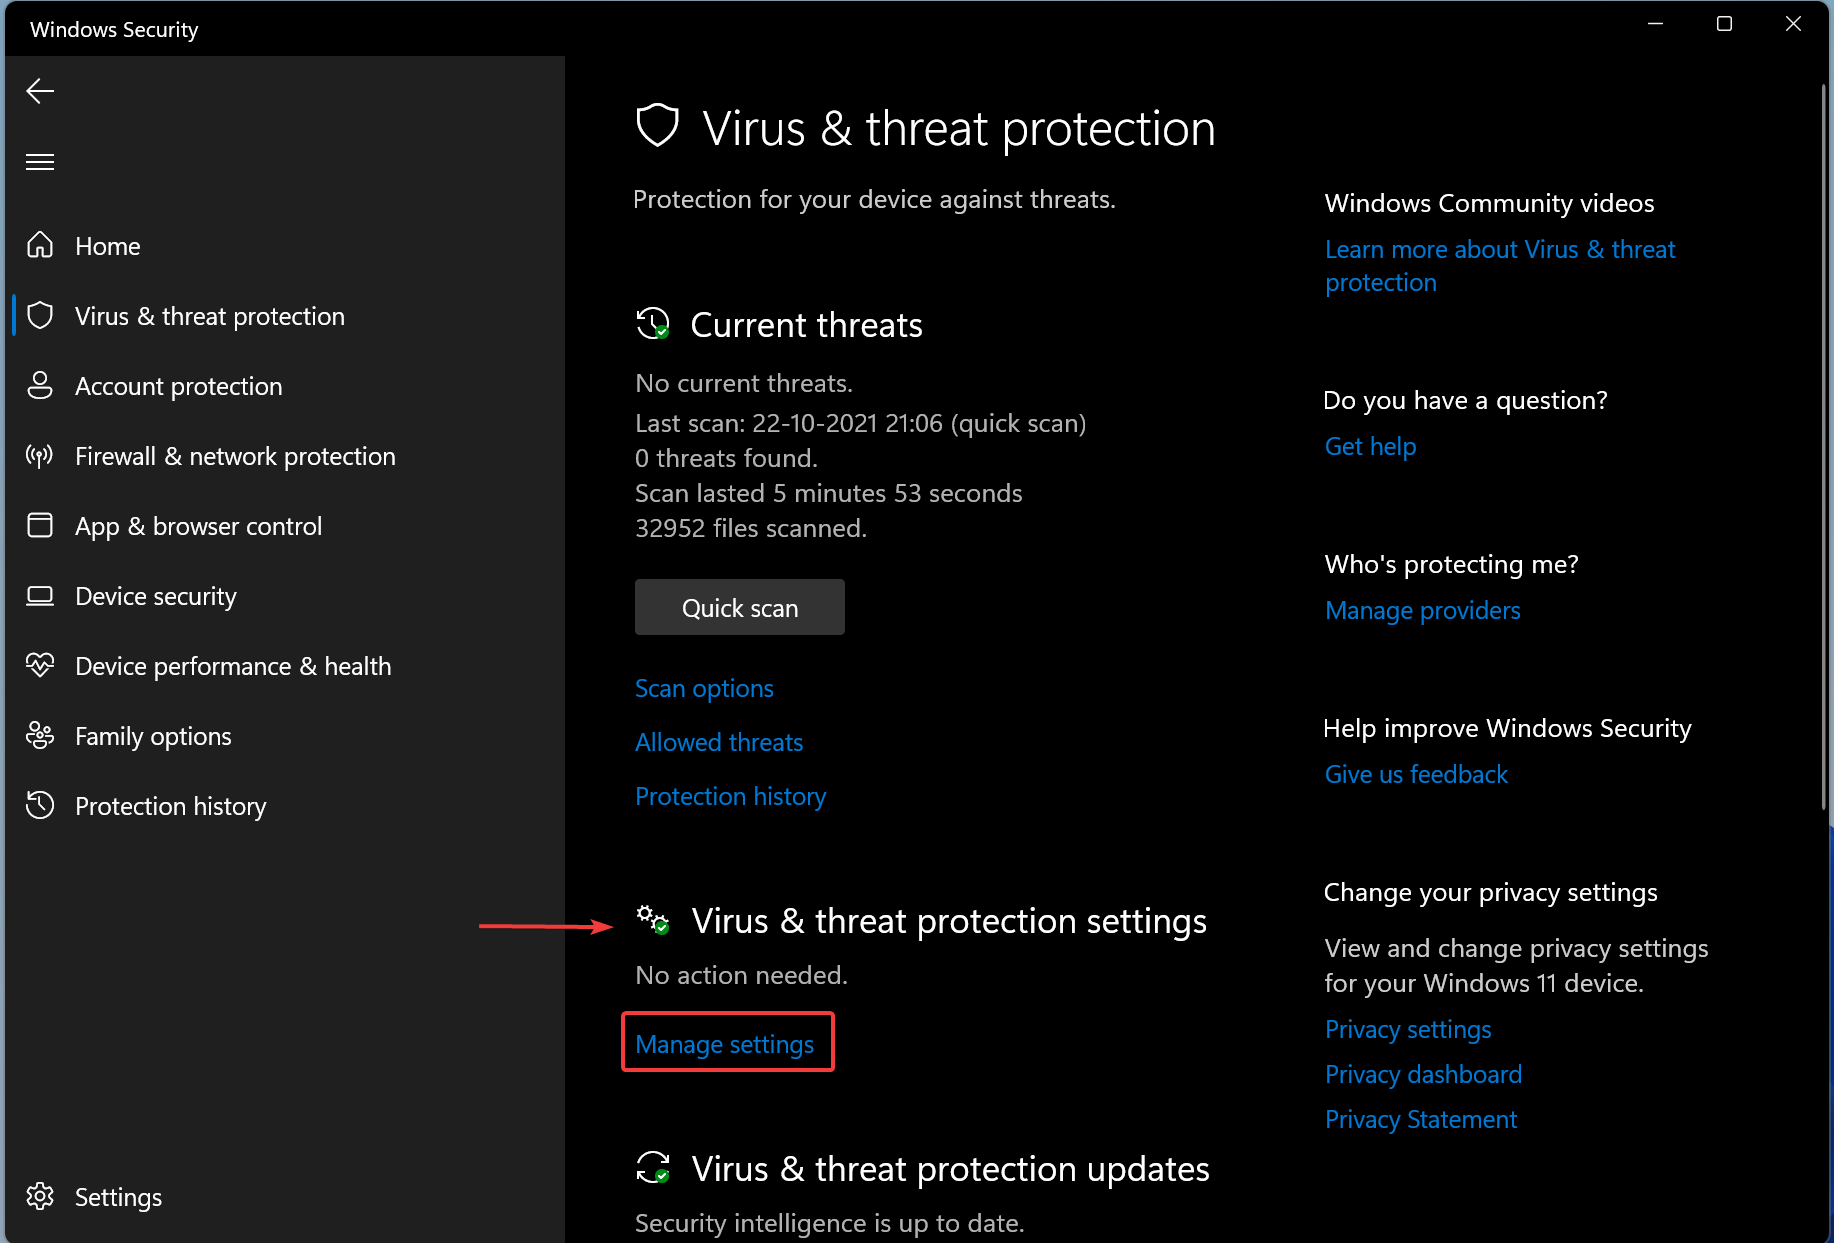
Step 3. Hit the Manage settings link under the “Virus & threat protection settings” page.
Step 4. Finally, turn the toggle switch to Off under “Real-time protection.”
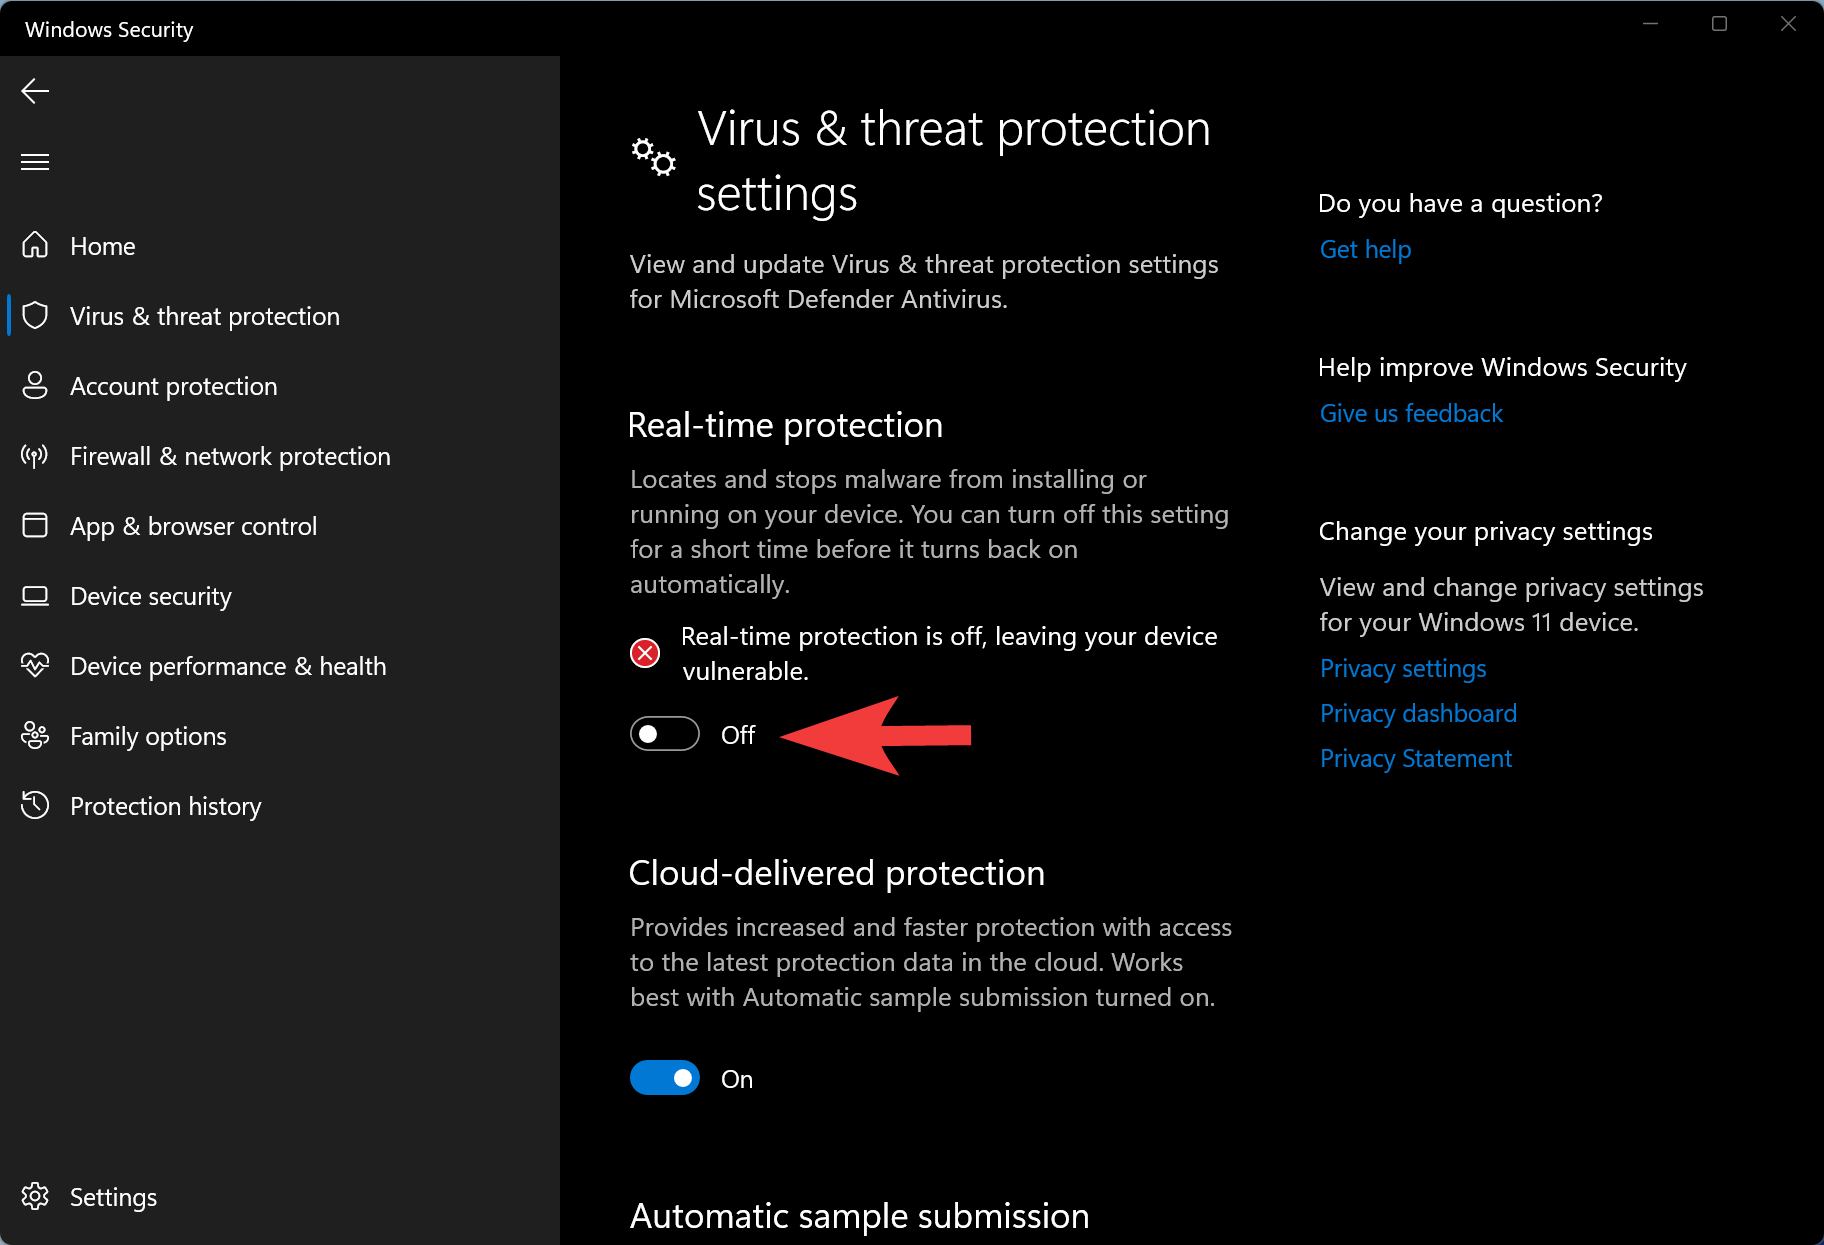
Microsoft Defender’s “Real-time protection” will automatically turn on after a short time to protect your computer again.
Conclusion
In conclusion, the final release of Windows 11 is scheduled for November 2021, but many Windows enthusiasts are already trying it out on virtual machines. Windows 11 brings several new features, some of which are carried forward from Windows 10, such as Microsoft Defender, a free anti-malware software that is a part of both operating systems. Although most users prefer commercial antivirus programs, some may want to disable Microsoft Defender. This can be a challenging task using built-in options, but it can be done using a third-party tool like Defender Control. Alternatively, users can temporarily disable Microsoft Defender by following a few simple steps. Regardless of your preference, it is essential to have proper security measures in place to protect your PC from malware and other threats.