If you’re a Mac user and want to run Windows 10, 8.1, or 7 on your machine, Apple’s official Boot Camp Assistant can help you install the operating system. However, if you need to resize your Windows partition after installation, the process can be challenging. Deleting the Windows partition through Boot Camp means you’ll need to reinstall Windows, which can be problematic if you have important data that cannot be moved to an external drive. Luckily, there is a way to resize your Boot Camp partition without erasing Windows.
To resize your Boot Camp partition without losing data, you’ll need to free up some space on your Mac OS, then add that space to your Windows partition (BOOTCAMP). In this guide, we’ll show you how to free up space on your Mac OS and how to resize your Boot Camp partition safely. With these steps, you can ensure that your data remains intact while also optimizing your system’s performance.
How to free up space on the Apple Mac partition?
To free up space on the Apple Mac partition, do the following:-
Step 1. Run the Launcher app on a Mac machine.
Step 2. On the search box, type disk utility.
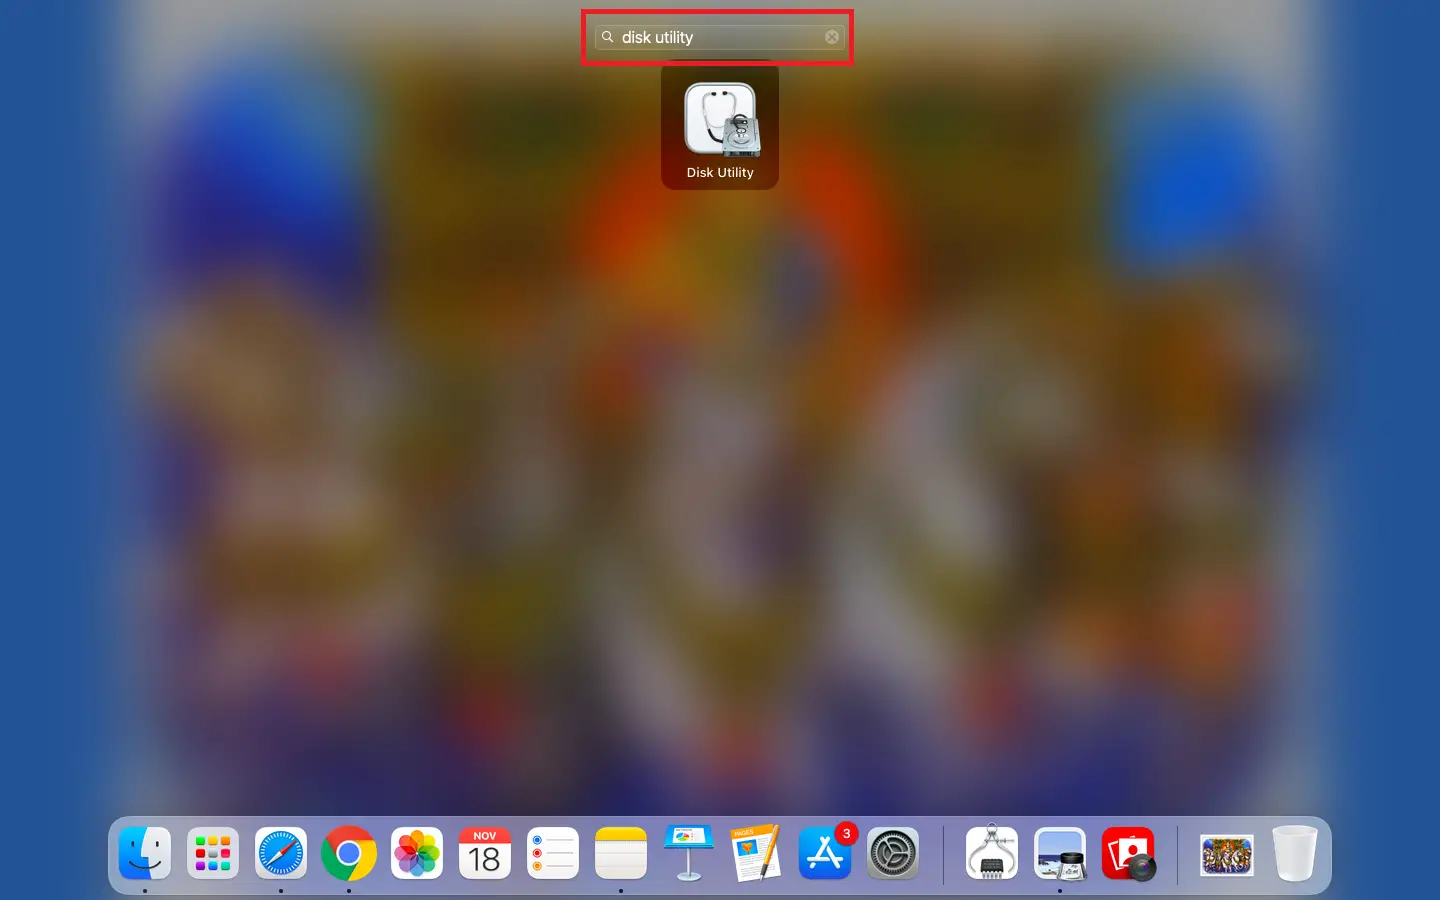
Step 3. From the available results, click on Disk Utility to launch the same. Select the Partition from the top menu.
Step 4. Once Partition is clicked, it will show all partitions and sizes available on your Mac machine.
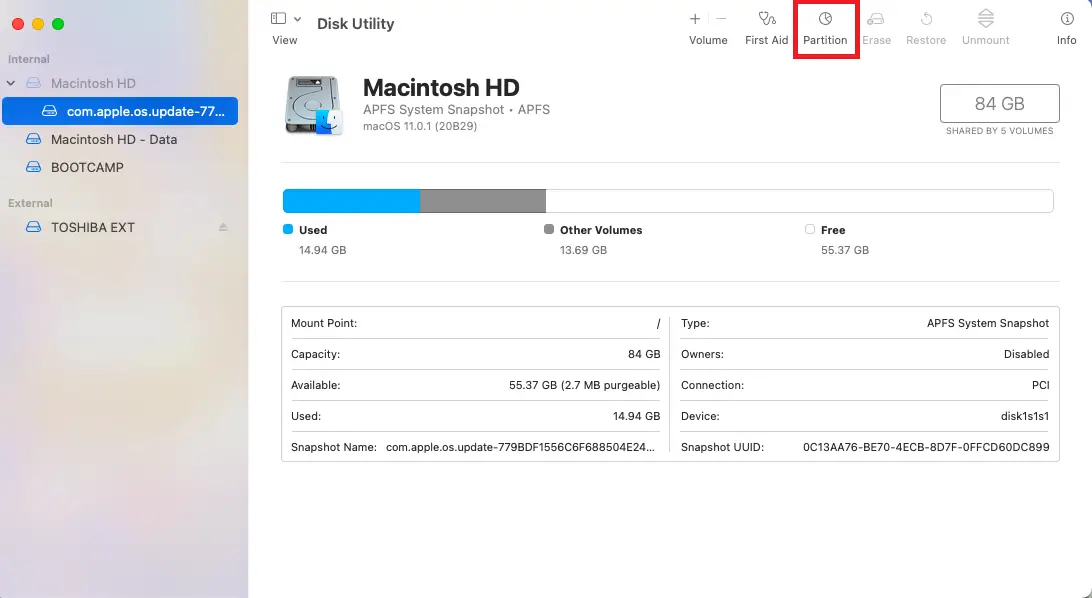
Step 5. Since we want to reduce the size of the Macintosh HD partition, which is currently 84GB, click on the Size text box and write a new size (64GB in my example).
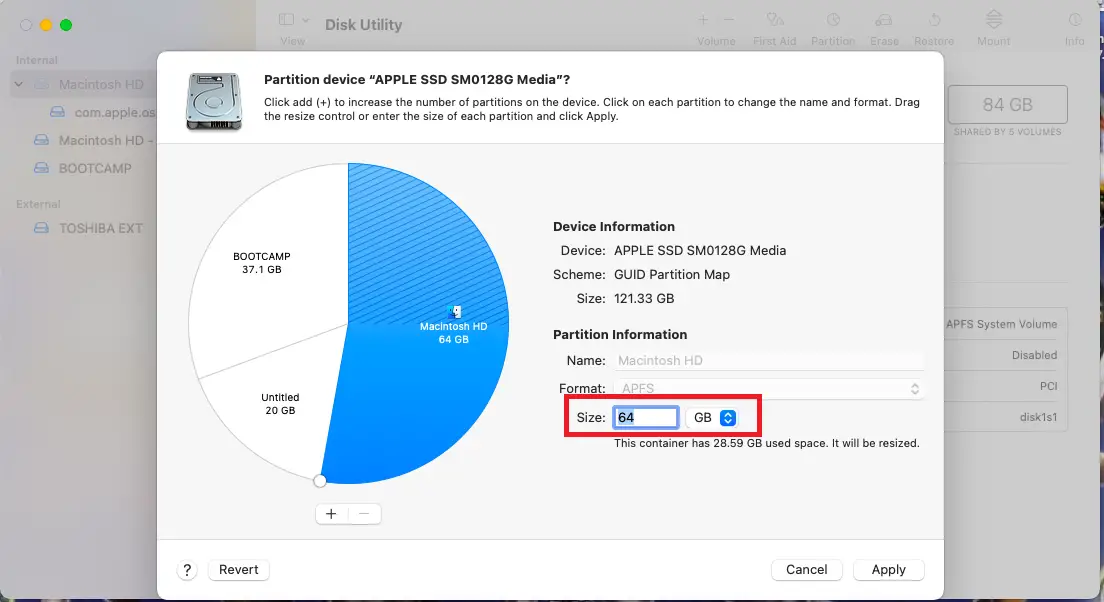
Step 6. Once a new size is specified for your Macintosh HD partition, hit Enter from the keyboard, or click the Apply button.
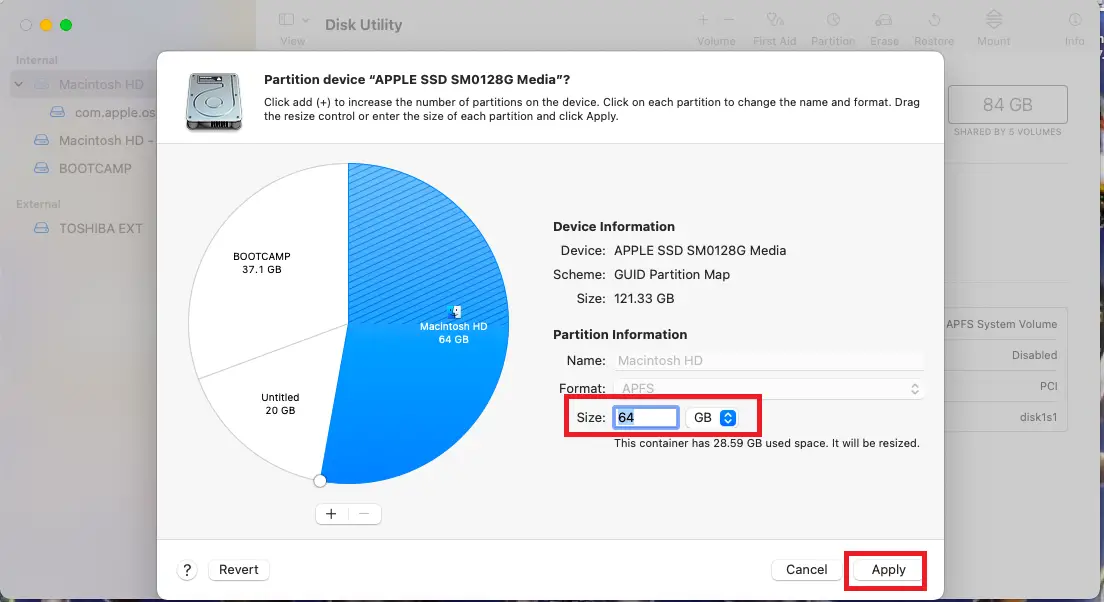
Step 7. Click on the Partition button on the new window when it opens automatically.
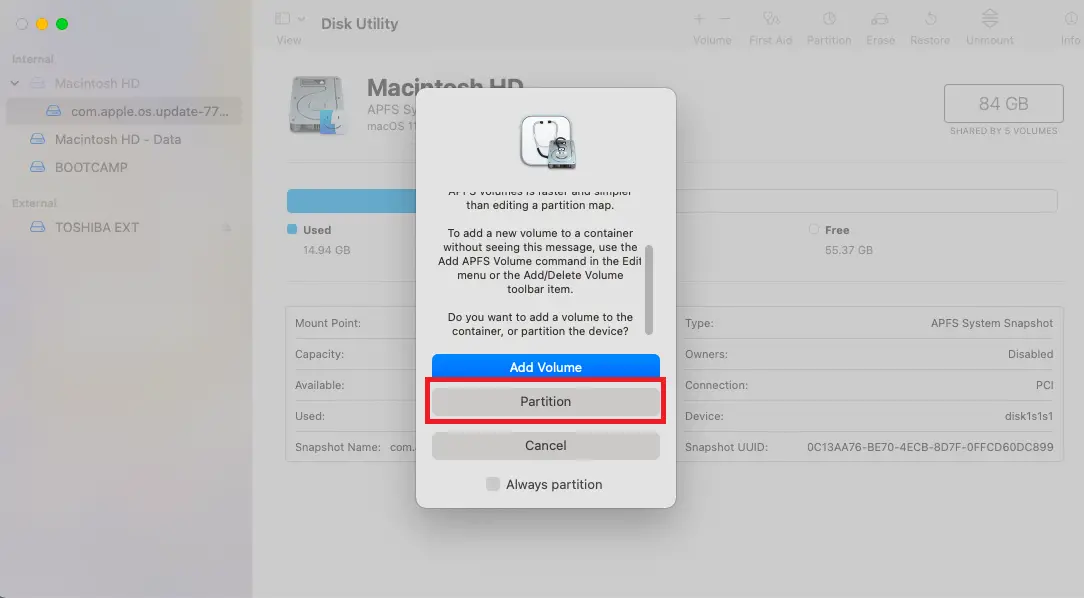
Step 8. Click on the Partition button again.
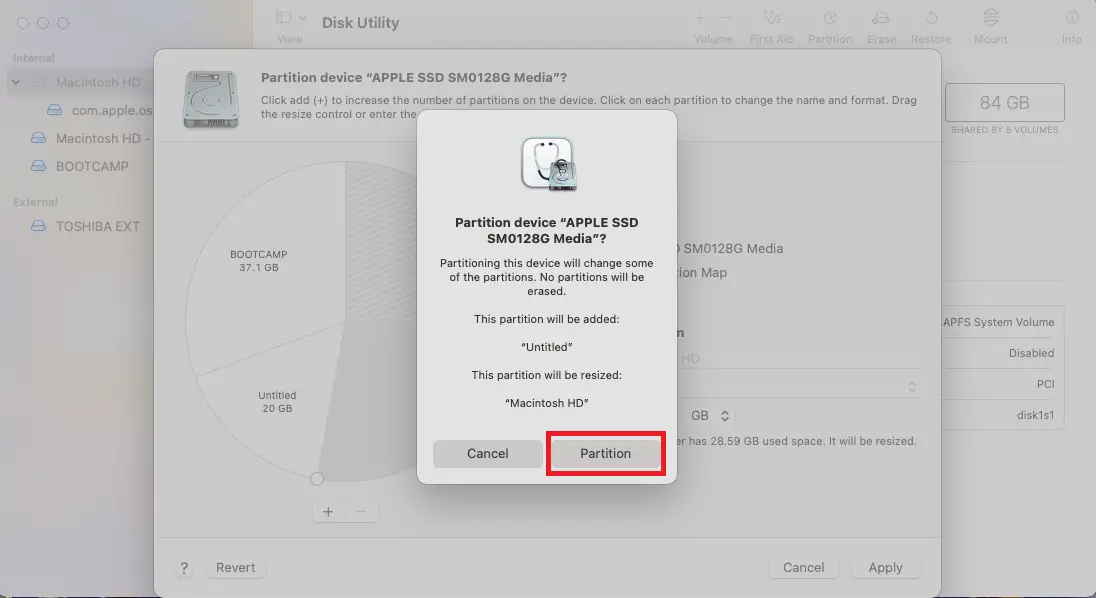
Step 9. Click the Continue button.
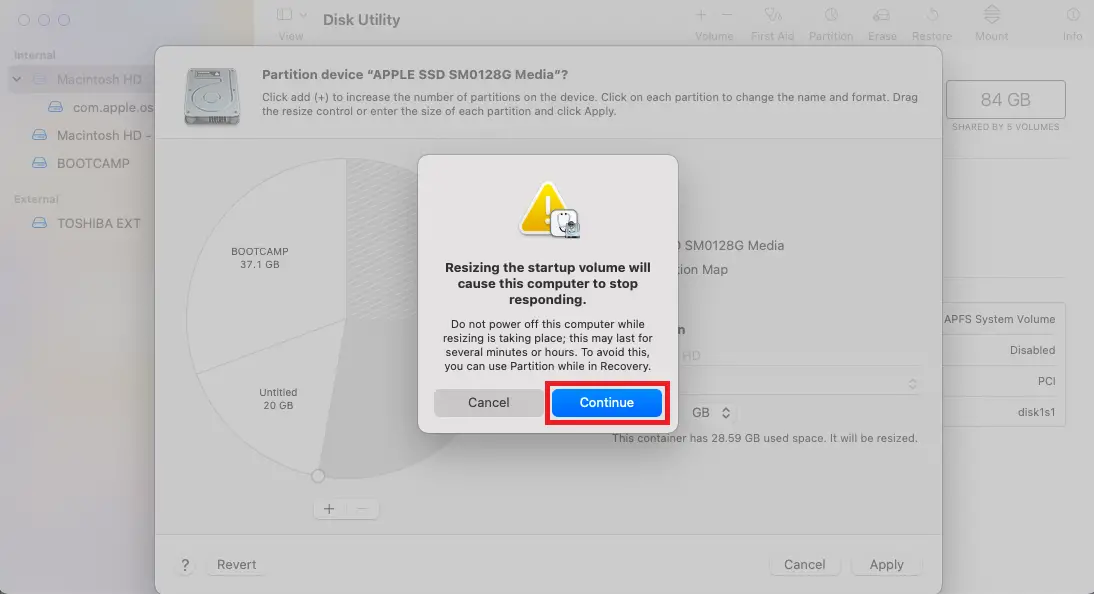
Step 10. Now, you will notice that Mac has started resizing the partition.
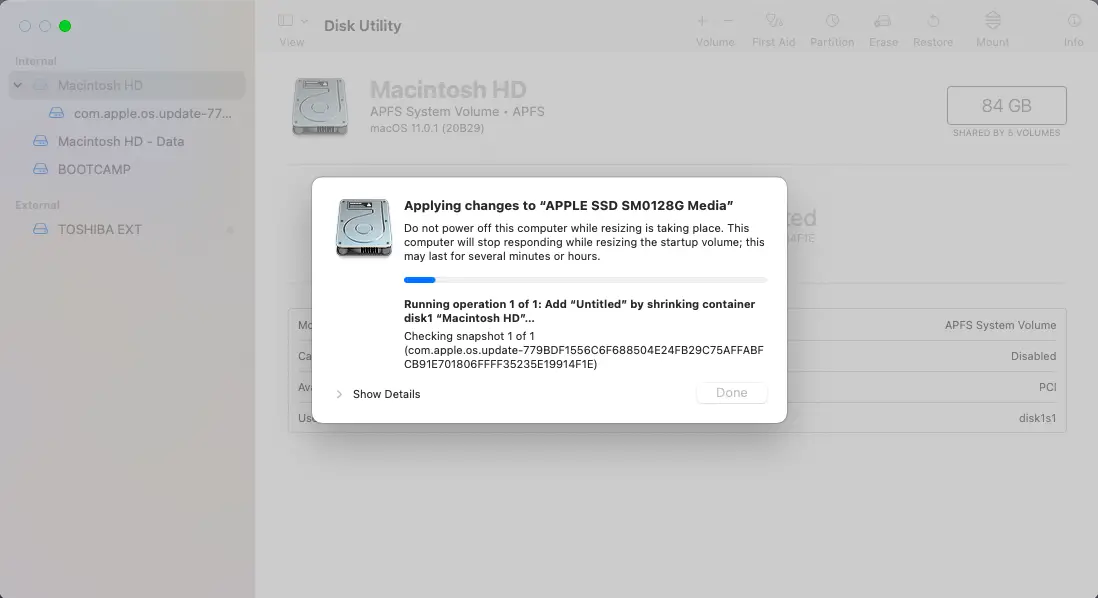
Step 11. Click on the Done button once resizing is completed (it may take more than 10 minutes, depending upon the data stored on your Mac machine).
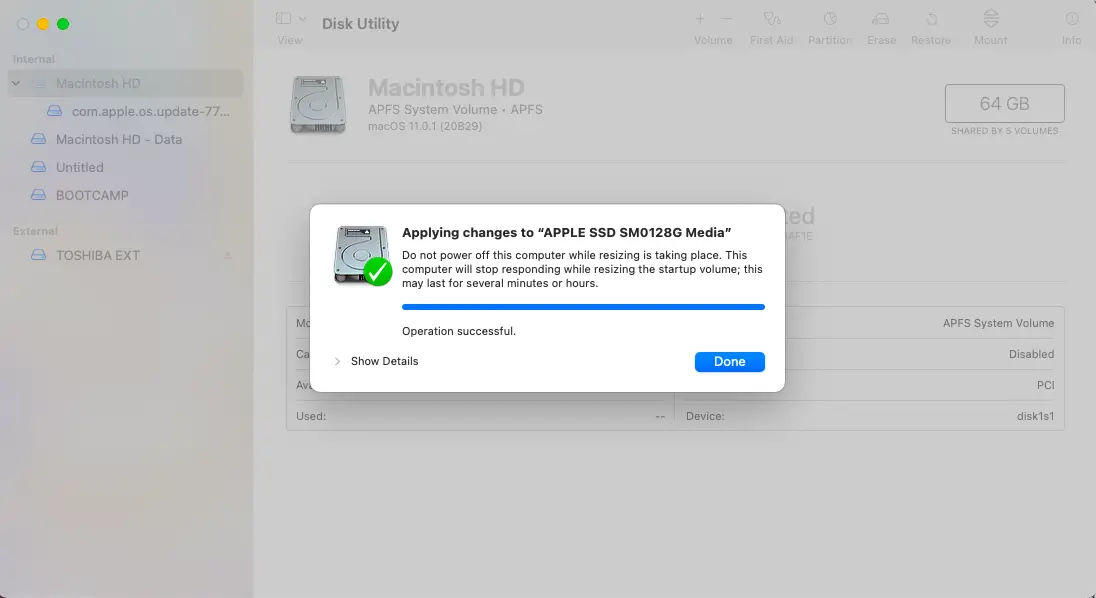
Step 12. Now resizing has been completed, and you will see the new size of the Mac partition.
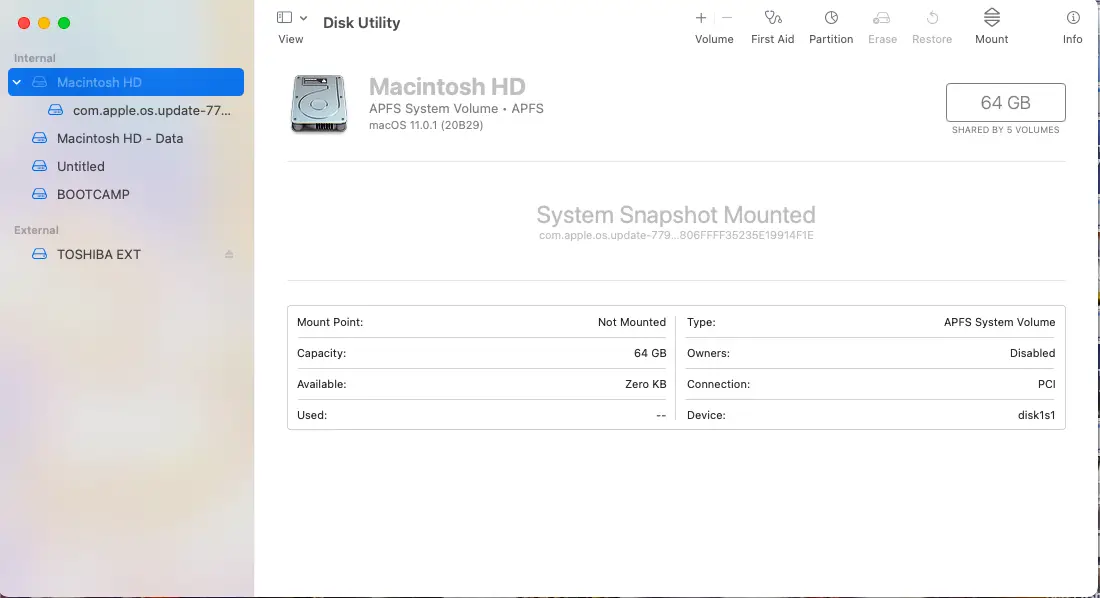
Step 13. You can also find unallocated space by clicking on the Untitled option from the left side.
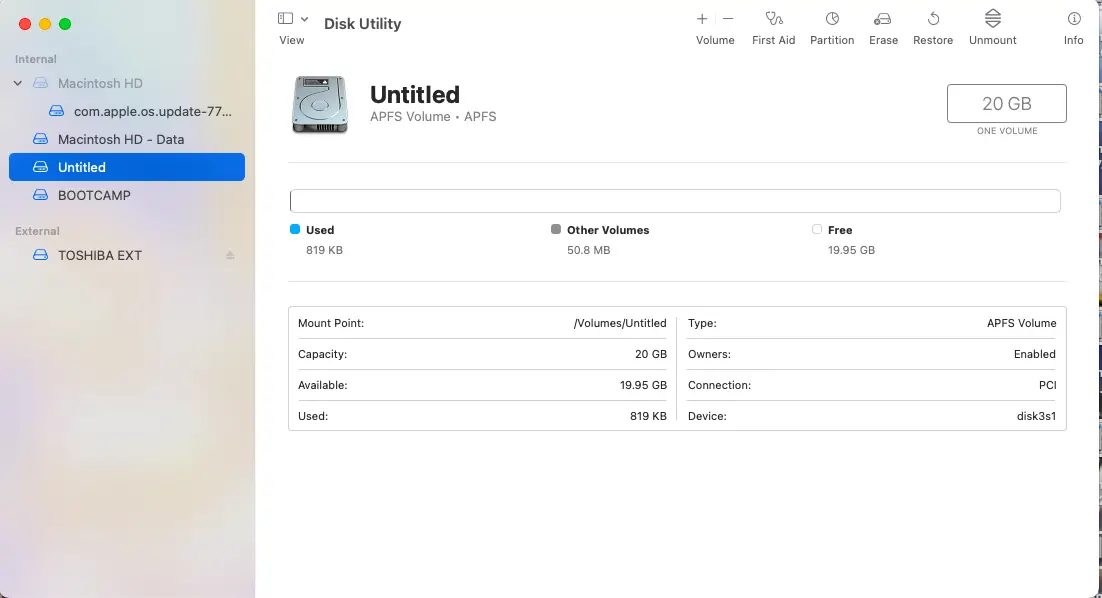
Now, on Machintosh HD, we have made 20GB of free space, and we want to merge it on Windows 10 partition (Boot Camp).
How to add unallocated space on Bootcamp Partition without deleting Windows?
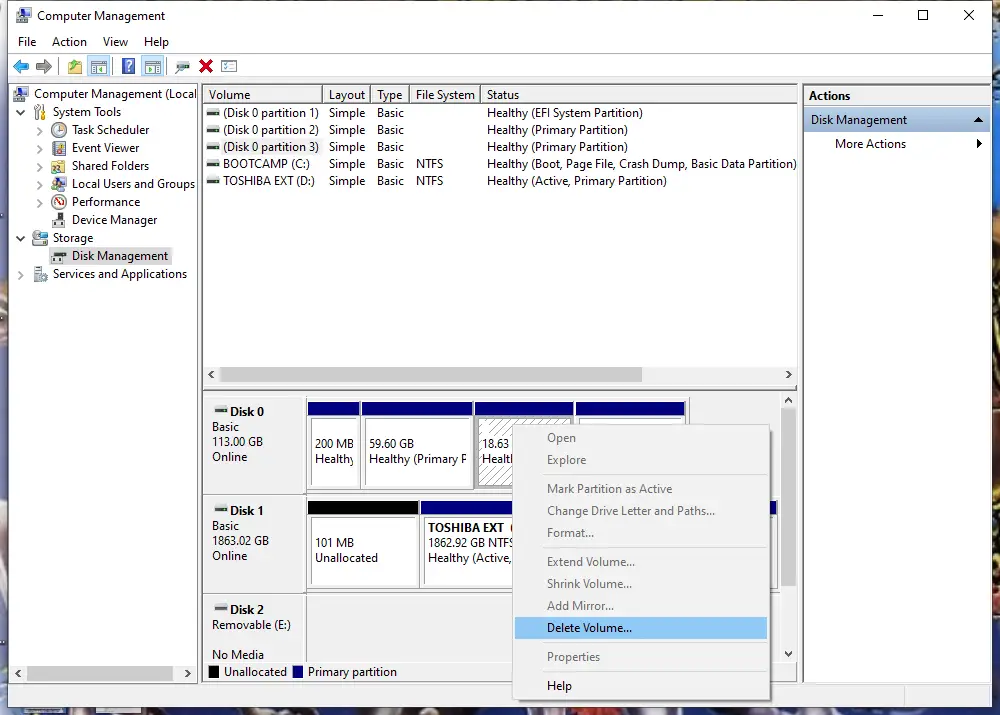
Step 2. Once you have logged into Windows OS, right-click on My Computer / This PC from the Desktop icon and select Manage to open Computer Management.
Step 3. On the Computer Management window, click on Disk Management from the left side options.

Step 4. You can see the free space as a healthy partition.
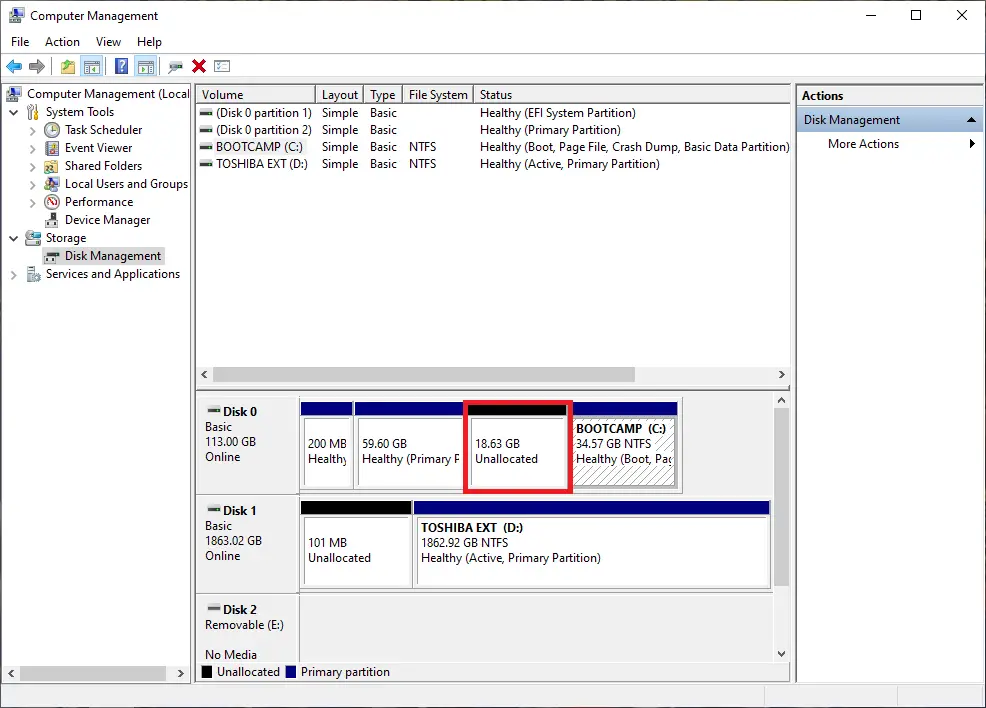
Step 5. Right-click and select the Delete Volume option to free up space again.
Now you will see Unallocated space.
Step 6. Once free space is deleted, download and install the MiniTool Partition Wizard, free software.
Step 7. Launch the MiniTool Partition Wizard tool.
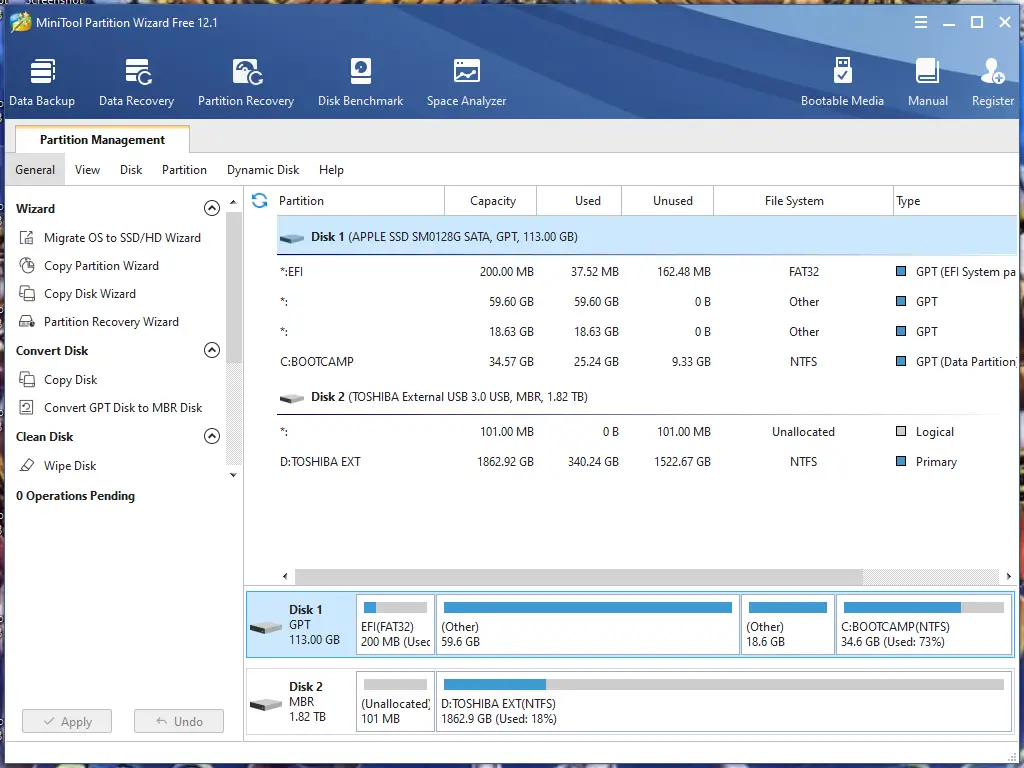
Step 8. Right-click on the BOOTCAMP partition and select the Extend option.
Step 9. Select the Unallocated partition/space.

Step 10. Click the OK button.
Step 11. It will show a warning message; click the Yes button to proceed.
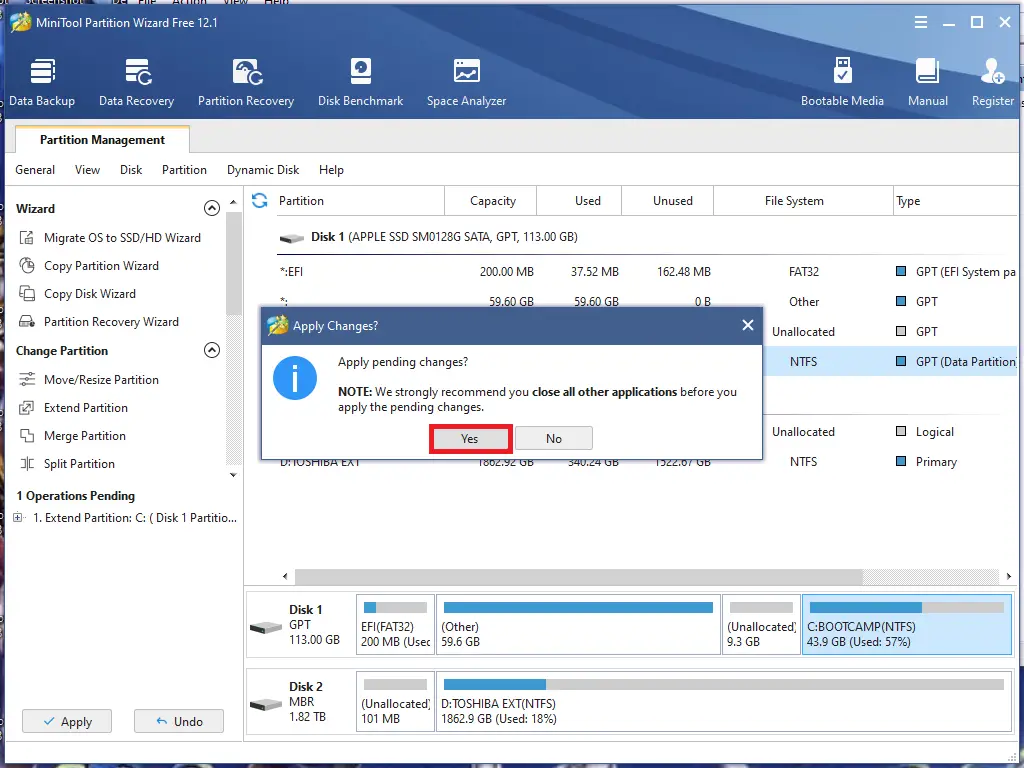
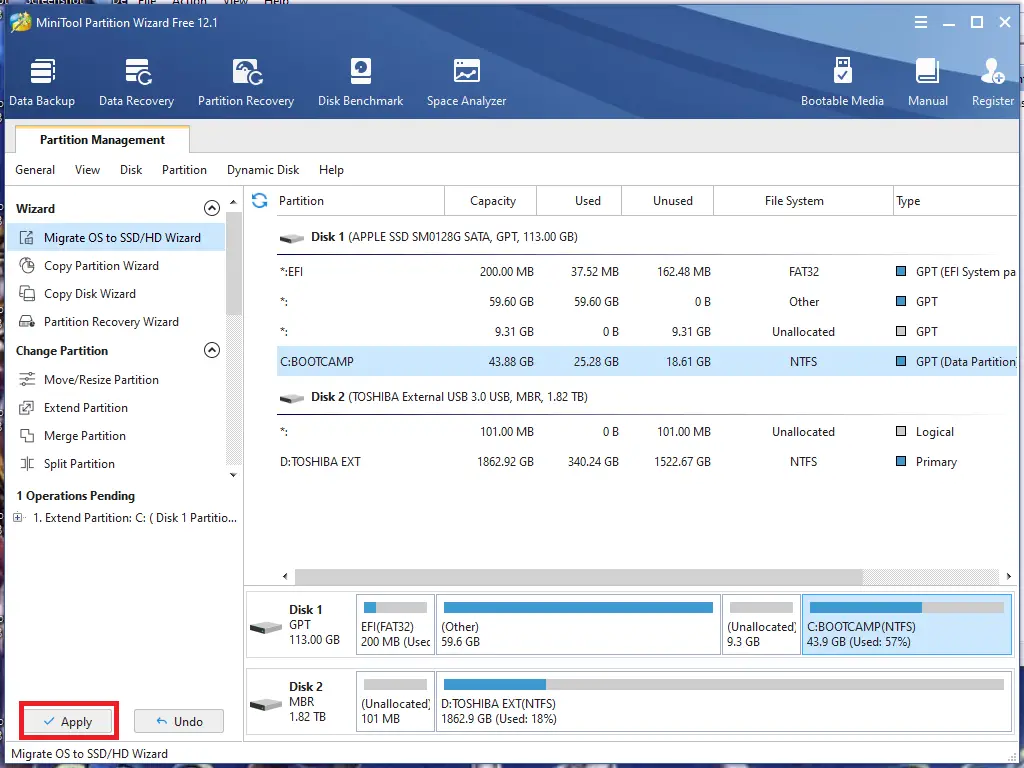
Step 12. Click on the Apply button.
Step 14. Click on the Restart Now button.
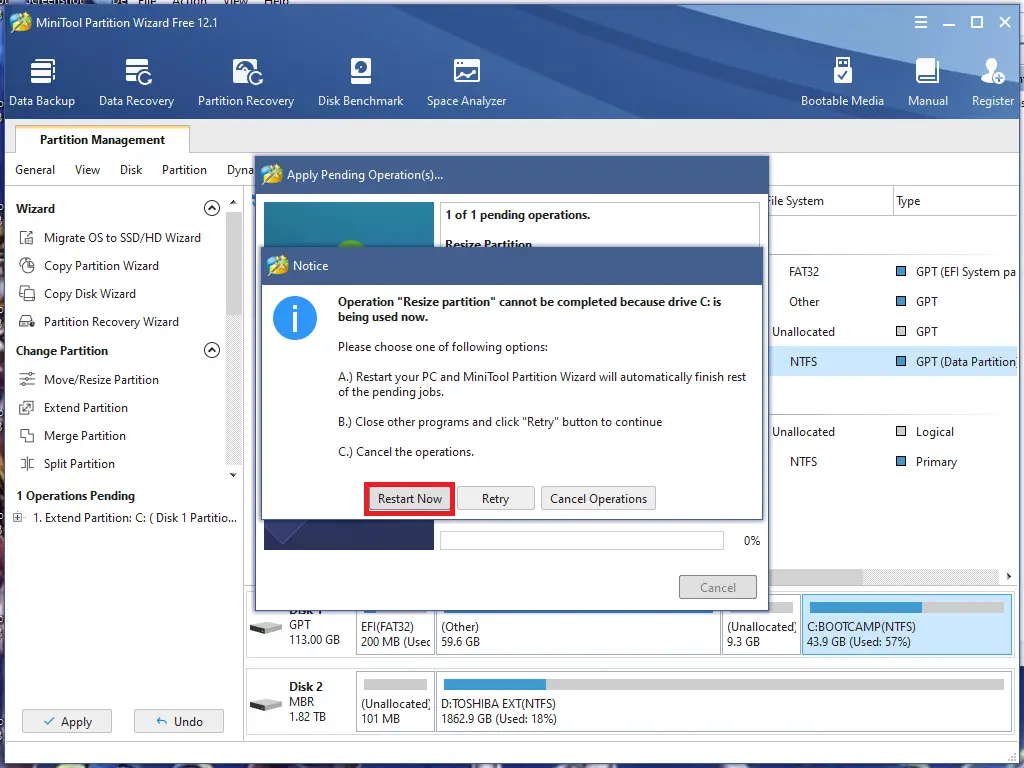
Now, Windows OS will restart to increase the size of the BOOTCAMP partition.
Conclusion
In conclusion, resizing a Boot Camp partition on a Mac machine can be challenging, especially when you have important data that cannot be moved to an external drive. However, with the steps provided in this guide, you can free up space on your Mac partition and safely resize your Boot Camp partition without losing any data. By using the Apple Disk Utility and MiniTool Partition Wizard, you can optimize your system’s performance and ensure that your data remains intact. With these tools and instructions, Mac users can run Windows 10, 8.1, or 7 on their machine without any hassle.
fwiw this worked perfectly for me, in case anyone is googling around for a solution
Thanks. This actually worked!
Worked perfect in my McBook Air at the first run. Excellent tutorial. Much Thanks.
You are welcome.
hi, great post and topic! however, my situation is different and i’m afraid to try things willy nilly…
i have a macbook pro 2012 i think and it was almost impossible to get windows on it, the normal bootcamp way didn’t work, i had to really massage it on. i finally did and both the mac and windows sides work fine. however, it turns out i allocated too much disk space to the windows side! so now what i want to do is shrink the windows allocation and increase the mac OS. i want to just move some of the free space back to mac, but i don’t want any new partitions.
is this possible? how can i do it?
thanks!
Dear Mike,
You can use a partition manager to resize the existing partition, such as MiniTool Partition Wizard.
I did this and windows is larger and working but when i boot back into Osx the bootcamp partition is no longer shown on desktop just says unmounted in disk utility. Any way to fox this