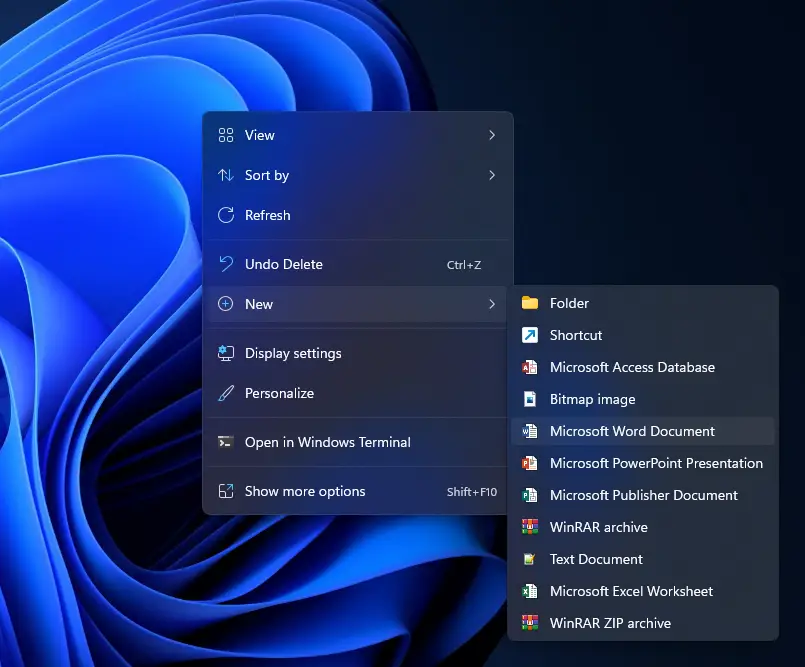
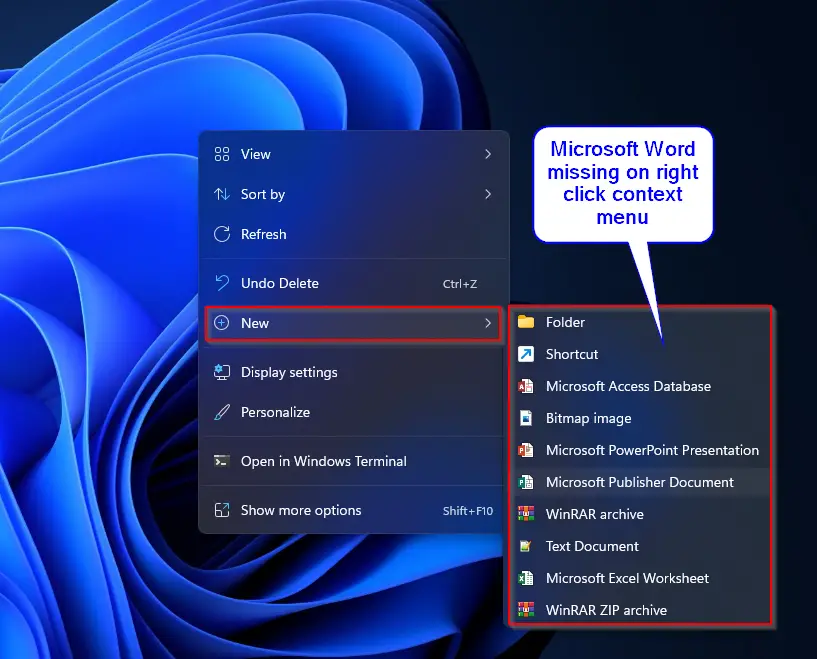
I recently performed a right-click on Windows 11 PC, selected the New option, and was surprised, Microsoft Word Document was missing from the context menu. Microsoft Office program allows us to draft an attractive Word document. If it is missing from the right-click menu, you need to click on the Start button and search for it. Then, you can open this word program. It is very awkward, and most of us will not like to open the MS Word program through a lengthy procedure.
Fortunately, or unfortunately, I had similar issues on Windows 10 while I was using it. Hence, I decided to opt for a similar method to fix the missing Microsoft Word document on Windows 11. Luckily, I was able to fix this issue and restore the missing New Microsoft Word document. The process is similar to Windows 10, but on Windows 11, Microsoft has made several graphical changes, and you might be uncomfortable following the old post. Hence, we decided to write a new article for Windows 11.
Microsoft Word Document in the New context menu may be missing due to several reasons. It might be that some third-party apps have messed up with MS Office and modified the default registry values. Improper shutdown of the PC may be another reason for missing MS Word document on the right-click menu.
Luckily there is an easy fix that lets you restore registry values to their original values. Checking and editing the registry values one by one is a difficult task, specifically for a novice. Hence, we will show the only easy process that will suit all of our blog readers.
How to Restore a Missing Microsoft Word Document to the Right-click Context Menu on Windows 11?
To restore the missing MS Word Document, you need to perform the following steps:-
Step 1. Open a Notepad file.
To do that, press Windows + R keys from the keyboard to access the Run dialog box. In the Run, type notepad and hit Enter from the keyboard to open it.

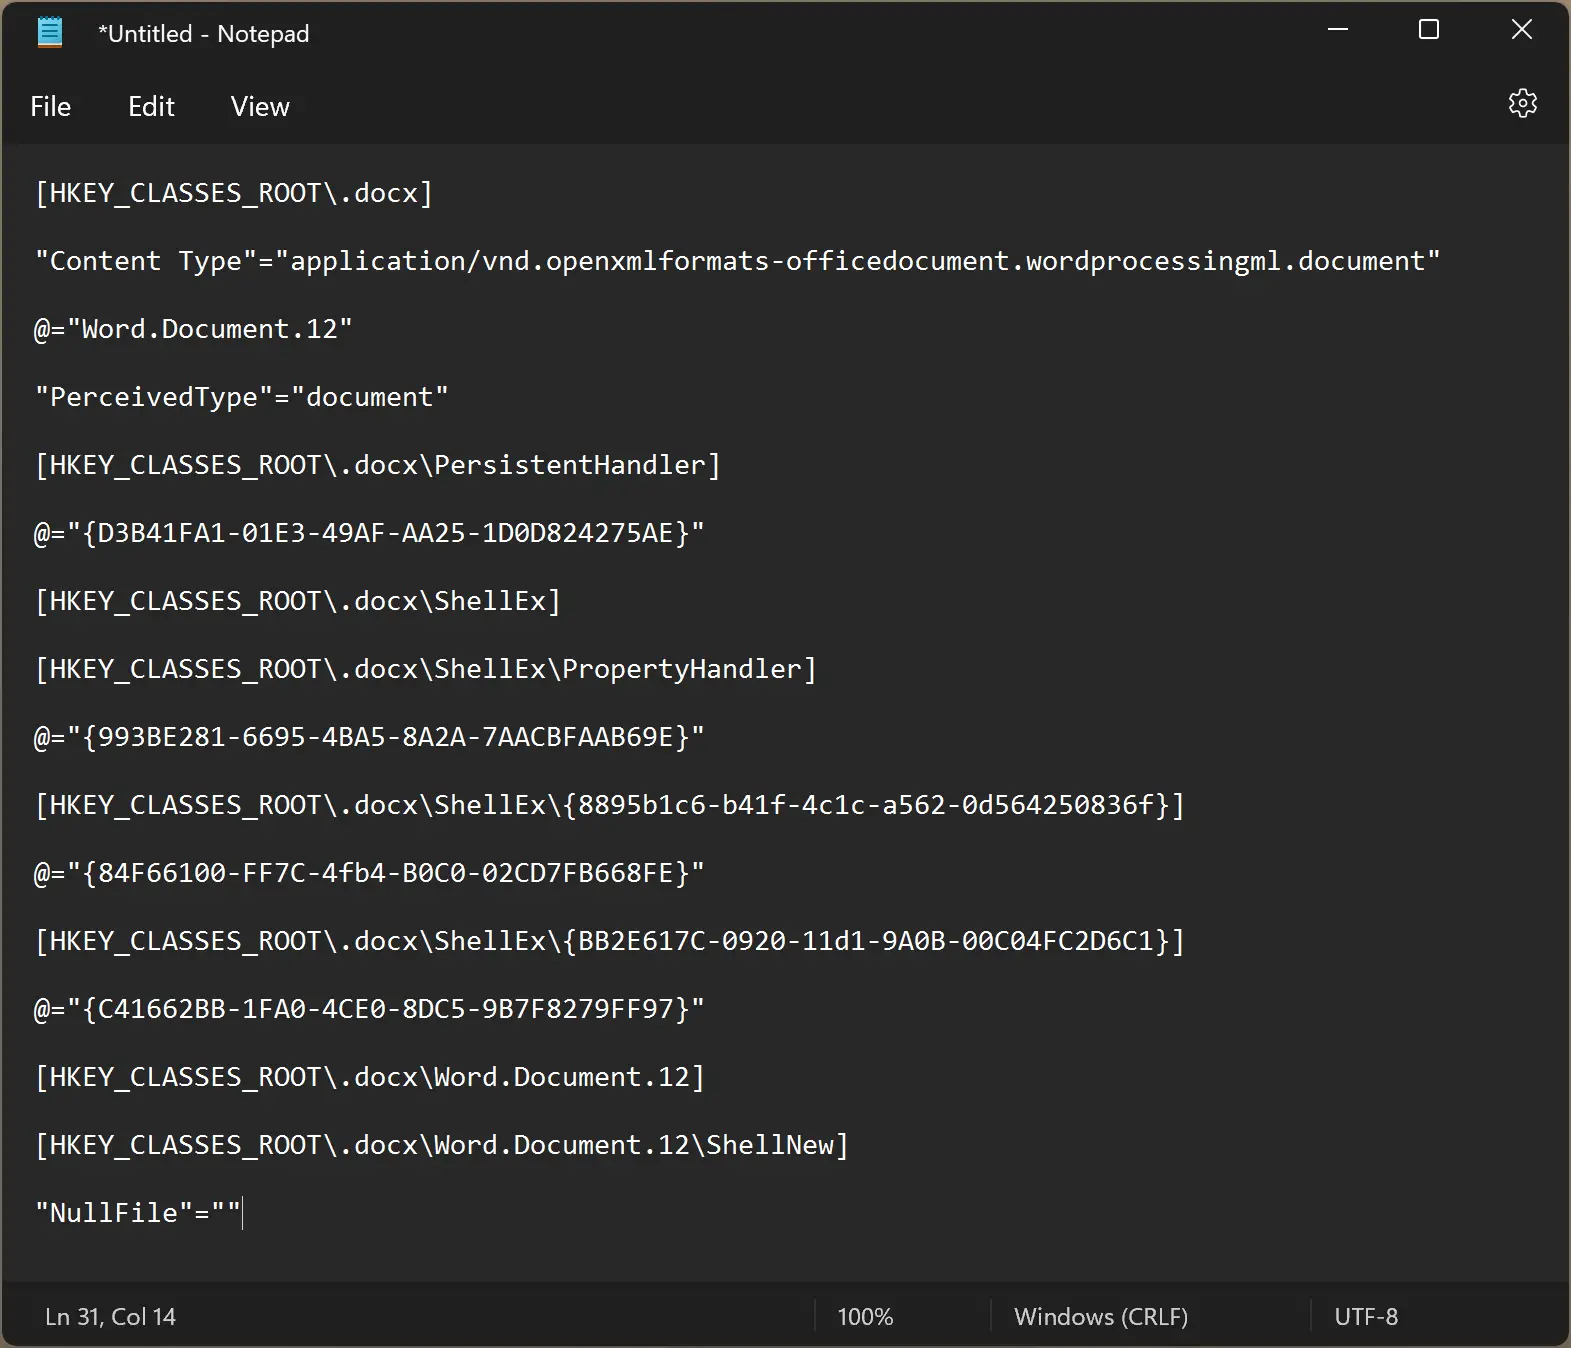
Step 2. Now, copy and paste the following lines into the notepad file:-
Windows Registry Editor Version 5.00


[HKEY_CLASSES_ROOT\.docx]

"Content Type"="application/vnd.openxmlformats-officedocument.wordprocessingml.document"

@="Word.Document.12"

"PerceivedType"="document"

[HKEY_CLASSES_ROOT\.docx\PersistentHandler]

@="{D3B41FA1-01E3-49AF-AA25-1D0D824275AE}"

[HKEY_CLASSES_ROOT\.docx\ShellEx]

[HKEY_CLASSES_ROOT\.docx\ShellEx\PropertyHandler]

@="{993BE281-6695-4BA5-8A2A-7AACBFAAB69E}"

[HKEY_CLASSES_ROOT\.docx\ShellEx\{8895b1c6-b41f-4c1c-a562-0d564250836f}]

@="{84F66100-FF7C-4fb4-B0C0-02CD7FB668FE}"

[HKEY_CLASSES_ROOT\.docx\ShellEx\{BB2E617C-0920-11d1-9A0B-00C04FC2D6C1}]

@="{C41662BB-1FA0-4CE0-8DC5-9B7F8279FF97}"

[HKEY_CLASSES_ROOT\.docx\Word.Document.12]

[HKEY_CLASSES_ROOT\.docx\Word.Document.12\ShellNew]

"NullFile"=""
Step 3. It should look like the below image:-
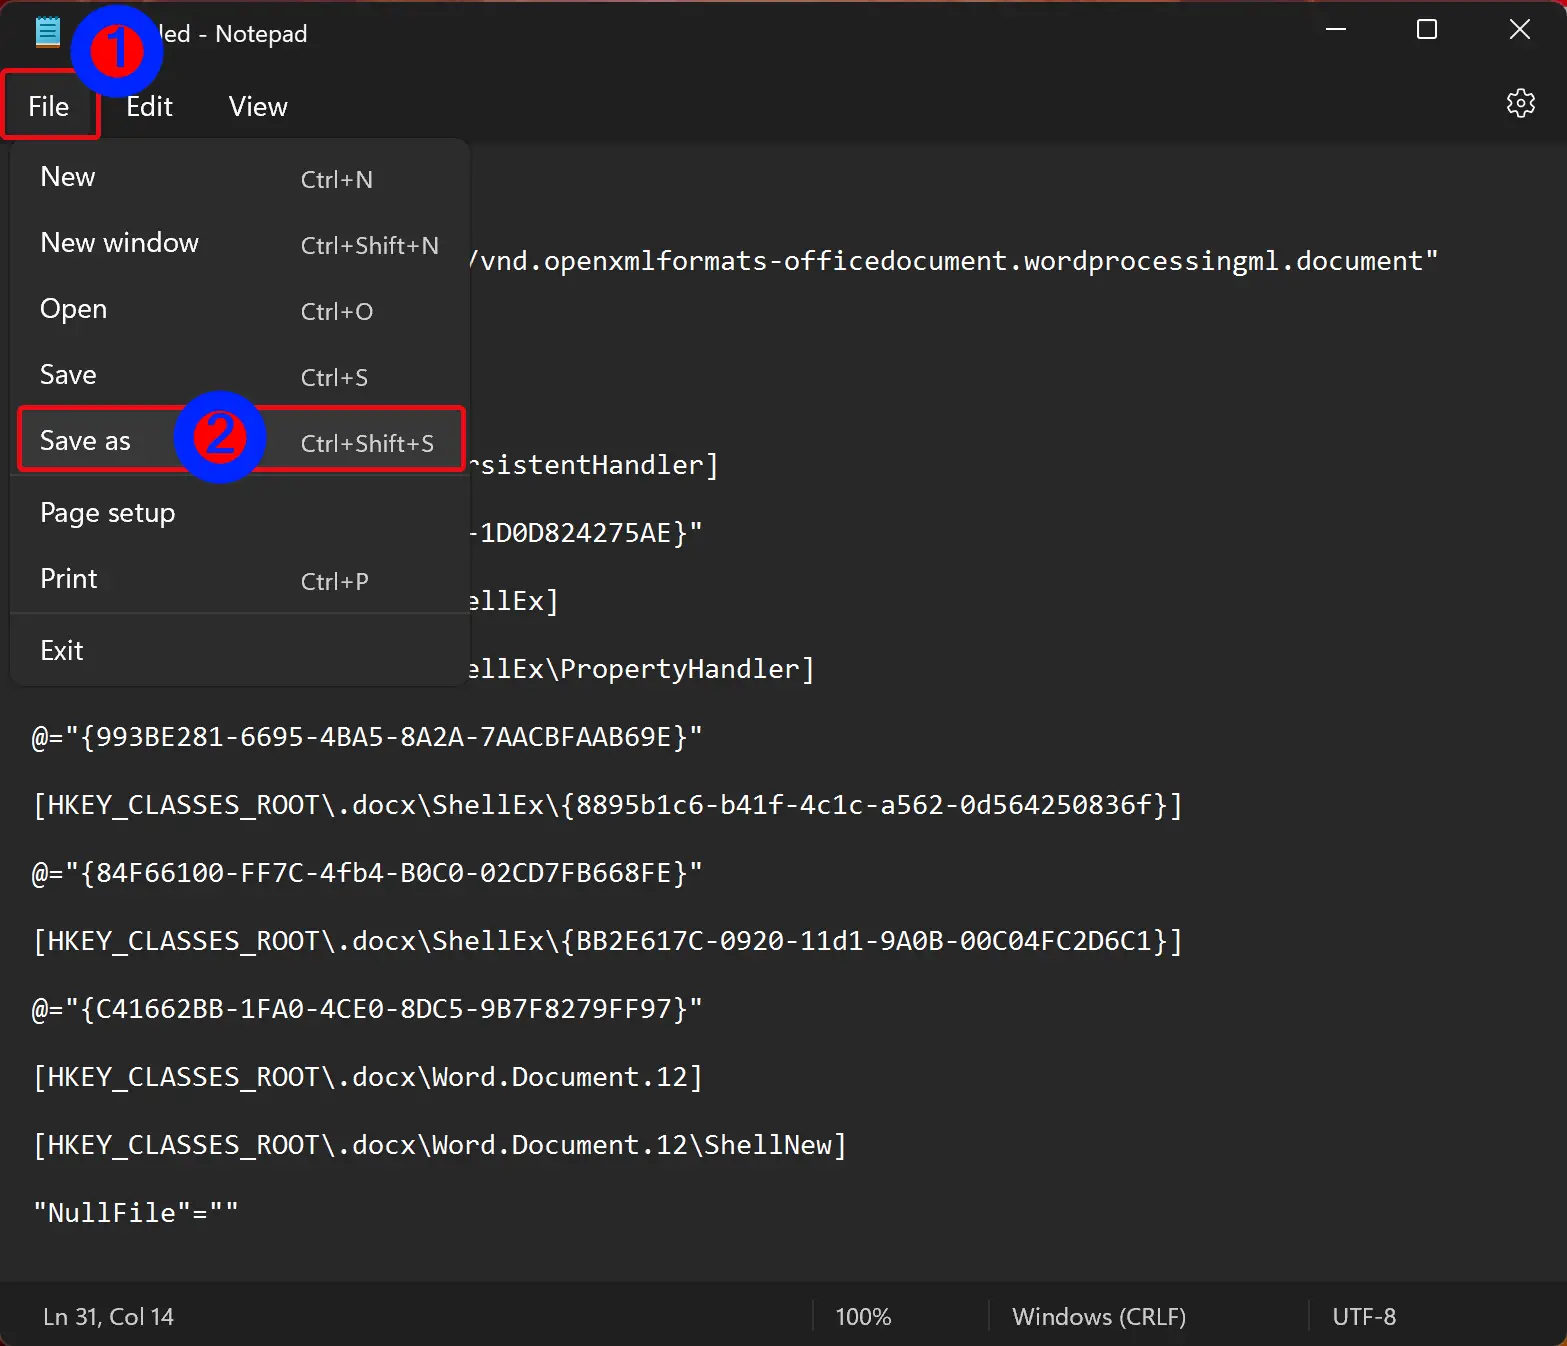
Step 4. Click on the File menu and select the Save As option.
Step 5. In the “Save As” dialog, next to the “File name” box, typeWord Fix.reg. Now, select the “All Files” option from the “Save as type” drop-down menu.
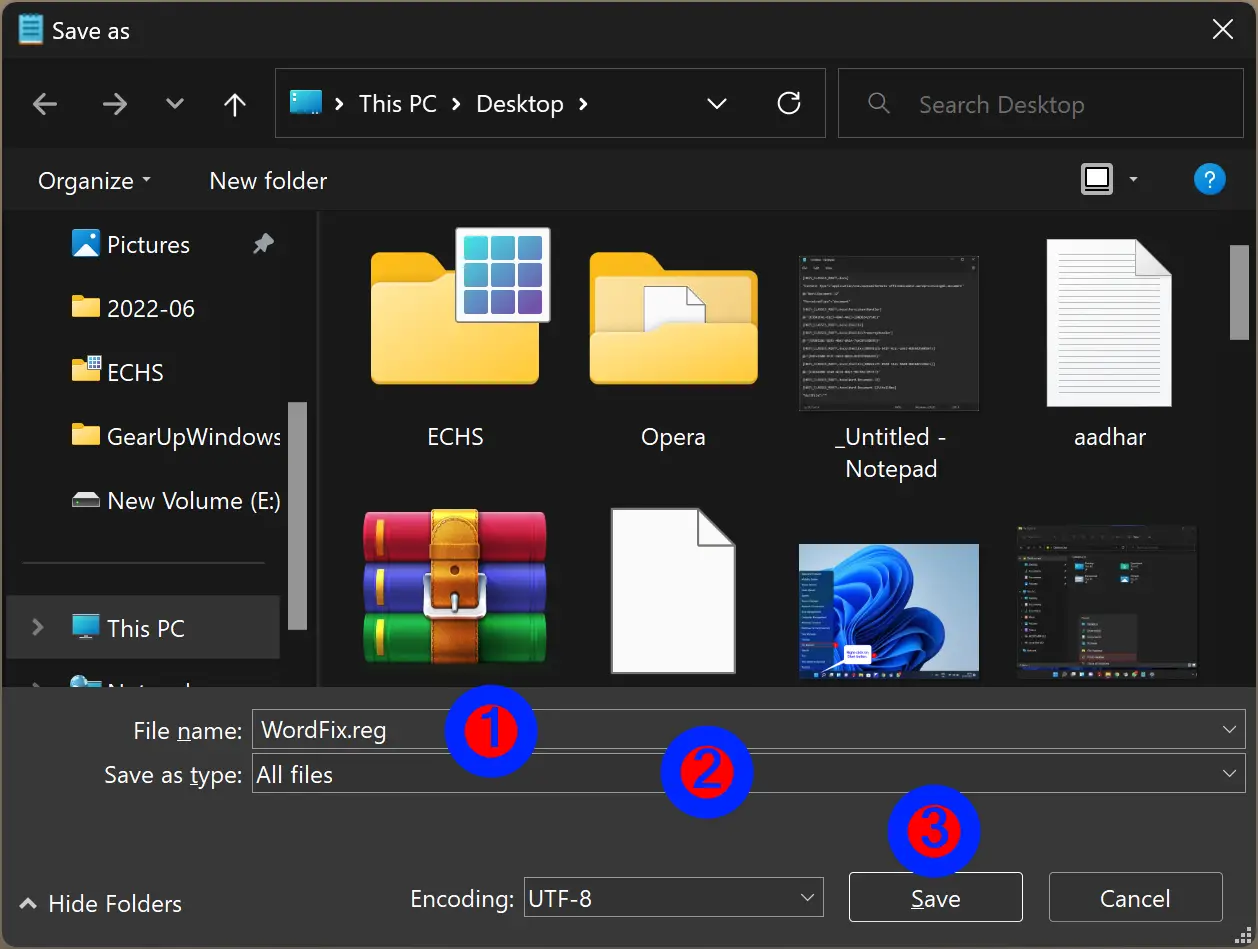
Step 6. Finally, click on the Save button.
Step 7. Now, a “Word Fix.reg” file is saved in your “Documents” folder.
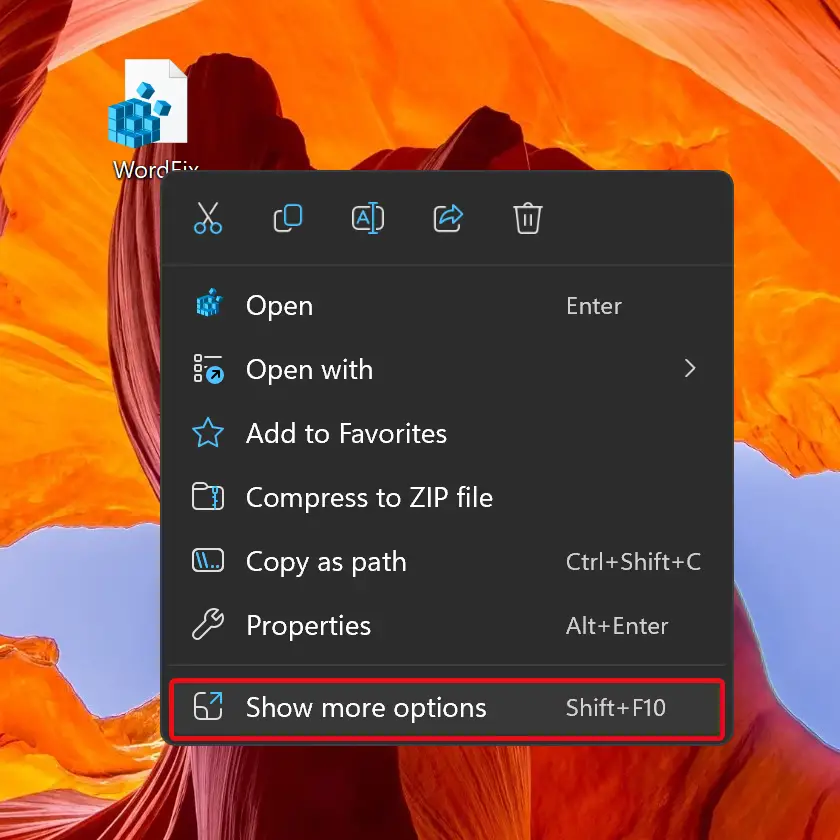
Step 8. Please right-click on the “Word Fix.reg” file and choose the Show more options option.
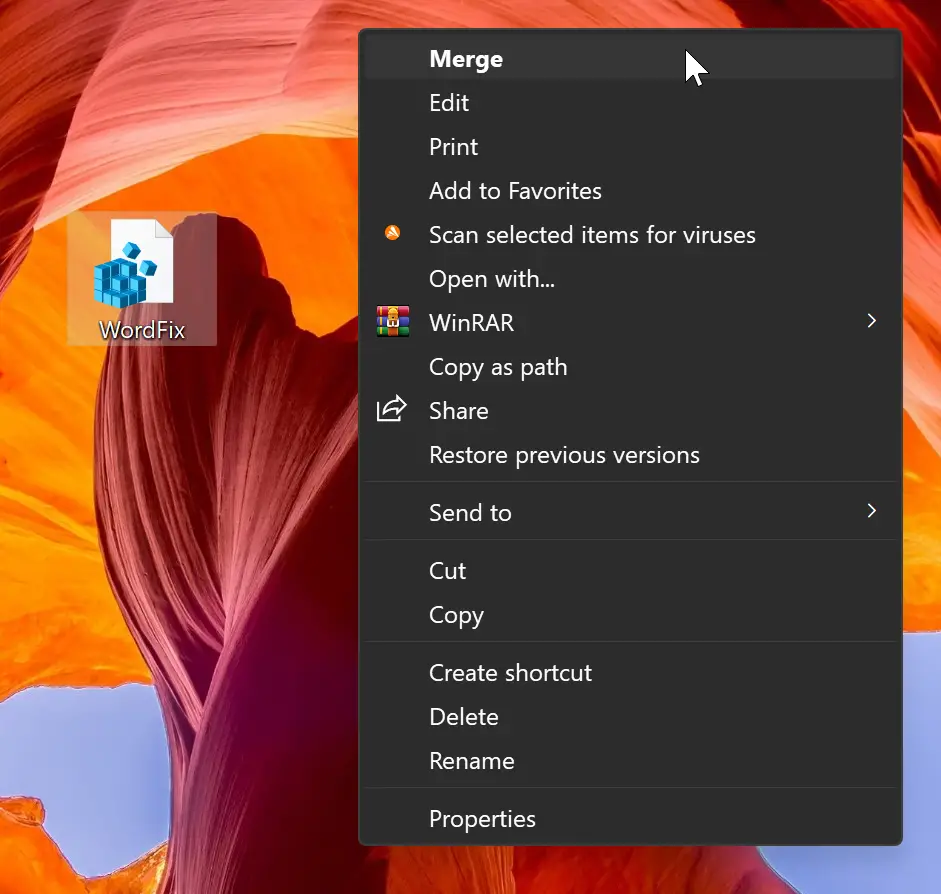
Step 9. Now, click on the Merge option in the classic context menu.
Step 10. If the “User Account Control” dialog box prompts, click the Yes button to continue.
Step 10. Again, click Yes on the pop-up window that appears.

Step 11. Click OK when prompted.
That’s all!!! Now, right-click on Windows 11 desktop, select the New option, and Microsoft Word Document should be visible next to it.
Although we have personally tested it on MS Office 2016, it should work on MS Office 2007/2010/2019.
Conclusion
In conclusion, the missing Microsoft Word Document on the right-click context menu can be a frustrating issue for Windows 11 users. It can be caused by various reasons, including third-party apps and improper shutdowns. However, the good news is that restoring the missing Word Document is an easy process that involves creating a Notepad file, copying and pasting a specific set of lines, saving the file as a registry file, merging it with the registry, and finally, clicking OK. This method should work for most versions of Microsoft Office, and it is a great solution for novices who may not be comfortable editing the registry values manually. Overall, this method offers a quick and easy way to restore the missing Microsoft Word Document to the right-click context menu in Windows 11.
Also Read: Microsoft Excel Option is Missing from the Right Click Context Menu; How to Fix it?
Did not work
Microsoft Word Document Missing – Solved 1- Open a New Notepad file and Copy Paste the below codes: 2-Save it as “.docx.reg” without quotation and remember filetype as “All…