By default, Microsoft Office programs, such as Word, Excel, PowerPoint, etc., use a basic theme. However, one can change the Office theme according to their need. You can set a Colorful, Dark Gray, Black, White, etc., theme. But what if you want to set a theme for all users? Using Local Group Policy Editor or Registry Editor, you can restrict theme change in MS Office.
If you are an administrator and want to stop users from changing the default Microsoft Office theme in your organization, this gearupwindows article will guide you. We will show the steps to block changing themes in MS Office using Local Group Policy Editor and Registry Editor.
How to Prevent Users from Changing Default Office Theme Using Local Group Policy Editor?
To prevent or stop users from changing the default organization Office theme using Group Policy, do the following:-
Step 1. First, install the Office’s Group Policy template on your computer.
Step 2. Then, launch the Local Group Policy Editor.
Step 3. When the Local Group Policy Editor window opens, browse to the following path on the left side:-
Computer Configuration > Administrative Templates > Microsoft Office 2016 (Machine) > Global Options > Customize
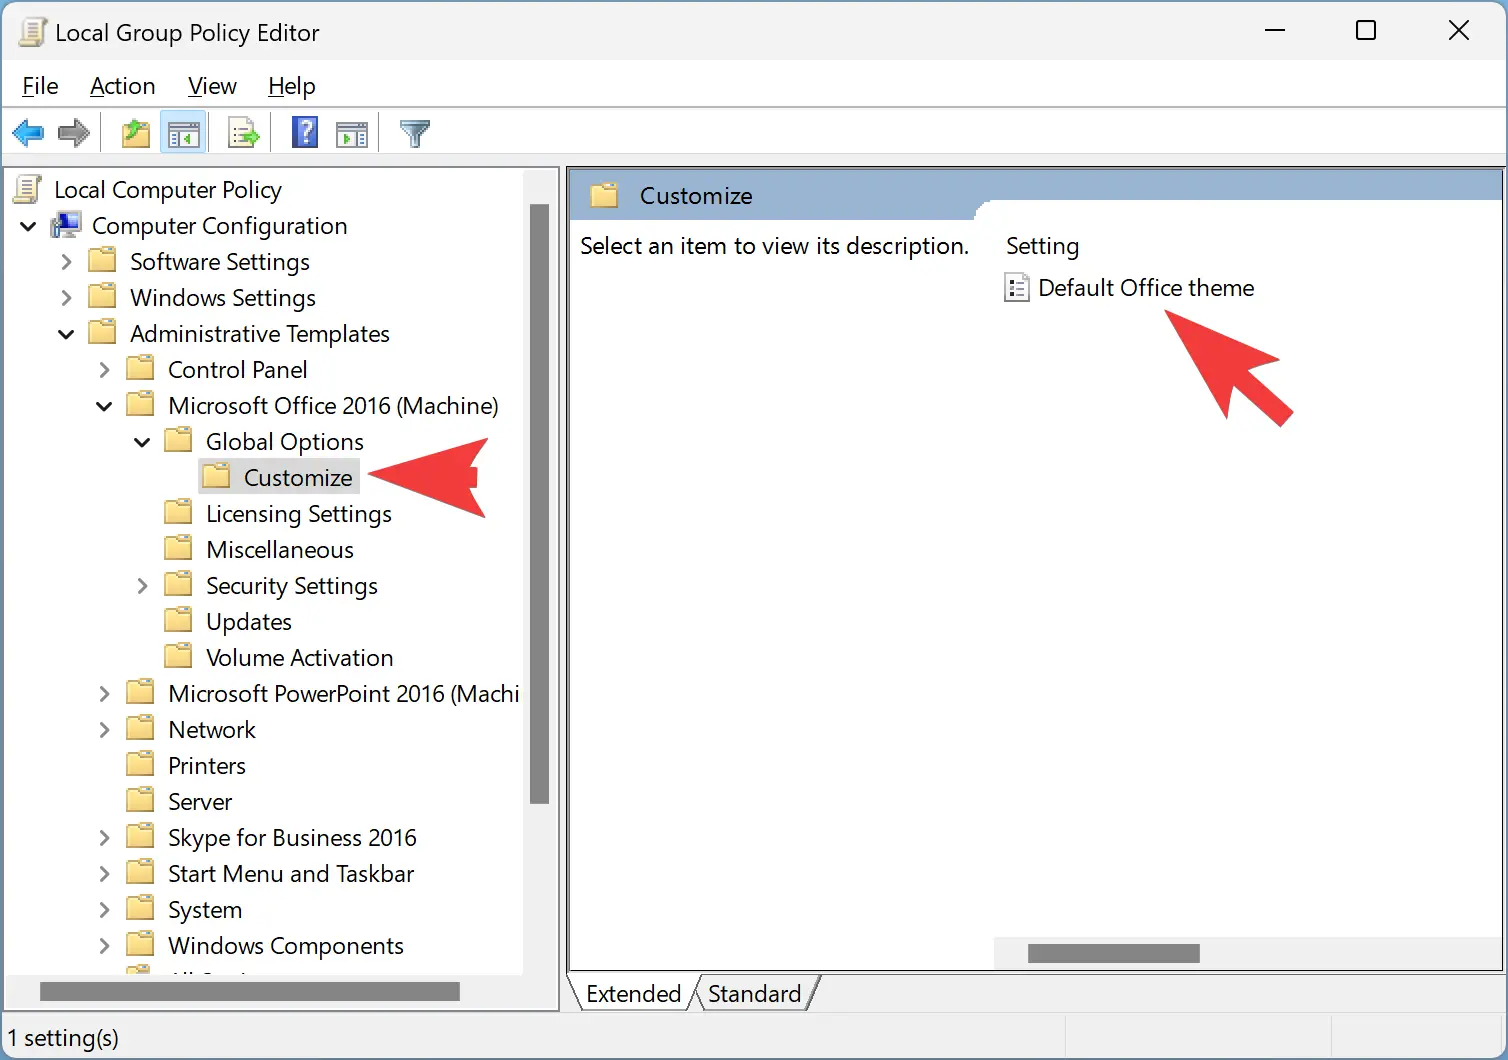
Step 4. Then, on the right side of Customize folder, double-click on the Default Office theme policy to change the settings.
Step 5. Select the Enabled option.

Step 6. Select a theme from the “Theme” drop-down menu that you want to set for all users.
Step 7. Then, click the Apply button.
Step 8. Finally, hit the OK button to save the changes.
To allow the theme changes in MS Office again, repeat the above steps and choose the Not Configured option in the above step 5. Click Apply and then the OK button.
How to Stop Users from Changing Default Office Theme through Registry Editor?
To stop or prevent users from changing the default Office theme using Windows Registry, use the following steps:-
Step 1. At first, open the Registry Editor.
Step 2. When Registry Editor opens, navigate to the following key in the left sidebar:-
HKEY_LOCAL_MACHINE\SOFTWARE\Policies\Microsoft

Step 3. Then, right-click on the Microsoft folder and select New > Key.
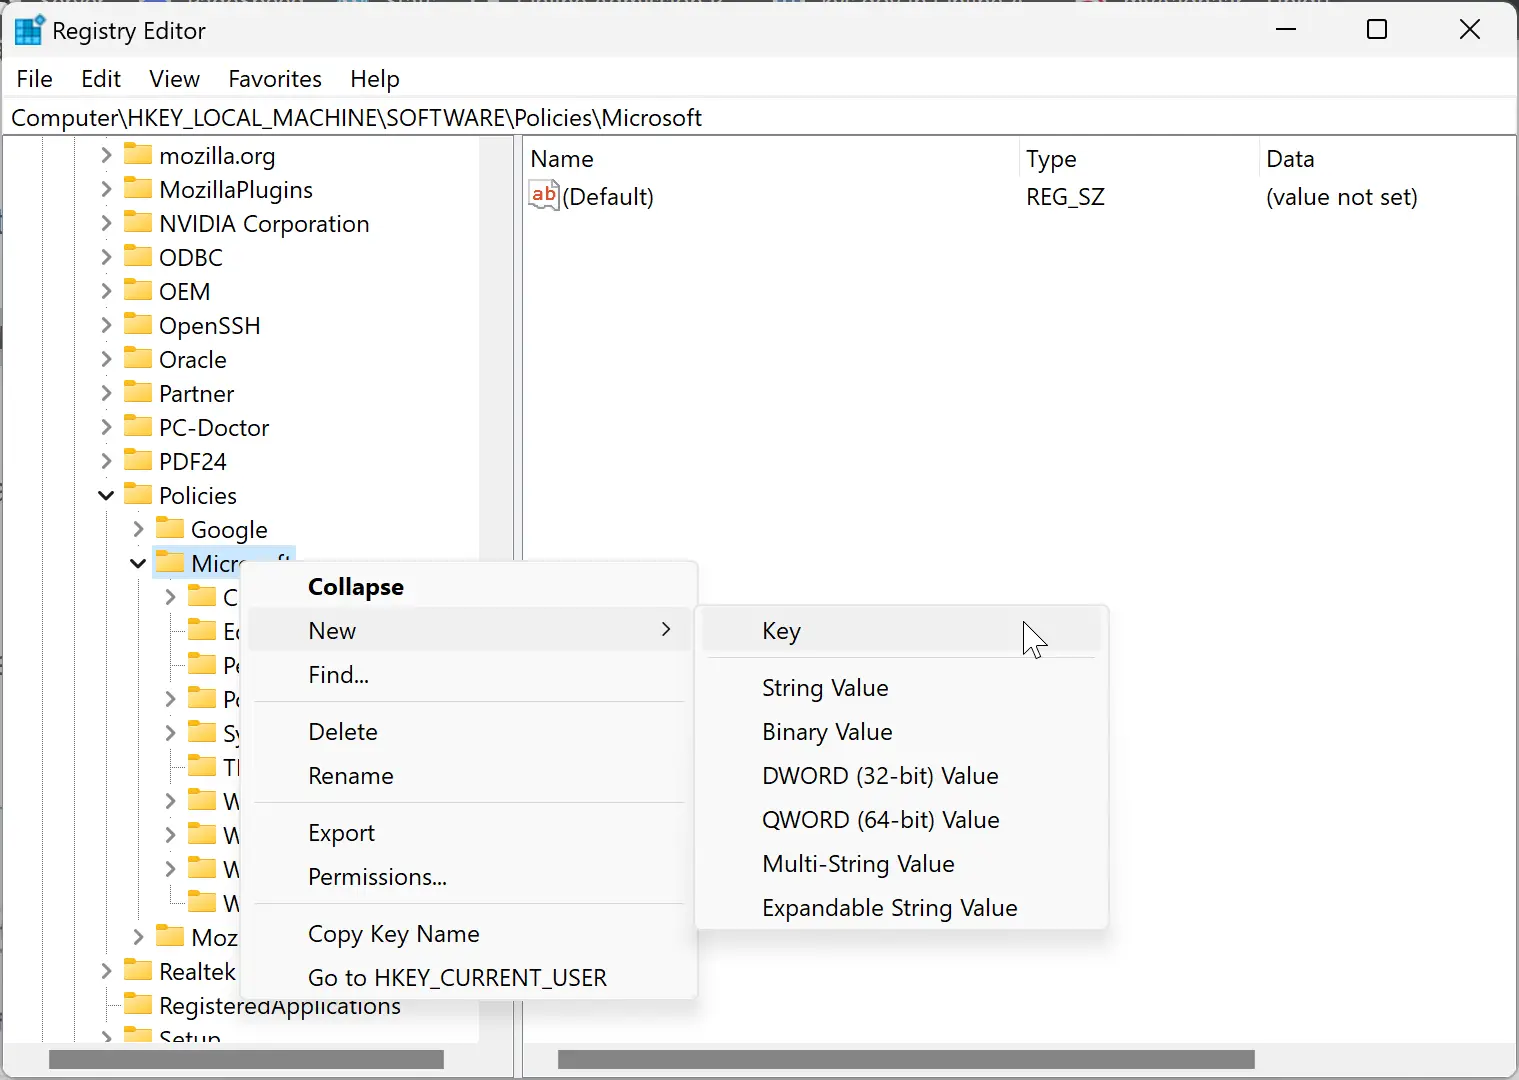
Step 4. Name the newly created key office.
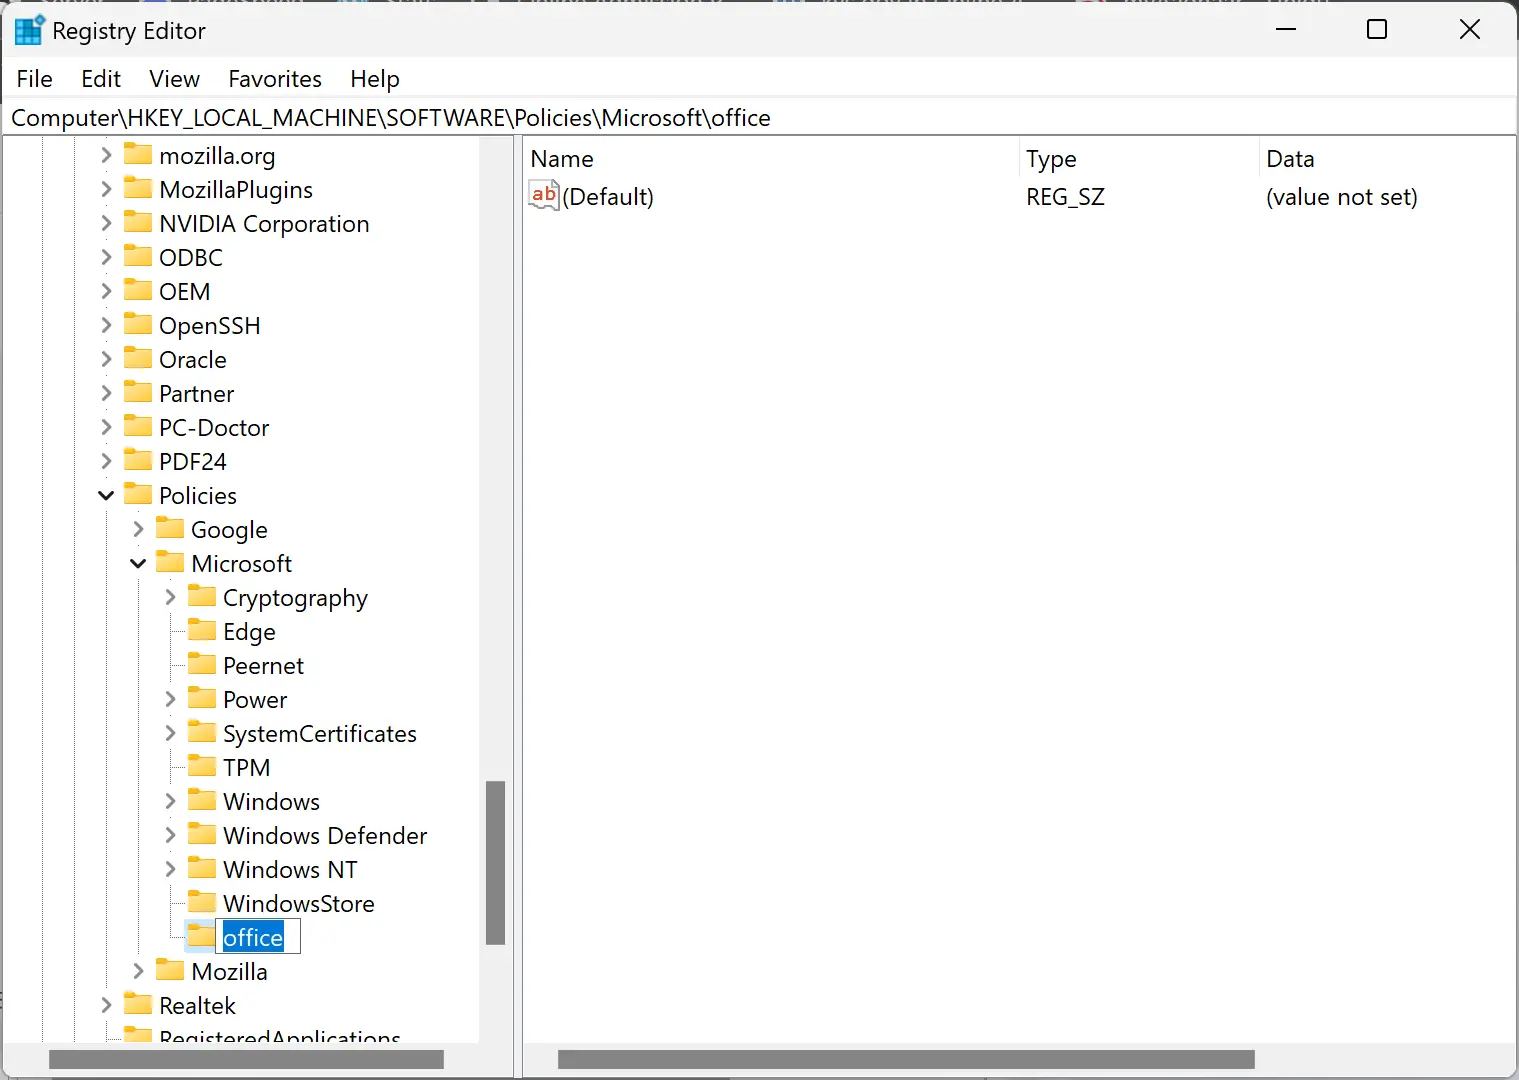
Step 5. Now, right-click on the office folder and select New > Key.
Step 7. Name it 16.0.
Step 8. After that, right-click on the 16.0 folder and choose New > Key.
Step 9. Name it as common.

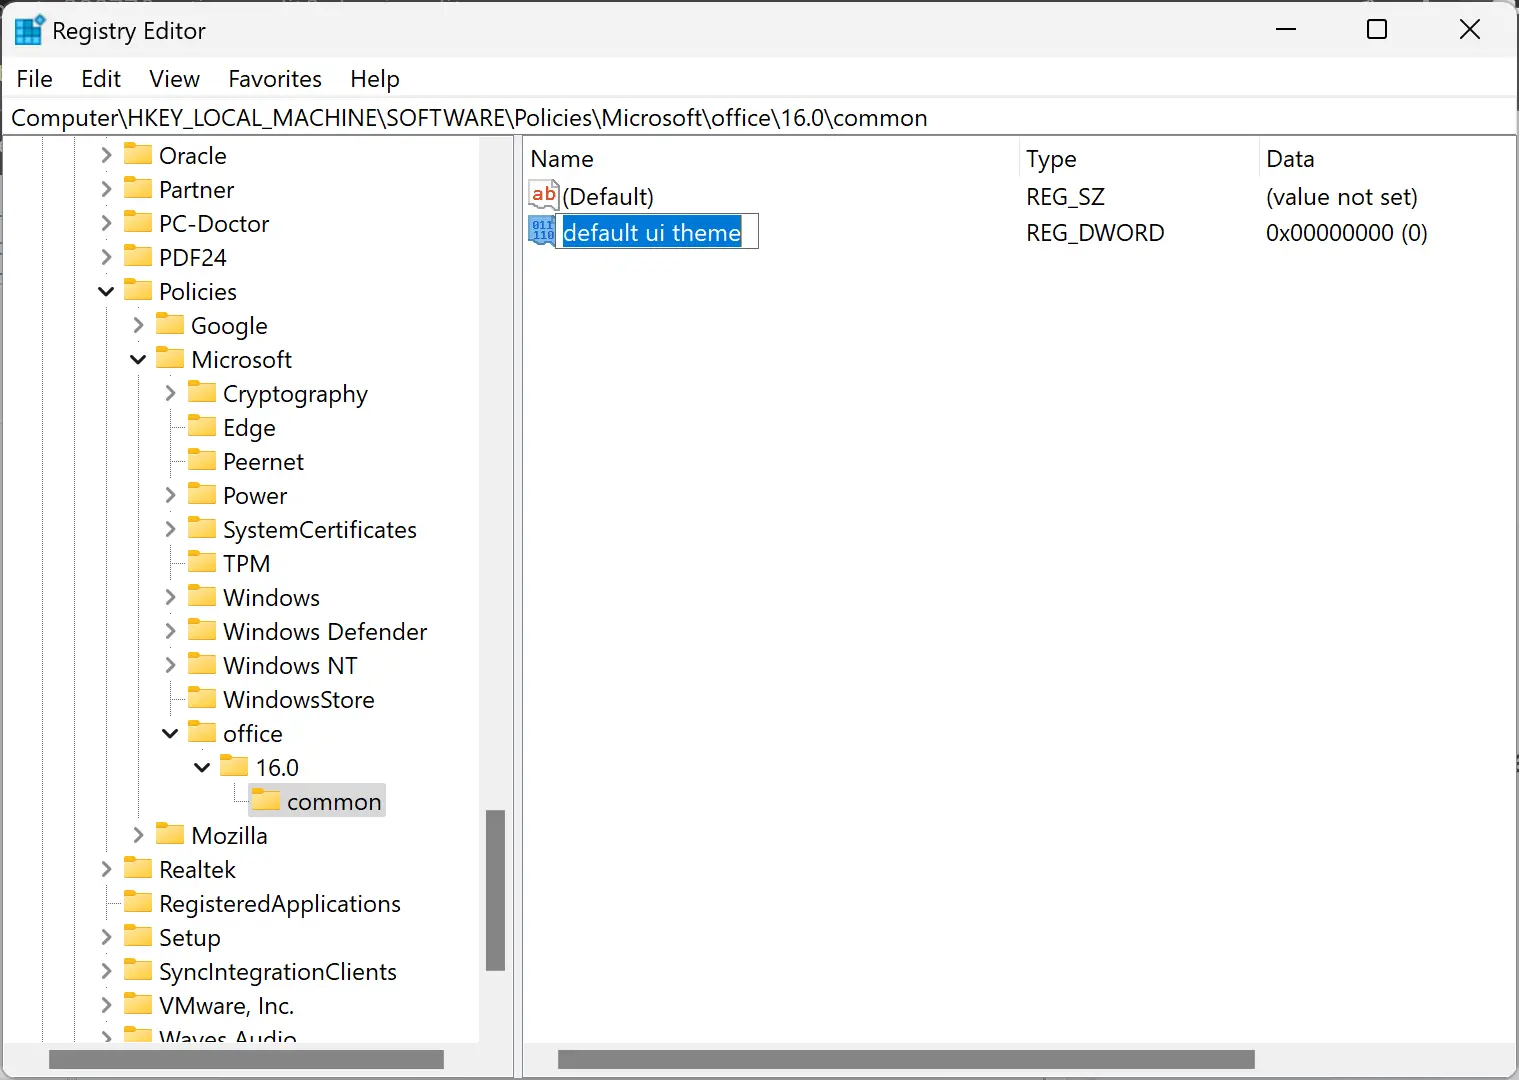
Step 10. Now, on the right-side pane of the common folder, right-click on the blank space and select New > DWORD (32-bit) Value.
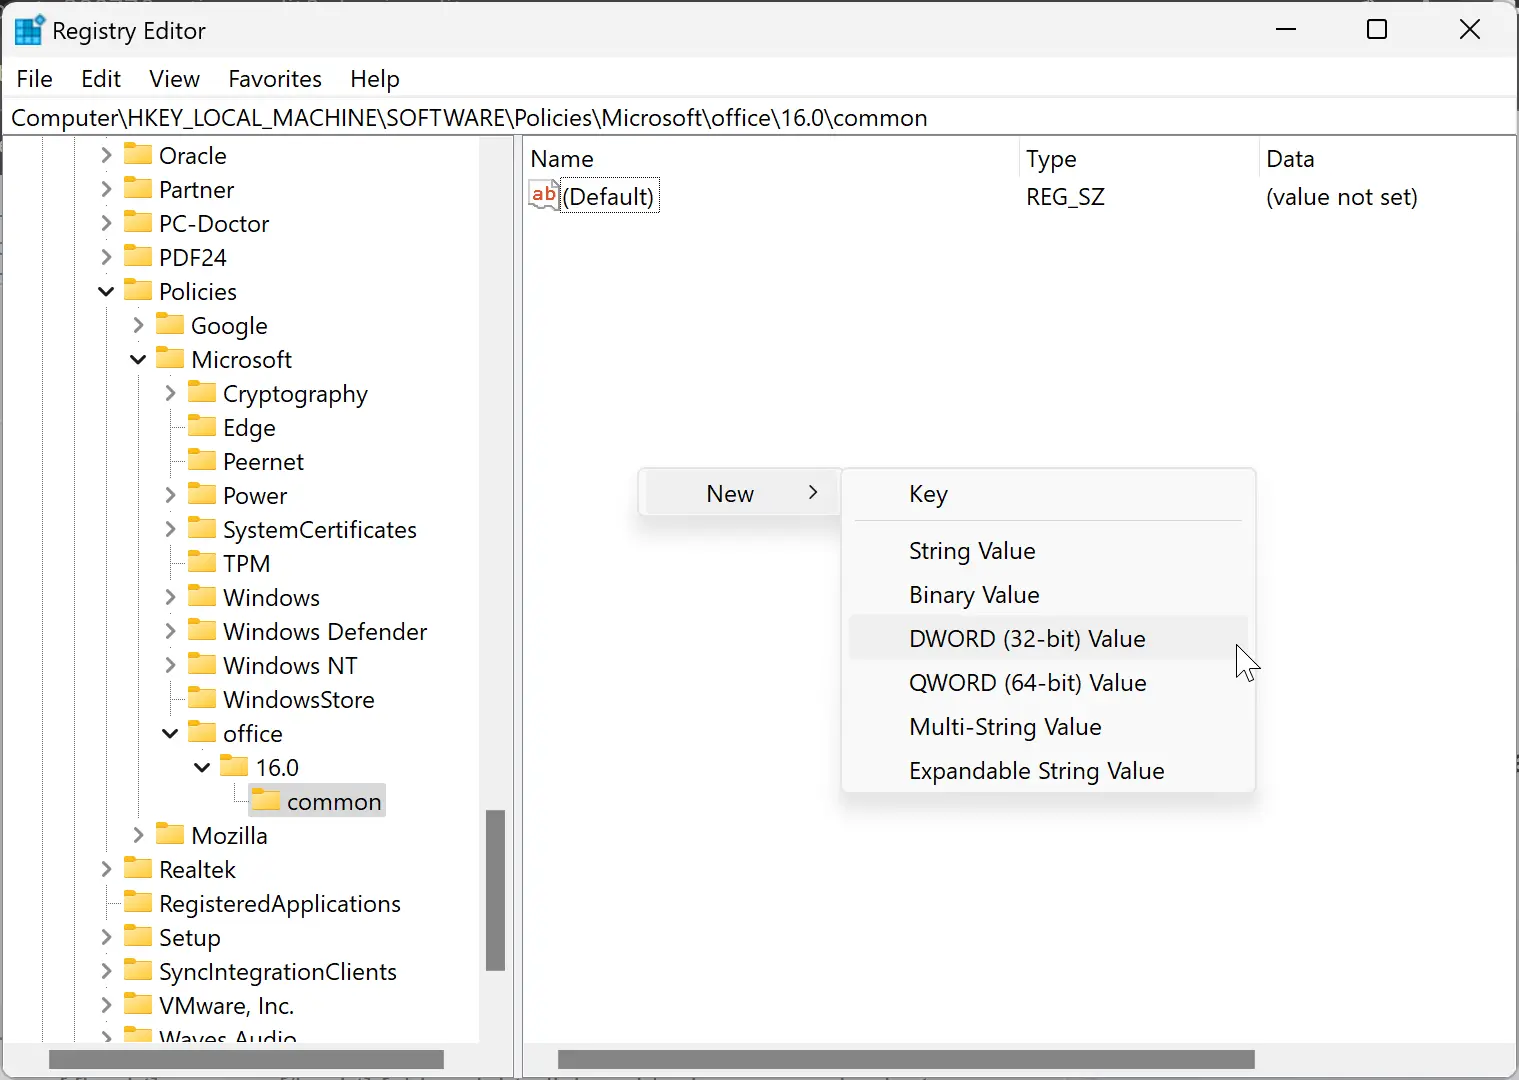
Step 11. Name it default ui theme.
Step 12. Double-click on the default ui theme and set its value data as follows:-
- 0 – Colorful theme.
- 3 – Dark Gray theme.
- 4 – Black theme.
- 5 – White theme.
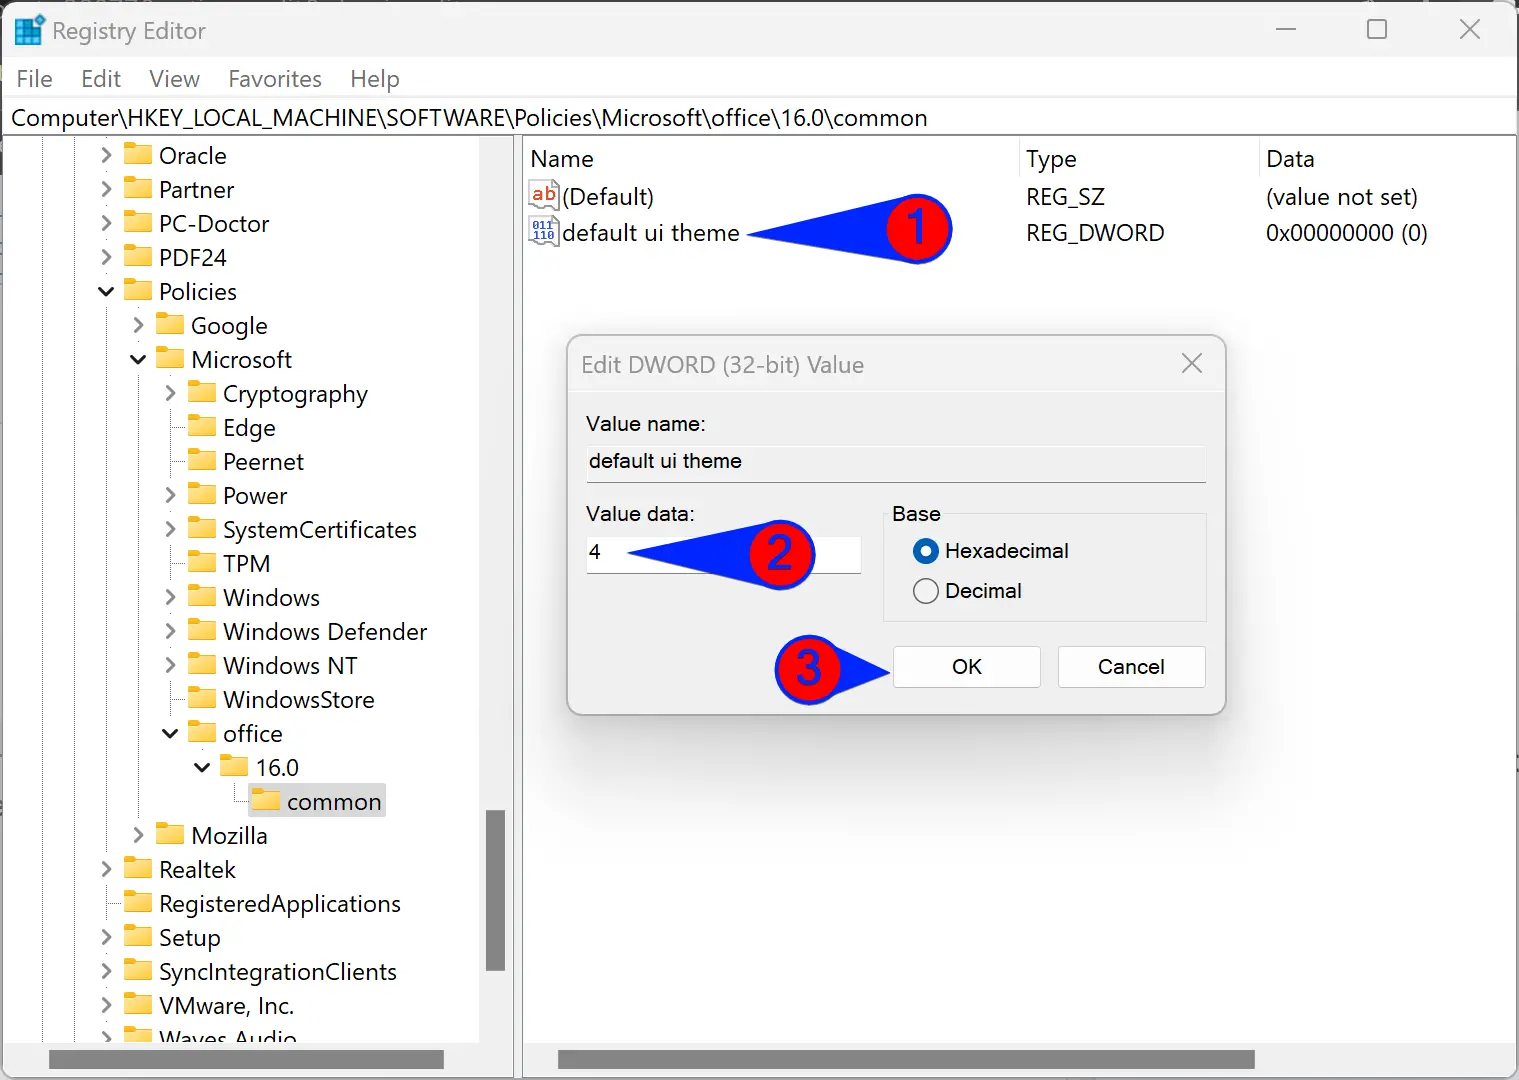
Step 13. Click the OK button.
Step 14. Finally, reboot your computer to apply the changes.
To revert the changes to default, navigate to the following path in the Registry Editor:-
Computer\HKEY_LOCAL_MACHINE\SOFTWARE\Policies\Microsoft\office\16.0\common
On the right side of the common folder, right-click on the default ui theme and select the Delete option.
Conclusion
In conclusion, changing the Office theme is a personal preference, but as an organization administrator, it might be necessary to restrict theme change in MS Office to maintain a consistent appearance across all user accounts. This article presented two methods to prevent users from changing the default Office theme using Local Group Policy Editor and Registry Editor. By following the steps outlined in this article, you can ensure that the Office theme remains the same for all users in your organization. However, if you want to allow theme changes again, the article also shows how to revert the changes made in both Group Policy and Registry Editor.