Do you want to transfer files between Windows PCs? Although you can transfer your files using a USB flash drive or an external hard disk drive, it is time-consuming. Bluetooth is the best and most convenient way to connect to nearby devices for sharing files wirelessly. This is handy if you don’t have any other media to transfer the files. There is no need for Ethernet, Wi-Fi, USB, HDD, etc., to transfer files between Windows 11 computers.
Bluetooth is ancient technology, and this can be found inbuilt on old computers and laptops. In this gearupwindows article, we will guide you on transferring files between two different Windows 11 PCs with Bluetooth.
How to Transfer Files Between Two Windows 11 PCs with Bluetooth?
To transfer files between two Windows 11 computers using Bluetooth, you need to pair both computers first. Here is how to do it.
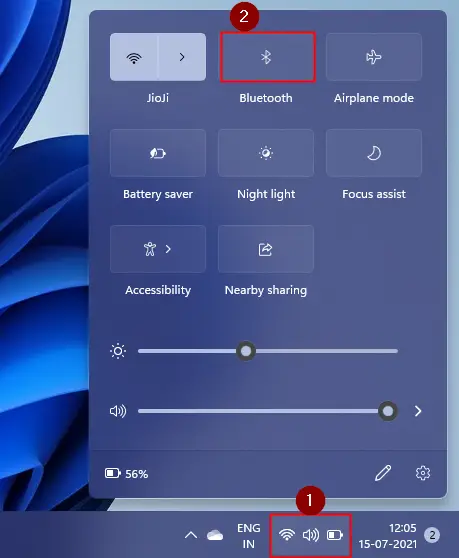
Step 1. Turn on Bluetooth on both computers.
To do that, click anywhere on the Quick Settings icon on the taskbar. Now, click on the Bluetooth tile to enable it.
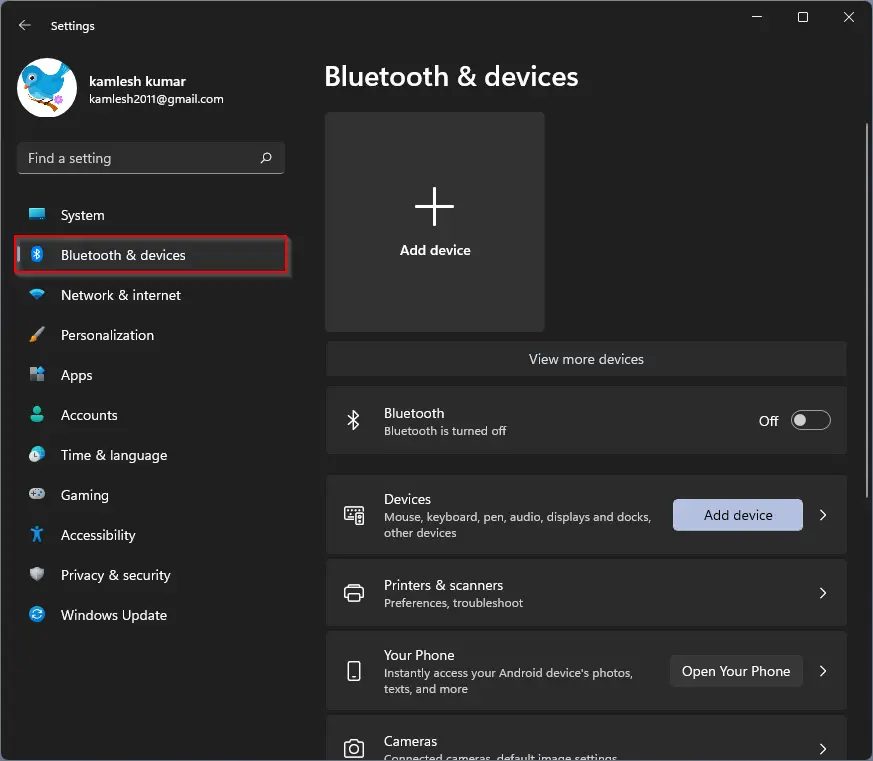
Step 2. Now you need to pair both computers with Bluetooth. For that, open the Settings app from any of the computers (To open the Settings app quickly, press the Windows + I keys from the keyboard.
Step 3. Click on the Bluetooth & devices category in the Windows Settings.
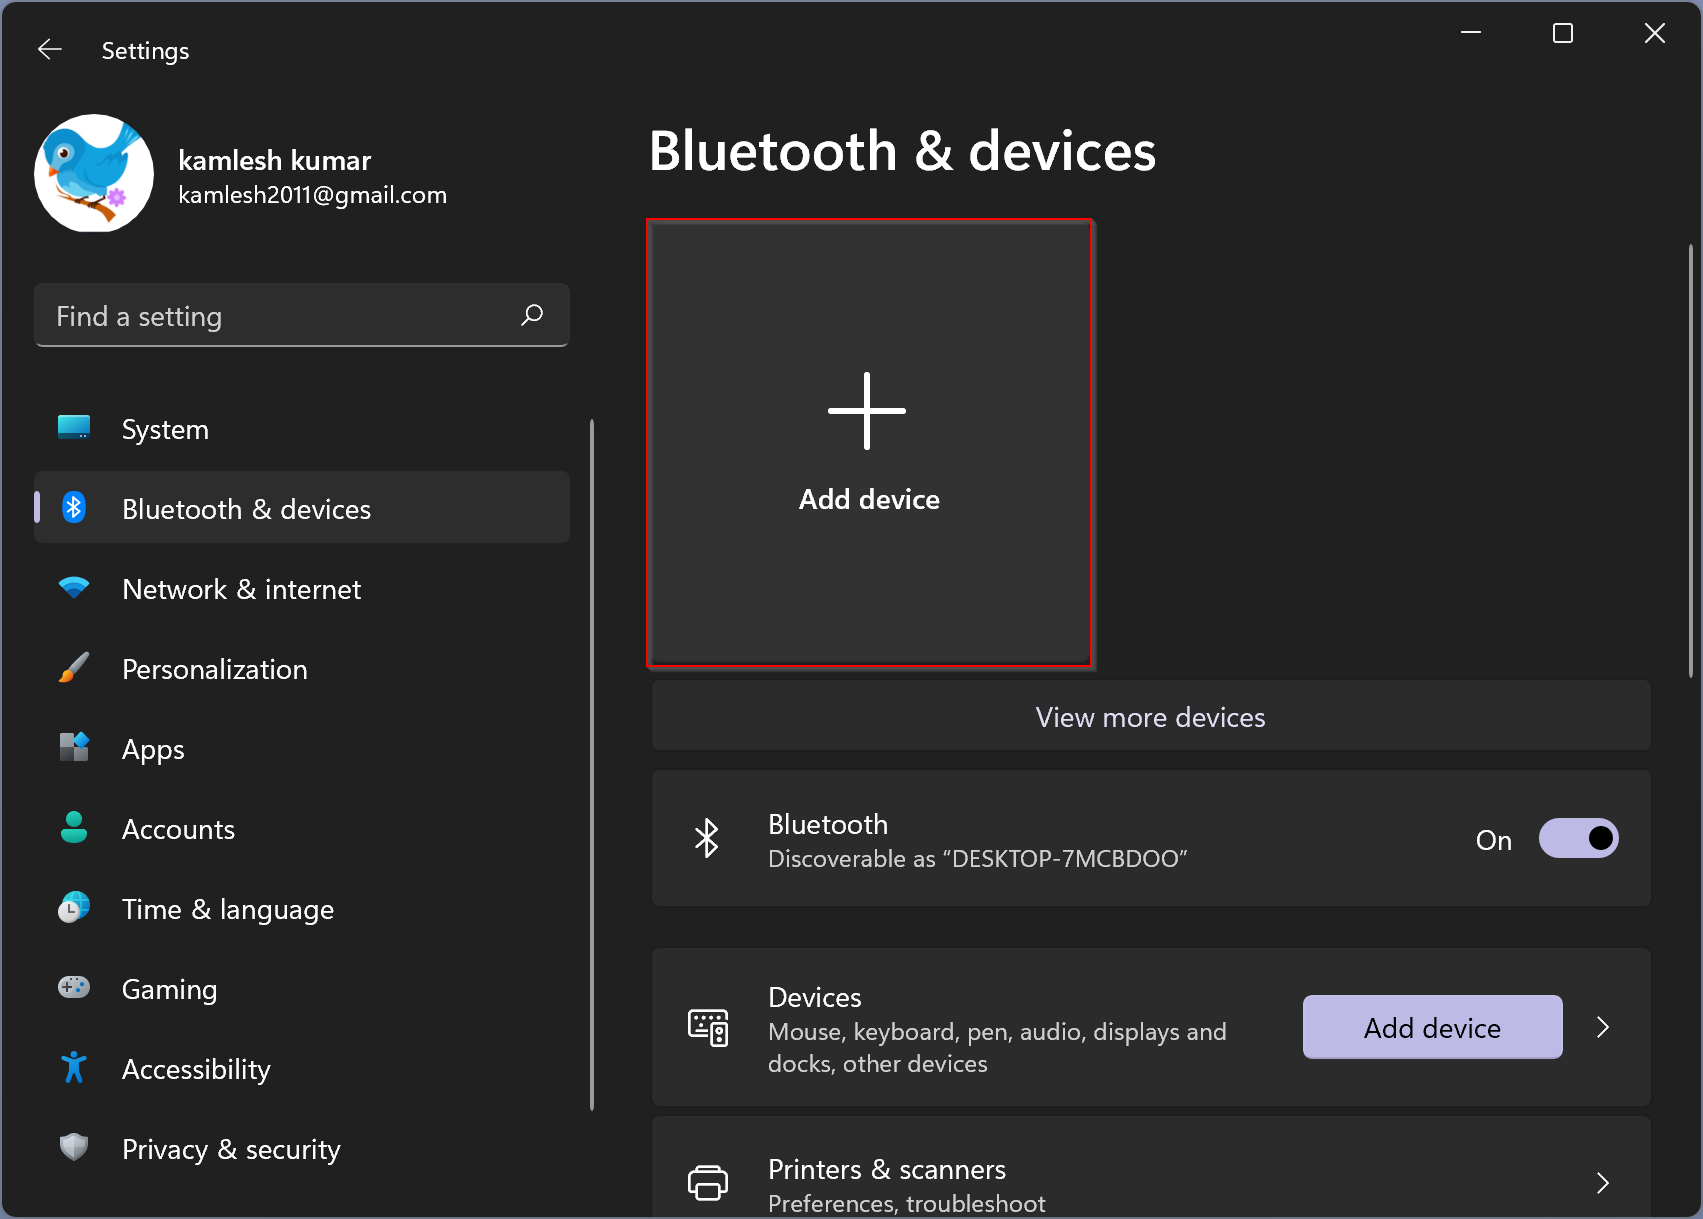
Step 4. On the right-side pane, click on the Add device button.
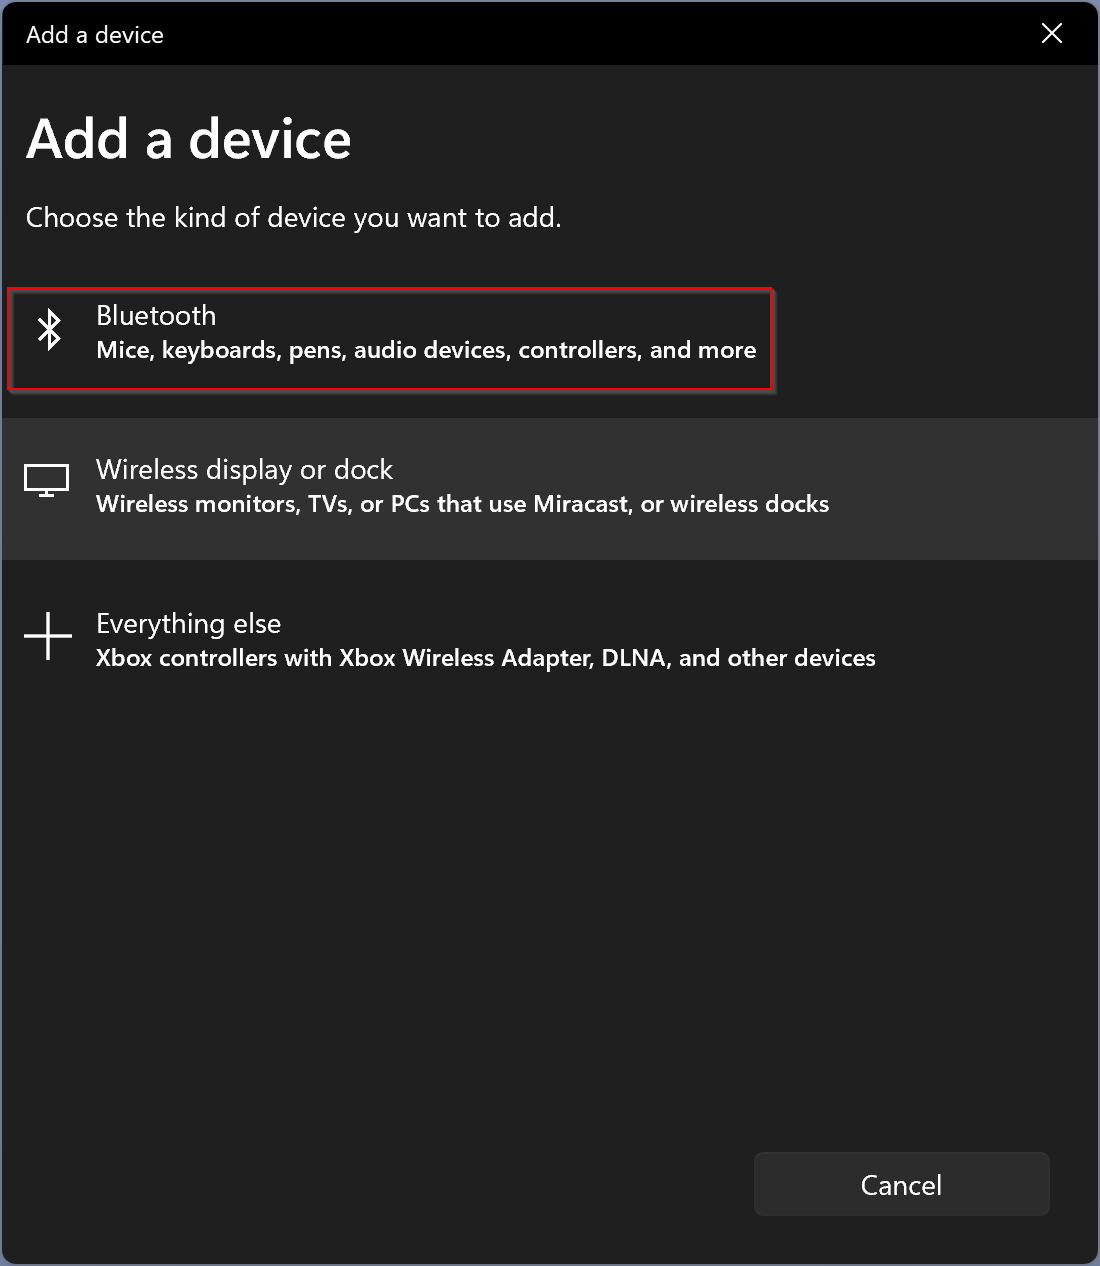
Step 5. Click on the Bluetooth option on the pop-up window that appears.
Step 6. Now, your other computer will appear here. Click on the computer’s name to communicate with another PC.
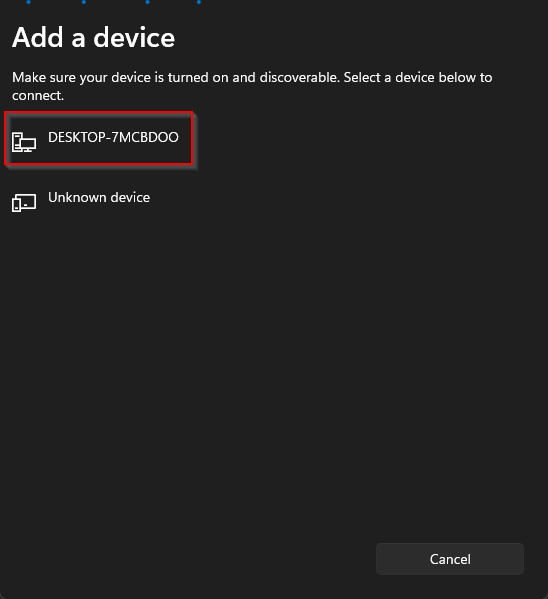
Step 7. You will see the Add a device message at the bottom right screen on another PC. Click on that to open it up.

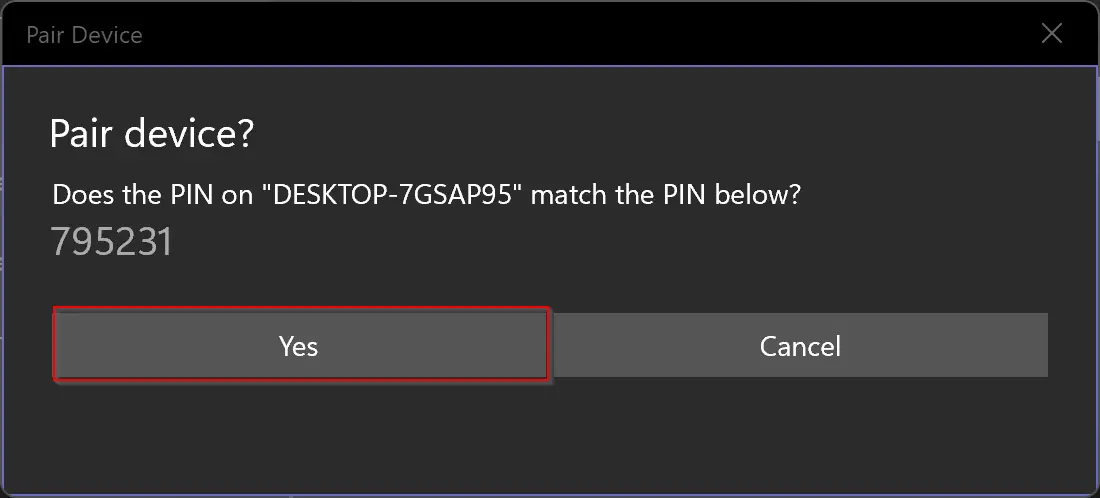
Step 8. Now, a pop-up window will appear on both computers. Click the Yes button on both PCs.
Step 9. Now, you will see the Connection succeeded message on both computers.
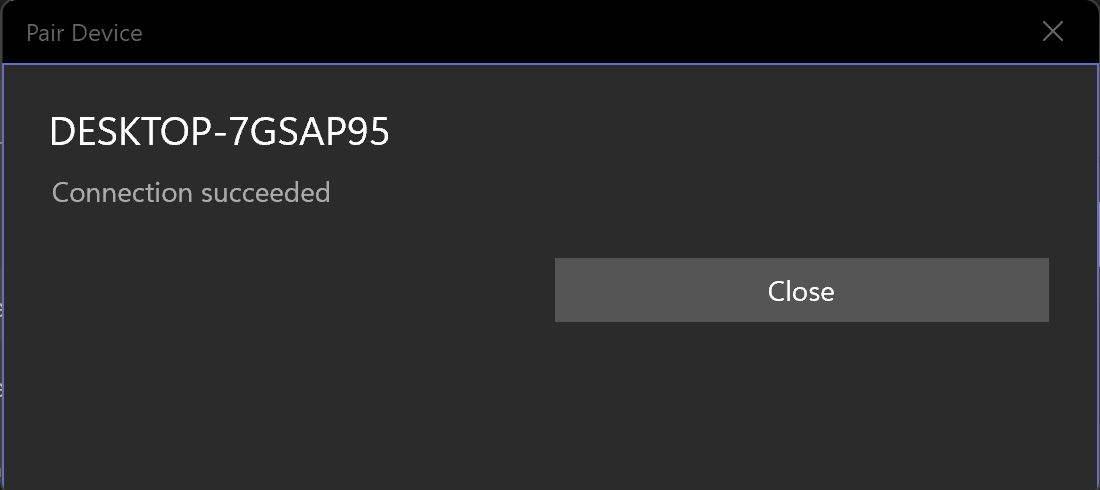
That’s it! Now, both computers can communicate with each other.
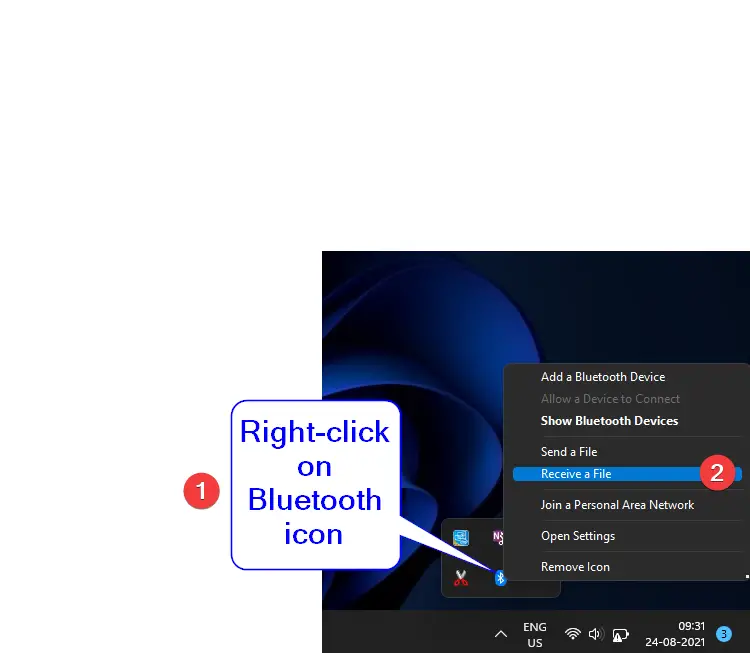
Step 10. From either computer through which you want to send a file to another PC, right-click on the Bluetooth icon on the Taskbar Corner Overflow area and select the Send a File option.
![]()
Step 11. Here, you will see your paired PC. Click on the computer name to select it, and then press the Next button.
![]()
Step 12. Click on the Browse button and select the file from your computer that you need to transfer to another PC.
![]()
Step 13. Now, click on the Next button.
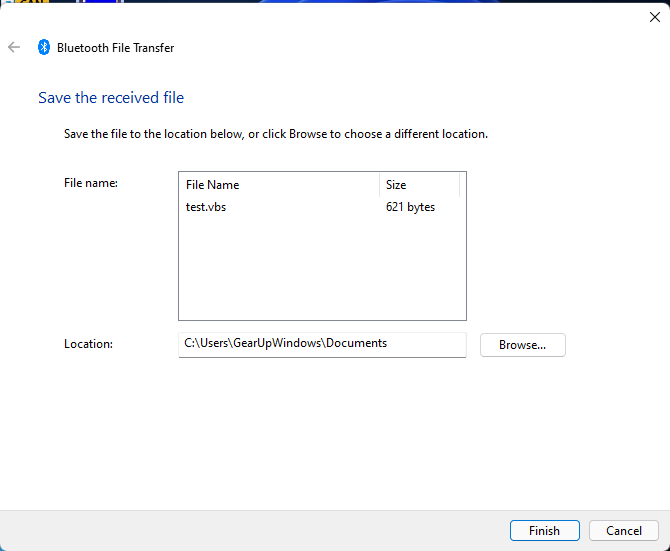
Step 14. On the next computer where you would like to receive the file, right-click on the Bluetooth icon on the Taskbar Corner Overflow area and select the Receive a File option.
Step 15. That’s it! On your next computer, you will see that the file has been received.
Until both your PCs are paired with Bluetooth, you can transfer files from either computer. If you have to transfer many files from one to another computer, make a Zip file and transfer them in one go.
Conclusion
In conclusion, transferring files between Windows 11 PCs has become much easier with the advancement of technology. While USB flash drives and external hard disk drives can be used to transfer files, Bluetooth is the most convenient and time-saving method for transferring files wirelessly. By following the simple steps outlined in this gearupwindows article, you can easily transfer files between two Windows 11 PCs with Bluetooth. Just make sure to pair both computers first and then follow the steps to transfer files seamlessly. If you have a large number of files to transfer, creating a Zip file can help you transfer them all at once. Additionally, you can also explore other methods, such as transferring files using Wi-Fi between two computers in Windows 11.