The Aero Shake feature was first introduced in Windows 7 by Microsoft. This minimizes all opened app windows on your desktop except the one you’re holding with your mouse. To minimize all the applications except one, hold the title of an application and shake it from the mouse. That’s it; all other opened windows will minimize automatically. Simply shake again to restore the minimized windows to their original location.
Aero Shake is an amazing feature if you want to look on the desktop without minimizing or closing applications. It is known as “Title bar window shake” on Windows 11 and remains turned off by default. However, if you want to use it, you need to enable it.
In this gearupwindows article, you will learn to turn On or Off Aero Shake on Windows 11 in several ways, including the built-in Settings app, Group Policy, or Registry Editor.
How to Enable or Disable the “Aero Shake” Feature in Windows 11 Settings?
By default, the “Aero Shake” or “Title bar window shake” feature remains turned off on Windows 11. To use it, you need to enable or activate it first.
Follow these steps to turn on or off the “Aero Shake” function on Windows 11 Settings:-
Step 1. Open the Settings app by pressing Windows + I keys simultaneously from the keyboard or any other method.

Step 2. When Windows Settings opens, select the System category from the left sidebar.
Step 3. Now, scroll down and click on the Multitasking tab on the right-side pane.

Step 4. Turn On the toggle switch beside the “Title bar window shake” option.
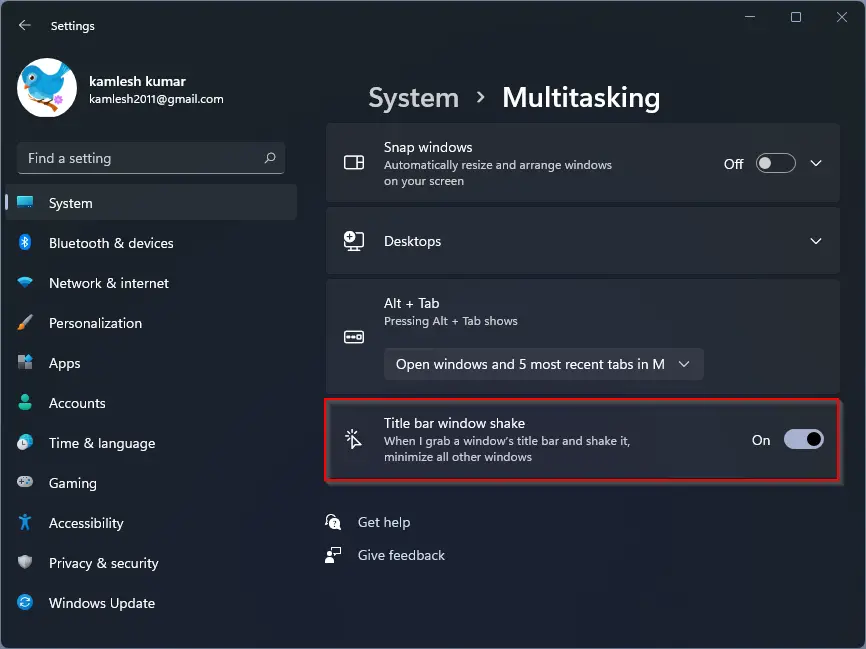
After performing the above steps, the “Aero Shake” or “Title bar windows shake” feature is approved on your Windows 11 PC. In the future, if you would like to turn Off this feature on your computer, repeat the above steps, and in step 4, turn the toggle switch to the Off position next to the “Title bar windows shake” option.
That’s all. Now, you can close the Settings app. The changes are stored on your PC automatically, and no further action is required.
How to Turn On or Off the “Aero Shake” Feature in Windows 11 using Group Policy Editor?
If you’re using Windows 11 Pro or higher edition, follow these steps to enable or disable the “Aero Shake” feature:-
Step 1. First, open Local Group Policy Editor.
Step 2. Next, browse or navigate to the following path on the left side:-
User Configuration > Administrative Templates > Desktop
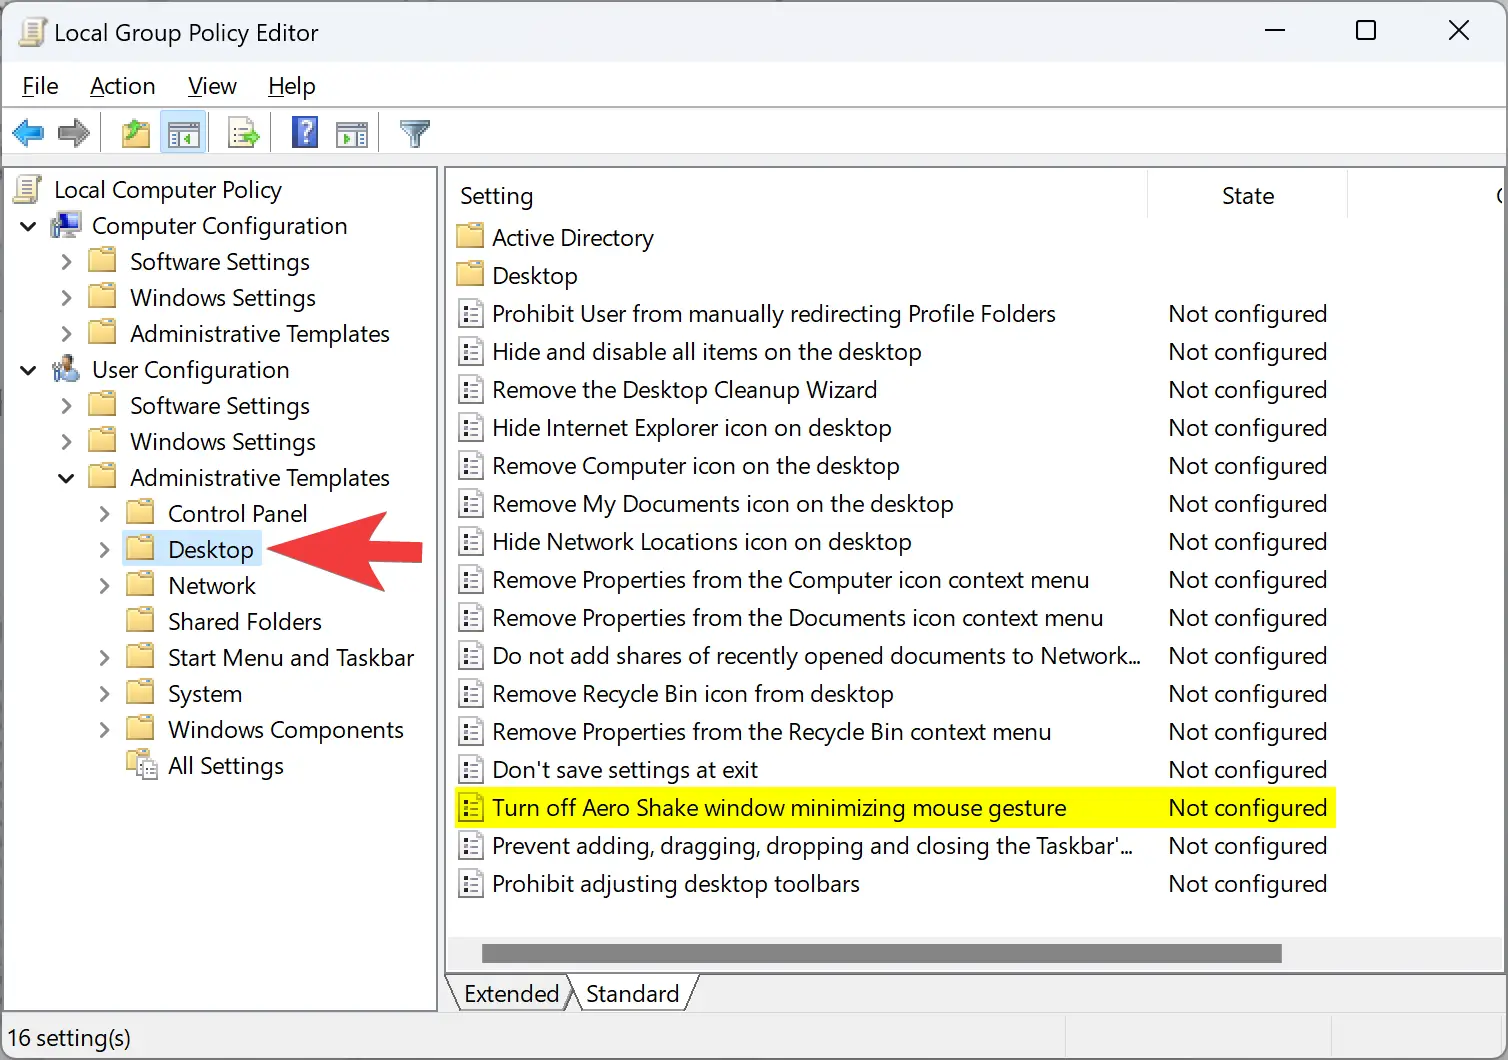
Step 3. On the right pane, double-click the setting “Turn off Aero Shake windows minimizing mouse gesture.”
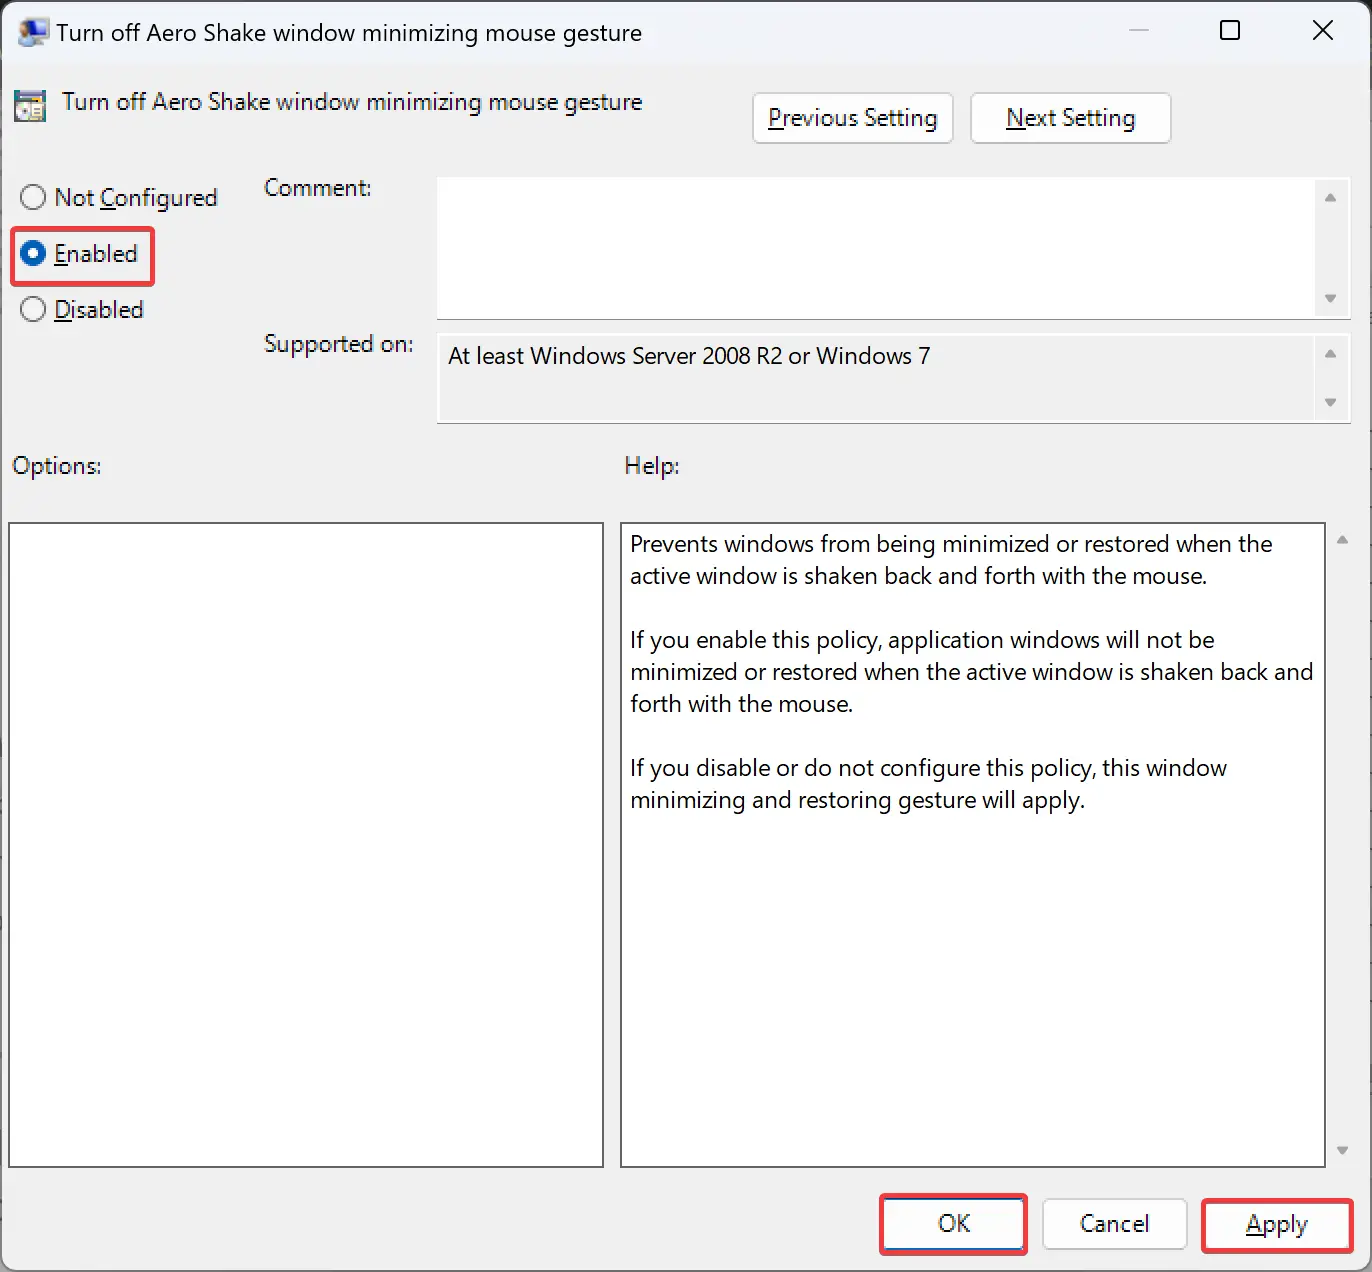
Step 4. Here, select one of the following options:-
- Not Configured: Leave the default settings.
- Enabled: To disable the Aero Shake.
- Disabled: To enable the Aero Shake.
Step 5. Click the Apply button.
Step 6. Click the OK button.
Step 7. At last, reboot your PC to apply the changes.
How to Enable or Disable the “Aero Shake” in Windows 11 through Registry Editor?
Follow these steps to turn On or Off “Aero Shake” in Windows 11 using Registry Editor:-
Step 1. Open Registry Editor.
Step 2. Next, browse or navigate to the following key on the left side:-
HKEY_CURRENT_USER\SOFTWARE\Microsoft\Windows\CurrentVersion\Explorer\Advanced
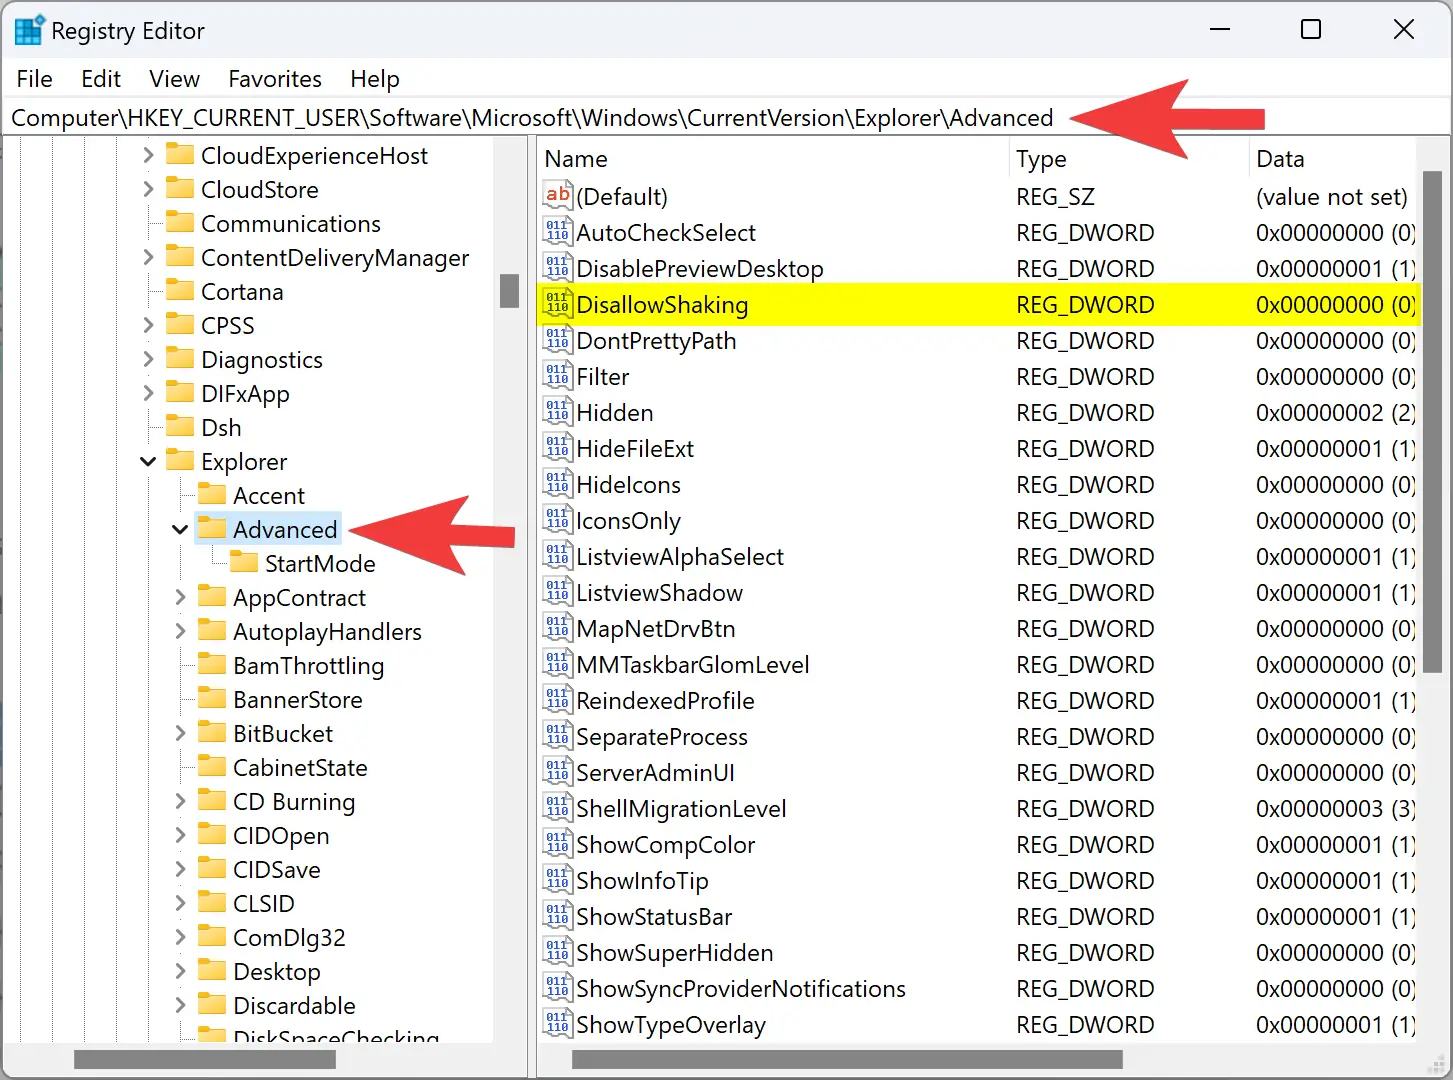
Step 3. On the right side, double-click on the DisallowShaking REG_DWORD to change its “Value data” and enter the following:-
- 0: Enable Aero Shake.
- 1: Disable Aero Shake.
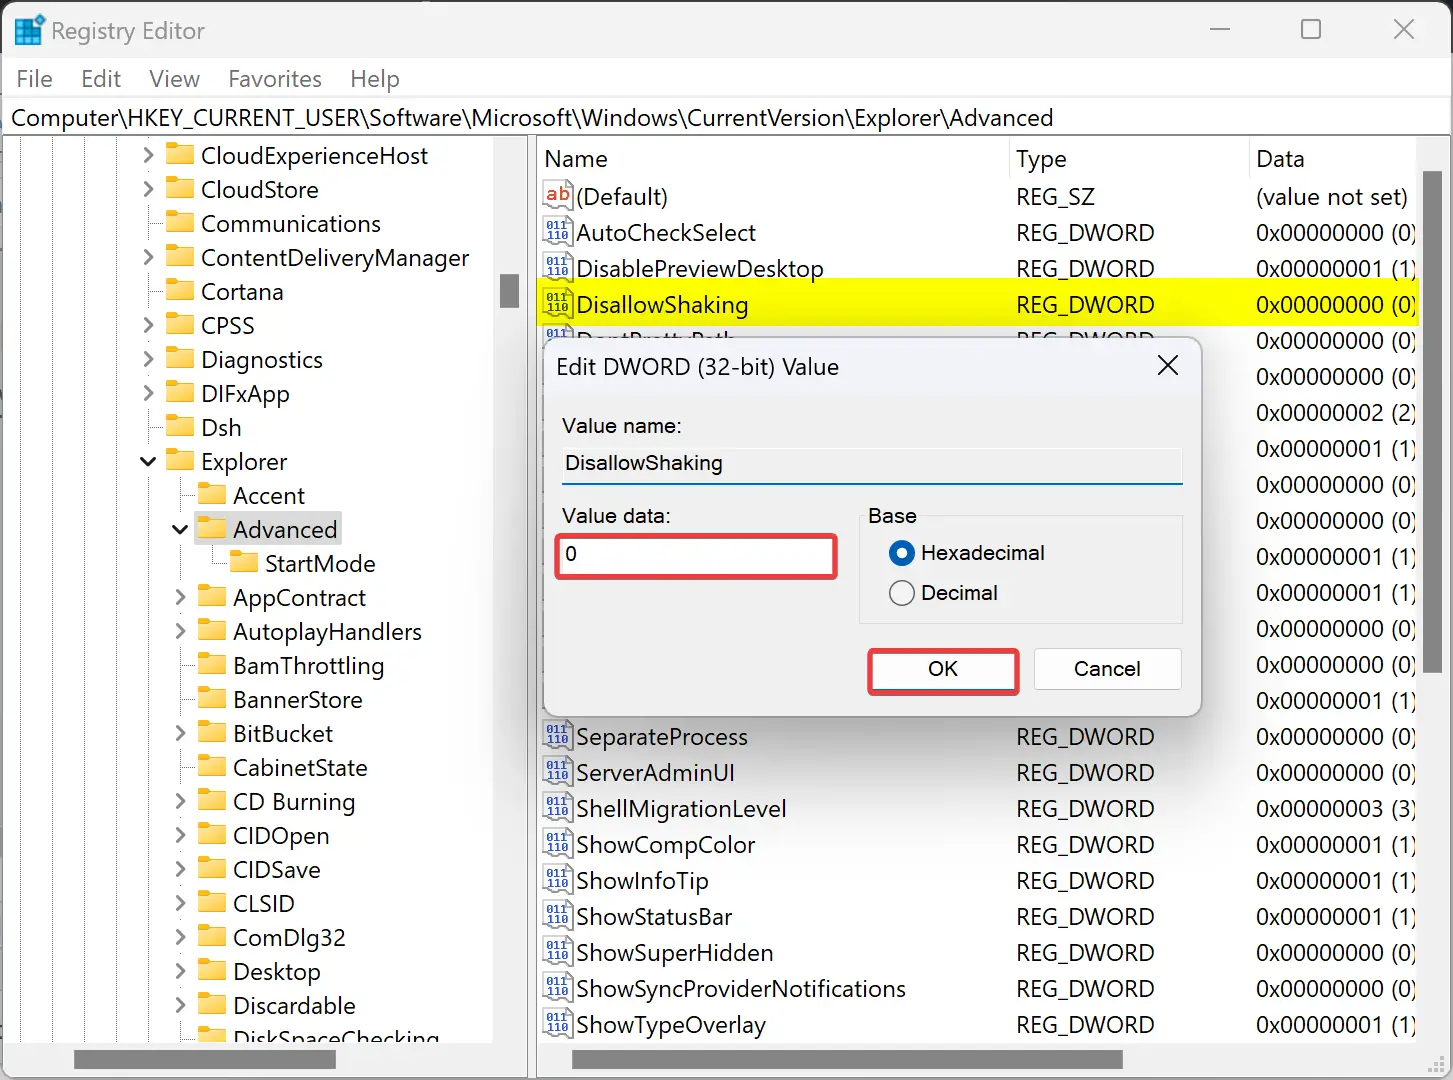
Step 4. Click the OK button.
Step 5. Finally, reboot your PC to apply the changes.
Conclusion
In conclusion, Aero Shake is a useful feature introduced by Microsoft that allows users to quickly minimize all opened app windows on their desktop, except for the one they’re holding with their mouse. While this feature is turned off by default in Windows 11, it can be easily enabled through the built-in Settings app, Group Policy, or Registry Editor. By following the steps outlined in this gearupwindows article, users can easily enable or disable the Aero Shake feature on their Windows 11 PC, depending on their preferences. Whether you prefer to use the Settings app, Group Policy, or Registry Editor, the process is simple and straightforward, and the changes take effect immediately after rebooting the PC.