CCleaner is probably one of the most popular programs to clean up your Windows PC. It quickly deletes temporary files, web browsing history, and other unwanted files from your Windows PC. The developer of the program keeps adding new features and makes it perfect. There are several functionalities available on the free version of CCleaner, and you can say it is the best free maintenance tool available over the internet.
Apart from cleaning the temporary files and registry, CCleaner can uninstall any program (even built-in programs), removes Windows startup programs, and manages your system restore points. It can securely erase the drive contents, cleanup & optimize the registry, and clean up Windows and other installed applications.
Now the developer has added an option to remove the unwanted context menus (right-click menus). If your Windows PC has been cluttered with a context menu, you can easily remove them using CCleaner. Most of us keep testing the freeware tool, and it creates a context menu. Most of them get automatically removed from the right-click context menu during uninstallation; however, a few may not. It may also happen you don’t want some right-click context menu, and you want to obliterate it from your Windows 11/10 machine. It may be any reason to remove the unwanted right-click context menu; we will show the steps to remove unwanted right-click context menus using CCleaner software.
Most CCleaner users use this software to clean the temporary files and unwanted registry entries, but now you can remove unwanted right-click context menus.
In this gearupwindows article, you will learn to clean Context Menu on Windows 11/10 using CCleaner.
How to Use CCleaner to Clean the Context Menu?
Step 1. If you have not yet installed the CCleaner tool, you can download the same from the official website.
Step 2. Install on your Windows 11/10 PC, and launch the CCleaner program from the Desktop shortcut.
Step 3. Click on Tools, Startup, and then the Context Menu.
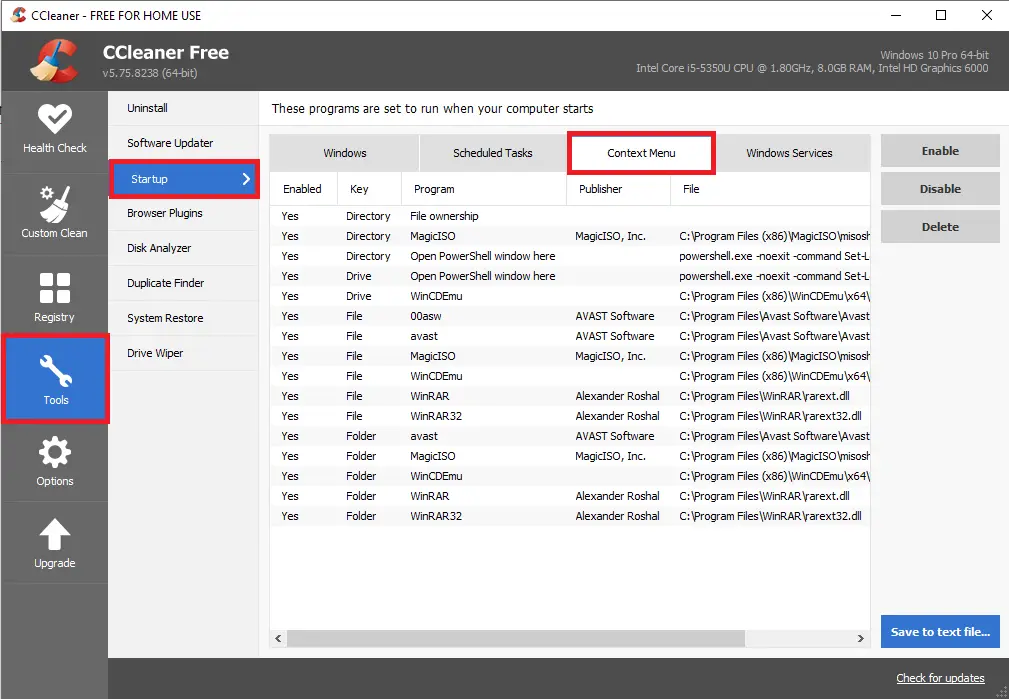
Step 4. From here, you can completely delete an entry from the context menu or disable the access so you can enable the same again at any time. One should note that deleting a program entry from the context menu doesn’t remove your system’s program. So, it is safe to use this feature.
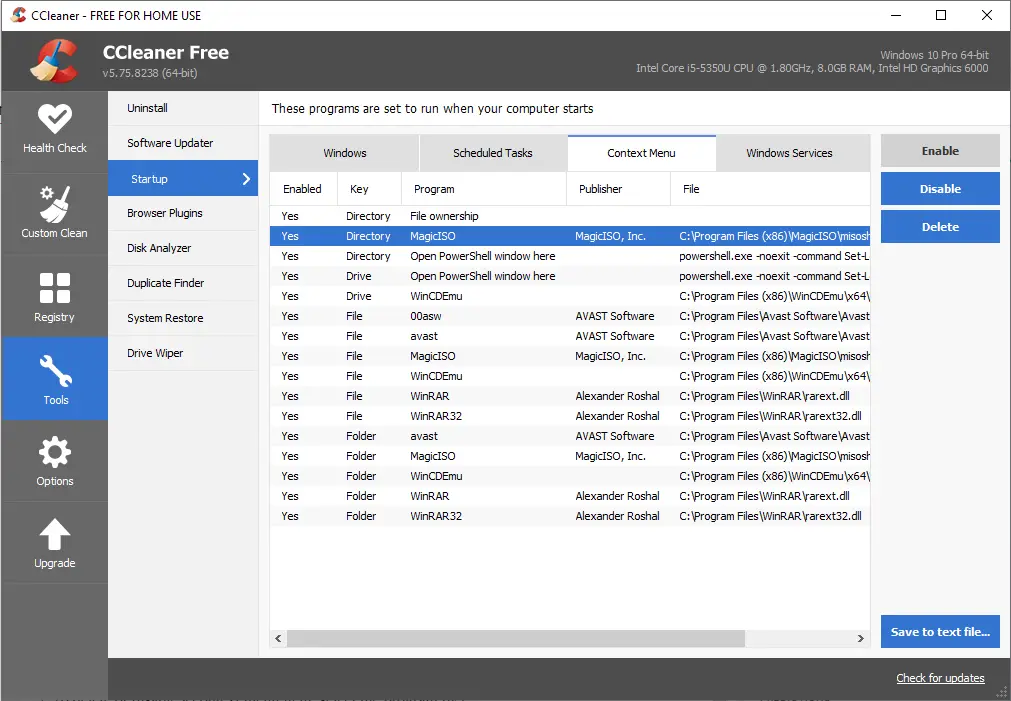
Step 5. To delete or disable a context menu item, select the program by clicking on them.
Step 6. Once you have selected the unwanted entry, you can click on Disable or Delete button, according to your need.
CCleaner is available for free and paid for both options. It is compatible with Windows XP/Vista/7/8/10/11 (32-bit and 64-bit).
Conclusion
In conclusion, CCleaner is a highly popular and effective program for cleaning and optimizing Windows PCs. It offers a range of features, including the ability to remove temporary files, web browsing history, unwanted files, and even unwanted context menus. With regular updates and continuous improvement, CCleaner has become one of the best free maintenance tools available online. Its user-friendly interface and ability to uninstall programs, manage startup programs, and optimize the registry make it a comprehensive solution for PC maintenance. Whether you want to clean up your system or remove unwanted right-click context menus, CCleaner provides a reliable and safe option for Windows users.
Very Helpful thanks for the information