Microsoft has rolled out the Windows 11 preview build to the Insiders with a lot of new features and upgrades over its predecessor. However, there is no straightforward way to stop or turn off the automatic updates in Windows 11. So if you want to prevent your Windows 11 from getting updated, you might prefer to use a third-party tool.
Windows 11/10 offers less control over the updating behavior of the operating system than previous versions of Windows. You can not permanently turn off Windows Updates using the Control Panel or Settings app in Windows 11/10. Once you are connected to the internet, it checks for updates periodically and automatically installs if they find any, whether you like it or not. Sometimes a buggy update changes the whole settings, or some of the features stop working. If you want control over the update process, you can disable the Windows Update service. This requires you to open the Services Manager, locate the Windows update service, and change its startup parameter and status. You would then have to enable the service again whenever you want the operating system to check for updates. Although you can enable or disable Windows updates from “services.msc,” it is a pretty convenient way for beginners.
Windows Update Blocker for Windows 11/10
“Windows Update Blocker” is a freeware tool from Sordum that helps you quickly enable or disable Windows updates. This free tool allows you to completely disable or enable Automatic Updates on your Windows system with just a click. This is a portable utility, which means that you can run it without installing it on your PC.
To enable or disable Windows Update on Windows 11/10, download this freeware application and extract its content using WinRAR or other archiver tools.
Note: A separate file is available for 32-bit and 64-bit operating systems, making sure you download the correct file.
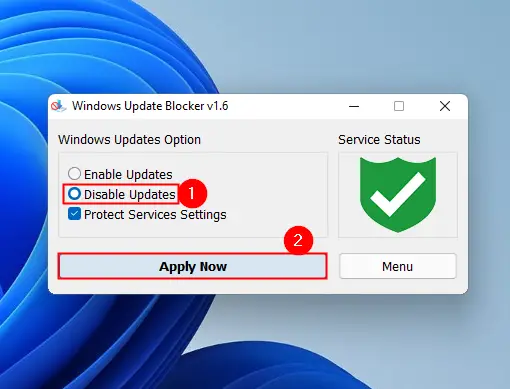
Now, double-click on the executable file to run it. To disable automatic updates, select Disable Updates and then click on the Apply Now button.
Now, you will notice that “Service Status” is turned red, which means you have successfully blocked the Windows Update service. To enable the Windows automatic update, rerun the app and select the Enable Updates option. Then click on the Apply Now button.
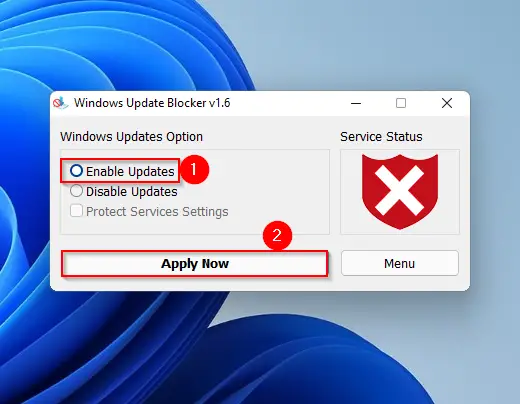
Now, the “Service Status” will turn green, which means the automatic update is successfully enabled.
Download Windows Update Blocker
Although Windows Update Blocker is compatible with Windows 10, Windows 8.1, Windows 8, Windows 7, Windows Vista, and Windows XP (32\64-bit), in our test, it is working fine on Windows 11, too. You can download this free and portable tool from its official website.
Those who don’t prefer to use a third-party tool can use the built-in methods. The built-in ways to disable the Windows 11 automatic update may be long, but they are still effective.
How to Permanently Disable Automatic Windows Updates through Windows Registry?
Windows Registry is an effective tool that allows configuring a lot of policies. This is basically for advanced users who know about the registry. A wrong modification in the registry values may make your Windows unbootable; hence, before proceeding with the steps, we recommend taking a full backup of the registry and creating a system restore point.
Windows Registry is the centralized database where Windows stores all its configurations and settings, including structures related to the update process. By altering the Registry settings, we can easily disable Windows Update permanently.
Step 1. Open the Registry Editor.
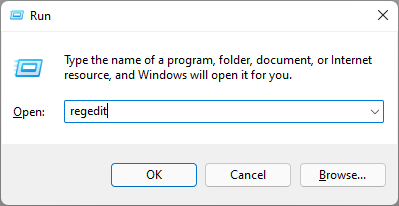
To open it, first press the Windows + R keys from the keyboard to access the Run dialog box. In the Run box, type regedit and then hit Enter from the keyboard.

Step 2. In the Registry Editor window that opens, navigate to the following key from the left side pane:-
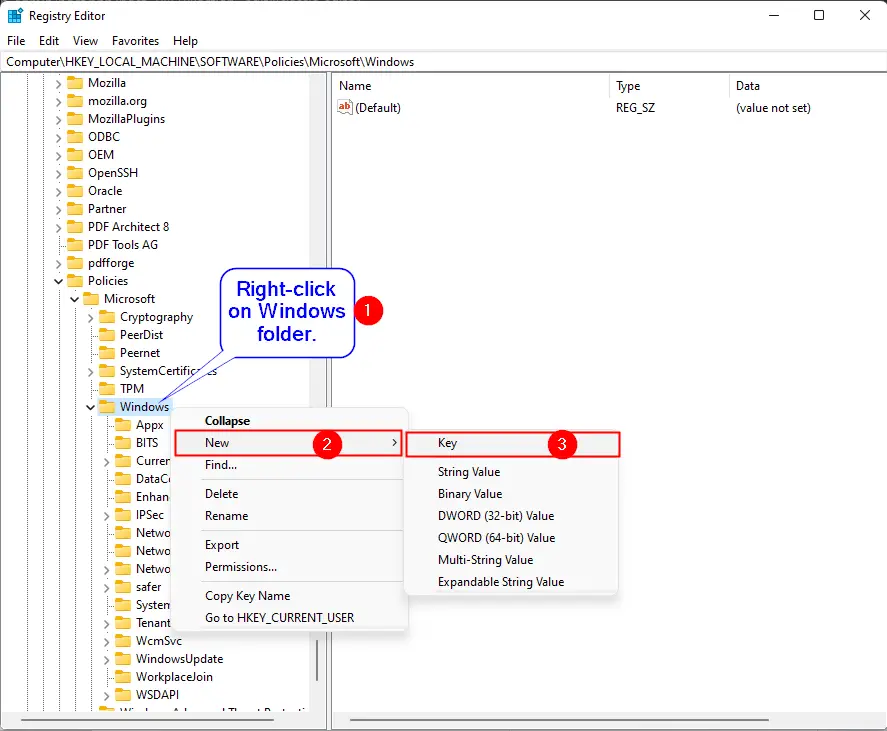
HKEY_LOCAL_MACHINE\SOFTWARE\Policies\Microsoft\Windows
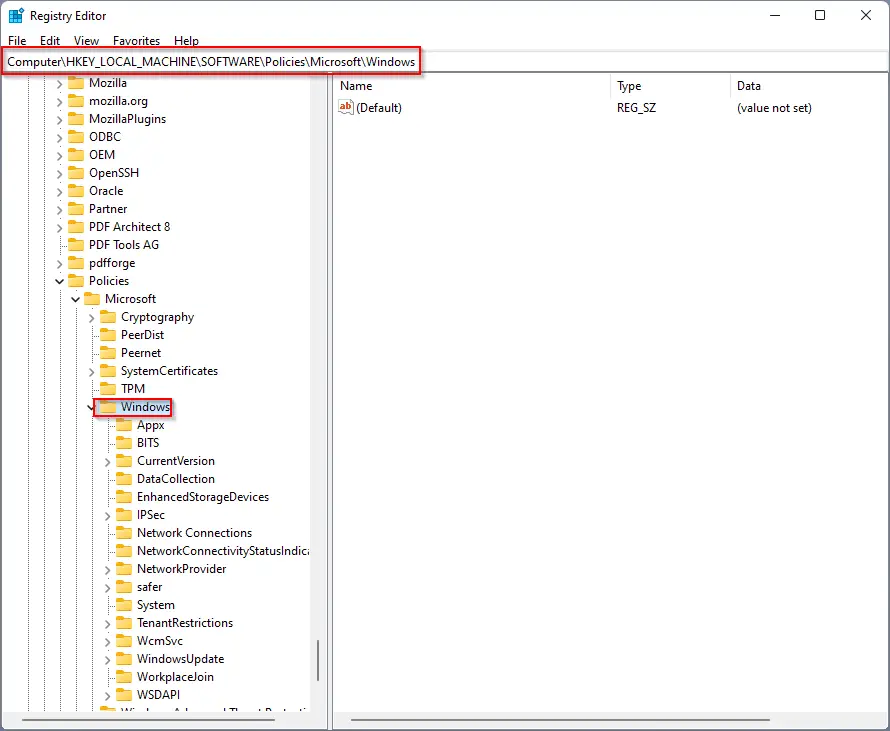
Step 3. Then right-click on the “Windows” folder and select the New > Key options from the context menu. Name the newly created key as WindowsUpdate. If this key already exists on your Windows PC, you can skip this step.
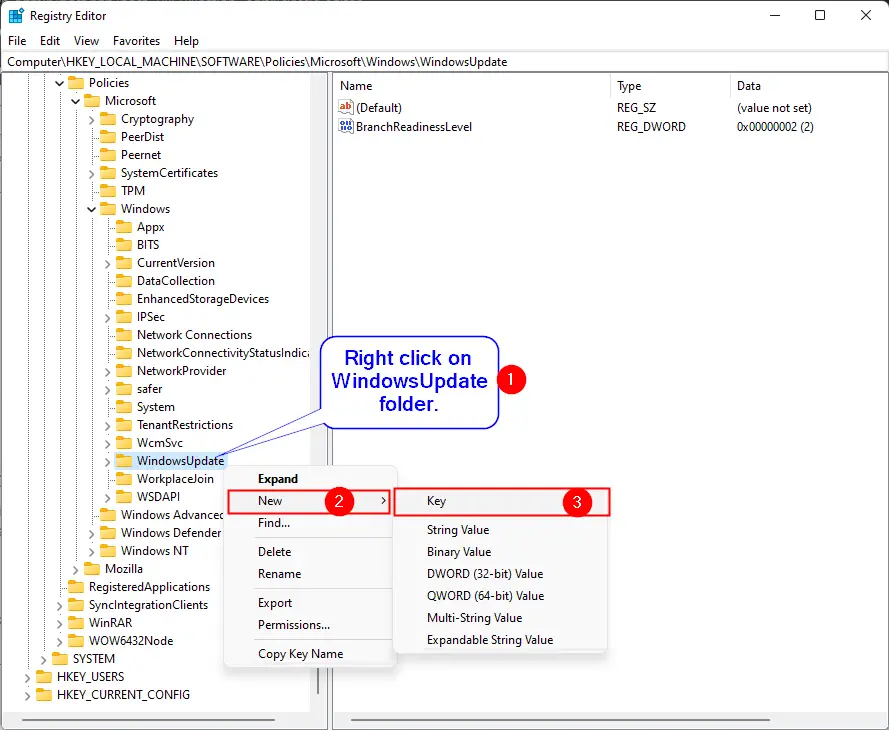
Step 4. Now, right-click on the “WindowsUpdate” key and then select the New > Key option. Name the newly created key as AU. You can skip this step also if the AU folder already exists under “WindowsUpdate.”
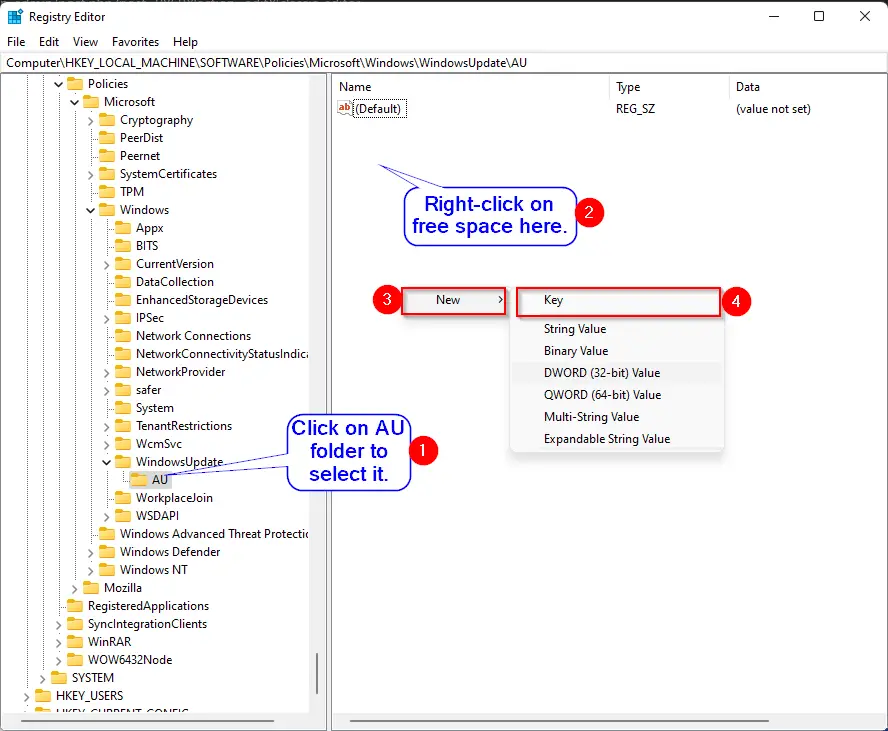
Step 5. Now select the AU folder by clicking on it, and on the right side pane, right-click on free space, select New, and then the DWORD (32-bit) Value option. Name it to NoAutoUpdate.
Step 6. Now double-click on the “NoAutoUpdate” DWORD on the right side pane and change its value from “0” to “1.”

Step 7. Click OK.
Step 8. Reboot your PC.
Once you execute the above steps, the automatic Windows update process is disabled on your computer. However, you can always check updates manually from Settings > Windows Update.
In the future, if you wish to continue with automatic update of Windows 11, open the registry editor and then navigate to the following key:-
Computer\HKEY_LOCAL_MACHINE\SOFTWARE\Policies\Microsoft\Windows\WindowsUpdate\AU
Now, double-click on the NoAutoUpdate on the right side pane of the “AU” folder and set its “Value data” to “0.” That’s it. Windows automatic update is enabled on your computer.
How to Enable or Disable Automatic Windows Update using Command Prompt?
Using Command Prompt, you can enable or disable the automatic Windows update. To do that, use the following procedures:-
Step 1. Open the elevated command prompt.
Step 2. In the administrative command prompt, copy and paste the following texts:-
To disable Windows automatic update:-
sc config wuauserv start= disabled
To enable Windows automatic update:-
sc config wuauserv start= auto
You can quickly enable or disable Windows automatic update services using the above commands according to your needs.
How to Turn On or Turn Off Automatic Windows Update via Services?
Microsoft uses the Windows Update service to check for updates and then download & install if new updates are available to your Windows operating system. If you disable this service, Windows will stop checking for the latest updates. Enabling this service will invoke automatic updates on your PC.
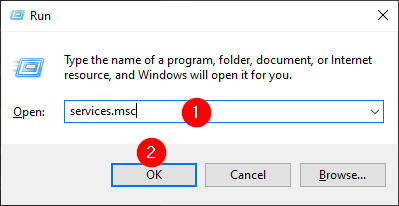
Step 1. Call the Run dialog box by pressing the Windows + R key from the keyboard.
Step 2. In the Run box that opens, type services.msc and then hit Enter from the keyboard or click the OK button.
Step 3. In the “Services” window that appears after doing the above steps, find Windows Update from the list of services. Now, please double-click on it to open its Properties dialog box.
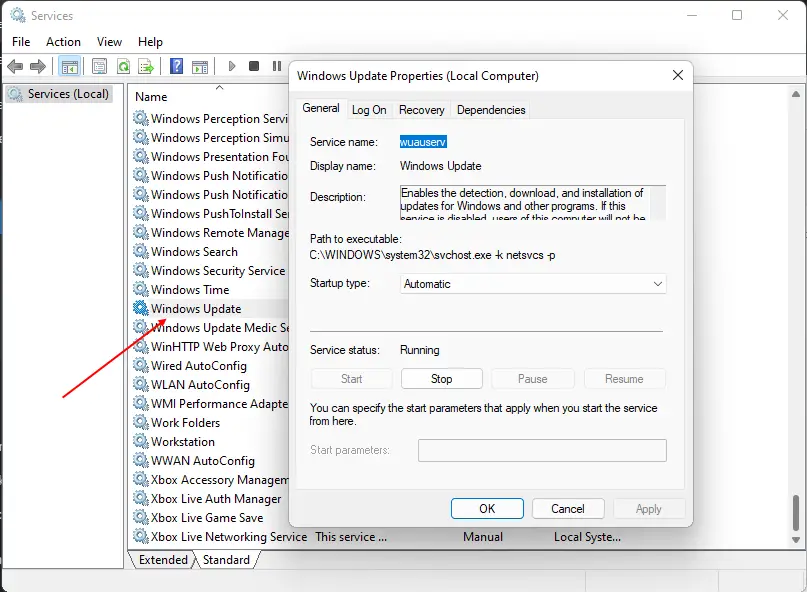
Step 4. On the “Windows Update Properties” dialog box, select Disabled from the “Startup type” drop-down menu.
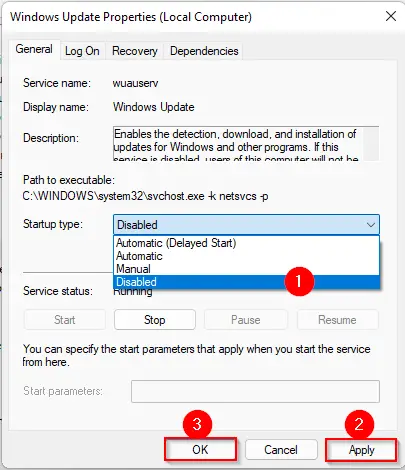
Step 5. Click Apply/OK.
After performing the above steps, Windows Update is disabled on your PC. If you would like to start it again, repeat the above steps, and in step 4, select the Automatic option from the “Startup type” drop-down menu. Then click Apply/OK.
How to Allow or Disallow Automatic Windows Update through Group Policy?
Using Group Policy on Windows 11, you can permanently disable the Windows update service.
Step 1. Open the Local Group Policy Editor.
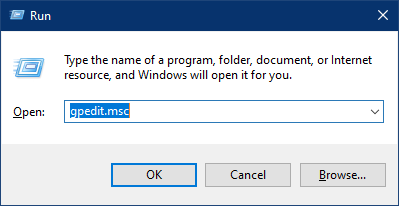
To do that, first launch the Run dialog box by pressing the Windows + R keys from the keyboard. Now type gpedit.msc in the Run box and then hit Enter from the keyboard.
Step 2. Navigate to the following path under the Local Group Policy Editor window:-
Computer Configuration > Administrative Templates > Windows Components > Windows Update > Manage end user experience
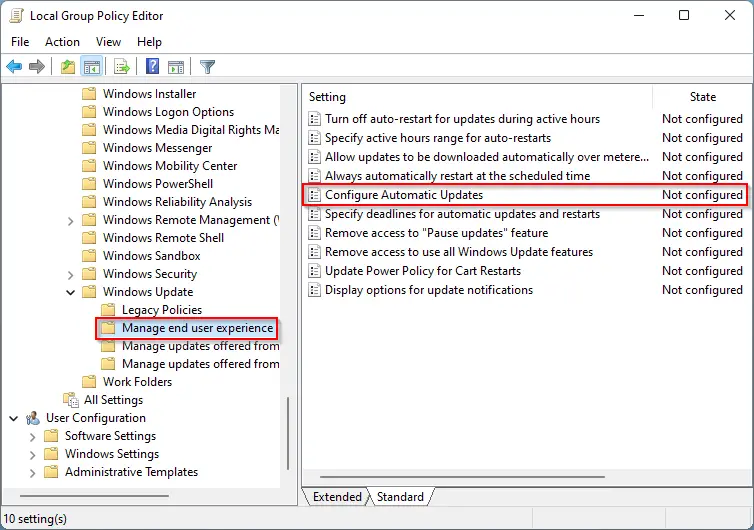
Step 3. On the right side of the “Manage end user experience” folder, double-click on the policy name Configure Automatic Updates.
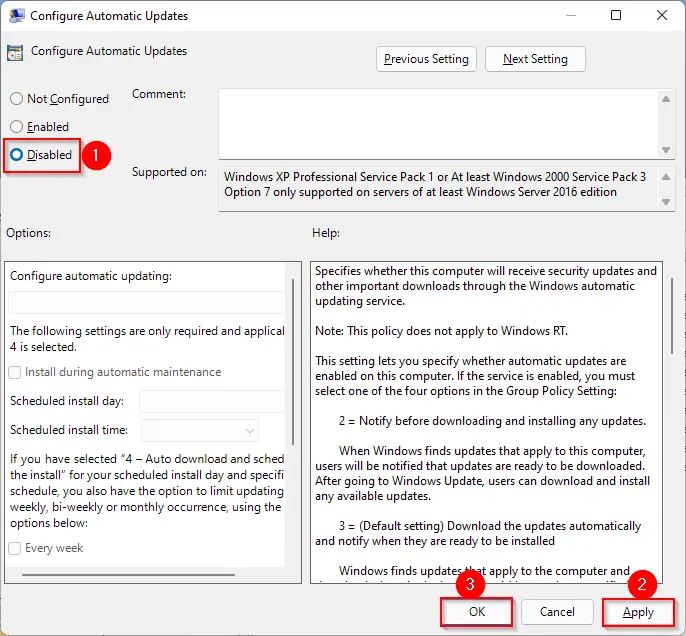
Step 4. Select the Disabled option.
Step 5. Click Apply.
Step 6. Click OK.
Step 7. Reboot your computer.
Now, you have completely turned off Windows automatic updates. If you wish to start it, repeat the above steps, and in step 4, select the Not Configured option.
Conclusion
In conclusion, Microsoft has launched Windows 11 with various new features and updates compared to its predecessor, but there is no direct way to turn off automatic updates in Windows 11. Third-party tools like Windows Update Blocker are available to disable or enable Windows updates with a click. Inbuilt methods are also effective in disabling Windows 11 automatic updates, but they may be lengthy. Advanced users can use Windows Registry to disable automatic updates permanently, but this should be done with caution, as modifying the registry can cause a system failure. Using the Command Prompt, users can enable or disable automatic updates in Windows 11. It is always recommended to create a system restore point or take a full registry backup before proceeding with any changes.