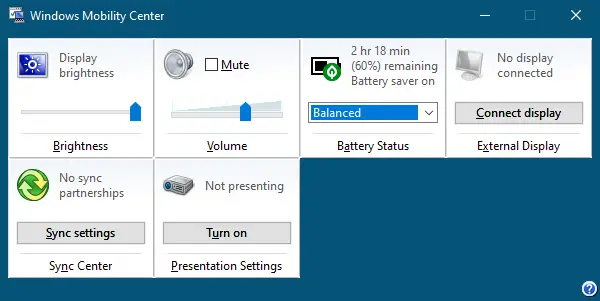
Windows 11/10 comes with a built-in feature for laptops that is called Windows Mobility Center. It allows you to instantly access or adjust the display brightness, mute or adjust volume, view and change Power Plans, view the remaining battery percentage, set Sync Settings, and connect to an external display. For some reason, if you wish to disable or remove it from your Windows PC altogether, Microsoft offers a built-in option to do the same. This means there is no need to use a third-party tool to remove the Windows Mobility Center in Windows 11/10.
This post will share at least two ways to prevent access to Windows Mobility Center on Windows 11 or 10 for all users. These are the following:-
- Enable or Disable Windows Mobility Center using Group Policy Editor
- Turn On or Off Windows Mobility Center via Windows Registry
How to Enable or Disable Windows Mobility Center in Windows 11 or 10 using Group Policy Editor?
Gentle Reminder: Local Group Policy Editor is not a part of the Windows 10 Home edition; if you are still using the Windows 10 Home edition operating system, you need to enable gpedit.msc.
To turn on or off Windows Mobility Center in Windows 11/10 using Group Policy Editor, perform the following recommended steps:-
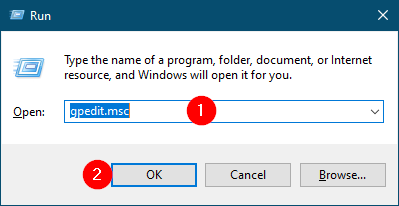
Step 1. Press the Windows logo + R keys simultaneously to open the Run dialog box.
Step 2. In the Run box, type the following and hit Enter from the keyboard to open Local Group Policy Editor windows:-
gpedit.msc
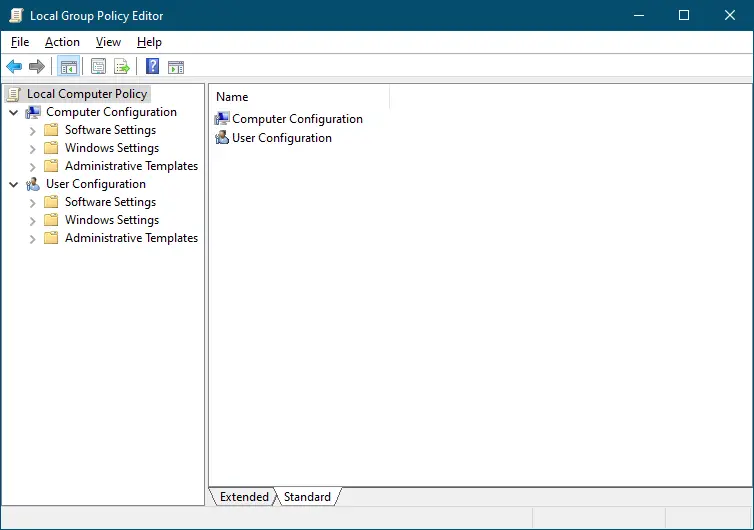
Step 3. In the Local Group Policy Editor, navigate or browse for the following path from the left side pane:-
Computer Configuration > Administrative Templates > Windows Components > Windows Mobility Center
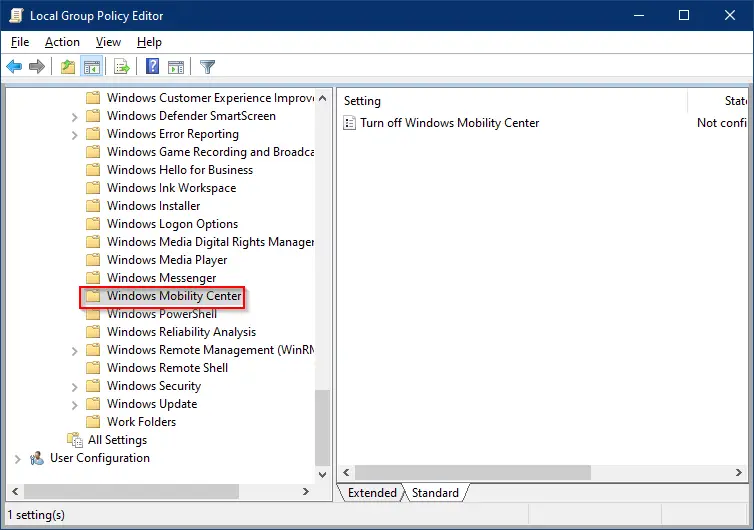
Step 4. On the right-hand section of Windows Mobility Center, double-click on the policy “Turn off Windows Mobility Center.”
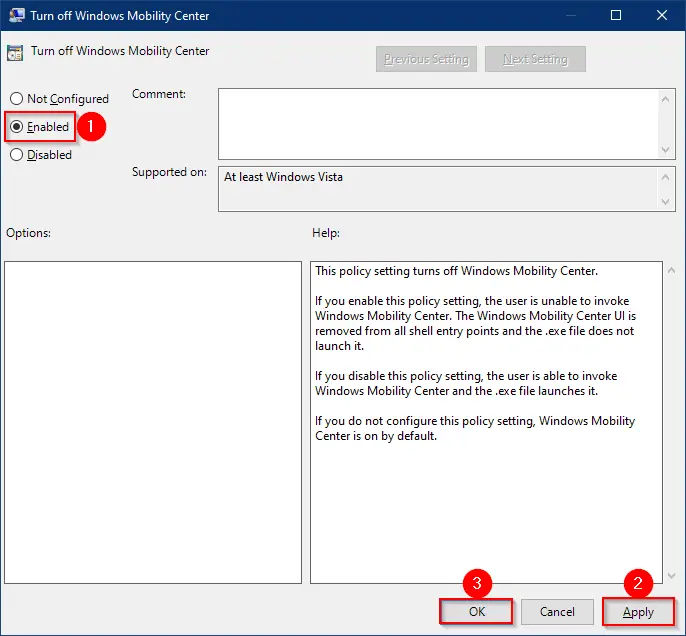
Step 5. Select Enabled.
Step 6. Click Apply.
Step 7. Click OK.
The policy will be applied immediately, which means there is no need to restart your PC.
If you change your mind and want to enable Windows Mobility Center, repeat the above steps and, in step 5, select the Not Configured option.
How to Turn On or Off Windows Mobility Center in Windows 11 or 10 via Windows Registry?
Gentle Reminder: Editing Windows Registry may damage your Windows installation; hence we recommend taking a full backup of the Registry and creating a system restore point. If something goes wrong, you can revert your PC to a previous working state.
To enable or disable Windows Mobility Center in Windows 11 or 10 via Windows Registry, use these steps:-
Step 1. Click on the Start button and type regedit.

Step 2. In the top search results, click on the Registry Editor entry to open the Registry Editor window.

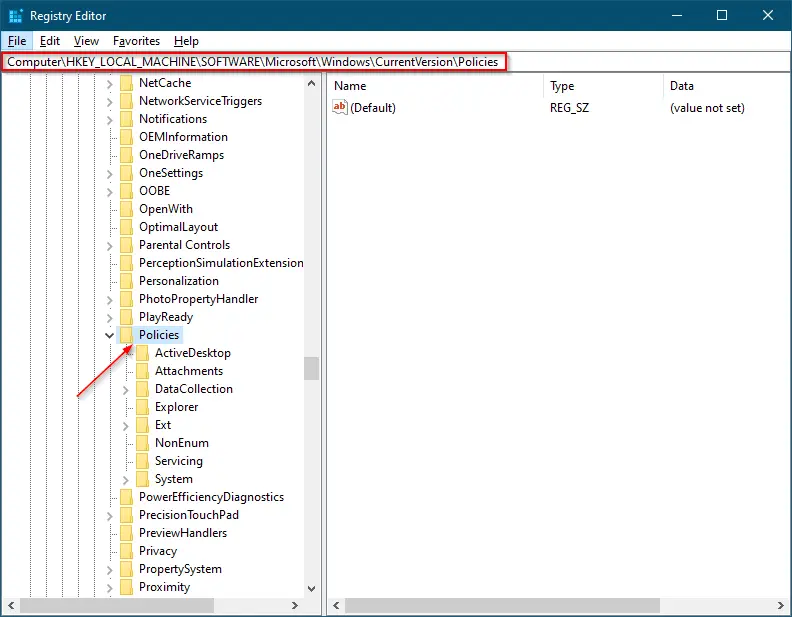
Step 3. In the Registry Editor window that opens, navigate or browse for the following key:-
Computer\HKEY_LOCAL_MACHINE\SOFTWARE\Microsoft\Windows\CurrentVersion\Policies
Step 4. Right-click on the Policies folder, select New, and then Key.
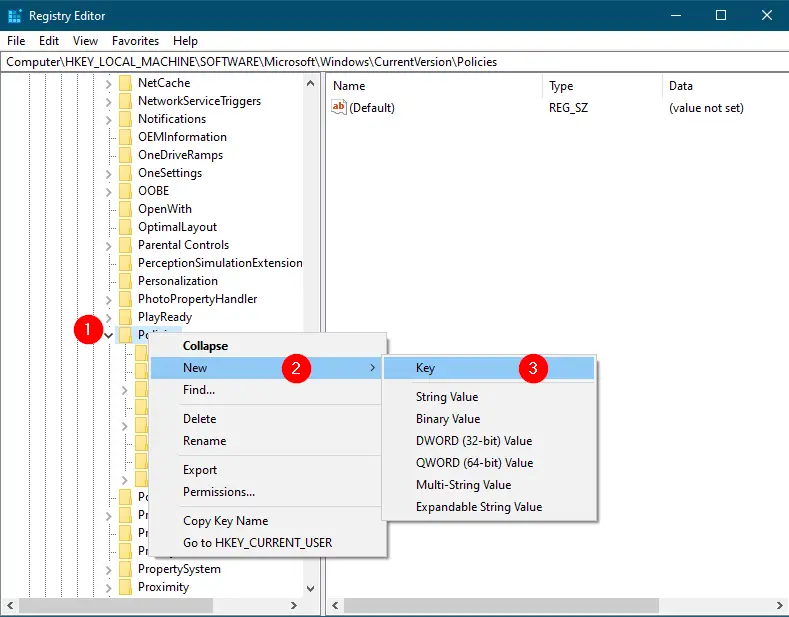
Step 5. Rename the newly created key as MobilityCenter.
Step 6. Now, perform a right-click on the MobilityCenter folder, select New, and then DWORD (32-bit) Value.
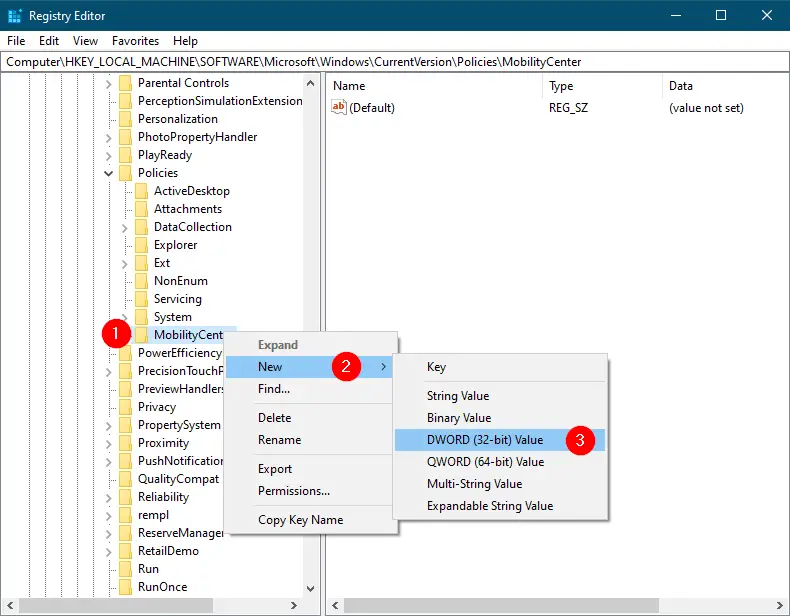
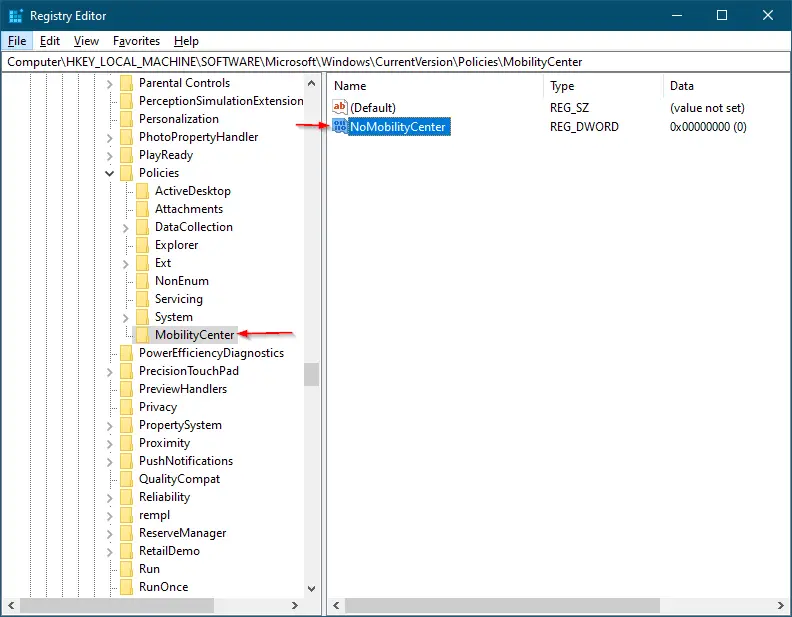
Step 7. Rename the newly created DWORD (32-bit) Value as NoMobilityCenter.
Step 8. On the right side pane of MobilityCenter, double-click on the NoMobilityCenter and change its Value data from 0 to 1.
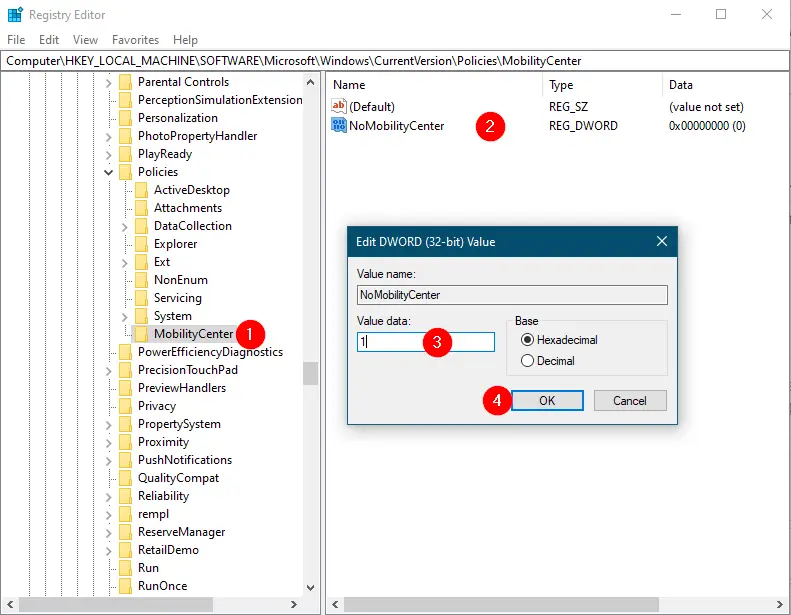
Step 9. Click OK.
Step 10. Reboot your computer or laptop.
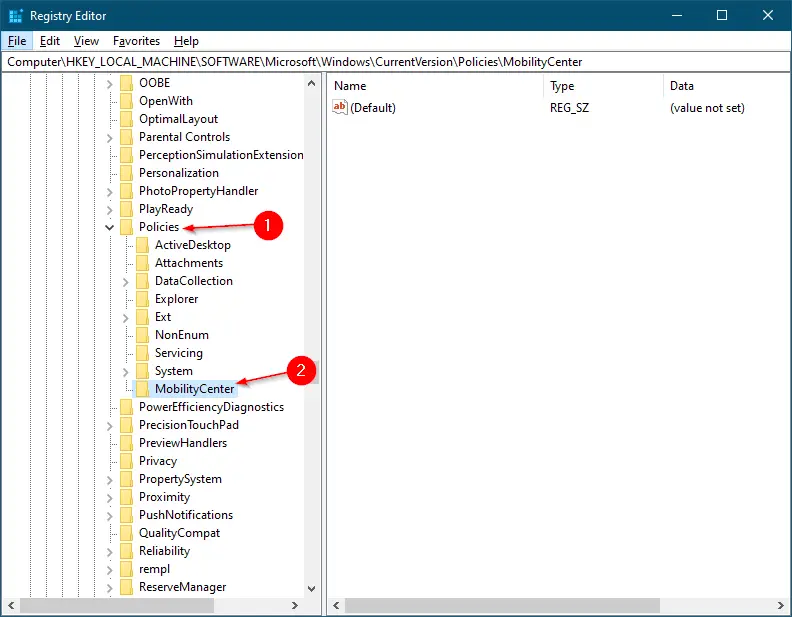
Now, you will not be able to open the Windows Mobility Center in Windows 11 or 10. If you want to enable it again, navigate to the following key:-
Computer\HKEY_LOCAL_MACHINE\SOFTWARE\Microsoft\Windows\CurrentVersion\Policies\MobilityCenter
On the right side of MobilityCenter, double-click on NoMobilityCenter and change its Value data from 1 to 0. Restart your computer or laptop, and you have done it.
Conclusion
In conclusion, Windows Mobility Center is a useful built-in feature in Windows 11/10 that allows users to easily adjust settings related to display brightness, volume, power plans, battery percentage, sync settings, and external display connectivity. However, if you want to prevent access to this feature for all users, there are two methods to do so: using Group Policy Editor or Windows Registry. It is important to note that editing the Registry can potentially damage your Windows installation, so it is recommended to take a full backup and create a system restore point before making any changes. By following the steps outlined in this post, users can easily enable or disable Windows Mobility Center according to their preferences.