Microsoft Word is a powerful word-processing tool that offers a wide range of formatting options. One of the most convenient features is the Styles Gallery, which allows users to apply predefined formatting styles to their documents. However, there might be instances when you need a style that is not available in the default Styles Gallery. In such cases, you can create and add your own custom styles. This gearupwindows article will guide you through the process of adding a new style to the Styles Gallery in Microsoft Word.
Why Customize Styles?
Customizing styles in Microsoft Word can save you time, maintain document consistency, and enhance the overall appearance of your documents. Whether you need to create a custom heading style for your organization’s reports or develop a unique style for your academic papers, knowing how to add a new style to the Styles Gallery is a valuable skill.
How to Add a New Style to Styles Gallery in Word?
Here’s a step-by-step guide on how to do it:-
Step 1. Launch Microsoft Word and open the document you want to add the new style to or create a new document.
Step 2. The Styles Gallery can be found in the “Home” tab on the ribbon. It is located in the “Styles” group.
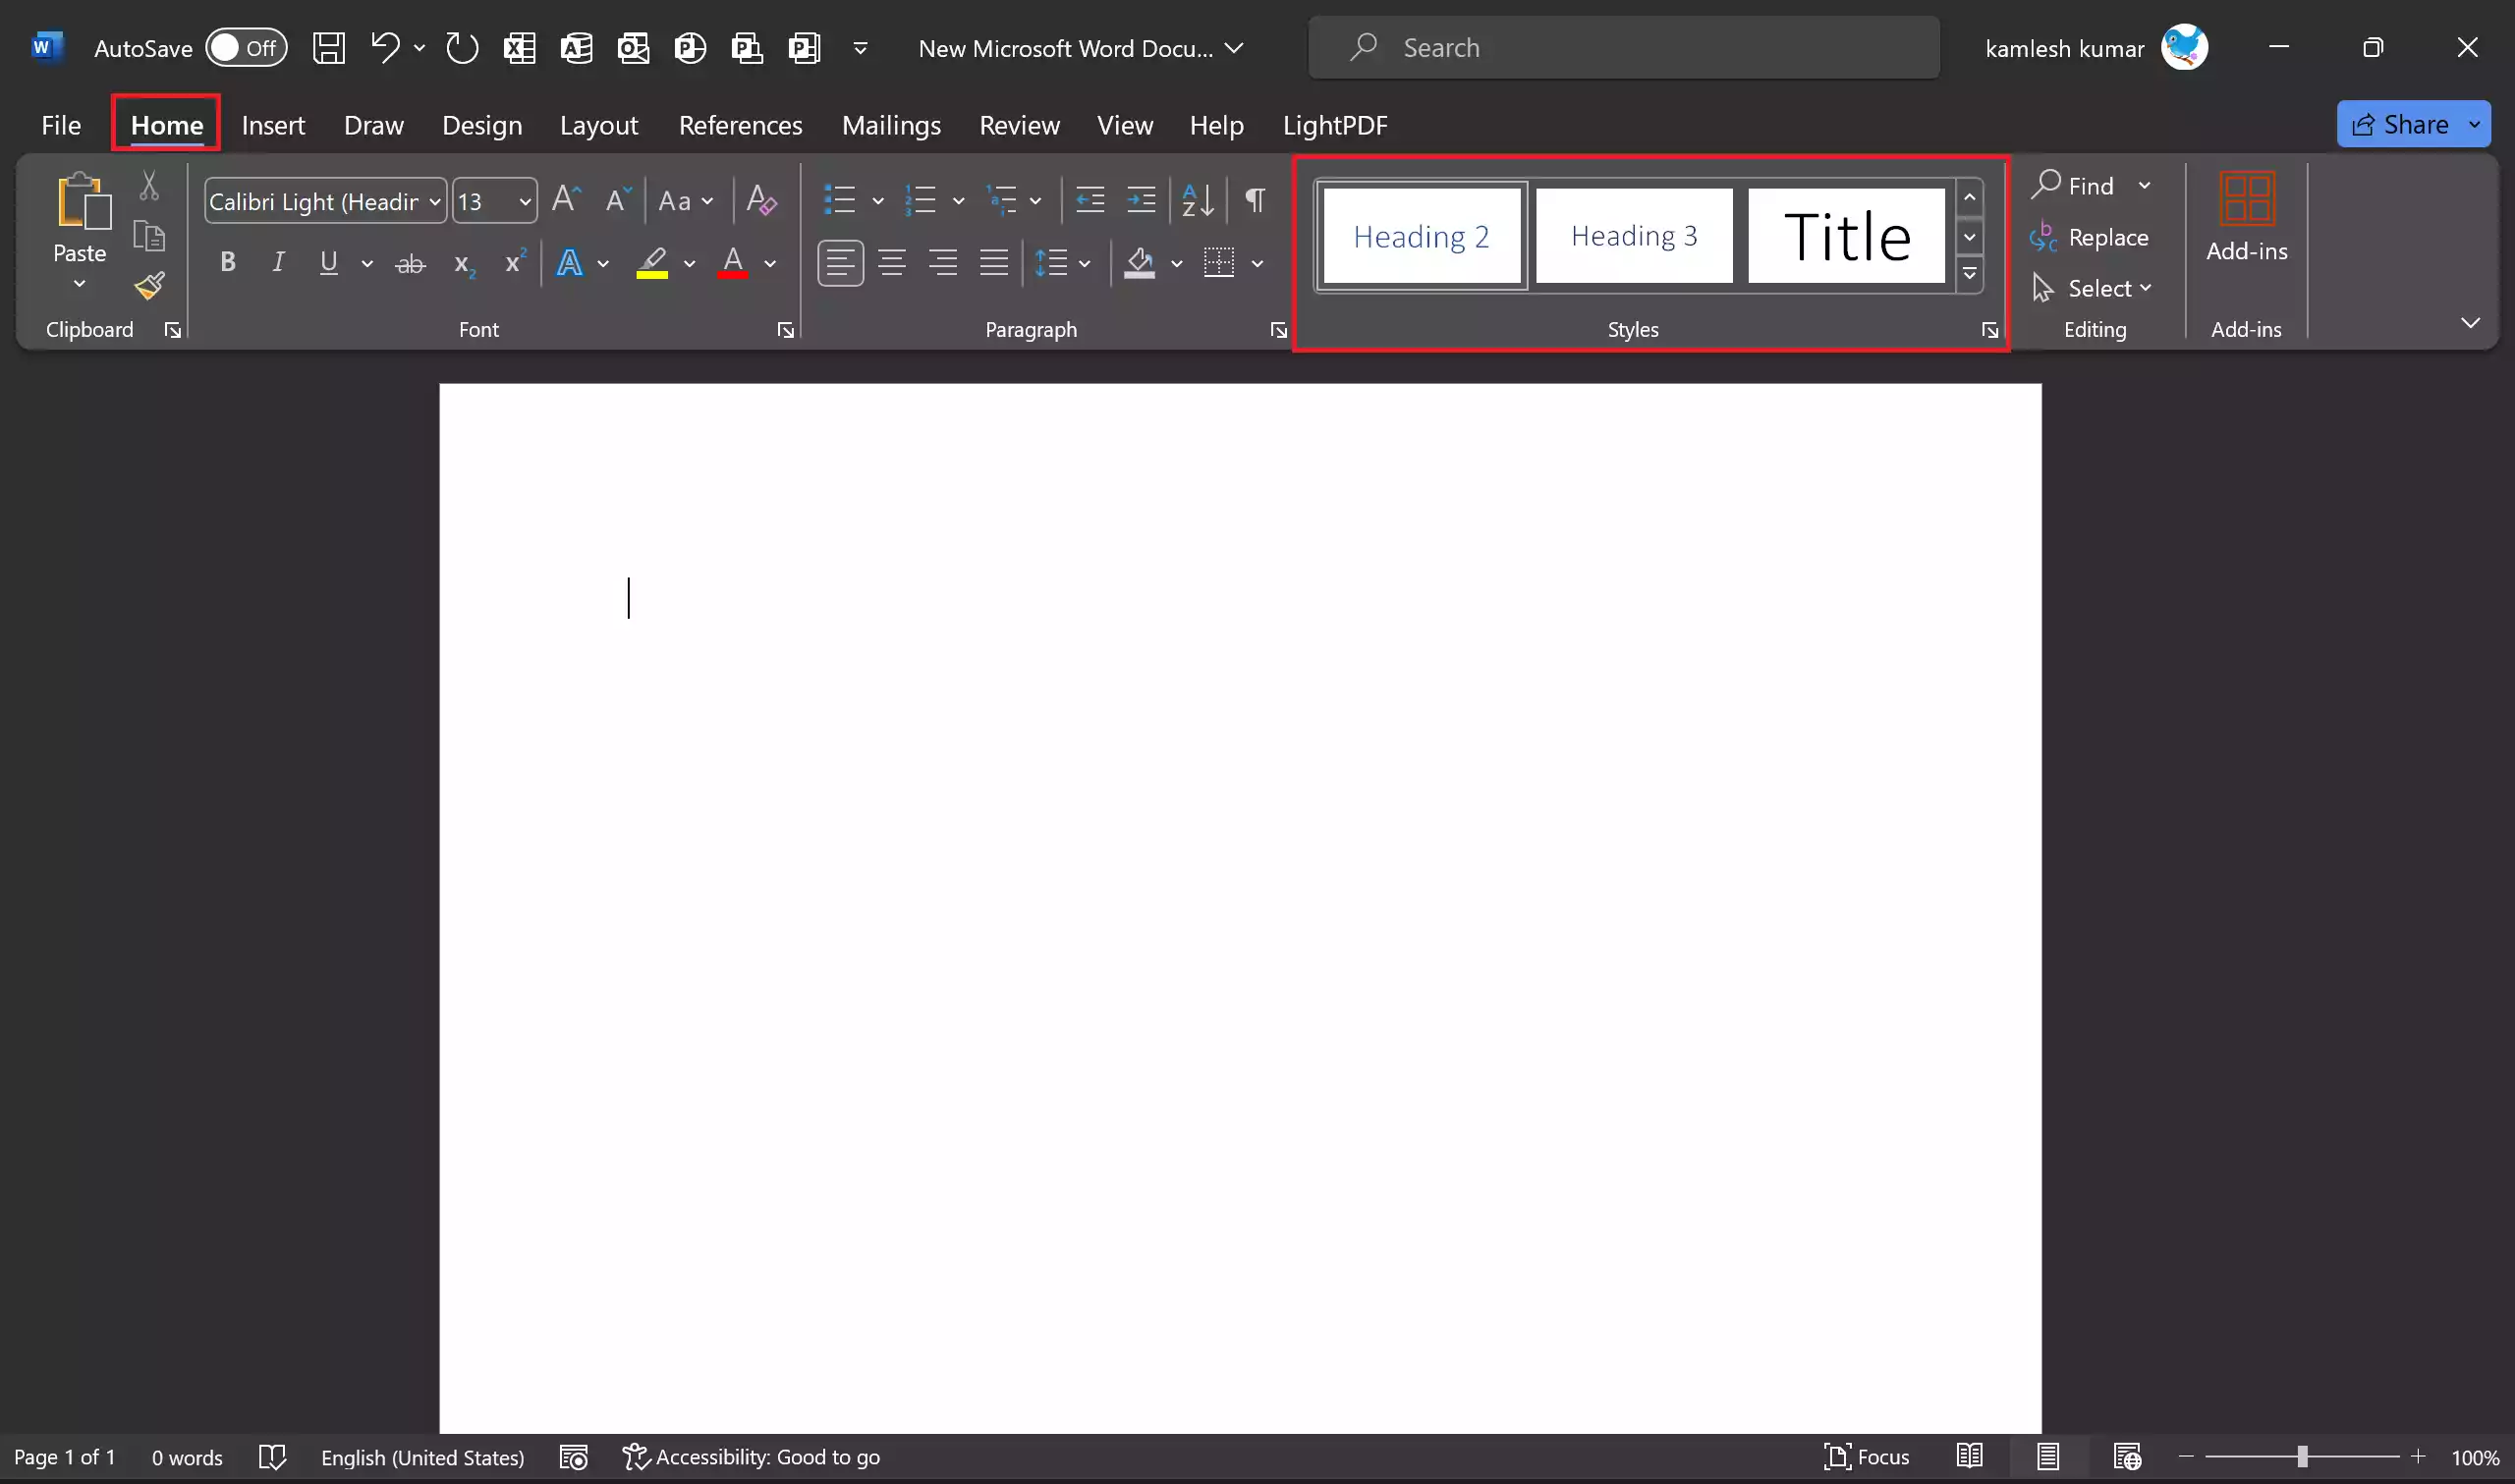
Step 3. To manage and add new styles, you need to access the Styles Pane. Click on the small arrow in the bottom right corner of the Styles group. This will open the Styles Pane on the right-hand side of your Word window.

Step 4. To add a new style, locate and click on the “New Style” button at the bottom of the Styles Pane. This action will open the “Create New Style from Formatting” dialog box.
Step 5. In the “Create New Style from Formatting” dialog box, you can start customizing your new style. The first step is to provide a name for your style. Choose a descriptive name that reflects the purpose of the style.
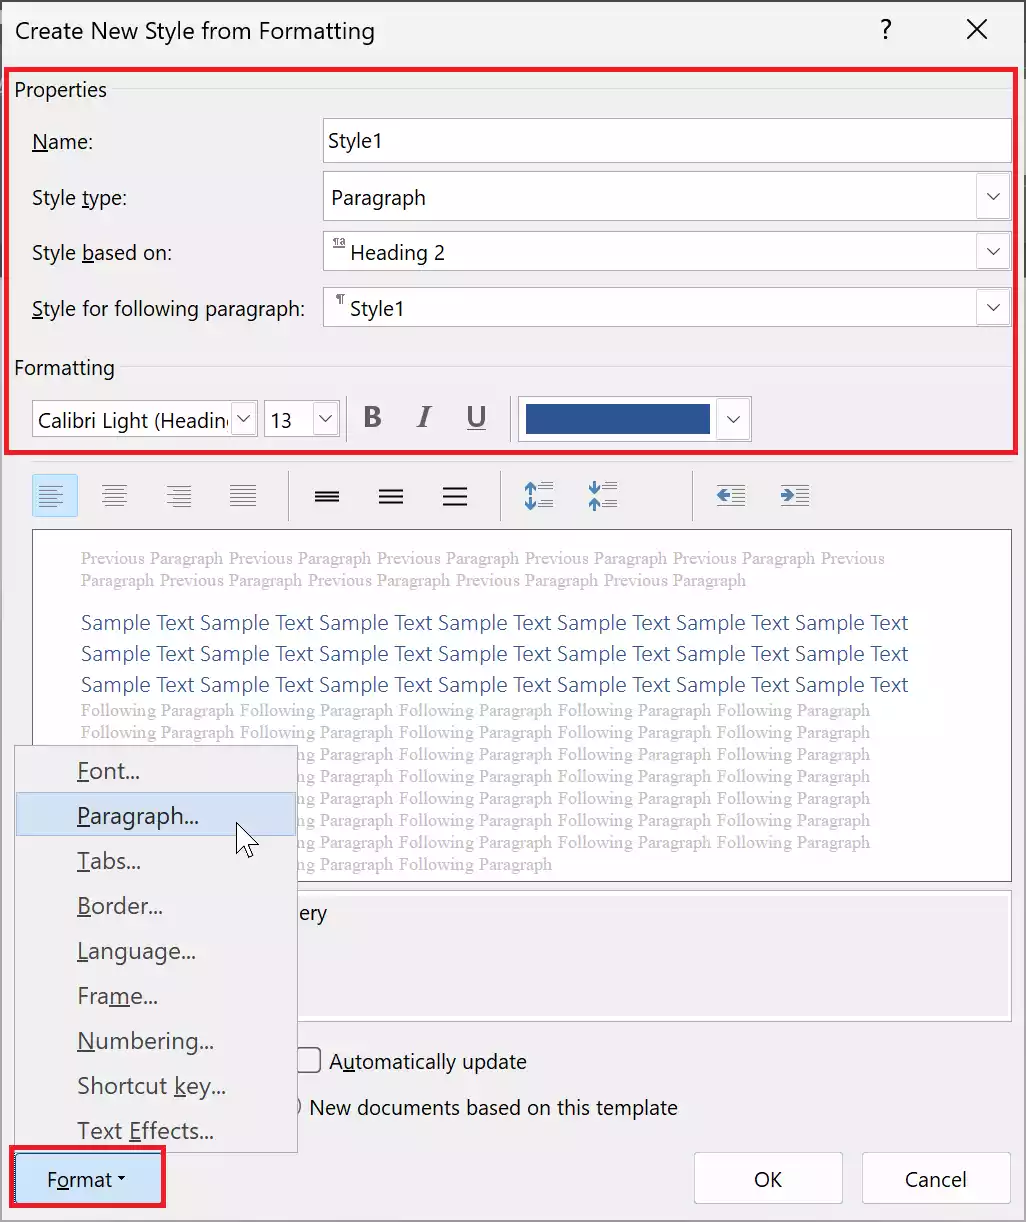
Step 6. Next, you can format your style by specifying the font, size, color, alignment, and other formatting options. Use the options in the dialog box to make the changes you want. You can also base your new style on an existing style for a consistent look.
Step 7. If your style involves paragraph formatting, click the “Format” button in the dialog box and select “Paragraph.” Here, you can adjust line spacing, indentation, and other paragraph-level settings.
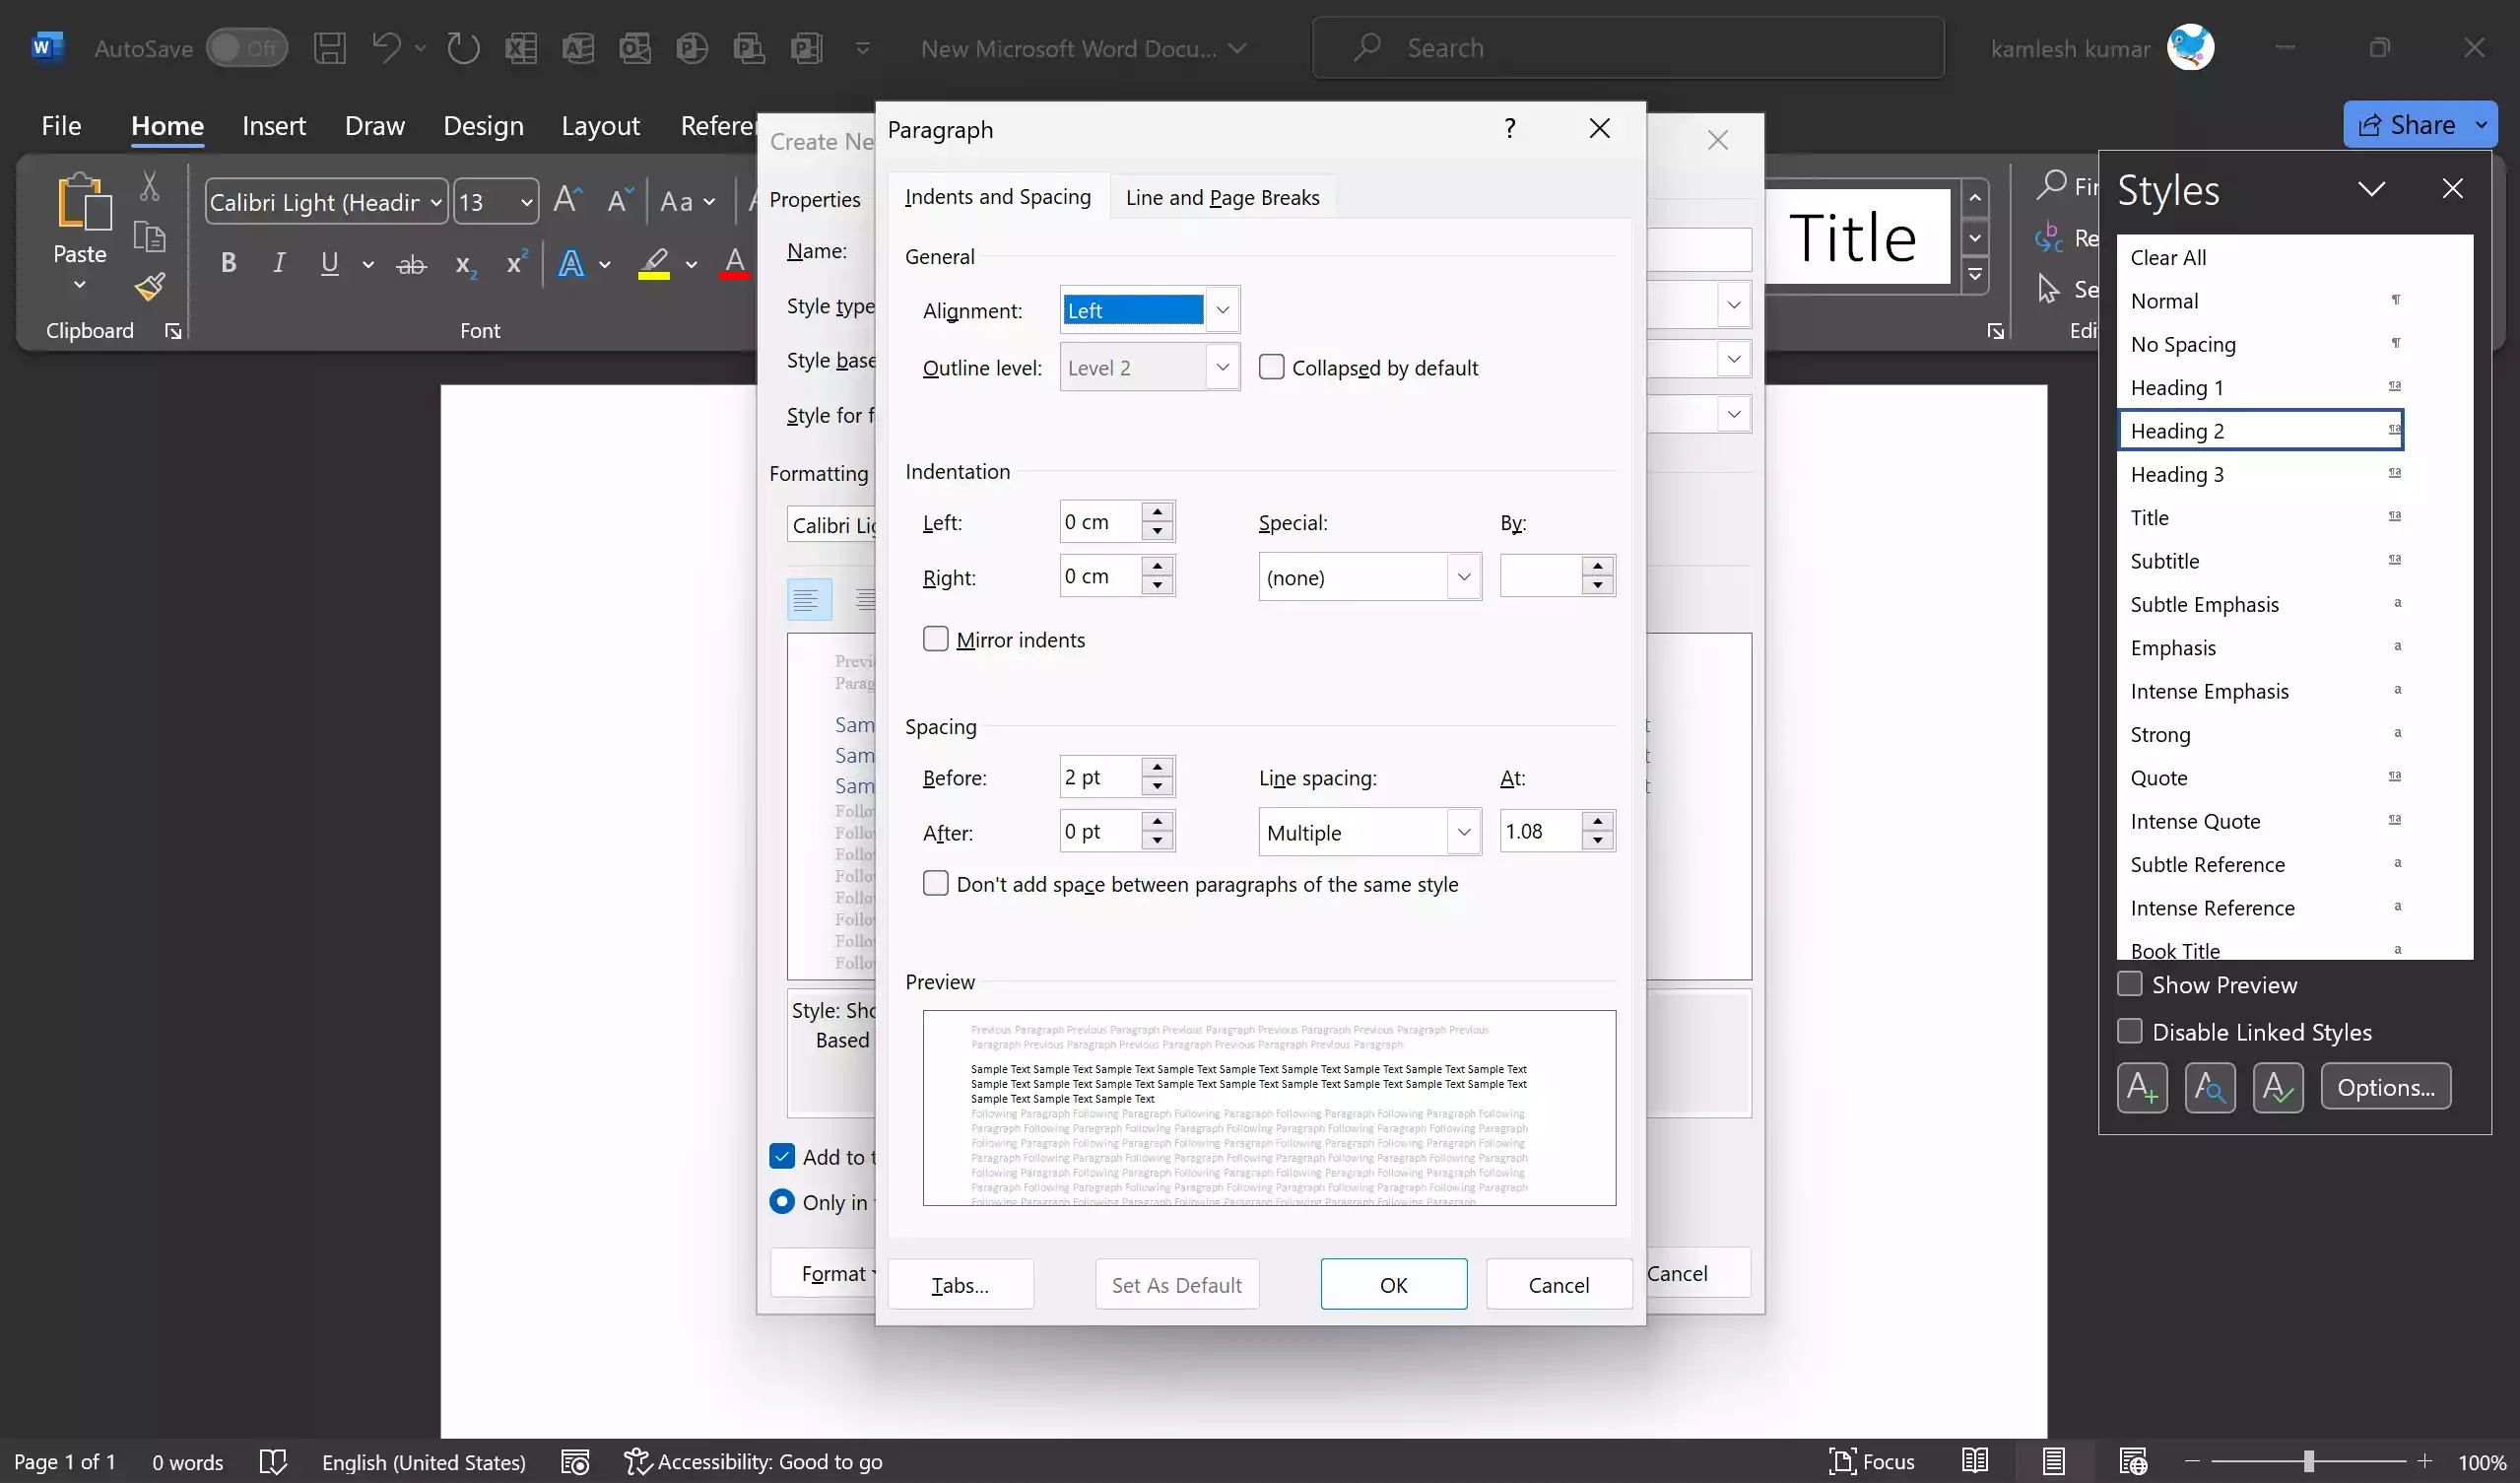
Step 8. In the same “Format” menu, you can configure additional options like borders, shading, and numbering for your custom style.
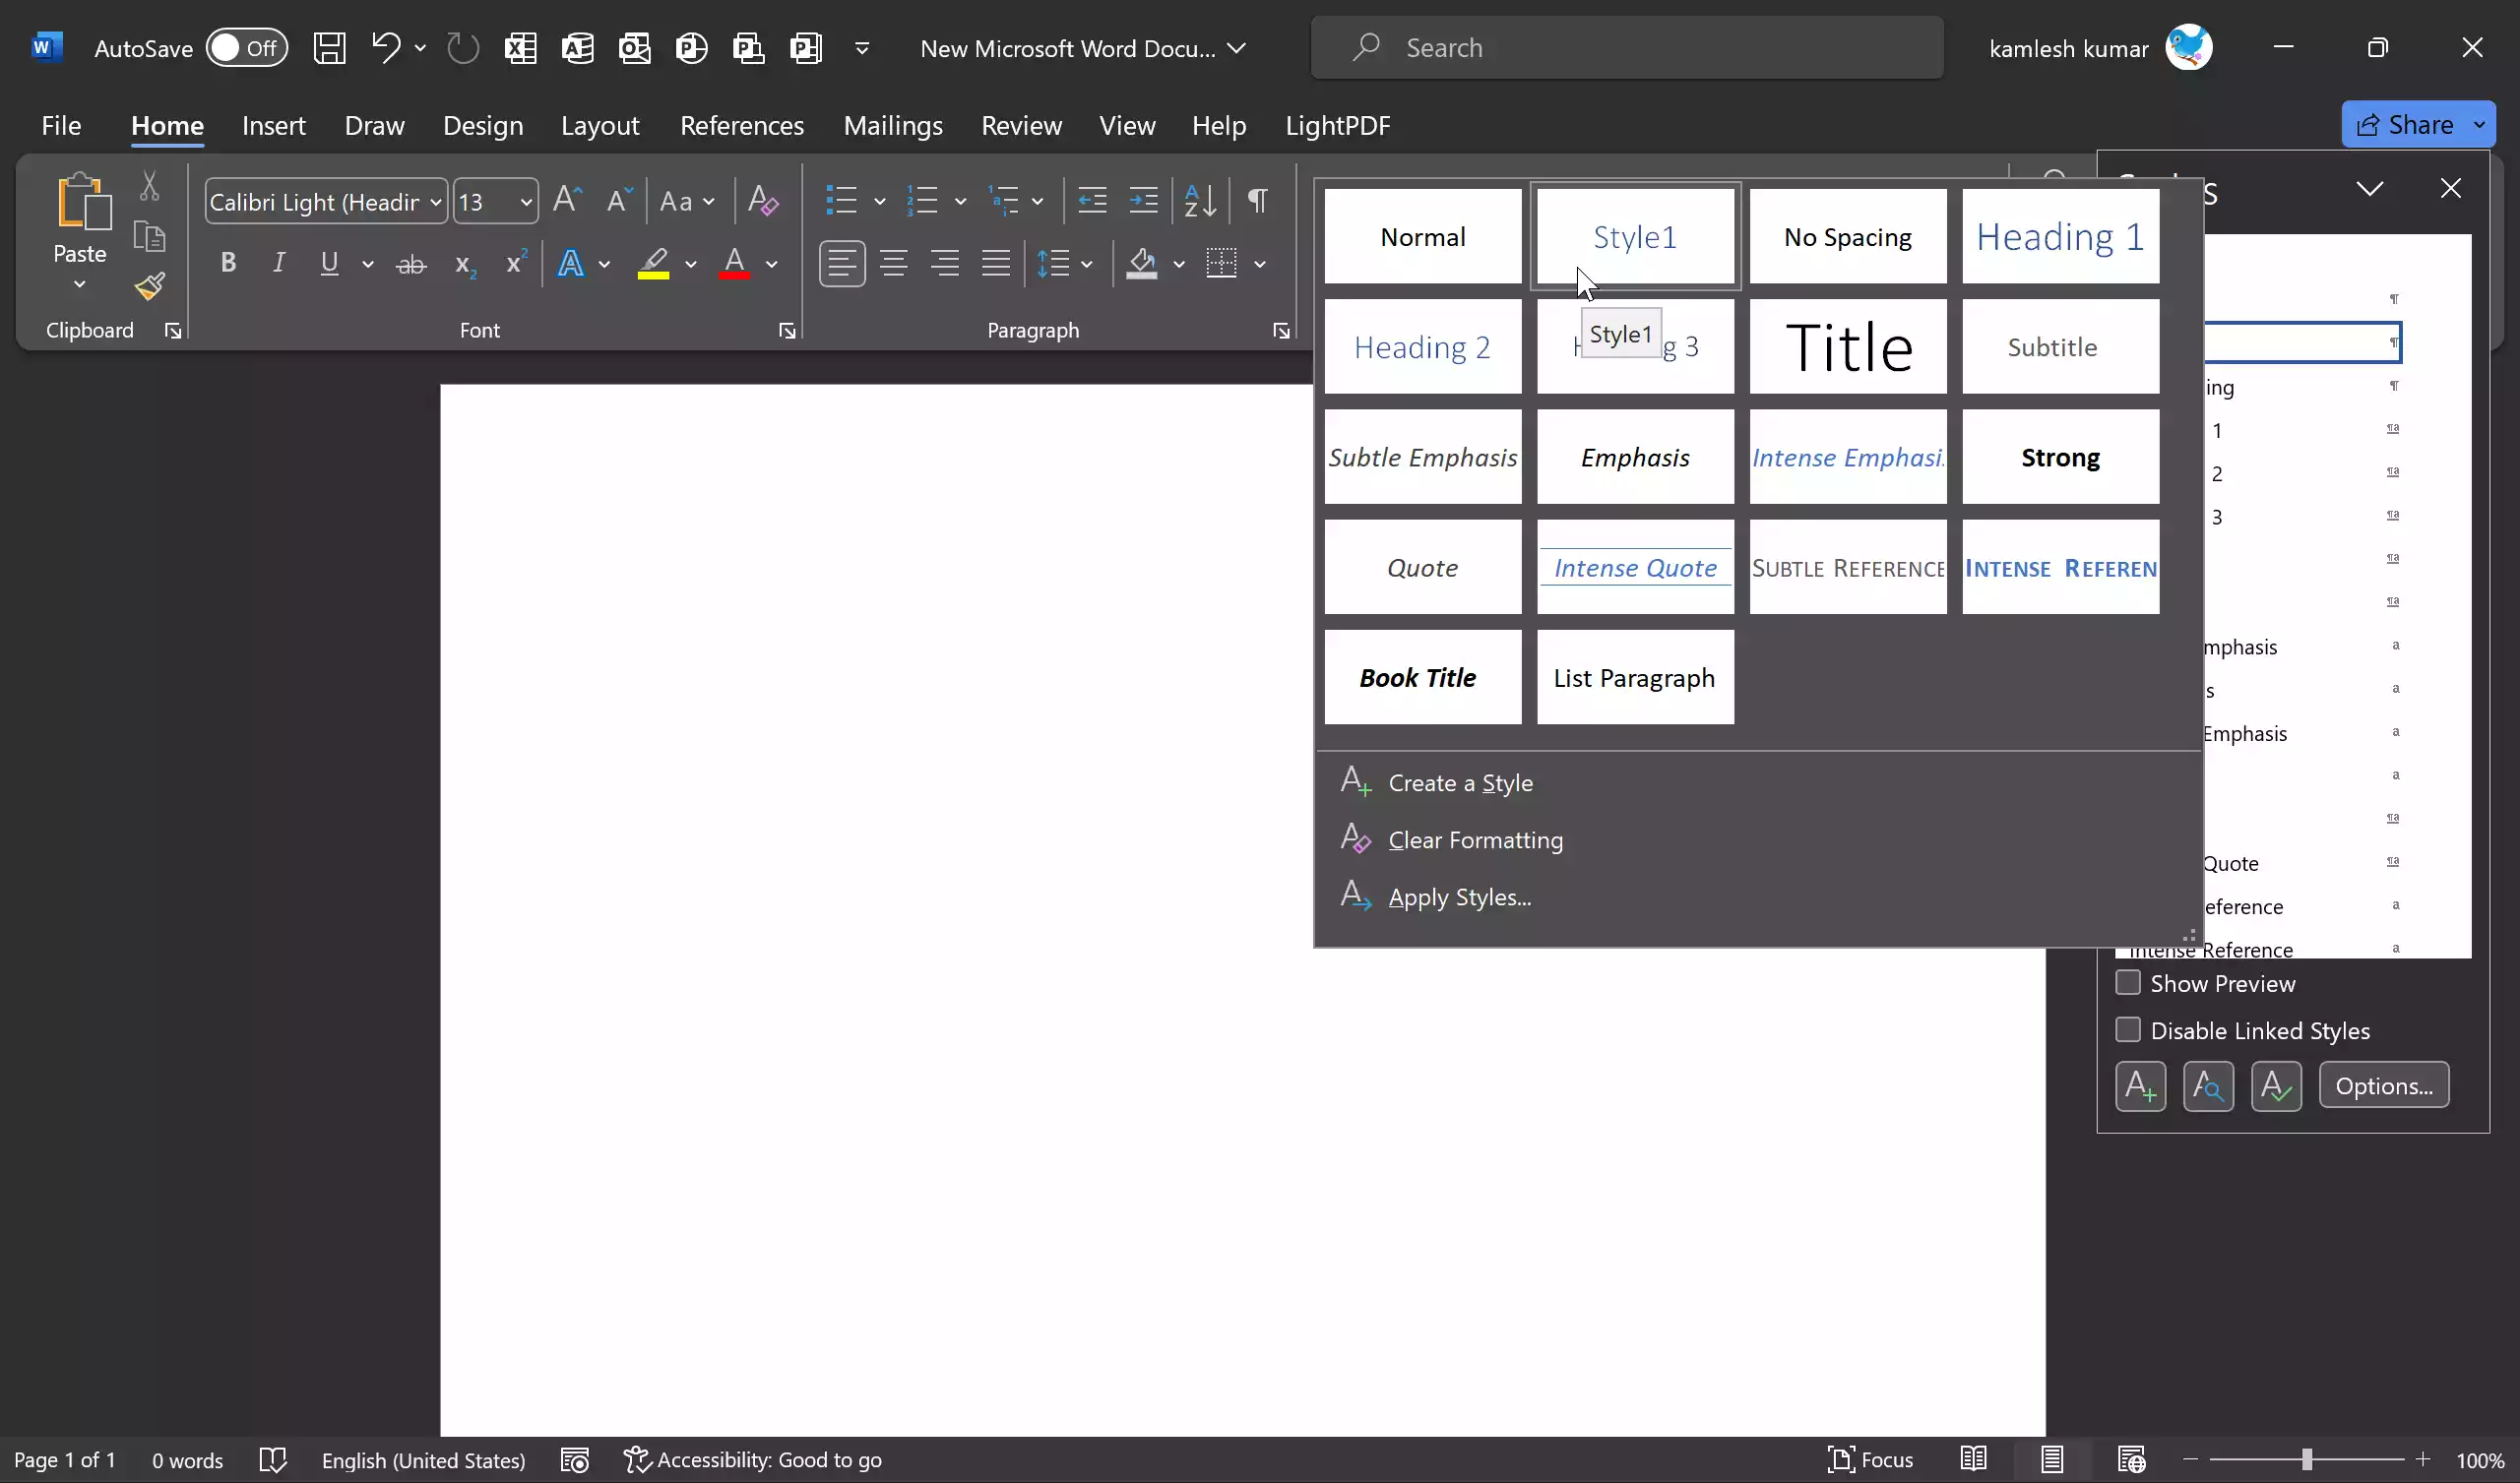
Step 9. Once you’ve customized your style to your satisfaction, click “Word – Paragraph” to save it. Your new style will now appear in the Styles Gallery. You can apply it to selected text or use it throughout your document as needed.
Conclusion
Custom styles in Microsoft Word can save you time and help maintain consistency in your documents. By following the steps outlined in this article, you can easily add a new style to the Style Gallery in Word. This customization allows you to format your documents exactly as you want, streamlining your workflow and improving the overall appearance of your written work.
Also Read: