Windows 11 and 10; both come with the Snipping Tool, which lets you take screenshots. If you want to share something with someone or save a copy of what is on your screen, you can use this tool.
Depending on the situation, you might not need this tool on your device, such as if you don’t use it to take screenshots or use other third-party applications instead, such as Greenshot or ShareX.
In this gearupwindows article, we will assist you in disabling the Snipping Tool on your Windows 11 and 10 PC.
What is Snipping Tool?
Windows Snipping Tool allows you to take screenshots and crop them in various ways. For taking screenshots on the computer, Rectangular Snip, Window Snip, Full-screen, and Free Form modes are available.
This tool comes pre-installed with all versions of Windows. For this reason, no download is required. To open the snipping tool, click on the Start button and enter the snipping tool. Then, click on Snipping Tool from the results. Alternatively, you can use Windows + Shift + S keyboard shortcut.
How to Turn Off the Snipping Tool in Windows 11 or 10?
To disable the Snipping Tool on Windows 11 or 10, you can either use the Local Group Policy Editor or the Registry Editor. Here is a step-by-step explanation of the whole process.
Disable the Snipping Tool via the Local Group Policy Editor
Local Group Policy Editor is a handy tool for configuring a wide range of Windows 11/10 system settings. Even this allows you to disable the built-in Snipping Tool. However, gpedit.msc (Local Group Policy Editor) is only available in the Pro and Enterprise editions of Windows. Hence, if you run the Home edition of Windows, you should enable the Local Group Policy Editor first.
In order to disable the Snipping Tool using the Local Group Policy, follow these steps:-
Step 1. Open Local Group Policy Editor.
To do that, open the Run dialog box by pressing Windows + R. Then, type gpedit.msc in the text box and click OK to launch the Local Group Policy Editor.
Step 2. From the Local Group Policy Editor, navigate to the following locations in the left sidebar:-
User Configuration > Administrative Templates > Windows Components > Tablet PC > Accessories
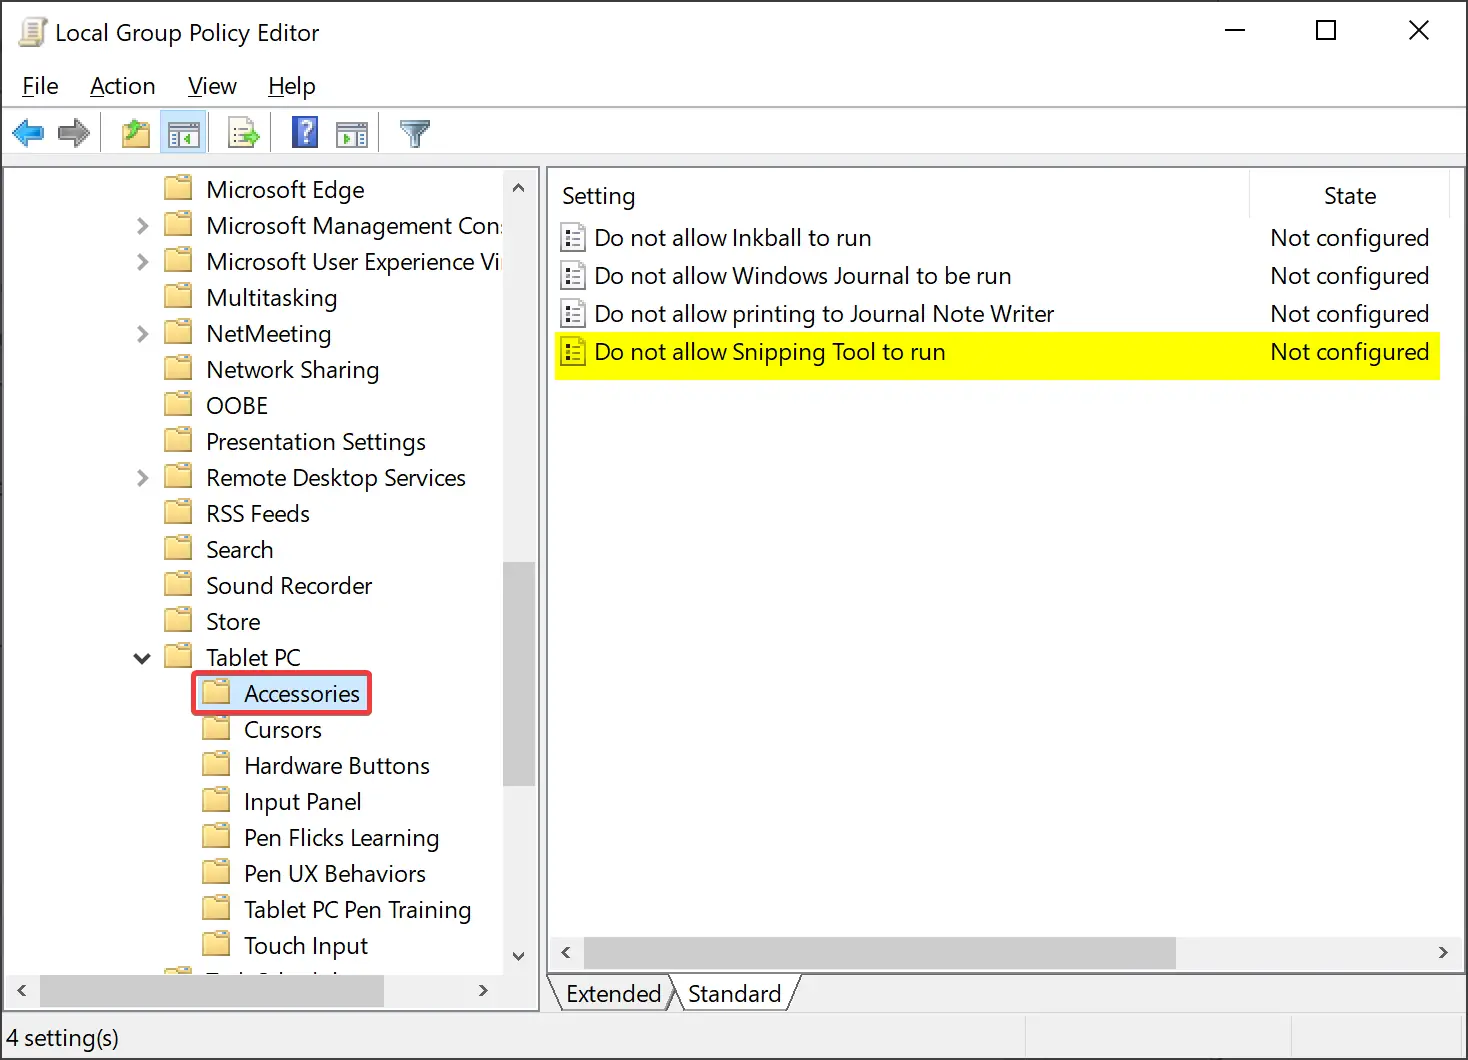
Step 3. On the right, double-click the “Do not allow Snipping Tool to run” policy.
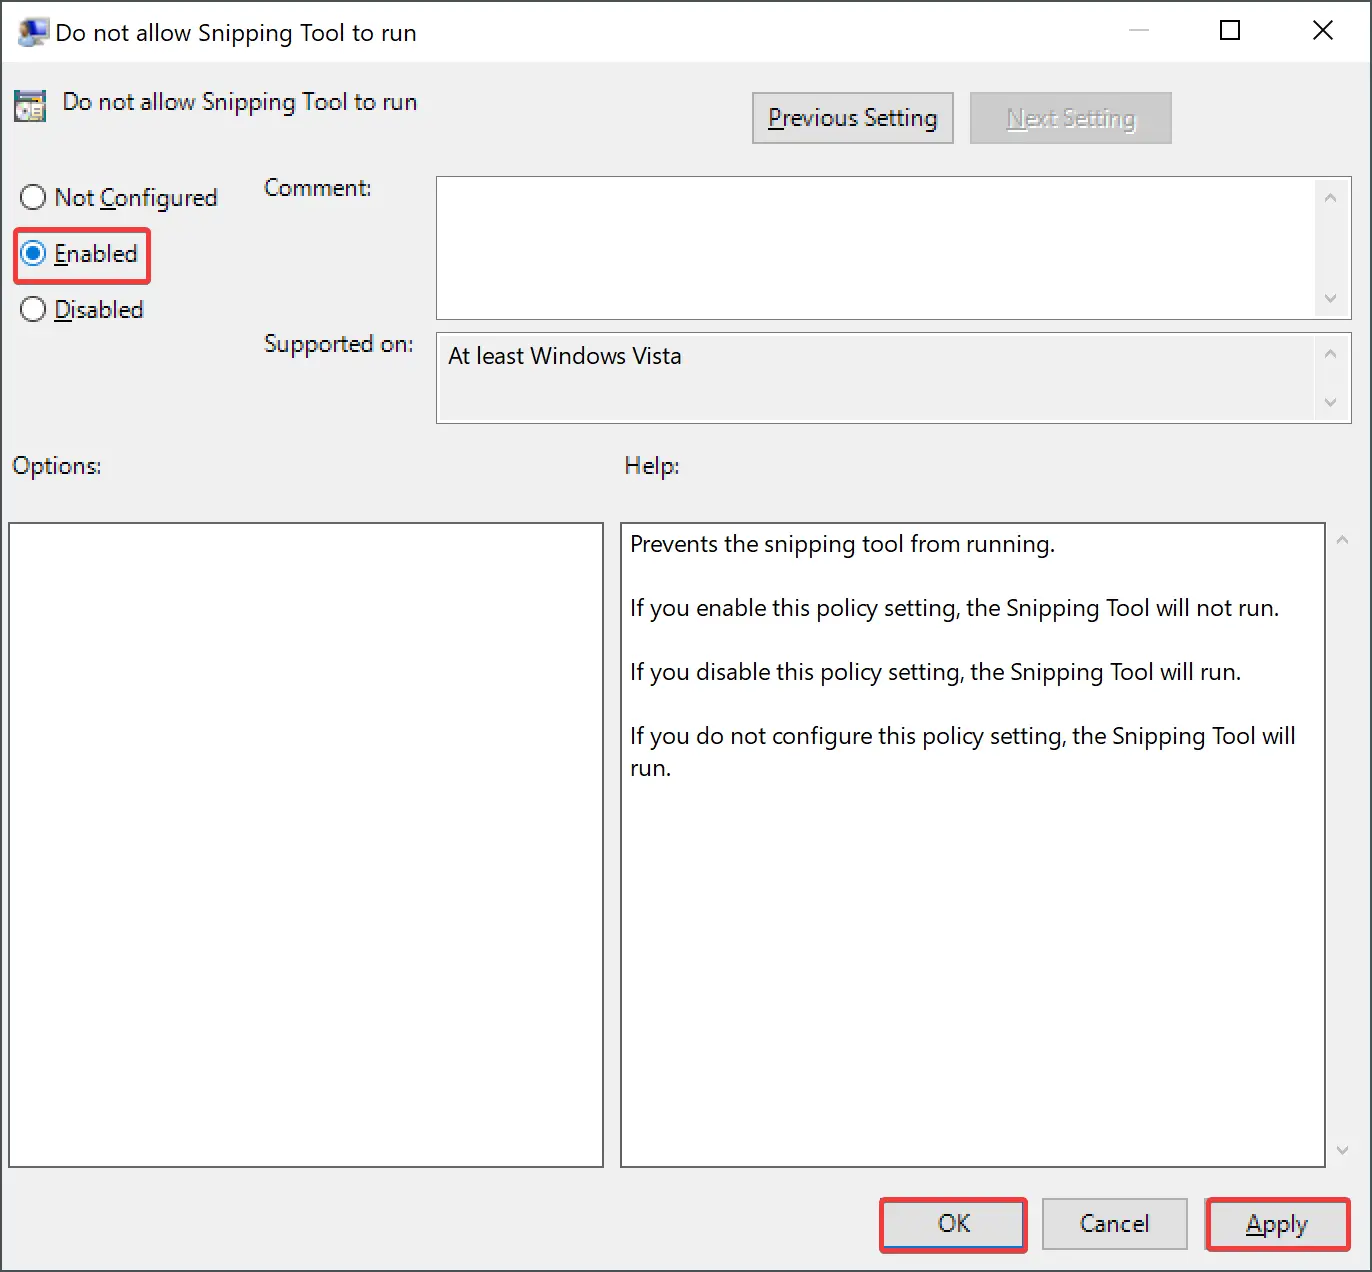
Step 4. Make sure Enabled is selected.
Step 5. Then, click Apply.
Step 6. Next, click OK.
Step 7. Lastly, restart your computer to apply the changes.
After restarting your computer, check if the Snipping Tool is disabled. The following error message will appear when you press the Windows + Shift + S keyboard shortcut:-
Windows cannot open this program because it has been prevented by a software restriction policy. For more information, open Event Viewer or contact your system administrator.
In the unlikely event that you ever need to enable the Snipping Tool again, open the Local Group Policy Editor once again. To disable Snipping Tool, set the radio button to Disabled or Not Configured in step 4 above. Once you have made the changes, click Apply > OK.
Disable the Snipping Tool through the Registry Editor
A wide range of Windows 11/10 system settings can be configured using the Registry Editor. Using this, you can disable the Snipping Tool.
Follow these steps to disable the Snipping Tool using the Registry Editor:-
Step 1. The first thing you need to do is open the Registry Editor.
Step 2. Next, you will need to navigate to the following location:-
HKEY_LOCAL_MACHINE\SOFTWARE\Policies\Microsoft
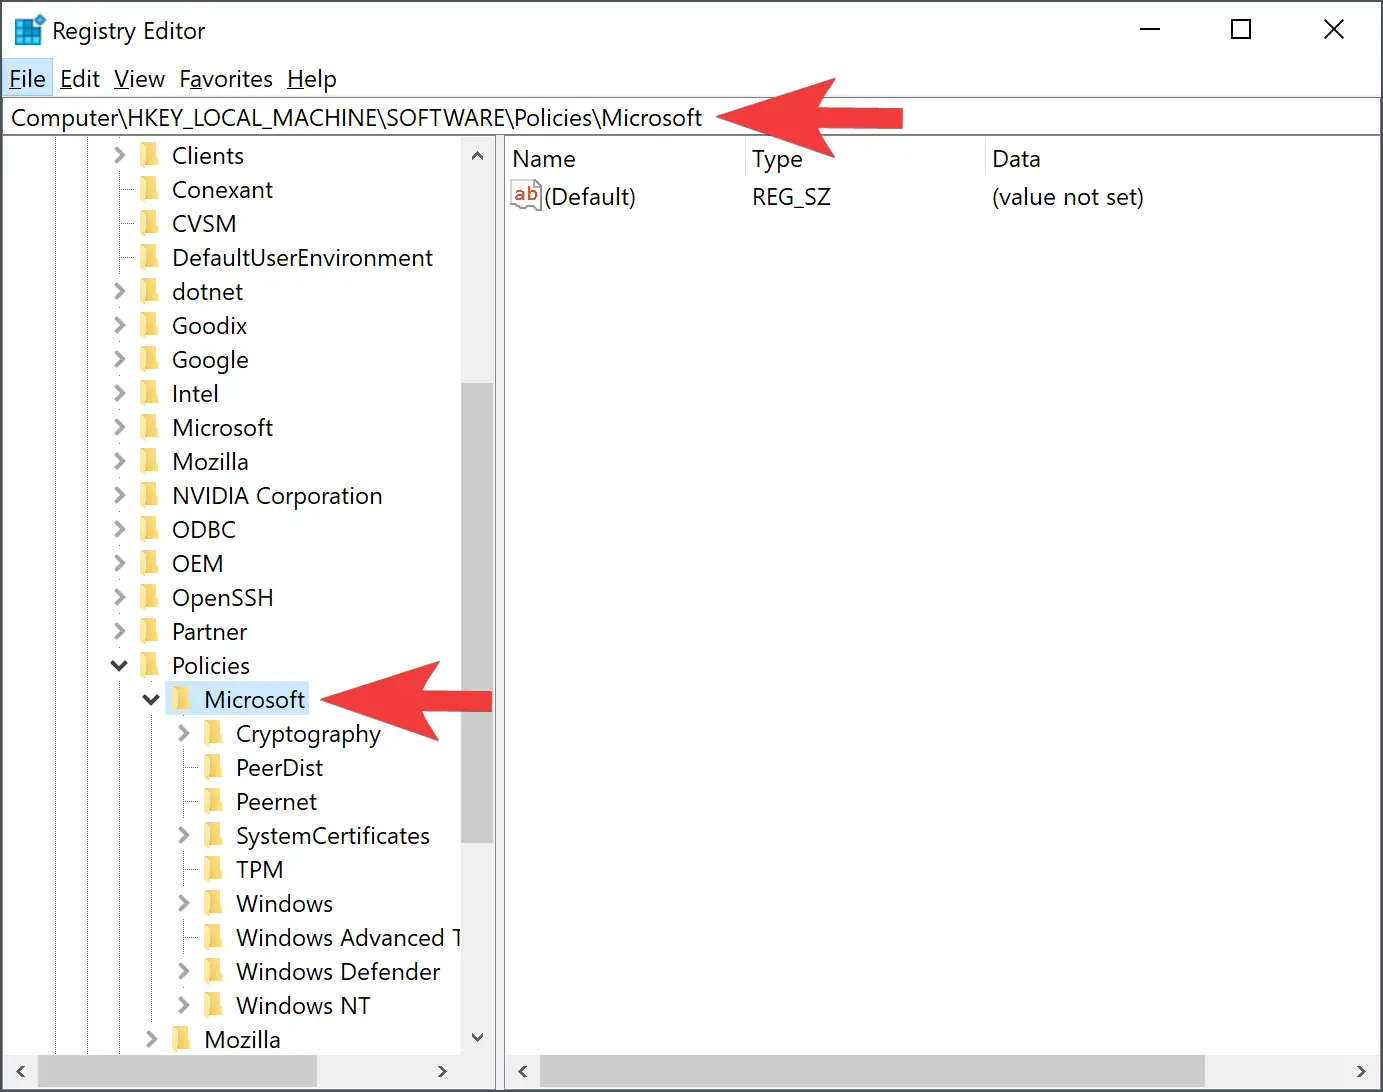
Step 3. Now, look for the TabletPC key under the Microsoft key; if you don’t see it, you’ll need to create it. To do so, right-click the Microsoft key and choose New > Key.
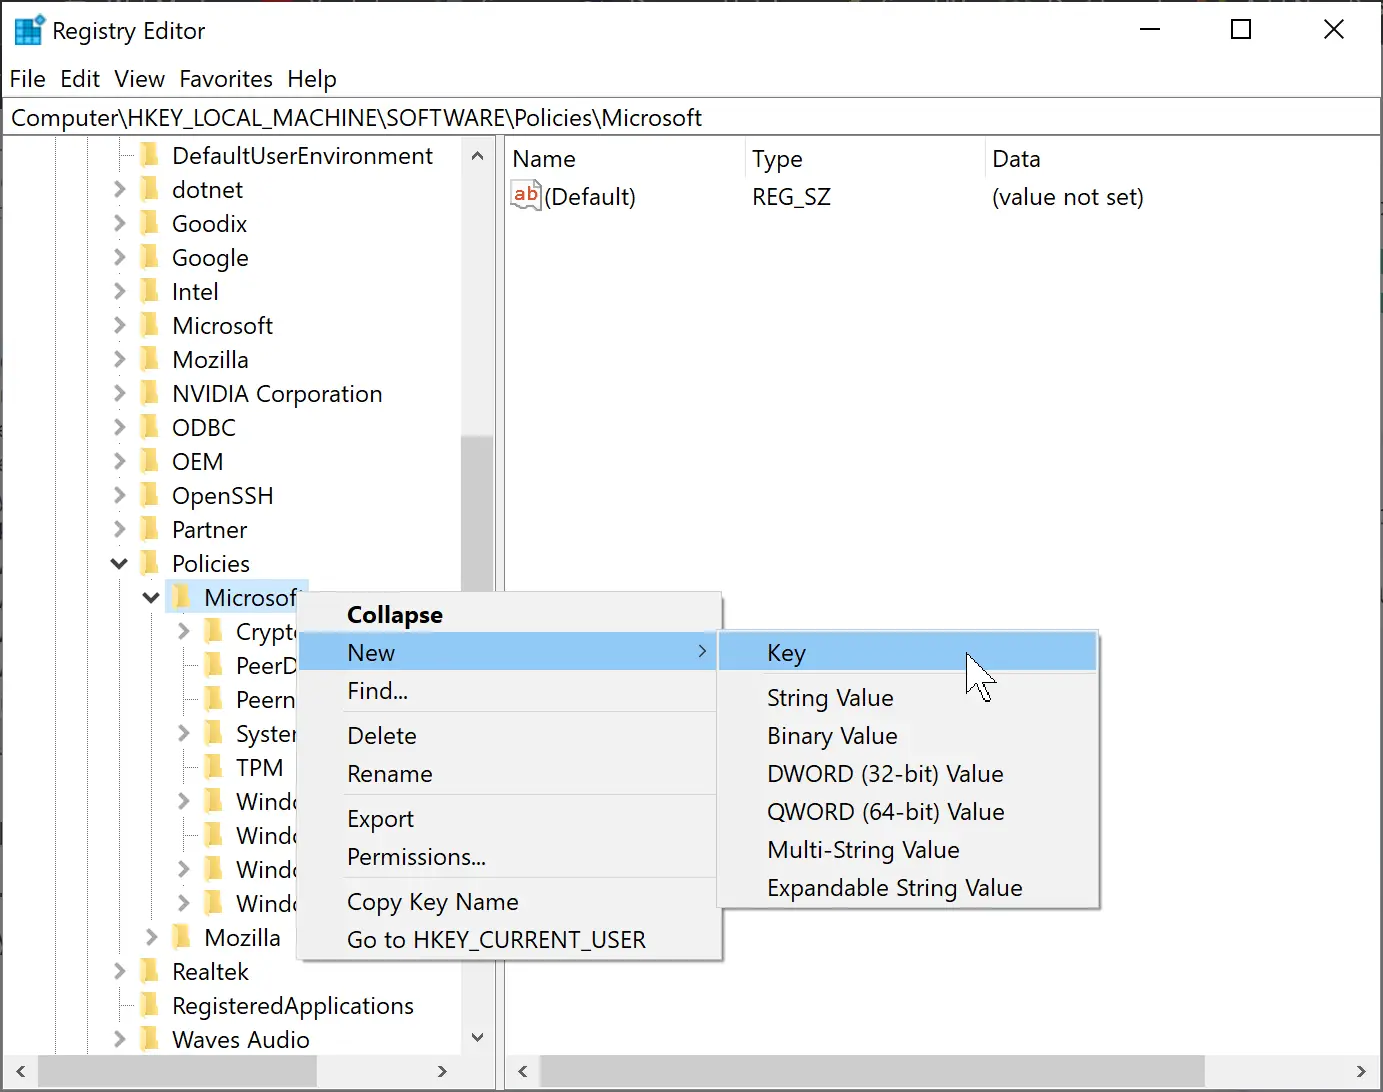
Step 4. Give it the name TabletPC.
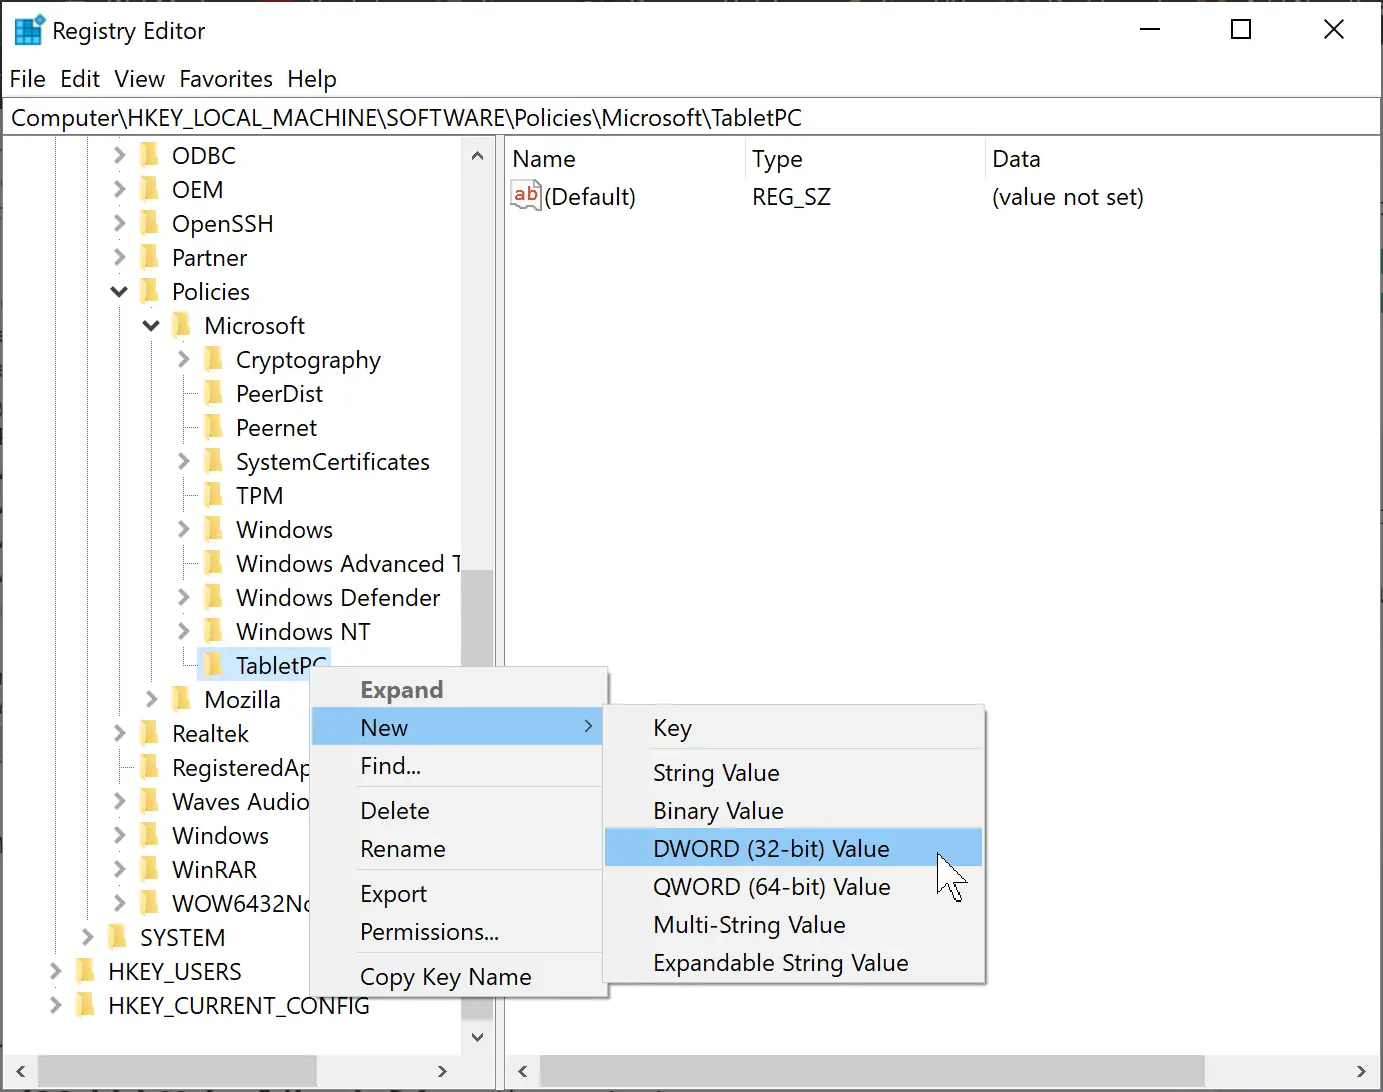
Step 5. Now, right-click TabletPC and select New > DWORD (32-bit) Value from the context menu.
Step 6. Name the newly created REG_DWORD DisableSnippingTool.

Step 7. Then, double-click the DisableSnippingTool REG_DWORD and set its “Value data” as follows:-
- 0: To enable Snipping Tool.
- 1: To disable Snipping Tool.
Step 8. Click the OK button.
Step 9. Lastly, reboot your PC to apply the changes.
Conclusion
In conclusion, the Snipping Tool is a useful tool that comes pre-installed on all versions of Windows 11 and 10, allowing users to take screenshots and crop them in various ways. However, depending on the situation, some users may prefer to disable the tool, especially if they use third-party applications instead. In this gearupwindows article, we have outlined two methods for disabling the Snipping Tool, using the Local Group Policy Editor and the Registry Editor. Both methods involve navigating to specific locations and making changes to system settings. Regardless of which method you choose, it is important to note that disabling the Snipping Tool can prevent users from taking screenshots using the built-in tool, and it can be re-enabled if necessary.