One can easily change the Drive letter on windows 11/10/8/7 using the Disk Management tool or Command Prompt without any third-party tool. If you are a novice user, you can use a freeware utility tool Sordum Drive Letter Changer, to change or assign a Drive Letter to the existing partition. That means you can change or assign drive letters in Windows operating system with or without any tool.
This post will guide you on hiding or removing drive letters in Windows 11/10/8/7 via Command Prompt. The Command Prompt is a powerful tool to fulfill certain tasks that usually can’t be done unless you have a third-party tool. We have already covered a few posts, such as creating a bootable USB flash drive of Windows 10 version 20H2 and sign out other Users in Windows 11/10/8/7 using Command Prompt.
How to remove or hide drives in Windows 11/10/8/7 using Command Prompt?
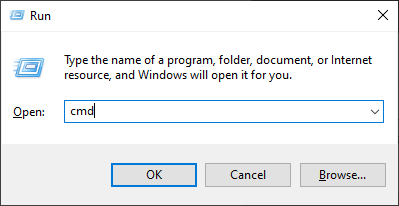
Step 1. Open Command Prompt with administrative privileges.
To open the Command Prompt with elevated rights, press the Windows Logo + R keys to launch the Run box. Type cmd in the Run box and then press Ctrl+Shift+Enter to run the command prompt as an administrator.
Step 2. Click Yes if you are prompted with the User Account Control dialog box.
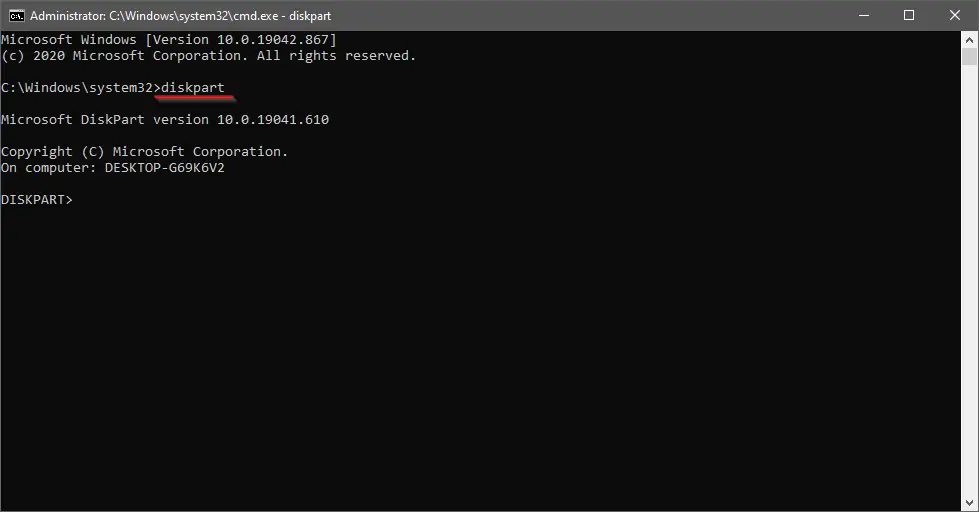
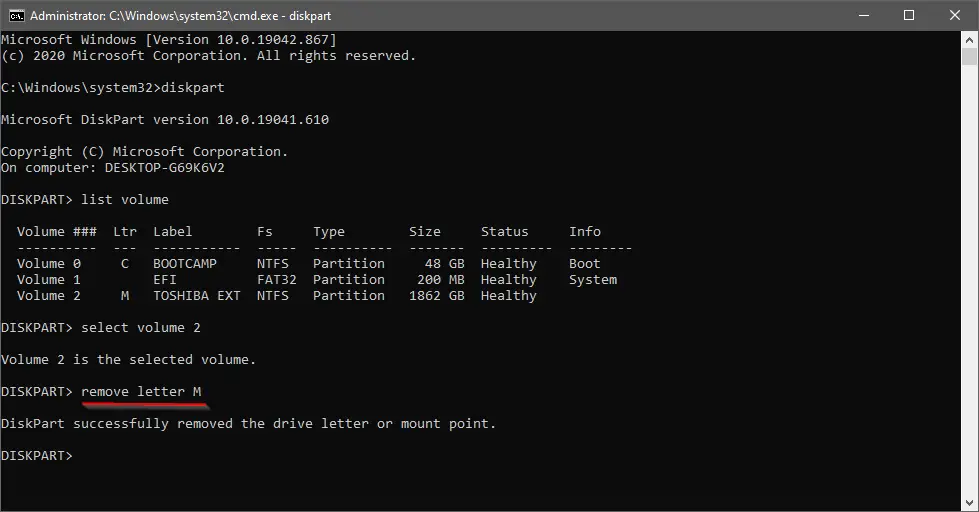
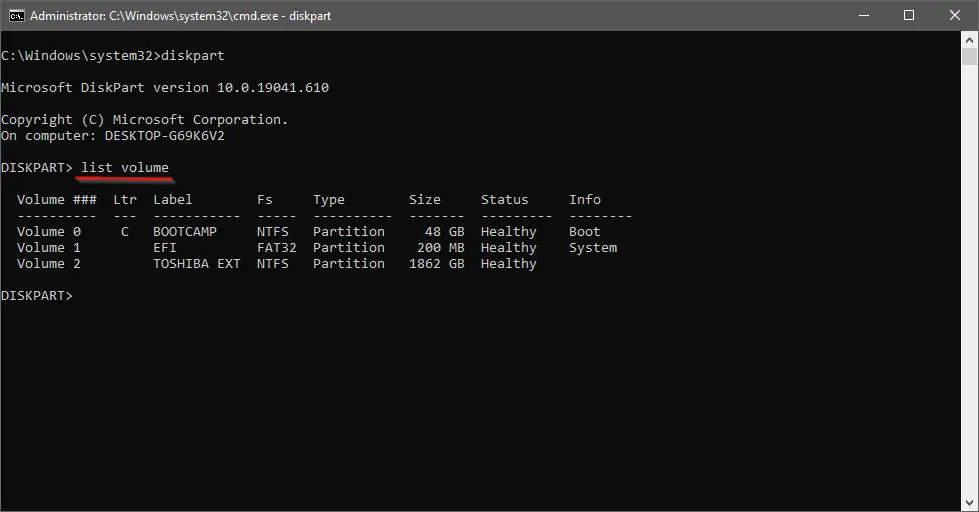
Step 3. In the Administrator Command Prompt window that opens, type diskpart and hit Enter key from the keyboard.
How to show hidden drives using Command Prompt in Windows 11/10/8/7?
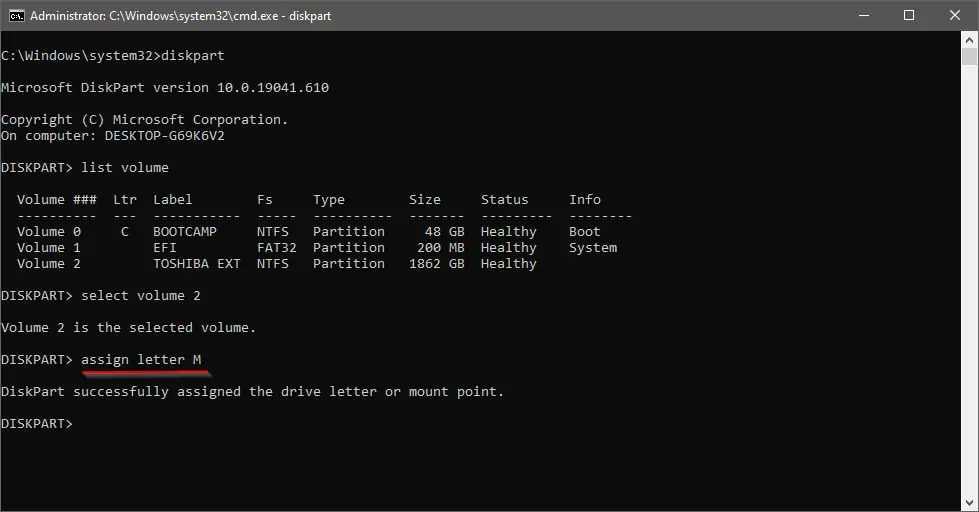
Once you want to open the drive letter you have hidden, you need to first assign a drive letter. Without assigning a drive letter, it will not be visible on This PC / Computer.
To show hidden drives using Command Prompt in Windows 11/10/8/7, perform the following steps:-
Step 1. Open Command Prompt with administrative privileges.
Step 2. Click the Yes button if you are prompted with a User Account Control dialog box.
Step 3. In the Administrator Command Prompt window that opens, type diskpart and hit Enter key from the keyboard.
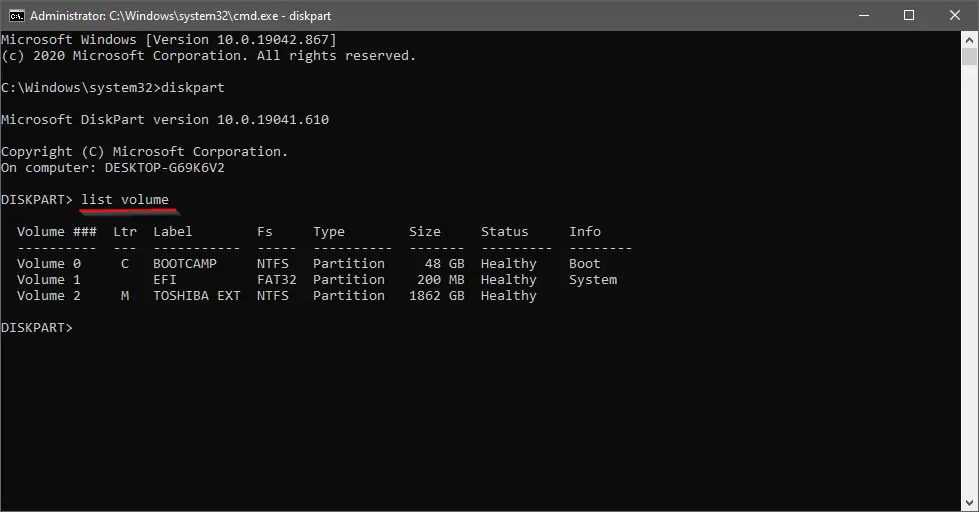
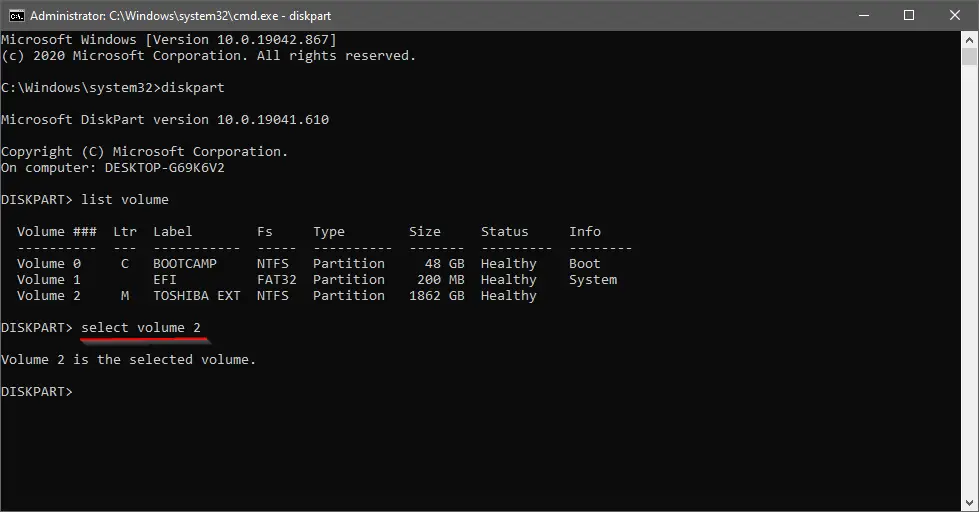
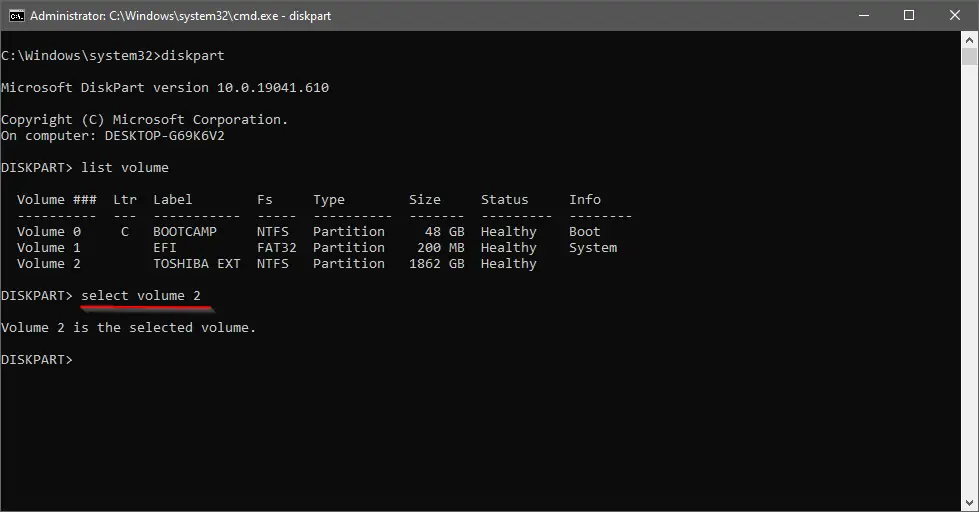
Step 5. Select the drive you want to hide. To do this, type select volume 2 (here, 2 is the volume number).
We want to assign a drive letter to Volume 2, so we can work on this drive.
Once you complete the above steps, hidden drives in Windows 10/8/7 will start showing in File Explorer / Windows Explorer.
That’s all!!!