“Projecting to this PC” is a built-in feature of the Windows 11 operating system that uses wireless technology to project the content of other devices to your PC screen and lets you control the connected device using your mouse or keyboard. Using this feature, you can project the screen of a Windows Phone, Android Phone, or another Windows PC over the same wireless network.
The “Projecting to this PC” feature of Windows 11 uses the Connect app for screen mirroring. The Connect app is no longer part of the Windows operating system, but its functionality can still be accessed via Wireless Display, which is part of Windows 11 “optional feature.”
In this gearupwindows, we will guide you through several ways to enable and disable the “Projecting to this PC” function in Windows 11.
How to Enable or Disable Projecting to this PC in Windows 11 Settings?
Follow these steps to turn on or off Projecting to this PC in Windows 11 Settings:-
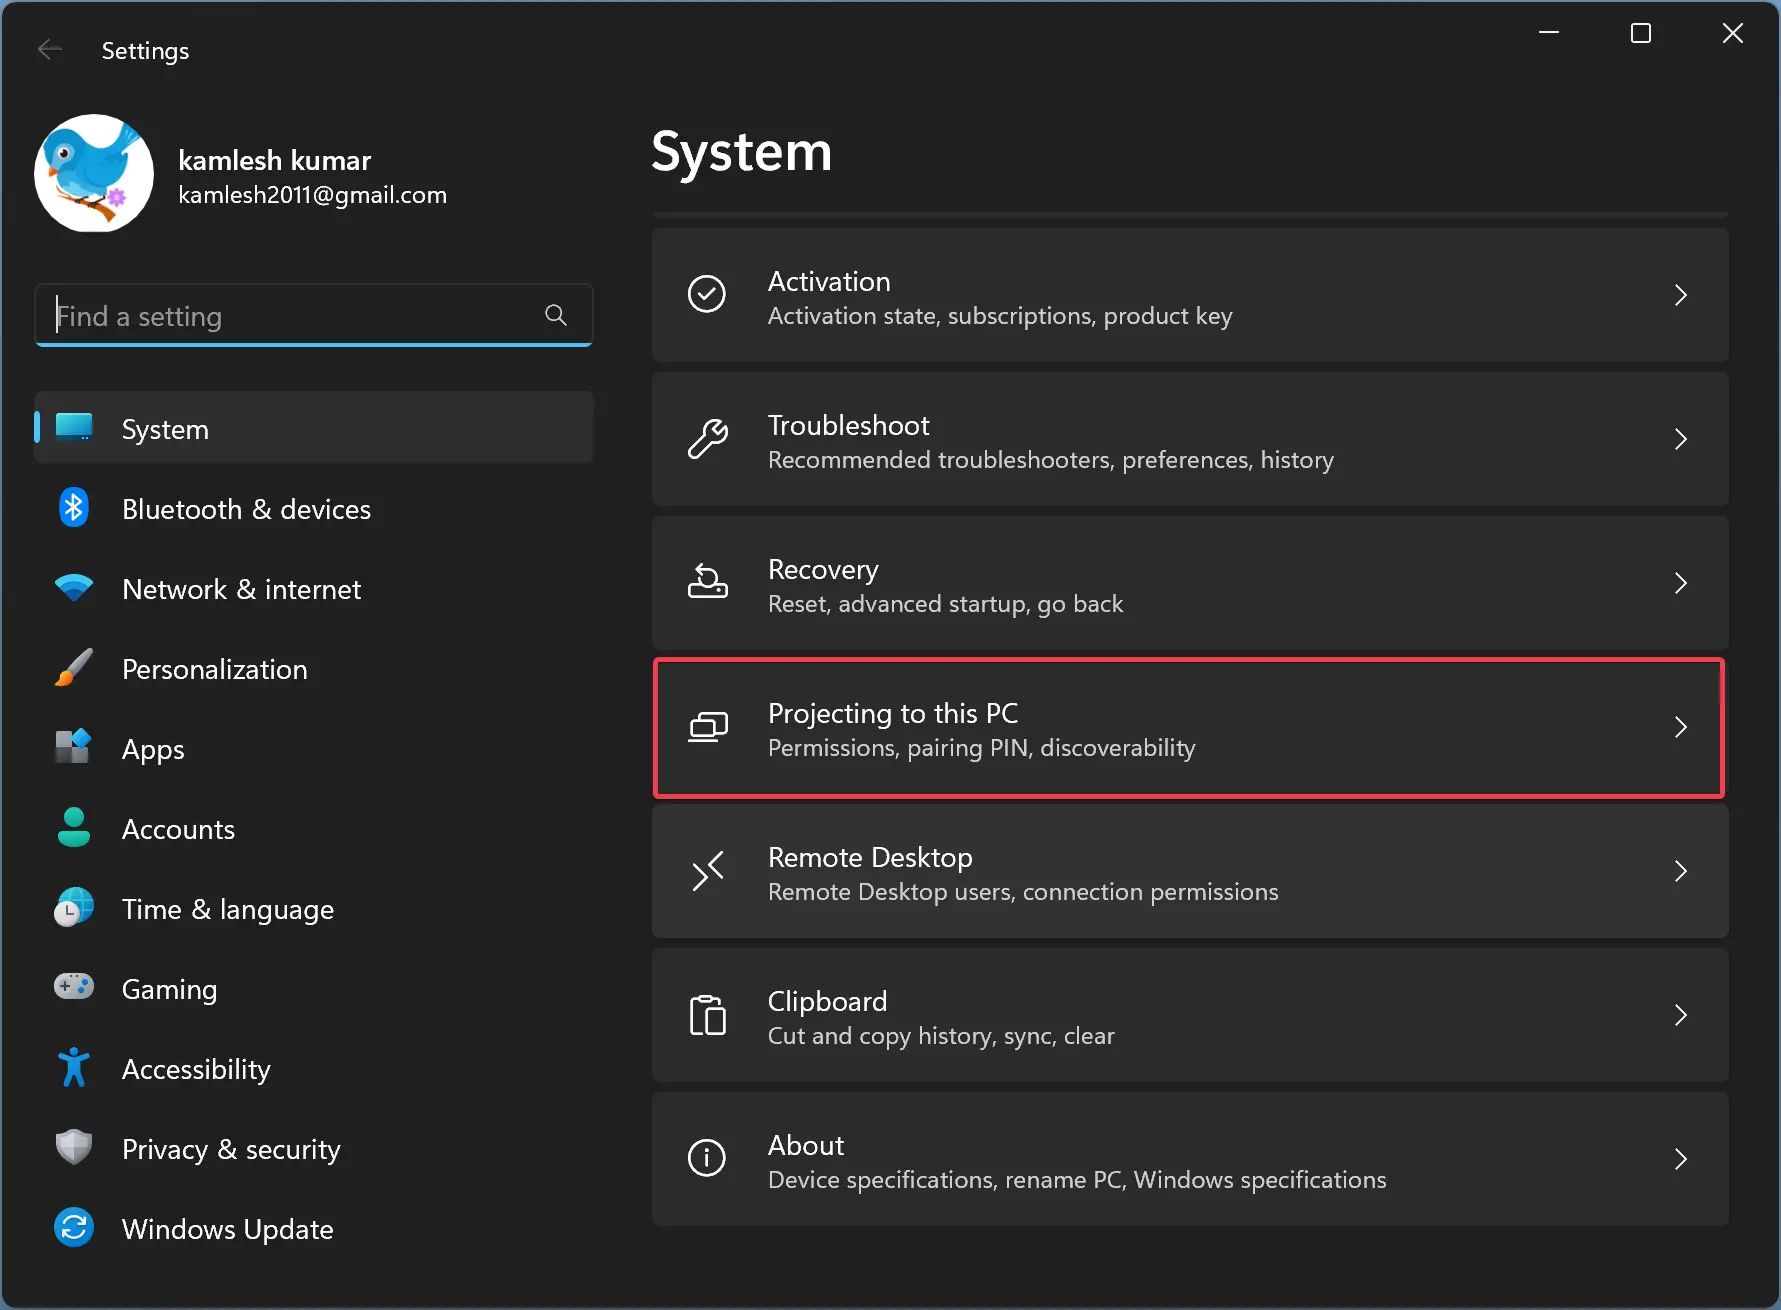
Step 1. First, open Windows 11 Settings.
Step 2. Then, select the System category in the left sidebar.

Step 3. On the right sidebar, scroll down and click on the Projecting to this PC option.
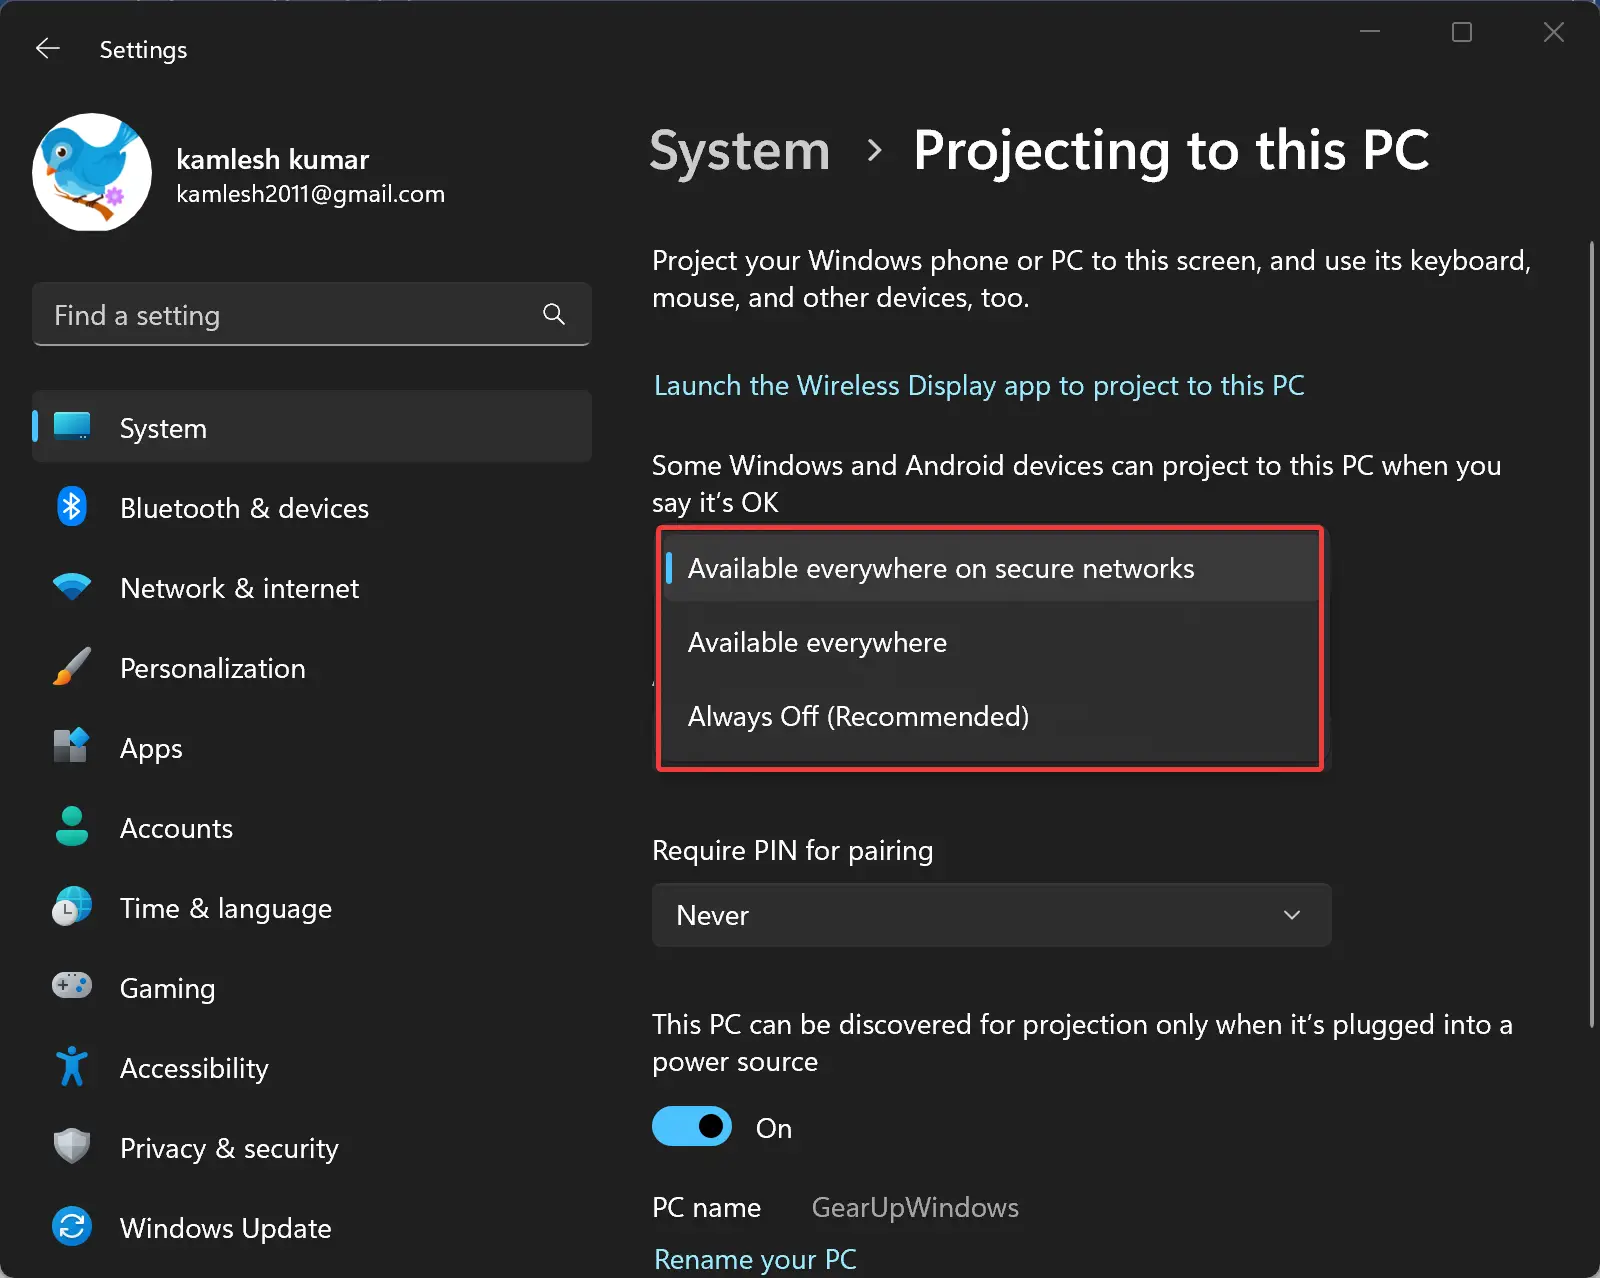
Step 4. In the topmost dropdown menu, select the “Available everywhere on secure networks” or the “Available everywhere” option to enable the setting.
If you want to disable the feature, choose the “Always Off” option.
By executing the above steps, you should be able to enable or disable Projecting to this PC in Windows 11.
How to Turn On or Off “Projecting to this PC” using Registry Editor?
To enable or disable “Projecting to this PC” through Windows 11 Registry Editor, use these steps:-
Step 1. Very first, open Registry Editor.
Step 2. When Registry Editor appears on your computer, navigate to the following path:-
HKEY_LOCAL_MACHINE\Software\Policies\Microsoft\Windows
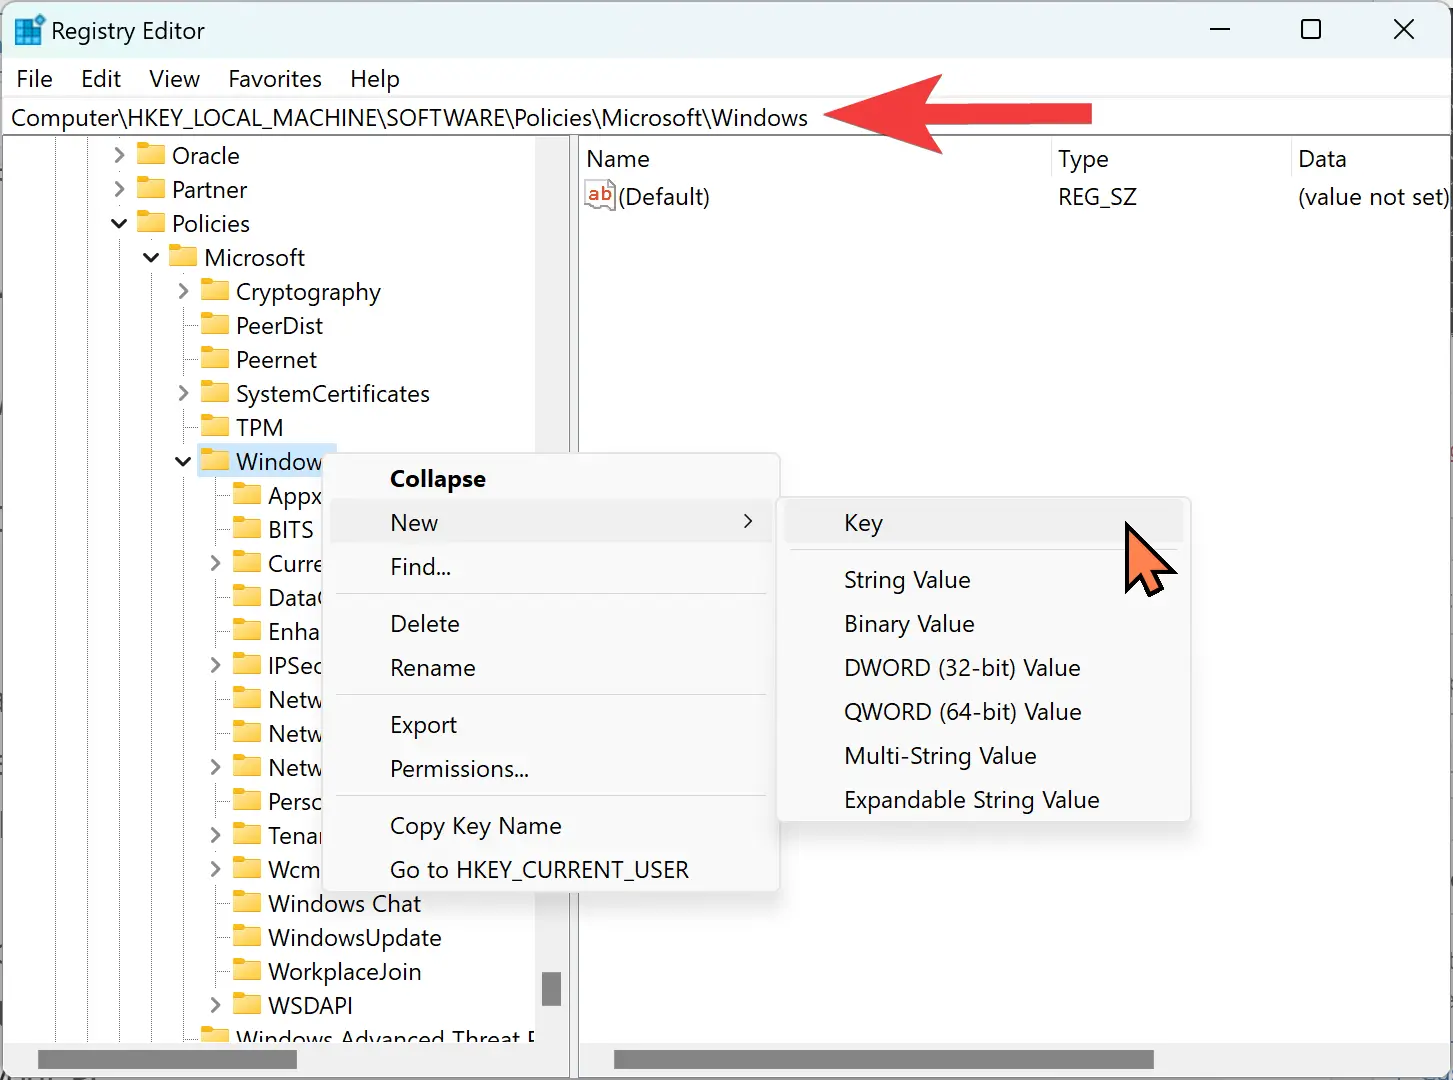
Step 3. Then, right-click on the Windows folder and select New > Key.
Step 4. Name the newly created key to Connect.
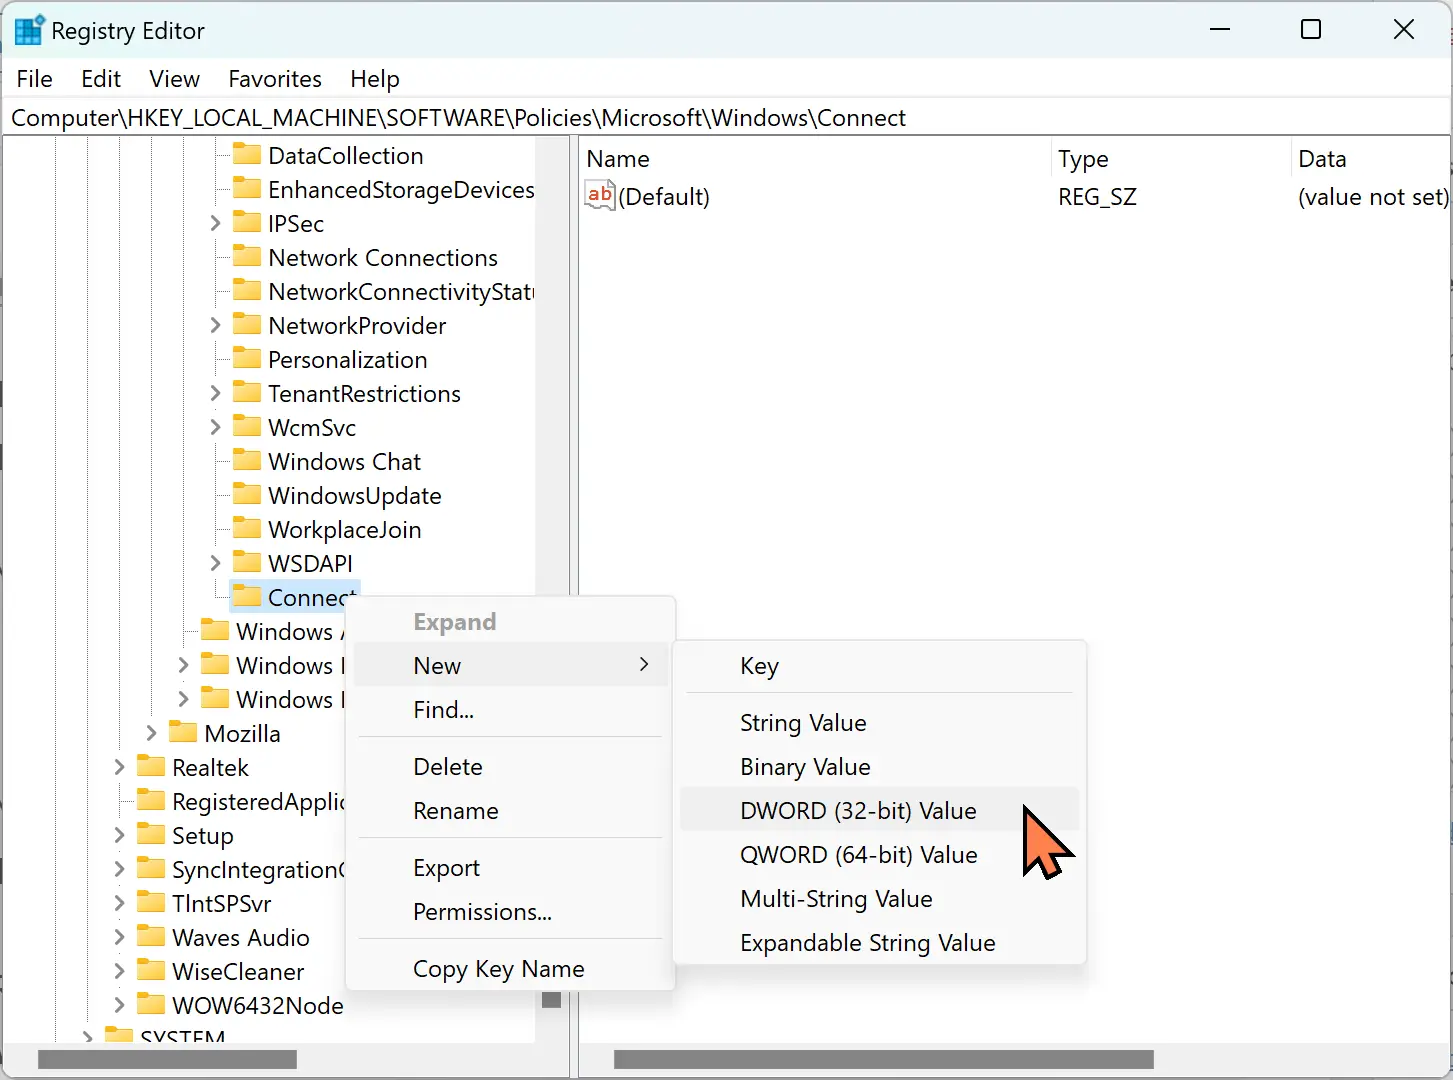
Step 5. Now, right-click on the Connect folder and select New > DWORD (32-bit) Value.
Step 6. Rename the newly created REG_DWORD to AllowProjectionToPC.
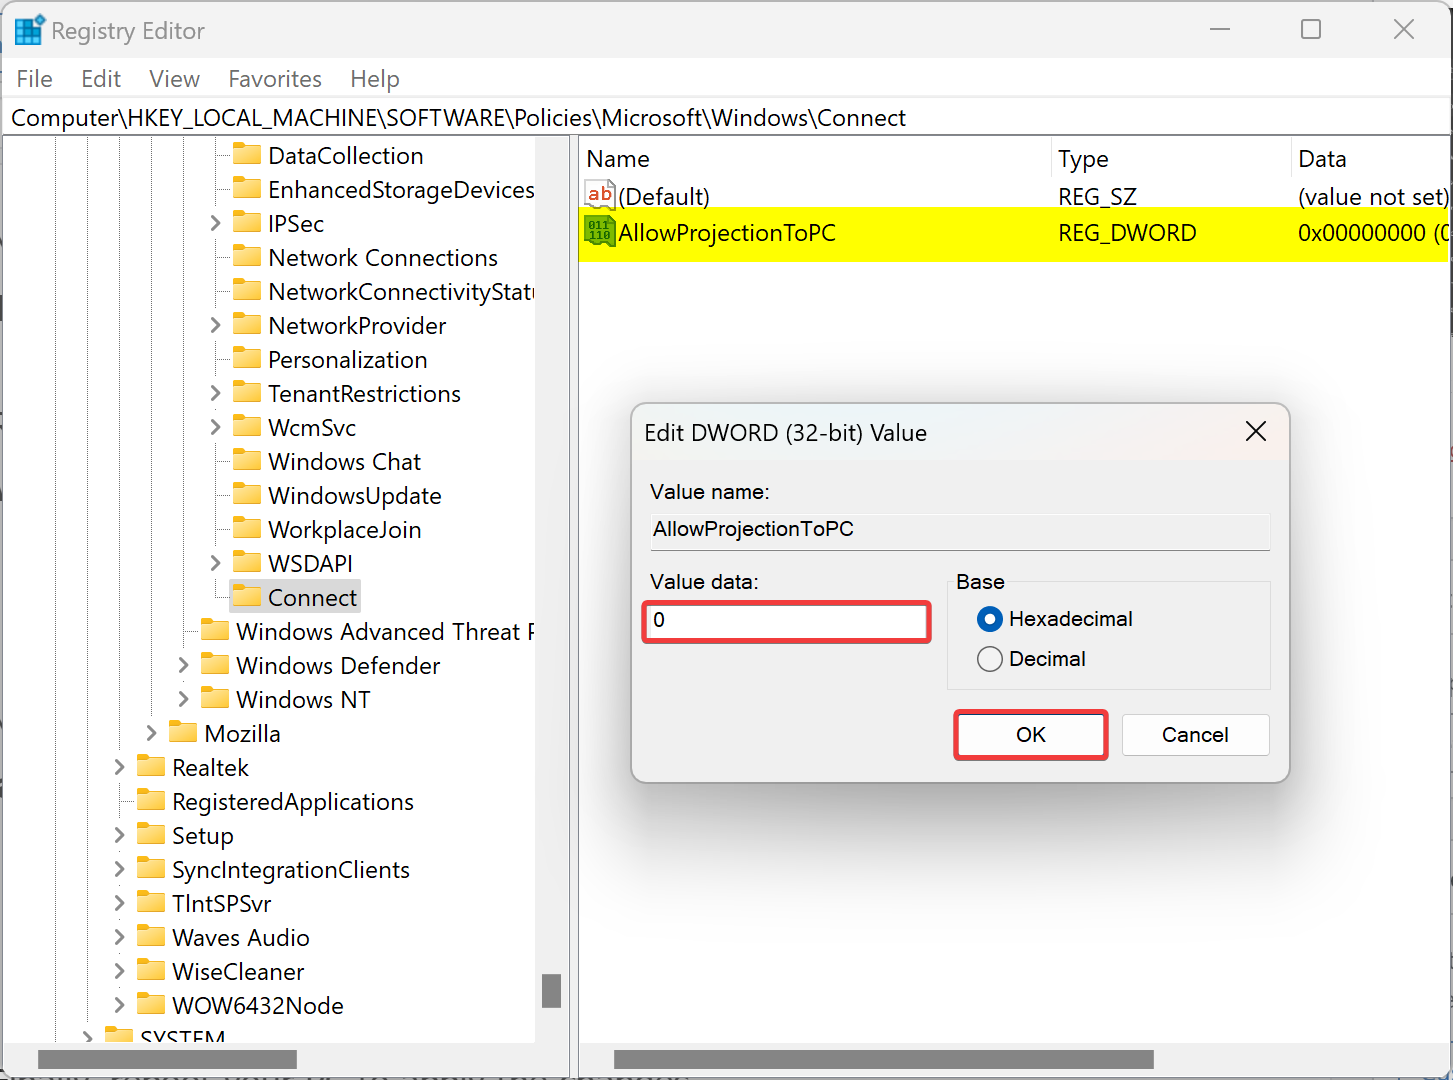
Step 7. Next, double-click on AllowProjectionToPC REG_DWORD and set its Value Data to the following:-
- 0: To disable Projecting to this PC.
- 1: To enable Projecting to this PC.
Step 8. Finally, reboot your PC to apply the changes.
How to Enable or Disable Projecting to this PC in Windows 11 through Local Group Policy Editor?
Follow these steps to turn on or off Projecting to this PC in Windows 11 through Local Group Policy Editor:-
Step 1. At first, open Local Group Policy Editor.
Step 2. When Local Group Policy Editor opens, navigate to the following path:-
Computer Configuration > Administrative Templates > Windows Components > Connect
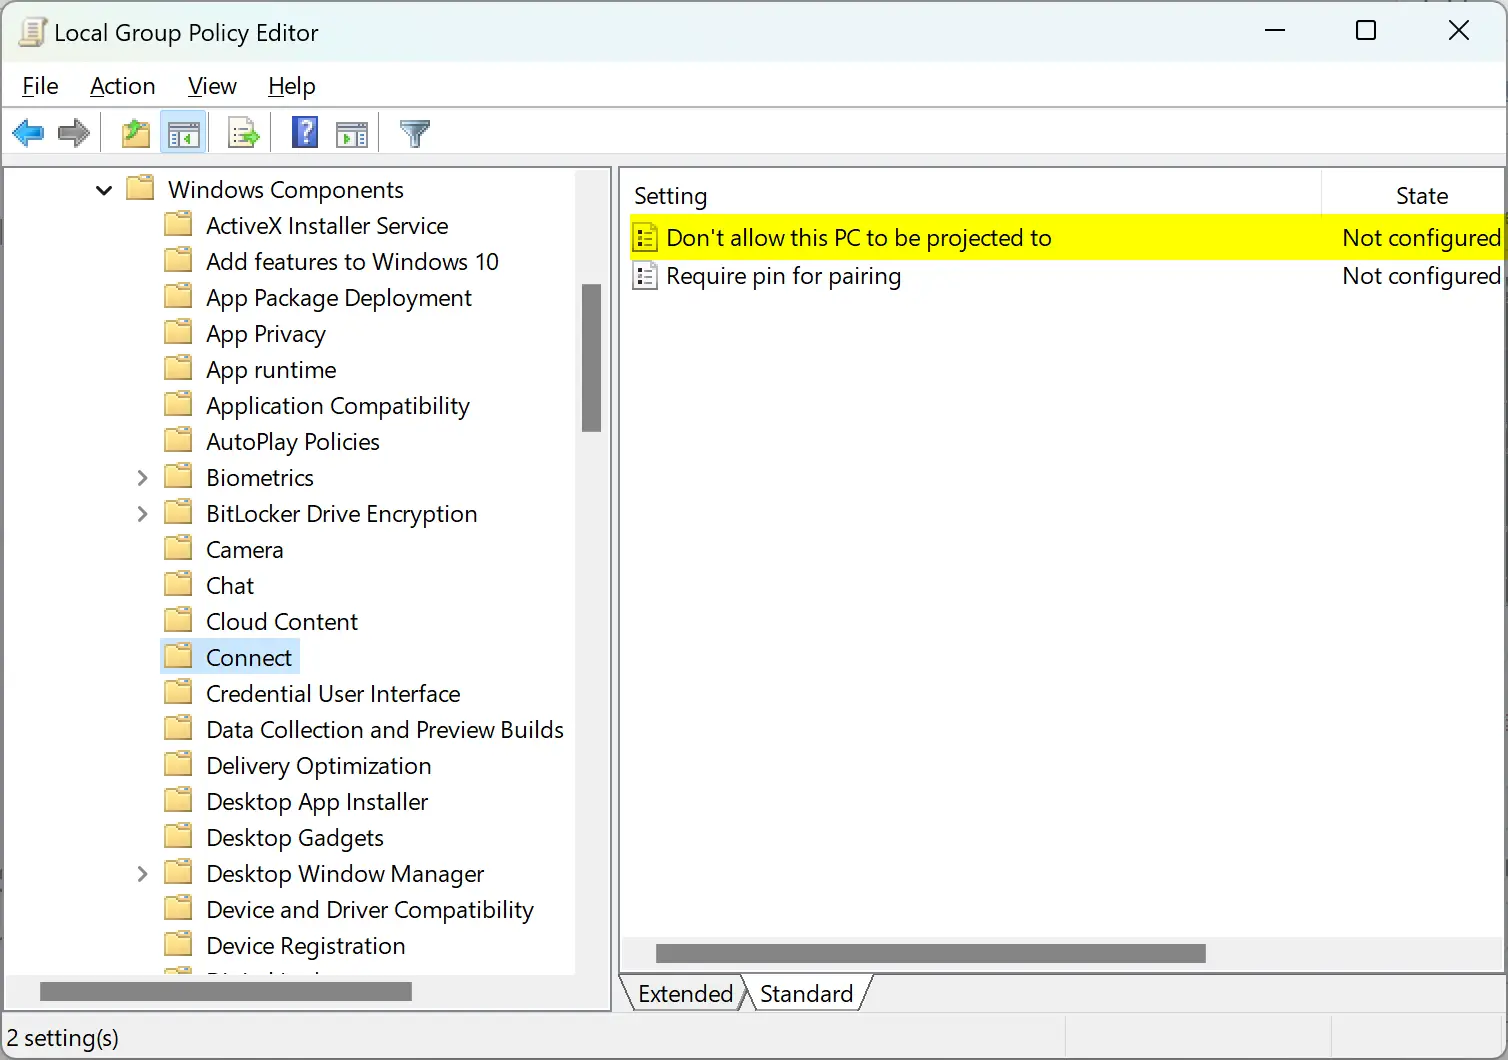
Step 3. On the right side pane, double-click on the “Don’t allow this PC to be projected to” setting.
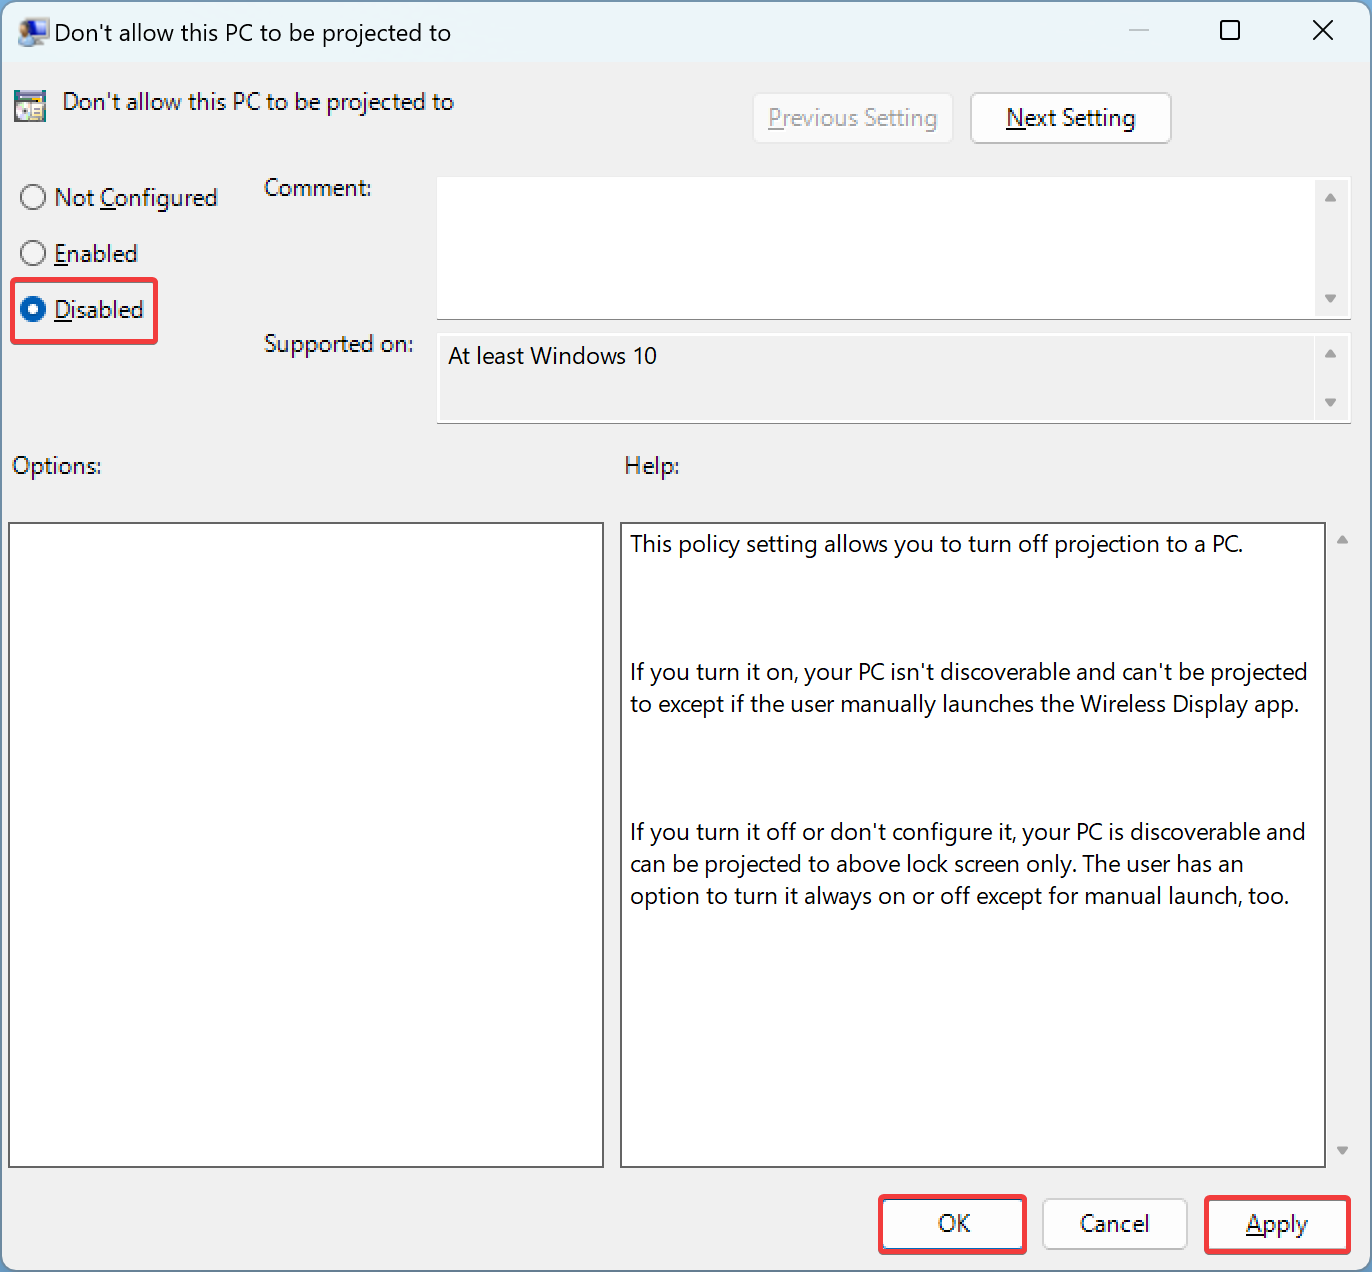
Step 4. Select the Disabled option to enable the setting.
Quick Note: Choose the Enabled option to disable the Projecting to this PC feature.
Step 5. Then, click on the Apply button.
Step 6. Next, click the OK button.
Step 7. At last, reboot your PC to apply the changes.
Conclusion
In conclusion, the “Projecting to this PC” feature of Windows 11 is a useful tool that allows users to project the content of other devices to their PC screens and control them using their keyboard or mouse. This built-in feature uses wireless technology and can be accessed through the Connect app, which is part of the Windows 11 “optional feature.” In this article, we have discussed several ways to enable and disable this feature, including using Windows 11 Settings, Registry Editor, and Local Group Policy Editor. By following the steps outlined in this guide, users can easily turn on or off “Projecting to this PC” according to their needs.
