Uninstalling drivers on Windows 11 might become necessary for various reasons, such as troubleshooting hardware issues, updating outdated drivers, or simply removing unwanted software. While the process might seem daunting, Windows 11 provides multiple user-friendly methods to uninstall drivers. In this comprehensive guide, we’ll explore step-by-step instructions for each approach, ensuring you can easily manage your drivers on this latest iteration of Microsoft’s operating system.
How to Uninstall Drivers on Windows 11?
Method 1: Uninstalling Drivers from Settings
Step 1. To start, click on the Windows icon in the taskbar or press the Windows key on your keyboard, and then click on the gear-shaped icon to open the Settings app.
![]()
Step 2. Inside the Settings app, select “Apps” from the left sidebar, and on the right pane, click on “Installed apps.”
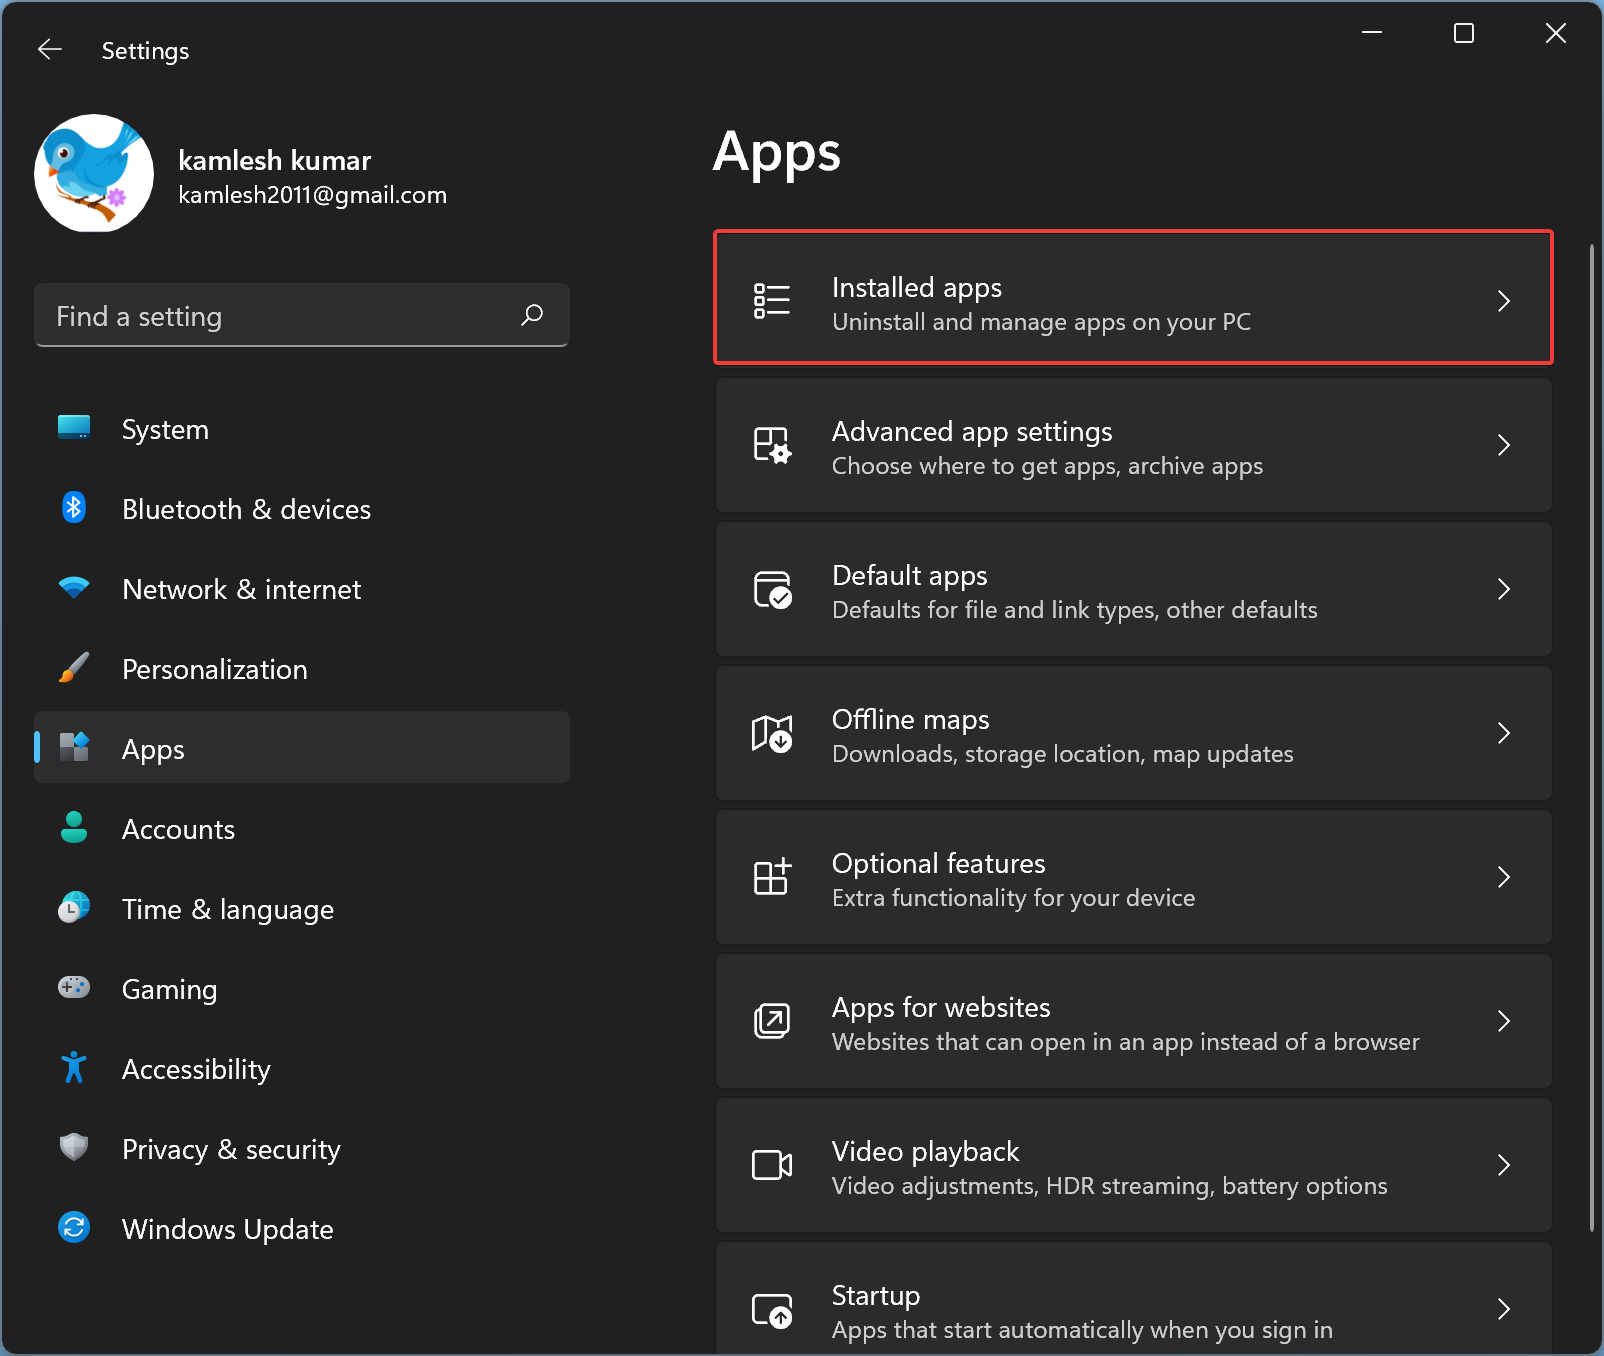
Step 3. Scroll through the list of installed applications and drivers until you locate the driver you wish to uninstall.
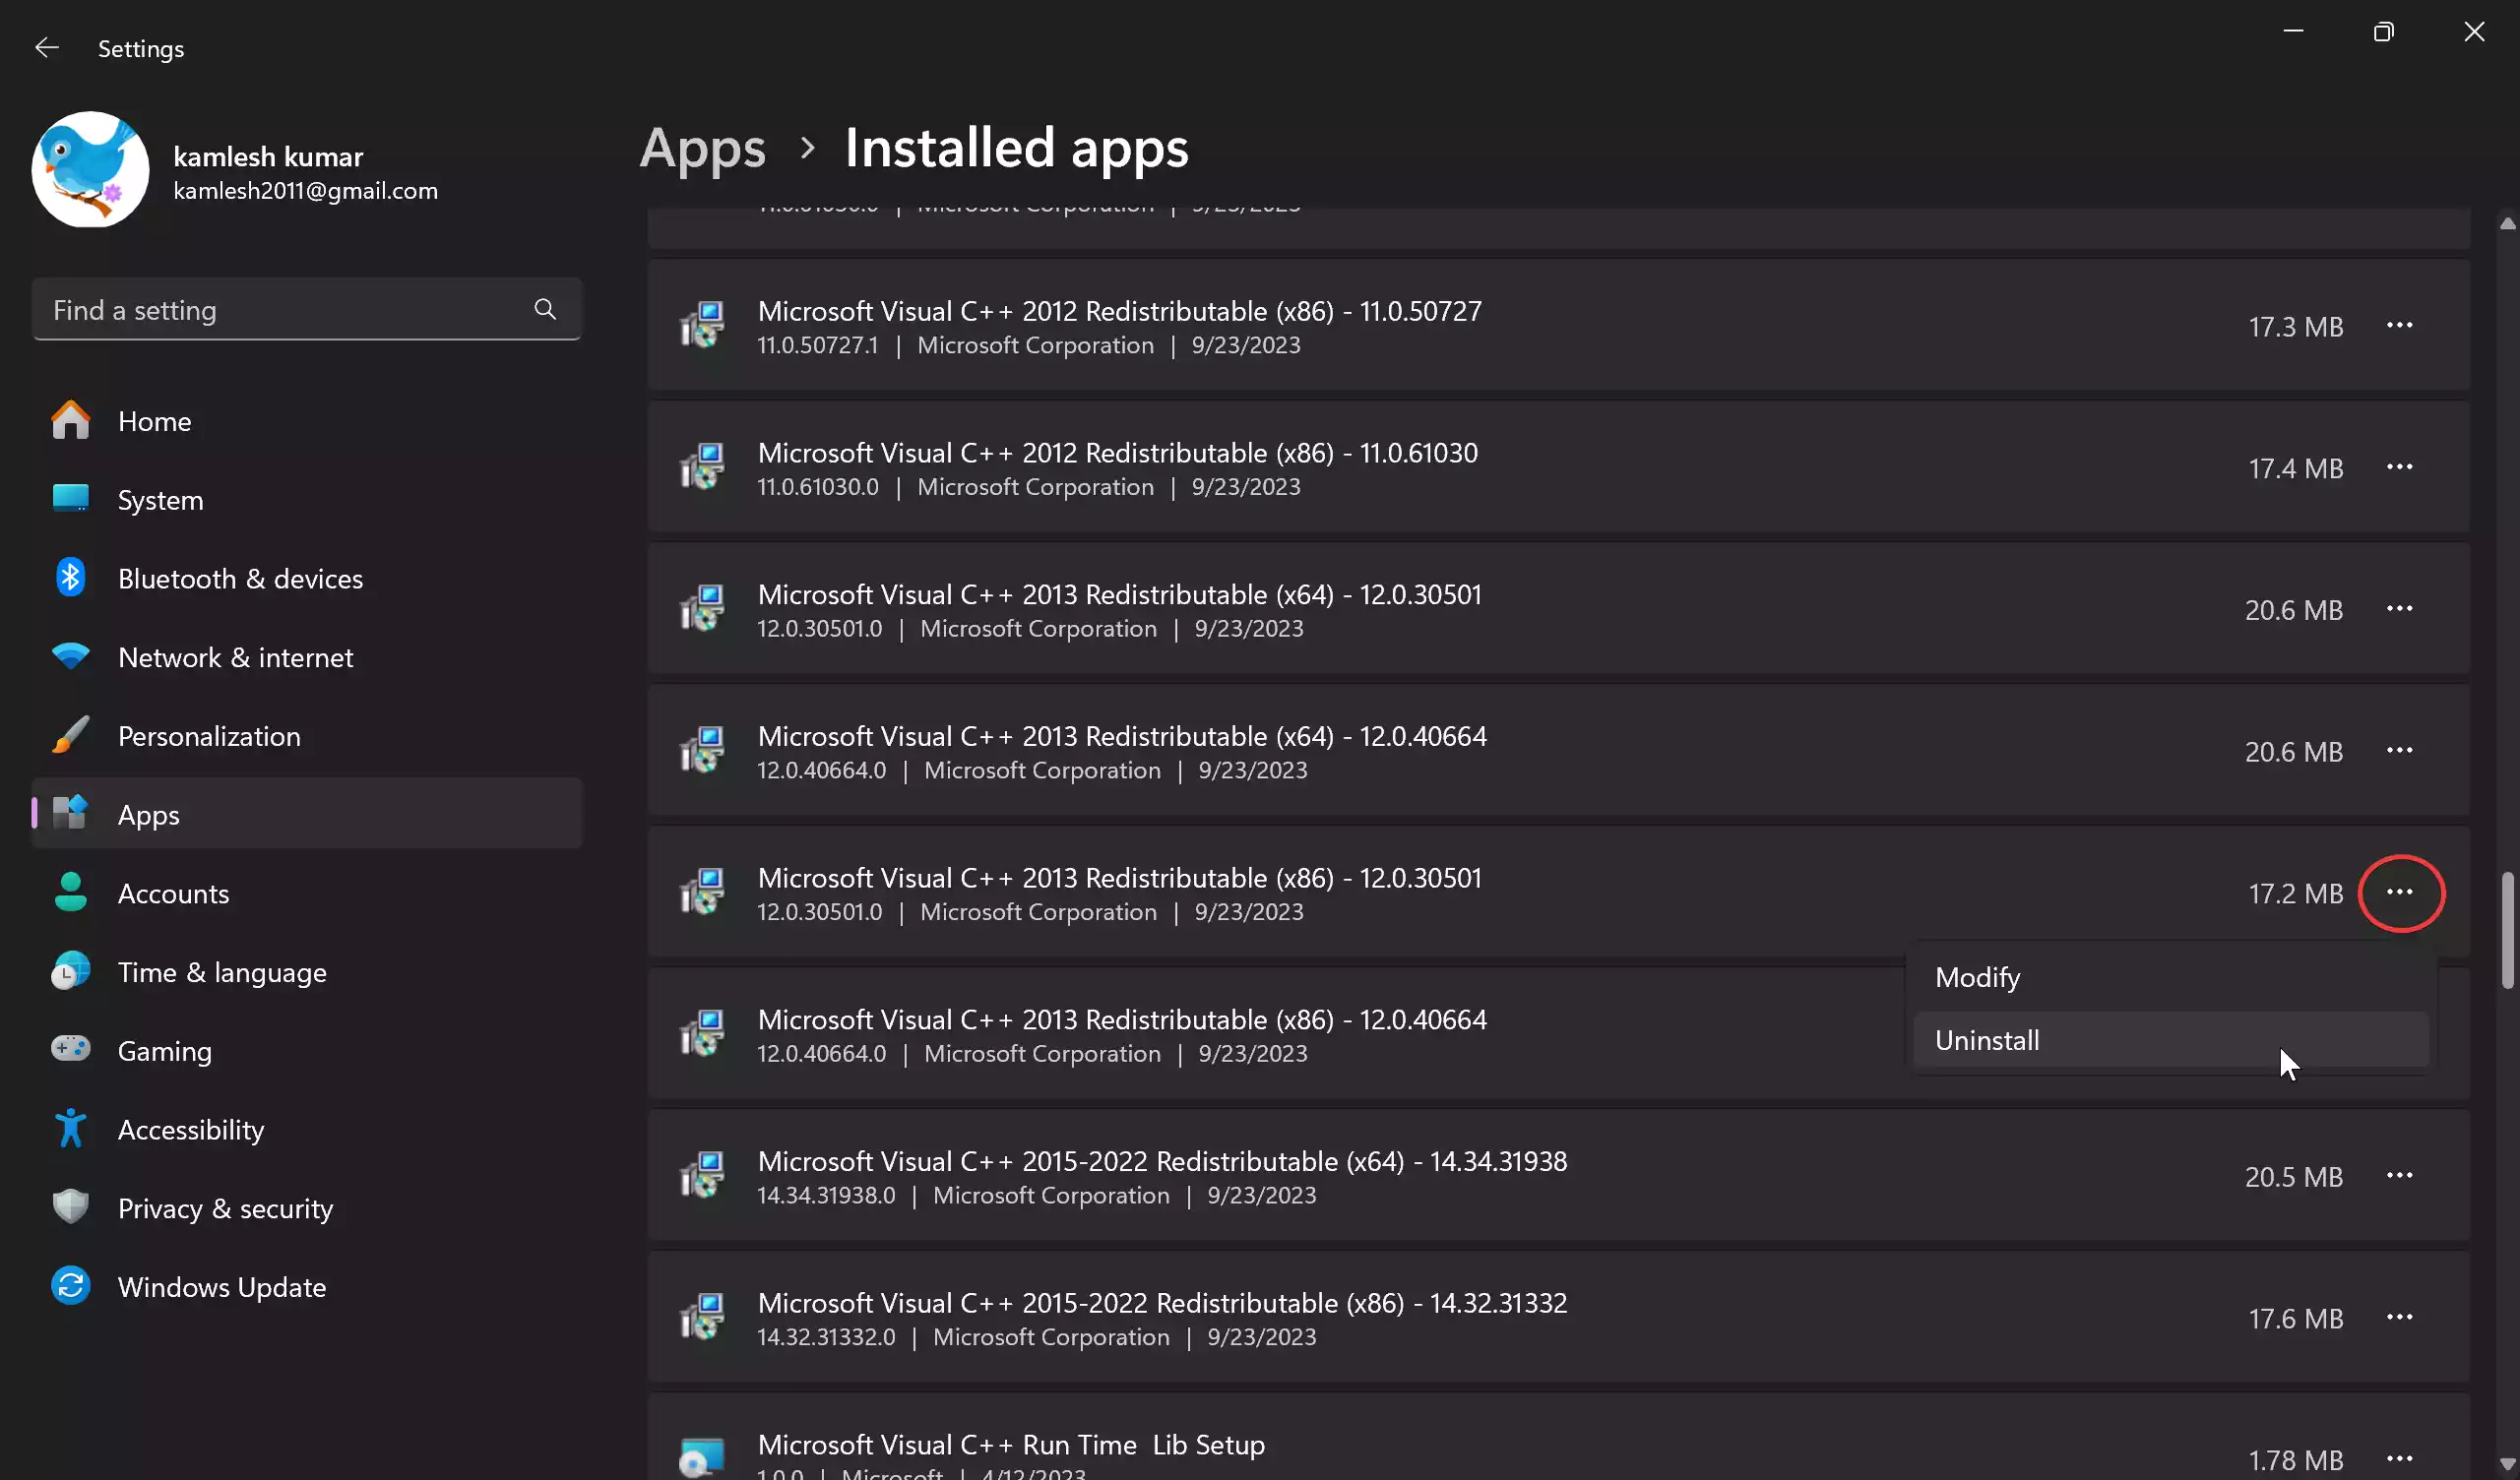
Step 4. Click on the driver to select it. Then, on the right side, you’ll see a menu represented by three dots. Click on it and select “Uninstall.” Confirm your choice by clicking “Yes” when prompted.
Once the uninstallation process is complete, the driver will be removed from your system. Note that some driver components might still remain, depending on the uninstaller instructions.
Method 2: Uninstalling Drivers from Control Panel
Step 1. Open Control Panel.
To do that, press the Windows key and type “Control Panel.” Select “Control Panel” from the search results.
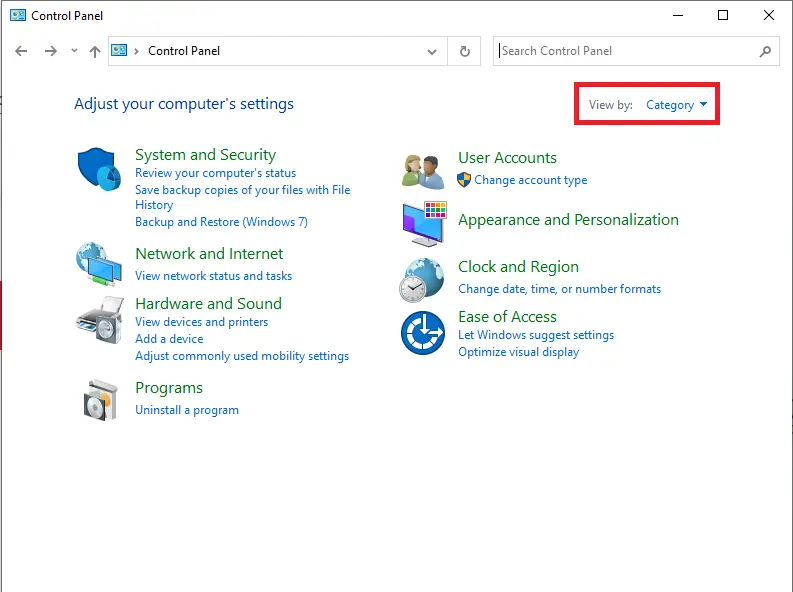
Step 2. In the Control Panel, set the “View by” option to “Category.”
Step 3. Now, find and click on the “Uninstall a program” option under the “Programs” section.

Step 4. Next, locate the driver package in the list of installed programs and select it.
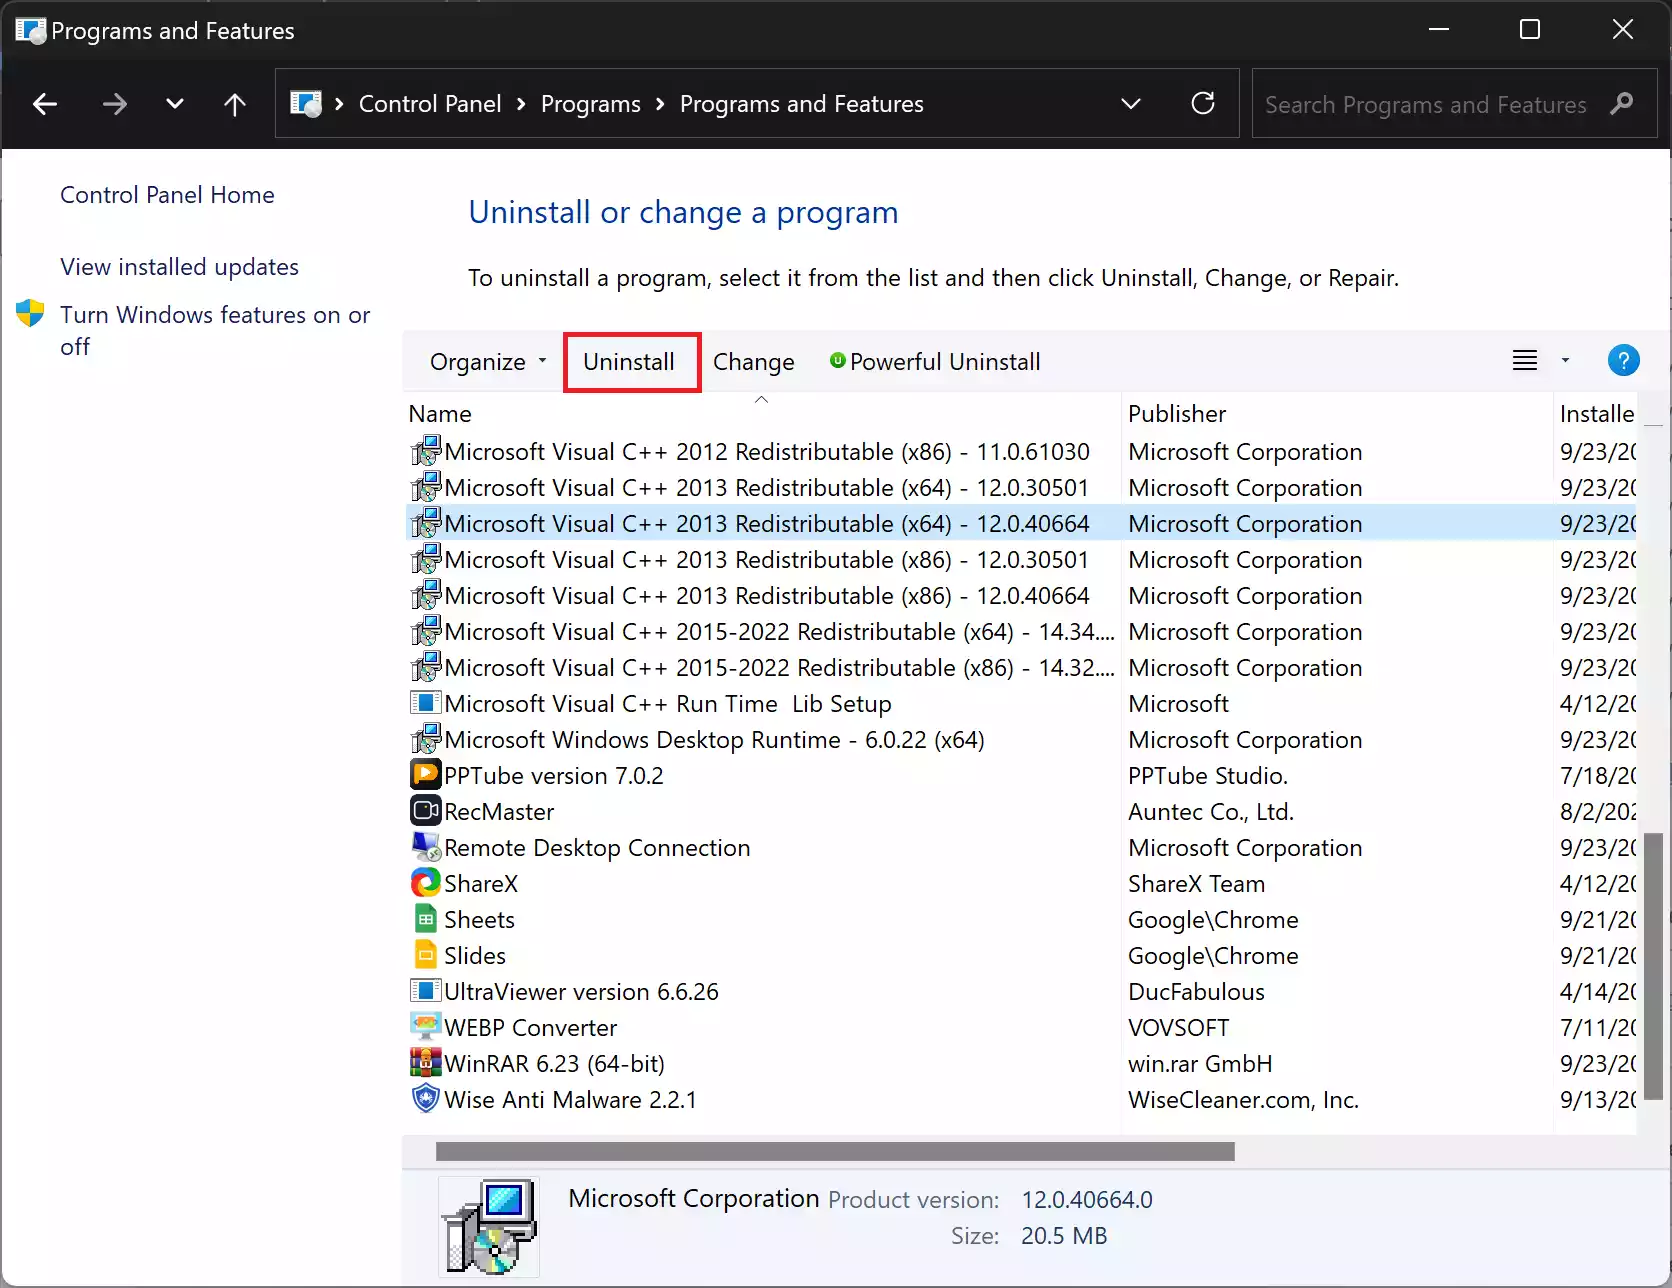
Step 5. Click on the “Uninstall” button at the top of the list.
Step 5. A confirmation dialog will appear. Click “Yes” to proceed with the driver removal.
The selected driver will be uninstalled from your system, leaving no traces behind.
Method 3: Uninstalling Drivers from Device Manager
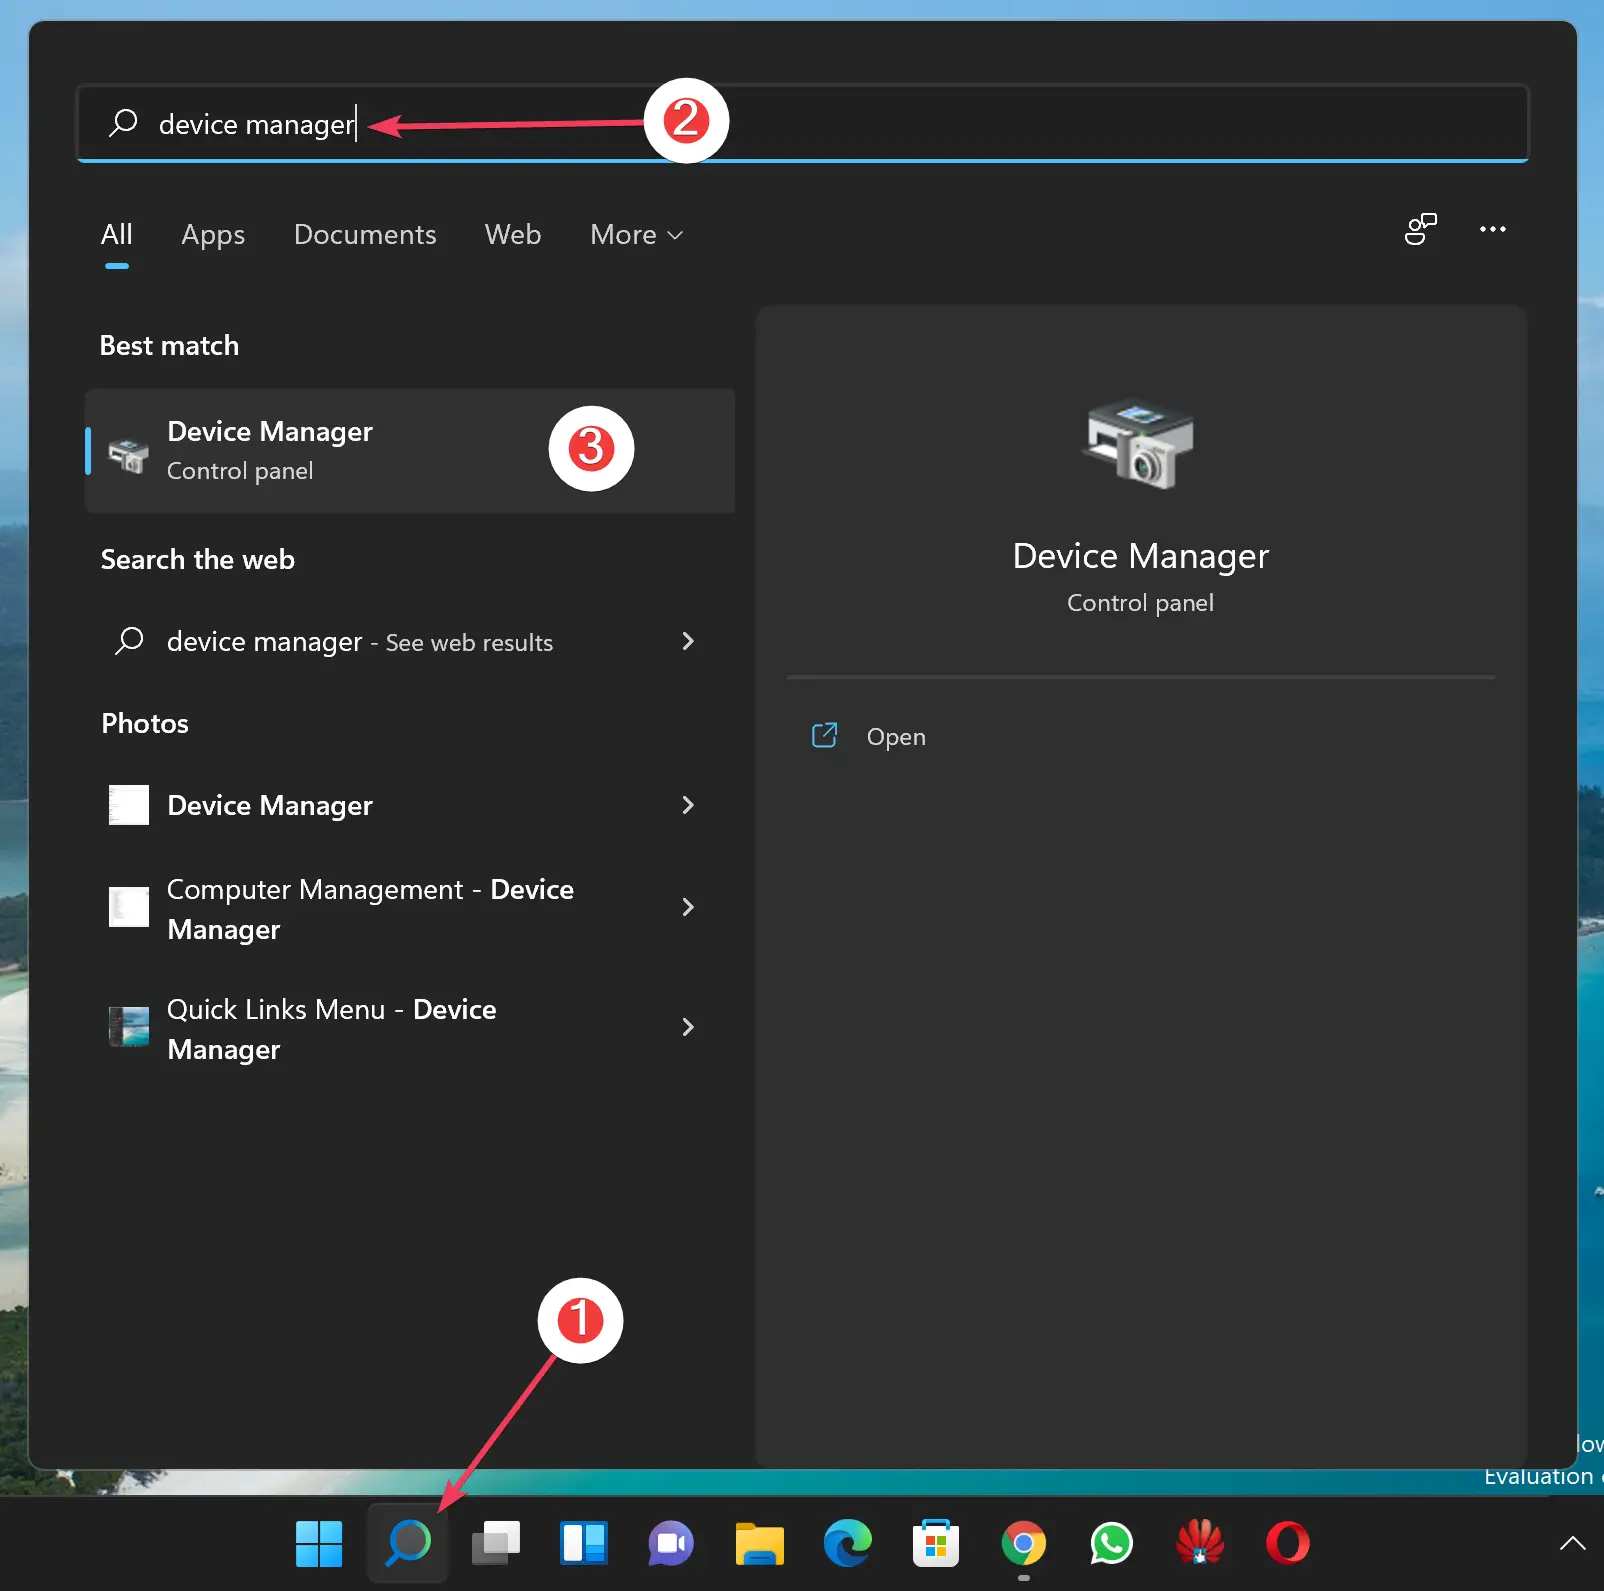
Step 1. Access Device Manager.
For that, open the Search menu (Windows+S), search for “Device Manager,” and click on the top result to open the Device Manager.
Step 2. In the Device Manager, expand the category containing the device driver you want to uninstall. Right-click on the device and select “Uninstall device.”
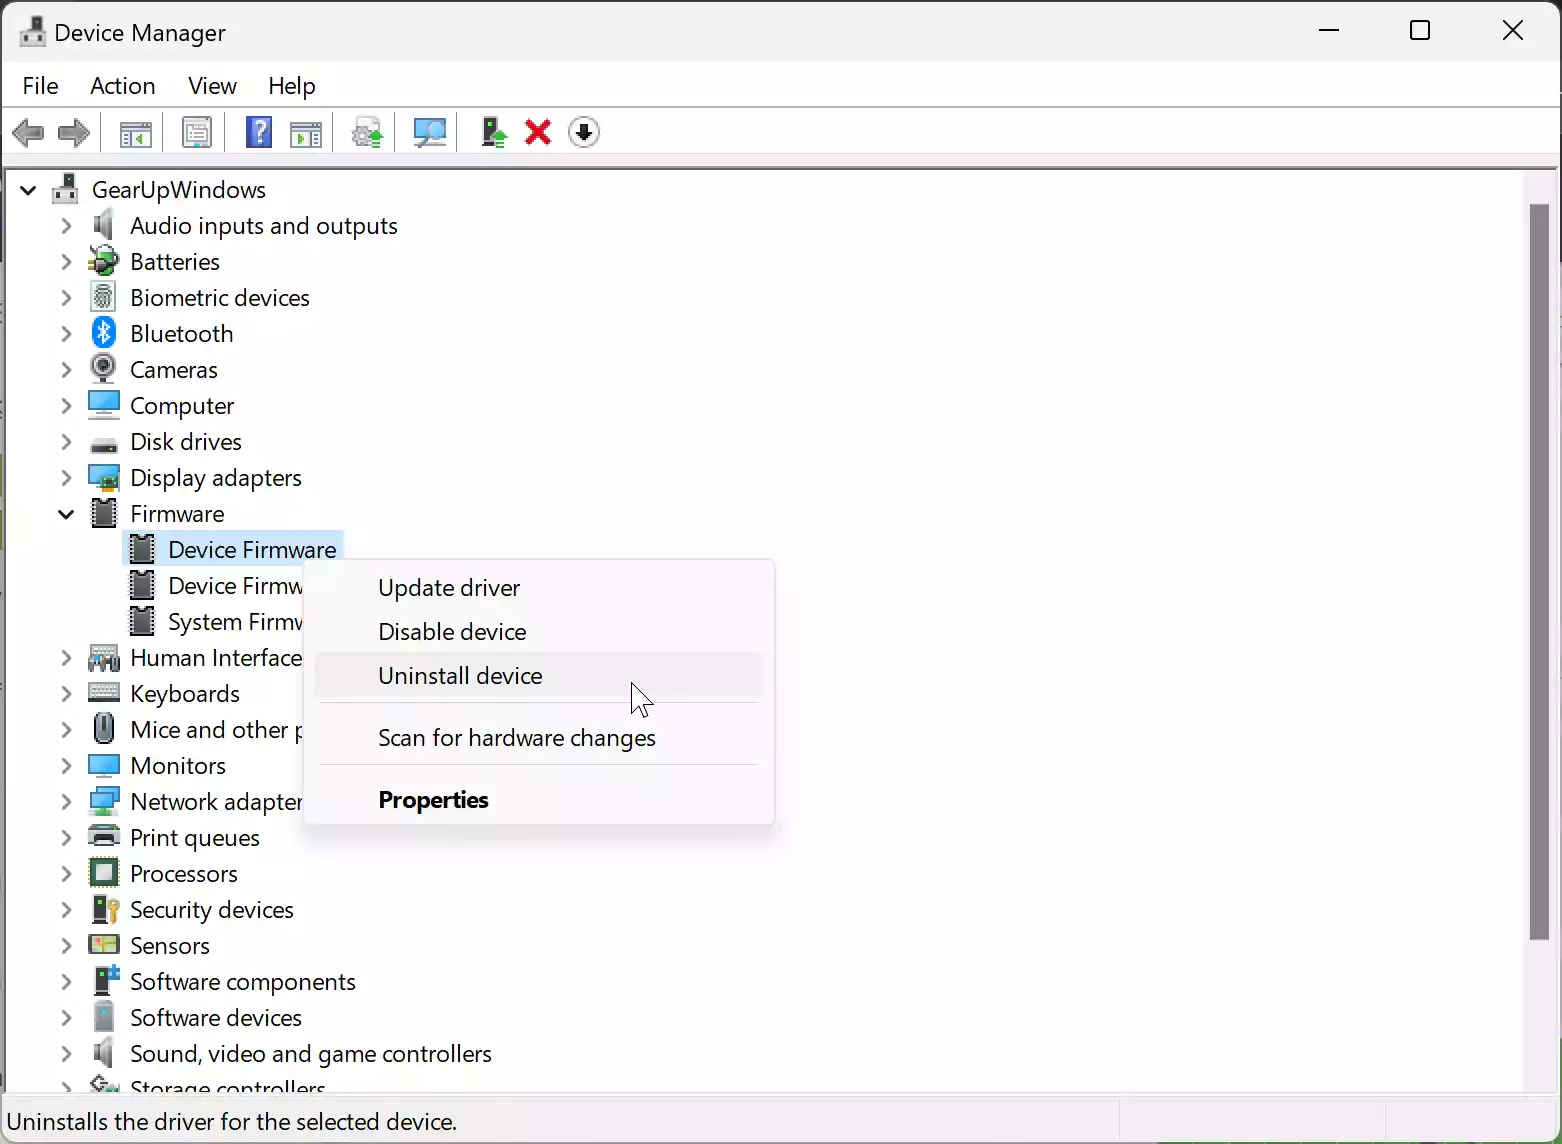
Step 3. A dialog may appear asking if you want to delete the driver software for the device. If you want to remove all traces of the driver, check the box that says, “Delete the driver software for this device.” Otherwise, you can leave it unchecked if you plan to reinstall the driver later.
Step 4. Click the “Uninstall” button to confirm the removal.
The selected driver will be uninstalled, and if you chose to delete the driver software, it will be completely removed from your system.
Conclusion
Uninstalling drivers on Windows 11 is a straightforward process, thanks to the user-friendly options provided by the operating system. Whether you prefer using the Settings app, Control Panel, or Device Manager, you can easily manage and remove drivers as needed. By following the detailed steps in this guide, you’ll be equipped to maintain a well-optimized and trouble-free Windows 11 system.
