For Windows 11 to install on your PC, TPM 2.0 and Secure Boot must be physically available in BIOS/UEFI. In other words, Windows 11 cannot be installed on your PC if your BIOS/UEFI does not support the TPM 2.0 and Secure Boot modules. When Microsoft announced these two features as minimum requirements, so many Windows users were unhappy.
Many Windows users were disappointed that they had to either purchase a new PC or adjust further to Windows 10 operating system only. Therefore, not even genuine Windows 10 users can upgrade from Windows 10 to Windows 11. We have already provided an article on installing Windows 11 without TPM 2.0 and Secure Boot, but this is a long process. Both Windows 10 and Windows 11 ISOs are required, and you will need to replace Windows 11 ISO files with Windows 10. During the installation of Windows 11, I noticed it was showing Windows 10, which I was not happy about, so I began looking for new options. Finally, I found success, so I decided to write this article.
Finally, I have managed to bypass TPM 2.0 and Secure Boot enforcement by Microsoft without using the Windows 10 ISO. Do you not think that is impressive?
You won’t find the TPM 2.0 chip or Secure Boot on UEFI if your Windows PC is older than four years. However, you will find a TPM module that is TPM 1.2. Even if you find Secure Boot and TPM 1.2 on your PC, Windows 11 will not work.
Our gearupwindows article will show you how to install Windows 11 with TPM 2.0 and Secure Boot enabled on your PC by deleting a single file from your ISO file.
How to Quickly Install Windows 11 on Unsupported PCs without TPM 2.0 and Secure Boot?
Follow these steps to quickly install Windows 11 on unsupported PCs without TPM 2.0 and Secure Boot:-
Step 1. Download the official Windows 11 ISO by registering for Windows Insider or any other source.
Step 2. Now, download the WinRAR application to extract the contents of the ISO file.
Step 3. Right-click on Windows 11 ISO you have downloaded and select the Extract to option (Refer to screenshot).
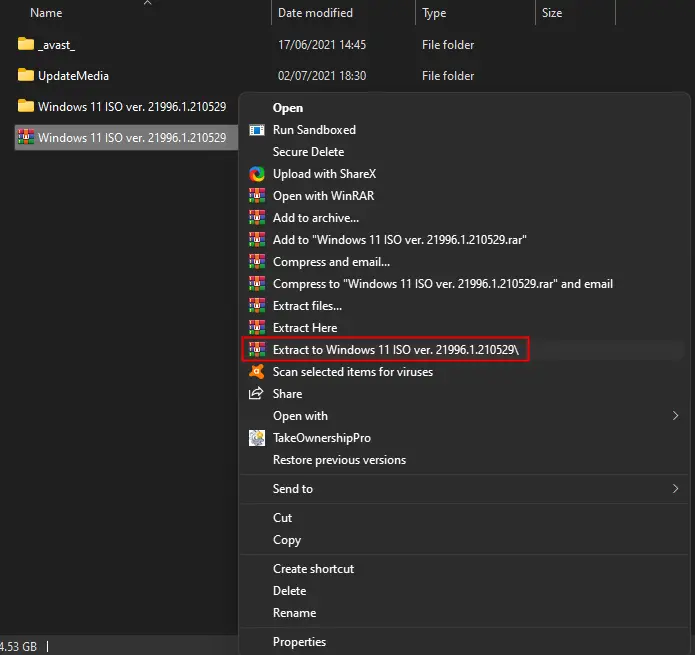
Step 4. In a few minutes, ISO contents will be extracted to a folder with the same name as the ISO file.
Step 5. Now, double-click on the folder to open it.
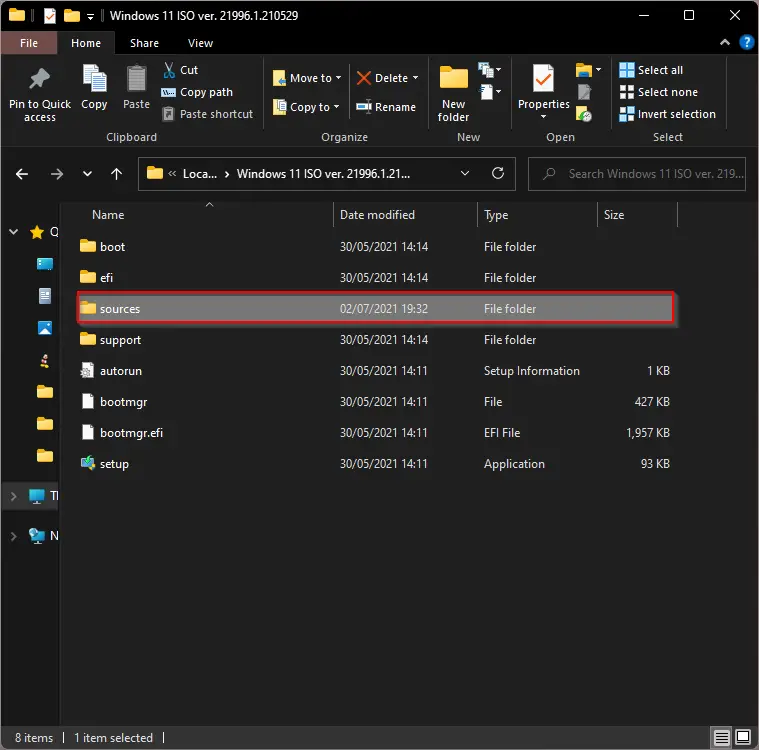
Step 6. Next, double-click on the sources folder to open it.
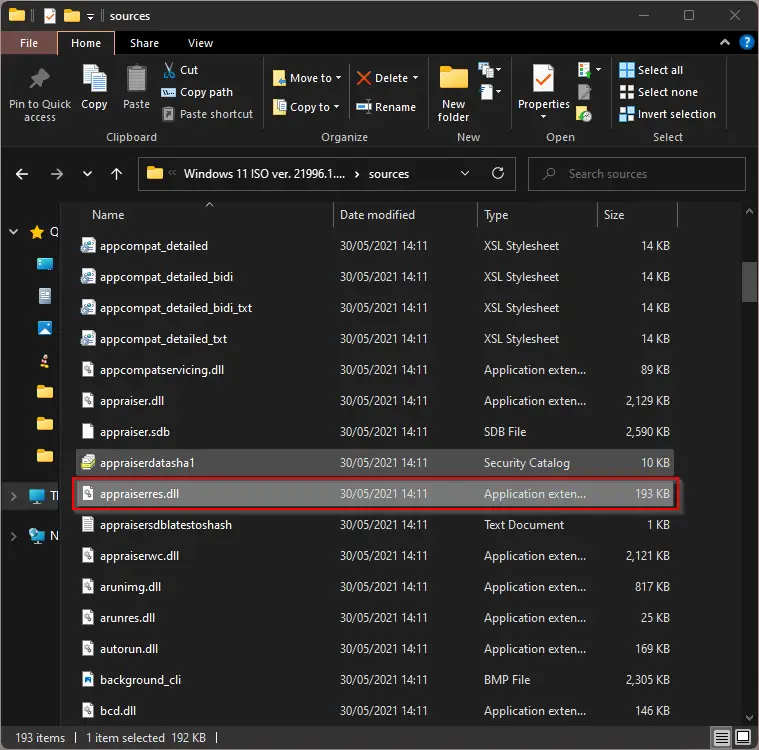
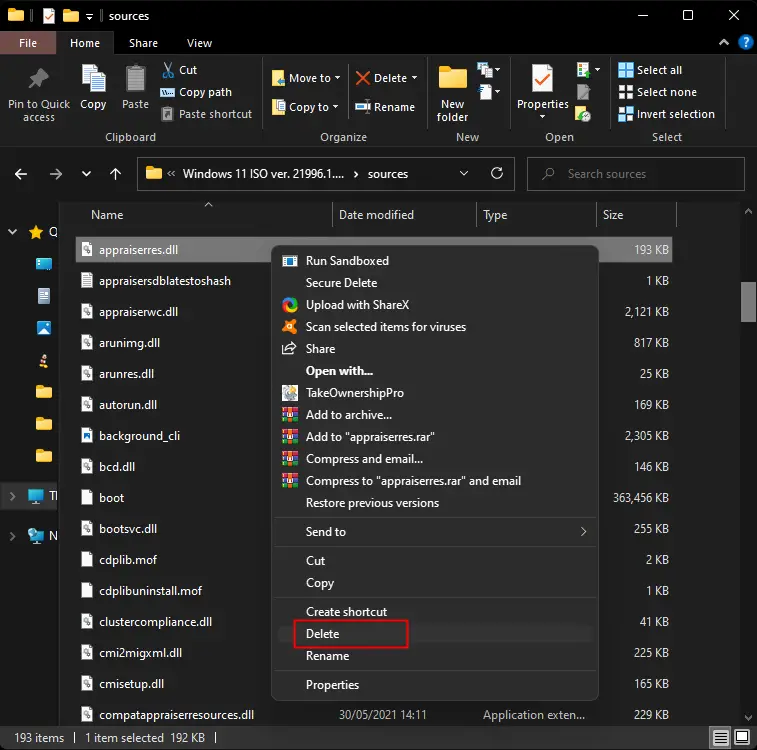
Step 7. Locate the appraiserres.dll file and right-click on it. Select the Delete option from the context menu.
Step 8. Click the Yes button when Windows prompts.
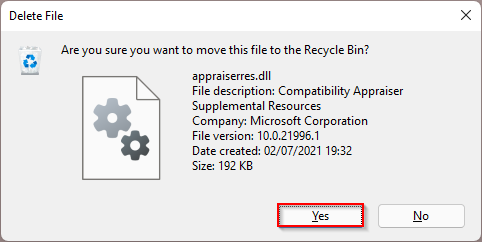
That’s all. Here the trick goes. Windows 11 appraiserres.dll file is responsible for checking Secure Boot and TPM 2.0 on your PC. Since you have deleted it, Windows 11 installation will no more able to check these features on your PC, and you can install it without any issues.
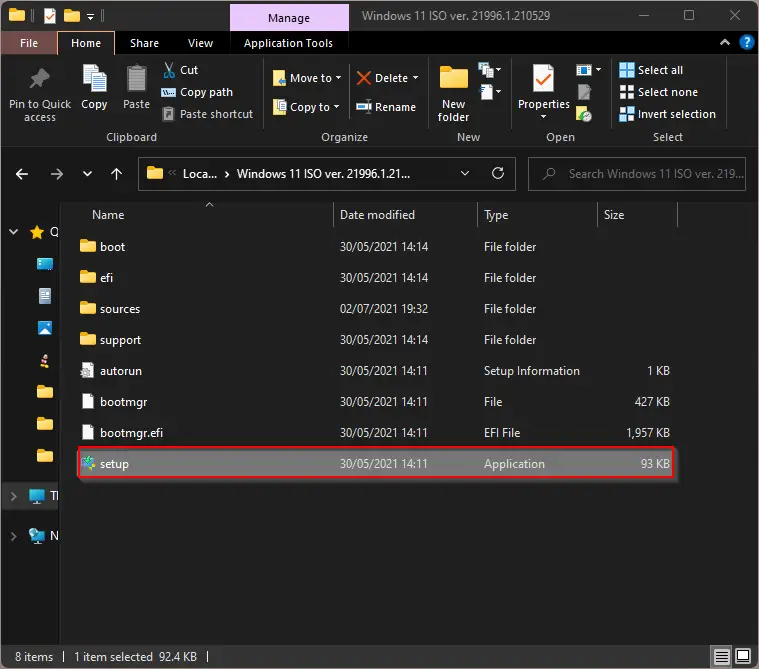
We have personally tested it and upgraded our Windows 10 to Windows 11 on Apple MacBook Air. To upgrade your old Windows 10 to Windows 11, double-click on the setup file and follow the onscreen instructions. It’s quite simple.
Conclusion
In conclusion, Windows 11 has introduced new minimum hardware requirements, including TPM 2.0 and Secure Boot, which have disappointed many Windows users. However, our gearupwindows article has provided a solution to install Windows 11 on unsupported PCs without TPM 2.0 and Secure Boot by deleting a single file from the ISO file. While it is recommended to have the latest hardware to enjoy the full features of Windows 11, this workaround provides an option for users who do not meet the minimum requirements. We hope this article has been helpful, and users can now enjoy the latest version of Windows without having to purchase a new PC.
Also Read:
No,it doesent works.
Pl refer https://gearupwindows.com/fix-error-during-windows-11-setup-this-pc-cant-run-windows-11/
and make the changes during installation of Windows 11. It even works with latest release and virtual machines.