Windows 11 offers a lot of features and advanced boot options to troubleshoot your Windows problems. You can reset your PC, restore it to a previous state using a System restore point, and boot in safe mode to troubleshoot problems.
What can we do from the Advanced Options Menu?
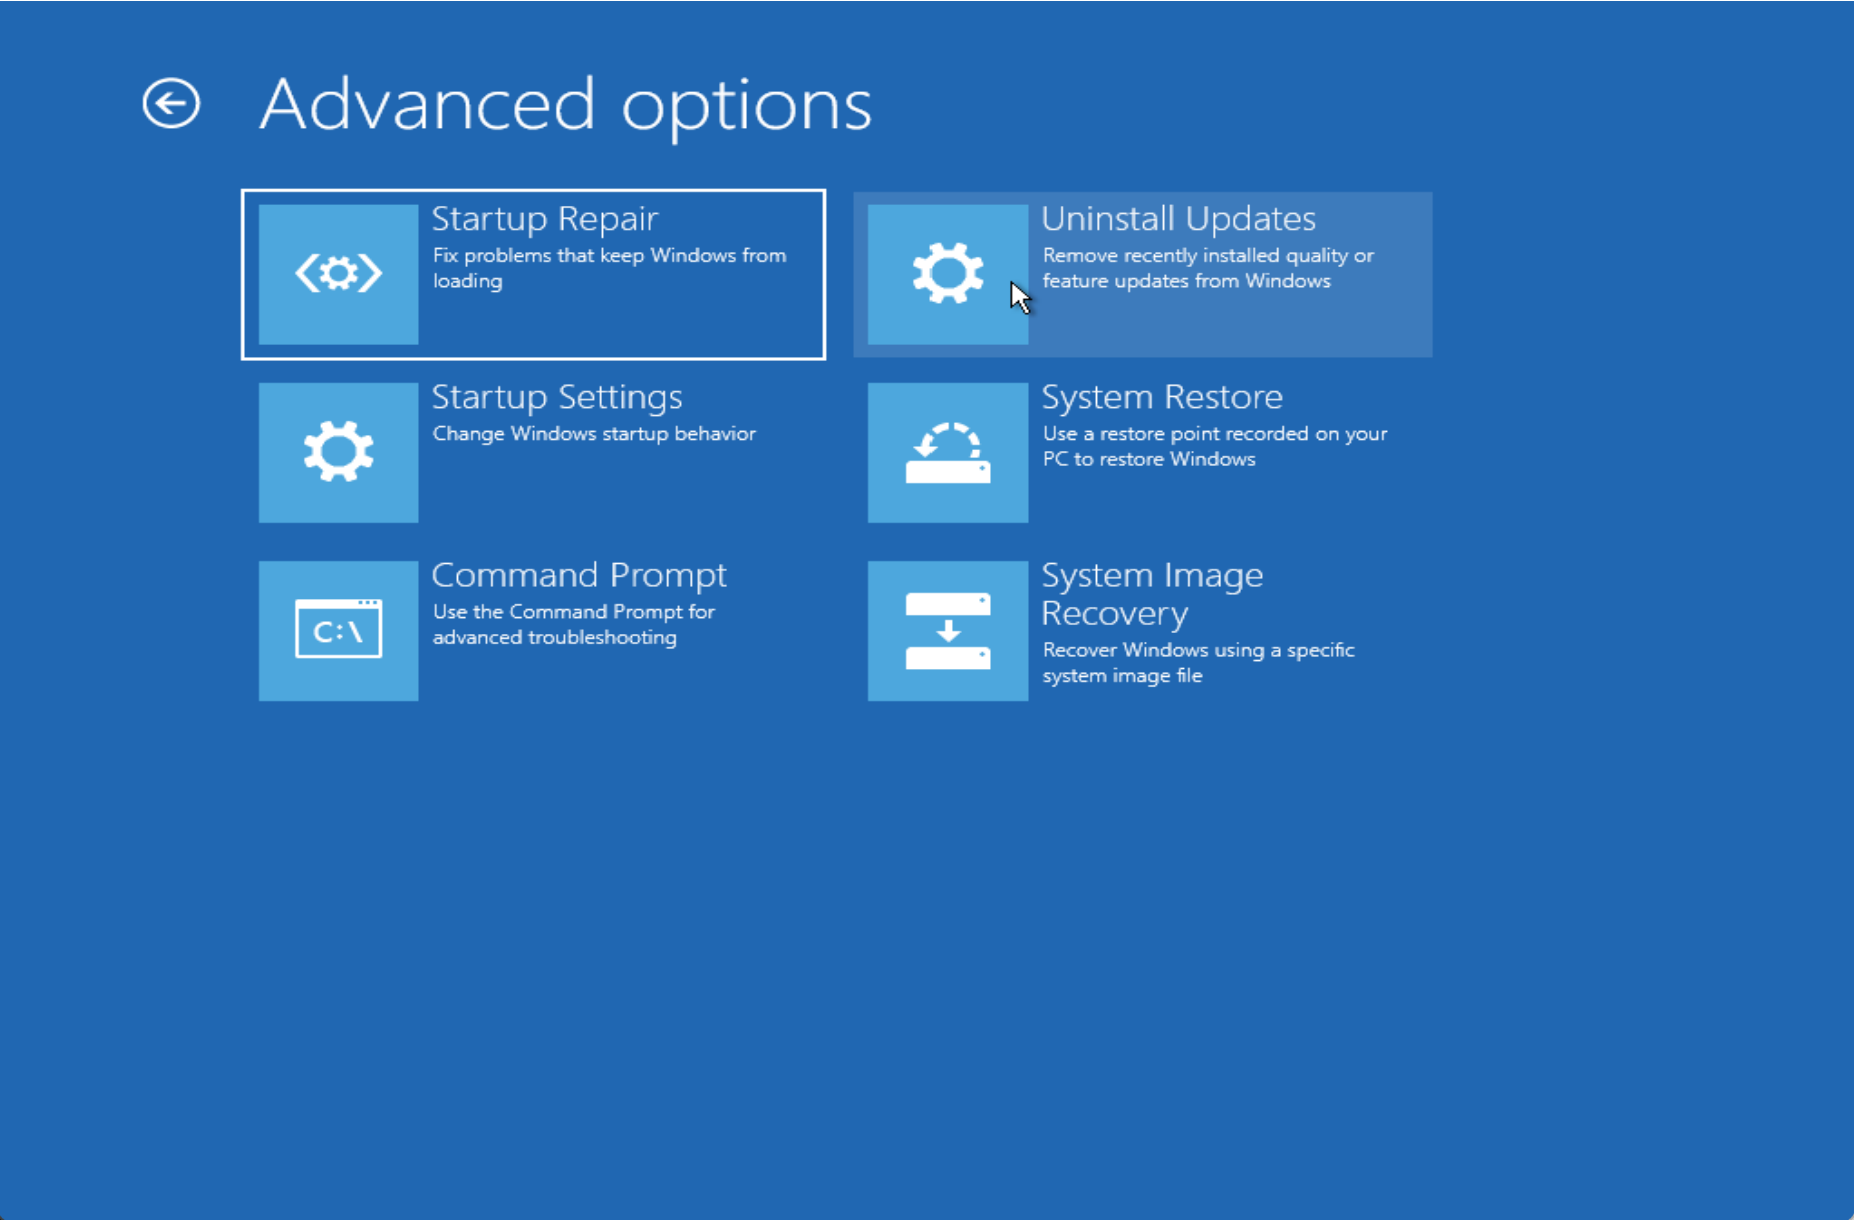
The “Advanced Options” menu lets you perform several actions to troubleshoot or repair your PC:-
Startup Repair: When you select this option, Windows automatically triggers the startup repair tool and tries to fix startup problems.
Uninstall Updates: If recent Windows updates make your system non-operational, Windows lets you uninstall buggy updates.
Startup Settings: This option lets you access alternative startup modes and tools, for example, Debugging Mode, Low-Resolution Video Mode, boot logging, Safe Mode, etc.
System Restore: This allows you to fix certain crashes and errors by restoring your Windows to the previously created system restore point. Settings, drivers, and apps are restored to earlier points.
Command Prompt: Your PC will start with a simple Command Prompt for troubleshooting.
System Image Recovery: This allows you to restore a backup image of your PC.
Go back to the previous version: Have you recently upgraded your computer from Windows 10 to 11? This option allows you to downgrade your PC to the previous version you were using. This option will only be available if you have upgraded your computer within the last 10 days.
There are several ways to open the “Advanced Options” menu on Windows 11. These are the following:-
- Via Command Prompt or Windows PowerShell
- Using Power Button
- Through Settings App
How to Open the “Advanced Options” Menu on Windows 11 using Command Prompt or Windows PowerShell?
To open the “Advanced Options” menu on Windows 11 using Command Prompt or Windows PowerShell, do these steps:-
Step 1. Open the Command Prompt or Windows Powershell with the administrative rights that you prefer to use.
Step 2. At the prompt, type the following command, and then hit the Enter key on the keyboard:-
shutdown.exe /r /o
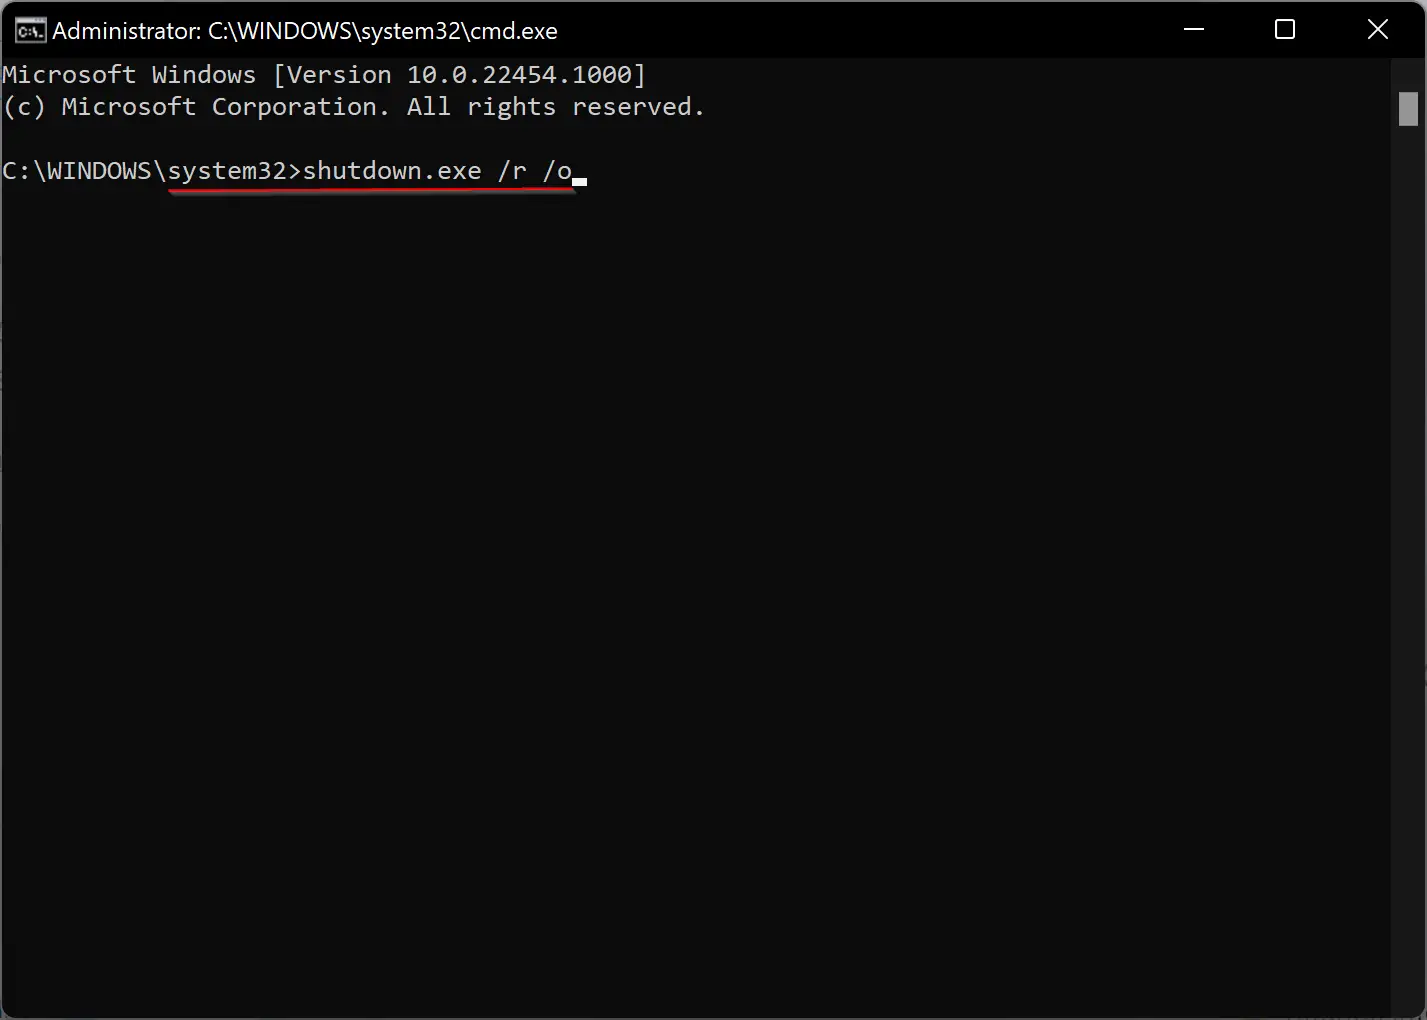
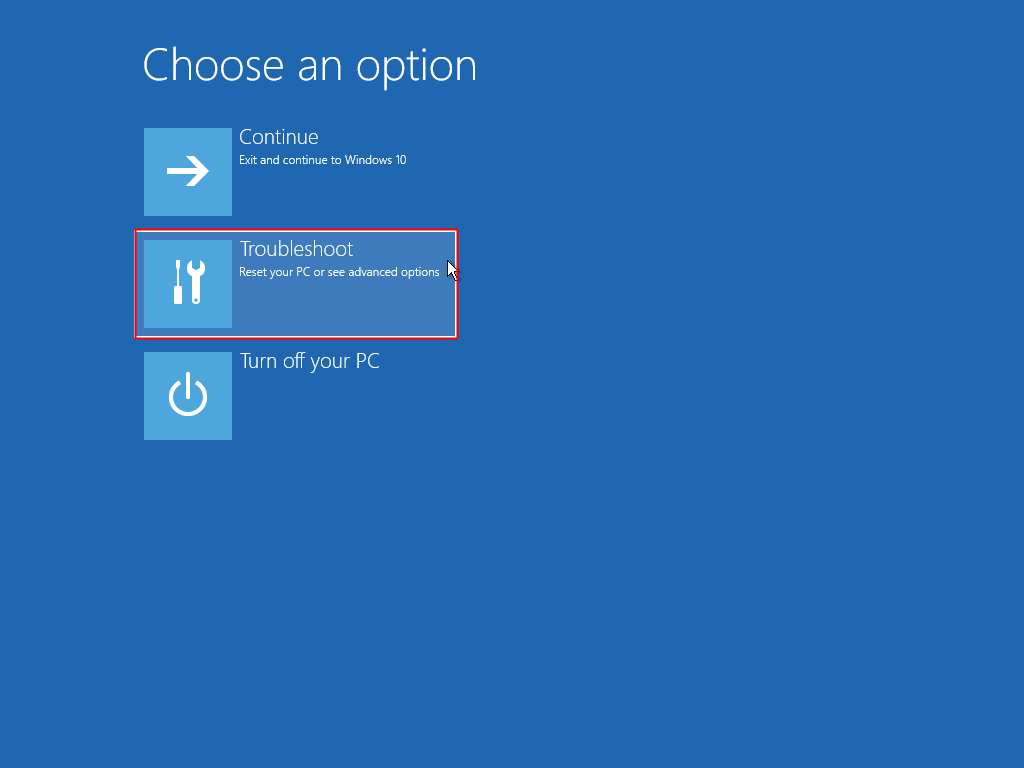
Step 3. After executing the above command, your PC immediately restarts. Click the Troubleshoot button.
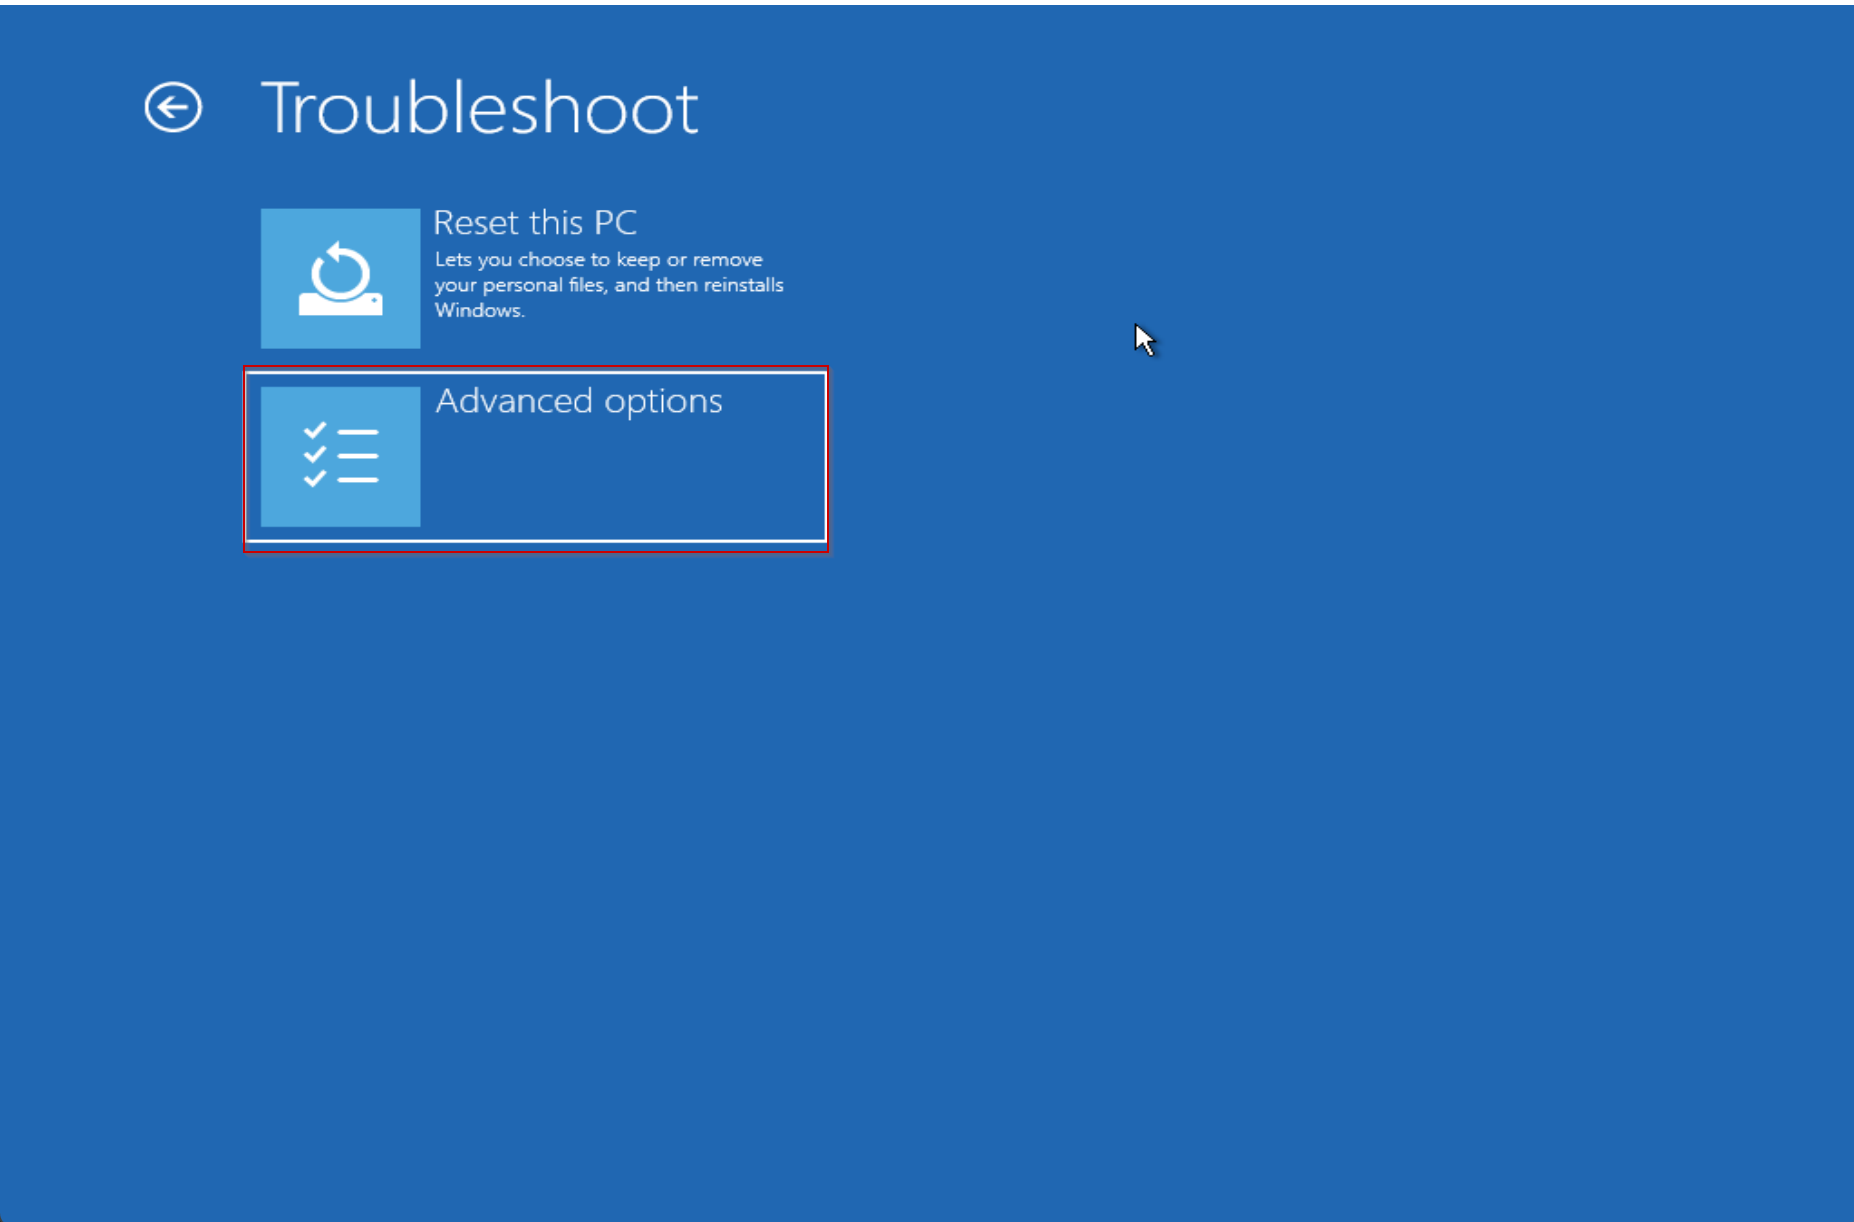
Step 4. Finally, select the Advanced options to access the Advanced options menu on Windows 11.
How to Access the “Advanced Options” Menu on Windows 11 using the Power Button?
To access the “Advanced Options” menu on Windows 11 using the Power button, do these steps:-
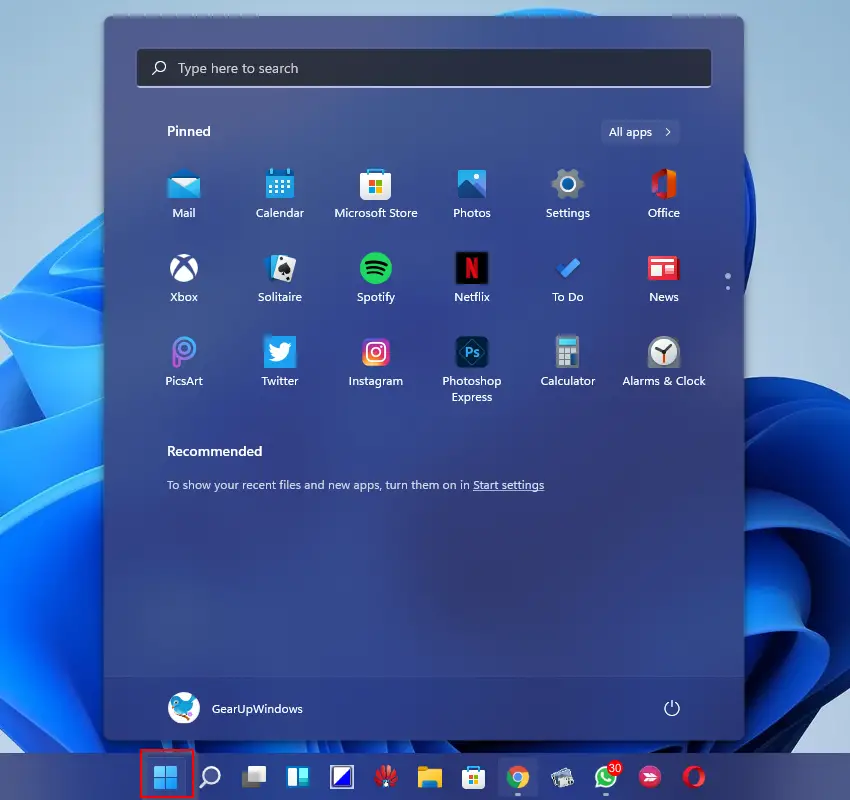
Step 1. Click the Start button on the taskbar.
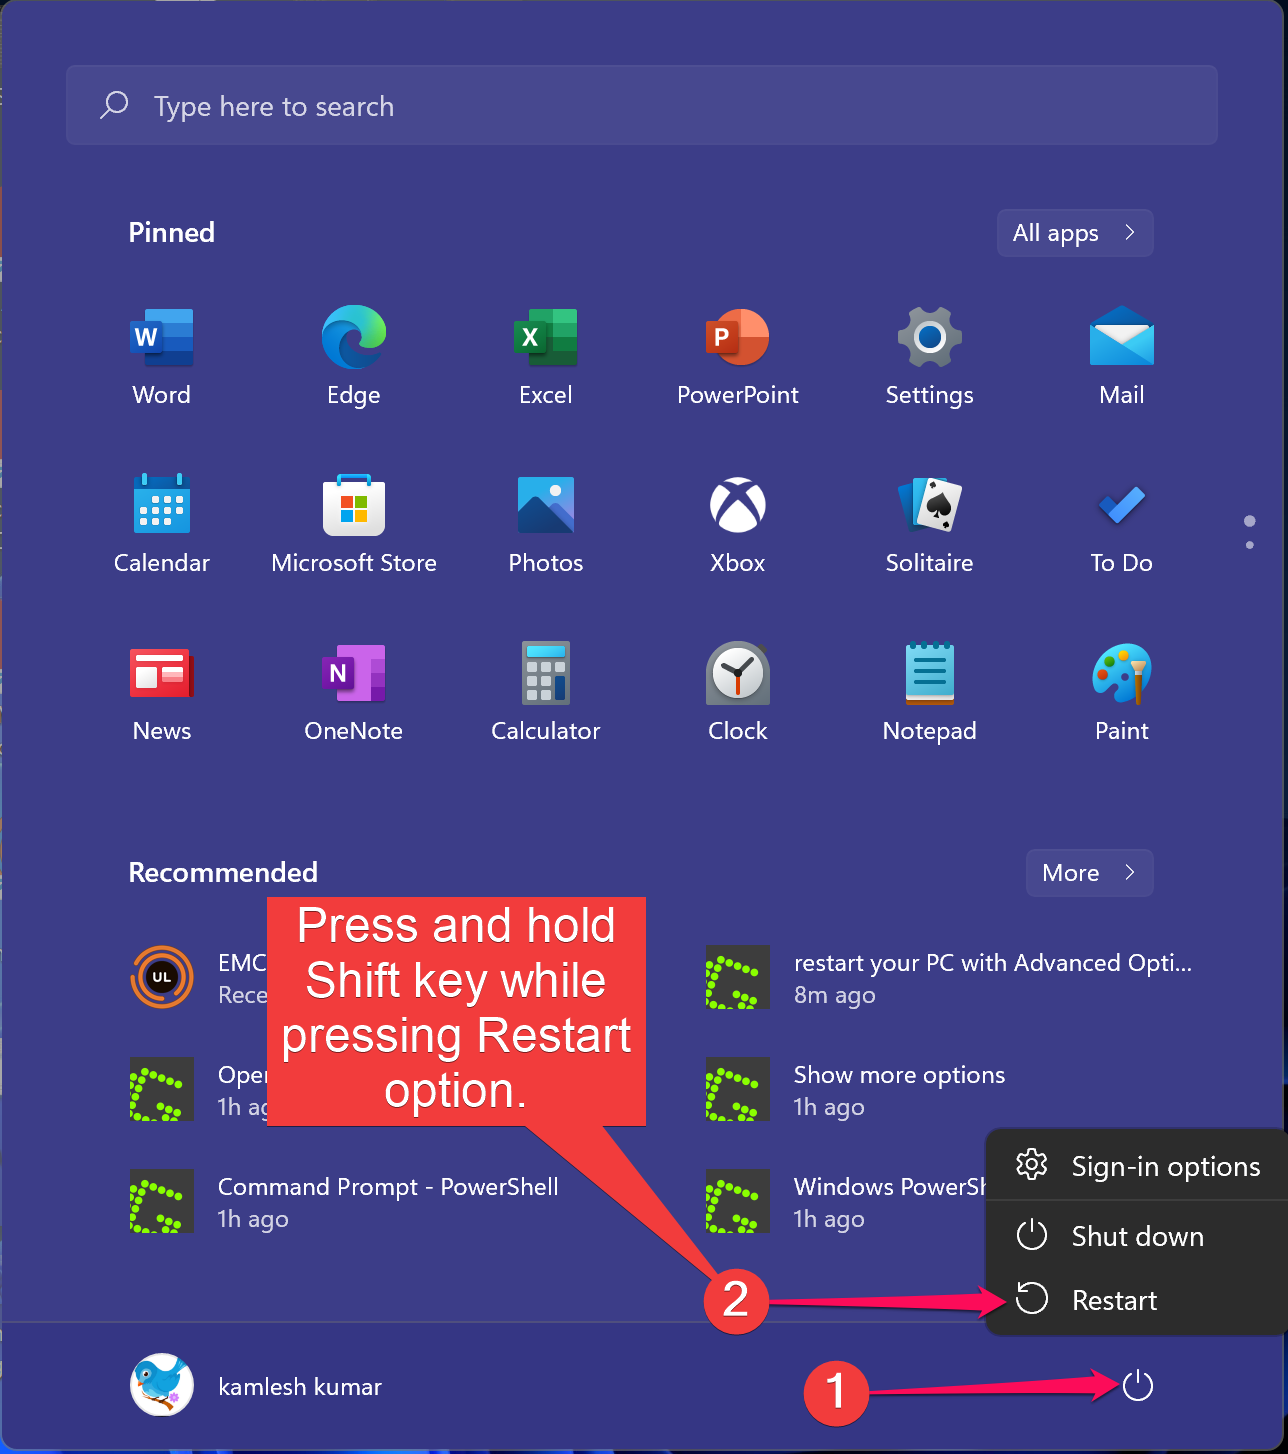
Step 2. Select the Power button. Now, press and hold the Shift key of the keyboard, and then press the Restart button.
Step 3. When done, your PC immediately restarts. Click the Troubleshoot button.
Step 4. Finally, select the Advanced options to access the Advanced options menu on Windows 11.
How to Open the “Advanced Options” Menu on Windows 11 through the Settings app?
If you don’t prefer the above methods, you can use the Windows 11 settings app to boot into the “Advanced Options” Menu. To do that, perform the following steps:-
Step 1. Open the Settings app by pressing the Windows + I keys.
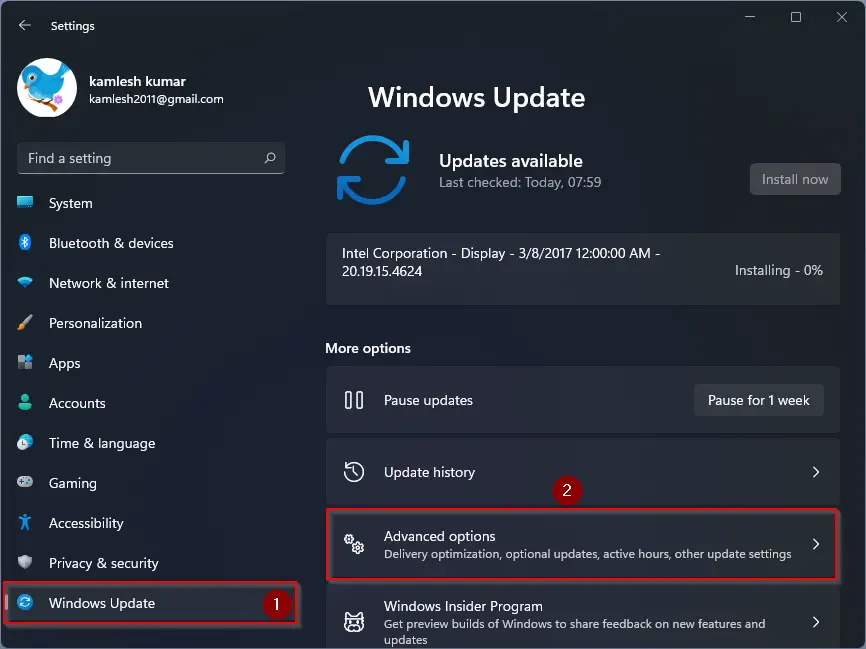
Step 2. When Windows Settings opens, select the Windows Update category from the left sidebar.
Step 3. Then click on the Advanced options tab on the right sidebar.
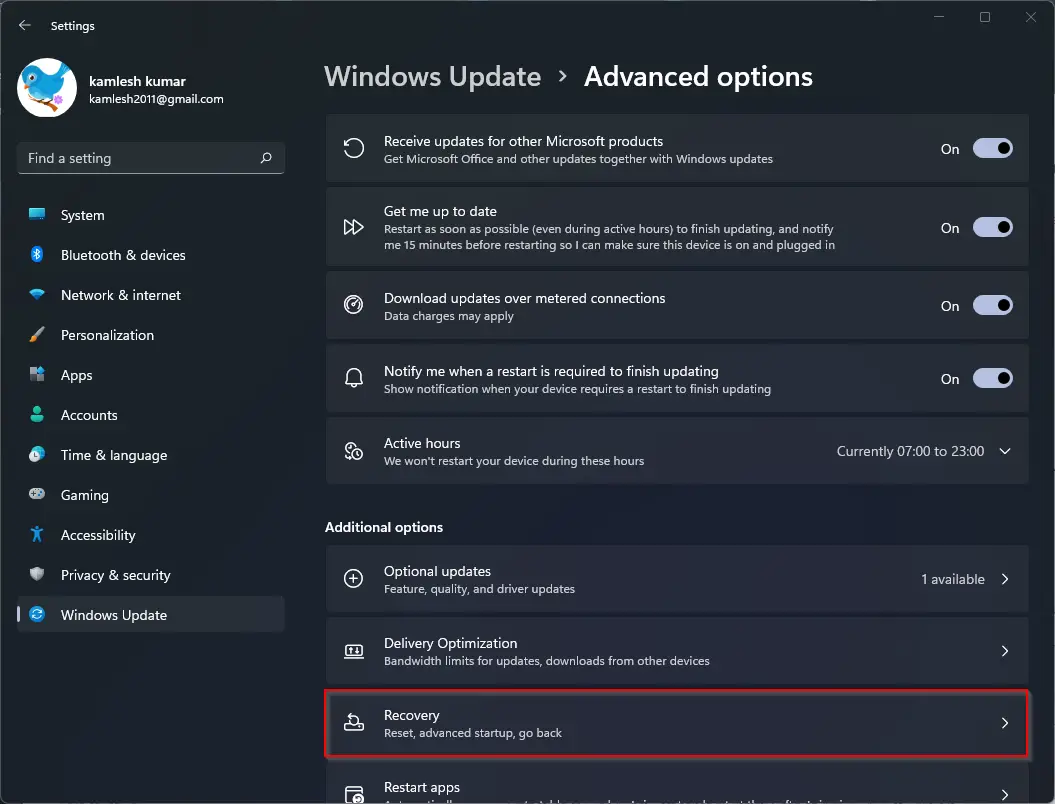
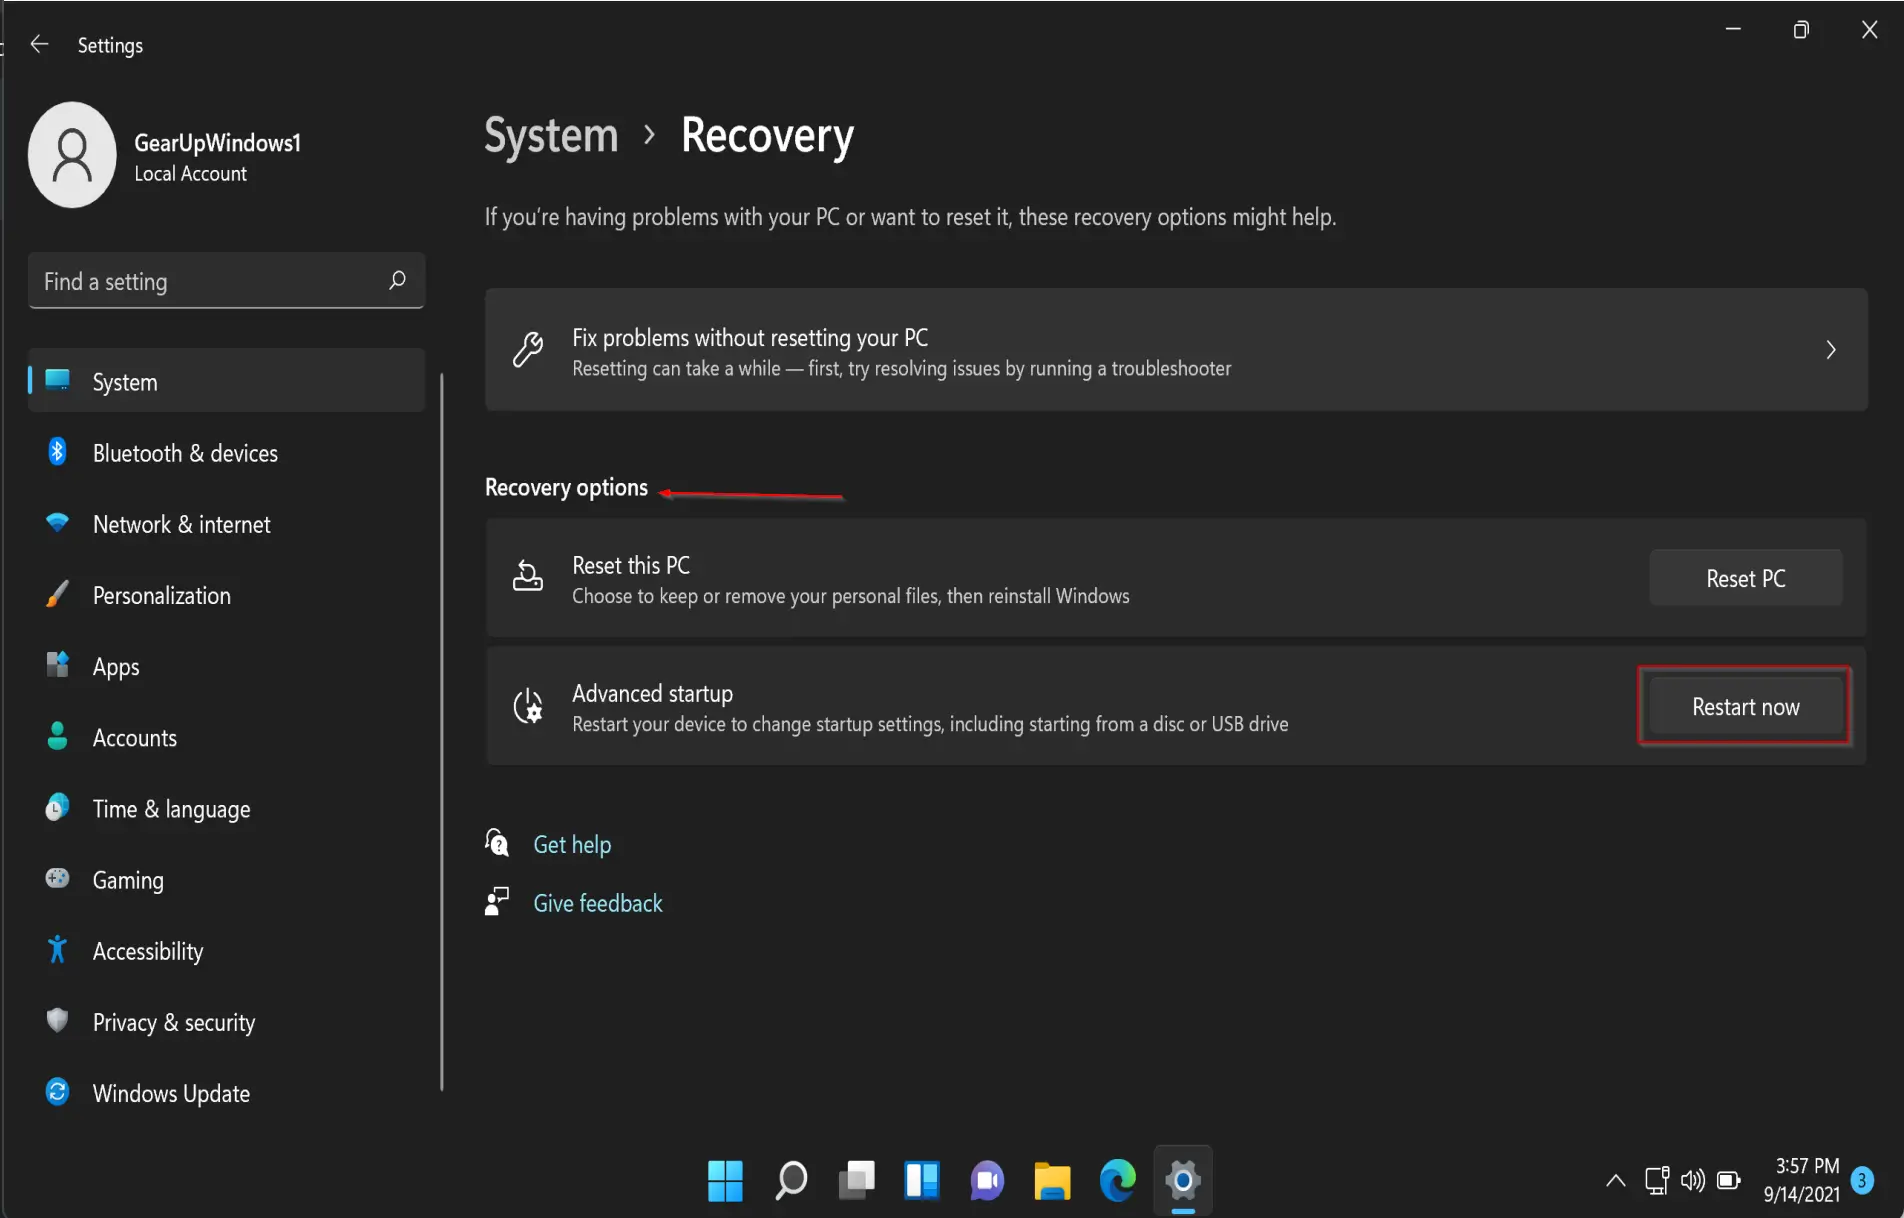
Step 4. Next, click on the Recovery option.
Step 5. Click on the Restart now button beside “Advanced startup” under the Recovery options section.
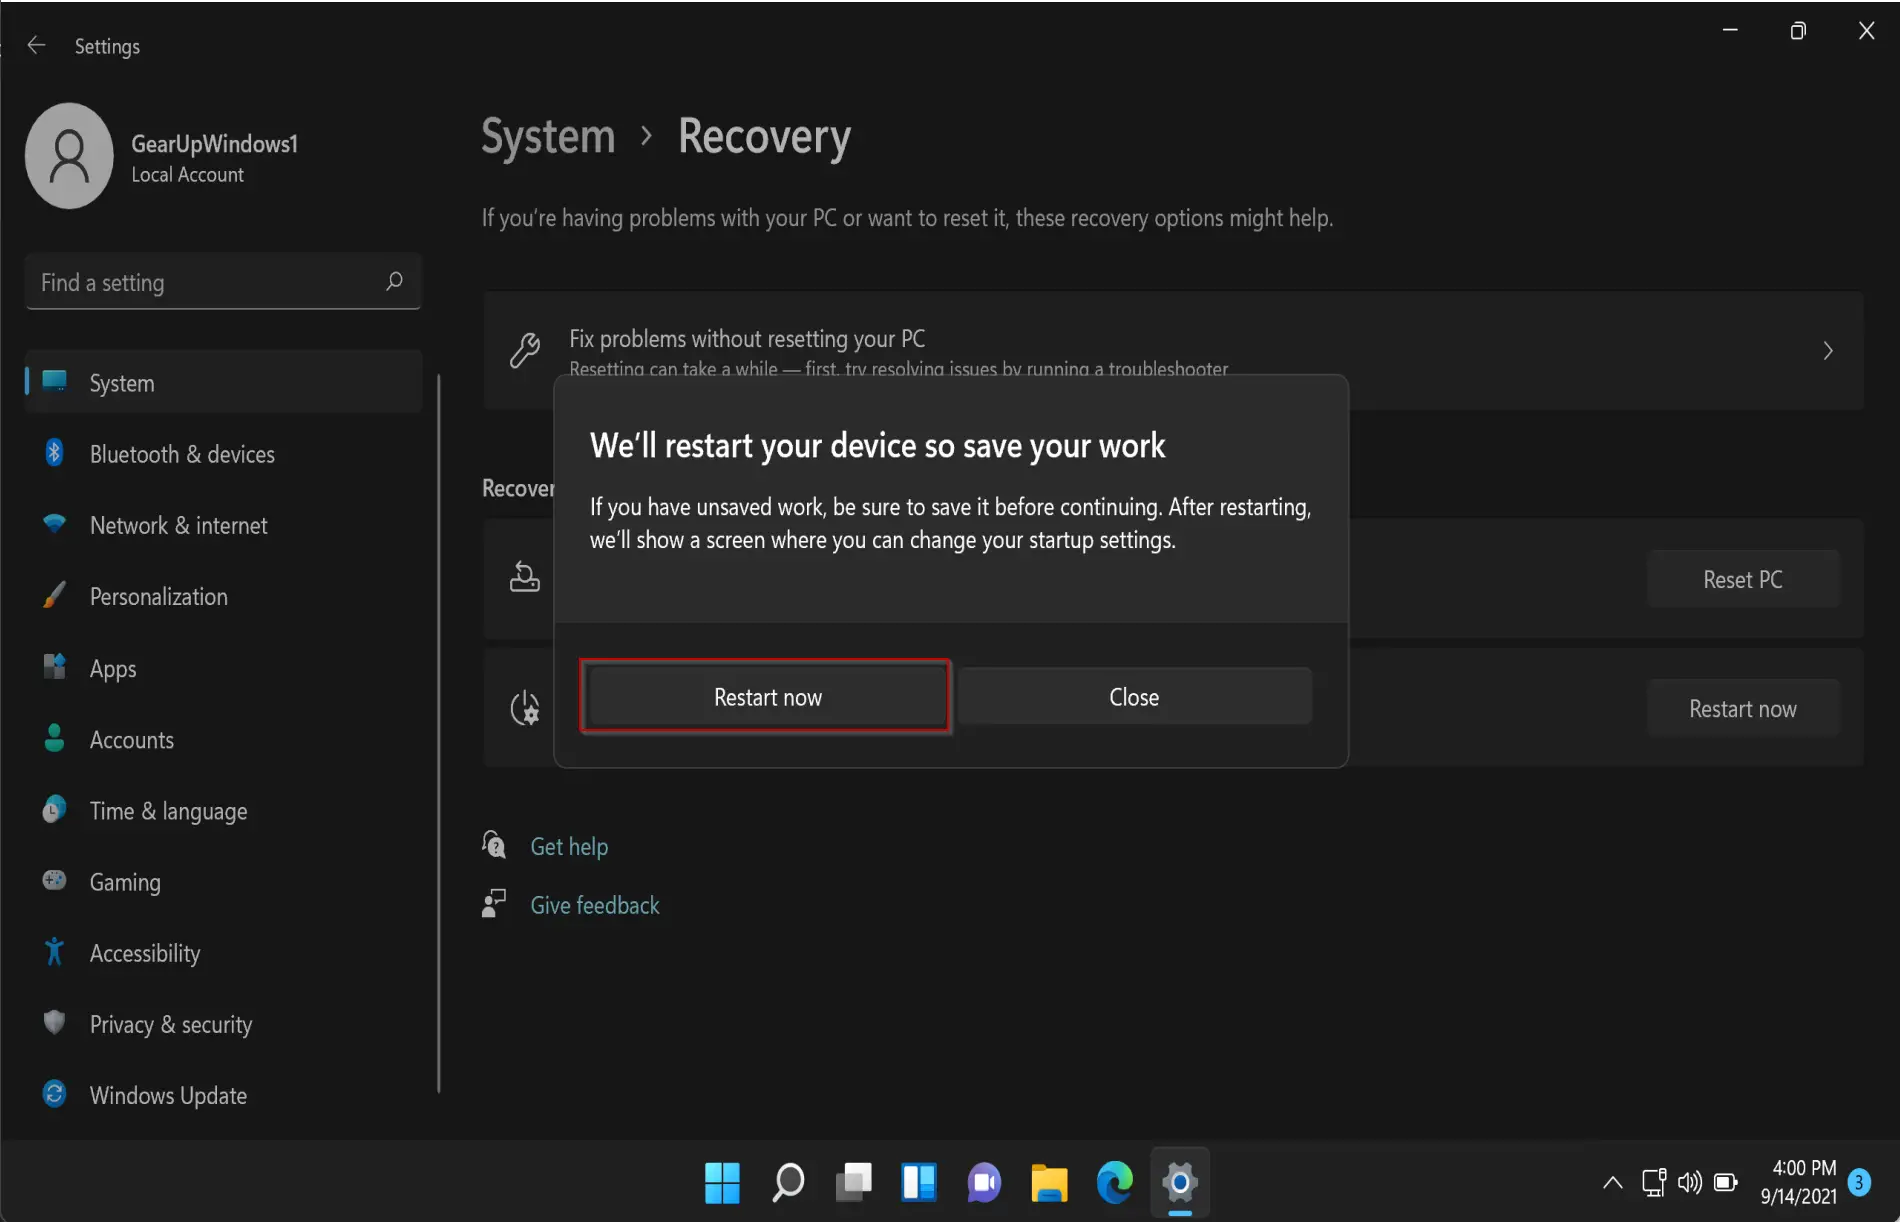
Step 6. When prompted, click the Restart now button.
Step 7. When you’re done, your PC immediately restarts. Click the Troubleshoot button.
Step 8. Finally, select the Advanced options to access the Advanced options menu on Windows 11.
How to Add a “Boot to Advanced Startup Options” to the Windows 11 Context Menu?
If you regularly use the Advanced Startup Options menu to troubleshoot problems on your Windows 11 machine, you can add a “Boot to Advanced Startup Options” on the Windows 11 context menu.
To add a “Boot to Advanced Startup Options” on the Windows 11 context menu, use the steps:-
Step 1. Open Registry Editor.
Step 2. Then, browse or navigate to the following path in the left sidebar of Registry Editor:-
HKEY_CLASSES_ROOT\Directory\Background\shell
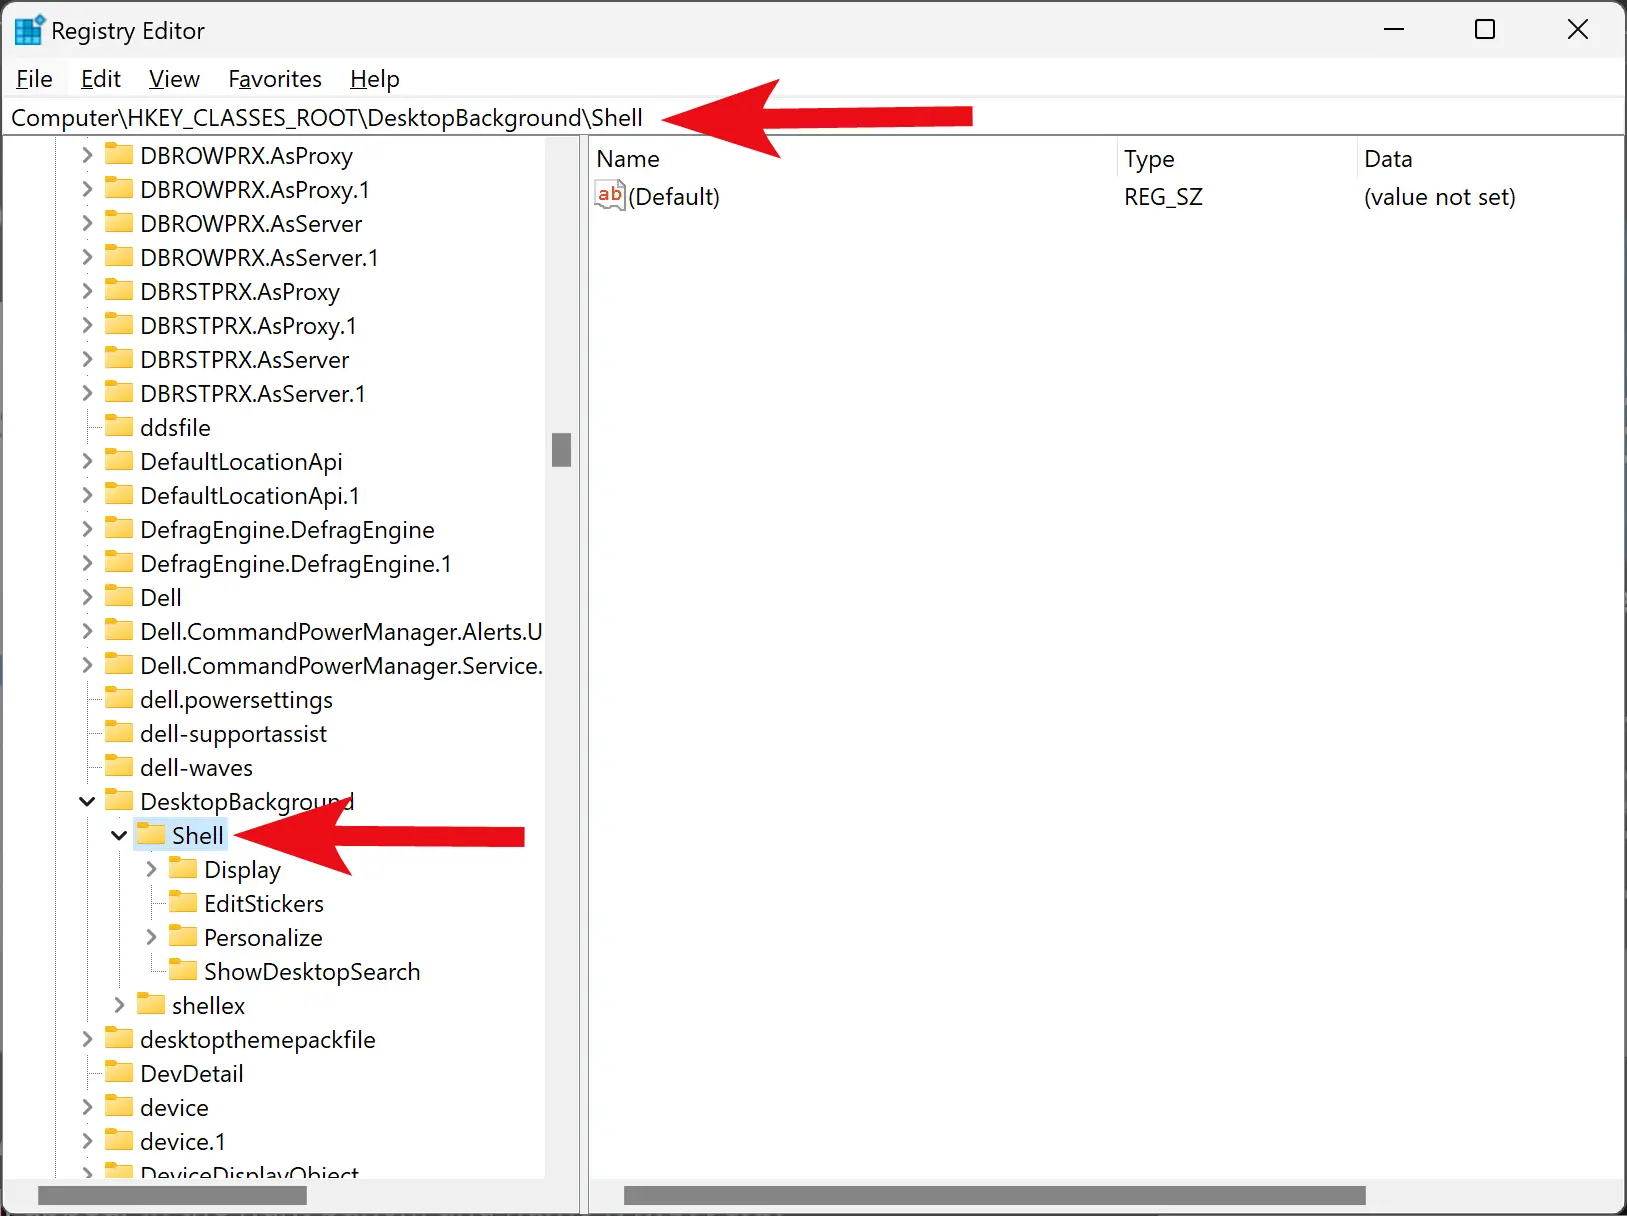
Step 3. Right-click on the Shell folder and select New > Key.
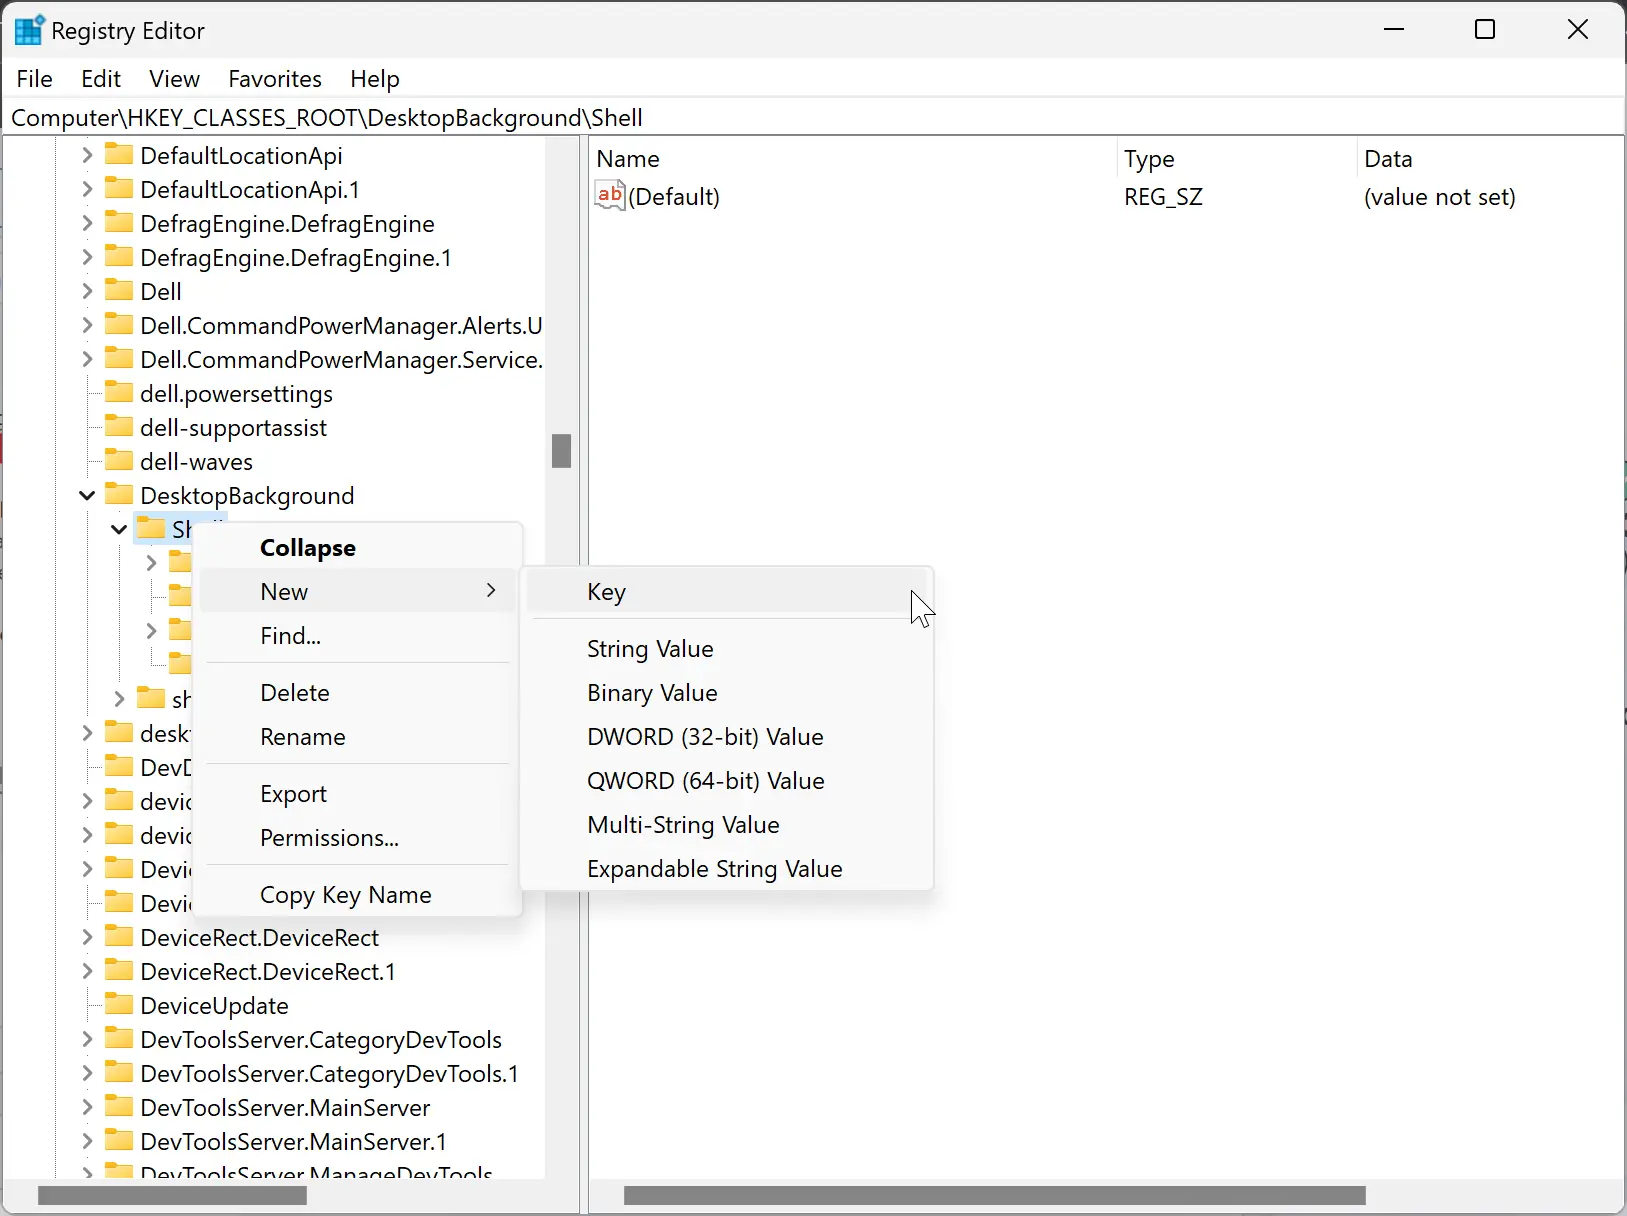
Step 4. Name the newly created key as AdvancedStartup.
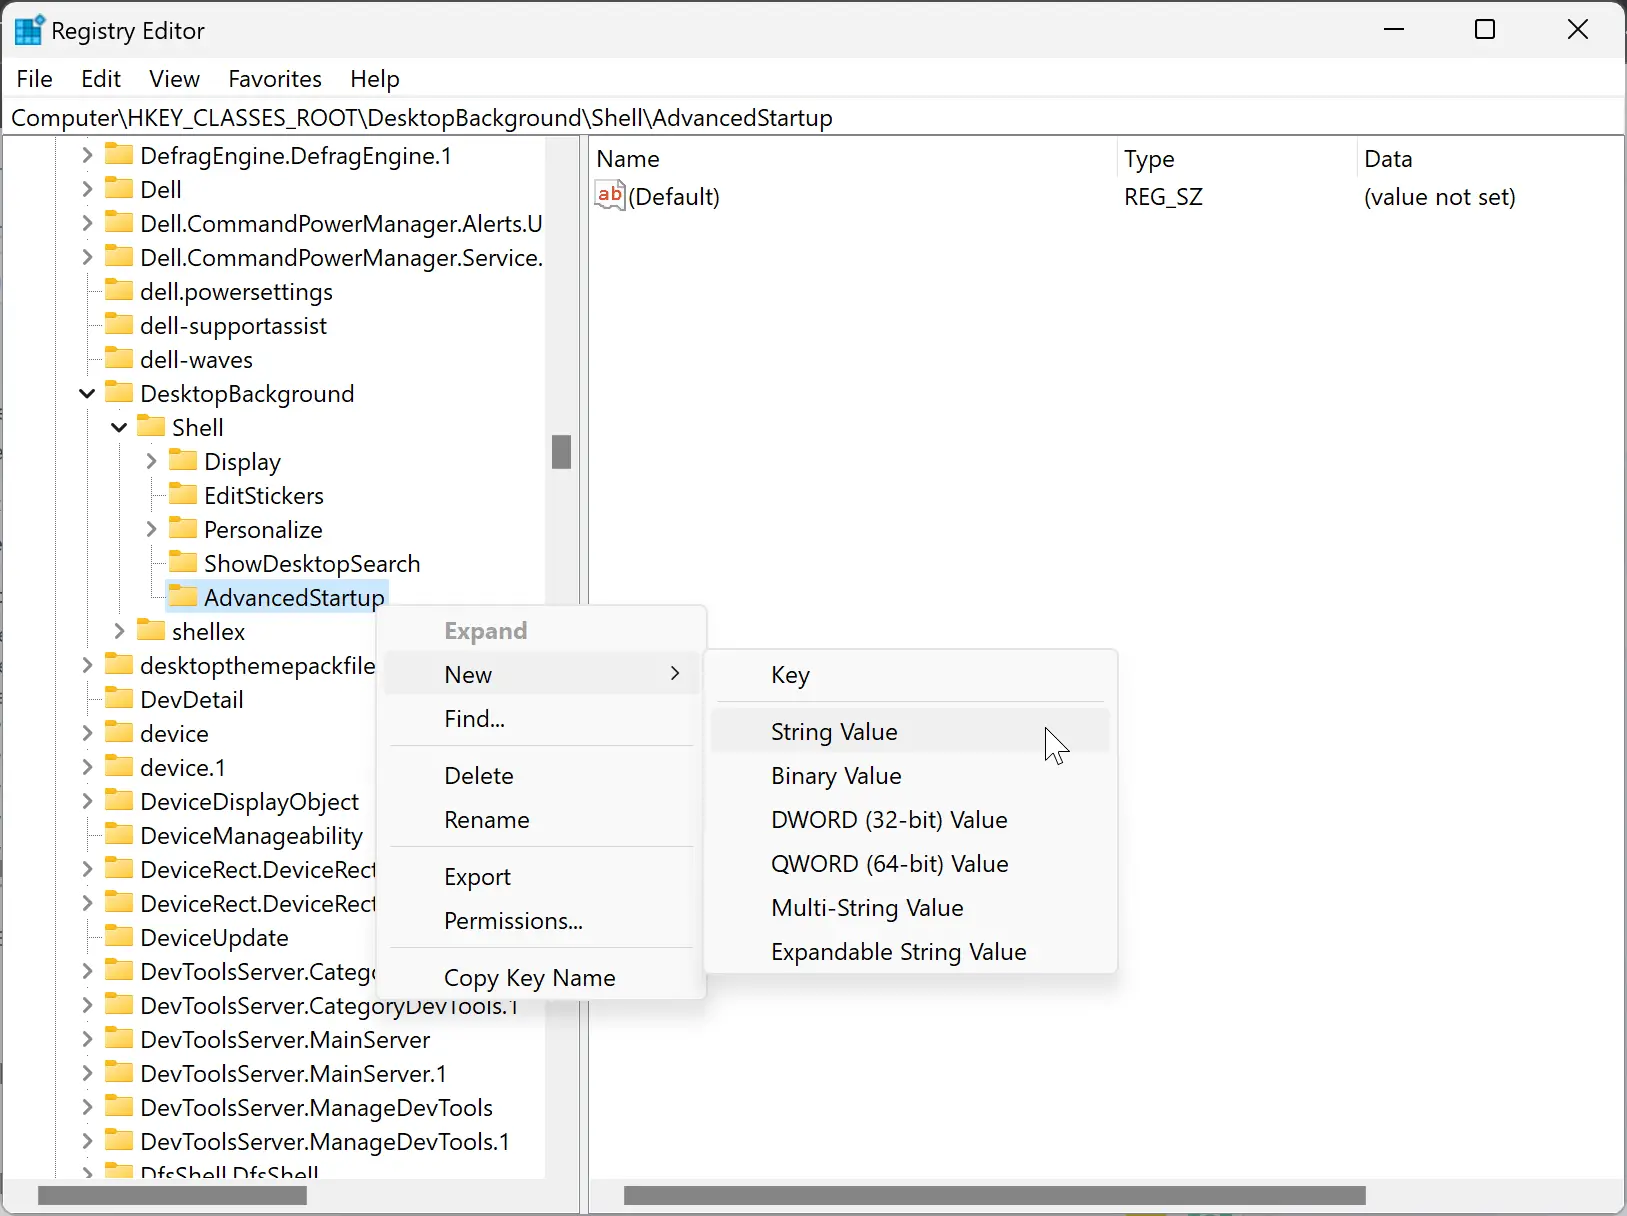
Step 5. Next, right-click the AdvancedStartup folder and select New > String Value.
Step 6. Name the newly created REG_SZ as MUIVerb.
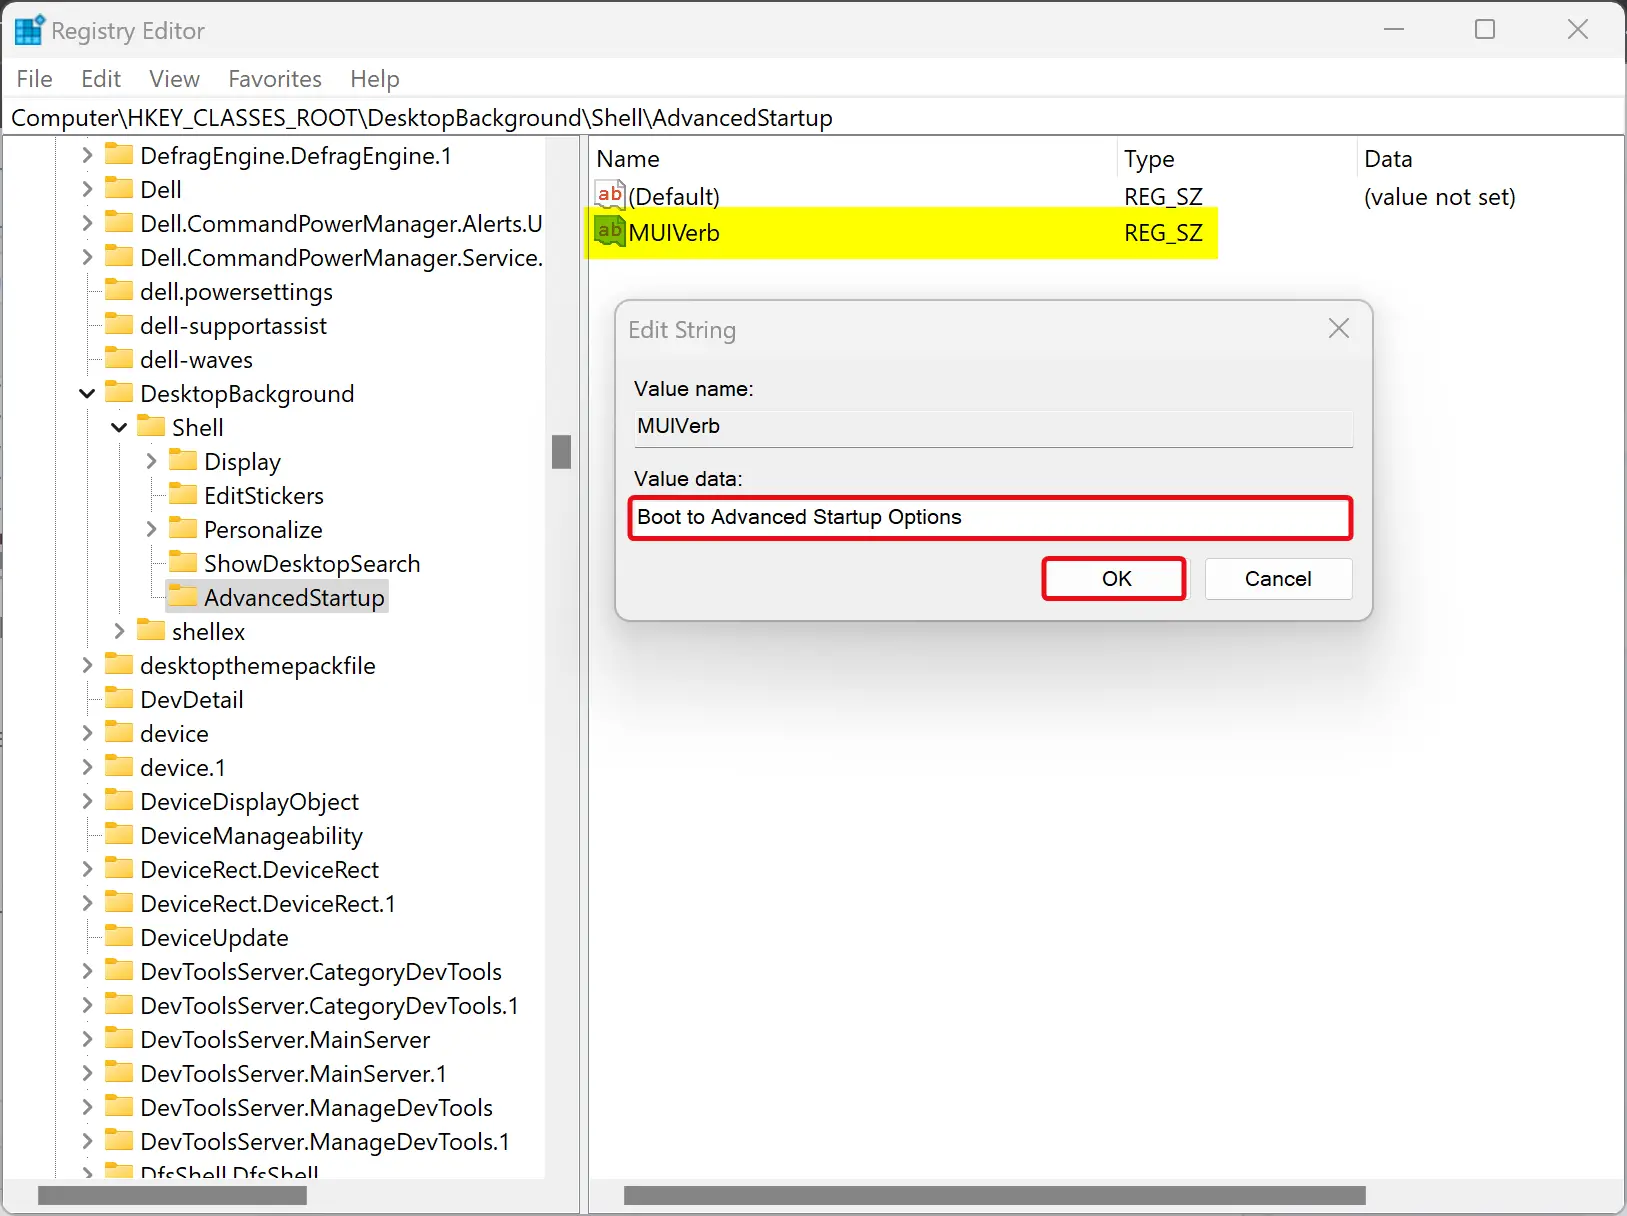
Step 7. Double-click the MUIVerb REG_SZ and type Boot to Advanced Startup Options in the “Value data” box.
Step 8. Click OK.
Step 9. Again, right-click the AdvancedStartup folder and select New > String Value.
Step 10. Name the new REG_SZ as Position.
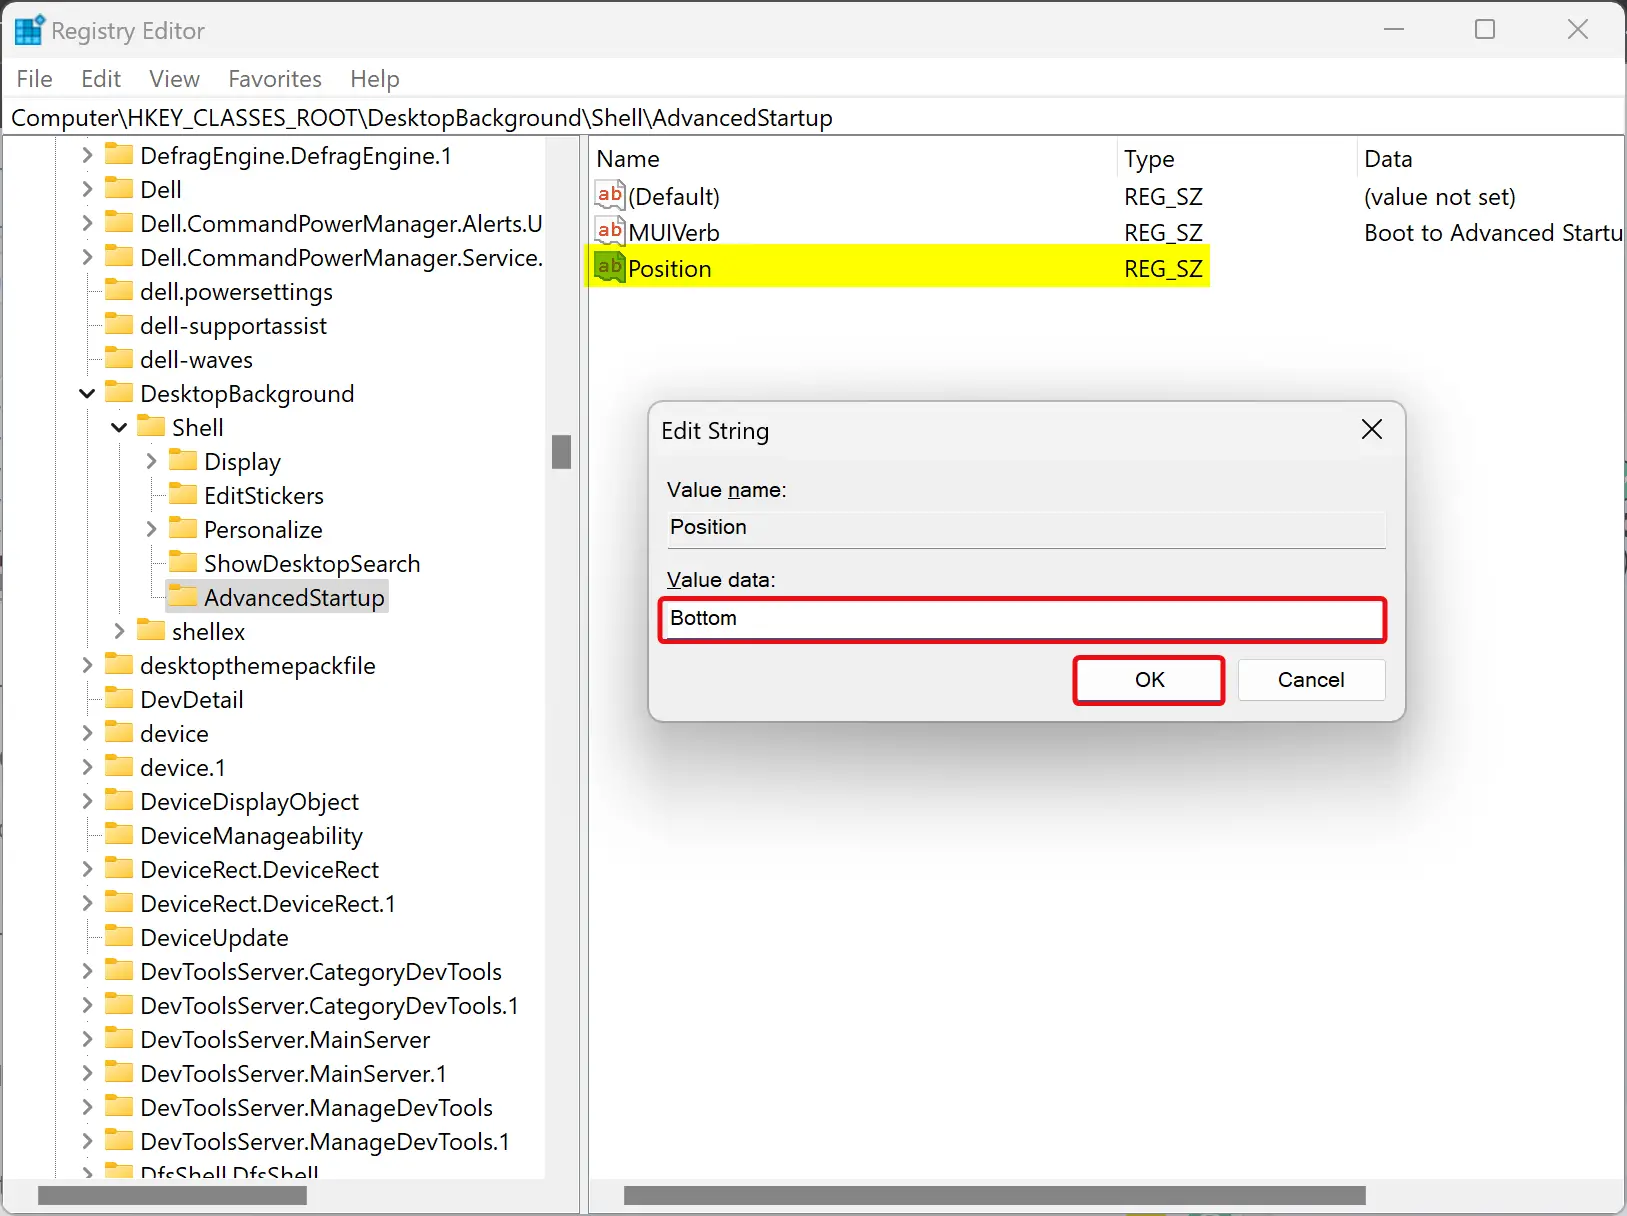
Step 11. Next, double-click on the Position REG_SZ and type Bottom in the “Value data” box.
Step 12. Click OK.
Step 13. Again, right-click on the AdvancedStartup folder and select New > Key.
Step 14. Name this new key command.

Step 15. On the opposite side of the “command” folder, double-click on the (Default) REG_SZ and type the following in the “Value data” box:-
shutdown.exe /r /o /f /t 00
Step 16. Click OK.
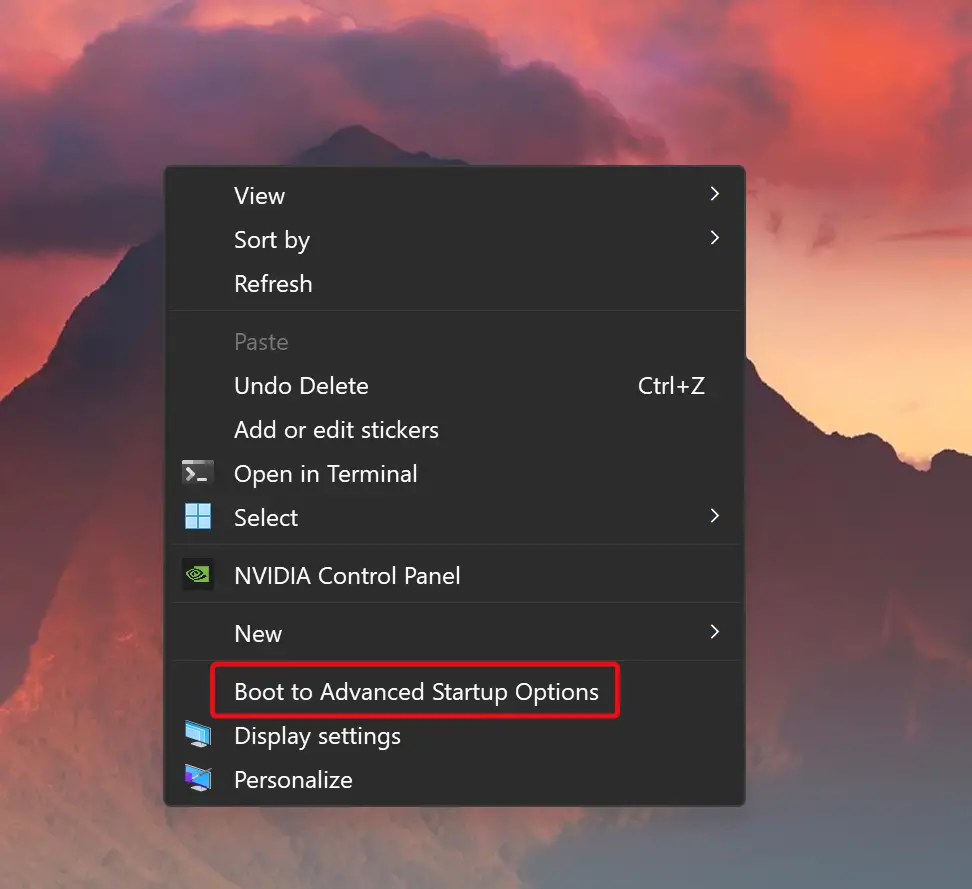
That’s it. Changes are immediate, which means there is no need to restart your computer. Right-click the free space on the Desktop and select Show more options. You’ll see “Boot to Advanced Startup Options” on the classic context menu. Clicking this option, Windows 11 will restart in the Advanced Options menu.
Conclusion
In conclusion, Windows 11 has advanced boot options to help you troubleshoot and repair your PC. The Advanced Options menu offers several options, such as Startup Repair, Uninstall Updates, Startup Settings, System Restore, Command Prompt, System Image Recovery, and Go back to the previous version. There are various ways to open the Advanced Options menu, including via Command Prompt or PowerShell, the Power button, and the Settings app. Users who regularly use the Advanced Startup Options can add a “Boot to Advanced Startup Options” to the Windows 11 context menu using Registry Editor. With these options, Windows 11 provides users with the necessary tools to solve any system problems that may occur.