Earlier, it was possible to install Windows 11 22H2 on an Oracle VirtualBox virtual machine by tweaking the registry during the installation process. But now, there is no need to bypass Secure Boot and TPM 2.0 on a VirtualBox virtual machine if you’re using the latest version, 7.0 or higher. Oracle has added built-in support for Secure Boot and TPM 2.0.
If you’re using an older build of VirtualBox and try to install Windows 11 22H2, you will receive the “This PC can’t run Windows 11” message during the installation.
In this gearupwindows article, you will learn to create a virtual machine and install Windows 11 22H2 on VirtualBox.
How to Install Windows 11 22H2 on VirtualBox Virtual Machine?
To install Windows 11 22H2 on VirtualBox Virtual Machine, use these steps:-
Step 1. Download and install version 7.0 or higher of free Oracle VirtualBox.
Step 2. Then, double-click on its desktop icon to launch it.
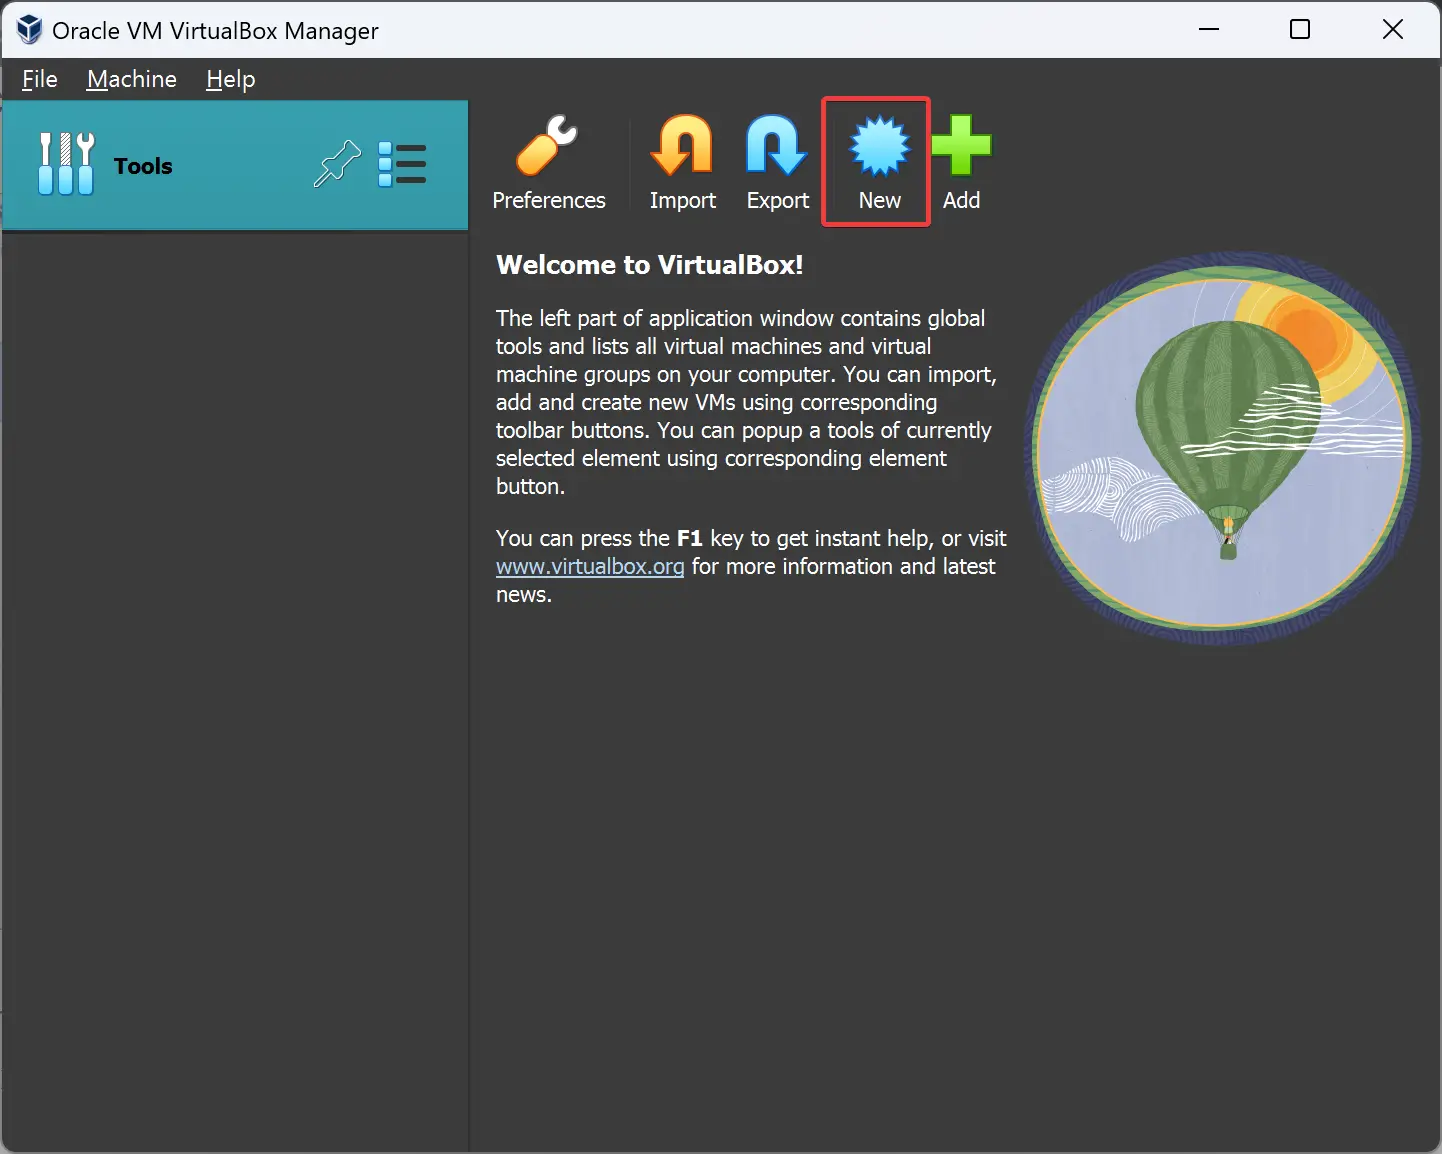
Step 3. After that, click on the New button to start creating a new virtual machine.
Step 4. In the following pop-up window, name your virtual machine, such as Windows 11. From the Folder drop-down menu, select the folder’s location where you want to store the new virtual machine. In the “ISO Image” drop-down, select Windows 11 22H2 ISO (You can download it from here.). In the “Edition” drop-down menu, choose Windows 11 edition, such as Home, Pro, etc. Finally, uncheck the option “Skip Unattended Installation.”
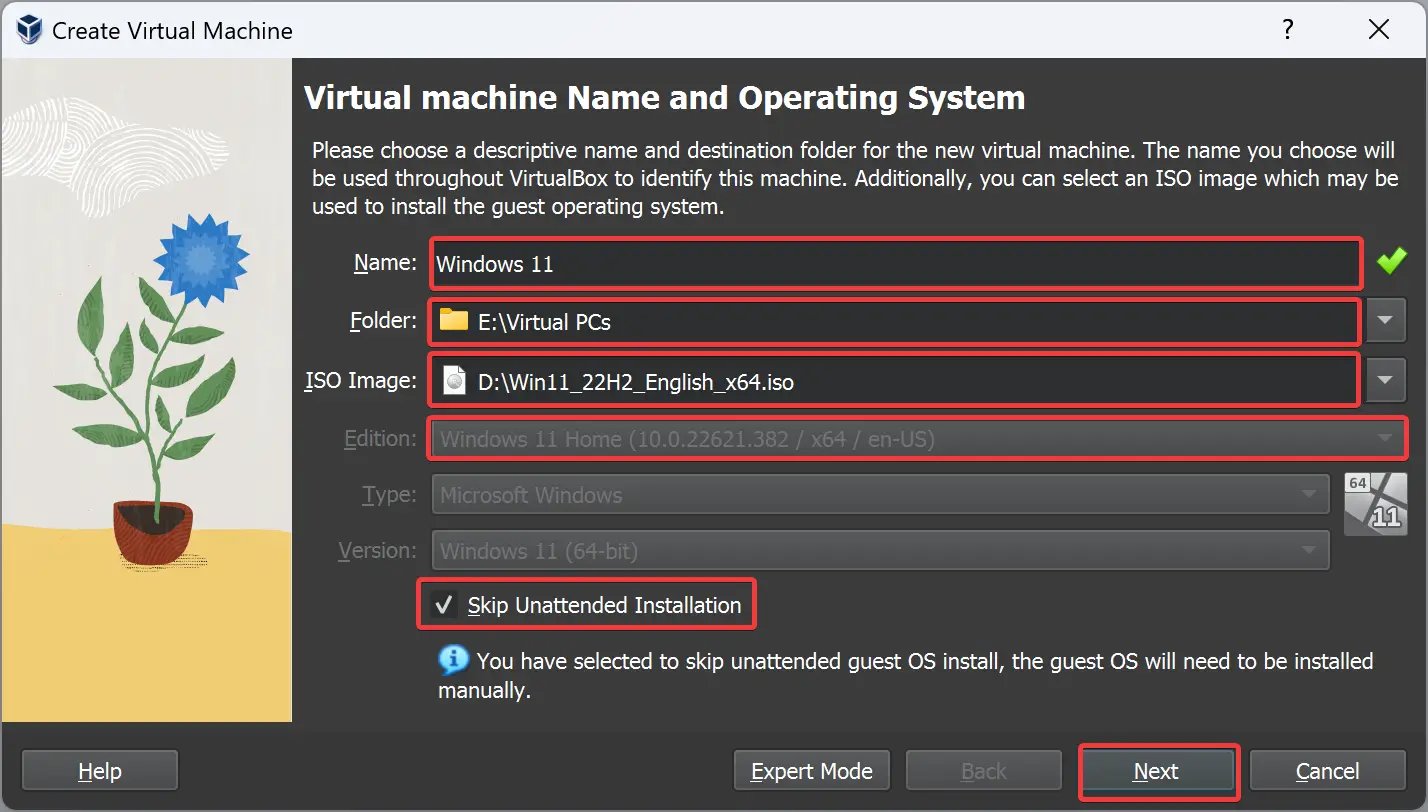
Step 5. When you’re done, click the Next button.
Step 6. In the next window, you need to select the RAM size for your virtual machine. You can use the slider to increase or decrease the RAM size of your virtual machine.
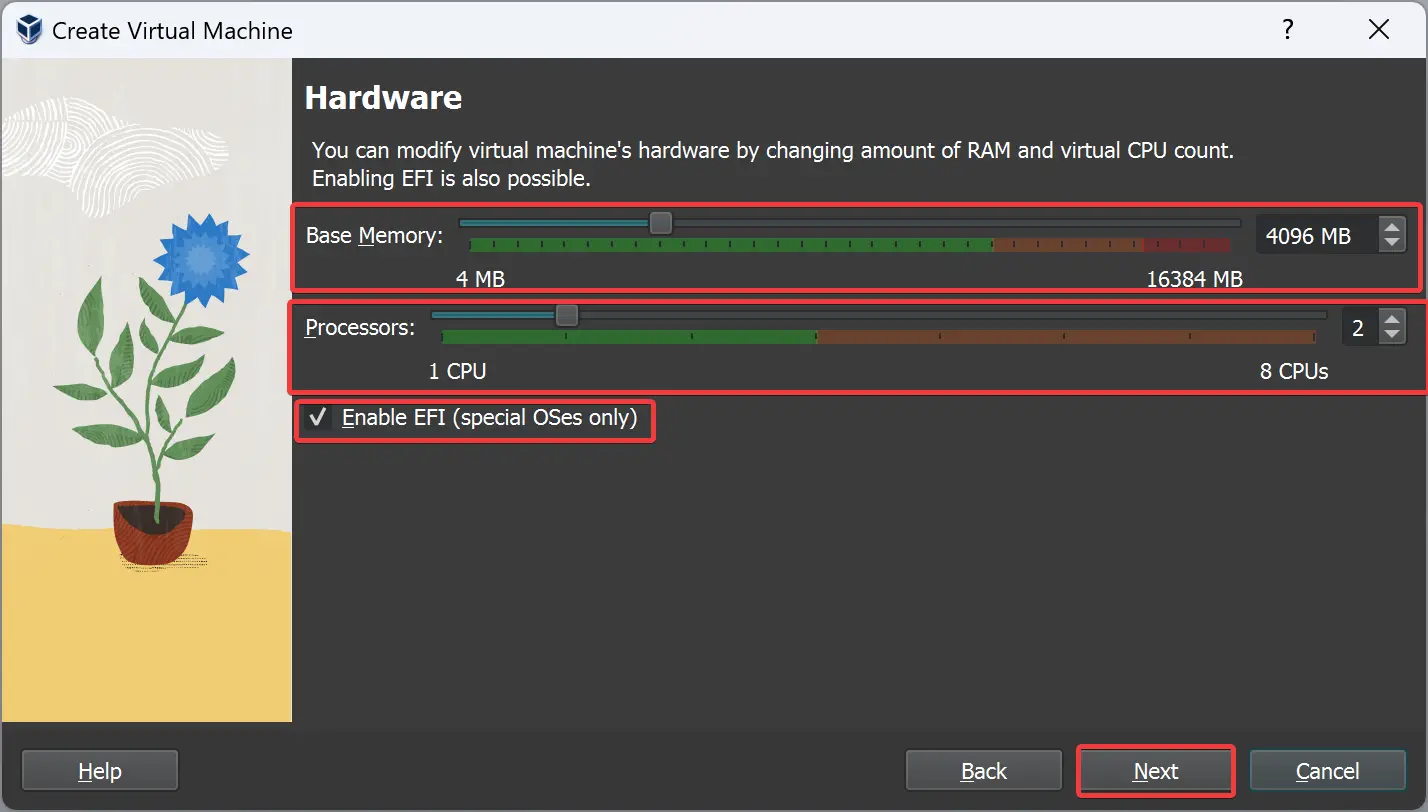
Note: At least 4 GB RAM is recommended for a Windows 11 22H2 OS. However, you can increase the RAM size according to your PC capacity.
Step 7. Next, select at least two processors.
Step 8. Then, check the option Enable EFI (special OSes only).
Step 9. Finally, click the Next button.
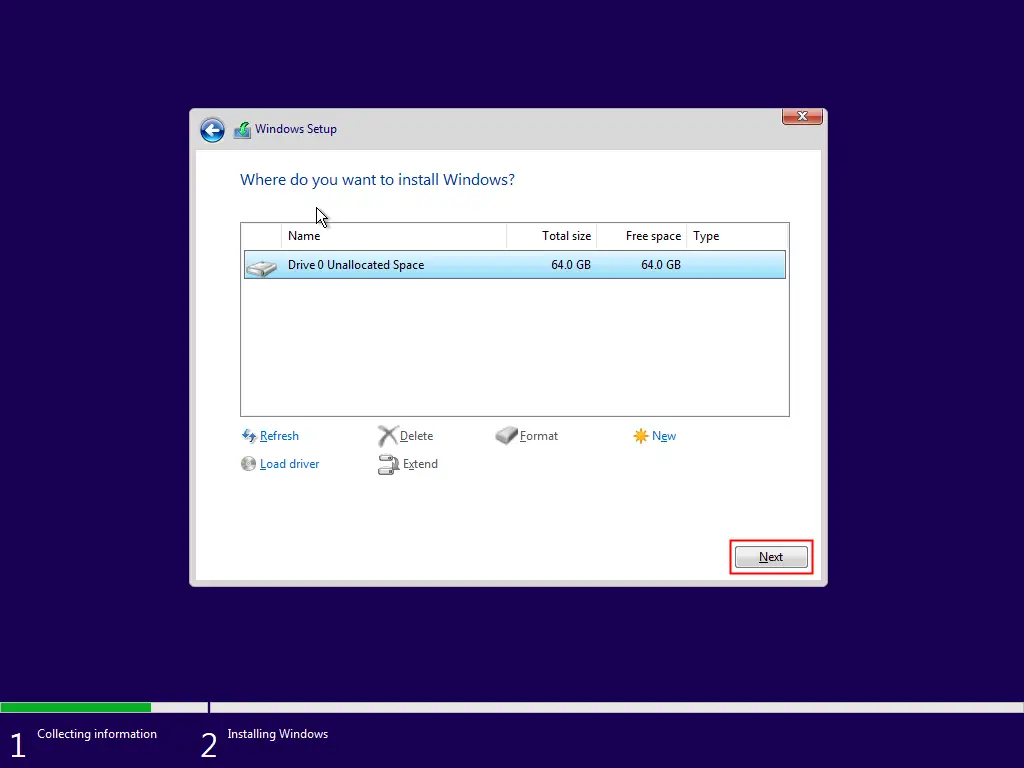
Step 10. In the following screen, allocate at least 60GB of the hard disk to store your virtual machine.
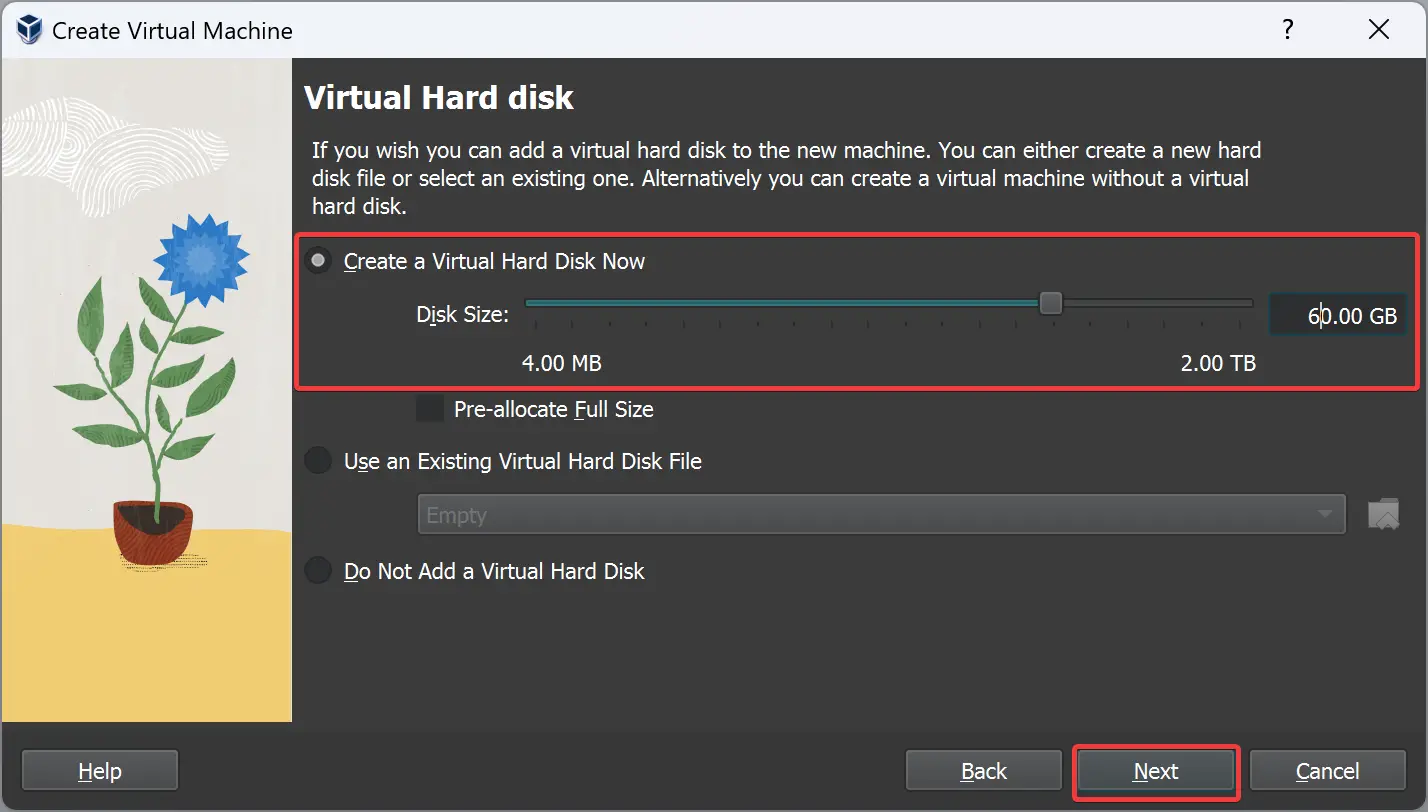
Step 11. Then, click the Next button.
Step 12. Click the Finish button on the following screen.
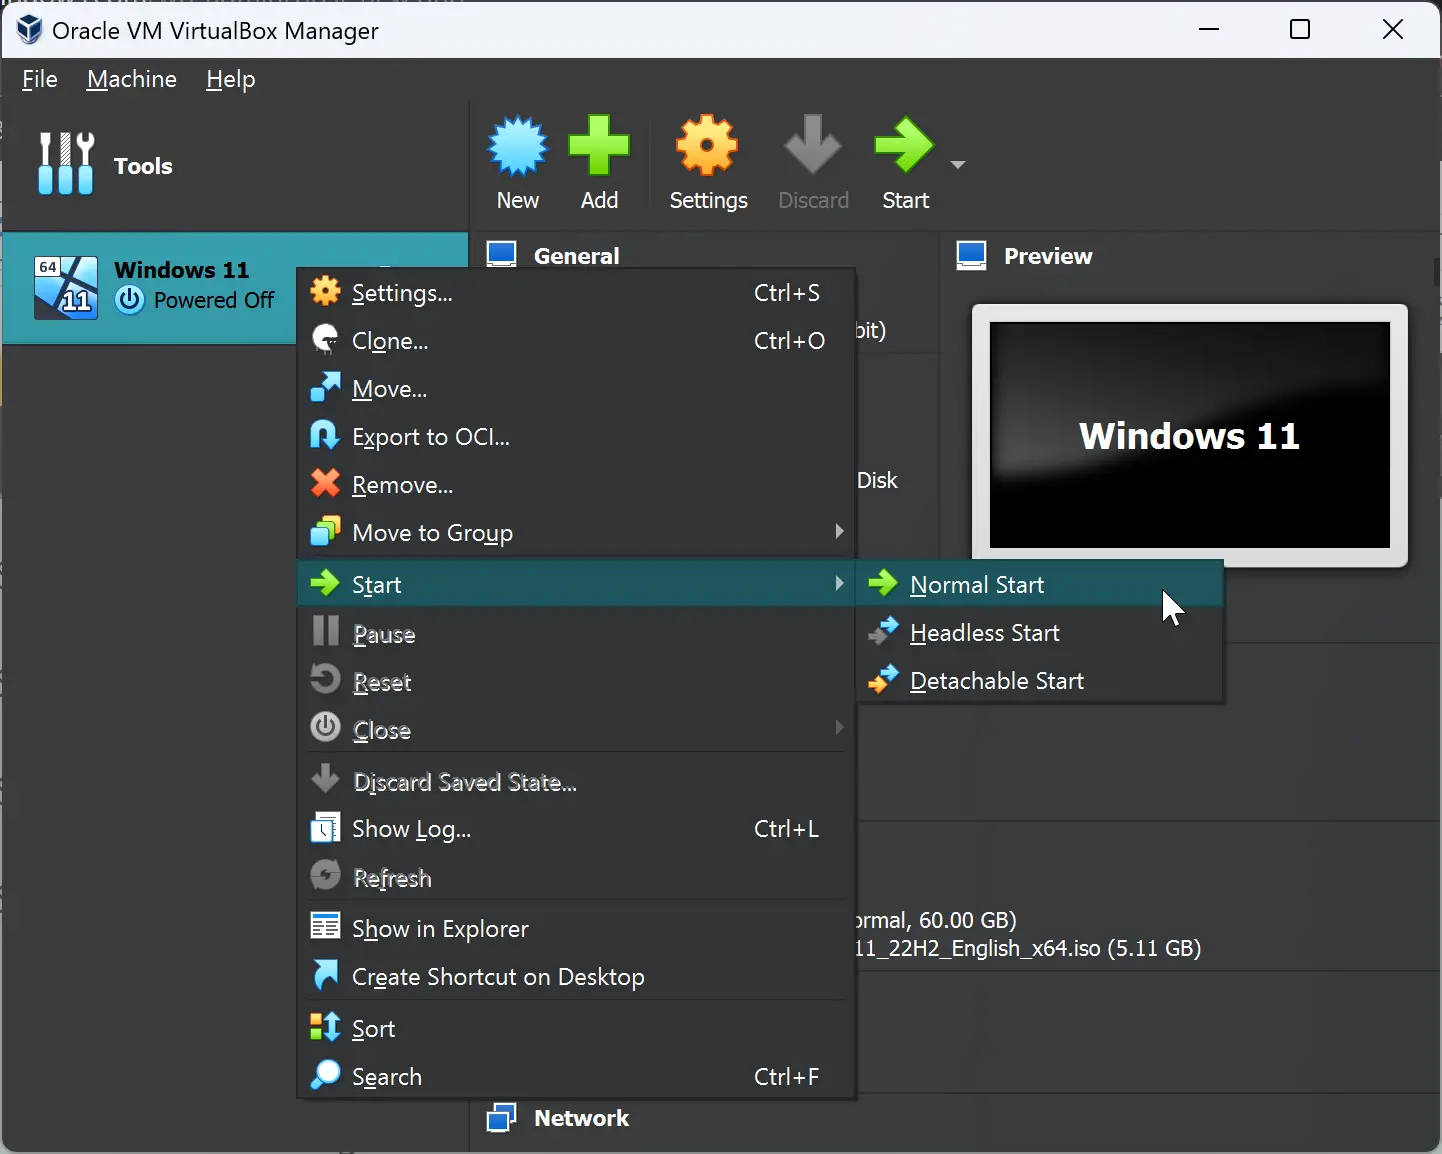
Step 13. Now, your virtual machine is ready to get installed. So, right-click on the Windows 11 entry on the homepage of VirtualBox and select Start > Normal Start.
Step 14. When prompted on the screen, press any key on the keyboard to boot from your Windows 11 22H2 ISO.
Step 15. When you’re done, your virtual machine will boot from the selected Windows 11 ISO, and installation will start on your virtual machine. Now, choose language, time & currency format, and keyboard input method.
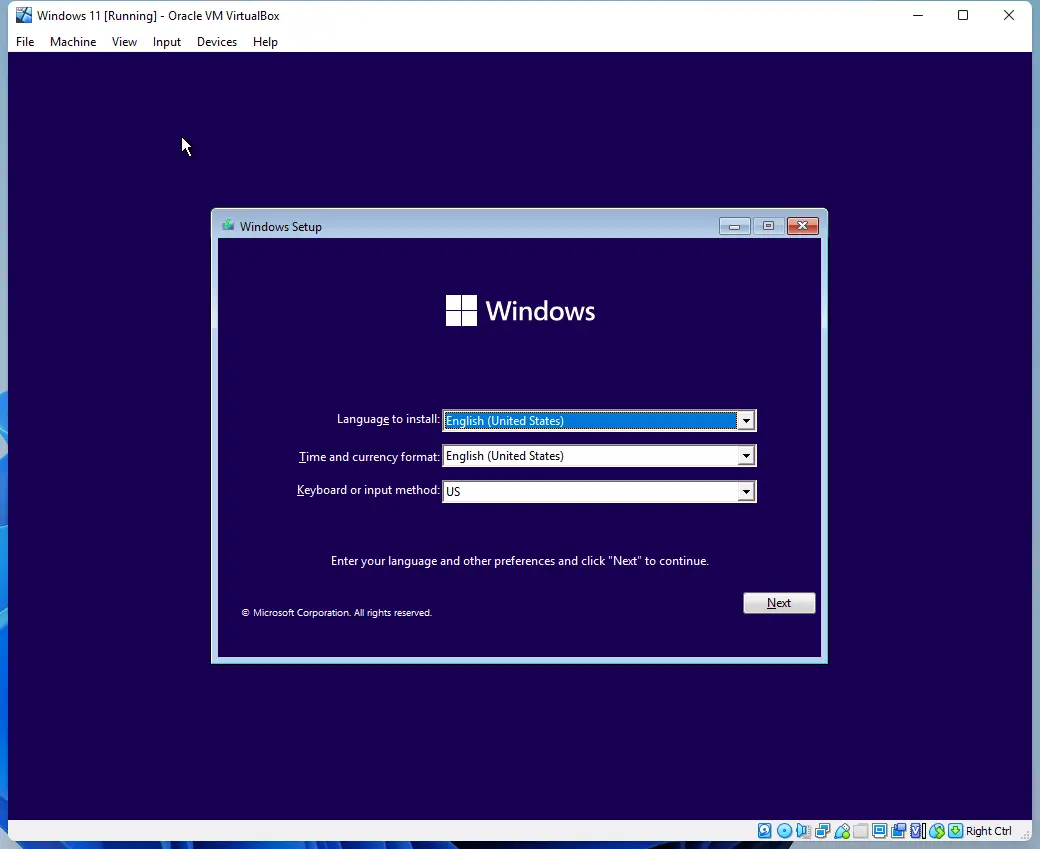
Step 16. Then, click the Next button.
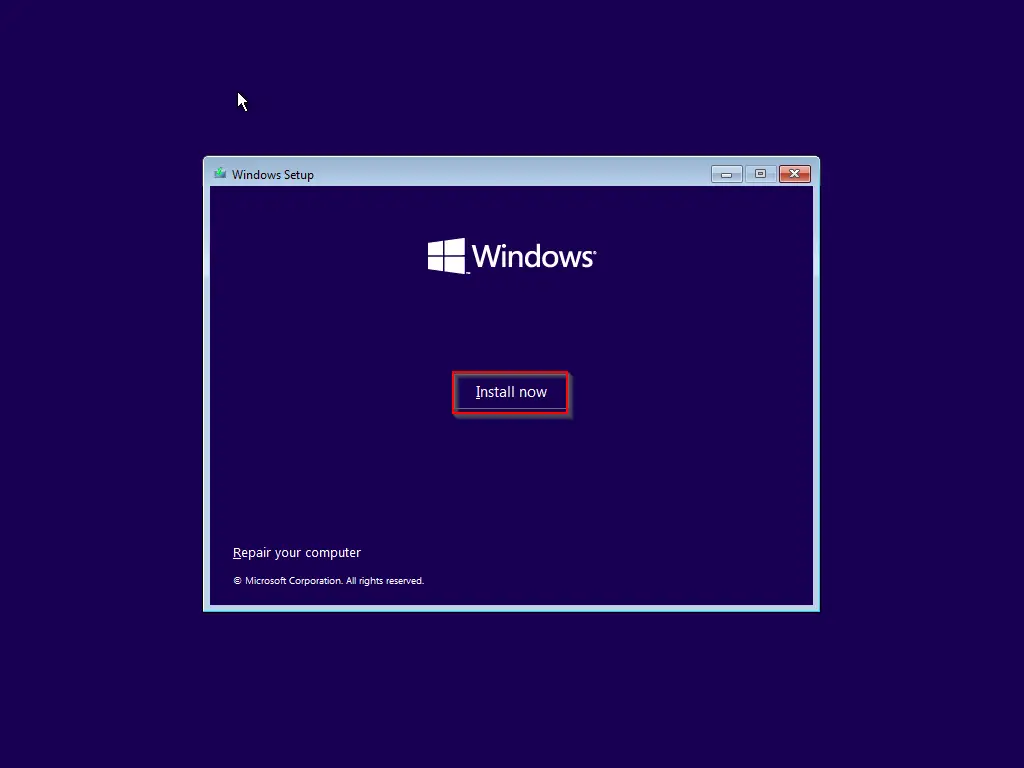
Step 17. Click the Install now button on the following screen.
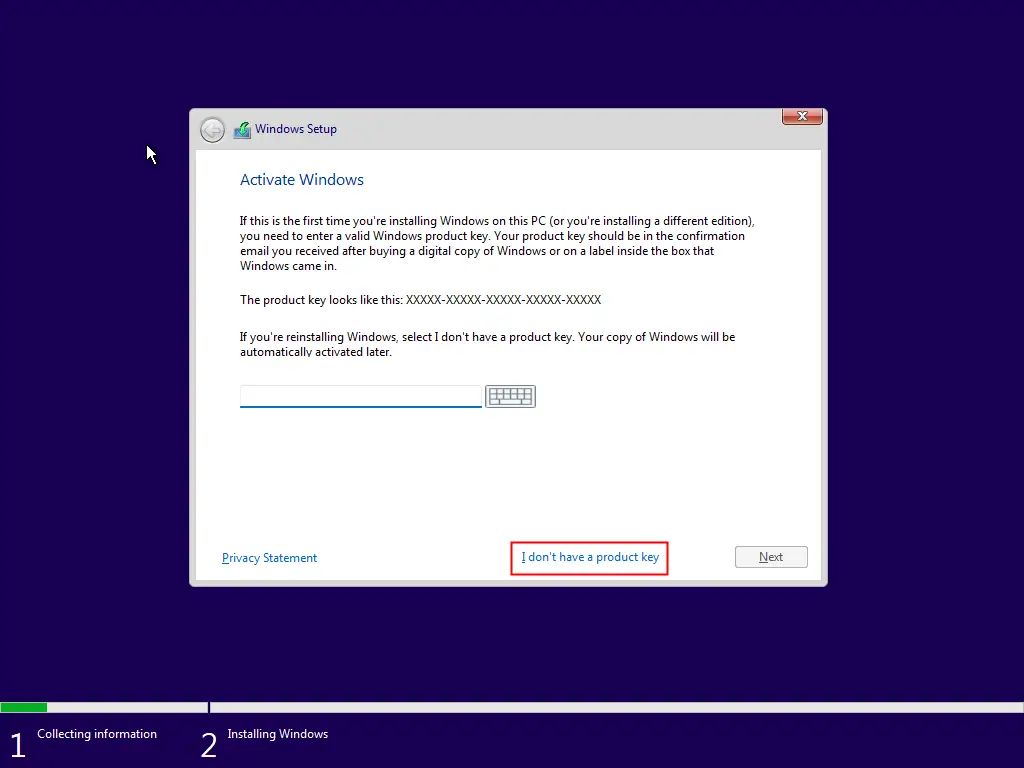
Step 18. When prompted to enter the product key and activate Windows. Type the genuine product key if you have it, or click the link “I don’t have a product key.”
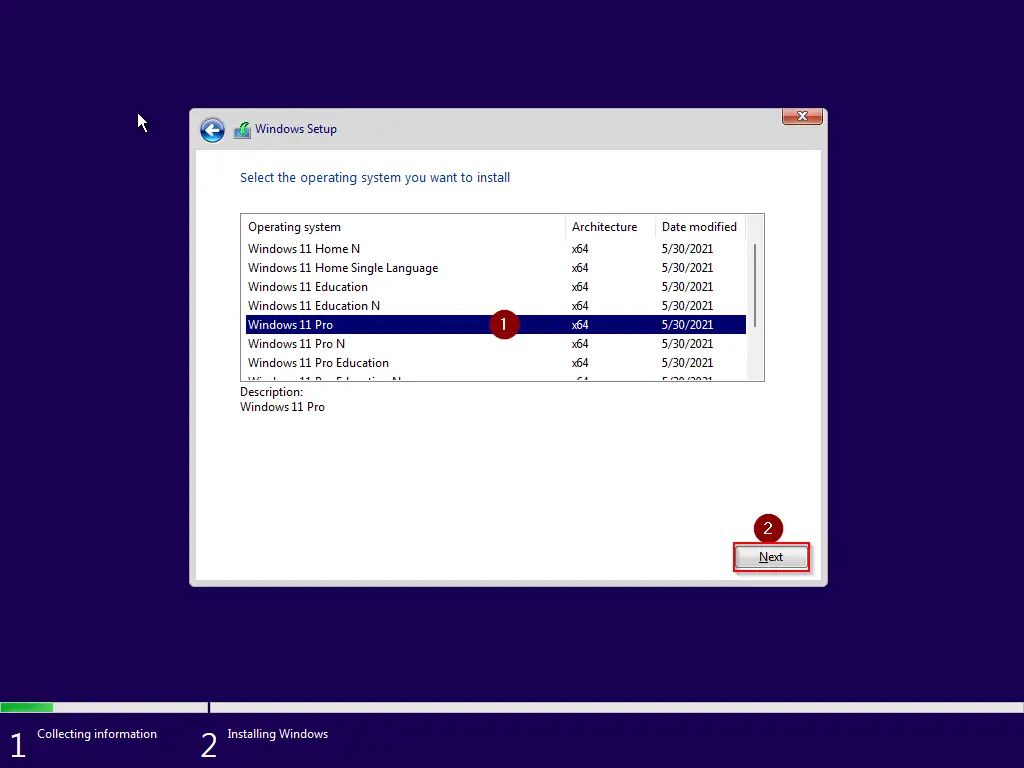
Step 19. In the upcoming window, again choose the Windows 11 edition you would like to install and then click the Next button. If you change your mind, you can select a different Windows 11 edition here.
Step 20. Now, check the checkbox “I accept the Microsoft Software Licence Terms. If an organization is licensing it, I am authorized to bind the organization.”
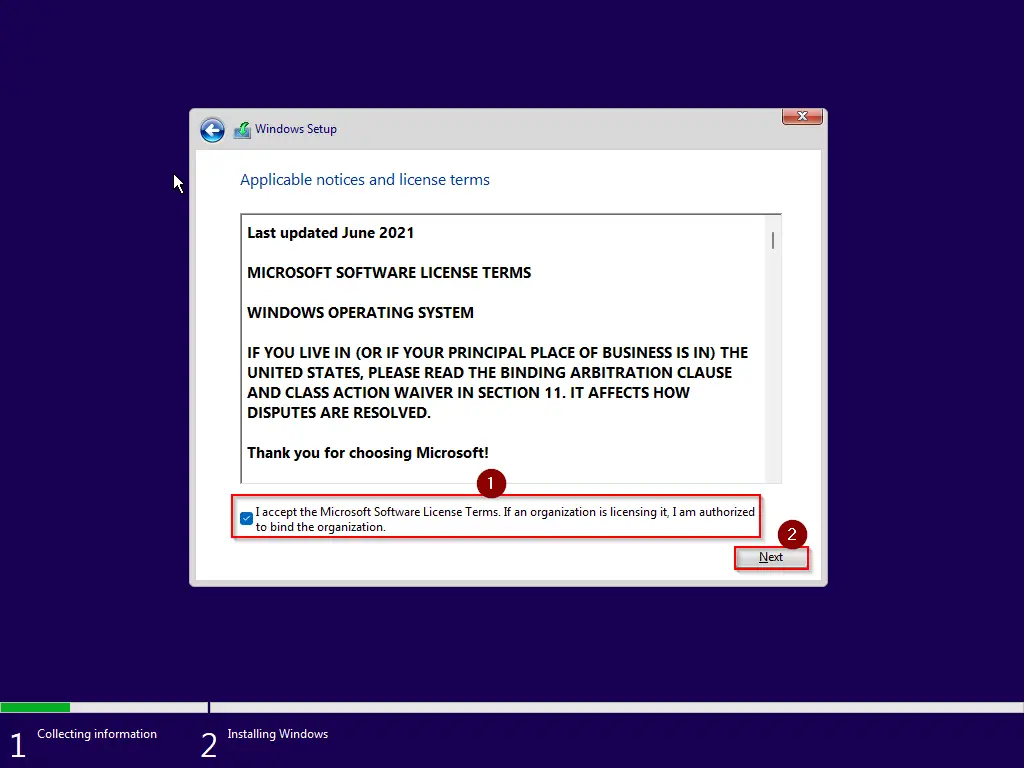
Step 21. Then, click the Next button.
Step 22. Now, you will see two options:-
- Upgrade: Install Windows and keep files, settings, and applications.
- Custom: Install Windows only (advanced).
Since you will install a fresh Windows 11, choose the second option, “Custom: Install Windows only (advanced).”
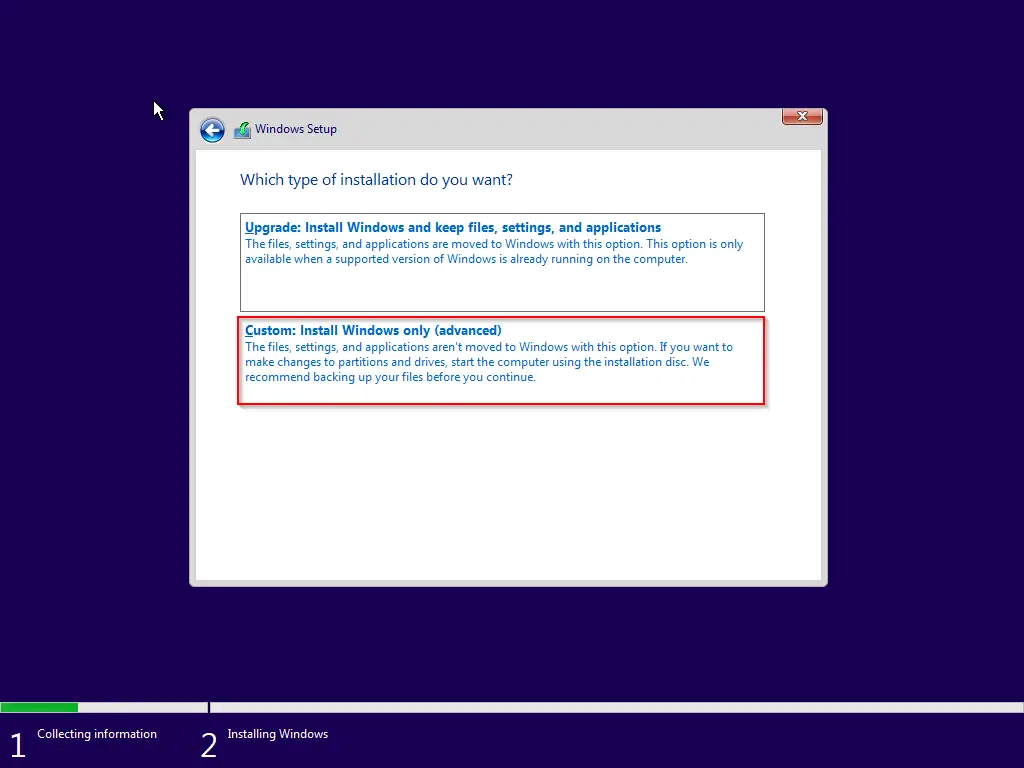
Step 23. Then, click the Next button.
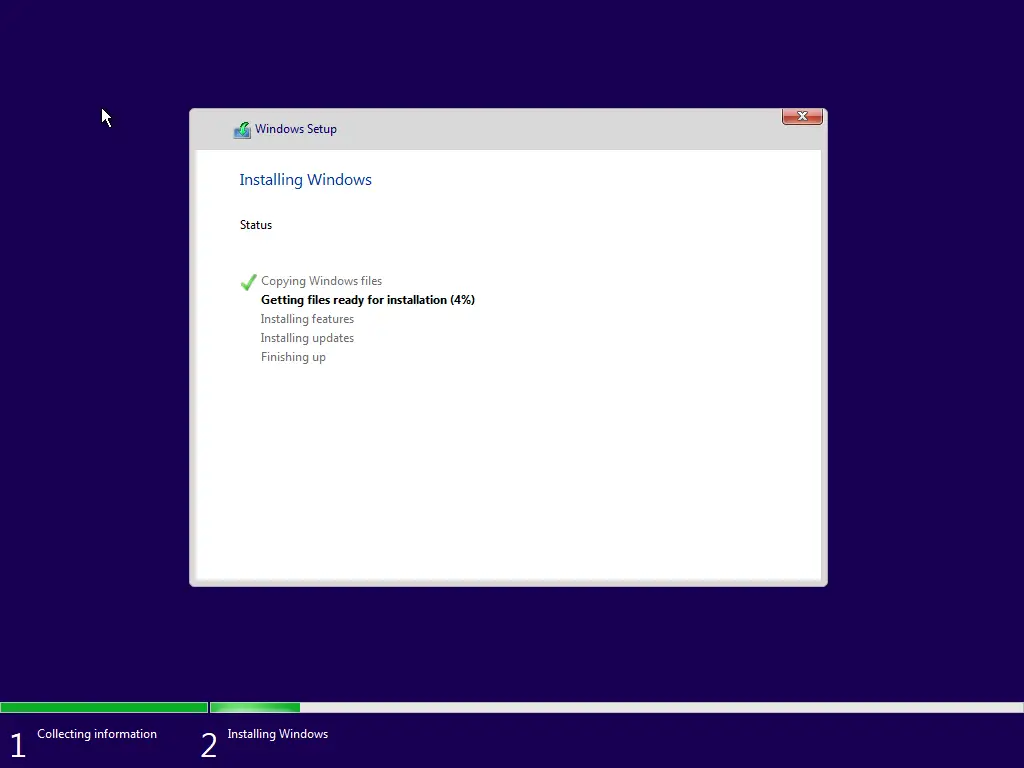
Step 24. Now, you should see the installation progress of your Windows 11 22H2. The virtual machine will start copying the required files to run your operating system. Once done, it will be restarted automatically.
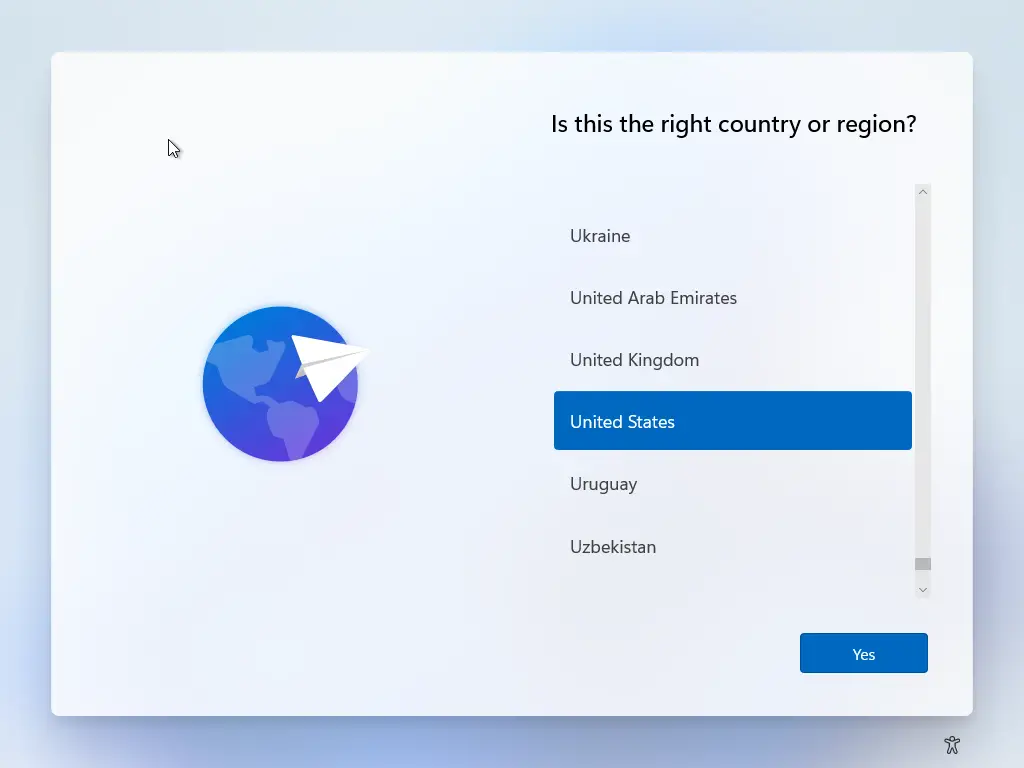
Step 25. Next, select the country in the list and click the Yes button.
Step 26. Now, choose the keyboard layout or input method.
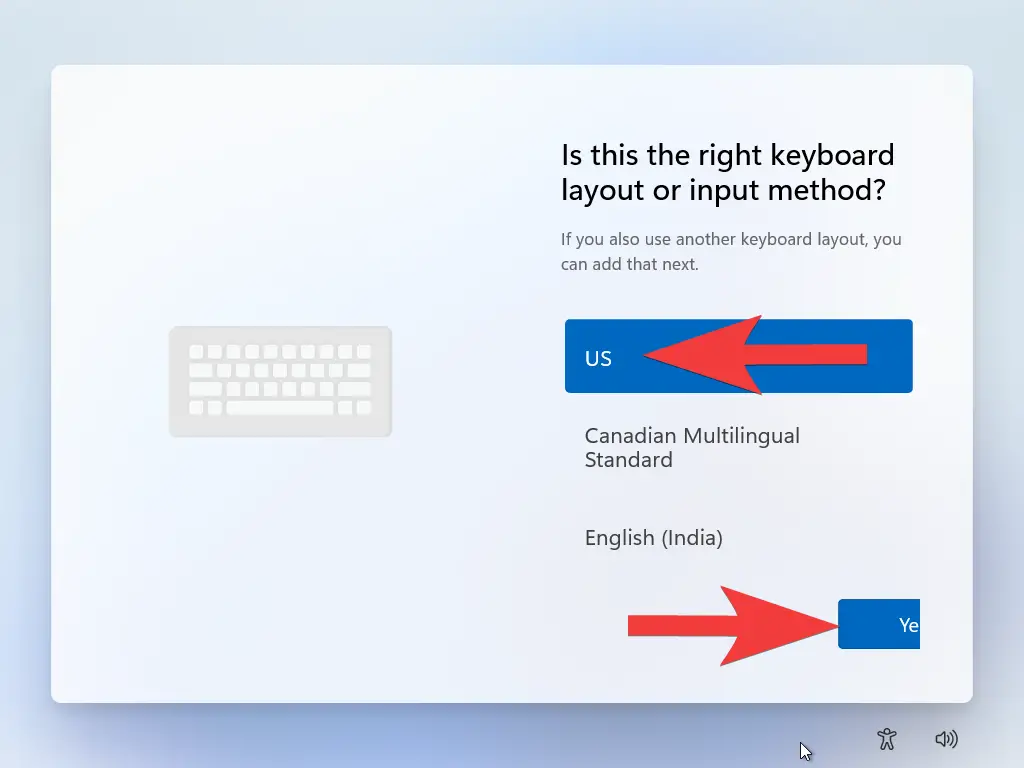
Step 27. Click the Yes button.
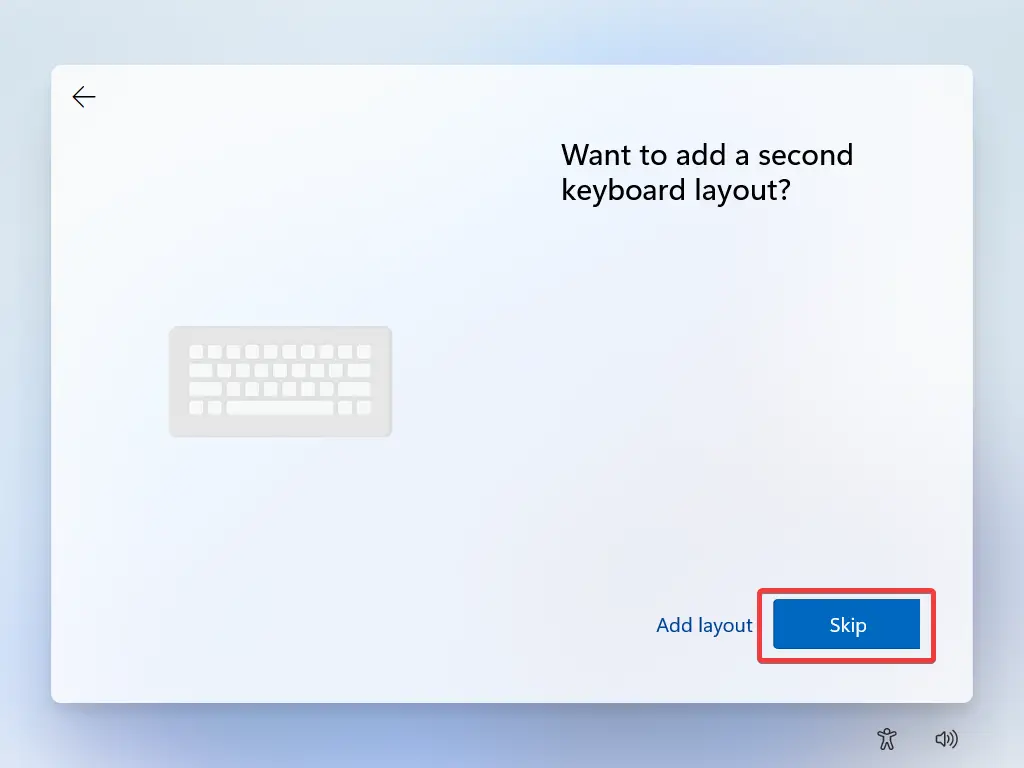
Step 28. When prompted to add a second keyboard layout, click the Skip button.
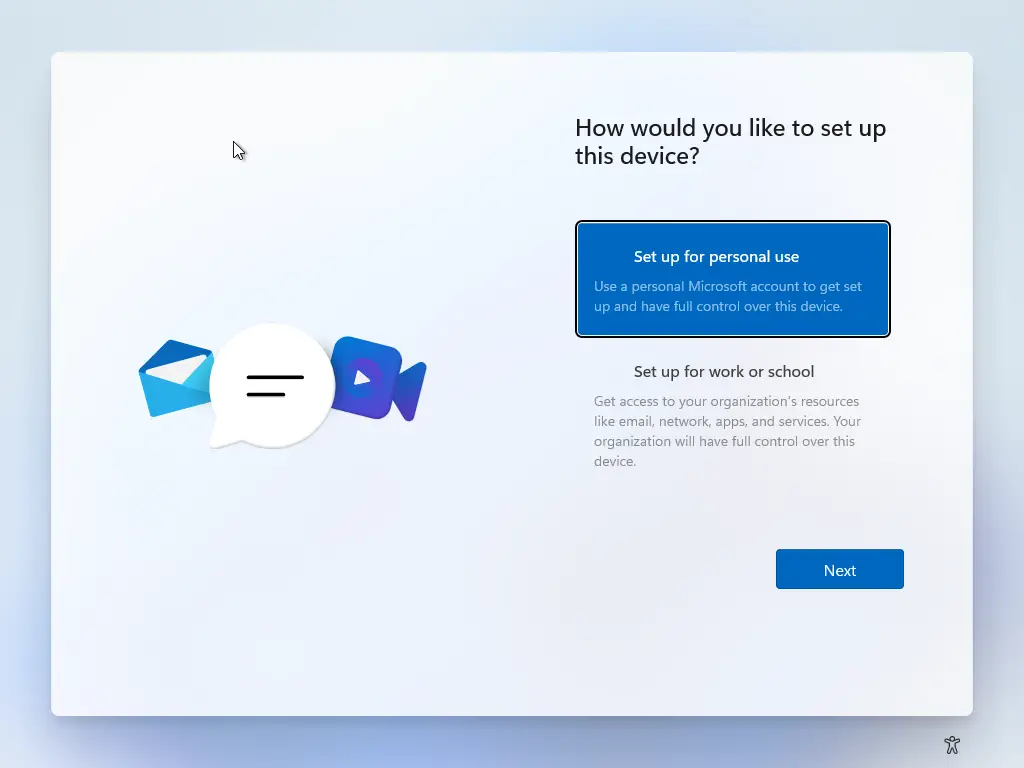
Step 29. Now, Windows 11 22H2 will start searching for the update. Wait for a while. On the following screen, click on the option “Set up for personal use.” Then, click the Next button.
Step 30. Now, you need to name your device. Set a name for your virtual PC.
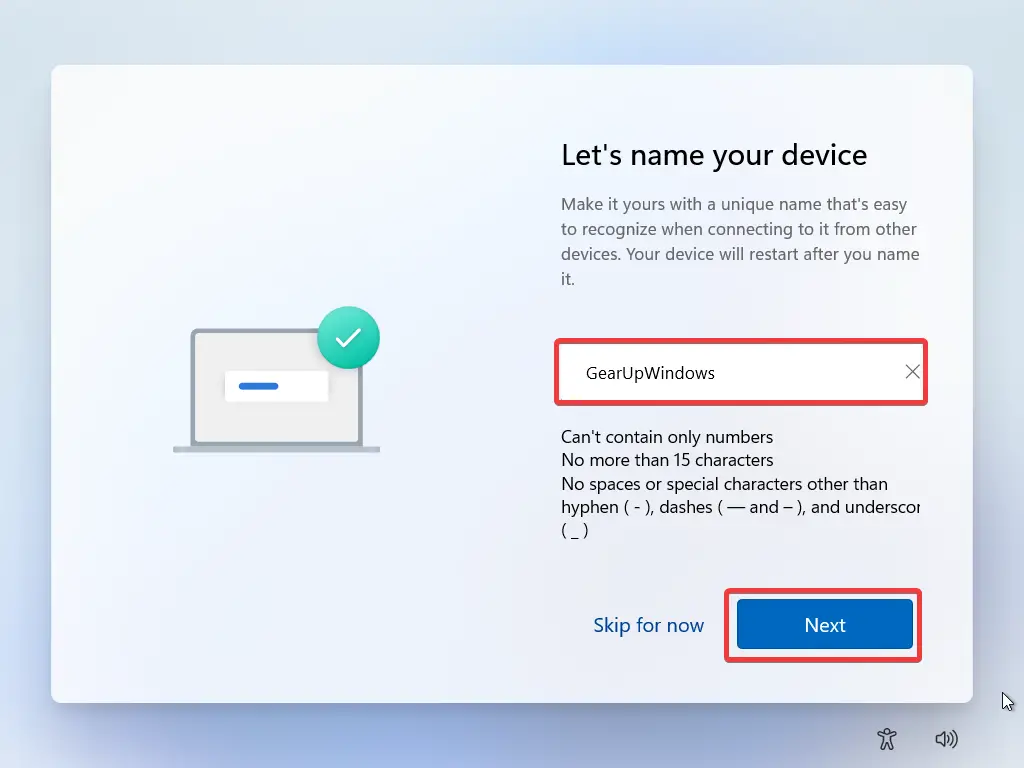
Step 31. Click the Next button.
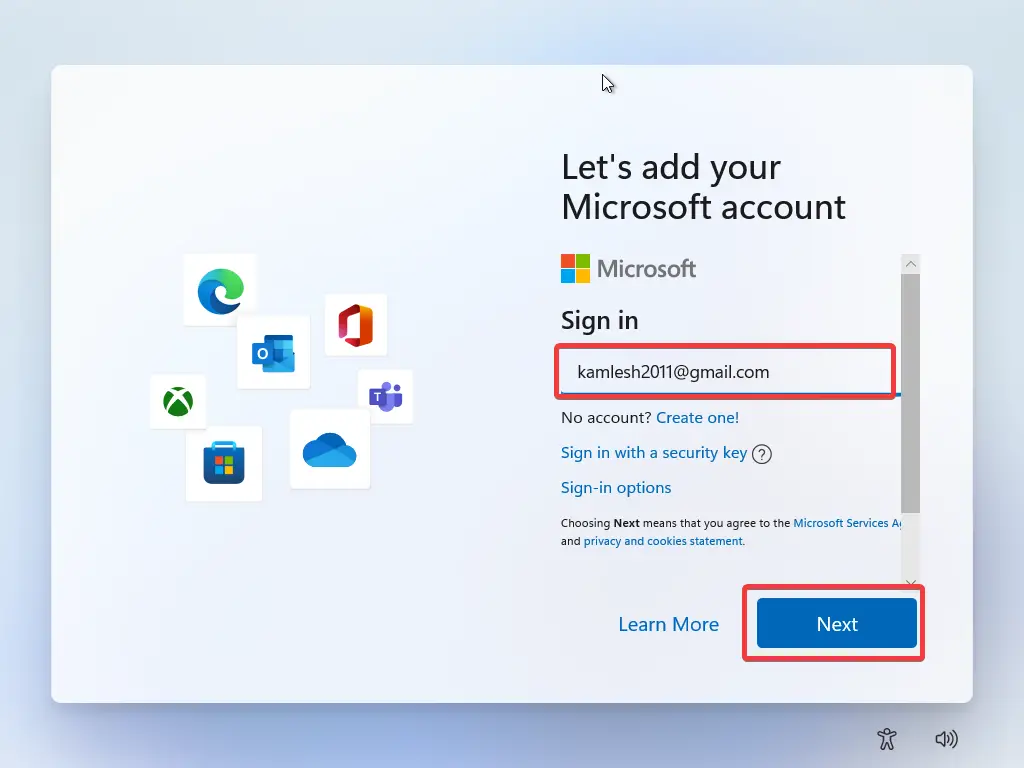
Step 32. Next, enter your Microsoft email account in the “Sign in” box.
Step 33. Click the Next button.
Step 34. Now, open your email for the code that Microsoft sent you. Enter that code in the provided box.
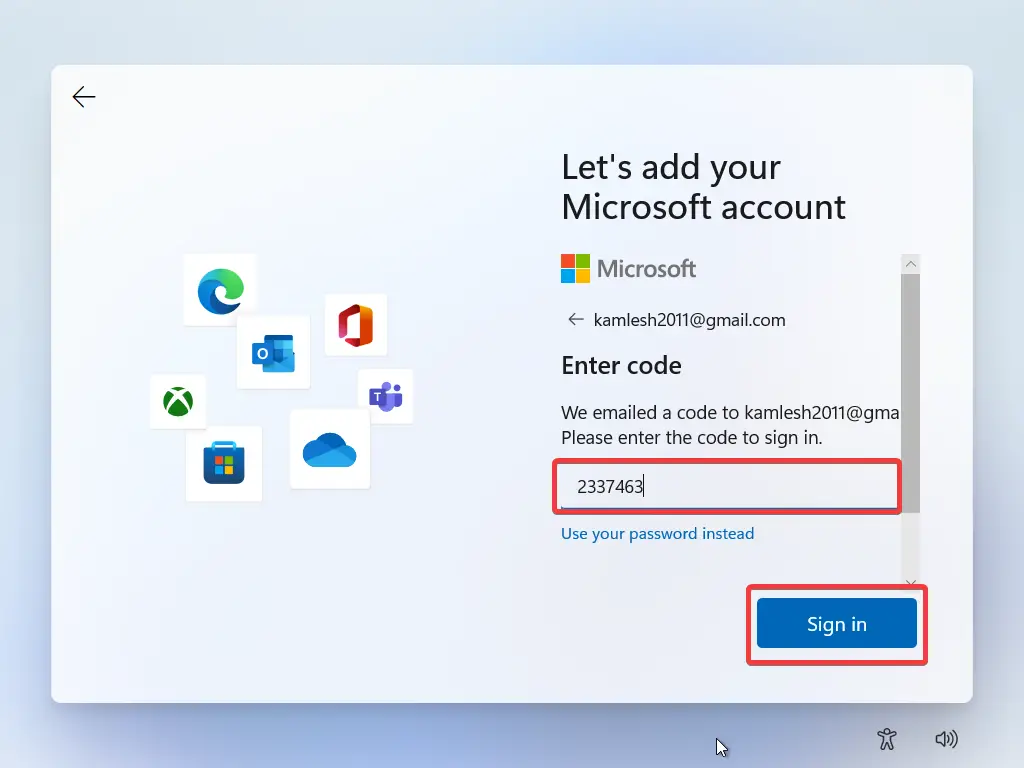
Step 35. Click the Sign in button.
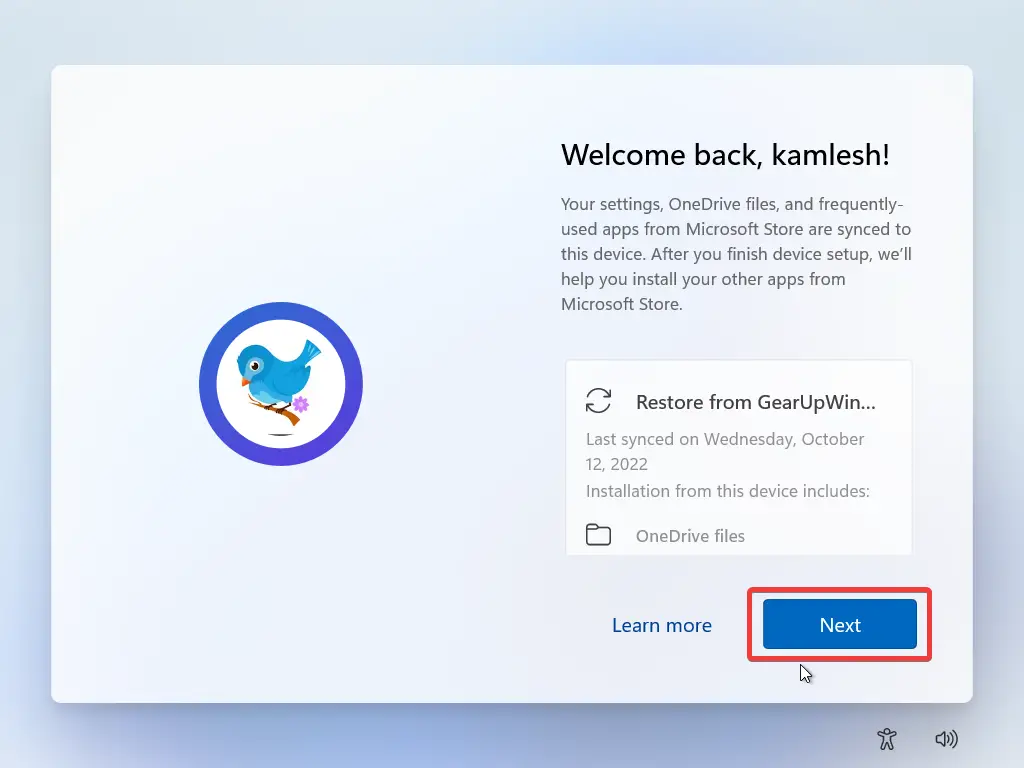
Step 36. Click the Next button.
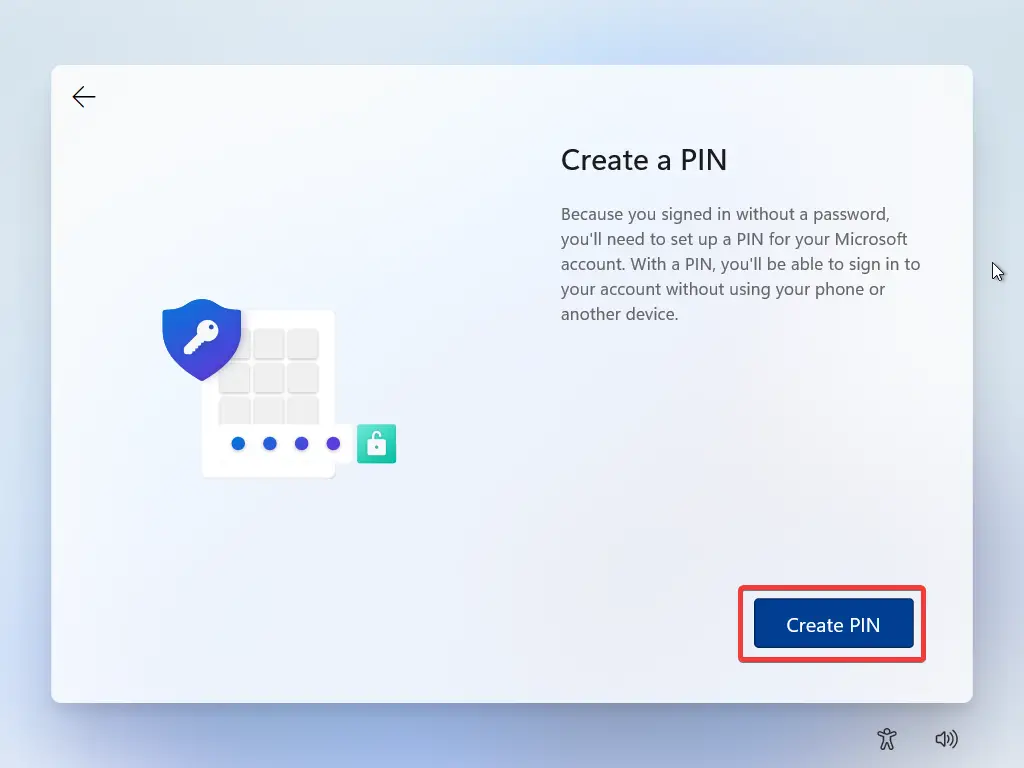
Step 37. Click the Create PIN button.
Step 38. Type a new PIN and confirm with the same.
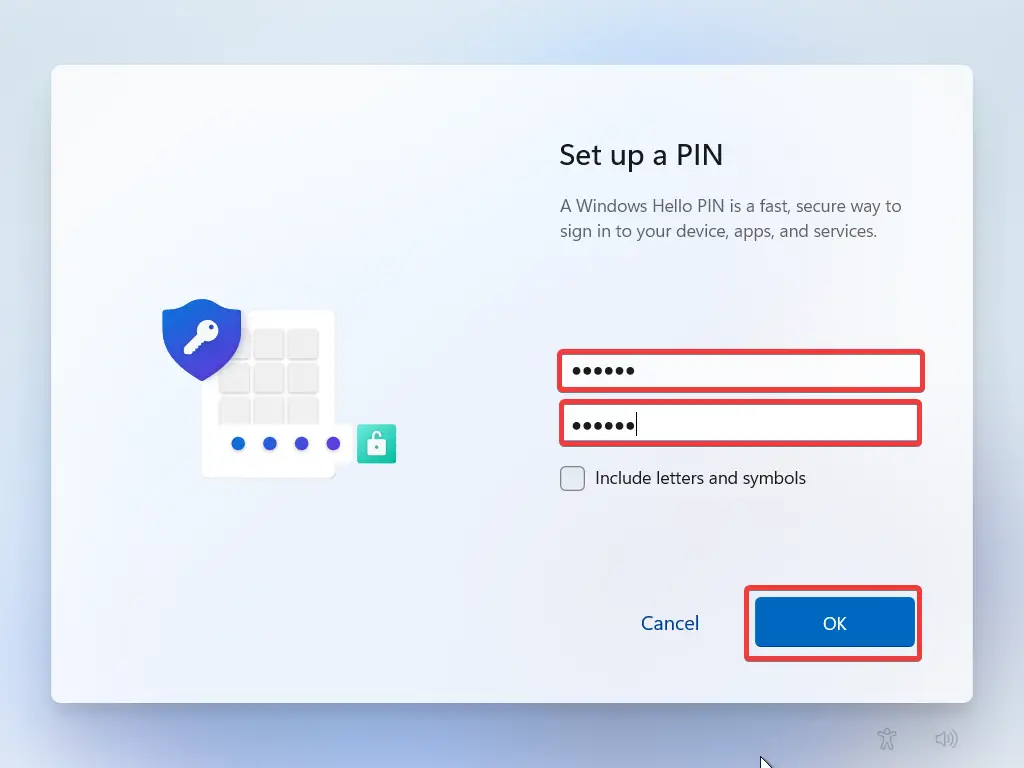
Step 39. Click the OK button.
Step 40. Now, confirm the privacy settings best suit your situation by enabling or disabling the toggle switches for each setting.
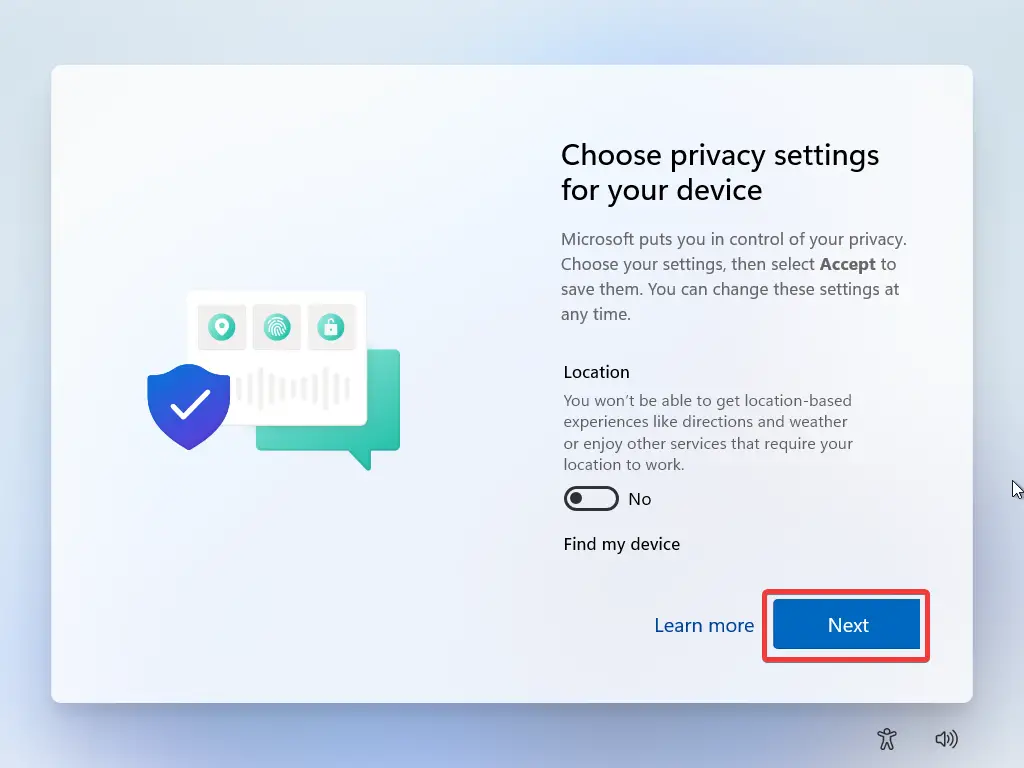
Step 41. Click the Next button.
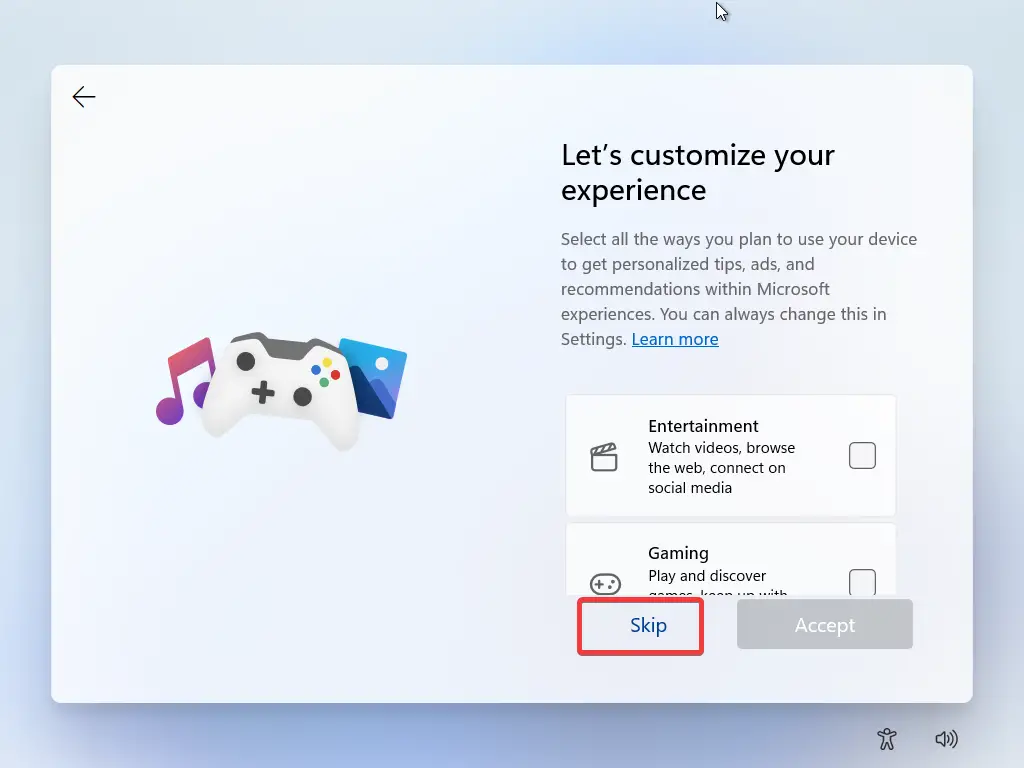
Step 42. In the “Let’s customize your experience” page, click the Skip button.
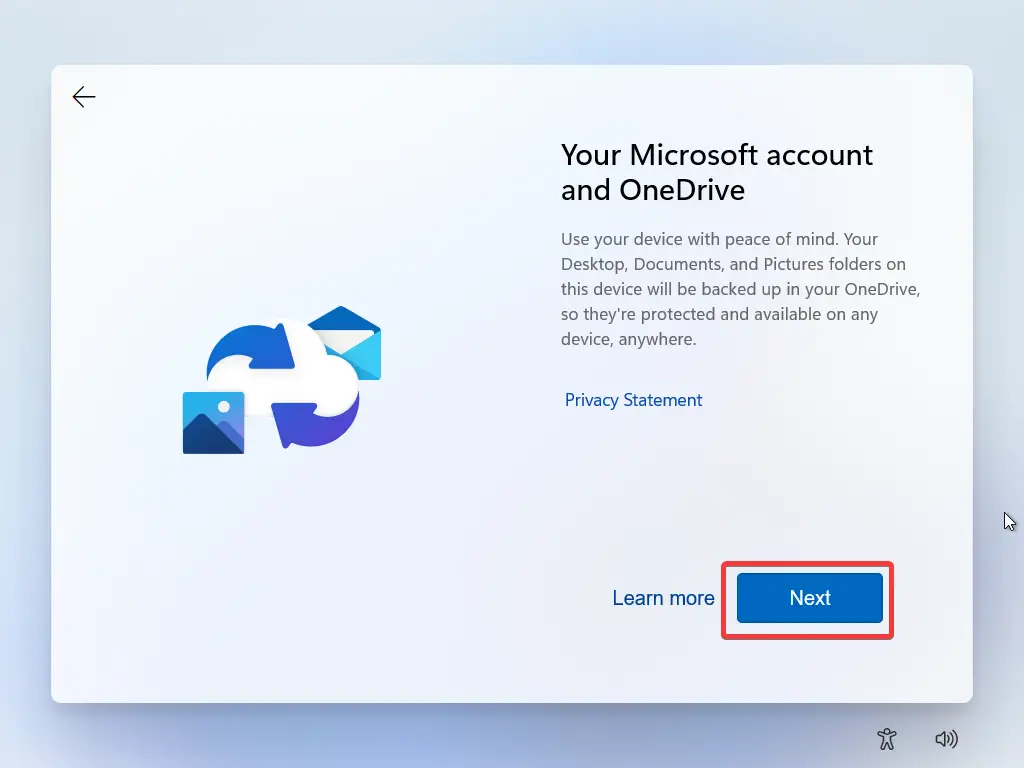
Step 43. On the “Microsoft account and OneDrive” page, click the Next button.
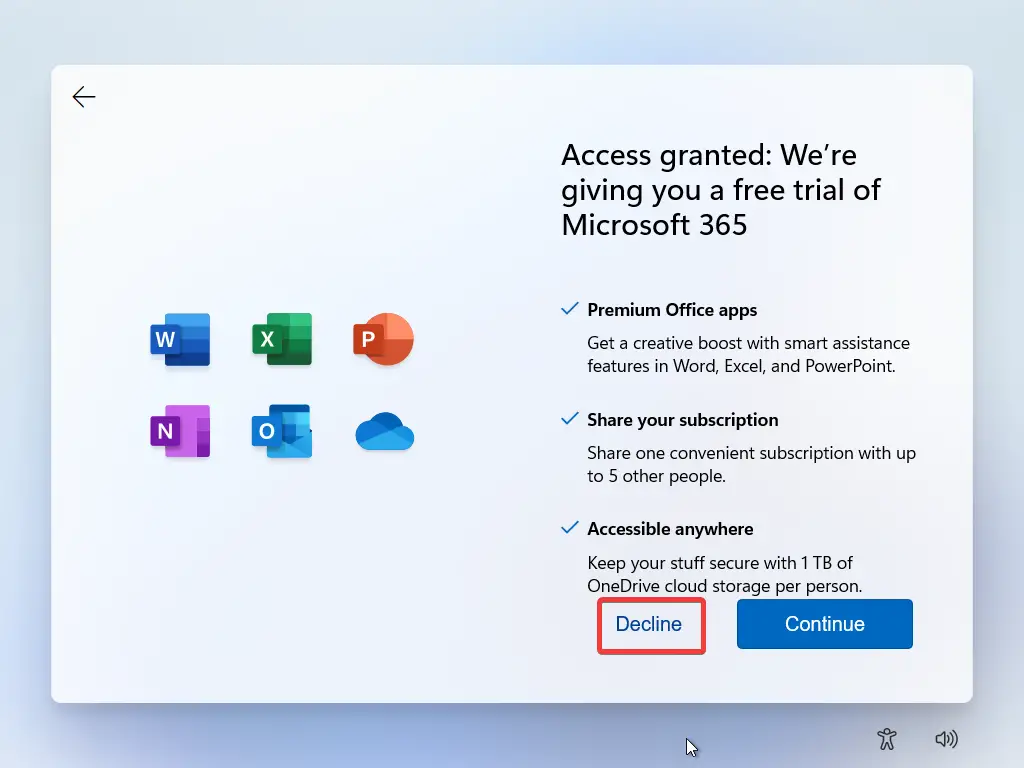
Step 44. When you see the free trial of Microsoft 365, click the Decline button.
Step 45. On the “GAME PASS” page, click on the Skip for now button.

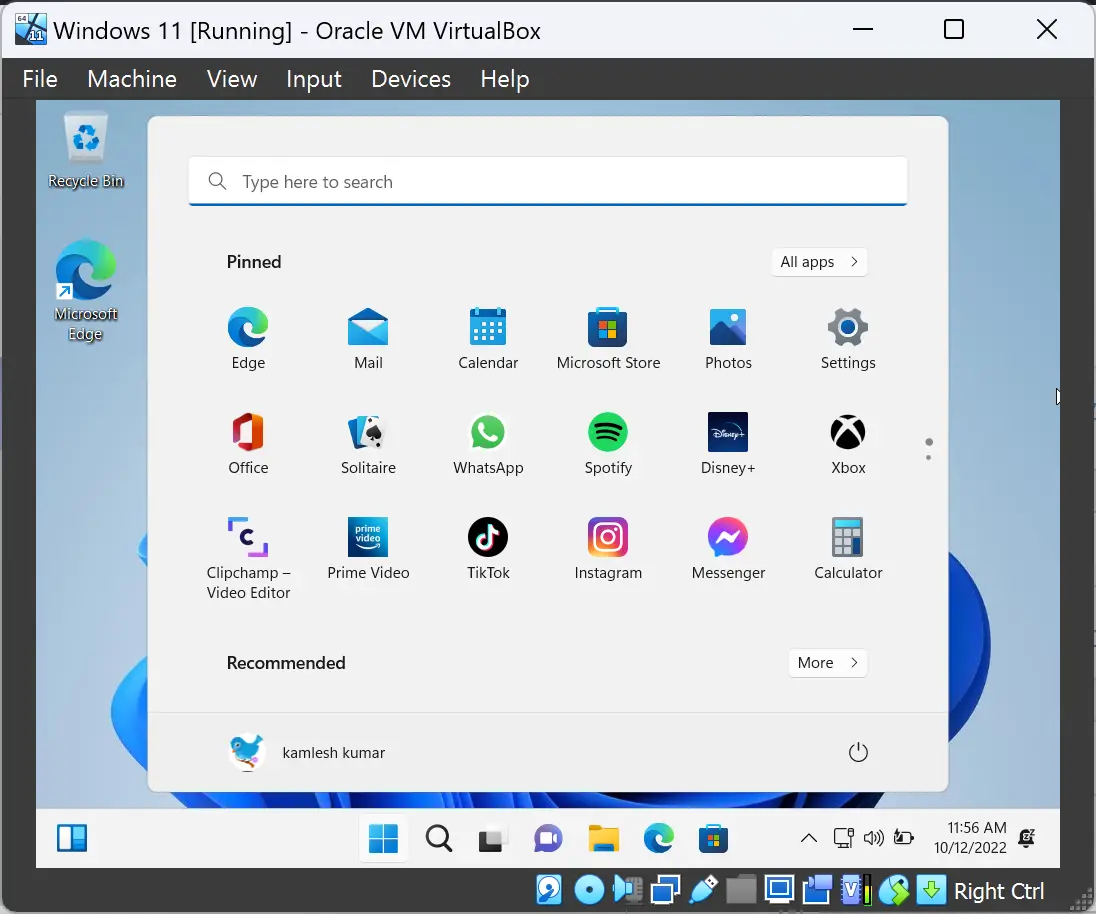
That’s it. In a few minutes, VirtualBox will show the desktop of your guest OS.
Once virtual Windows 11 22H2 is up and running, we recommend you install Guest Additions for a smooth OS experience.
Conclusion
In conclusion, while earlier it was possible to install Windows 11 22H2 on Oracle VirtualBox by tweaking the registry, there is no longer any need to bypass Secure Boot and TPM 2.0 on a VirtualBox virtual machine if you are using the latest version, 7.0, or higher. The latest version of VirtualBox has built-in support for Secure Boot and TPM 2.0. This article provided step-by-step instructions on how to create a new virtual machine and install Windows 11 22H2 on VirtualBox Virtual Machine. Following the steps mentioned in this article, you can easily create a virtual machine and install Windows 11 22H2 on it without any hassle.