Windows 10 is one of the best-operating systems that Microsoft launches. It includes several features, including XPS/OXPS reader/printer. XPS/OXPS is not so popular file format, and rarely do a few people use it. If you are one of those Windows users who don’t need a Microsoft XPS Document Writer printer can remove it from your PC.
There are several ways to uninstall this XPS printer; we will review only those which is helpful so you can give the desired results quickly. When you press the Ctrl + P hotkey to print a document, this printer appears in the drop-down list. Using this printer, you can print a document or webpage in XPS/OXPS format. Since it is a Windows-based virtual printer, you will see this app in all browsers while printing, including Google Chrome, Mozilla Firefox, Edge, Opera, etc.

You might often use your physical printer or a virtual PDF printer included in all modern browsers. Hence, the Microsoft XPS Document Writer printer is useless for you, and there is nothing wrong with removing it from your PC. XPS printer is only required when you deal with OXPS/XPS files.
How to Remove Microsoft XPS Document Writer Printer in Windows 10 using the Settings app?
To uninstall or remove Microsoft XPS Document Writer from your Windows 10 PC using the settings app, you need to do the following;-
Step 1. Open the Settings app by pressing the Windows + I keys simultaneously from the keyboard.
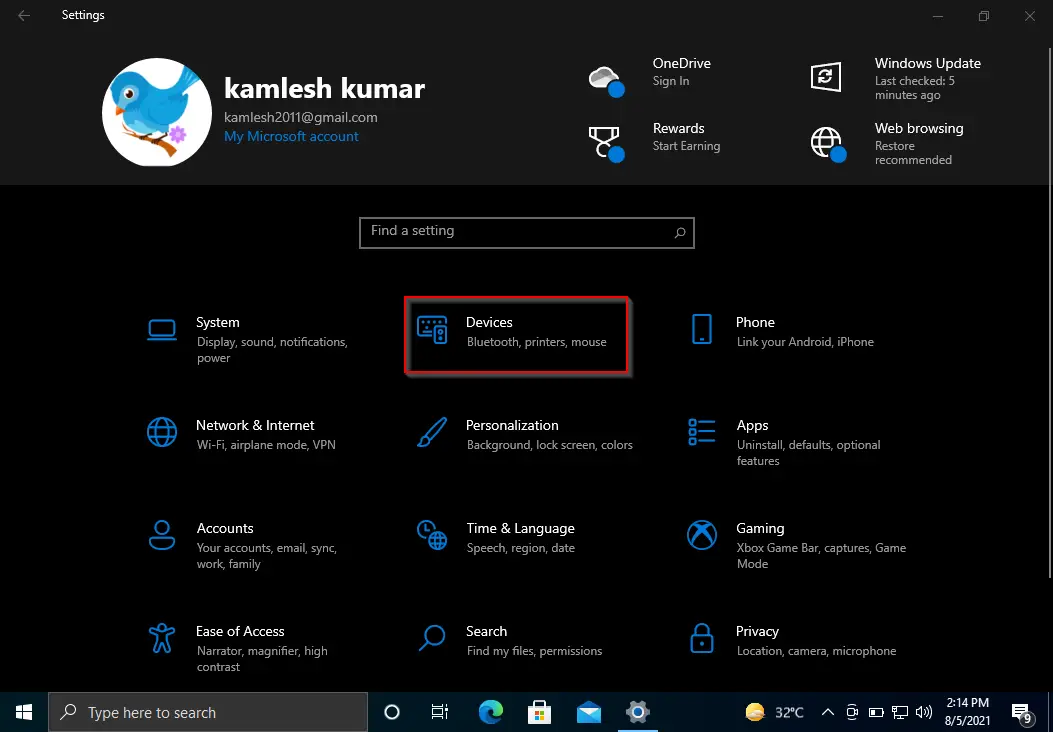
Step 2. In the Settings window that opens, click on the Devices category.
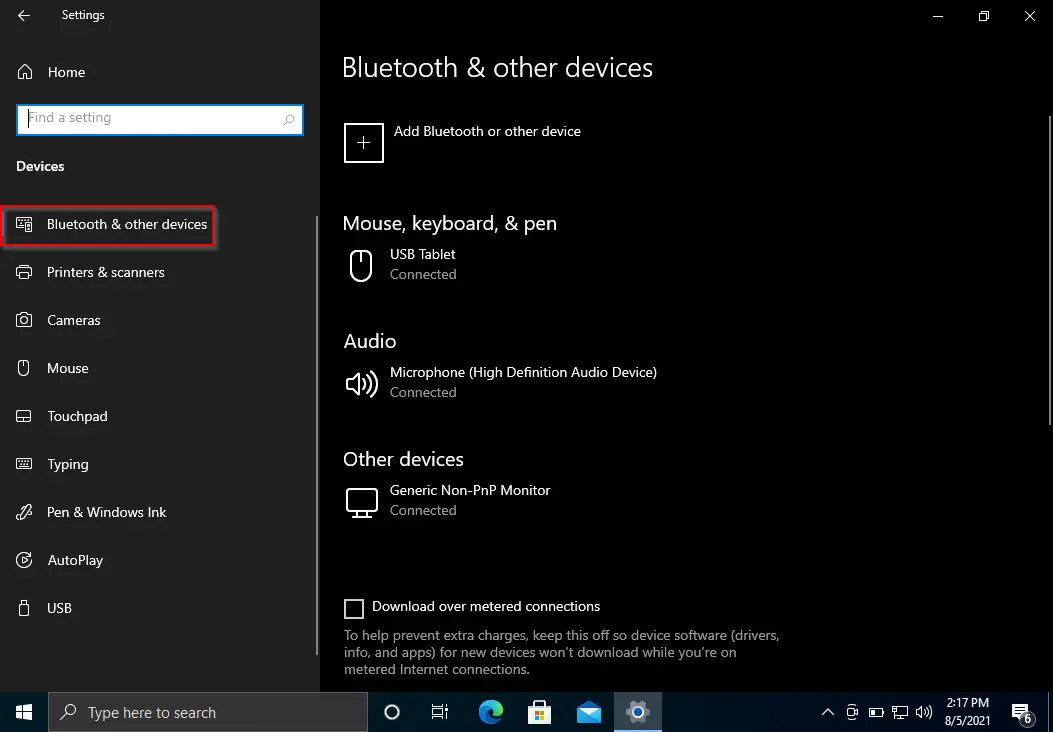
Step 3. Under Devices, select the Bluetooth & other devices tab from the left side pane.
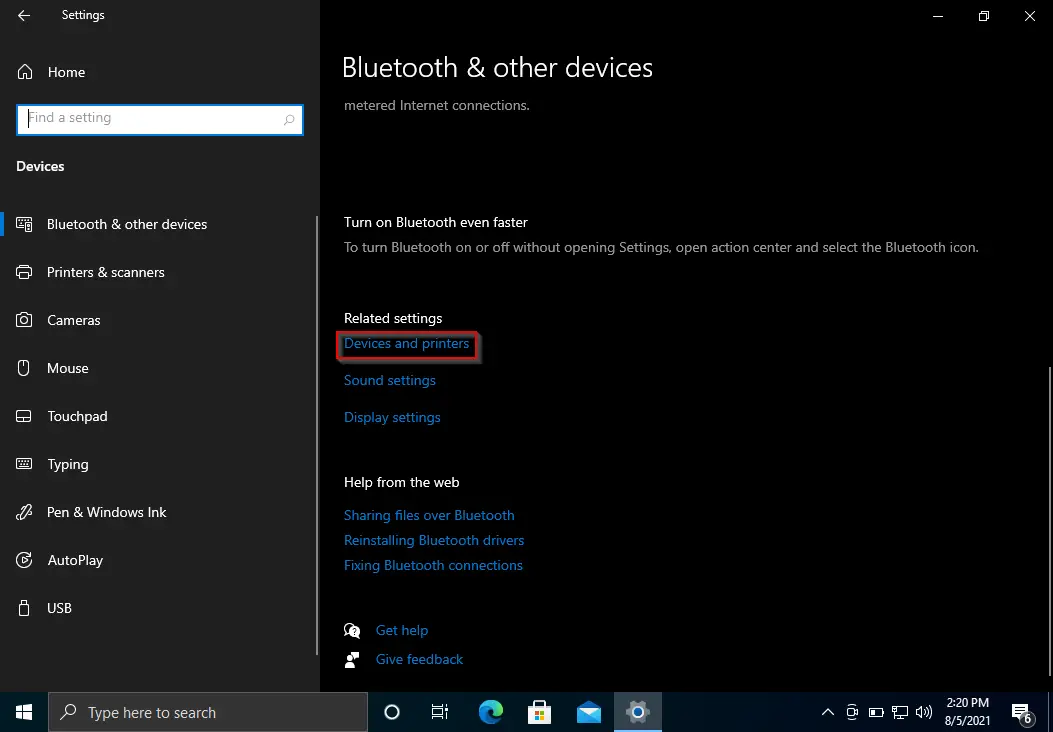
Step 4. On the right side of Bluetooth & other devices, please scroll down to see the Devices and printers link and click on it.
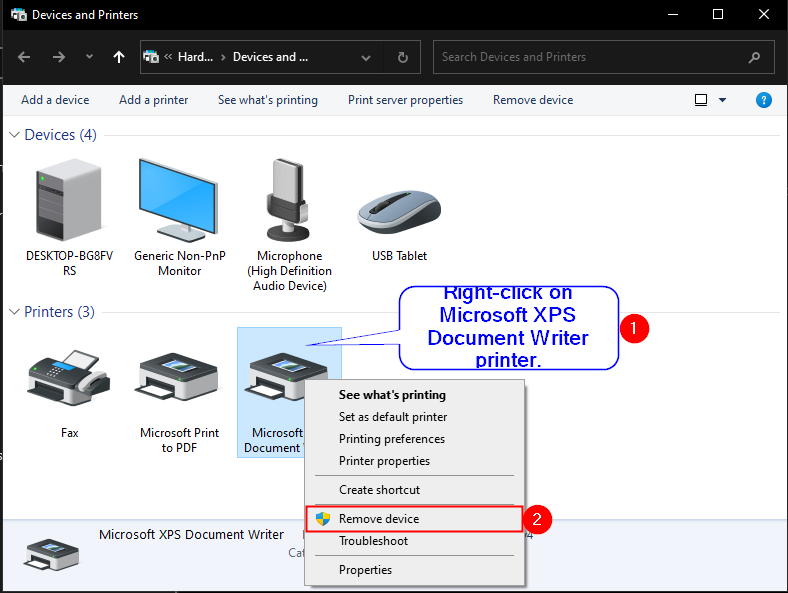
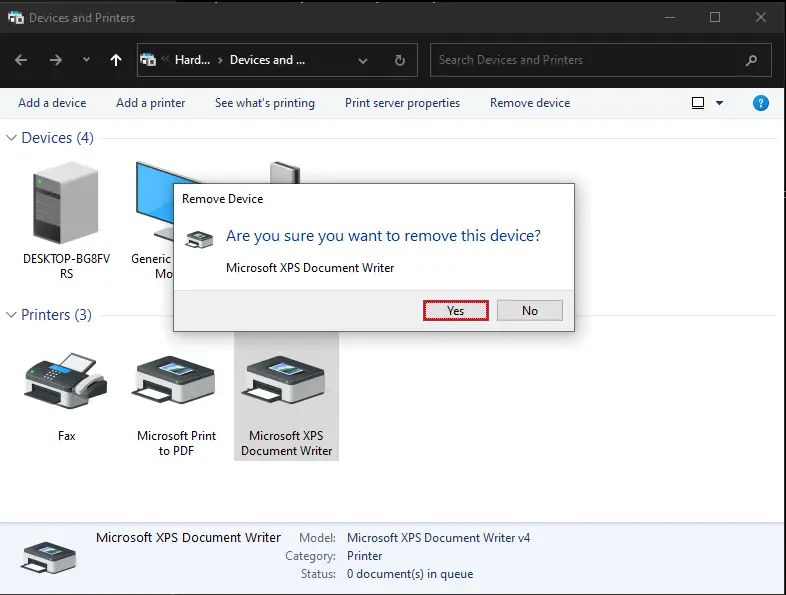
Step 5. After completing the above steps, the Devices and Printers window will open. Right-click on the Microsoft XPS Document Writer printer and select the Remove device option from the available pop-up menu.
Step 6. Click on the Yes button when prompted.
Once you complete the above steps, Microsoft XPS Document Writer will no more appear on the print dialog box when you press Ctrl + P shortcut keys to take a printout on Windows 10.
How to Add or Remove Microsoft XPS Document Writer Printer in Windows 10 using Windows Features?
Microsoft XPS Document Writer is an optional feature on Windows, and you can add or remove it according to your needs.
Step 1. Press the Windows key from the keyboard to open the Start menu.
Step 2. Now, start typing Turn windows features on or off.
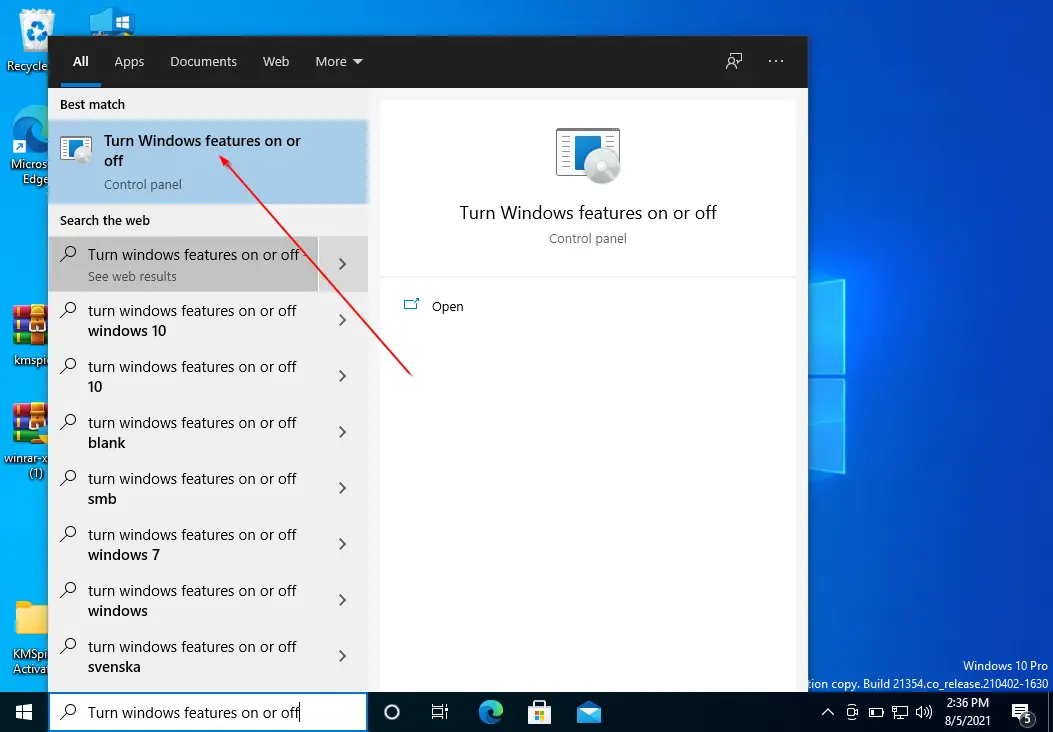
Step 3. In the available search results, click on the Turn Windows features on or off (Control Panel) item to open the Windows Features dialog.
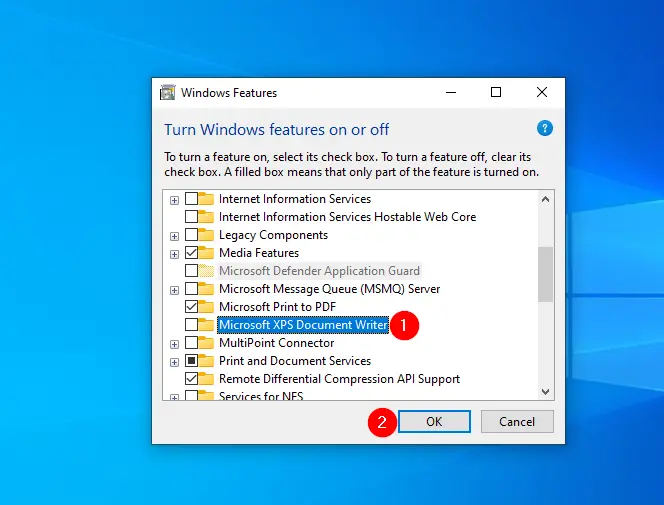
Step 4. Now, scroll down to find the Microsoft XPS Document Writer, remove the tick from the checkbox, and click on the OK button.
Once the process is finished, restart your computer to complete the task.
If you would like to get this printer back to your Windows 10, repeat the above steps and make a tick in the Microsoft XPS Document Writer and then click the OK button.
How to Remove Microsoft XPS Document Writer Printer in Windows 10 through Command Prompt?
To remove the Microsoft XPS Document Writer Printer, open the Command Prompt with administrative privilege. Now, enter the following command and hit Enter from the keyboard to remove the Microsoft XPS Document Writer Printer from your computer or laptop:-
printui.exe /dl /n "Microsoft XPS Document Writer"
How to Remove Microsoft XPS Document Writer Printer in Windows 10 using Windows PowerShell?
Open the PowerShell window with elevated rights and issue the following command to remove it from your PC:-
Remove-Printer -Name "Microsoft XPS Document Writer"
That’s it.
Conclusion
In conclusion, the Microsoft XPS Document Writer printer is a useful feature for those who work with XPS/OXPS files. However, for those who do not require this feature, it is not necessary to keep it on their Windows 10 PC. This article has provided three methods to remove the Microsoft XPS Document Writer printer from your computer or laptop, including using the Settings app, Windows Features, Command Prompt, and Windows PowerShell. By following any of these methods, you can easily uninstall this printer and free up some space on your PC.
