A MAC (Media Access Control) address is a unique physical identifier for network devices that enables them to connect to a network. The equipment manufacturer assigns this MAC to any network devices, such as smartphones, computers, TVs, etc.
Typically, you don’t have to bother about MAC addresses because the manufacturer assigns them. Since it is programmed on your device, you can’t change this physical address, but you can spoof a new MAC address in Windows and broadcast it from your computer. And then, your PC will start receiving packets in the network.
Also Read: How to find MAC address on Windows 11/10?
To change your computer MAC address, you may have some valid reasons. For example, your computer MAC address is misidentified as a threat, and you can no longer access any network resource. You will need to change the physical MAC address in Windows 11 or 10 machines to get network access again.
How to Change MAC address in Windows 11?
Although Windows 11 allows you to set random hardware addresses to help protect your privacy by making it harder for people to track your device location. If you need, you can configure a new MAC address of your choice. To do that, use the following steps:-
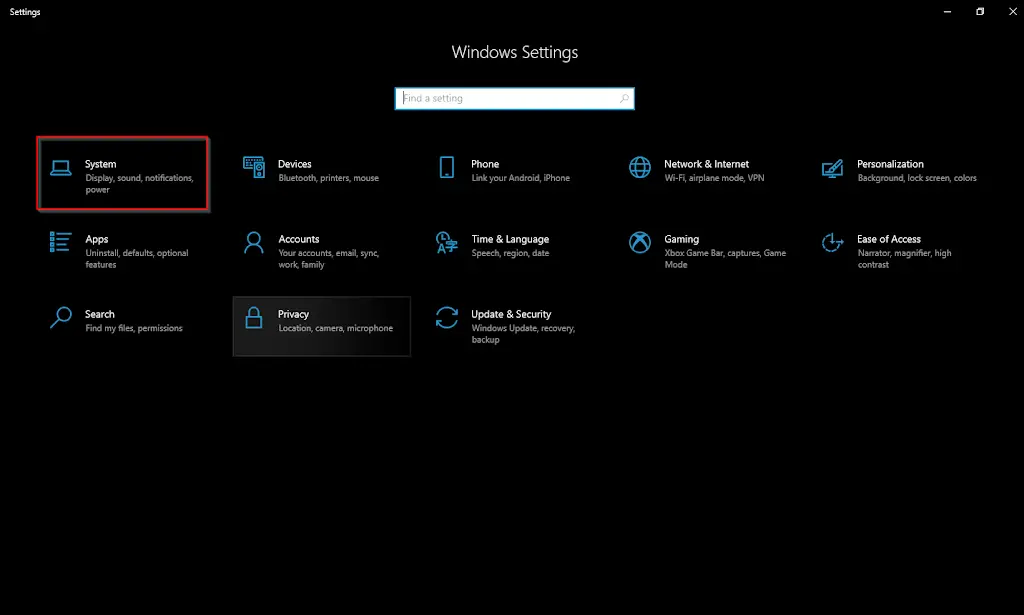
Step 1. Open the Settings app by pressing the Windows + I keys.

Step 2. When Windows Settings opens, select the System category in the left sidebar.
Step 3. Then click About on the right pane of the screen.
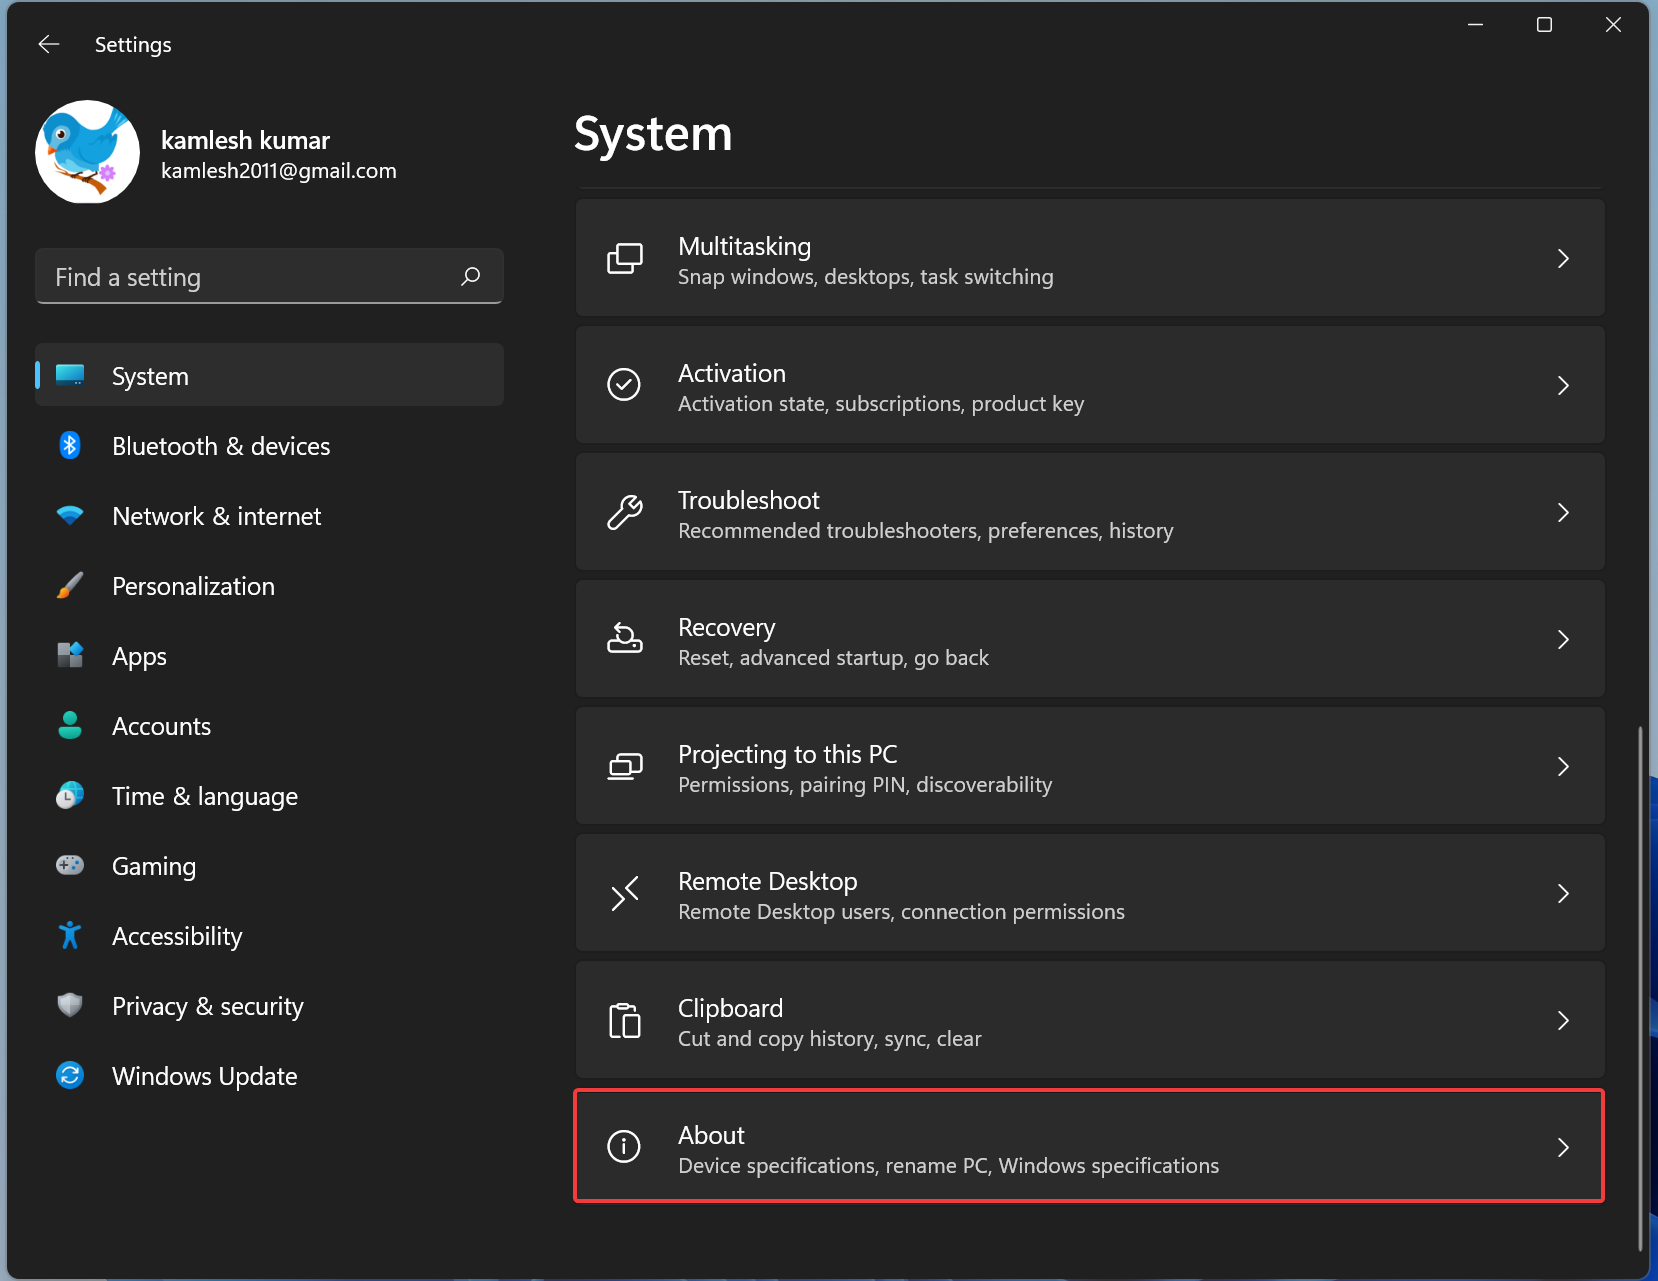
Step 4. After that, select Device Manager.
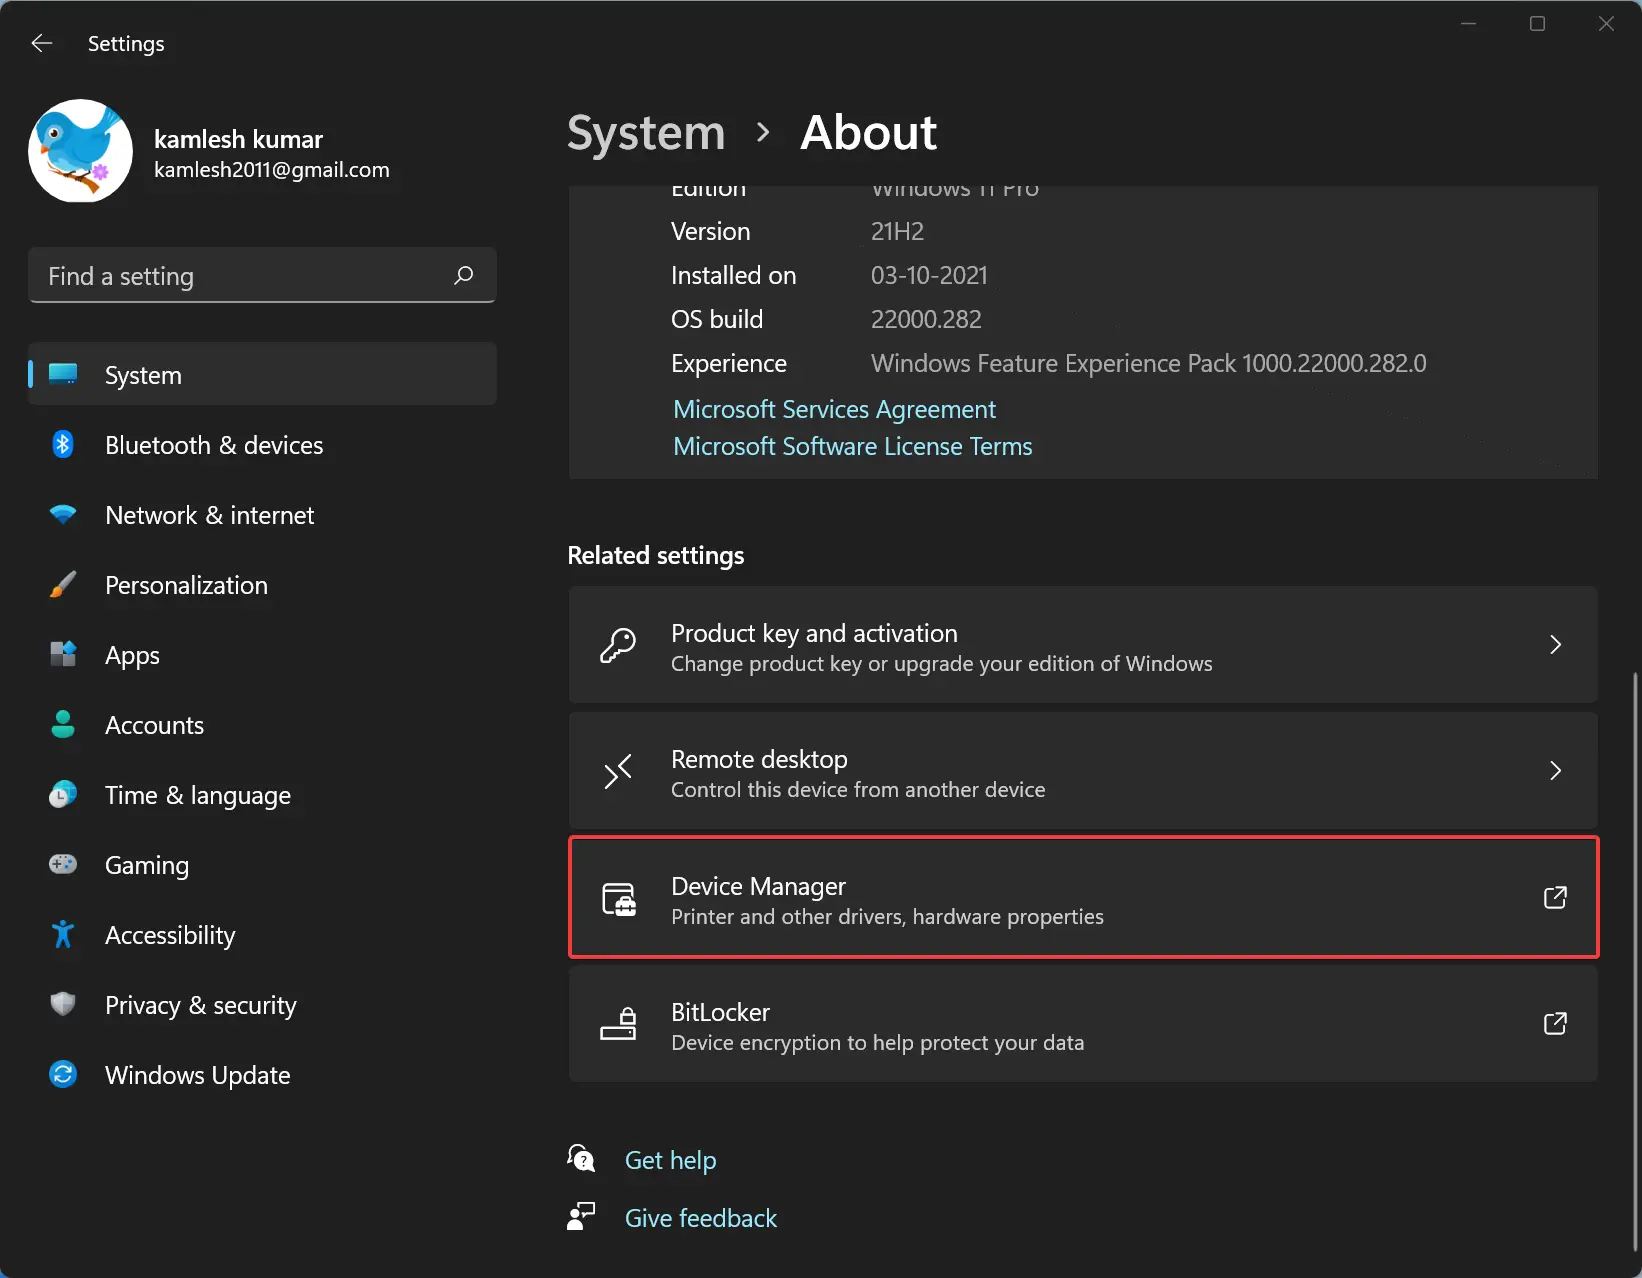
Step 5. Now Device Manager window will open. Double-click on the Network adapters to expand it.
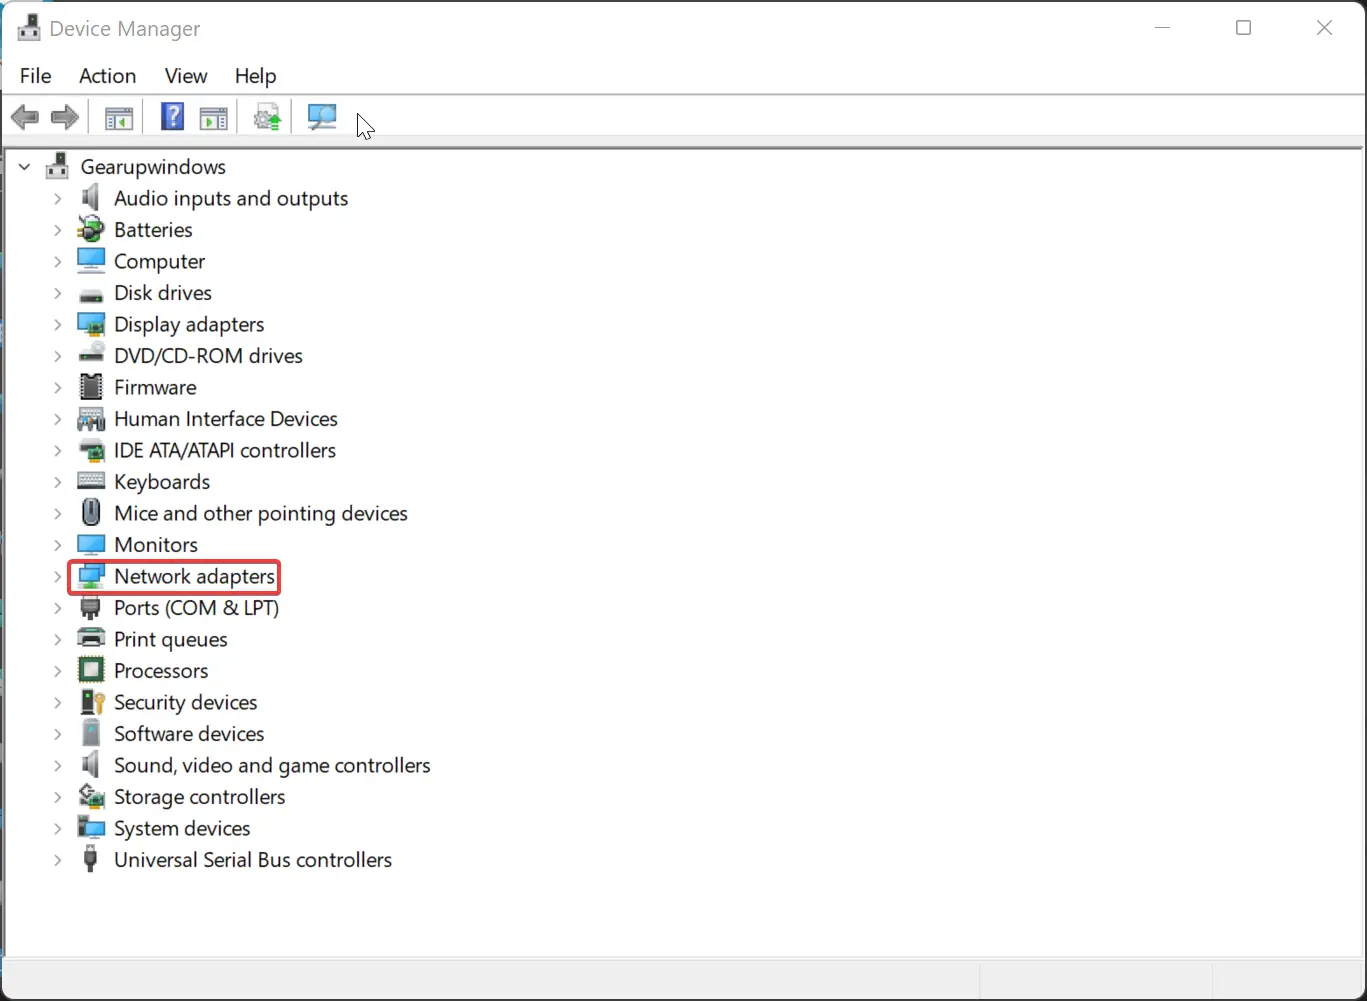
Step 6. Now, right-click on the network adapter you want to change the MAC address. Then select the Properties option.
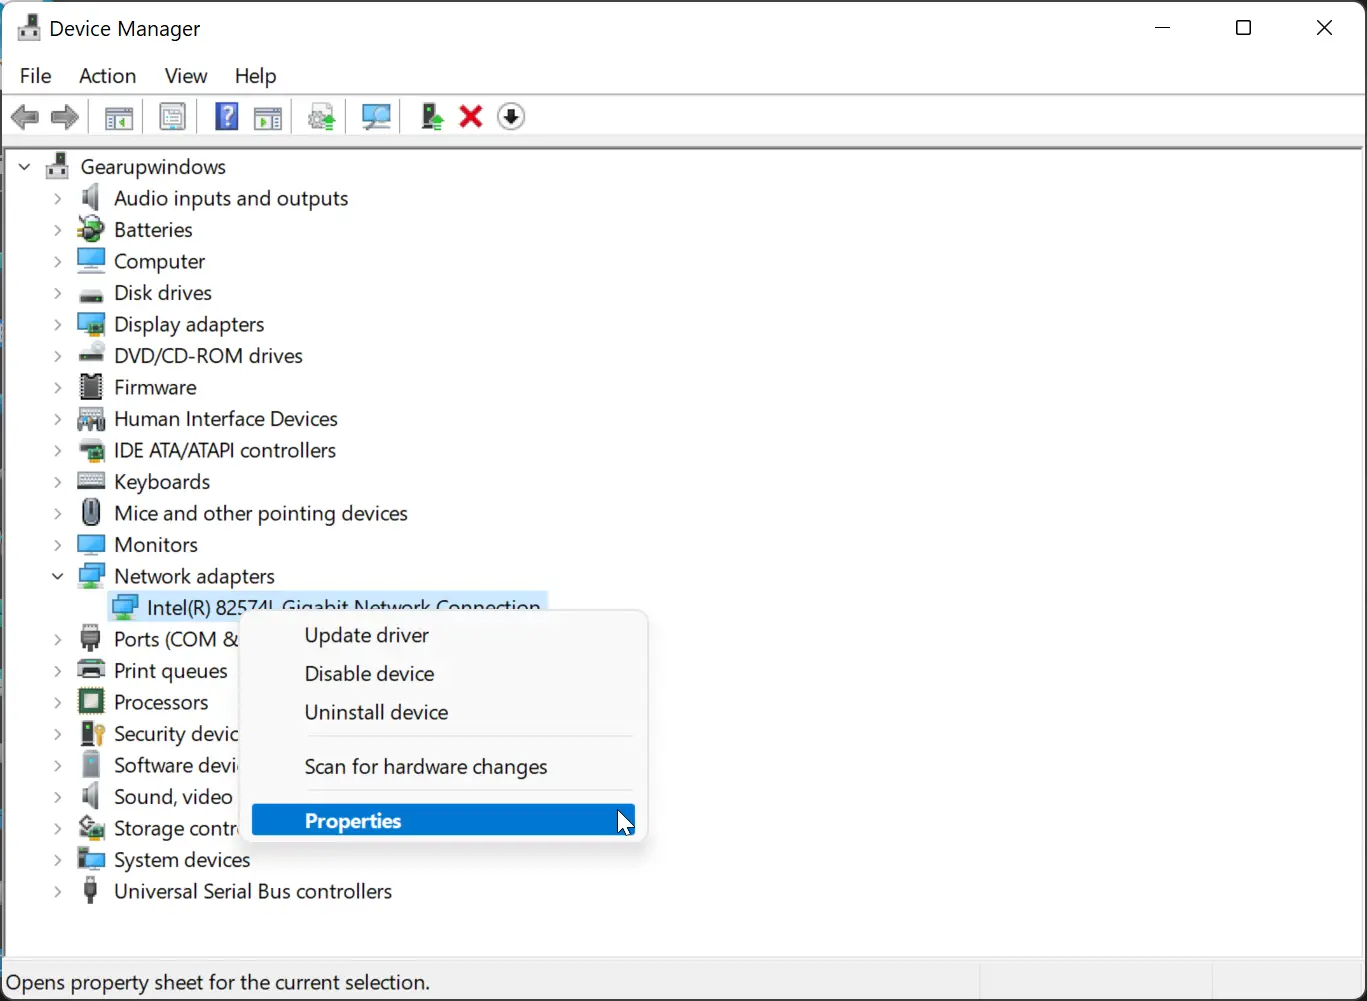
Step 7. On the Properties dialog, select the Advanced tab. Then, under the Property box, scroll down and select Locally Administered Address.
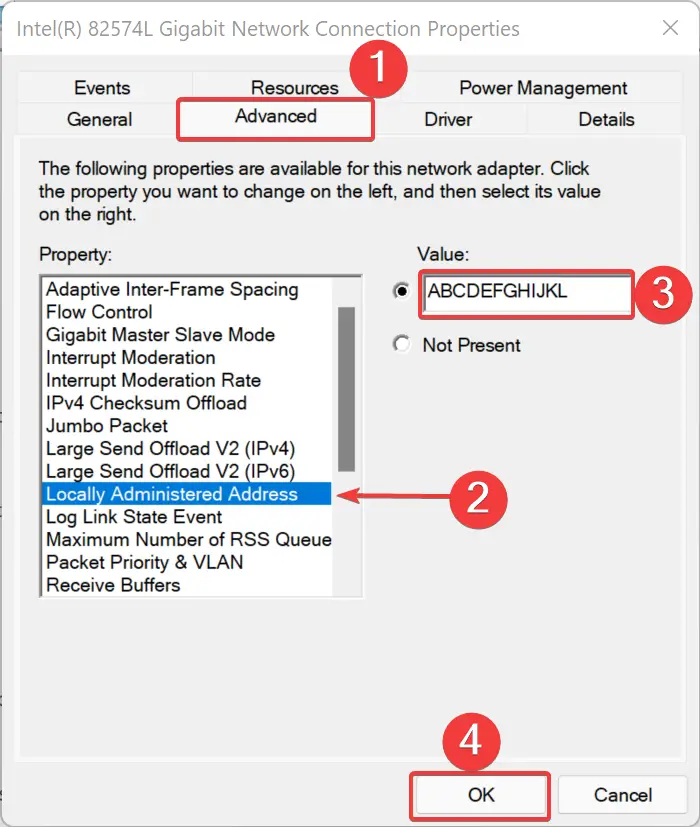
Step 8. In the “Value” field, enter the 12-digit new alphabetical MAC address and then click the OK button.
Quick Note: To restore the default MAC address, please repeat the above steps and select the Not Present option.
Step 9. Restart your computer.
Also Read: How to enable or disable random hardware addresses in Windows 11?
How to Change MAC address in Windows 10?
To change or alter the MAC address in Windows 10, use these steps:-
Step 1. Open the Settings app by pressing the Windows + I keys.
Step 2. When Windows Settings opens, click on the System category.
Step 3. Then, select About under “System.”
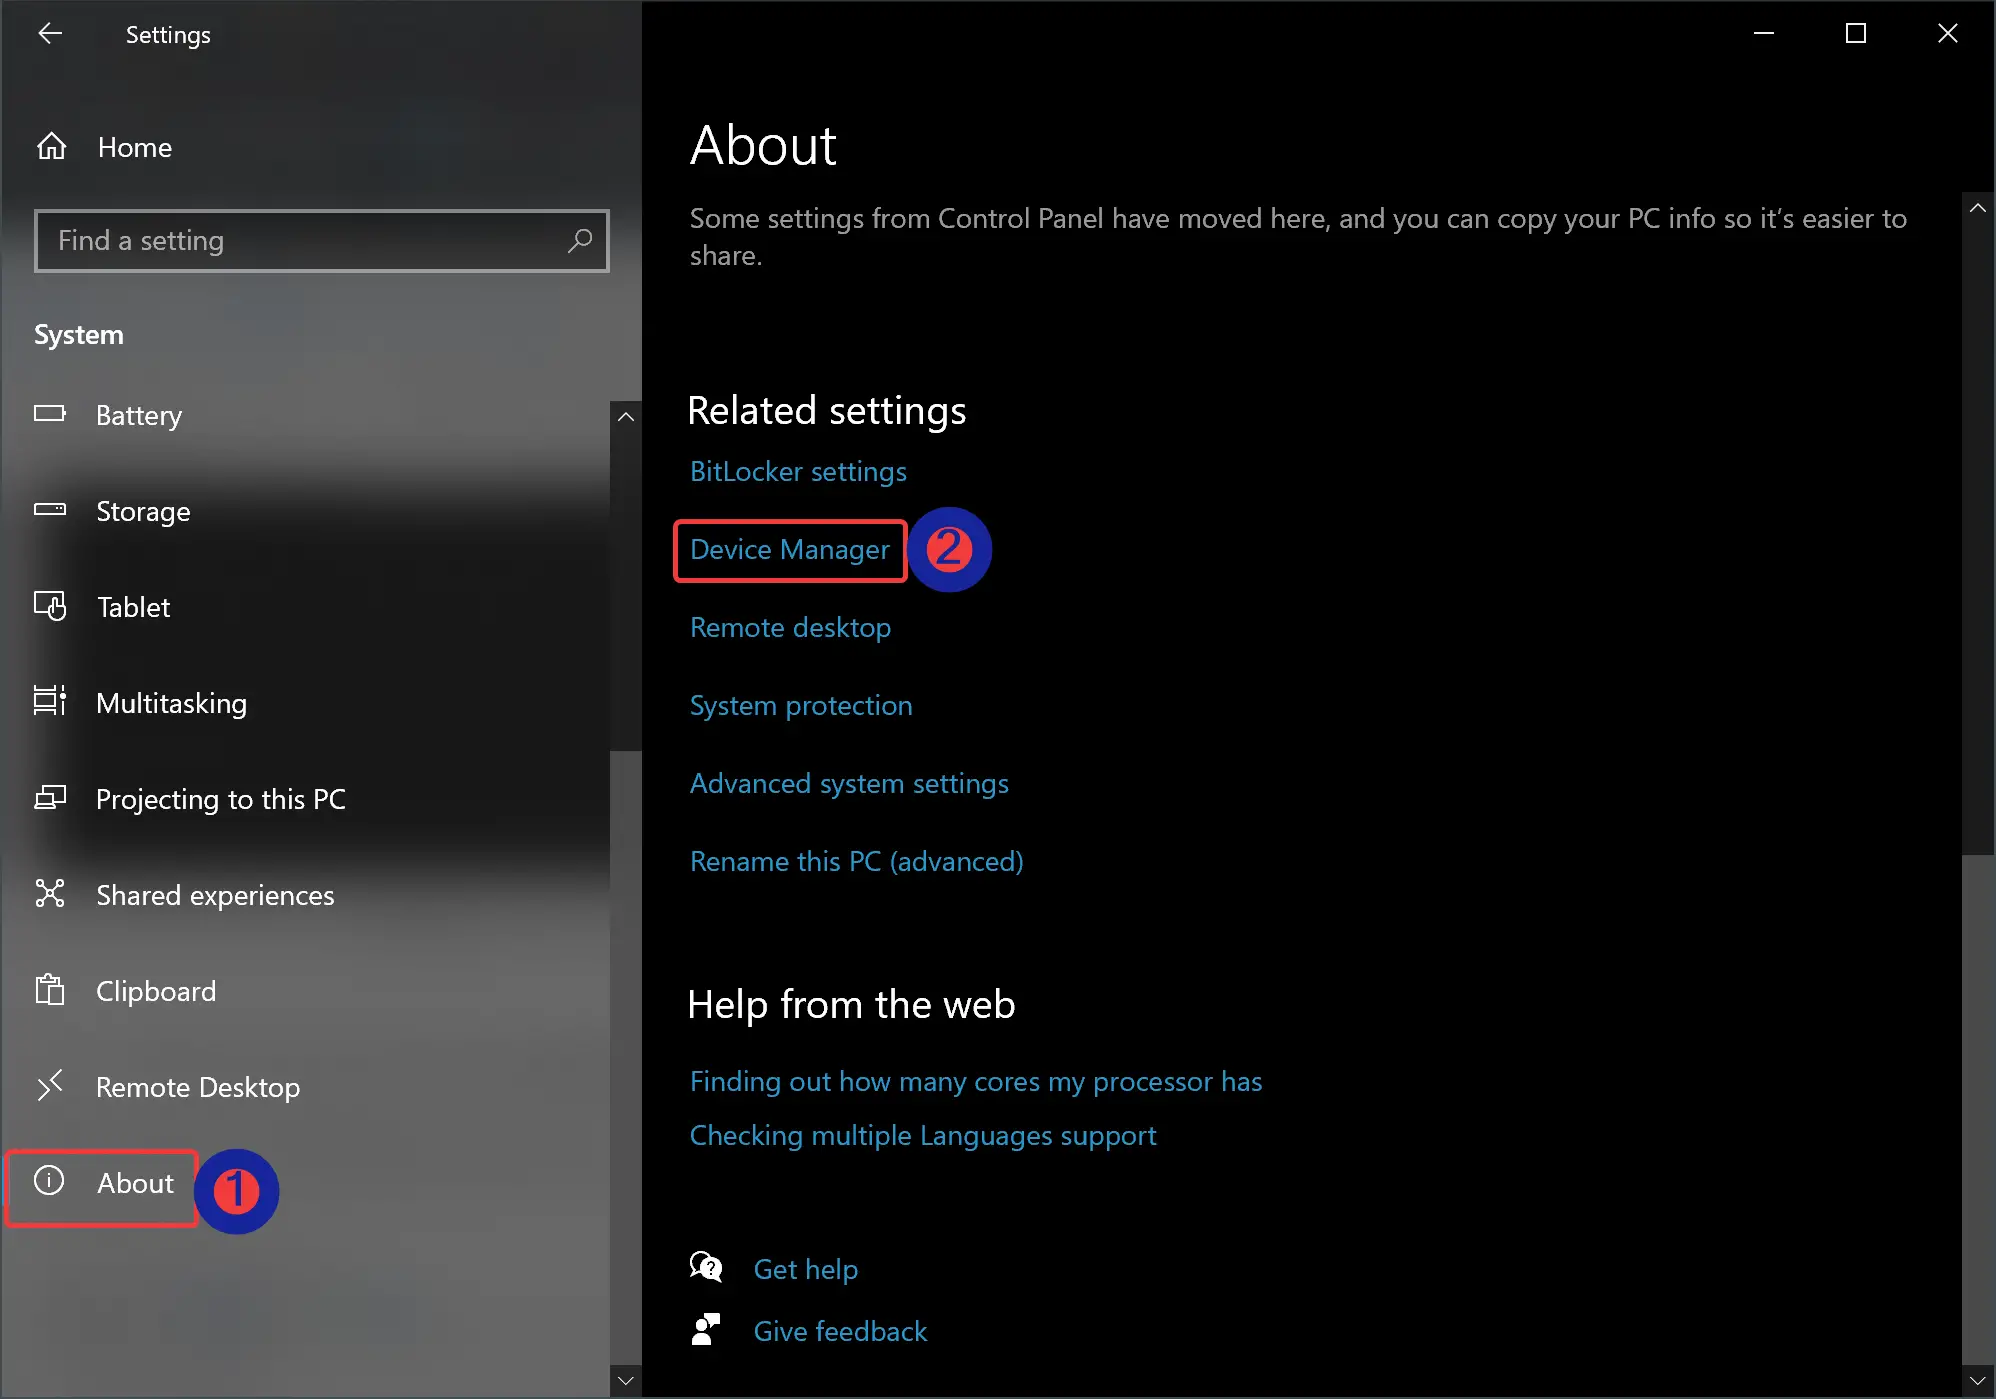
Step 4. After that, scroll down on the right side pane and click the Device Manager link.
Step 5. When you’re done, the Device Manager window will open. Double-click on the Network adapters tree to expand it.
Step 6. Then, right-click on the network adapter you want to change the MAC address and select the Properties option in the menu.
Step 7. On the Properties dialog, switch to the Advanced tab. Then, under the Property box, scroll down and select Locally Administered Address.
Step 8. In the “Value” field, enter the 12-digit new alphabetical MAC address and then click the OK button.
Quick Note: To restore the default MAC address, please repeat the above steps and select the Not Present option.
Step 9. Finally, reboot your computer to apply the changes.
Conclusion
In conclusion, a MAC address is a unique physical identifier assigned to network devices that allow them to connect to a network. Although it is usually not necessary to change your MAC address, there may be valid reasons to do so, such as a misidentified MAC address causing network access issues. In Windows 11 and Windows 10, you can change the MAC address of your network adapter by following the steps outlined above. It is important to note that spoofing a MAC address should be done carefully and only when necessary, as it can have unintended consequences on network security and privacy.
You might also be interested in SMAC (Spoof MAC Address) and Technitium MAC Address Changer, which allows you to change the MAC address on Windows 11 and 10 quickly.

it doesn’t show Locally Administered Address. how can i still do it?
Dear Aydin,
Try to uninstall and reinstall the drivers of LAN/Wi-Fi.