For the best performance and stability, you should always keep your PC drives updated. Without drivers or incorrect drivers may slow down the performance of your PC. Device drivers play an important role in Windows operating systems. It is always recommended to install the latest and correct drivers for your Windows 10 PC to run it smoothly.
Since most PC users never bother about drivers or do not know how to update device drivers manually, Microsoft automatically downloads device drivers via Windows Update and installs them on your Windows 10 computer or laptop.
With the default configuration, Windows 10 automatically downloads and installs device drivers and device driver updates. The automatic update feature maintains your Windows 10 at the top-notch. Still, for any reason, if you want to stop Windows 10 from automatically installing device drivers, this post will help you to do the same. The reasons may be many, e.g.; automatic updates make your PC unstable.
You can guide your Windows 10, not to install drivers automatically using Group Policy or Registry or Settings app. Through all these options, Settings app, Group Policy, and Registry, you can disable automatic driver updates in Windows 10.
Disable automatic driver updates via Group Policy in Windows 10
Group Policy is the best option to disable the automatic driver update. However, it is not a part of the Windows 10 Home edition. If you want to disable automatic driver update on Windows 10 Home Edition, you must first enable the Group Policy Editor.
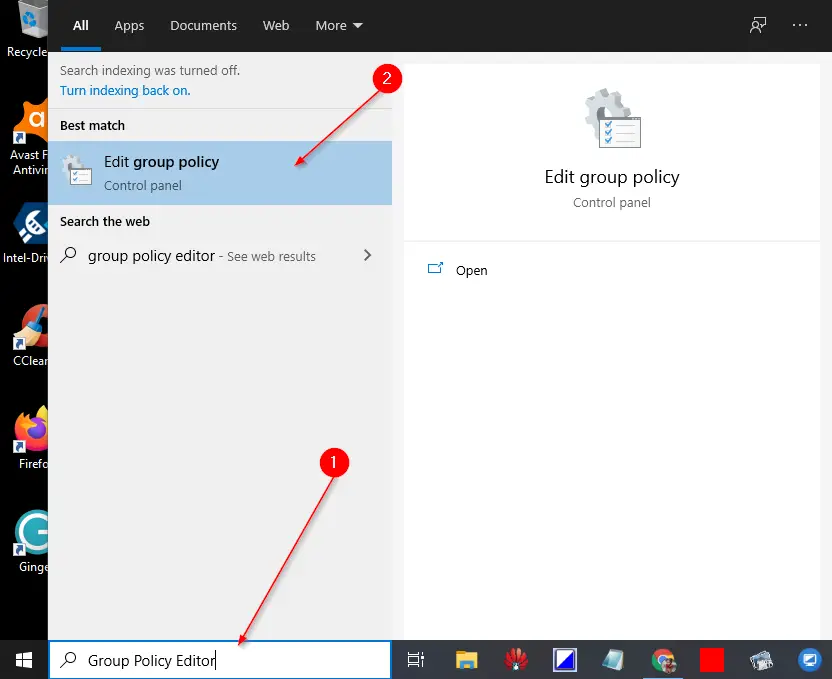
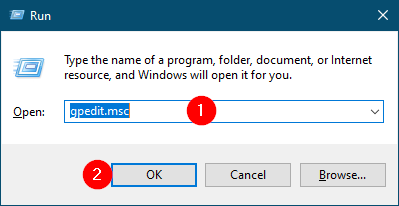
Step 1. Start the Local Group Policy Editor by typing its name in the Start/taskbar search field and then clicking the Edit group policy from the search results.
Step 2. In the Local Group Policy Editor window, navigate to the following:-
Computer configuration > Administrative templates > Windows components > Windows Update
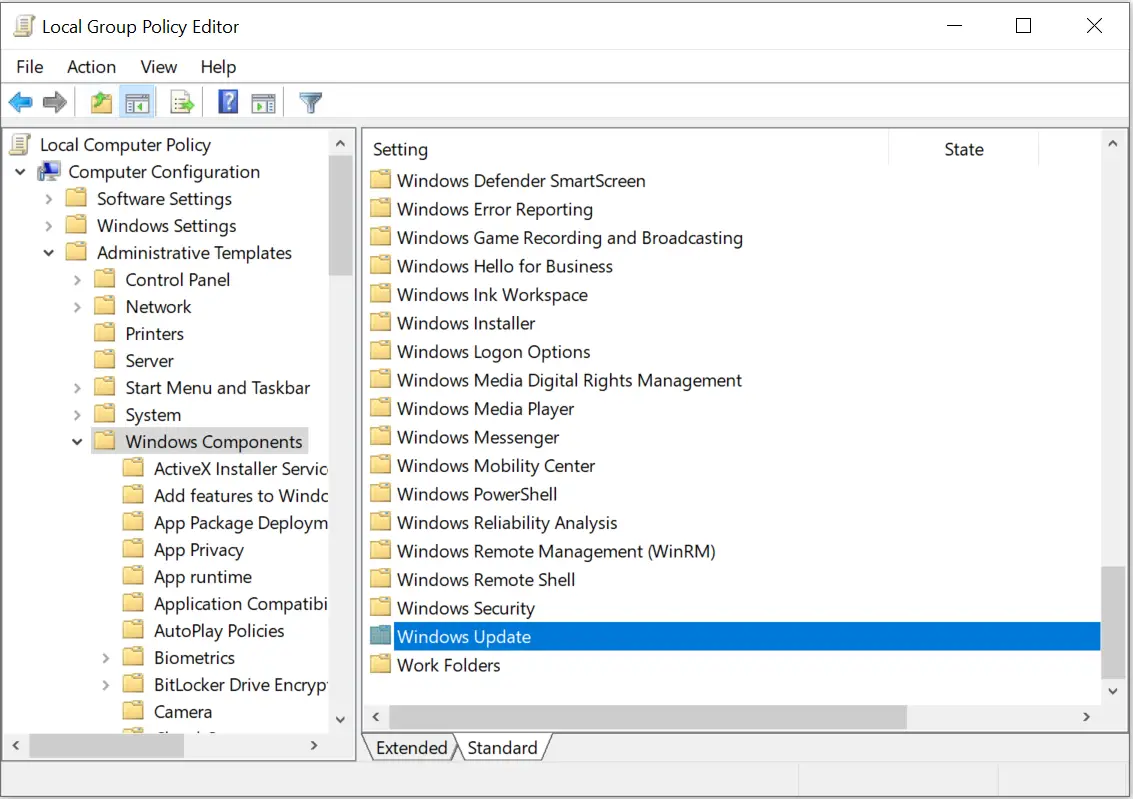
Step 3. On the right side, double-click on the entry Windows Update to open it.
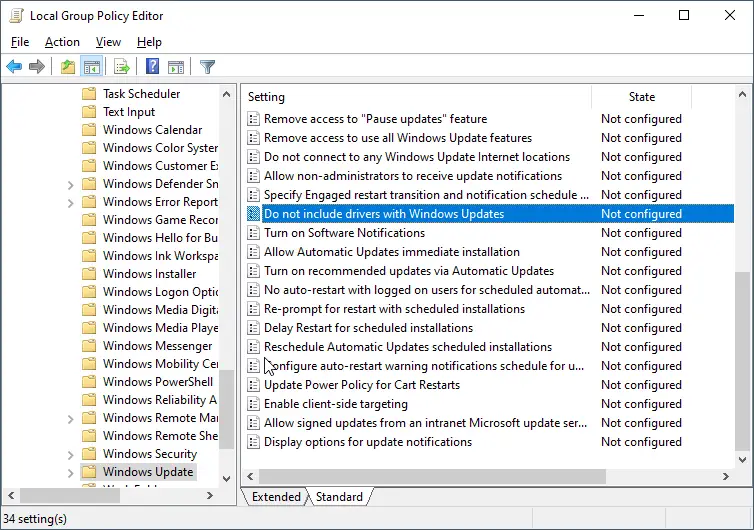
Step 4. Look for the policy “Do not include drivers with Windows Updates” and double-click on the policy to open its settings.
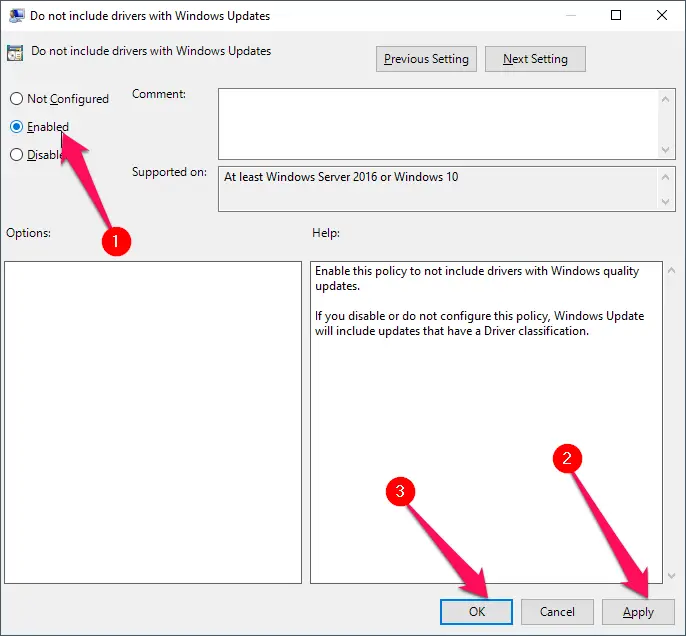
Restart your PC to take effect the changes.
In case you want to revert the change, that means you want to automatically update drivers through Windows Update; on step 5, select the option “Not Configured” or “Disabled.”
Disable automatic driver updates via Registry on Windows 10
Since you will edit the Windows Registry file, we recommend you create a system restore point. In case something goes wrong, you can revert your PC to its previous working state using a system restore point.
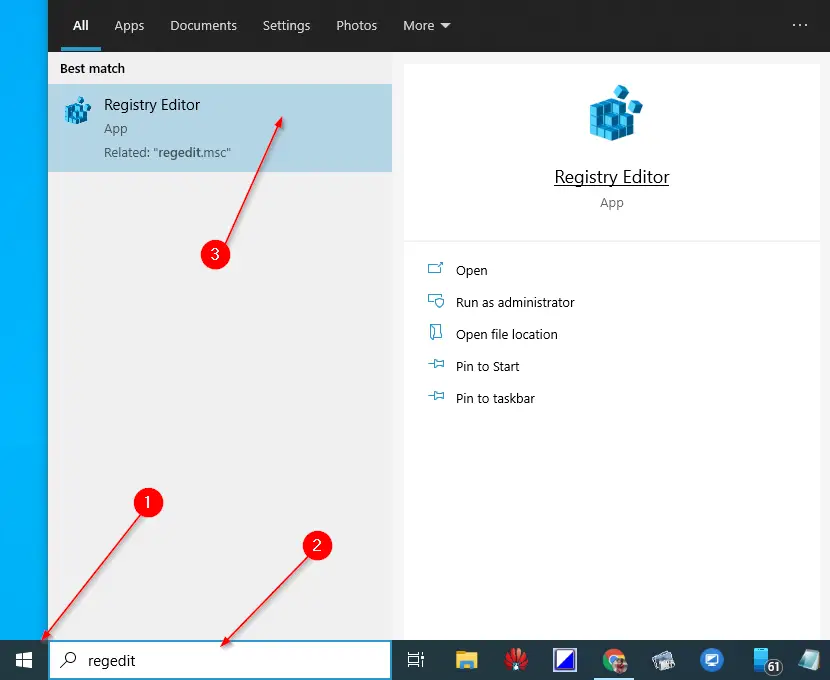
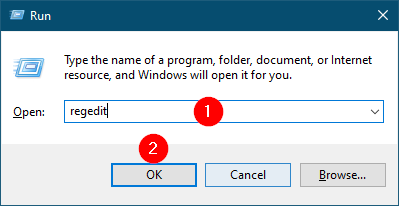
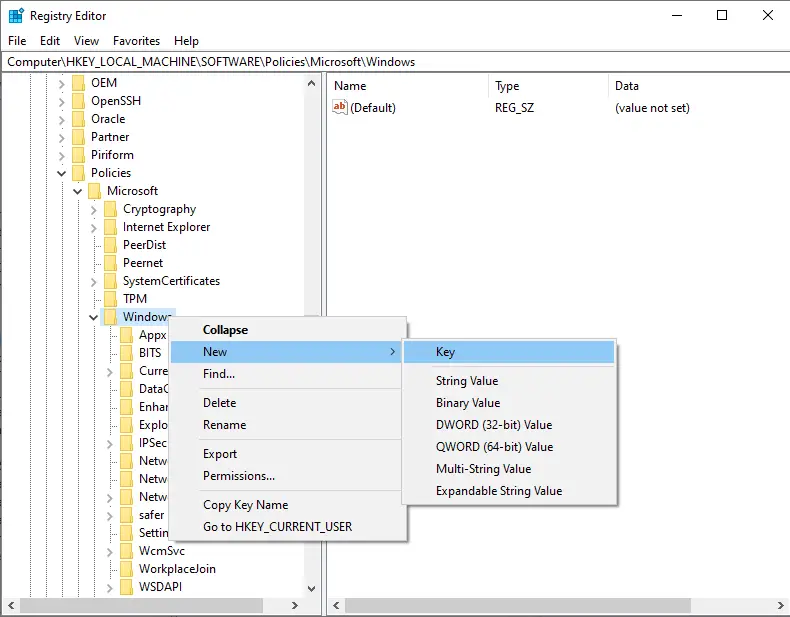
Step 1. Open the Registry Editor by typing regedit in the Start/taskbar search field and then click the Registry Editor from the available search results.
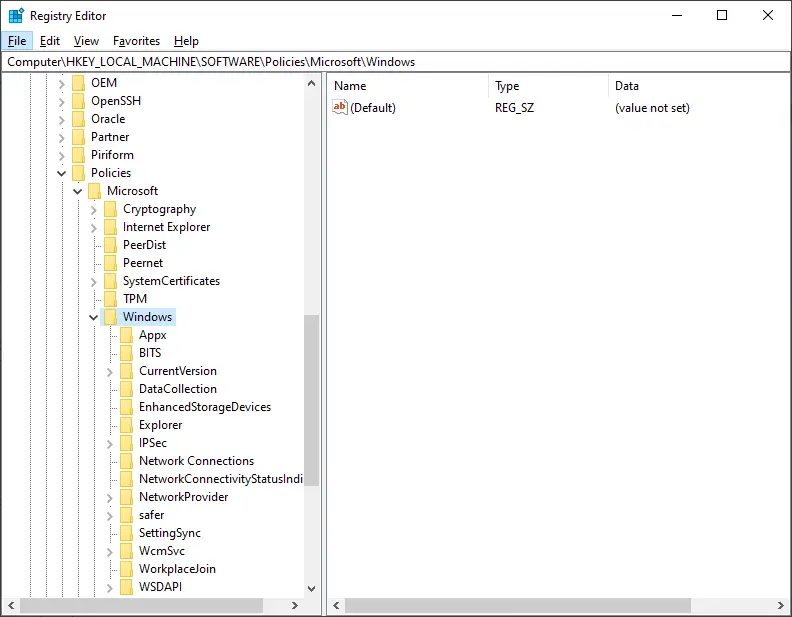
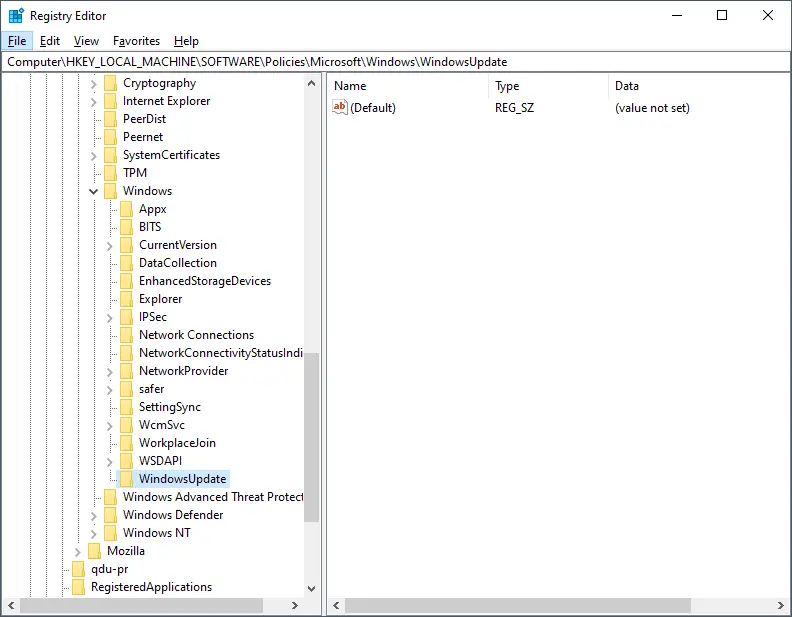
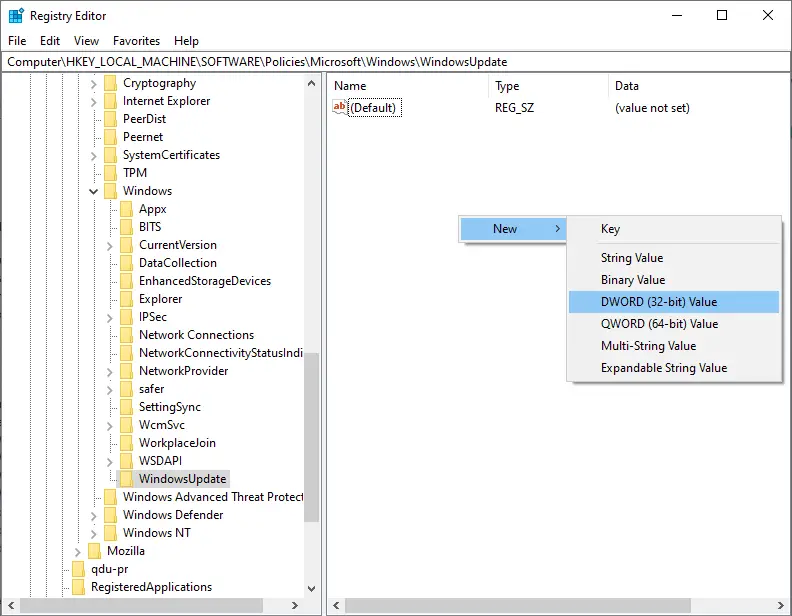
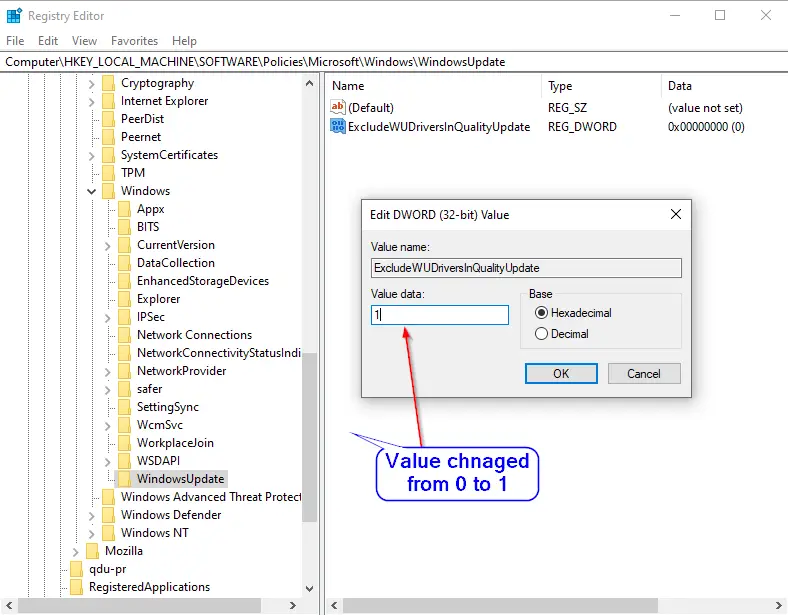
HKEY_LOCAL_MACHINE\SOFTWARE\Policies\Microsoft\Windows

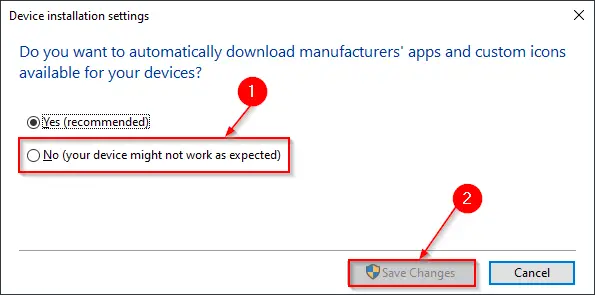
Disable automatic driver updates using the Setting app in Windows 10
This is the best way to disable automatic updates of drivers through Windows Update if you are running Windows 10 Home Edition or do not want to edit the registry file.
Step 1. Press Windows Logo + I hotkeys to open the Settings app in Windows 10.
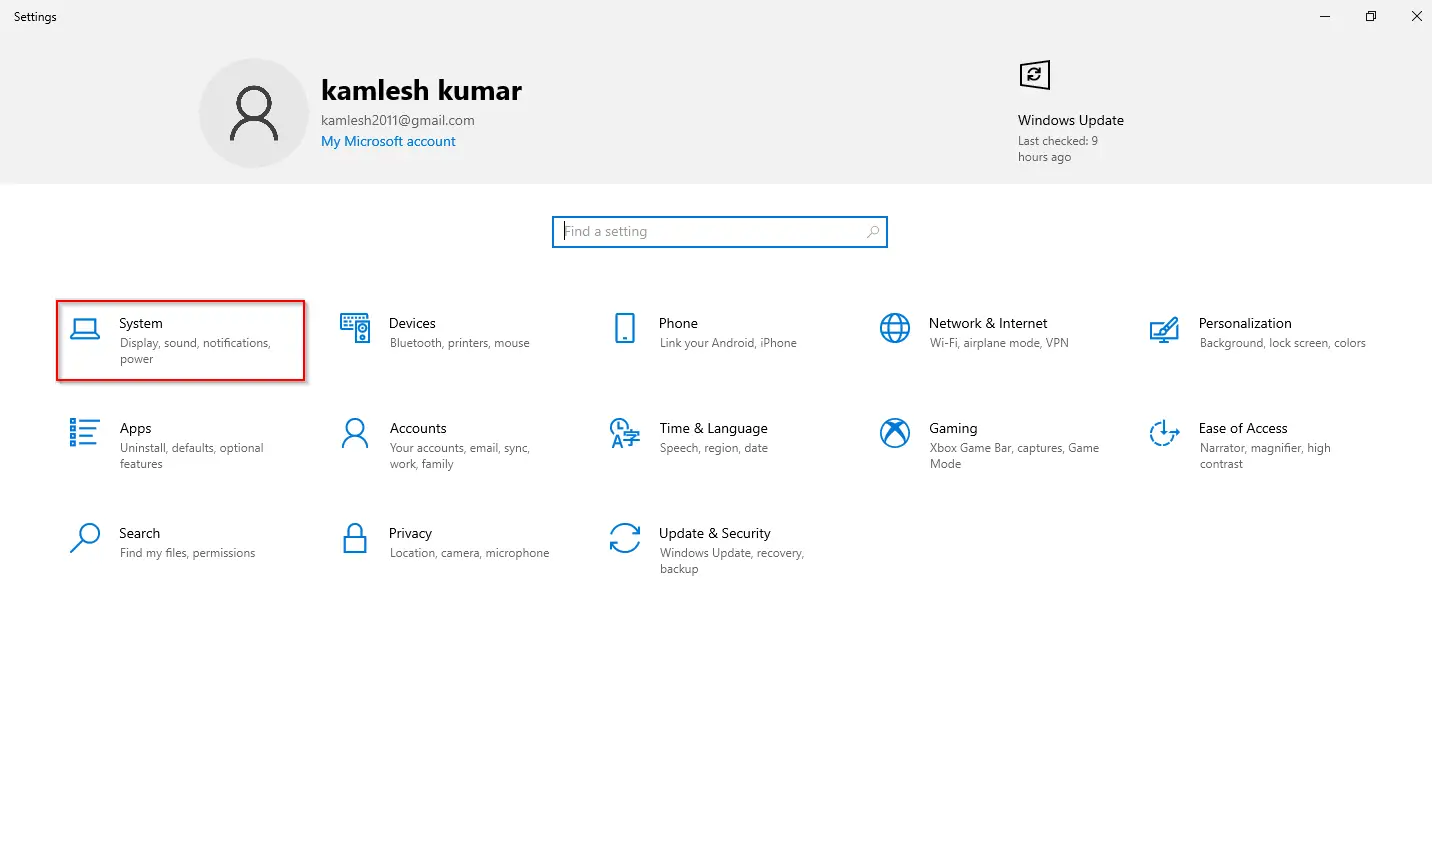
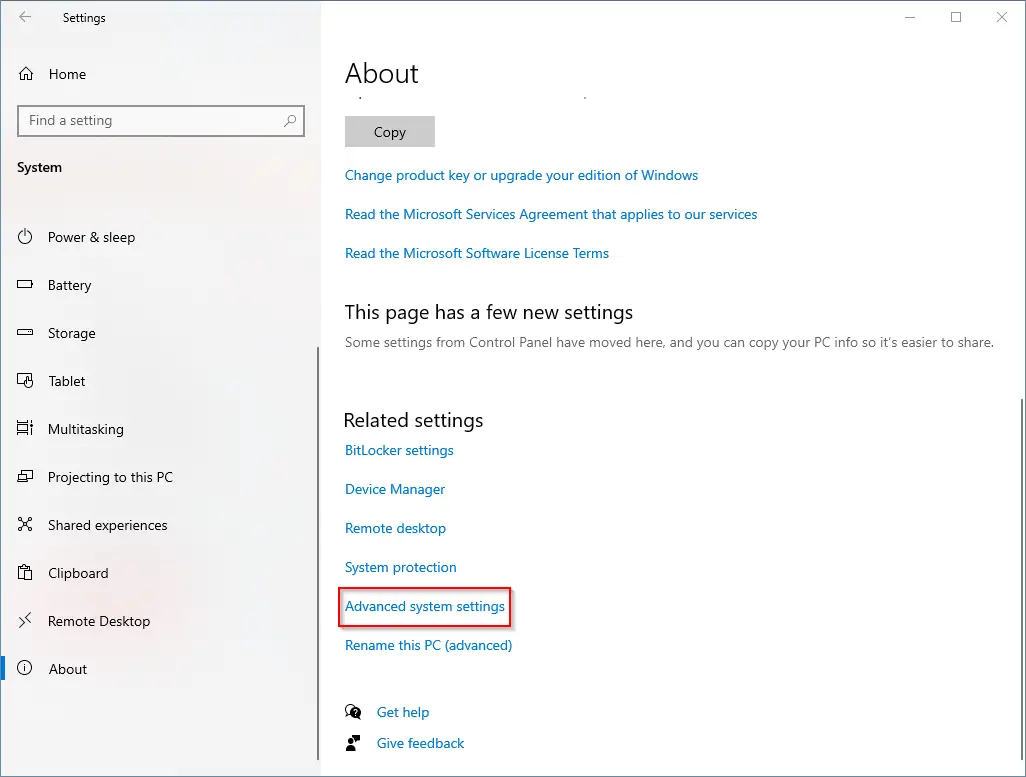
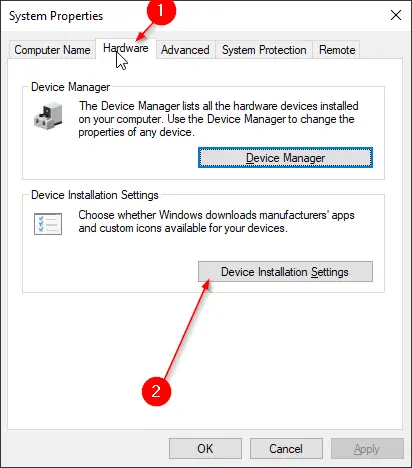
Step 2. Under the Settings window, click the System category.
Conclusion
In conclusion, keeping device drivers updated is crucial for the smooth functioning of your Windows 10 computer or laptop. However, some users may prefer to disable automatic driver updates for various reasons, such as system instability. This post has outlined three methods to disable automatic driver updates in Windows 10: using Group Policy, Registry, or the Settings app. While Group Policy and Registry editing are not recommended for novice users, the Settings app offers a straightforward and user-friendly option to turn off automatic driver updates. Once automatic updates are disabled; users must manually update their drivers or use third-party software to automate the process. Regardless of the chosen method, it is essential to keep device drivers updated to ensure the best performance and stability of your Windows 10 PC.