Taking a screenshot of Windows 10 is an entirely easy process. You can use the Prt Sc (Print Screen) keyboard button or Snipping Tool application to take a screenshot of the desired area. The latest version of Microsoft Word Document also comes with a built-in option that helps you to take the screenshot. Those who are already working on a Word document and want to add a screenshot may find this feature useful.
How to use Microsoft Word’s built-in Screenshot tool?
Step 1. Open up a Microsoft Word document on which you want to insert a screenshot.
Step 2. Click the Insert tab on the ribbon and then select the Screenshot button.
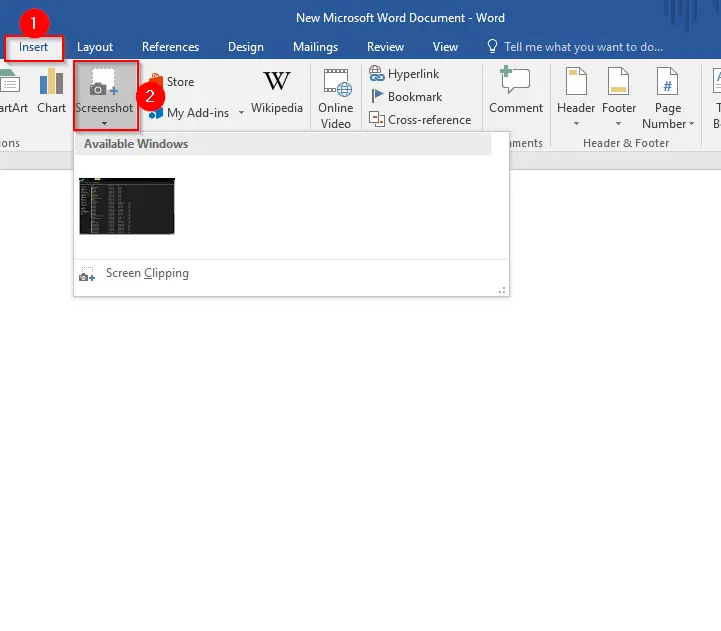
Step 3. You will see a thumbnail image of every Window you have open at the moment. You can click one of the thumbnails to take a screenshot and automatically insert it into your Word document.

Step 4. If you would like to capture a specific reason or area on the screen instead of an active window, click the Screen Clipping command instead of a thumbnail on that Screenshot drop-down menu.
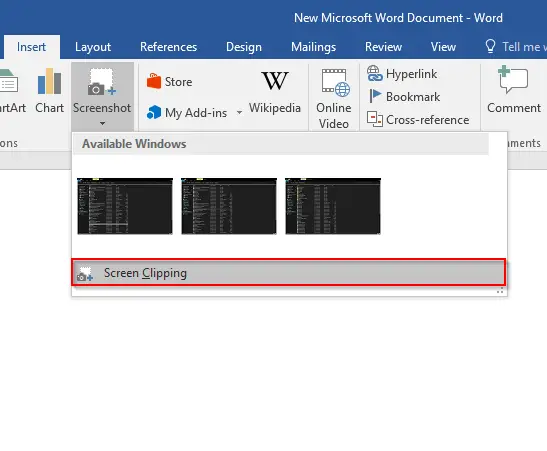
Step 5. Now, the entire screen will dim, and you can draw a rectangle to capture the portion you want to insert in a Microsoft Word document.
Also Read: