
There are several ways to open the Settings app in Windows 10, and it plays a vital role in managing and customizing your PC. However, if the Settings app is not working properly—such as not opening, crashing, or becoming unresponsive—resetting it can be an effective solution. While Windows 10 does allow you to reset the Settings app, the option isn’t immediately obvious or easily accessible. In this post, we’ll show you how to reset the Settings app to its default state and get it working correctly again.
How to Reset the Settings App in Windows 10?
If your Windows 10 Settings app is not working properly, and you want to reset it to its default, perform the following steps:-
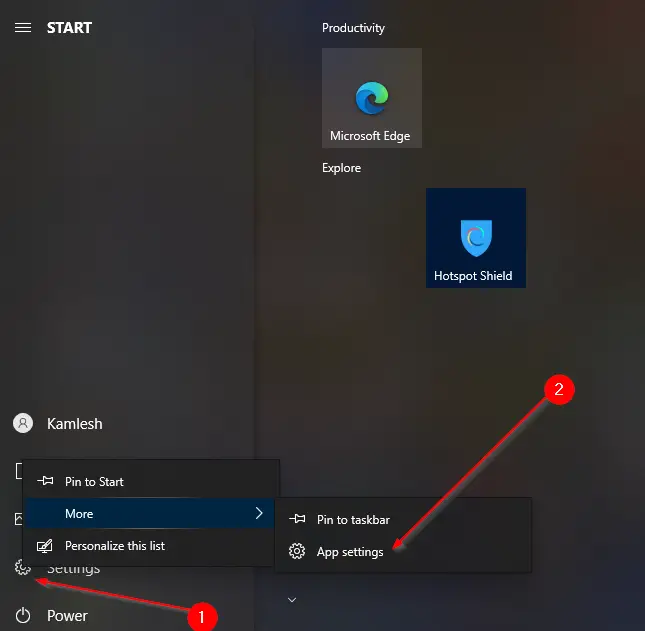
Step 1. Click the Start Menu to open it.
Step 2. Right-click on the Settings gear icon.
![]()
Step 3. Select More and then click on the App Settings option in the context menu.
Step 4. In the new windows that appear, scroll down to the bottom till you find the Reset section.
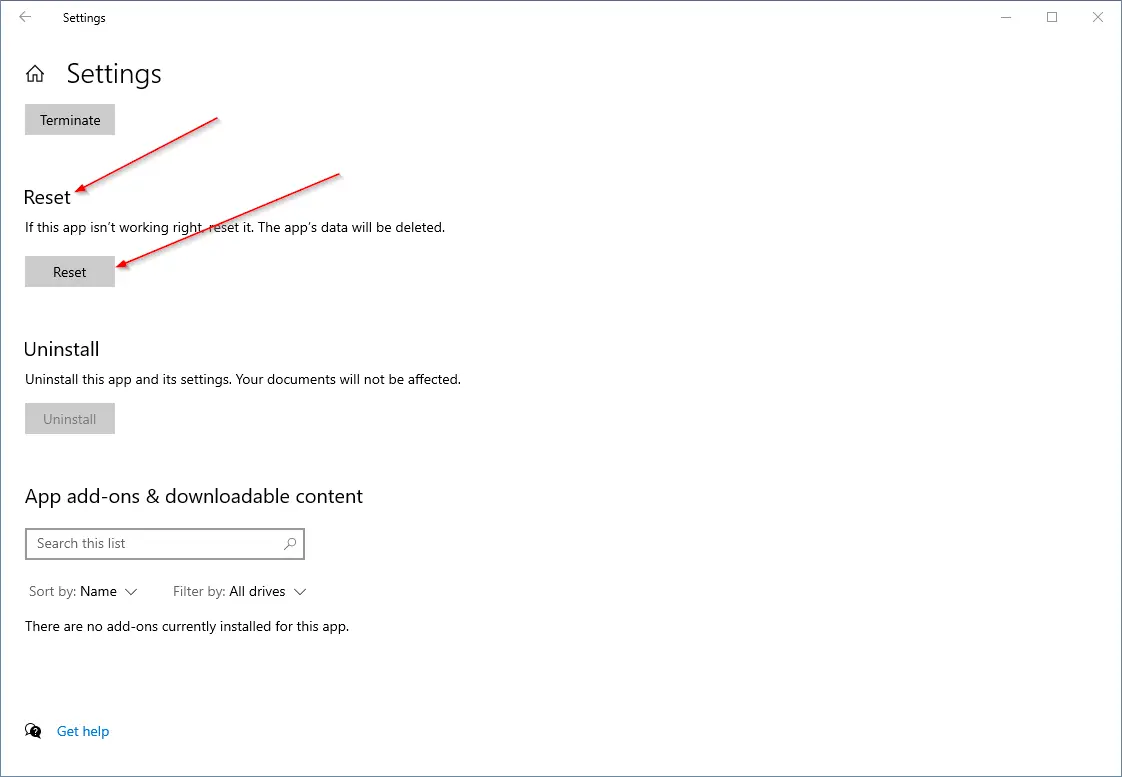
Step 5. Click on the Reset button next to “If this isn’t working right, reset it. The app’s data will be deleted.”
Step 6. A new dialog box will open with a message, “This will permanently delete the app’s data on this device, including your preferences and sign-in details.”
Click the Reset button again.
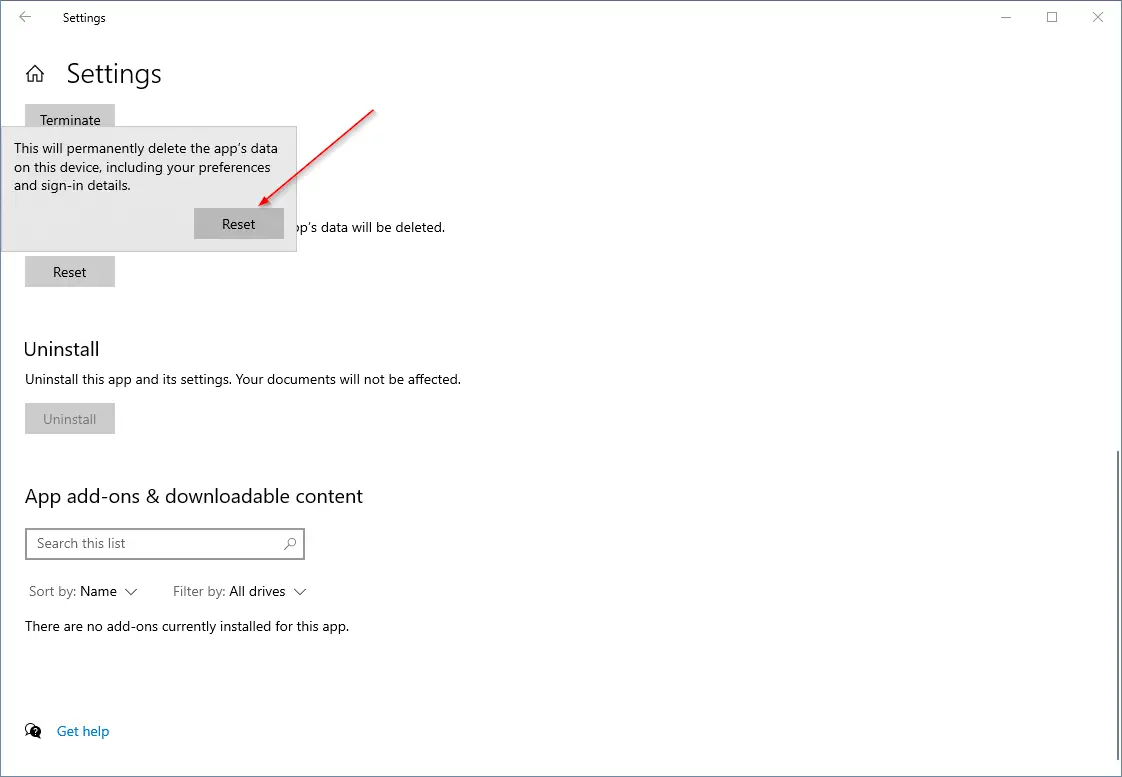
Once the above-mentioned process is completed, now Settings app in Windows 10 will reset to its default state. Now, the Settings app will start working.
Conclusion
In conclusion, the Settings app is a crucial component in Windows 10 that allows users to make changes and customize their PCs. However, if the app is not working correctly, resetting it to its default state is a useful solution. This post has outlined the steps needed to reset the Settings app in Windows 10. By following the simple steps mentioned above, users can reset the Settings app and restore its functionality.