
In this gearupwindows guide, we’ll show you how to edit Windows boot settings and configure the bootloader using a free and powerful utility called EasyBCD. Whether you want to add a second OS, modify boot entries, or set a default OS, EasyBCD makes it incredibly easy—even for beginners.
What Is EasyBCD?
EasyBCD is a free bootloader modification tool from NeoSmart Technologies. It lets you tweak the Windows Boot Manager without touching complex command-line tools like bcdedit. With its user-friendly interface, you can manage dual-boot setups, rename boot entries, or change the default operating system.
This is especially useful if you run multiple versions of Windows or want to boot into Linux or macOS alongside Windows.
Download and Install EasyBCD
Before editing the bootloader, you must install EasyBCD:
- Visit the official EasyBCD website and download the Community Edition.
- Run the installer and follow the on-screen instructions.
- Launch EasyBCD from your desktop or Start menu.
Now you’re ready to configure the bootloader and change boot settings.
How to View the Bootloader Entries Using EasyBCD?
If you’re using a BCD editor software like EasyBCD or Visual BCD Editor, viewing the existing bootloader entries becomes much easier with a graphical interface.
Step 1. Launch your BCD editor software with administrator privileges.
Step 2. Once the program opens, it will automatically read and display the current boot configuration data (BCD). If not, then click on View Settings in the left sidebar.
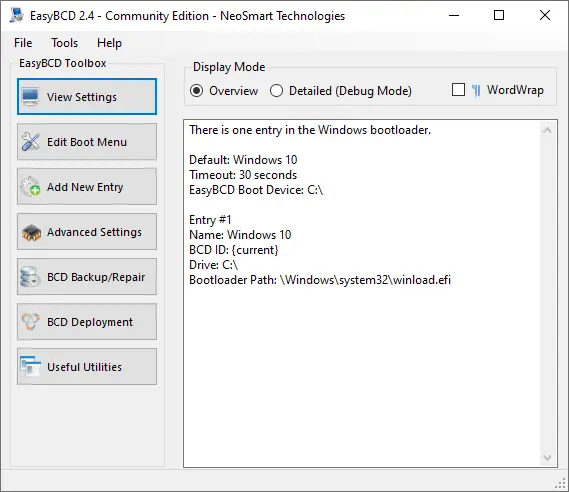
Step 3. Look for the section labeled Bootloader Paths or Entries in the right panel. Here, you’ll find all operating systems listed.
By default, the Display Mode is set to Overview. It displays only the basic details about the entries. If you want detailed information, choose the Detailed (Debug Mode).
How to Add a New Boot Entry Using EasyBCD?
If you’ve installed another OS, such as Linux or an older version of Windows, and it doesn’t appear during startup, follow these steps:
Step 1. Open EasyBCD and go to the Add New Entry tab.
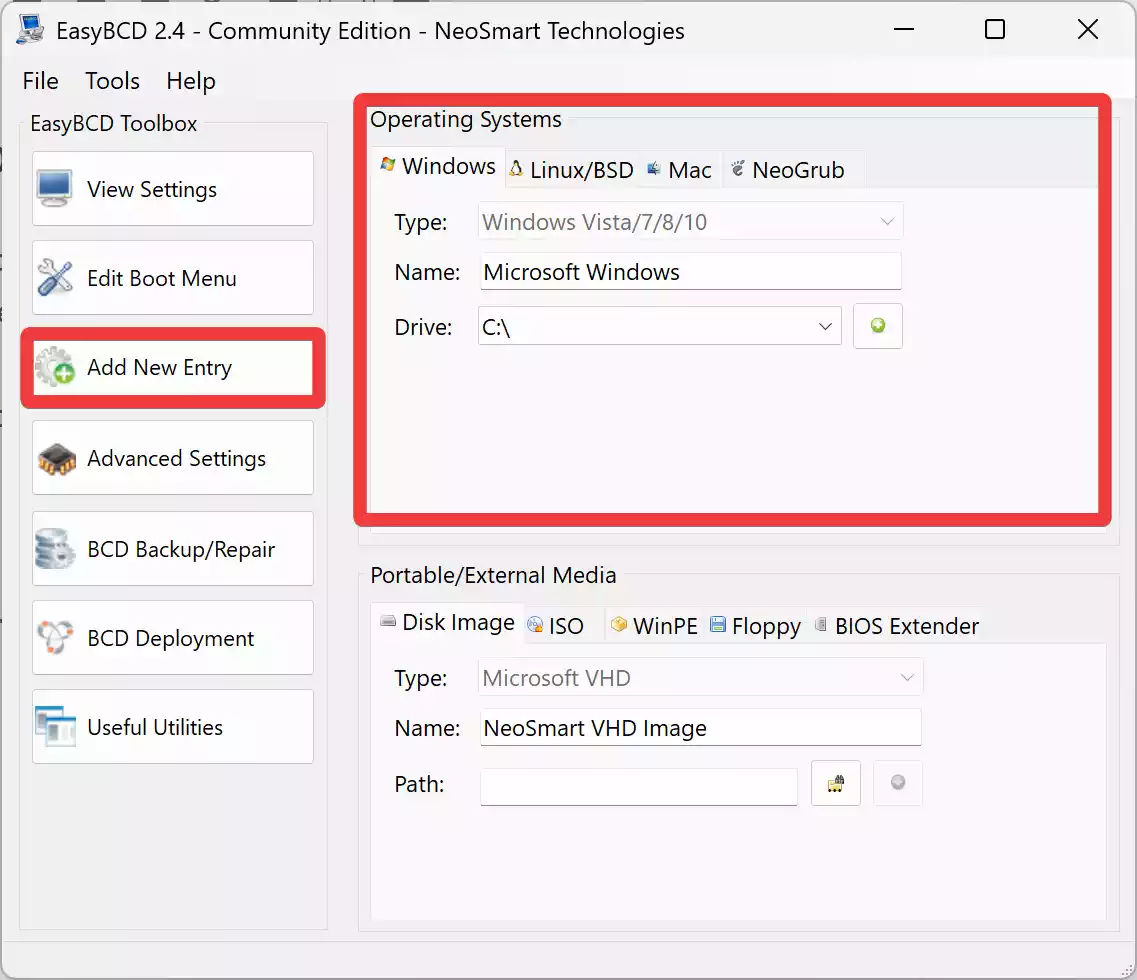
Step 2. Under the Operating Systems section, select your OS type (Windows, Linux, or macOS).
Step 3. Type a name for the entry that will appear in the boot menu.
Step 4. Choose the drive where the OS is installed.
Step 5. Click Add Entry (A small button next to Drive).
Step 6. Reboot your PC to see the new entry in the bootloader menu.
How to Rename or Delete Boot Entries?
To keep your boot menu organized, you might want to rename or delete entries:
Step 1. Open EasyBCD.
Step 2. Go to the Edit Boot Menu tab.
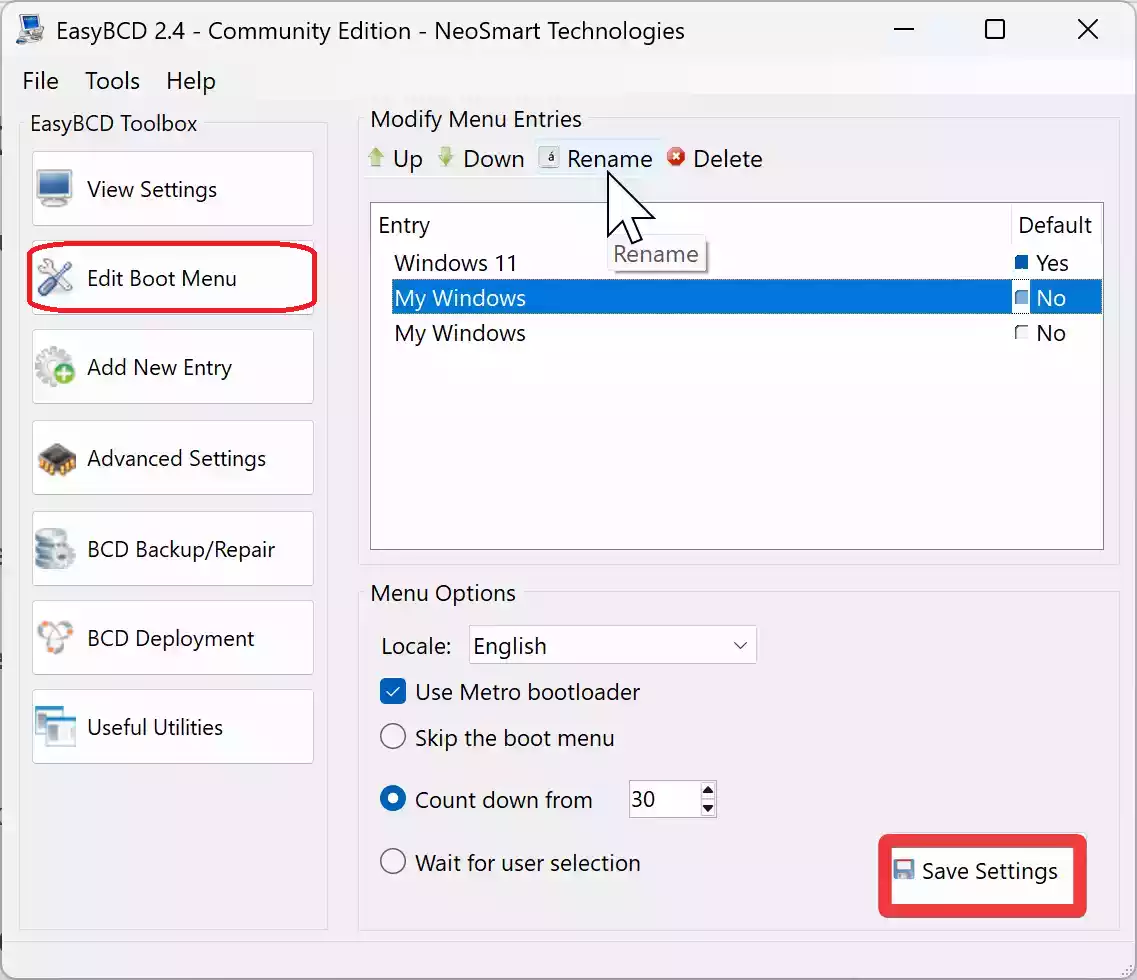
Step 3. Select the entry you want to rename or remove.
Step 4. To rename, click the Rename button and enter a new name. And if you want to remove the entry, click Delete.
Step 5. Click Save Settings after making changes.
How to Set a Default Operating System?
By default, Windows uses the first listed OS to boot. Here’s how to change it:
Step 1. Open EasyBCD and go to Edit Boot Menu.
Step 2. Select the entry you want to make the default.
Step 3. Check the box next to Default.
Step 4. Click Save Settings.
You can also adjust the timeout to delay or speed up the auto-boot process.
How to Change Boot Timeout?
The boot timeout is the delay before the default OS loads. To customize it:
Step 1. Go to the Edit Boot Menu tab.
Step 2. At the bottom, find Count down from.
Step 3. Enter the desired time in seconds.
Step 4. Click Save Settings.
How to Backup and Restore Boot Settings?
Before making major changes, it’s smart to back up your current boot settings:
Step 1. Go to the BCD Backup/Repair tab.
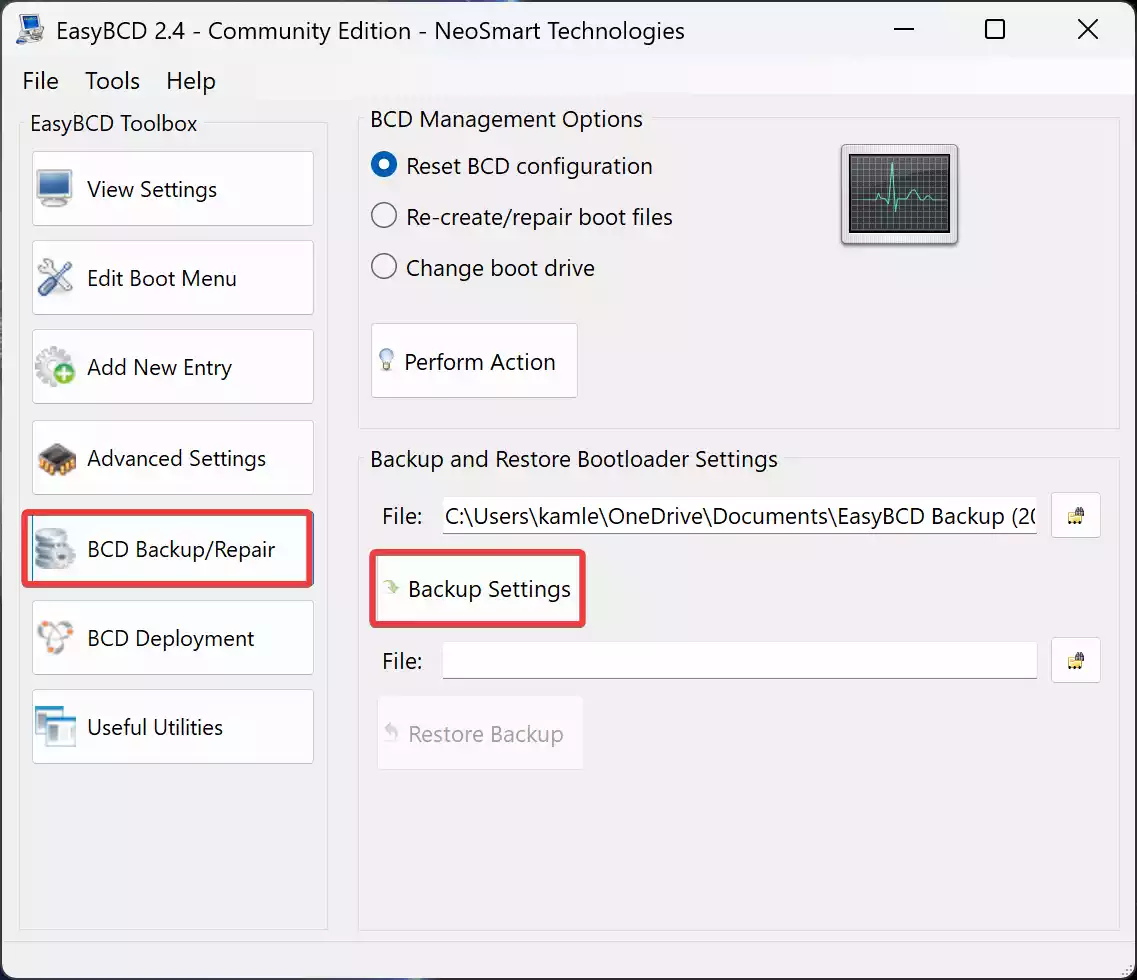
Step 2. Click Backup Settings.
Step 3. Choose a location and save the backup file.
If something goes wrong, return here and use the Restore Backup option to undo changes.
How to Reorder Boot Menu Items?
If you want a specific OS to appear first (but not necessarily be the default):
Step 1. Go to the Edit Boot Menu tab.
Step 2. Use the up/down arrows to rearrange the boot order.
Step 3. Click Save Settings to apply.
Why Use EasyBCD Instead of bcdedit?
Unlike the built-in bcdedit command-line tool, EasyBCD offers a visual interface. This makes it much easier for non-technical users to make changes without risking bootloader corruption. Also, it supports advanced features like booting from ISO files or USB drives.
Conclusion
EasyBCD simplifies the entire process of managing your Windows bootloader. From adding new operating systems to customizing the boot menu, everything is just a few clicks away. If you dual-boot or plan to, this tool is a must-have.
You can also explore how to change Boot Menu names in Windows or learn about the startup programs in Windows for more control over your PC’s boot and login behavior.