
Windows 11 includes a built-in feature that lets you automatically lock your screen after a period of inactivity by enabling the screen saver. This feature helps save power and enhances security by requiring a password on resume. If you’re unsure how to enable the screen saver itself, check out our guide on turning on the screen saver in Windows 11. For those on Windows 10, you might also be interested in how to password-protect the screensaver. In this post, we’ll guide you through enabling screen saver auto-lock on Windows 11.
How to Auto-Lock Windows 11 Screen Using Screen Saver?
Follow these steps to auto-lock the Windows 11 screen through the screen saver:
Step 1. Open the Settings app by pressing the Windows + I keys together.
Step 2. In the left sidebar, click on Personalization, and then on the right pane, select Lock screen.
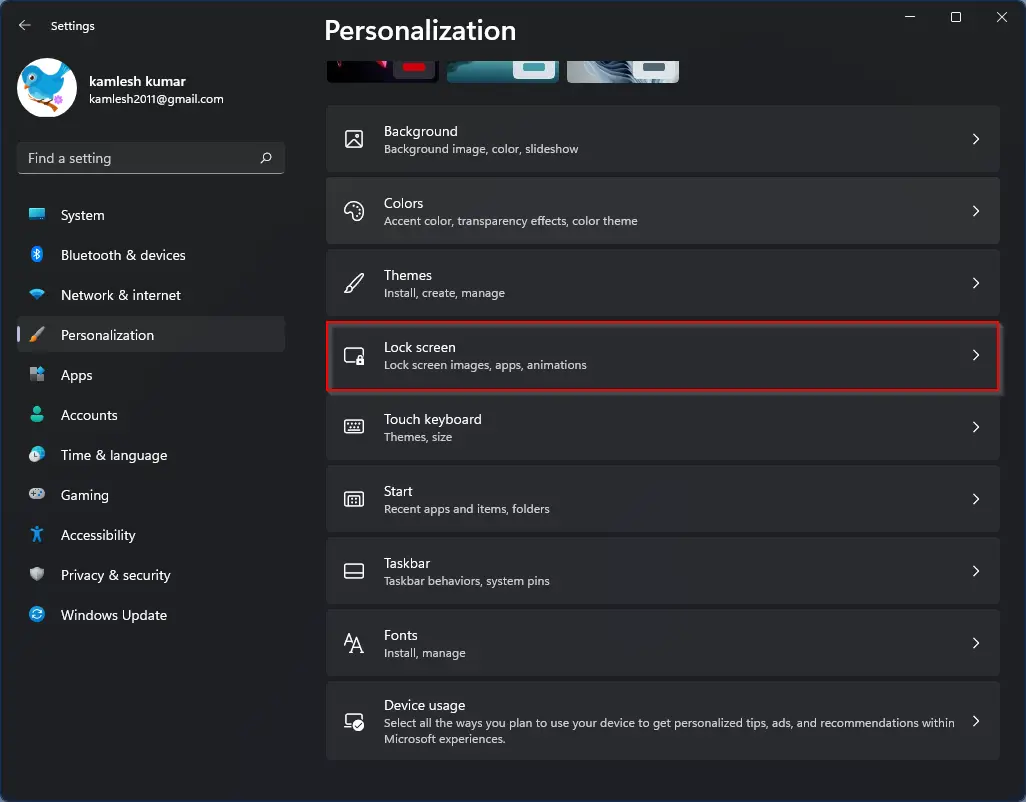
Step 3. Scroll down and click on Screen saver under the “Related settings” section. This opens the Screen Saver Settings dialog box.

Step 4. In the new window, choose a screen saver of your choice from the drop-down list.
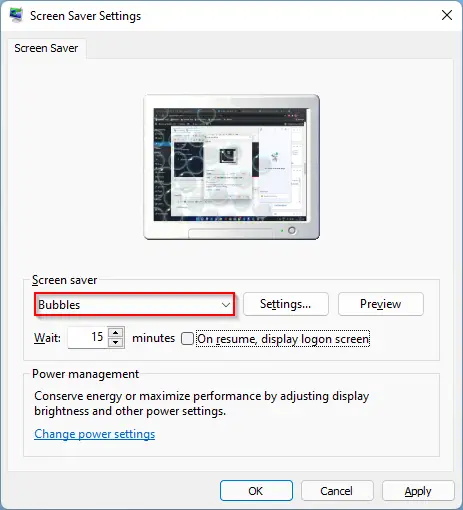
Step 5. Set the time in minutes inside the Wait box. This controls how long your PC waits before activating the screen saver.
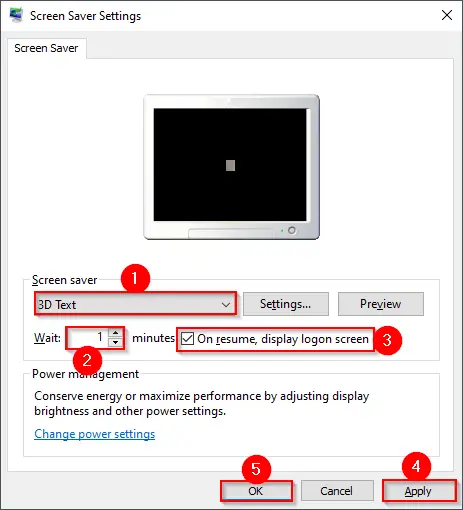
Step 6. Check the box labeled On resume, display logon screen. This ensures that your screen will be locked, and a password will be required to log back in.
Step 7. Click on Apply, and then OK to save your changes.
Alternate Way to Open Screen Saver Settings via Control Panel
You can also use the classic Control Panel to access the screen saver settings:
Step 1. Press the Windows + R keys together to open the Run dialog box.
Step 2. Type control and press Enter to open the Control Panel.
Step 3. In Control Panel, type Screen Saver in the search box at the top right.
Step 4. Click on Change screen saver from the search results to open the Screen Saver Settings window.
You can then configure the wait time and password-on-resume option as explained above.
Why Use a Screen Saver to Auto-Lock Your PC?
- Enhances security when the device is left unattended.
- Prevents unauthorized access by requiring a password on resume.
- No third-party apps needed — it’s a built-in Windows feature.
Conclusion
Auto-locking your Windows 11 screen using a screen saver is a simple and effective way to protect your data. With just a few steps, you can activate this built-in feature and ensure that your system locks automatically whenever you’re away. Whether you work in an office, at home, or in public, enabling this security measure helps keep your PC secure without needing any third-party tools.