
DirectX, developed by Microsoft, is a critical component of the Windows operating system that plays a crucial role in enhancing the multimedia capabilities of your computer. It is responsible for providing a collection of APIs (Application Programming Interfaces) for handling multimedia-related tasks, including gaming, video playback, and audio processing. Keeping DirectX up to date is essential to ensure optimal performance and compatibility with the latest games and multimedia applications. In this gearupwindows guide, we will walk you through the process of updating DirectX on a Windows 11 system.
Why Update DirectX on Windows 11?
- Improved Compatibility: Updating DirectX ensures that your system is compatible with the latest games and multimedia applications, as developers often utilize the latest DirectX versions to enhance the graphical and audio features of their software.
- Bug Fixes: Newer versions of DirectX often include bug fixes and security updates that can enhance system stability and security.
- Performance Boost: Upgrading DirectX can lead to performance improvements in games and multimedia applications, as newer versions may be optimized for faster rendering and processing.
- Visual Enhancements: Newer DirectX versions may introduce enhanced graphics and visual effects that can make your gaming and multimedia experiences more immersive.
How to Check DirectX Version on Windows 11?
Before proceeding with the steps on how to update DirectX on Windows 11, you might want to check your current DirectX version. If necessary, you can use the DirectX Diagnostic Tool to verify your current DirectX version before proceeding with the update. Here’s how:-
Step 1. Press “Windows + R” to open the Run dialog.
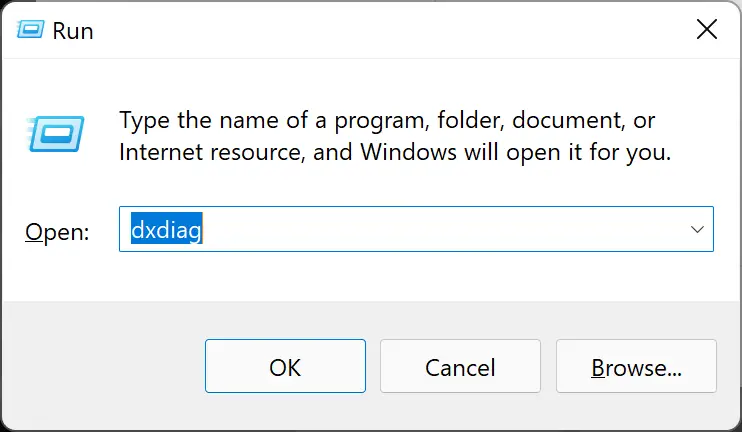
Step 2. Type “dxdiag” and press Enter to open the DirectX Diagnostic Tool window.
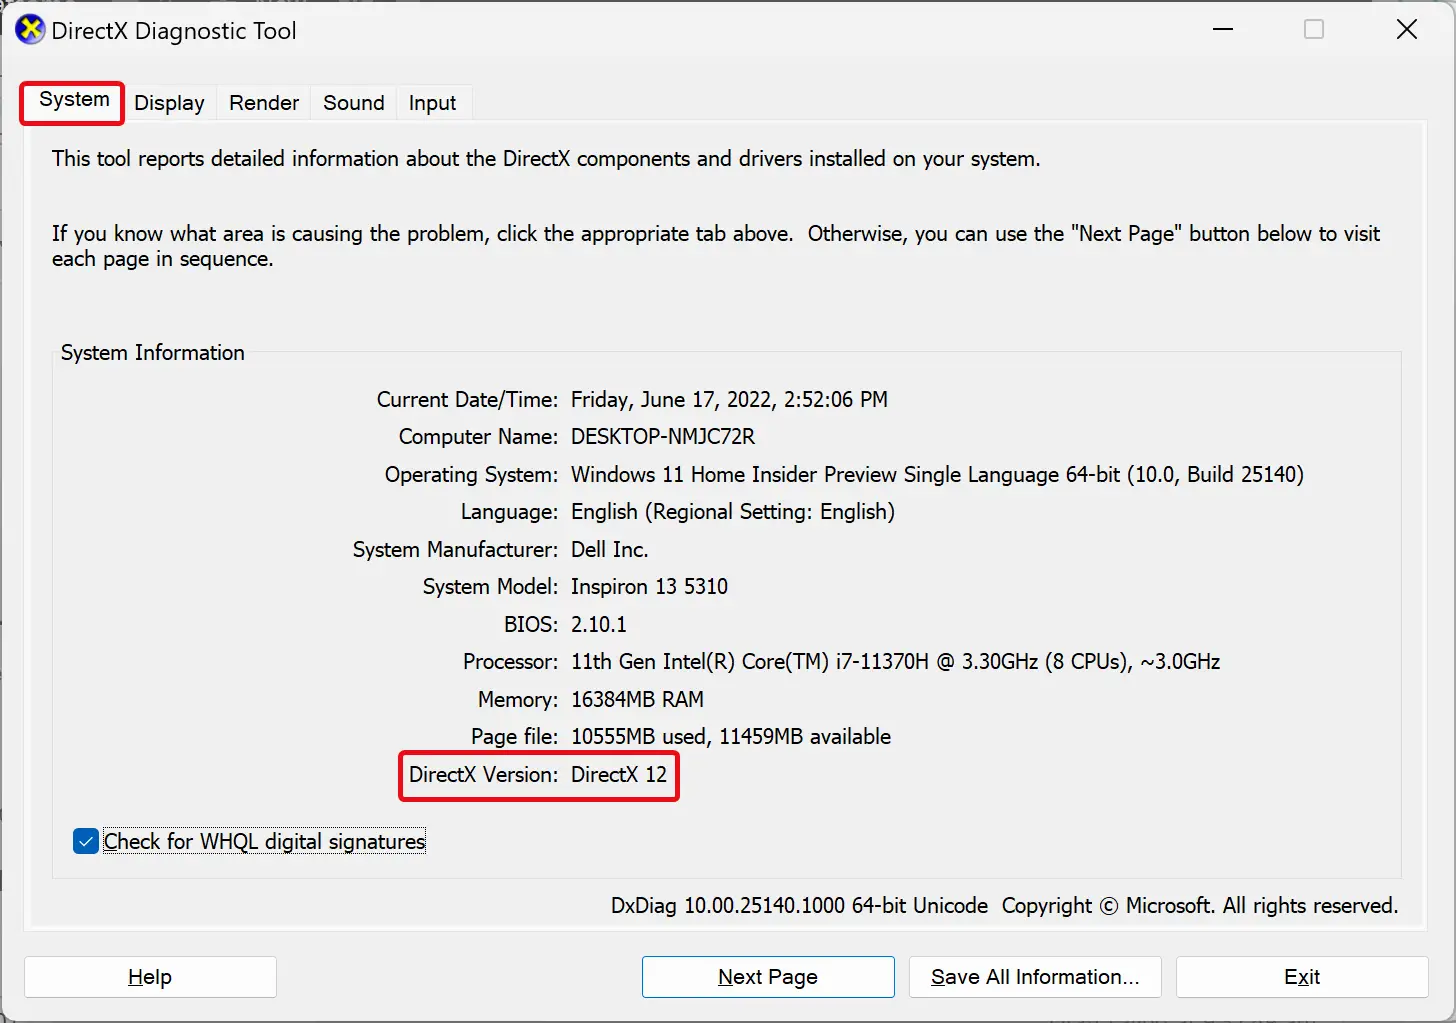
Step 3. In the DirectX Diagnostic Tool window, you can see your current DirectX version under the “System” tab.
How to Update DirectX on Windows 11?
There are several methods to update DirectX on your Windows 11 system. Here, we’ll cover the most common and straightforward approaches.
Method 1: Windows Update
Windows 11 includes DirectX as a part of its core system components. Therefore, DirectX updates are often delivered through Windows Update. To check for DirectX updates using Windows Update, follow these steps:-
Step 1. Press the “Windows” key and type “Windows Update” in the search bar.
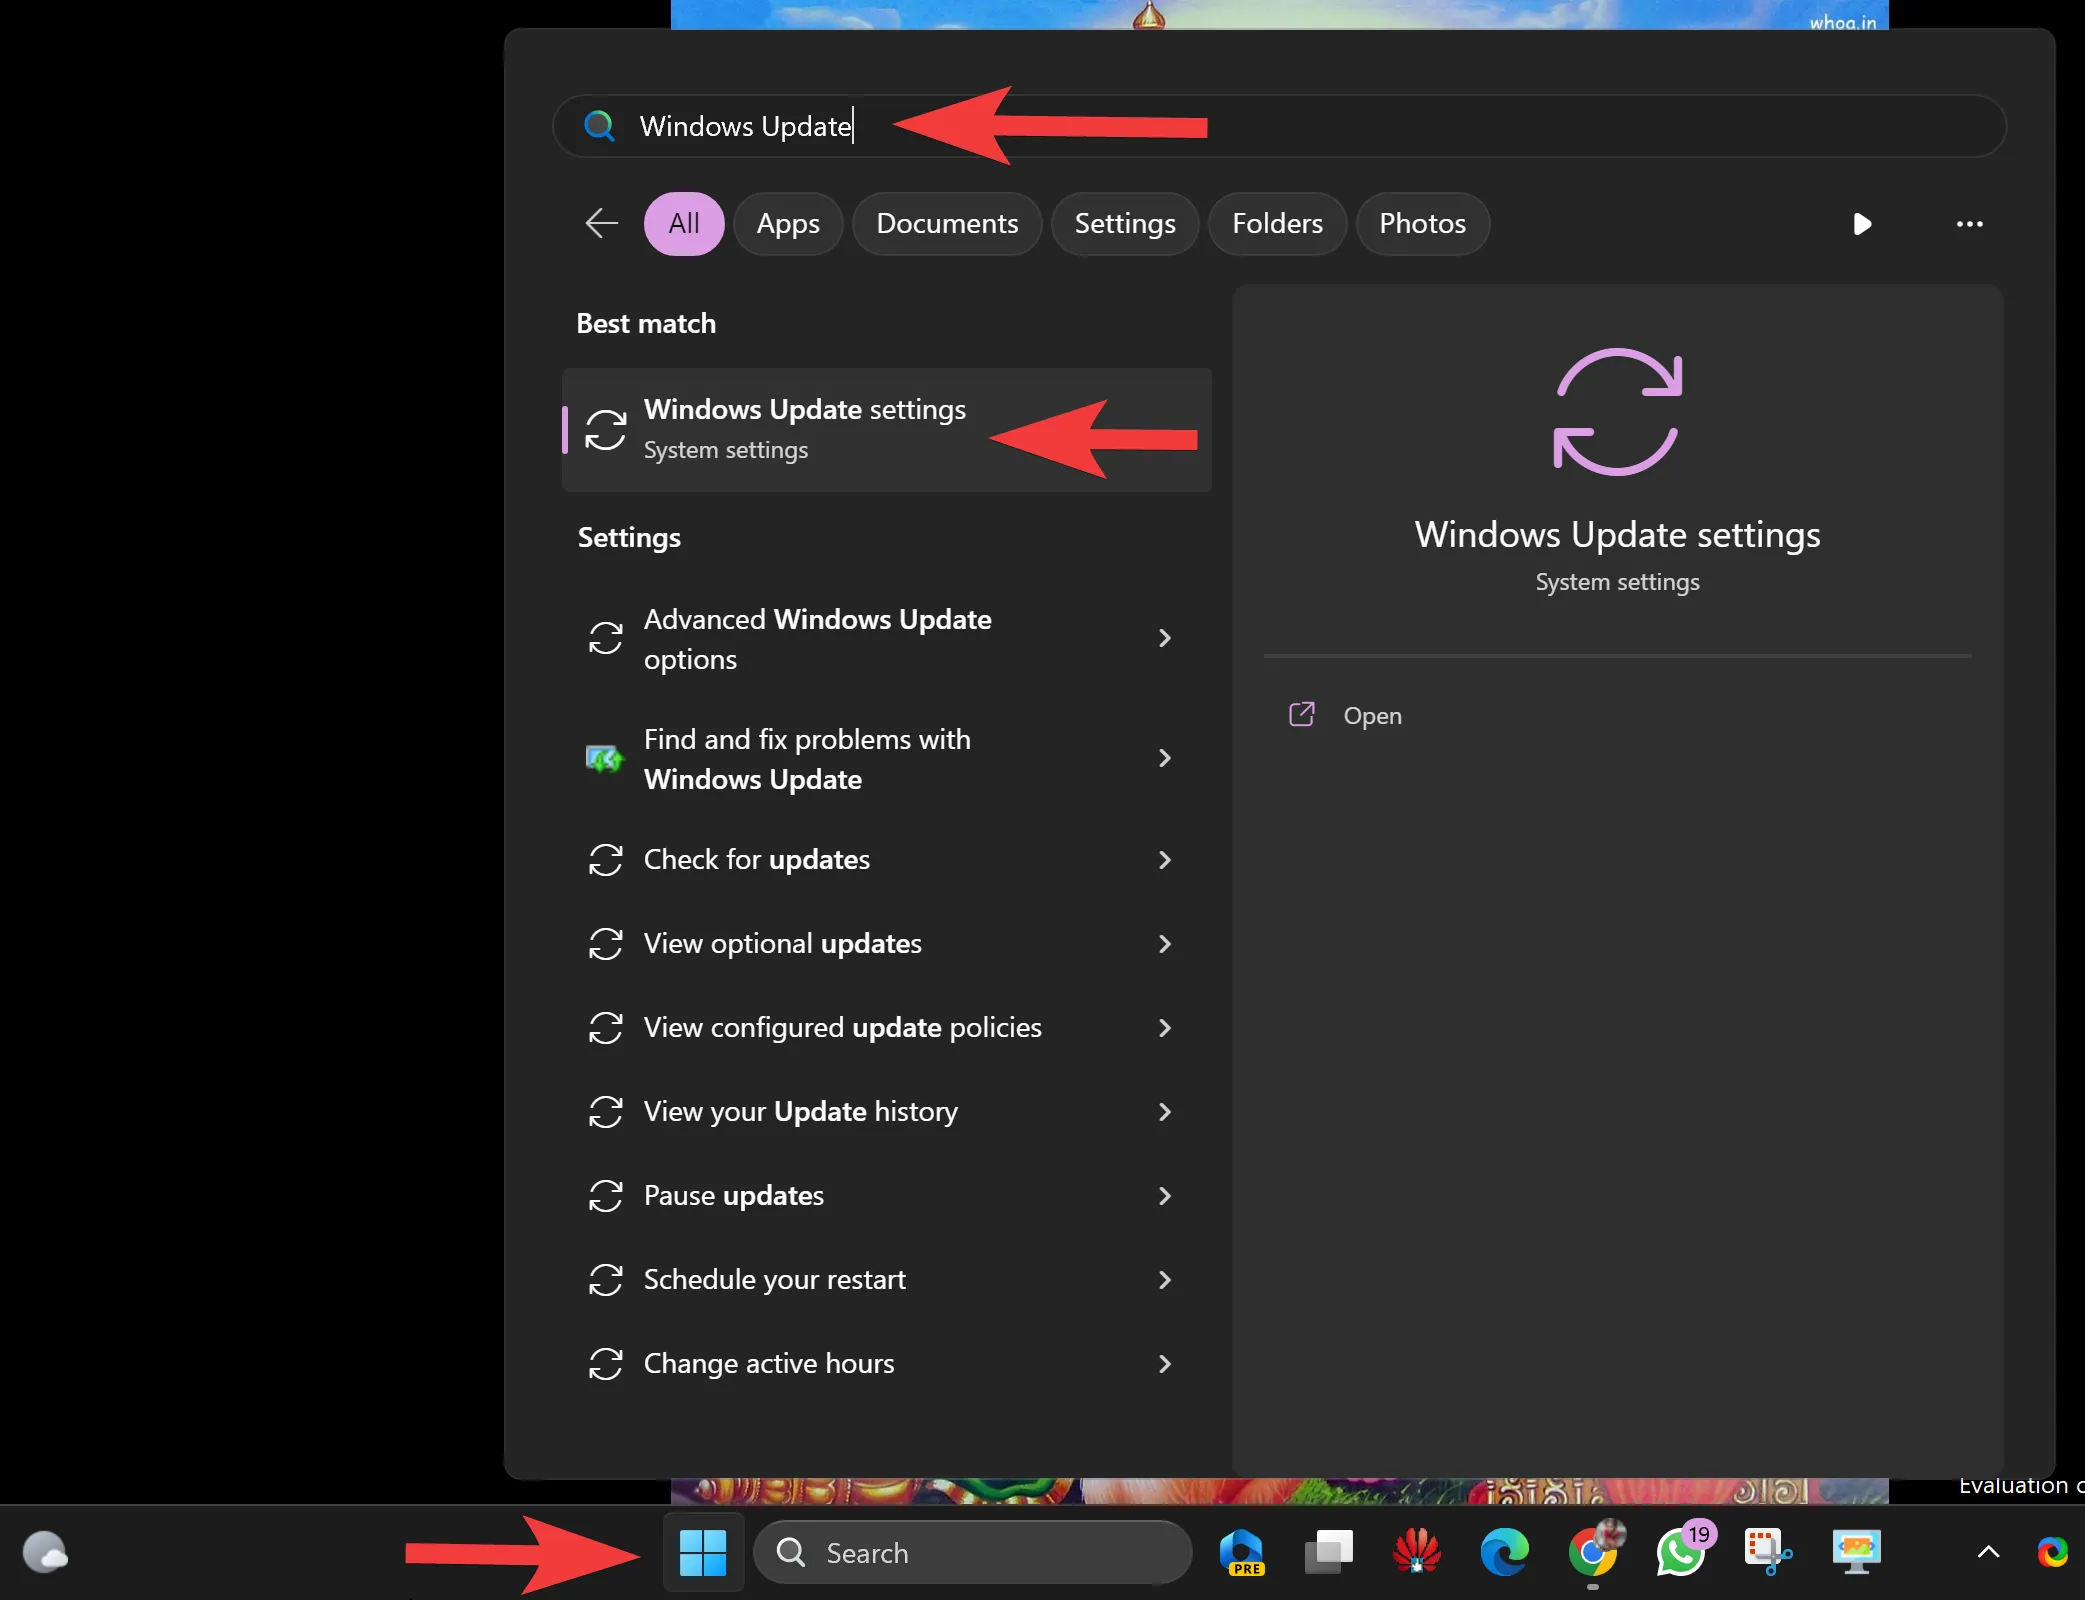
Step 2. Click on “Windows Update settings” in the search results.
Step 3. Click the “Check for updates” button on the top and allow Windows to search for and install any available updates, including DirectX updates.

Method 2: Install DirectX Runtime:
If you’re experiencing issues with DirectX or need to manually update it, you can download and install the latest DirectX Runtime from the Microsoft website:-
Step 1. Visit the official Microsoft DirectX download page.
Step 2. Download the DirectX Runtime Installer for Windows 11.
Step 3. Run the downloaded installer and follow the on-screen instructions to complete the installation.
Method 3: Check Game Requirements
Some games may come with their specific DirectX versions or components. It’s a good practice to check the system requirements of the games or multimedia applications you intend to run. If a game requires a specific DirectX version, it is often included in the installation package.
Conclusion
Keeping DirectX up to date on your Windows 11 system is crucial for optimal gaming and multimedia performance. Regular updates ensure compatibility with the latest applications, provide bug fixes and offer performance enhancements. While Windows Update is the most convenient method for automatic updates, you can manually install the DirectX Runtime or check game requirements to ensure you have the appropriate DirectX version. Following these steps will help you maintain a smooth and enjoyable computing experience on your Windows 11 PC.