
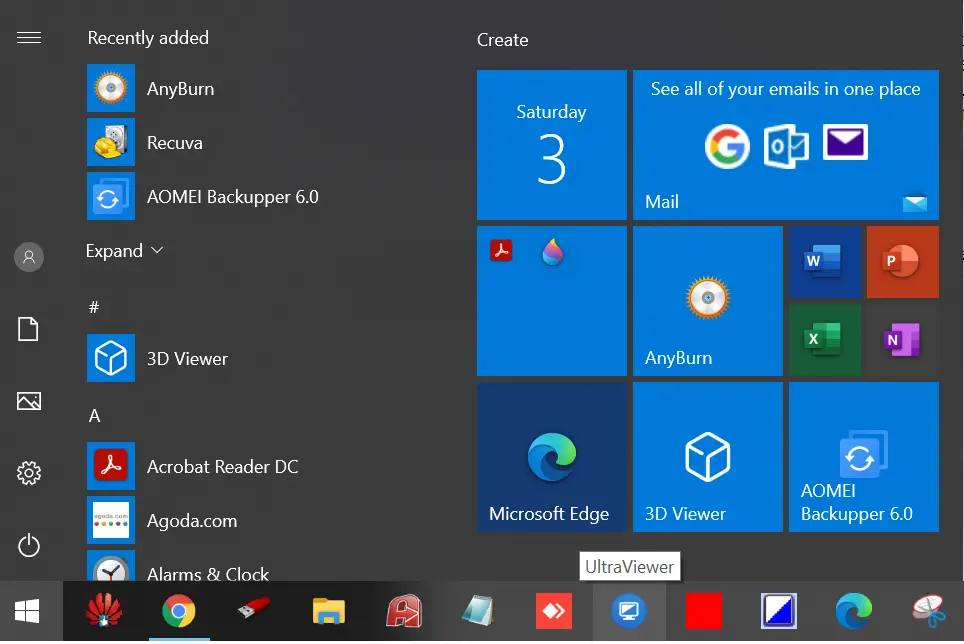
Windows 10 offers a plethora of personalization options, including the ability to set up a slideshow as your lock screen background instead of a static image. Additionally, you can customize your desktop background with a slideshow in Windows 10. By default, the Windows 10 Start menu displays the app list on the left side and pinned Tiles on the right, including recently installed and all available apps. To access all the apps on your PC, simply scroll down. The apps and folders pinned to the Start menu appear on the right side.
Why should you configure Windows 10 to show only Tiles on the Start Menu?
Configuring Windows 10 to show only Tiles on the Start menu can be beneficial for several reasons. It provides a cleaner and more organized layout, making it easier to navigate and find your required applications. By eliminating the traditional list view, users can access frequently used apps more efficiently without scrolling through an entire list. Additionally, Tiles offer live updates, providing quick access to news, weather, and other notifications. This feature is especially helpful for those who need real-time updates while working. Moreover, Tiles can be resized, grouped, and arranged according to user preference, offering greater customization of the Start menu.
If you want to show only Tiles in the Start menu, you can do so without any third-party tool.
How to configure Windows 10 to show only Tiles on the Start Menu?
Follow these steps to configure Windows 10 to show only tiles on the Start menu:-
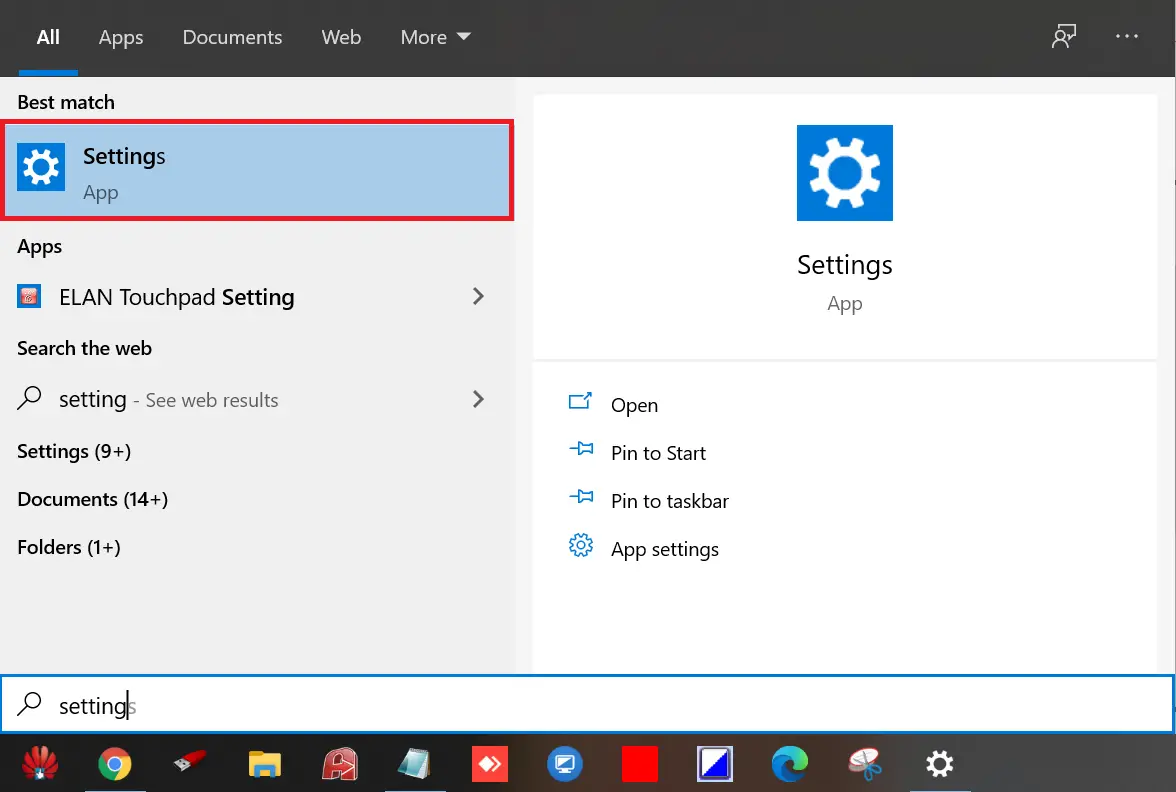
Step 1. Open the Settings app.
To open the Settings app, click the Start button and type Settings. From the search results, click Settings to launch it.
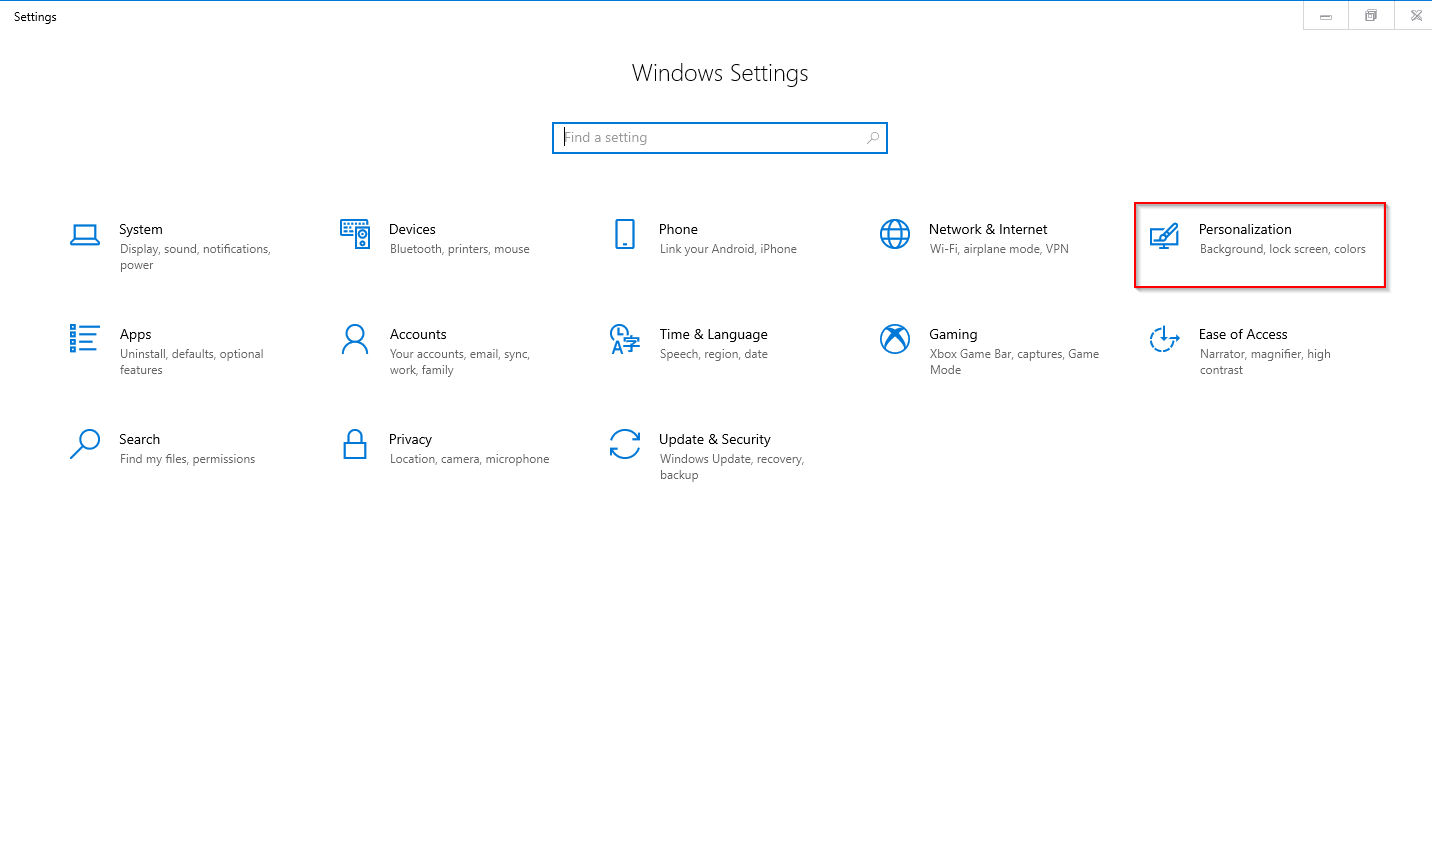
Step 2. Click on Personalization under Windows Settings.
Step 3. Click on Start from the left-side options.
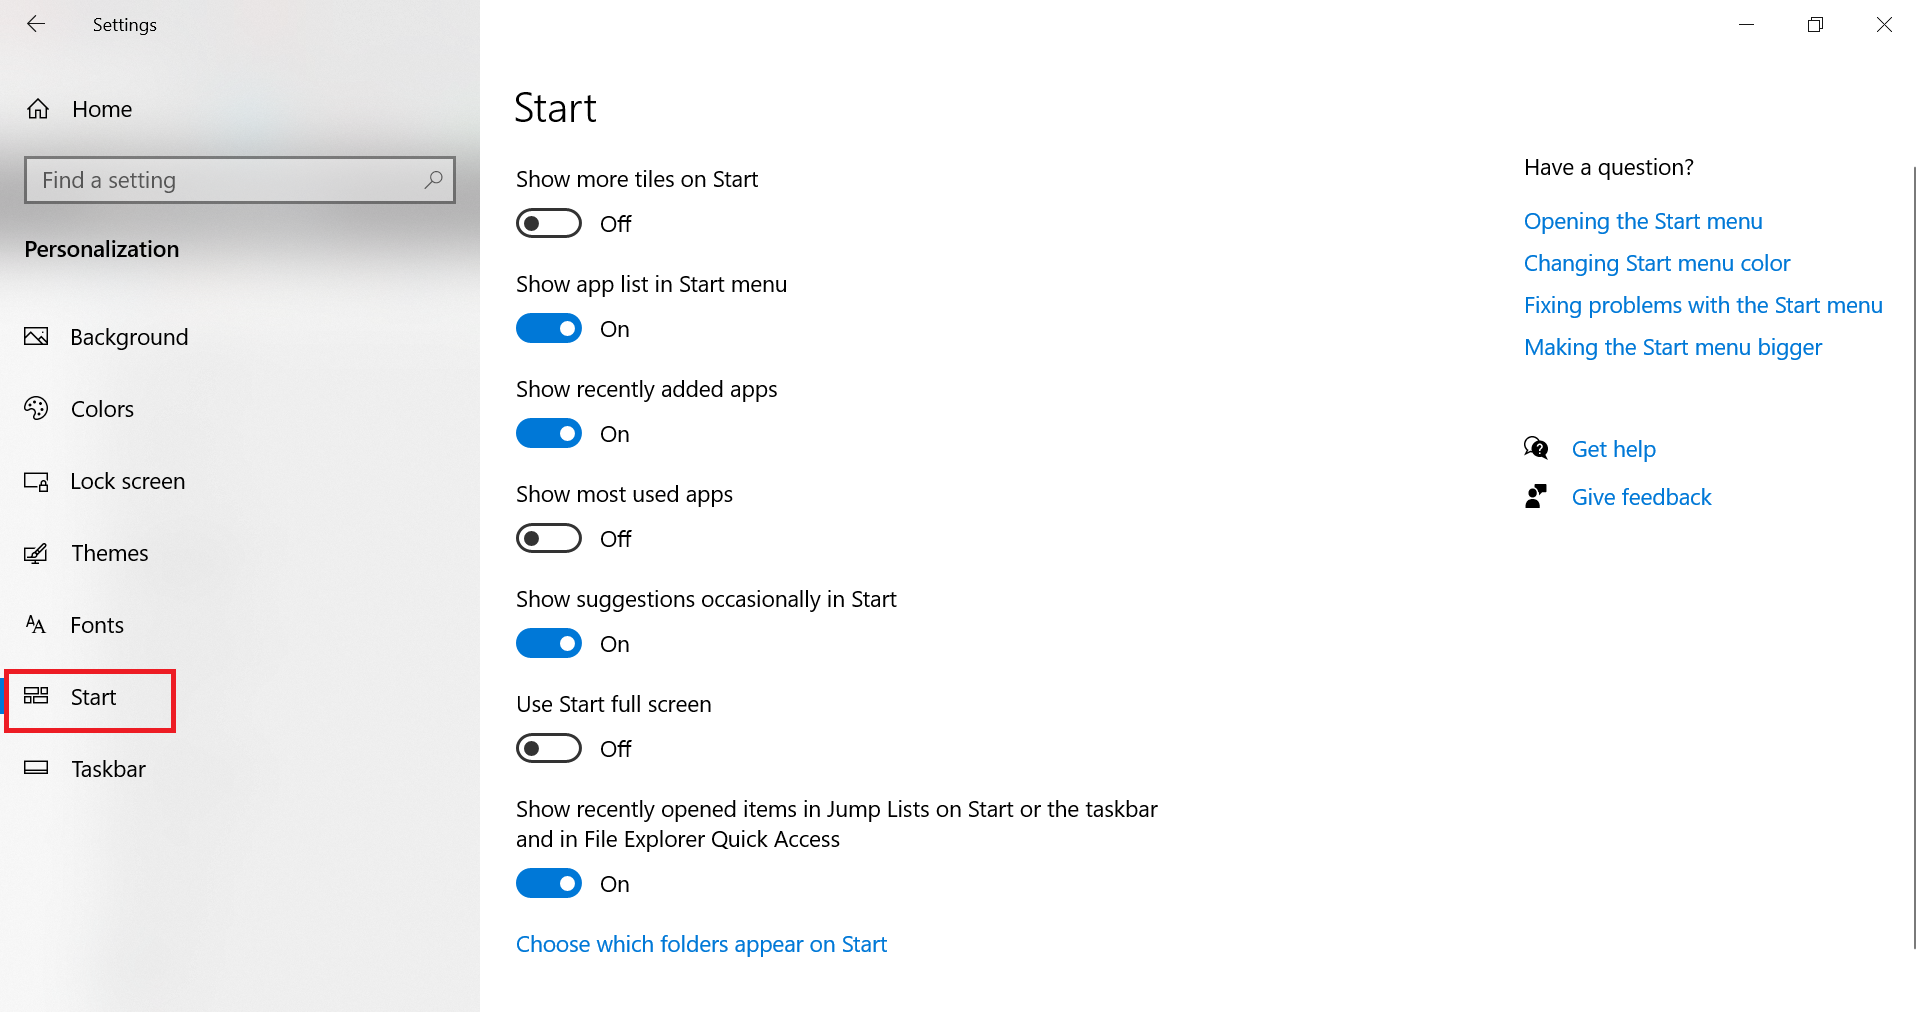
Step 4. Turn the toggle off next to “Show app list in Start menu” to remove the app list from the Start menu.

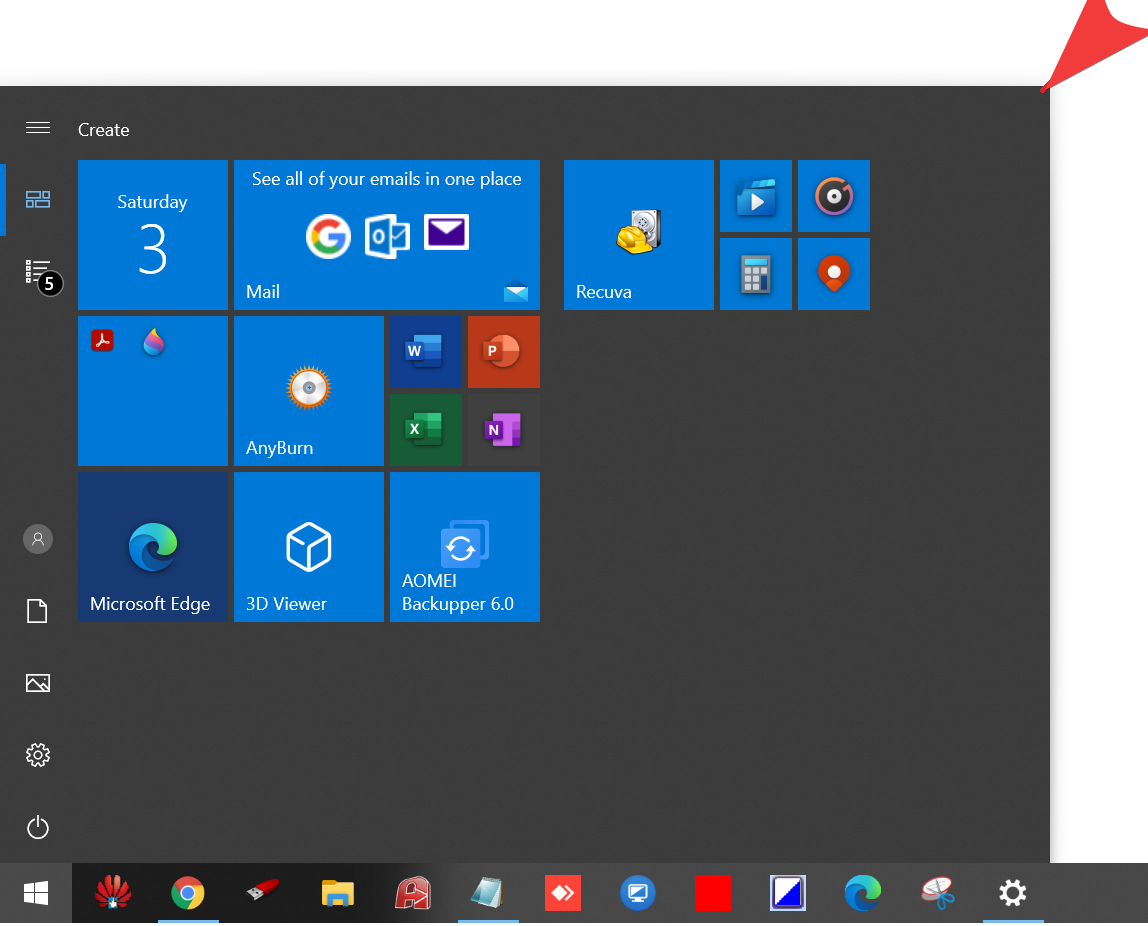
From now on, only Tiles will be visible in the Start menu.

If you want a bigger Start Menu, press and hold the top corner of the Start menu and drag to resize it as desired.
Bonus Tips
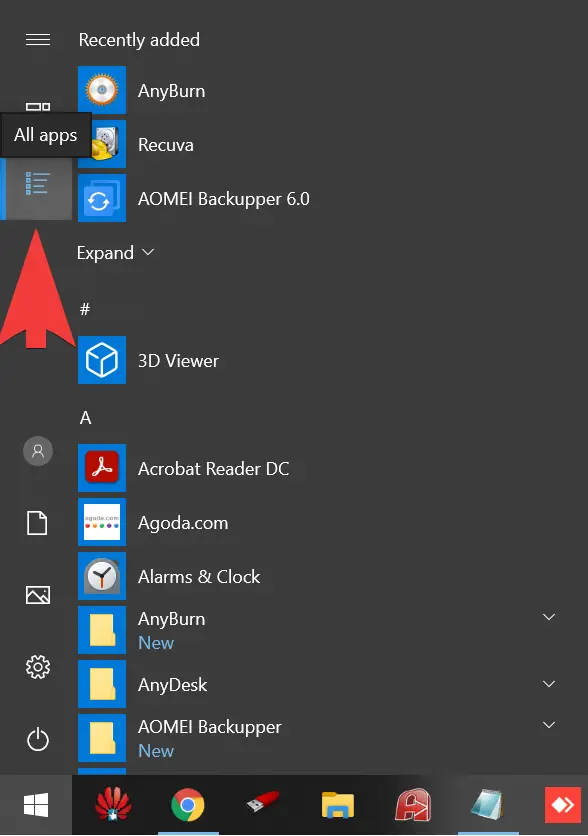
Once the app list is disabled from the Settings app, you can still access it by clicking the icon shown below.
![]()
However, when you click the all apps icon, the Tiles view will be temporarily disabled.
Conclusion
To conclude, configuring Windows 10 to show only Tiles on the Start menu is a simple yet effective way to reduce clutter and make it easier to find and launch the apps you need. By following the steps above, you can easily personalize your Start menu and remove unnecessary icons and shortcuts. This not only improves productivity but also streamlines your workflow, making your Windows 10 experience more efficient. If you’re looking to enhance your PC’s usability, consider customizing your Start menu to show only Tiles today.