
A Microsoft Office Word document offers a wide range of features to enhance productivity and document control. Among these features is the ability to hide specific text or entire paragraphs within a document. This can be particularly useful in scenarios where you want to keep certain information private or temporarily remove content without deleting it. Whether you’re working on a shared computer, preparing a draft with optional sections, or simply want to avoid displaying sensitive content to others, hiding text in Word can be an effective solution.
In this tutorial, we’ll guide you through the steps to hide and unhide text or paragraphs in an MS Office Word document with ease.
How to hide text or paragraphs in an MS Word Document on a Windows PC?
If you want to hide any text or paragraph in an MS Word document, perform the following steps:-
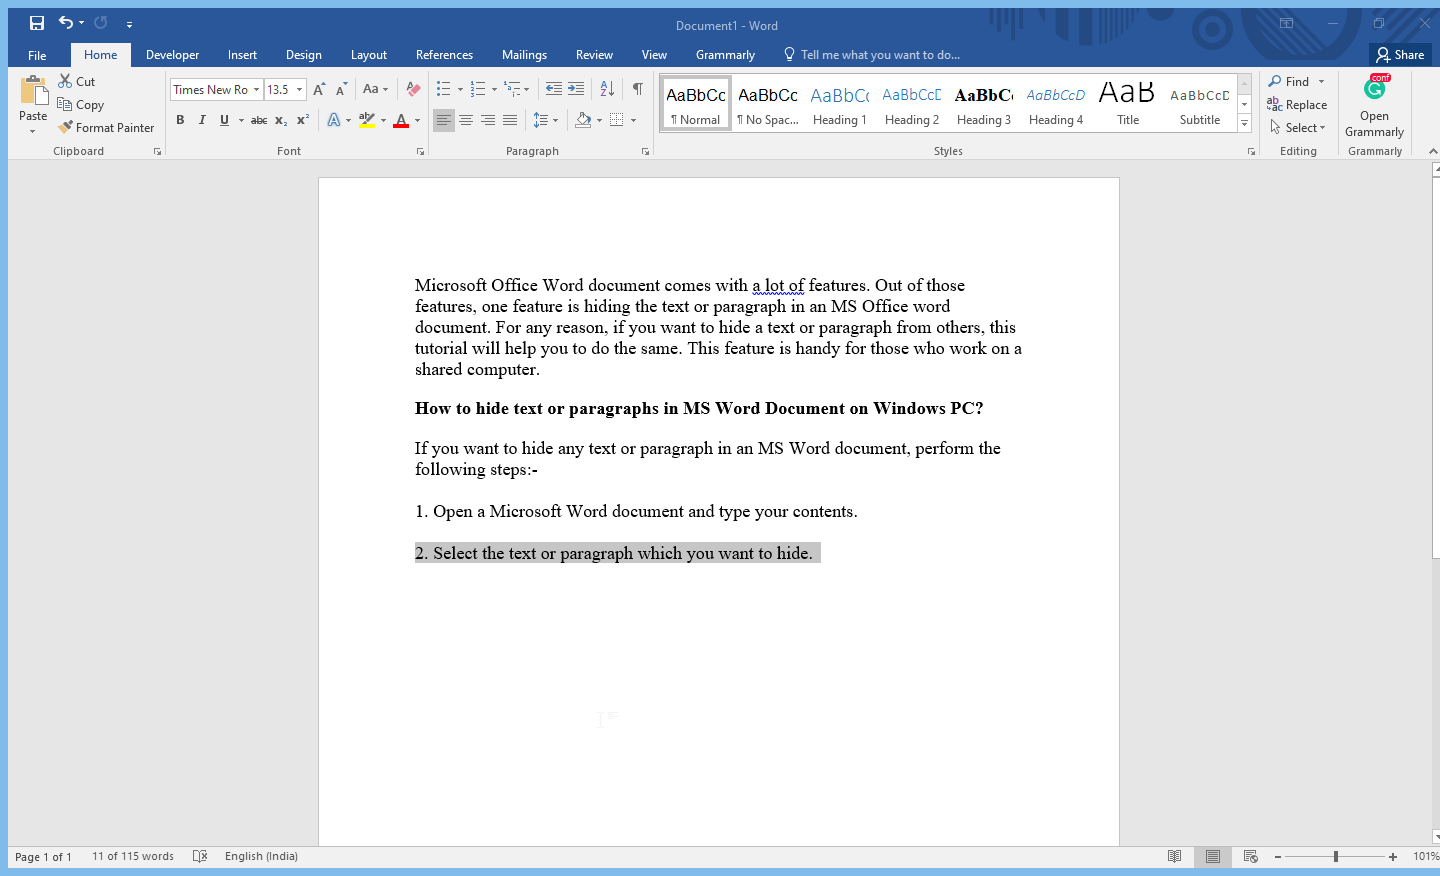
Step 1. Open a Microsoft Word document and type your content.
Step 2. Select the text or paragraph that you want to hide.
Step 3. Select the Home tab in the Font group and then click the Font icon to expand it.
![]()
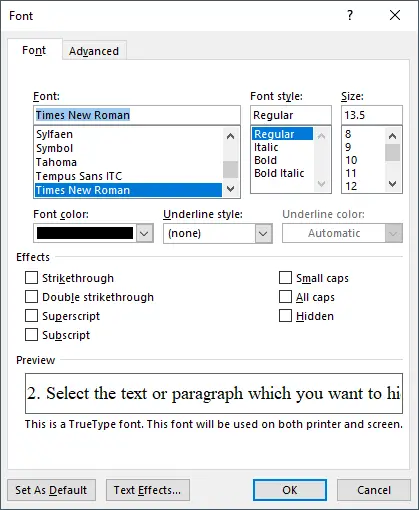
Step 4. In the Font window that opens after clicking on the Font Icon, click on the Hidden checkbox.
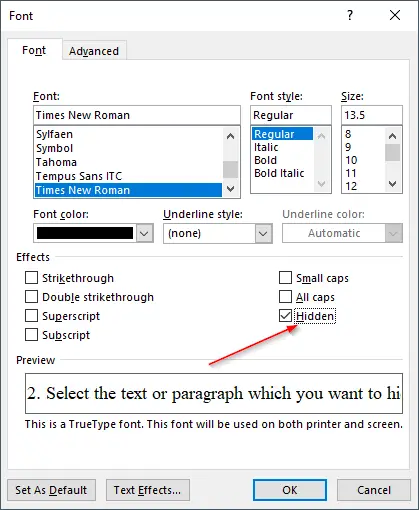
Step 5. Once you have clicked the checkbox next to Hidden, click the OK button to hide the selected paragraph or text.
That’s all! Now, text or paragraph will be hidden for all users, including you; also, while taking the printout, these hidden texts or paragraphs will be ignored automatically. In other words, the hidden text will not appear in the print preview or printed document.
If you want to take a printout with hidden text or paragraphs, refer to our guide on printing hidden text or paragraphs in MS Word on Windows PC.