
File transfer between two computers is one of the simplest tasks, and by following this post, you can easily move any file from one system to another. This process uses built-in Wi-Fi, so there’s no need for a USB drive or Ethernet cable—a built-in Wi-Fi adapter is all you need.
If you’ve bought a new computer or laptop and want to move files from your old system, transferring over Wi-Fi can be a convenient choice. This method allows quick file transfer from one PC to another without requiring internet access.
Transferring files over Wi-Fi is similar to using Bluetooth, but the pairing process is different. Both computers need to be connected to the same Wi-Fi network. Wi-Fi provides a faster transfer speed and greater range compared to Bluetooth. What might take hours over Bluetooth can be completed in minutes using Wi-Fi, making it a more efficient method for moving data between Wi-Fi-enabled PCs.
How to Configure the IP Address of the Wi-Fi Adapter in Windows 11?
Follow these steps to configure the IP Address of the Wi-Fi Adapter in Windows 11:-
Step 1. Open the Settings app by pressing the Windows + I keys on the keyboard.
Step 2. Click on the Network & Internet category from the left side pane in the Windows Settings.
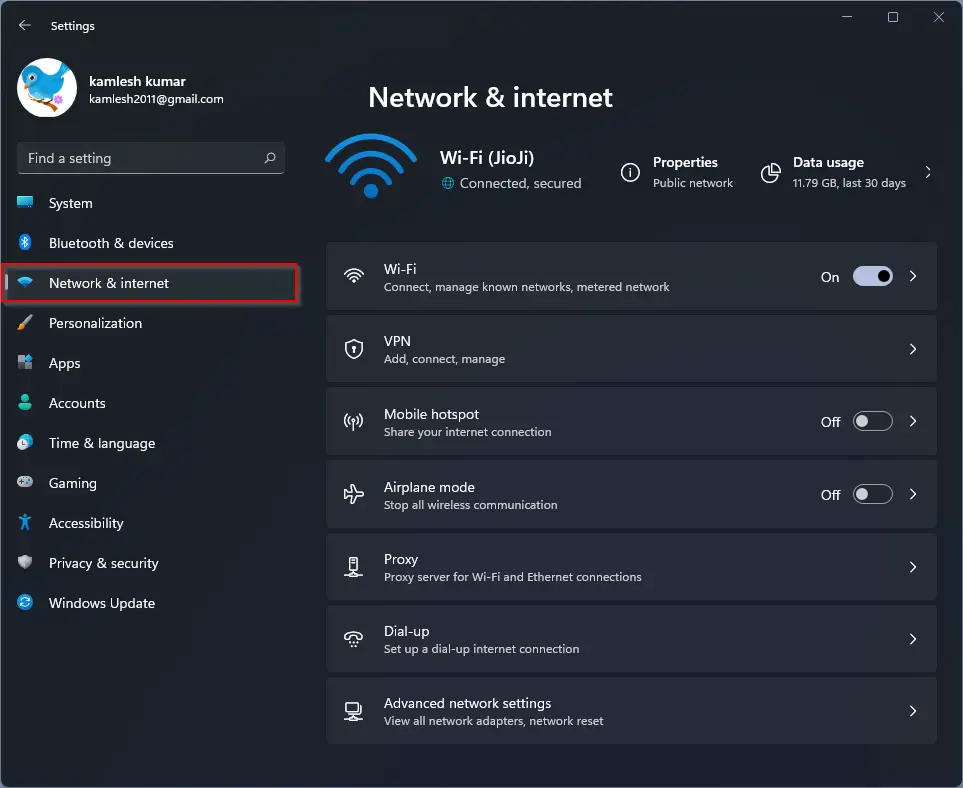
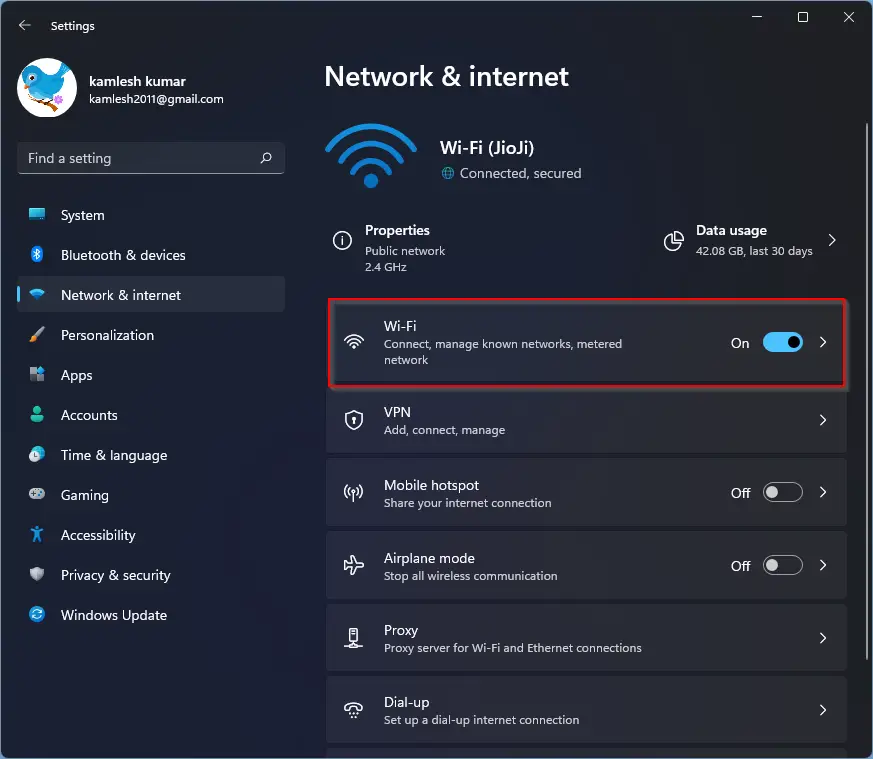
Step 3. On the right-side pane of Network & Internet, click on the Wi-Fi tab.
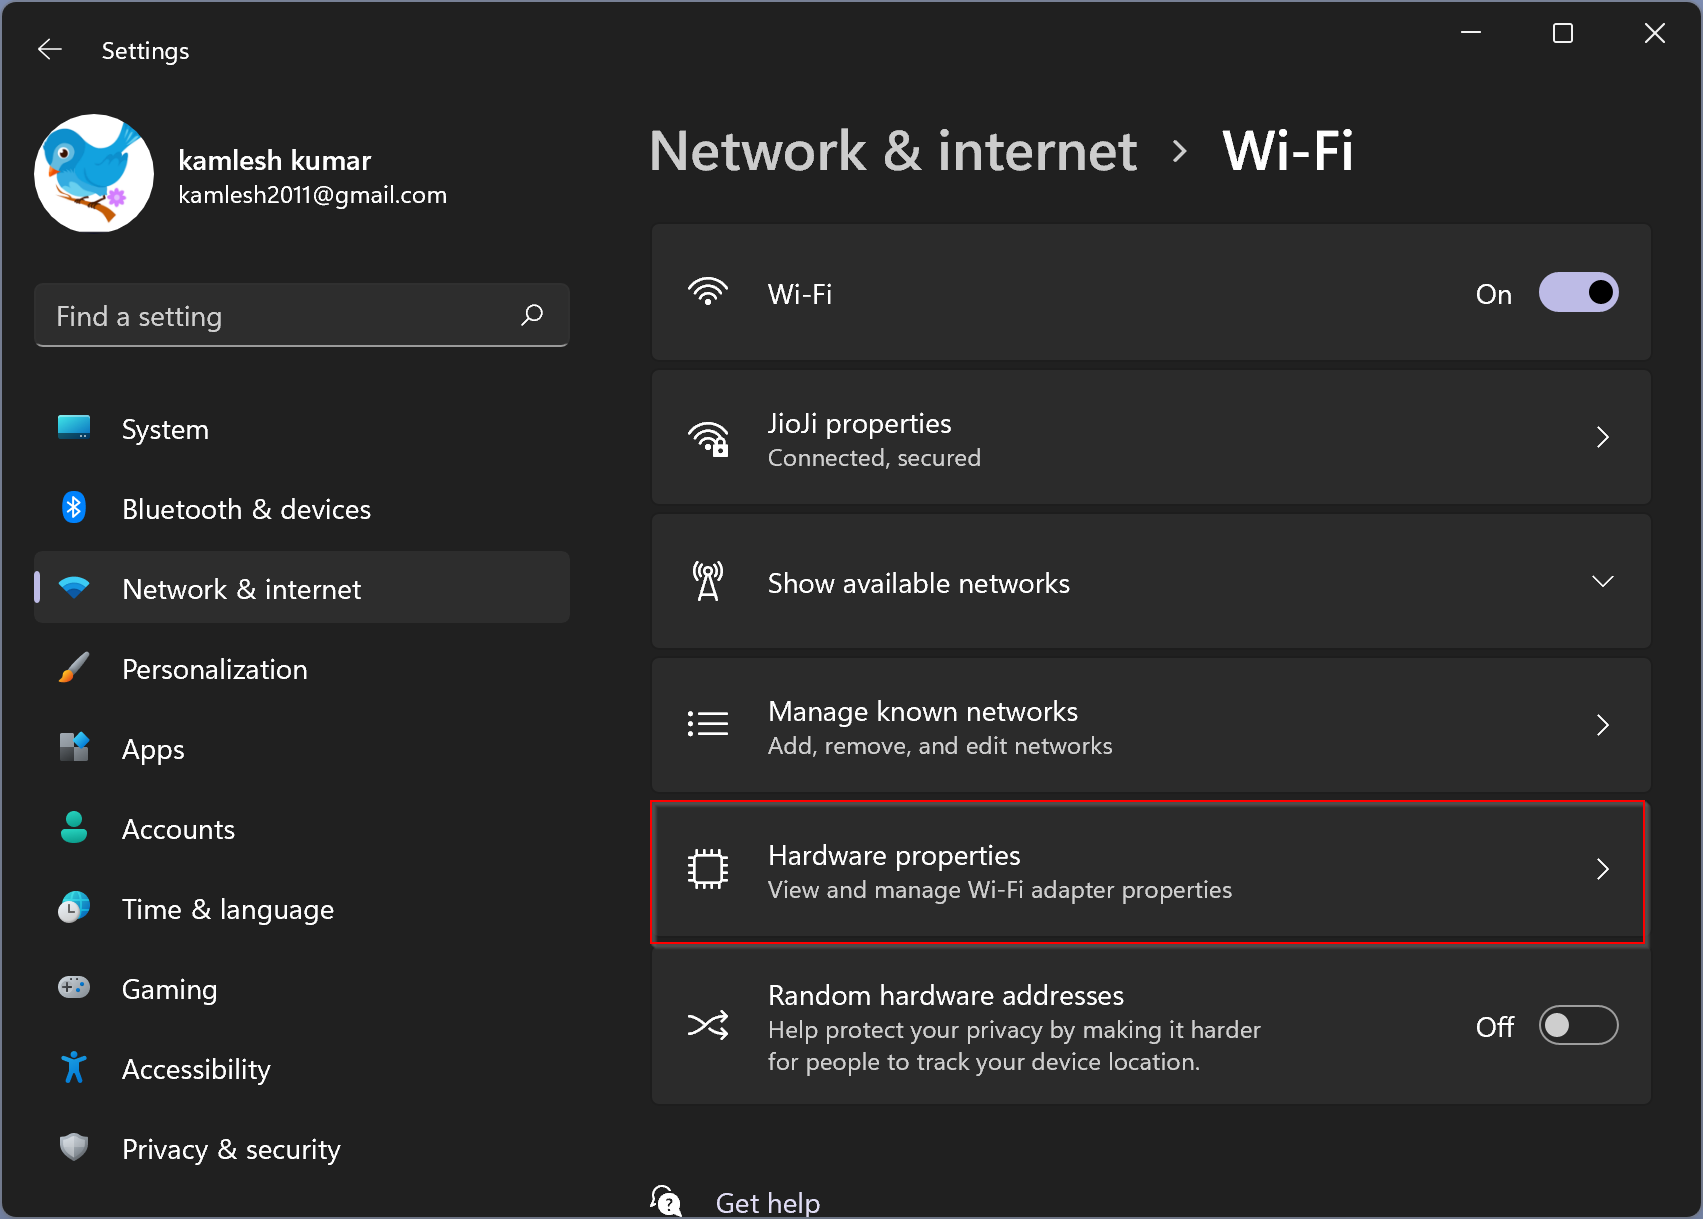
Step 4. Click the Hardware properties option.
Step 5. Click on the Edit button next to the IP assignment under the Wi-Fi properties section.
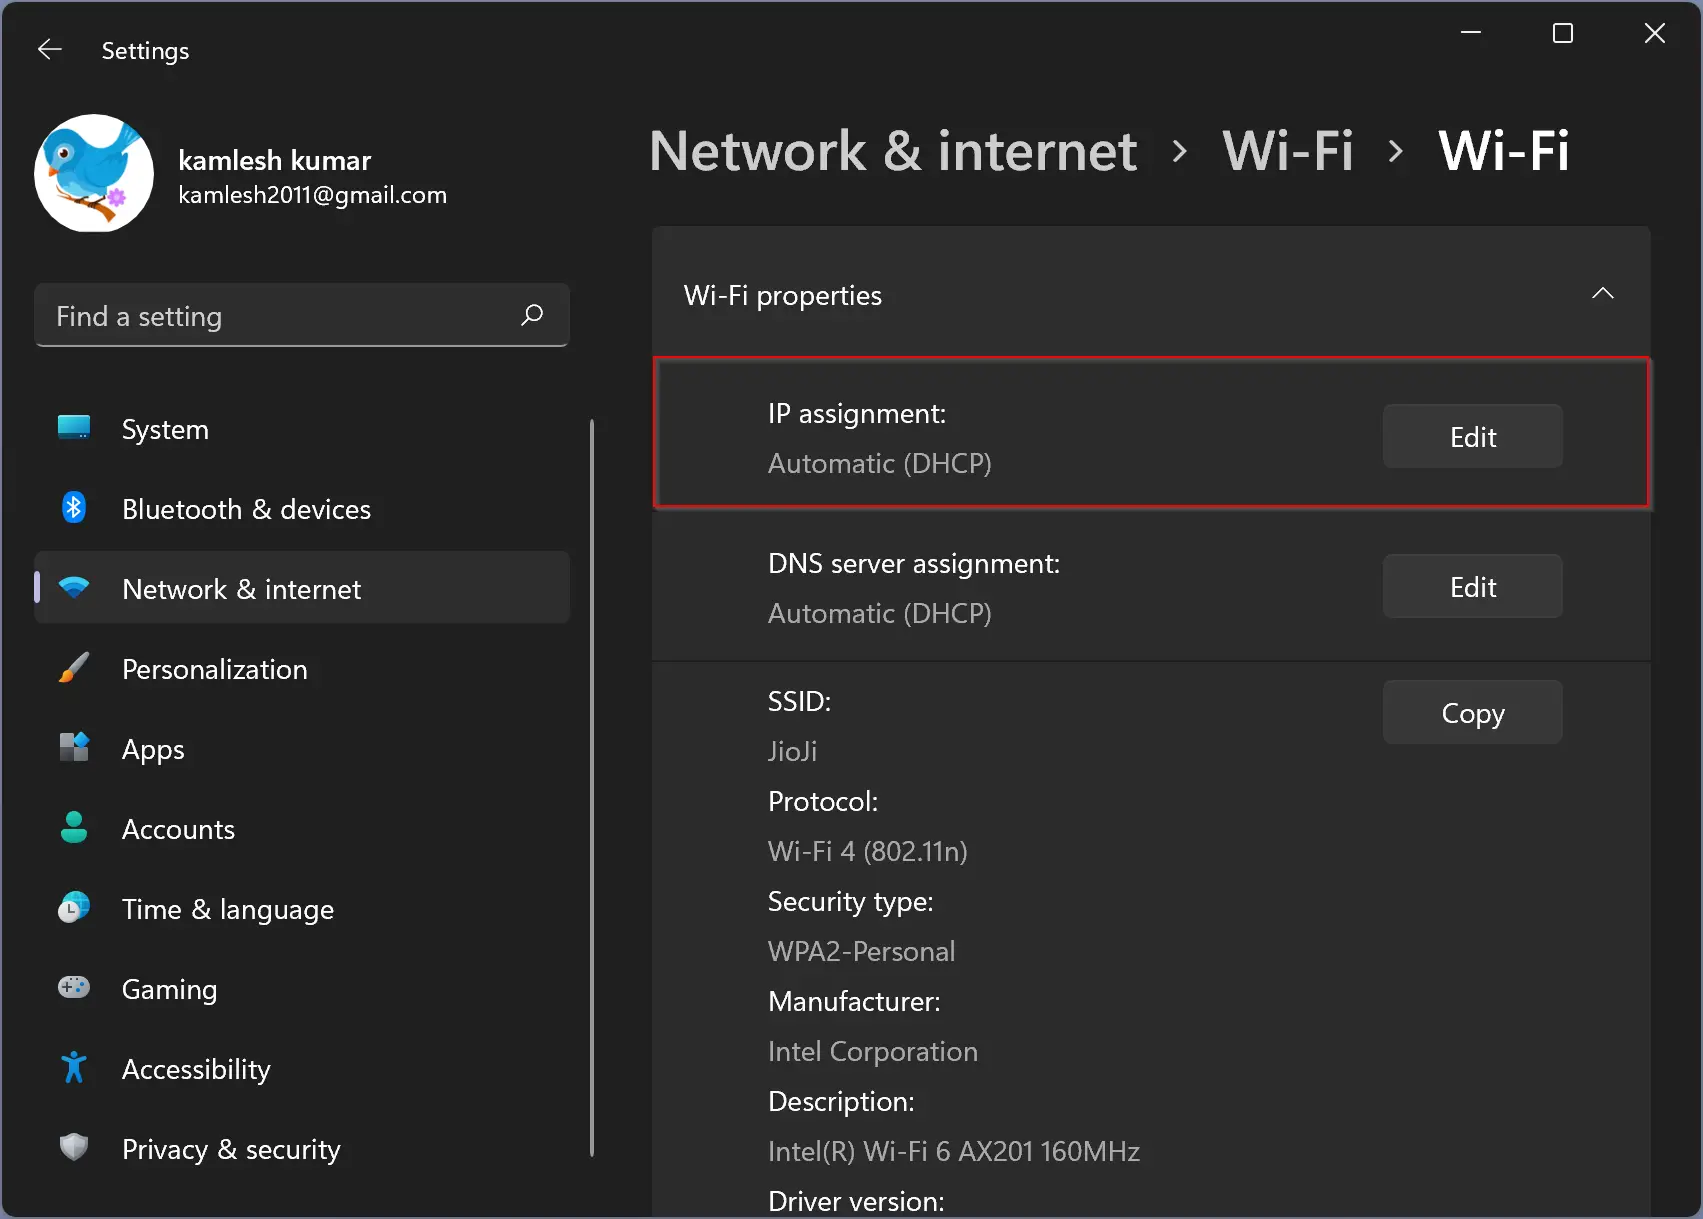
Step 6. A new pop-up window will appear with the title “Edit IP settings.”
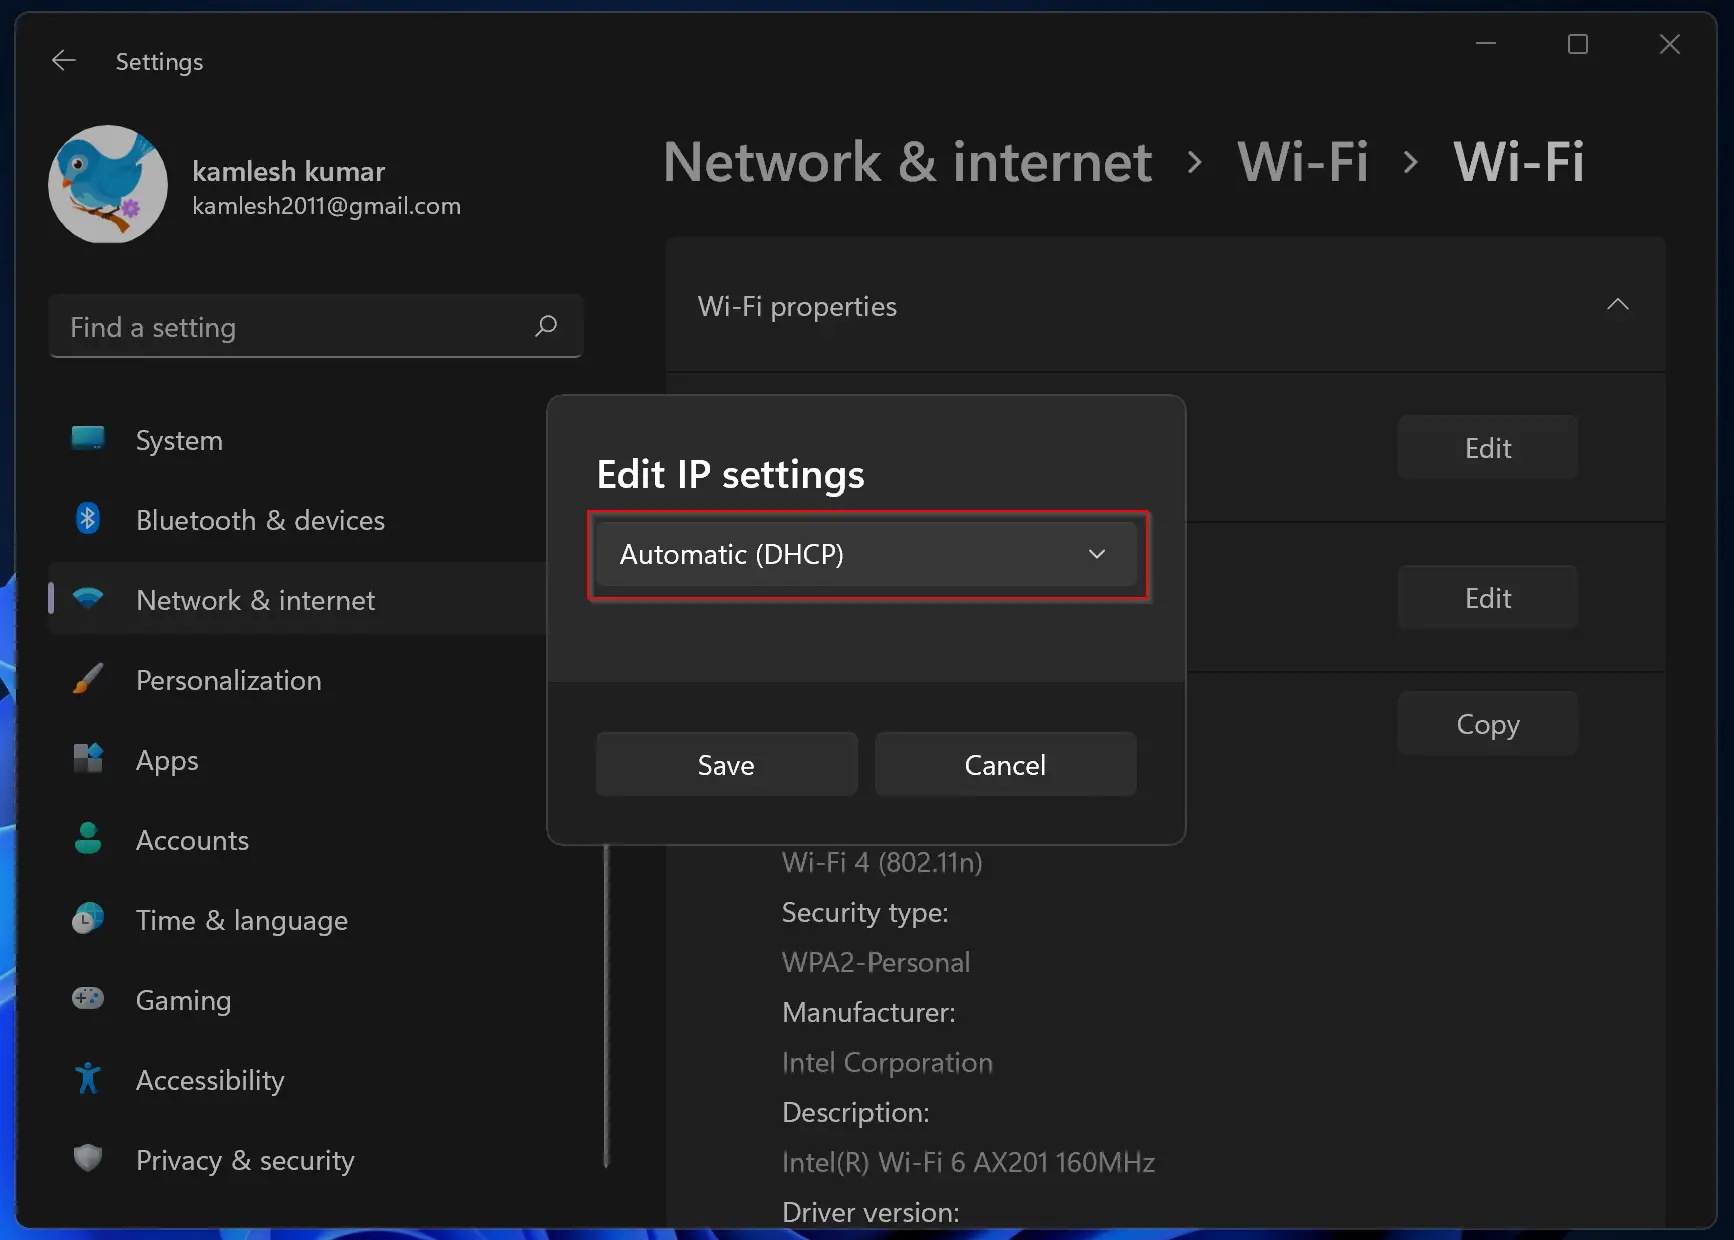
Step 7. Click on the drop-down menu and select the Manual option.
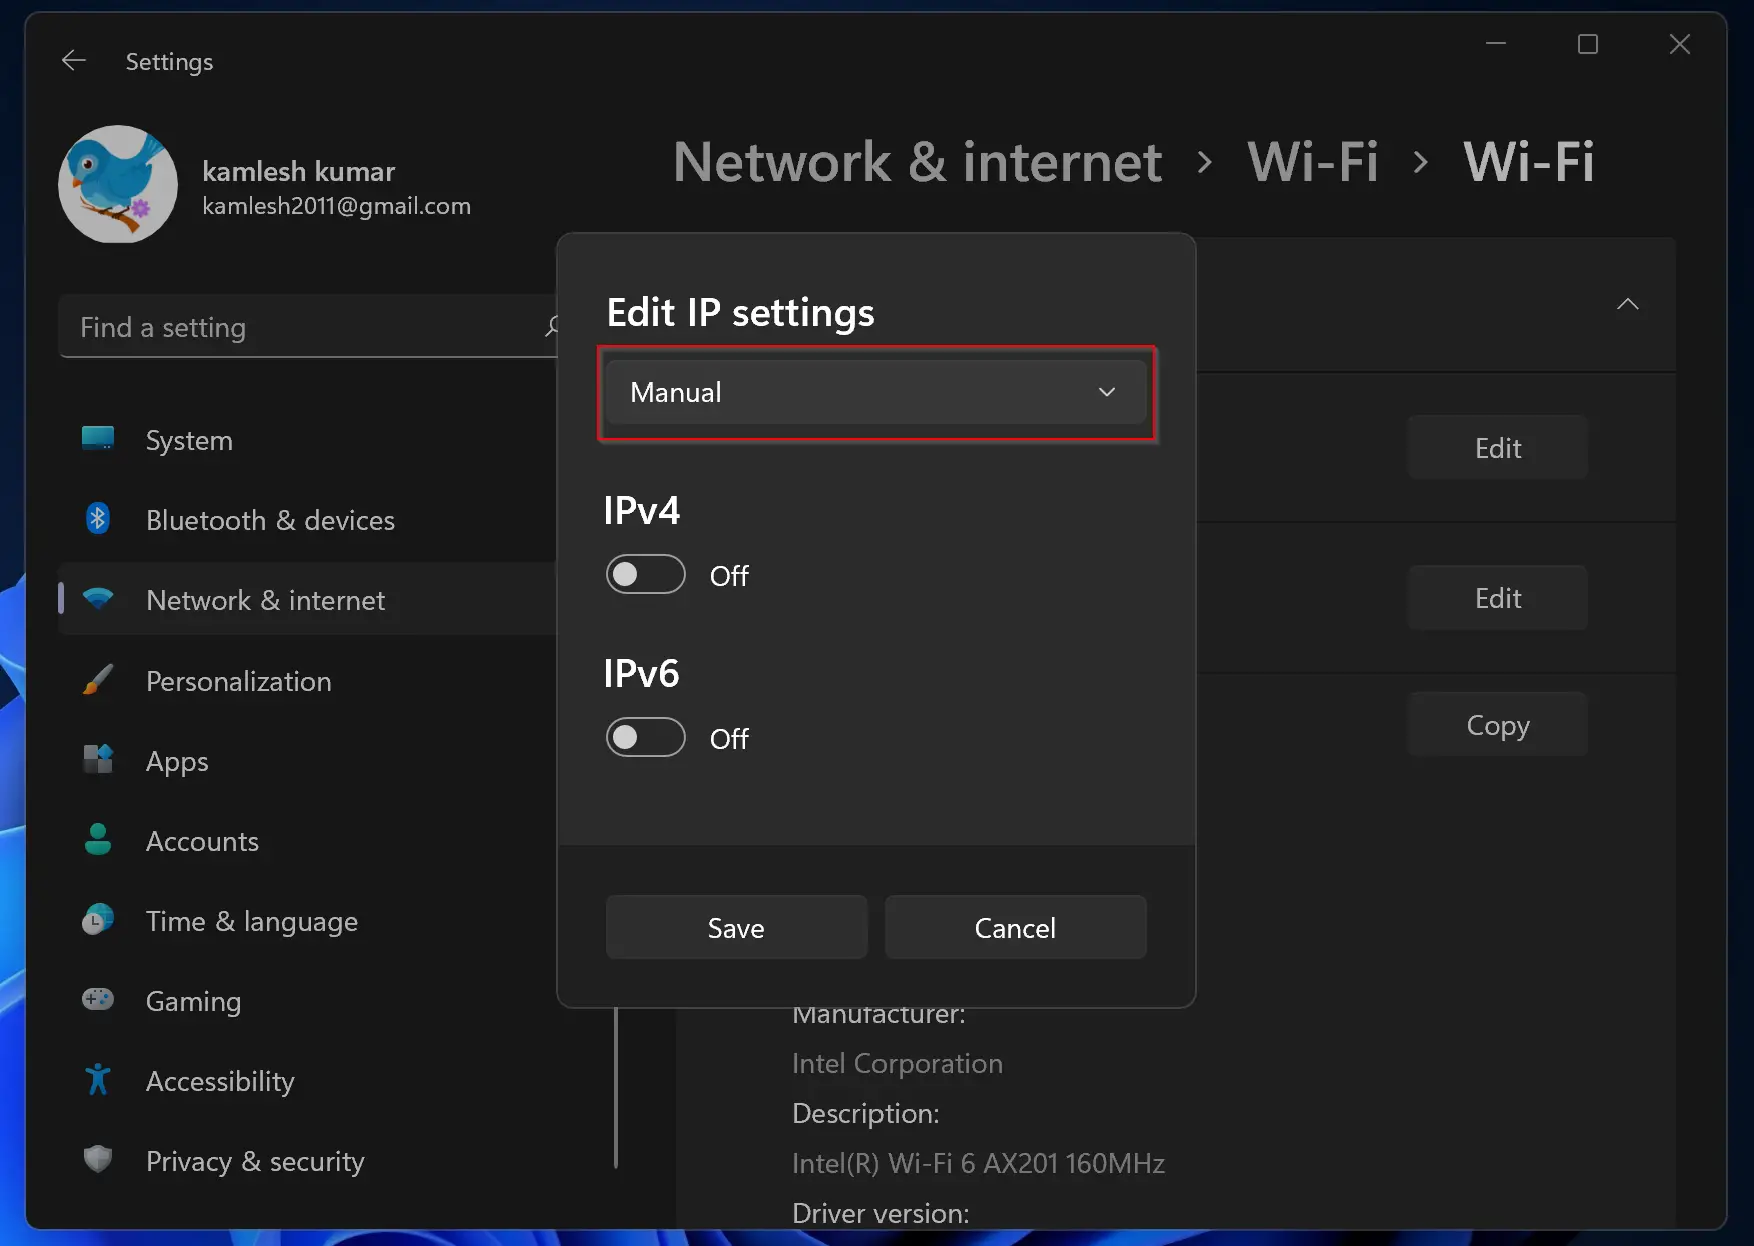
Step 8. Now, turn the toggle switch to the On position next to the IPv4 option.
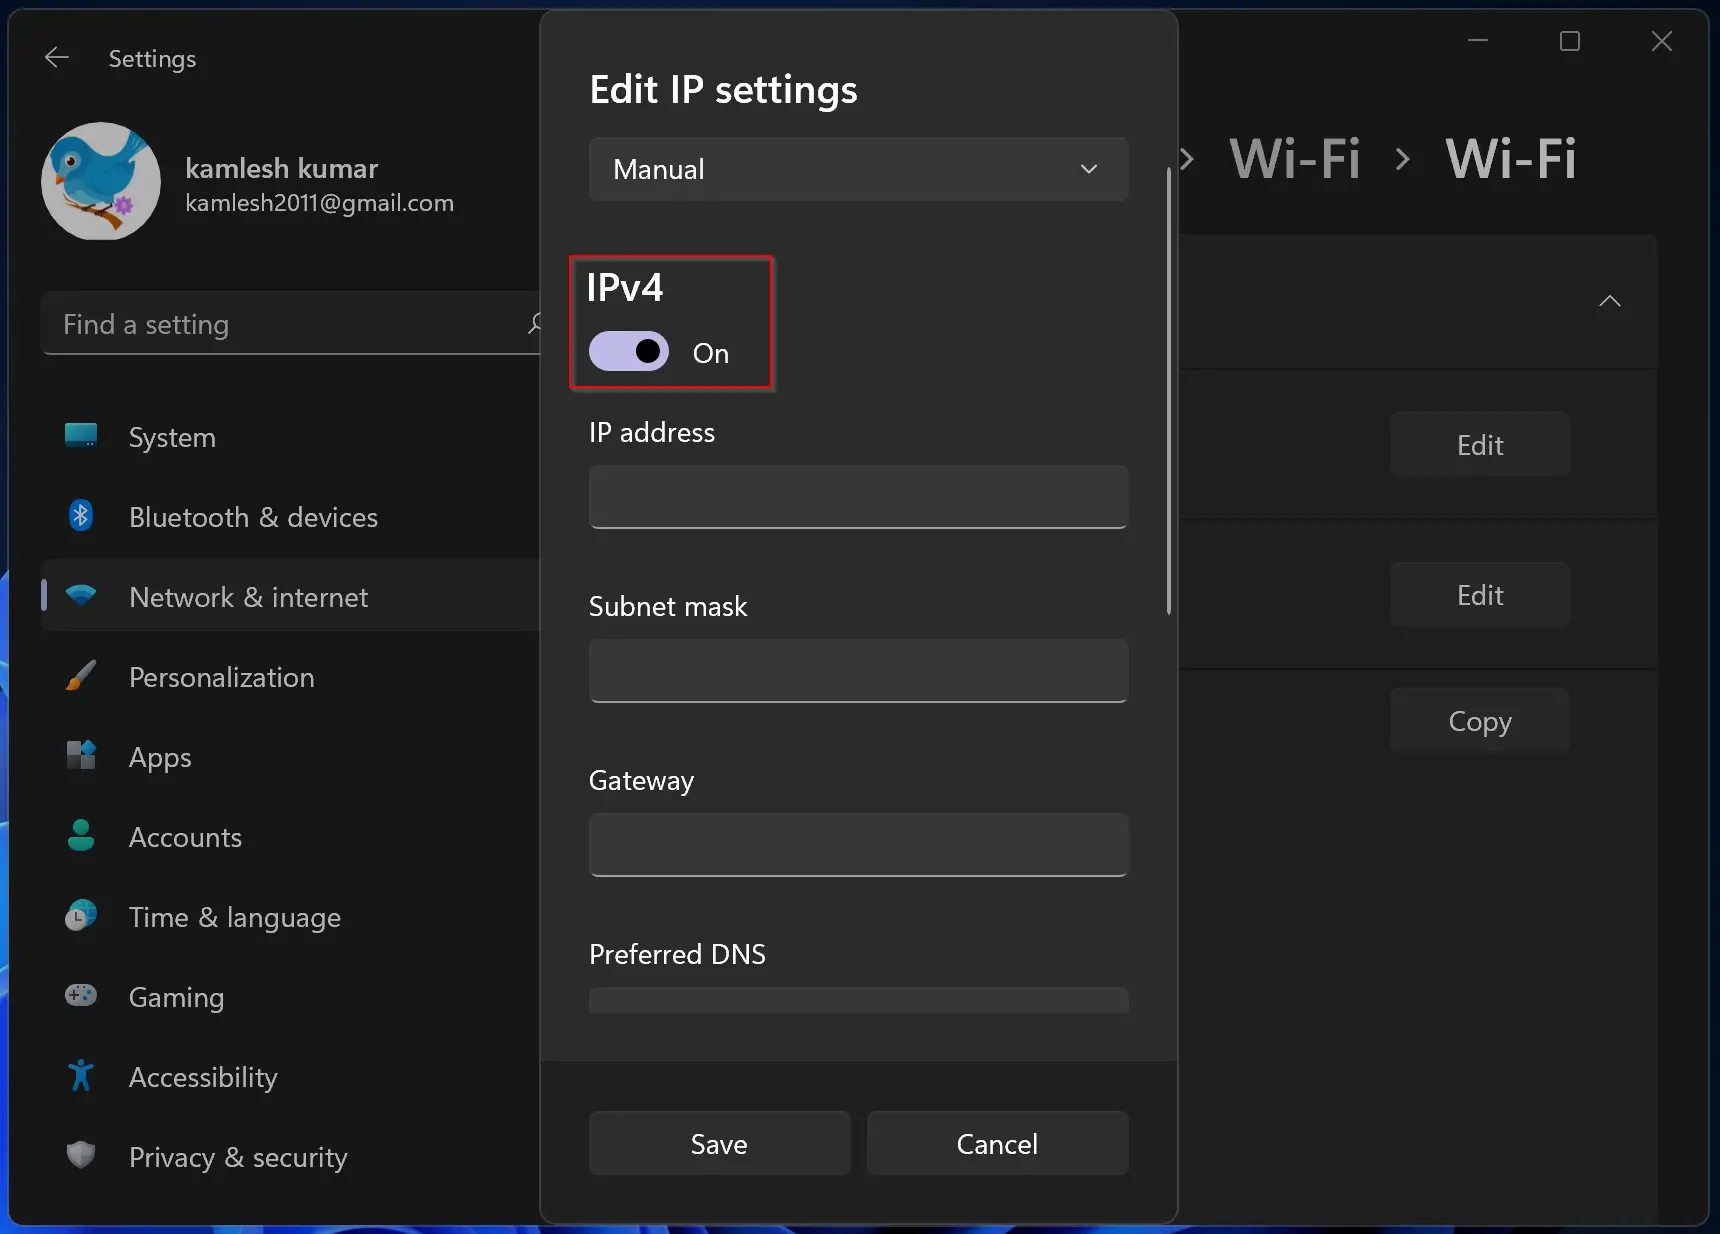
Step 9. Now, fill in the following details in the corresponding boxes:-
- IP address: 192.168.1.2
- Subnet mask: 255.255.255.0
- Gateway: 192.168.1.1
- Preferred DNS: 192.168.1.2
- Alternate DNS: 192.168.1.3
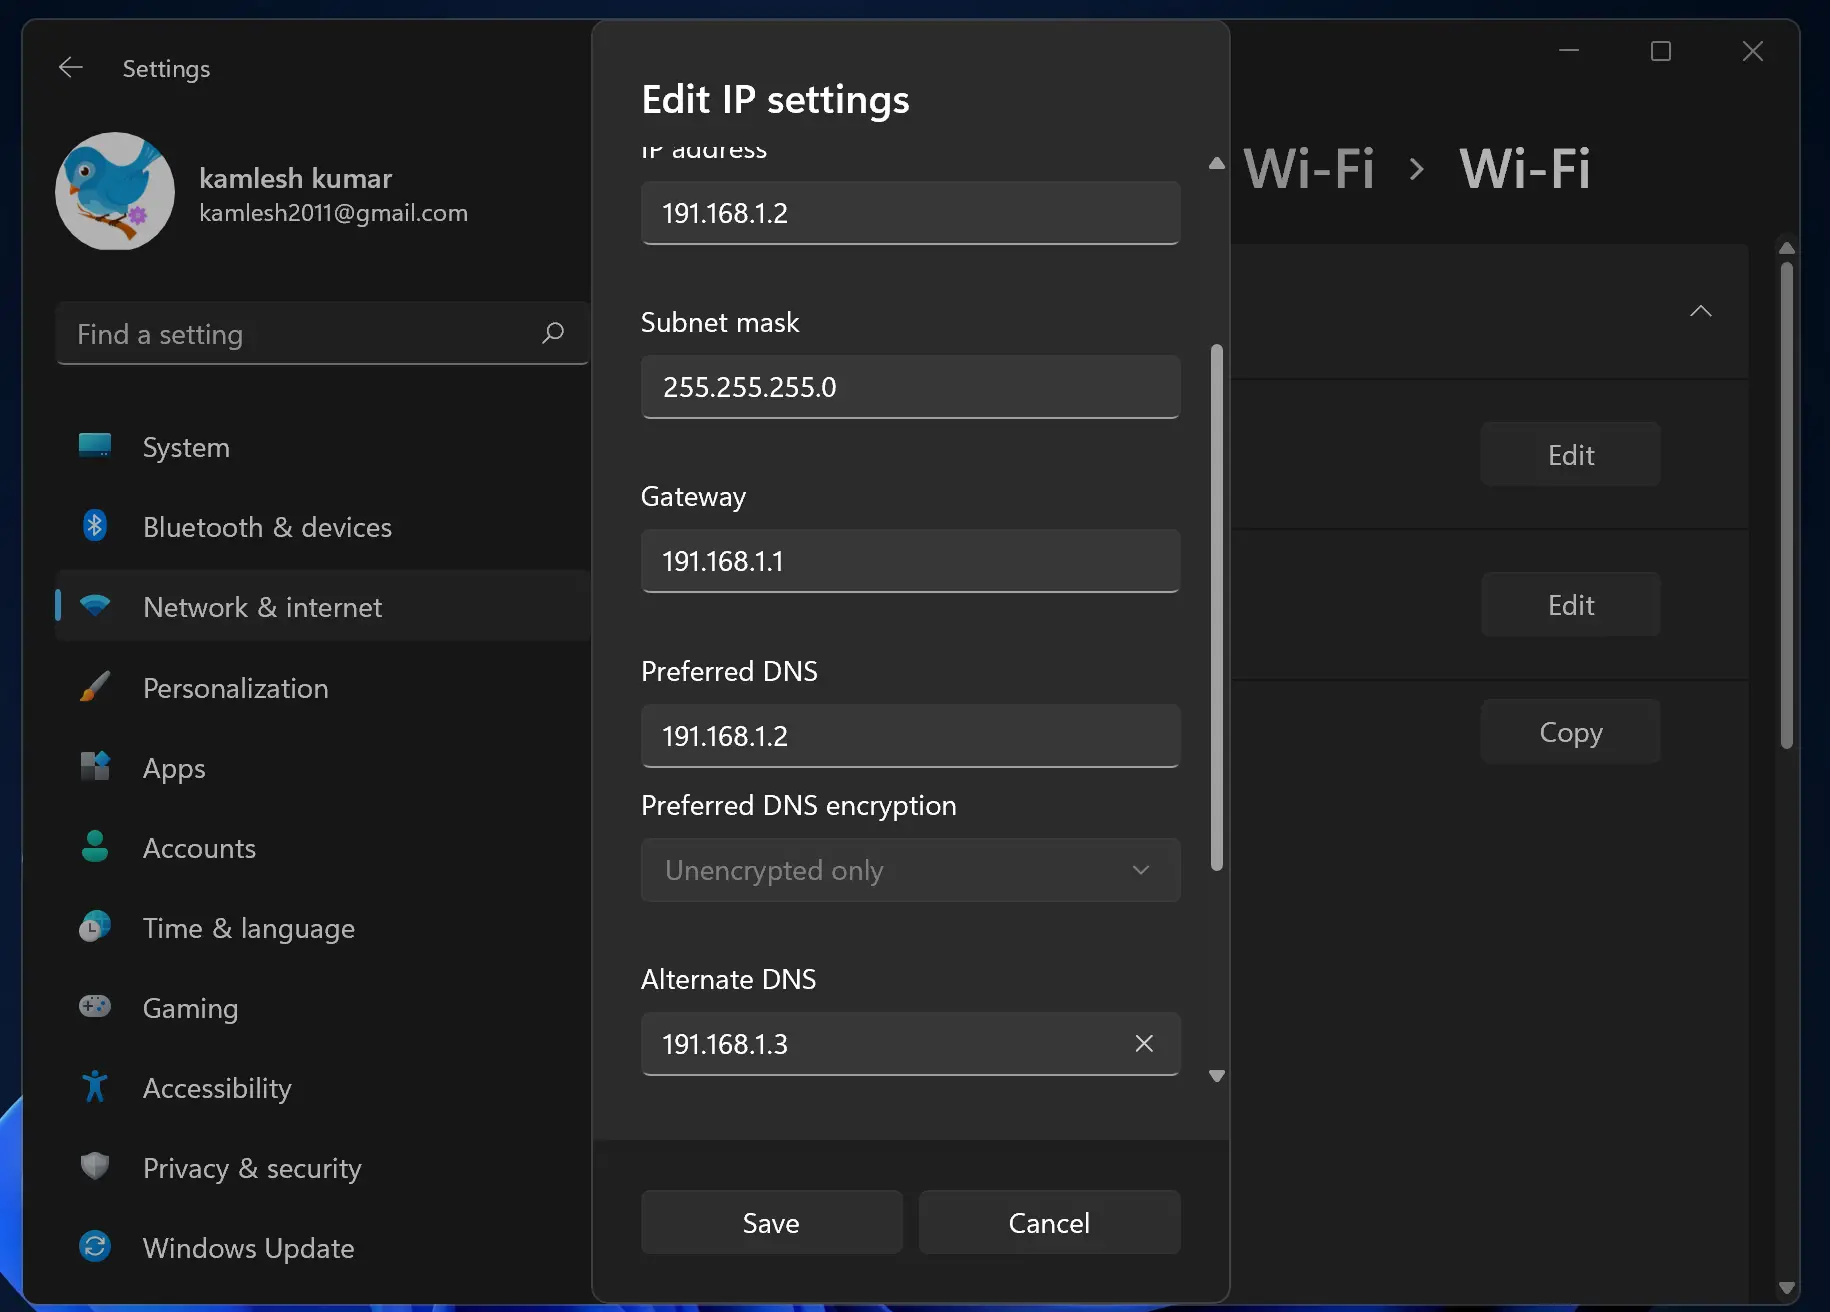
Step 10. Now, click on the Save button.
Now, on another computer, repeat the above steps and assign the following values in step 9 to put both PC in the same network:-
- IP address: 192.168.1.3
- Subnet mask: 255.255.255.0
- Gateway: 192.168.1.1
- Preferred DNS: 192.168.1.3
- Alternate DNS: 192.168.1.2
That’s it! Both your computers are on the same network, and you are ready to transfer files from one PC to another. But you need a router that can communicate with both of these computers. Configure the router/modem with the following details:-
- IP address: 192.168.1.1
- Subnet mask: 255.255.255.0
- Gateway: 192.168.1.1
- Preferred DNS: 192.168.1.3
- Alternate DNS: 192.168.1.2
Now, all three devices are on the same network. Connect both PCs to the router/modem.
The problem is that you may not have a router/modem because most people use mobile Wi-Fi as a hotspot. We can also use smartphone Wi-Fi to transfer data between two computers without an internet connection. For that, we need to make all three devices (two computers + one smartphone) on the same network.
Turn on the mobile hotspot on your smartphone and connect both computers to the same phone.
How to Transfer Files Between Two Computers Using Wi-Fi in Windows 11?
Once you have manually done the networking or connected both computers with a smartphone mobile hotspot to transfer files between both computers, do the following steps:-
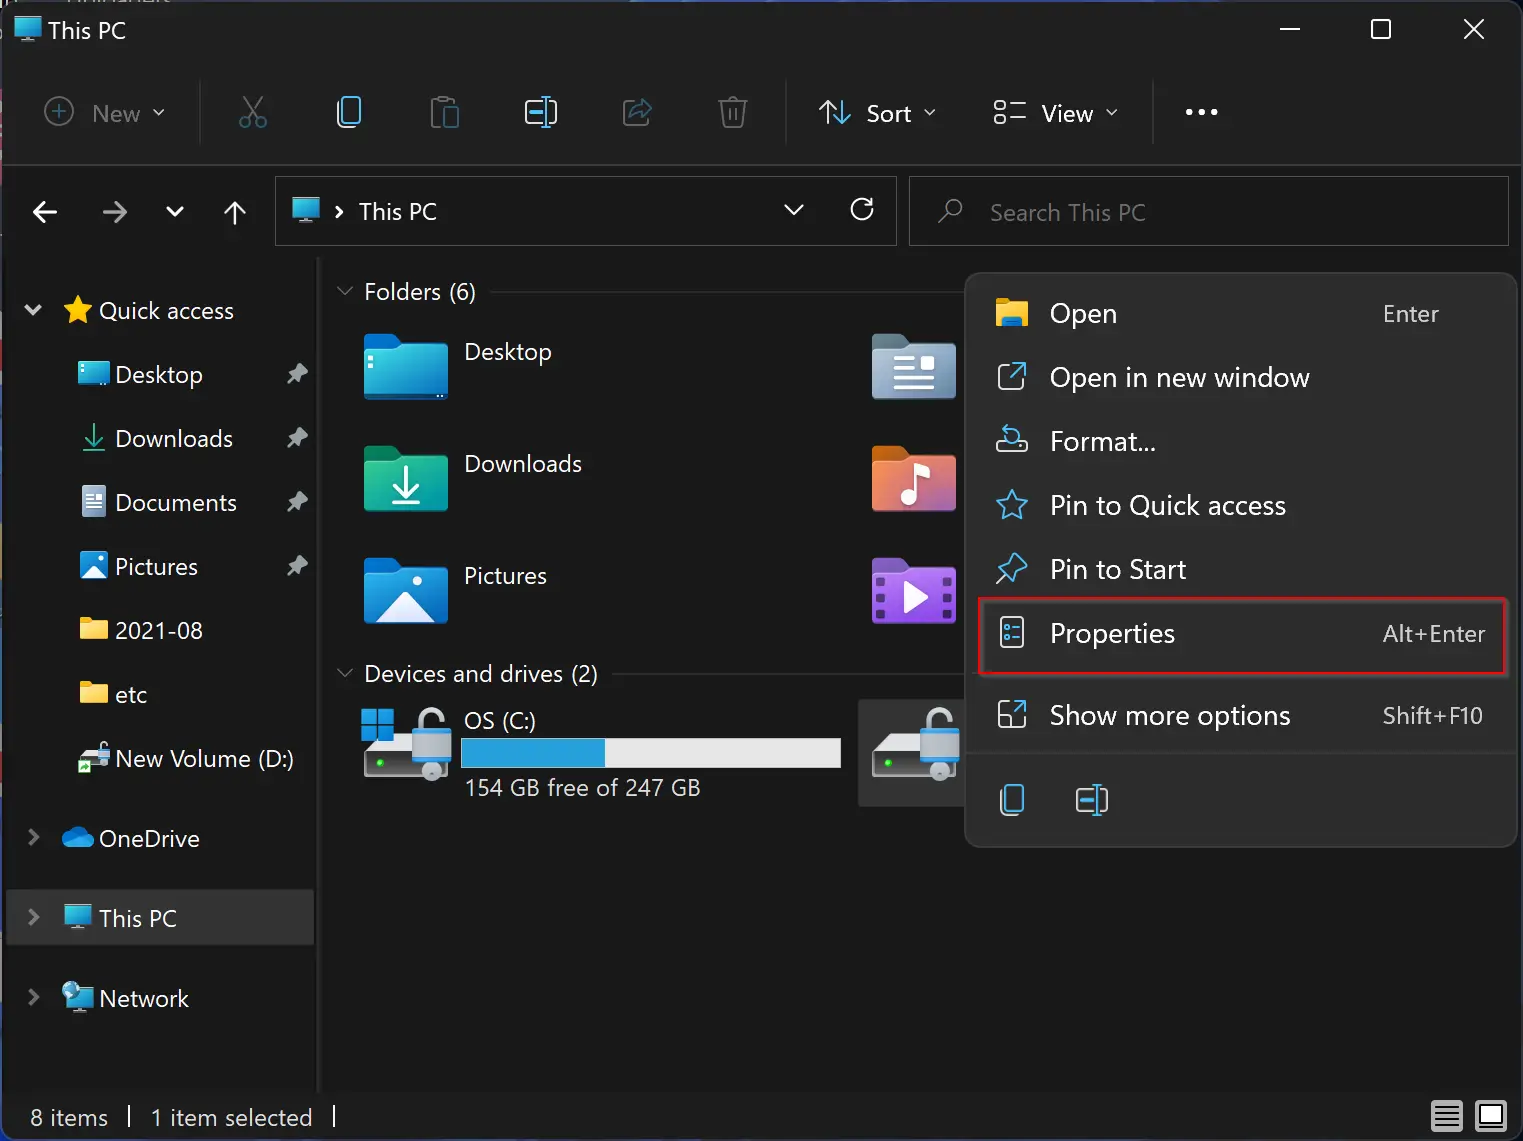
Step 1. Right-click on the drive letter or folder on the old computer from where you want to transfer the data to your new computer and select the Properties option.
Step 2. Navigate to the Sharing tab in the new volume properties dialog box.
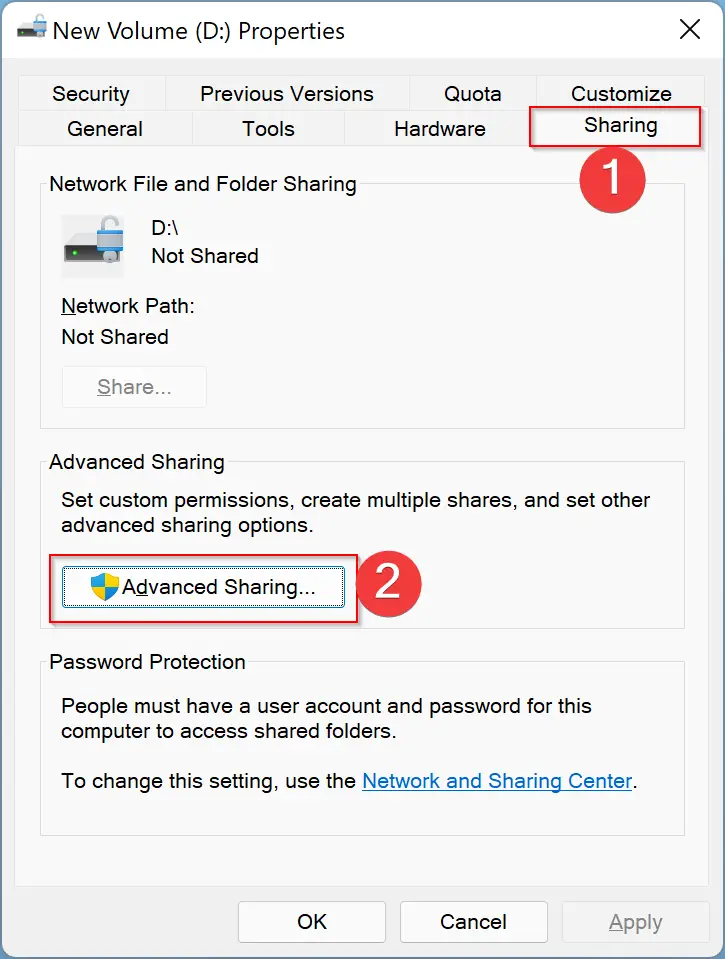
Step 3. Click on the Advanced Sharing button.
Step 4. A new pop-up window will open with the Advanced Sharing title. Check the checkbox Share this folder.
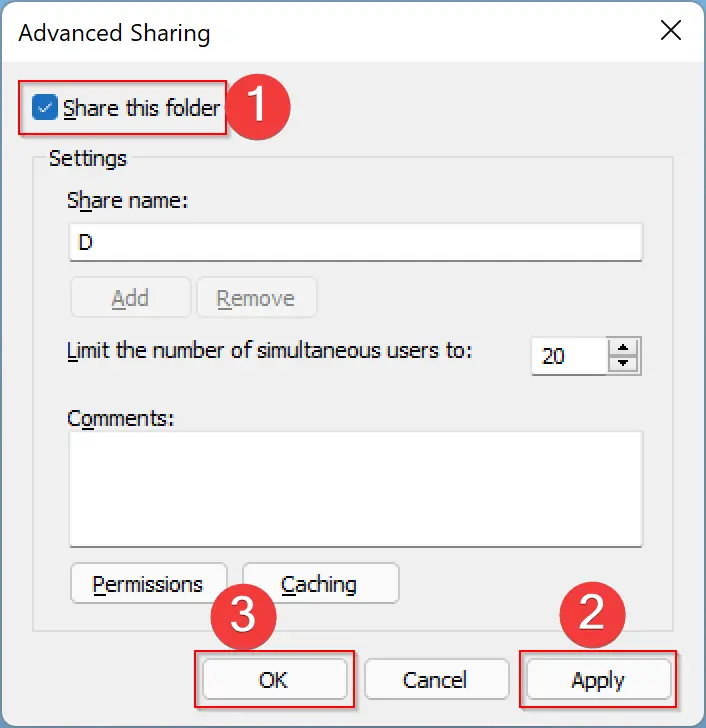
Step 5. Click Apply.
Step 6. Click OK.
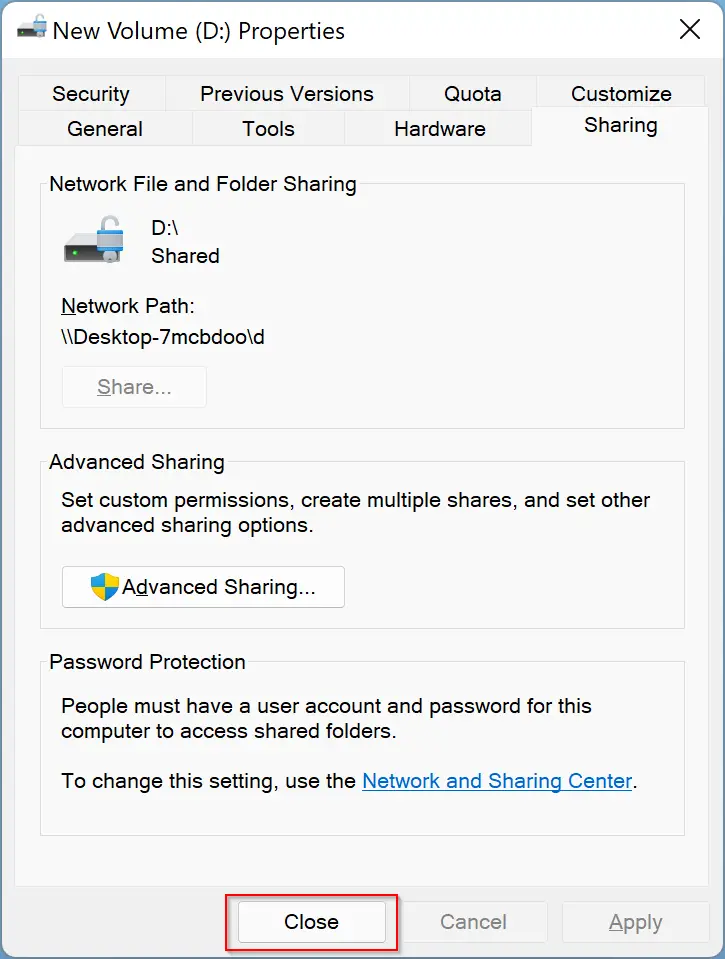
Step 7. Click Close.
Step 8. Now, open File Explorer on the new computer and click on the Network on the left side pane.
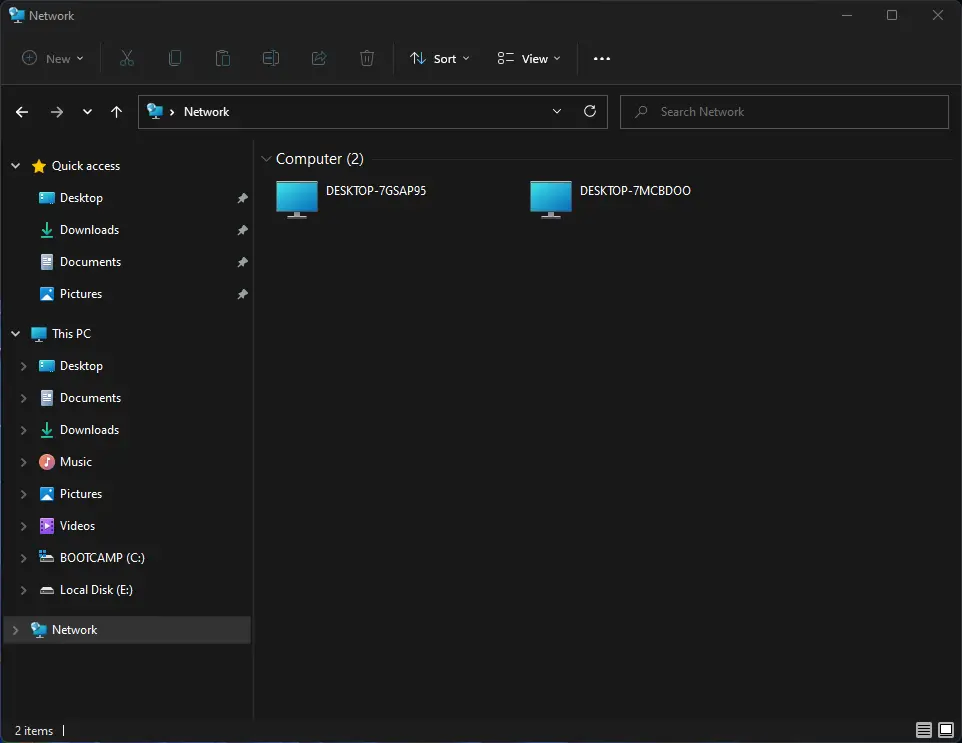
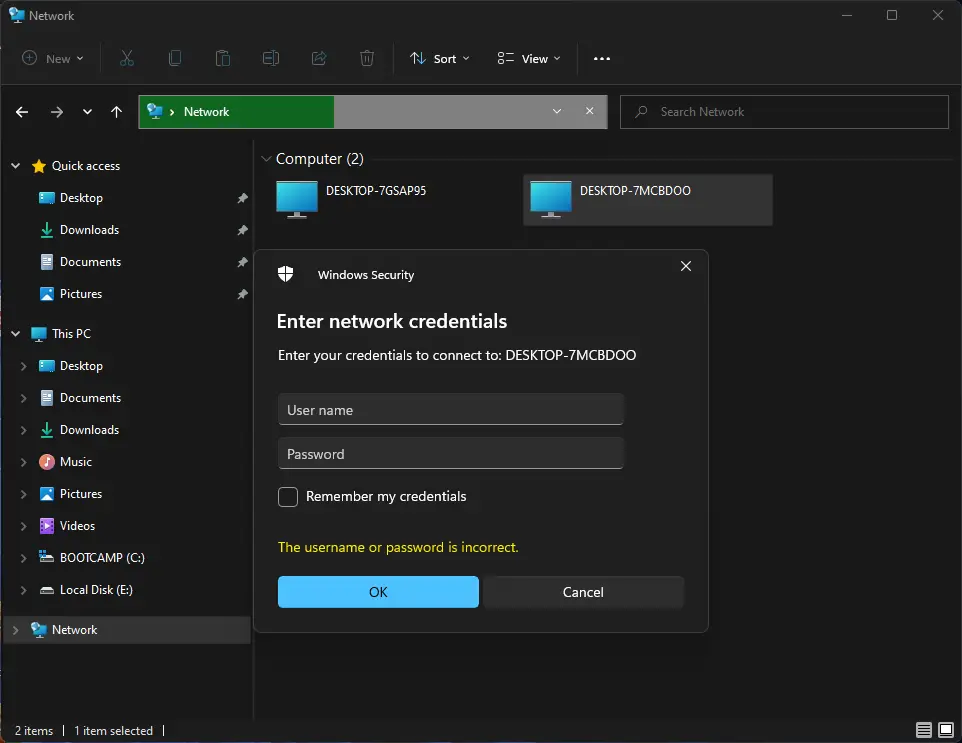
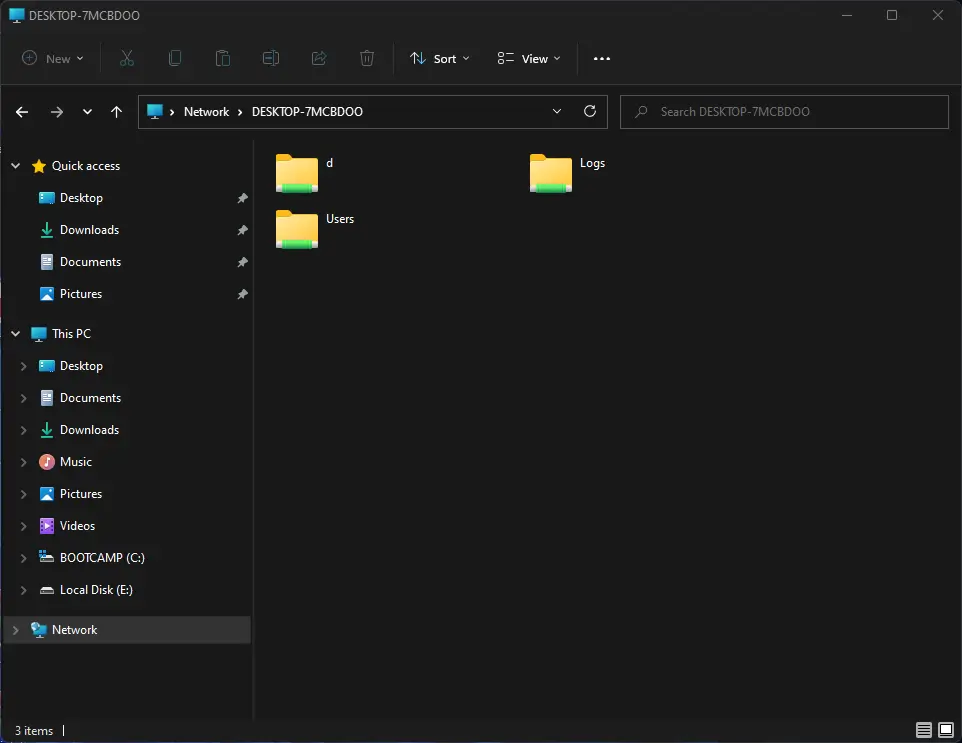
Step 9. Here, you can see all the shared folders packed under the computer icon on the right pane—double-click on any you would like to copy. Enter the credentials (username and password of the old computer) to access the folder.
Now your treasurer is open.
Copy and paste your data into your new computer. That’s it!
It is needless to say again that data transfer between two computers will be through local networking if you have an active internet connection.
Conclusion
In conclusion, transferring files between two computers is a simple process that can be accomplished through built-in WiFi. By following the steps mentioned in this post, you can quickly transfer files from one computer to another without the need for a USB or Ethernet cable. With WiFi, file transfer is faster and more efficient than Bluetooth, and you don’t need internet access to do it. Additionally, we provided a step-by-step guide on how to configure the IP address of the WiFi adapter in Windows 11, as well as how to transfer files between two computers using WiFi. Whether you have a router or not, you can easily transfer files between two computers using a mobile hotspot. In short, transferring files between two computers using WiFi is a quick and efficient process that requires only a few simple steps.