
If you have bad neighbors who set offensive Wi-Fi network names, you might want to hide or block them on your PC. It can also happen that too many Wi-Fi SSIDs are broadcasting around you, making it distracting or confusing to select the correct network.
Using the Command Prompt, you can prevent specific Wi-Fi network names from appearing on your Windows 10 or 11 PC. It’s a good idea to block all Wi-Fi network names that don’t belong to you for a cleaner and more focused experience.
In this gearupwindows article, we will learn the following:-
- Blacklist or Hide a Wi-Fi Network Name
- Whitelist a Wi-Fi Network
- View Filters
How to Blacklist or Hide a Wi-Fi Network Name?
You can blacklist or hide a WiFi network name on your PC using the “netsh” command by running Command Prompt as an Administrator. It is possible to hide an individual network by adding it to the block list. Once you put any WiFi network name in the block list, it will not appear in the list of nearby available Wi-Fi networks, and you can’t connect to it from Windows.
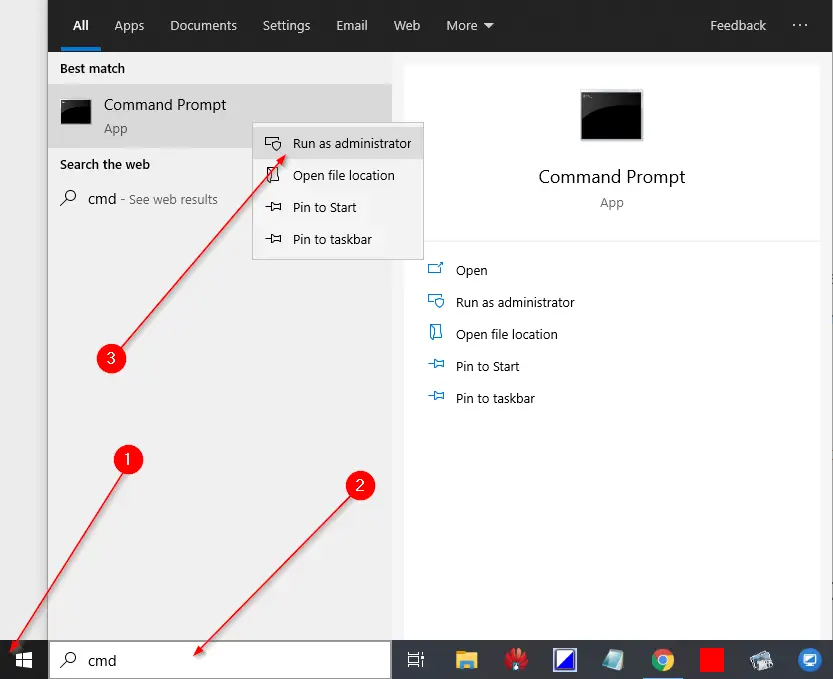
To open a Command Prompt with elevated rights, open the Start menu and search for cmd. In the available results, right-click the Command Prompt and select the Run as administrator option.
To block a network, run the following command in the Administrative Command Prompt:-
netsh wlan add filter permission=block ssid="WIFI NAME" networktype=infrastructure
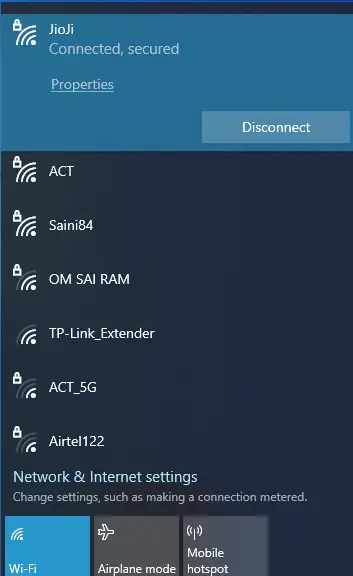
In the above command, replace the “WIFI NAME” with the name (SSID) of the wireless network that appears on your PC by clicking on the WiFi icon on the system tray.
For instance, we want to block “ACT,” which appears on my PC WiFi list. My command will be:
netsh wlan add filter permission=block ssid="ACT" networktype=infrastructure
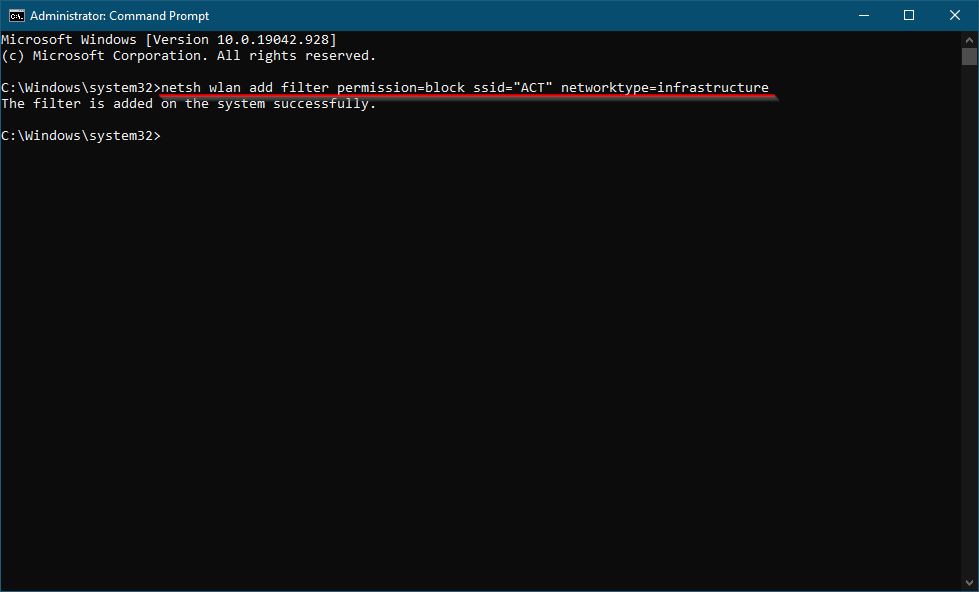
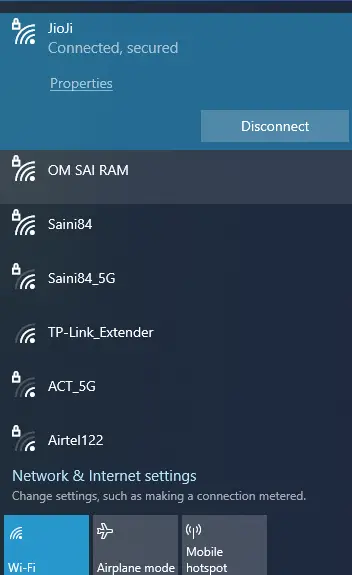
Now you can see “ACT” network is no longer visible on my PC.
If you want to block more than one network SSID on your computer, you need to repeat the above steps.
One should note that the above command filters are based on the network name. So, if your neighbor renames their Wi-Fi network, it will again appear in your Wi-Fi list with a new name.
If you want to undo the change and want to remove a network from the blocklist, run the following command and replace “WIFI NAME” with the name of the Wi-Fi network:-
netsh wlan delete filter permission=block ssid="WIFI NAME" networktype=infrastructure
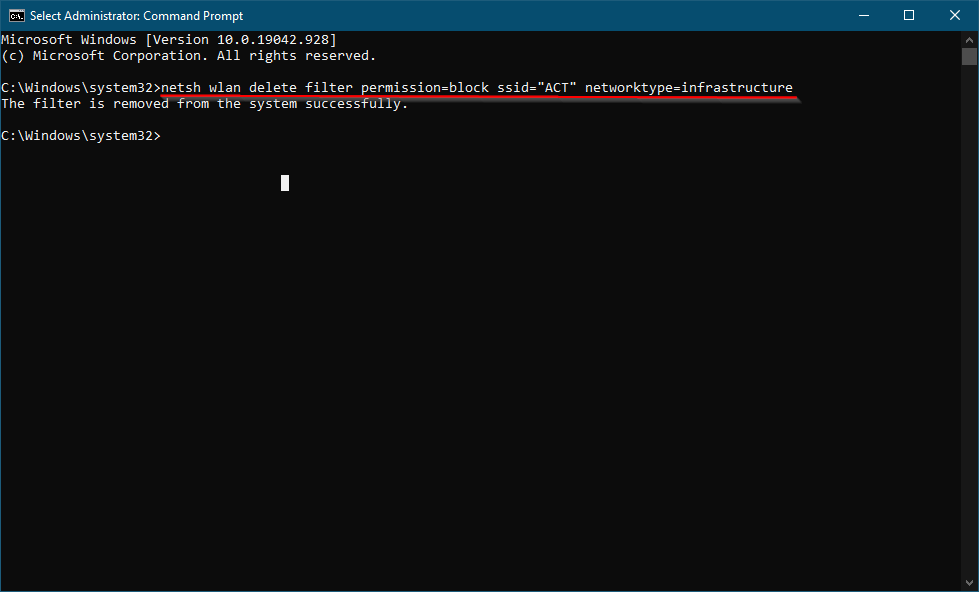
Once you execute the above command, the network name will be removed from the filter block list, and it will again show up in the WiFi list.
How to Whitelist a Wi-Fi Network?
You can block individual WiFi network names one by one, as shown in the first method, but it will again appear in the WiFi list if your neighbor renames the network name. Hence, it is better to add one or more WiFi networks to the allowed list and then block all other network names. By doing this, you can ensure that no other network name will show up on the WiFi list, and you can only connect to your network.
However, this method is embarrassing for those who use a portable device like a laptop. If you whitelist only the home network and take the laptop outside, you will not see the available Wi-Fi hotspots without changing this setting.
If you want to allow a specific WiFi network and block other networks, use the following command:-
netsh wlan add filter permission=allow ssid="WIFI NAME" networktype=infrastructure
Make sure to replace “WIFI NAME” with the name (SSID) of your wireless network.
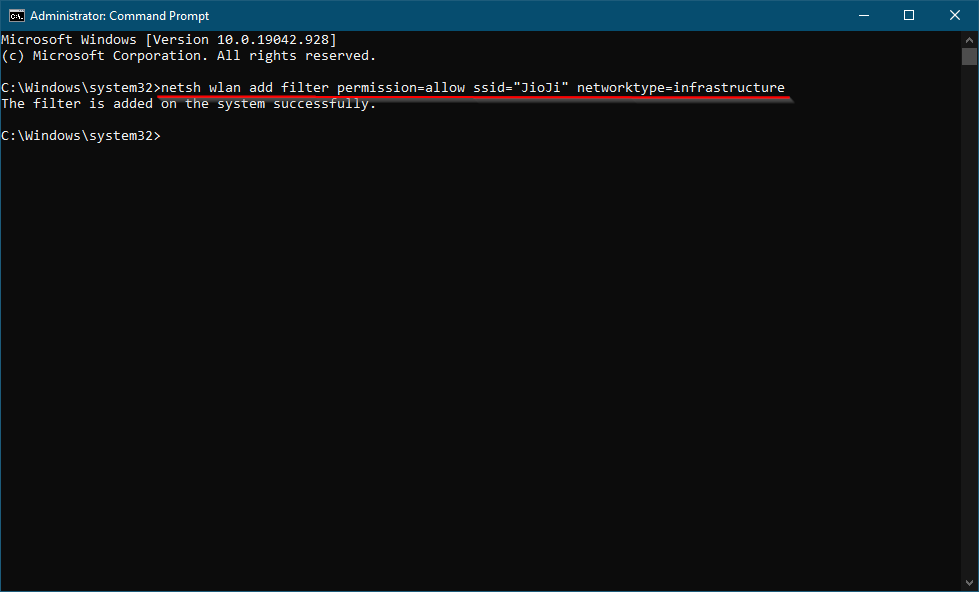
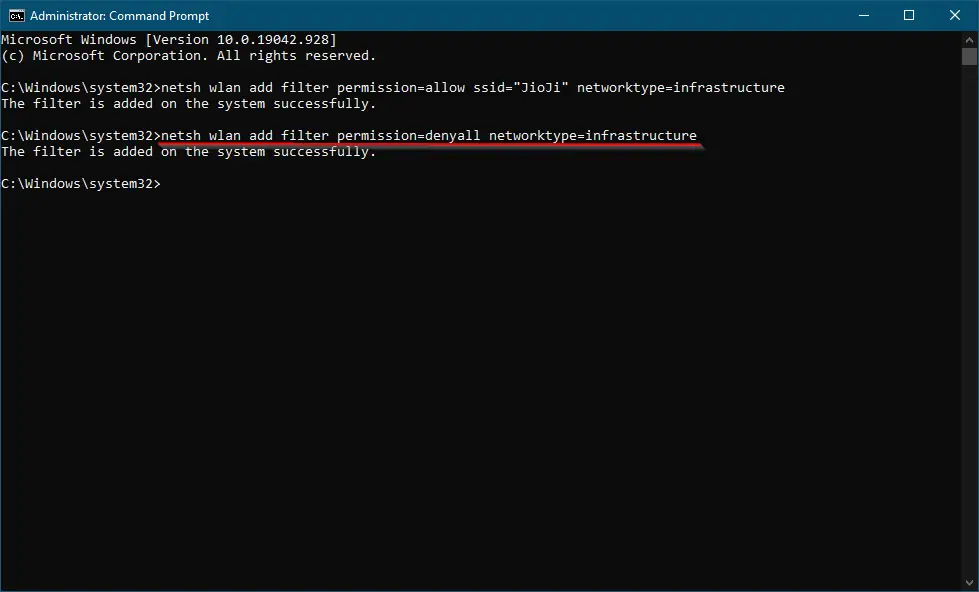
For instance, if we want to allow my Wi-Fi network “JioJi” and disallow all other networks, my command will be the following:-
netsh wlan add filter permission=allow ssid="JioJi" networktype=infrastructure
Once you have whitelisted one or more networks (SSIDs) on your PC, run the following command to block all other Wi-Fi networks that you haven’t specifically allowed:-
netsh wlan add filter permission=denyall networktype=infrastructure
Once you decide to undo the changes, run the following command:-
netsh wlan delete filter permission=denyall networktype=infrastructure
Once you execute the above command, you will see all WiFi networks that are not on the block list.
You can also optionally exclude the allowed Wi-Fi network rules you added. Just run the following command and make sure to replace “WIFI NAME” with the name of the Wi-Fi network:-
netsh wlan delete filter permission=allow ssid="WIFI NAME" networktype=infrastructure
How to View Filters?
To view the filters that you have created, execute the following command:-
netsh wlan show filters

That’s all!
Conclusion
In conclusion, having offensive Wi-Fi network names in your vicinity or a large number of available WiFi SSIDs can be distracting while trying to connect to the internet. However, with the help of Command Prompt, you can hide or block Wi-Fi network names on your Windows 10 or 11 PC. The article outlines how to blacklist or hide a WiFi network name and whitelist a Wi-Fi network. It also shows how to view filters, delete or remove Wi-Fi Network Profile, and add a new Wi-Fi Network Profile in Windows 10. By following the steps outlined in the article, you can ensure that you only connect to your own Wi-Fi network without being bothered by other networks in the vicinity.
You might also be interested in the following:-